-

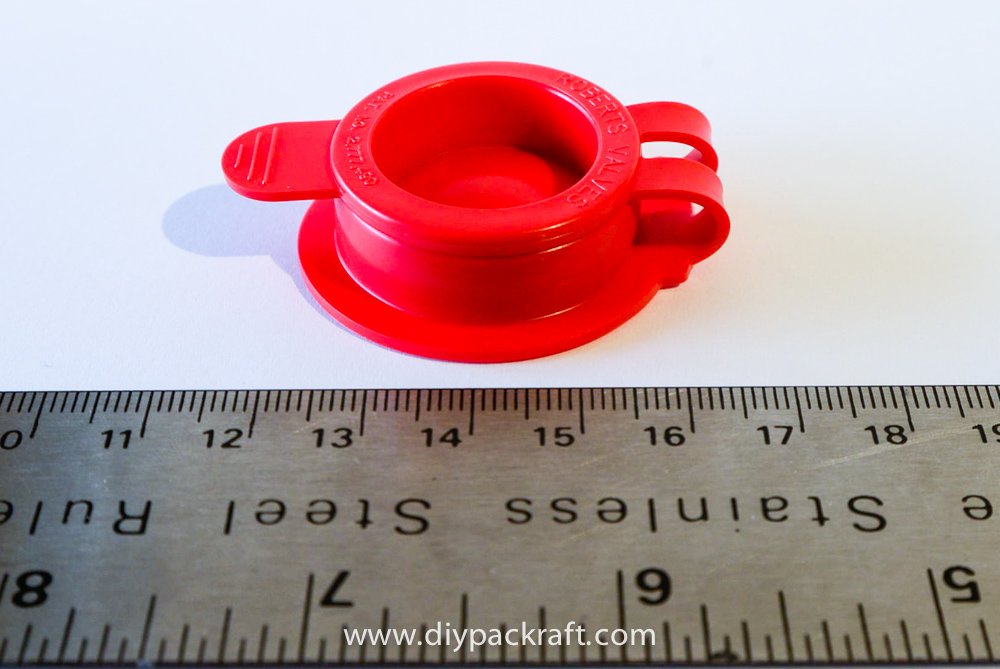
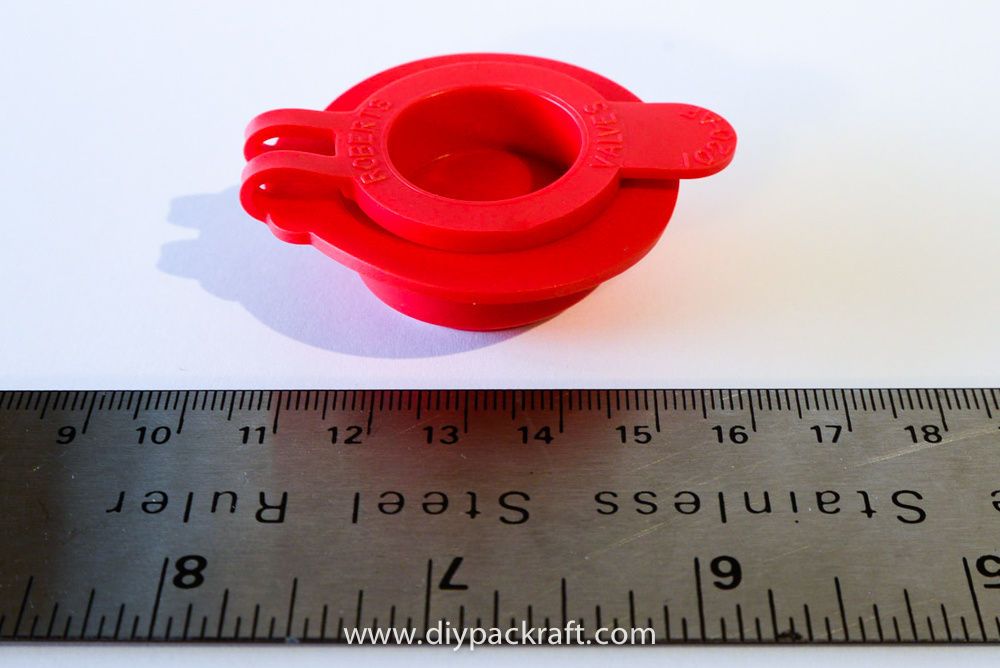
- Dump valve, closed
-
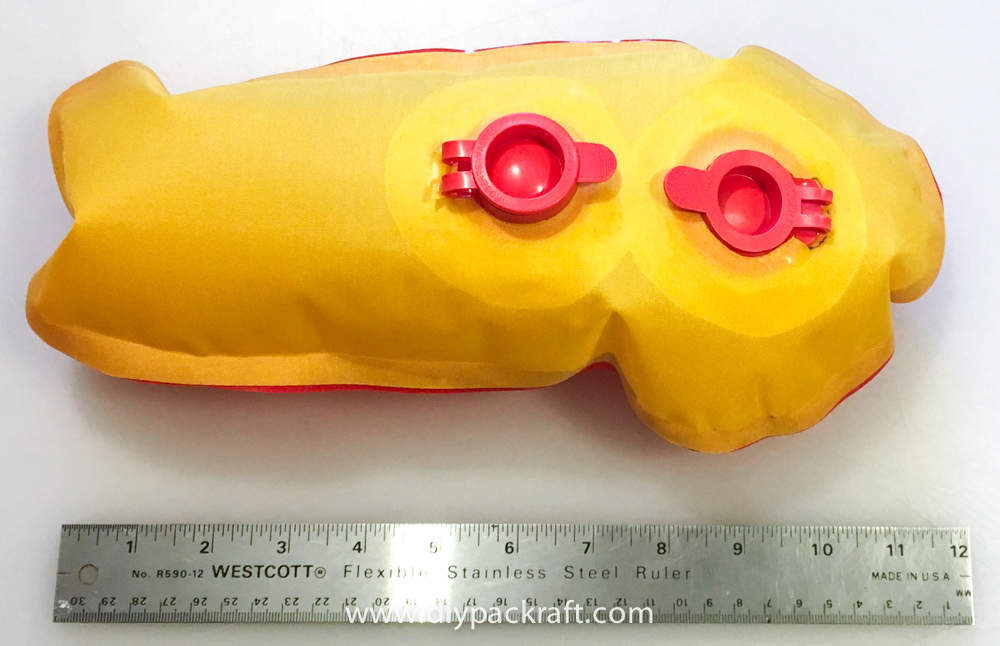
- Both valves installed, closed.
-
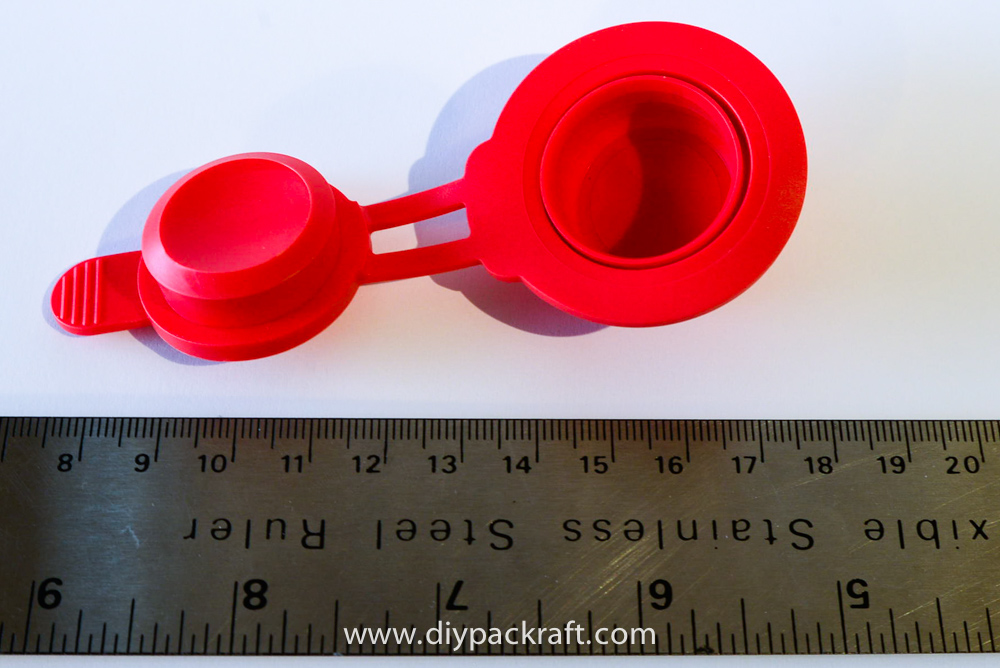
- Inflation (one-way) valve, open.
-
- Inflation (one-way) valve, closed.
-
- Dump valve, open.
-
- Both valves installed, open.
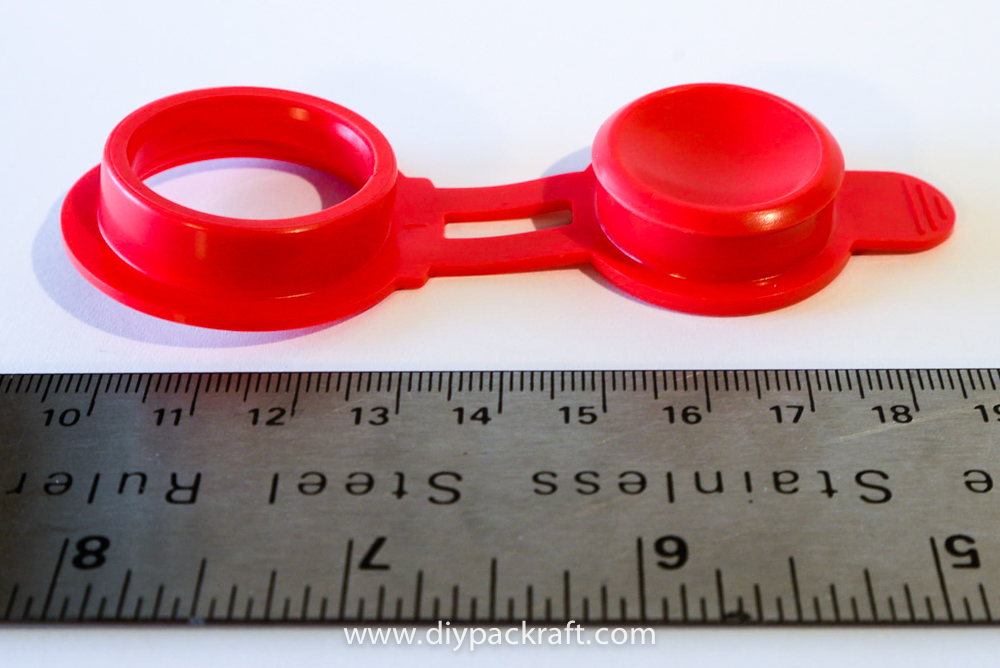
You may have noticed the new valves that are now available in the shop in addition to the Boston valves, top-up valves, and small valves that were already available.
These valves pop open and closed with a simple pressure-fit lid instead of a screw-on cap, which may seem undesirable, as you might think they could pop open without warning, but after making a test pillow and standing on it with all my weight, I’m convinced that they will easily withstand the air pressure in a packraft or other inflatable.
They’re made from medical grade PVC (they’re designed for medical use), and when I first received these valves, I thought they might be too hard to operate to be useful in a packraft (the seal is tight and the PVC is a bit stiff), but once they are glued into the fabric they are much easier to open and close – simply pull on the tab to open, and press the domed center of the lid to close.
There are two different valves – one is a simple hole with a lid; the other has a flap that only allows air to pass in one direction (inflation-only). The one-way valve makes inflating your packraft easy, because air can’t escape through it as you’re re-filling your inflation bag. The two-way valve makes deflating your packraft quick and easy.
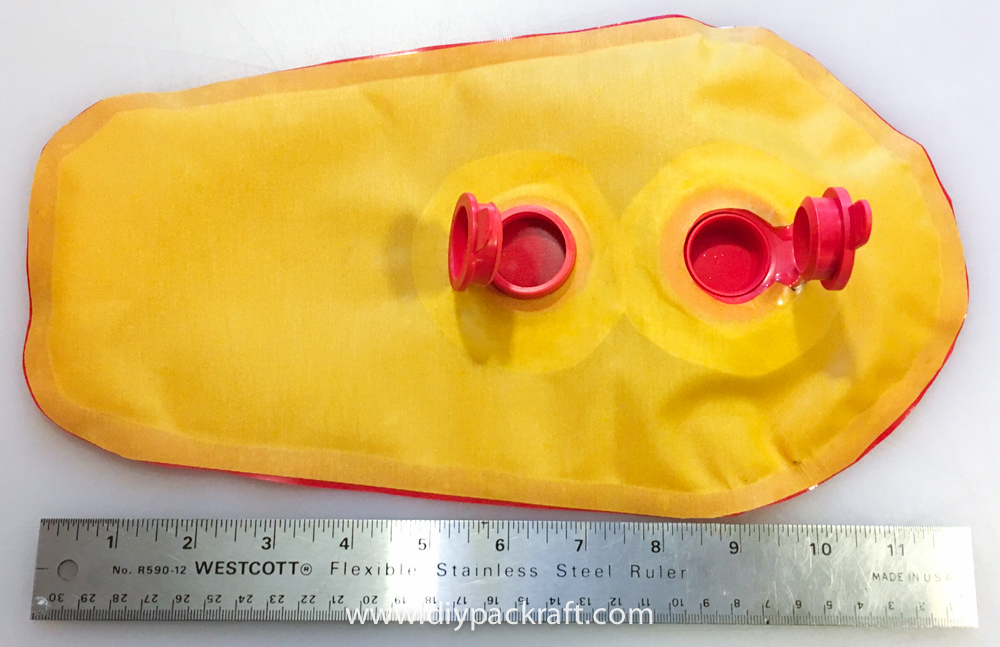
One nice feature of these valves is that you can install a modified two-way valve in your inflation bag so the bag’s valve will plug directly into the boat’s valve.
For ultra-lightweight applications, you could install just a two-way valve and a top-up valve. This would be a similar setup to what several packraft manufacturers use.
Compared to a Boston valve, these valves have a lower profile, so they’re less likely to catch on something and your packraft will roll up into a smaller bundle. They’re also lighter than a Boston valve, even as a pair, at 21 grams (0.74 oz) instead of 37 grams (1.3 oz).
Because the PVC must deform to allow the top to pop in and out, these valves probably aren’t suitable for very low temperature use. Most of us don’t do much packrafting in the winter, so that’s probably not much of an issue. They’re also slightly more difficult to install, because there are two of them, and also because the cap is attached directly to the base, so you have to work around the connectors as you’re heat-sealing and gluing them in place.
I’ll still be supplying Boston valves as the standard valve in DIY Packraft kits, but if you would prefer a pair of these valves instead, just make a note on your order. You can also order them individually or bundled into pairs, etc. here in the shop.
15 Comments
Anil Ganti · June 15, 2022 at 8:48 am
What adhesives would you recommend for installing one of these valves?
Matt (Admin) · June 16, 2022 at 8:06 am
Aquaseal works, but something like HH-66 or Stabond might be stronger.
Anthony Just · March 15, 2020 at 9:44 am
Just so I’m clear…. I would glue these valves onto the outside of the boat so they sit on top of the tube, not inside it. Then I glue a donut on top and heat seal around it?
Matt (Admin) · March 19, 2020 at 7:45 am
Yep, that’s right. You’ll just have to cut out slots in the ring to accommodate the cap retainers.
Elise · February 18, 2020 at 3:52 pm
What is the installation process for these valves? Can they be heat-sealed similar to the Boston valve?
Matt (Admin) · February 18, 2020 at 4:05 pm
They cannot; instead, the flange around the valve should be glued between two layers of fabric that are heat sealed together (as in the pictures above).
unnamedpeaks · December 21, 2019 at 1:22 am
Having put these in multiple rafts, what are you preferring? These seem like they would be better for the UL raft, maybe include this as an option on that page…
Matt (Admin) · December 22, 2019 at 1:44 pm
I prefer the heat sealable Boston valves because they are much easier to install.
Doug Cochran · November 26, 2019 at 1:08 pm
What’s the modification needed for the Roberts valve on the inflation bag? Is it just a matter of using the cap with the center cut out of it?
Matt (Admin) · November 26, 2019 at 1:10 pm
Yep, that’s right. Cheers!
unnamedpeaks · December 21, 2019 at 1:21 am
So, does this mean you with this system I could make an inflation bag that was also a dry-bag, when this valve was closed? Or is the modification destructive, meaning you are left with a hole in the bottom of the bag?
Matt (Admin) · December 22, 2019 at 1:41 pm
Unfortunately you have to cut a hole in the cap for the air to flow through, so it wouldn’t be waterproof.
Doug Cochran · December 29, 2019 at 11:52 pm
I’ve glued a piece of fabric on the back side of the part that the cap fits into. My plan is to use it as a cap, and the cap as the connector. I’m still trying to figure out the best way to attach it to the bag though.
Nele · July 26, 2017 at 10:33 am
Would you then still need a top-up valve?
Matt (Admin) · July 26, 2017 at 10:42 am
If you want to add air while paddling, then yes, I recommend a top-up valve.