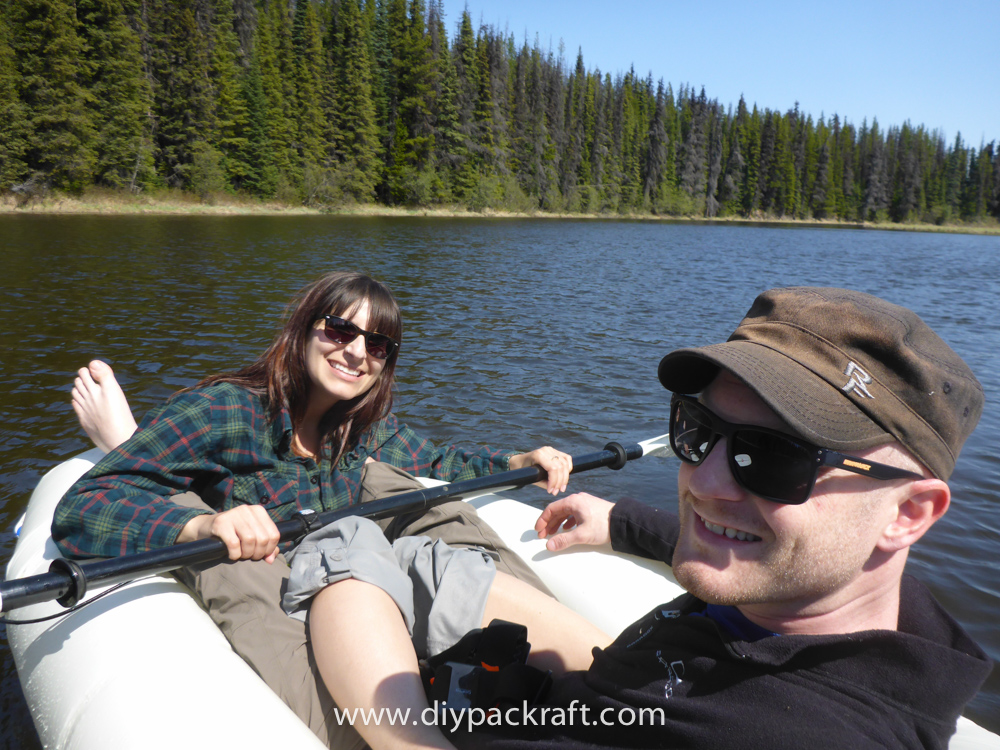
Why make a packraft?
If you’re trying to decide whether to make your own packraft or buy a manufactured boat, here are four reasons why you might consider making your own:
Cost
This is the most obvious benefit of any do-it-yourself project. You can save a lot of money by building your own packraft – roughly 80% savings compared to a premium manufactured model with similar features, and even significant savings compared to budget brands made from inferior materials that weigh twice as much.
Weight
Because DIY Packrafts are assembled using a unique construction method (heat sealing), they are significantly lighter than other packrafts made from similar materials plus lots of sewing and glue, and much lighter than cheap packrafts made from PVC. Heat sealing does not compromise strength – in my tests, the welds are consistently stronger than the fabric itself.
Customization
Once you understand the basics, you’ll be able to outfit your boat with new accessories – want to install thigh straps or carry skis and a fatbike on your packraft? No problem!
Fun
If you’re a “do-it-yourselfer” like me, you’ll feel great satisfaction after making your own packraft, and when people ask you about your unusual boat (as they inevitably will), you can tell them you made it yourself.
Do-it-Yourself Packraft Kits
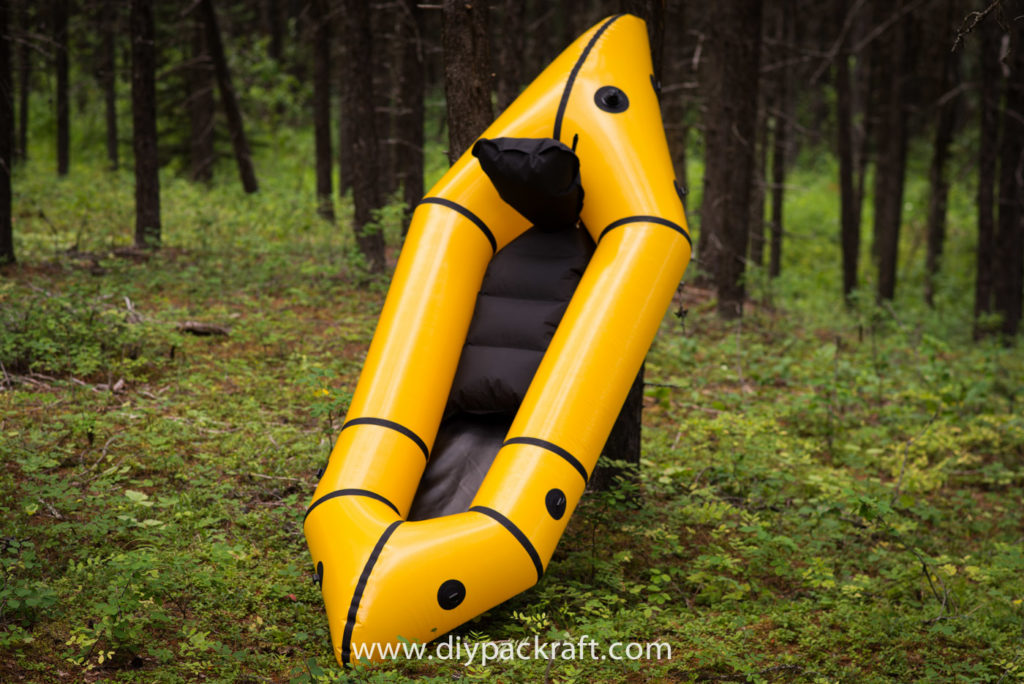
DIY Packraft kits are available in several different designs, colors, sizes and fabric weights, either with or without an airtight zipper that allows internal gear storage.
These aren’t just copies of brand name packrafts – I’ve designed each one myself, and some have innovative features that aren’t available anywhere else, such as ultralight fabrics or a wrap-around floor for extra protection against punctures.
Each kit includes all the fabric and valves you need to make a packraft and seat, plus lots of extra fabric for heat sealing practice and for making attachment points, small accessories, and repairs. Detailed video instructions demonstrate each step of the assembly process, and you can post questions directly to the instructions pages or in the forum.
To save you time, I score the shapes into the fabric so they can be quickly separated with scissors, and then I fold and roll the fabric into a small package that minimizes shipping costs.
Check out the different DIY Packraft models in the shop for details about each one.

Fabrics
The best packraft manufacturers make their packrafts out of polyurethane-coated synthetic fabrics, and that is what DIY Packraft kits are made from too. These fabrics feature an airtight, heat-sealable polyurethane coating, called thermoplastic polyurethane, or TPU for short. When two pieces of TPU-coated fabric are pressed together and heated to very high temperatures, the TPU layers fuse together and the bond becomes stronger than the fabric itself, so additional sewing or gluing would be redundant.
Learn more about fabrics here, and see how strong the DIY Packraft fabrics are in the video below. You can also order a fabric sample pack to evaluate them yourself.
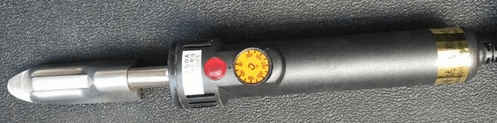
Tools & Workspace
The only specialized tool required to assemble a DIY Packraft is a heat-sealing iron. You can buy the one pictured here for about $25. Learn more about irons here.
Other tools you’ll need are things you probably already own or can purchase locally, such as scissors, masking tape, and scraps of wood.
You’ll want a fairly large work bench or table to comfortably work on your packraft kit, at least 2 m (6′) long and 1 m (3′) wide (larger is better). I built my first three packrafts on my dining room table, which worked well aside from having to pack things up before every meal. I’ve also heard of people assembling their kits on their floors – it works, but it’s not so comfortable. Read more about recommended work surfaces here.
How difficult is it to make a packraft?
By boat-building standards, packrafts are extremely quick and easy to assemble. With a little practice, anyone can master the DIY Packraft heat sealing technique – there aren’t any special skills required.
Not everyone has the time or inclination to make their own packraft, however, and that’s okay! Making a packraft requires patience, so you should only purchase a DIY Packraft kit if you’re the type of person who already enjoys do-it-yourself projects. If you have a hobby such as woodworking, sewing, model building, or anything else that requires manual dexterity, concentration, and the ability to follow instructions, then you’re more than qualified to construct a packraft.
When making a packraft, most difficulties arise when someone rushes ahead without checking their work or fails to refer to the instructions – often because they have a self-imposed deadline such as a packrafting trip on the calendar. This is not the right way to go about making a packraft (or anything else, really). I haven’t yet seen a mistake that couldn’t be fixed, but fixing mistakes can add a significant amount of work to the project, so it’s best to avoid them by carefully following the instructions.
How long does it take?
I have a bunch of packrafts under my belt and it still takes me at least 20 hours to make one; it might take you twice that long (or longer!) to complete your first packraft. This is highly dependent on the individual, but the average seems to be about 35 hours for a first-time builder. The Ultralight kits go together more quickly, and the larger 2-Person kits take longest.
You’ll find the process much more enjoyable if you spread it out over a few weeks rather than trying to finish it in just a few long days. After you’re familiar with the techniques you can turn on some music or a podcast to help pass the time while you work (but don’t forget to check the instructions before each new step!).
Who is DIY Packraft?
DIY Packraft is a one man show – it’s just me, Matt Pope here – and I do literally everything myself, from designing the packrafts to sourcing materials, building prototypes, cutting and packing kits, processing orders, answering emails, bookkeeping, taking kits to the post office, building and maintaining this website, and creating all the text, videos, and pictures you see here.
Obviously I’m passionate about this project, but I can only fit so much into a day, so I have to set priorities and say no to a lot of requests. Thanks for your patience and understanding.
Learn More
To learn about the different DIY Packraft models, check out the detailed descriptions in the DIY Packraft Shop.
Read the How to Choose a Packraft (not just DIY) article if you’re not sure which brand or model of packraft is right for you.
If you want to learn more about making your own packraft, browse through the extensive menus above.
Unfortunately I’ve had to password protect the newer packraft assembly instructions due to plagiarism, but you can still view the older V2 instructions before making a purchase. The newer instructions have improved significantly, with more detailed videos and new assembly procedures, but the basics haven’t changed, so those instructions will give you a good idea of what to expect when you assemble one of the newer DIY Packraft kits.
Use the search bar (above) to find answers to specific questions, and if you have a question that isn’t answered in the FAQ or elsewhere on the site, post a comment on the relevant page or join the discussion in the DIY Packraft Forum.
If you want to see some detailed reports written by actual DIY Packraft customers, please check out the Customer Build Reports page.

DIY Packrafts have been made in all of the 35 countries indicated above, plus at a field station in Antarctica! Is your homeland represented? If not, be the first! (Note: DIY Packraft no longer ships to Russia.)
Happy packrafting!
–Matt