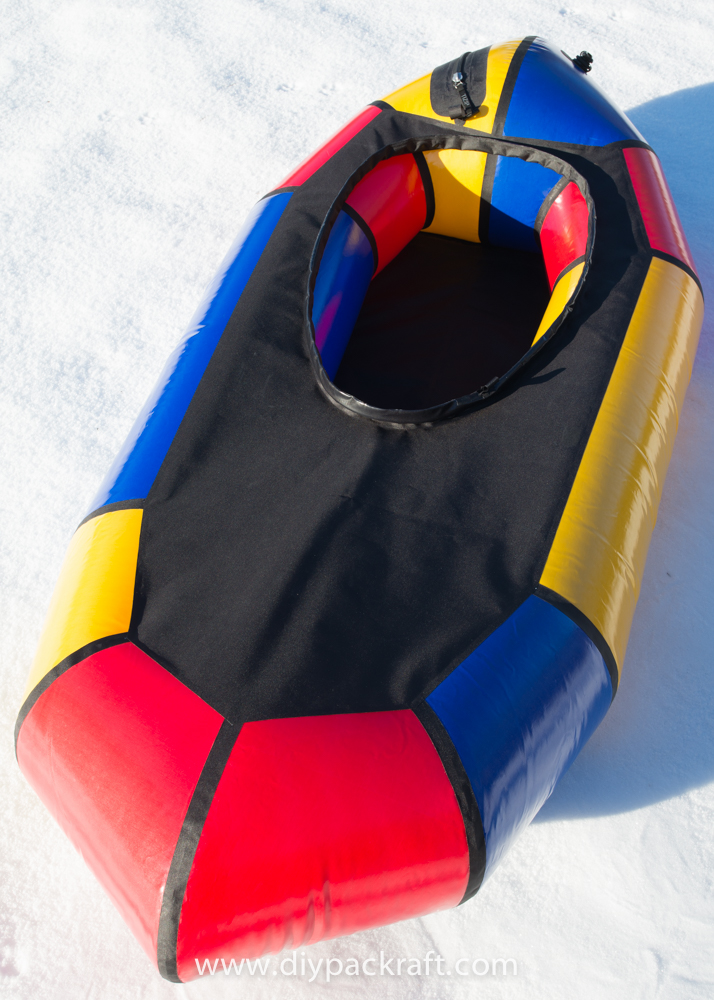
Below are patterns for making spray decks like the one pictured above, designed to fit Small, Medium, and Large V2 DIY Packrafts (and V2 plans). They can also be modified to fit the V3 DIY Packraft as well.
This is a permanently-attached “whitewater” style deck that uses a separate spray skirt.
The cockpit opening (i.e. the hole where you sit) shown below is small compared to some kayak cockpit openings and, depending on your femur length, you may prefer a larger opening… I suggest you experiment with a mock-up before deciding how big to make your opening.
You’ll need at least 1 m of fabric for the Small and Medium size decks, and 2 m for the Large. I recommend using 250 GSM fabric. You will also need one aluminum tent pole or a 10-foot length of PEX pipe to make the coaming; there are cheap, good quality tent poles available on Amazon and elsewhere online, and I recommend purchasing one about 3 m (10′) long – that way you will have spare segments in case you break some while bending them. (The tent pole’s diameter is not important.)
I made the above spray deck with the TPU side of the fabric facing down, but you could make yours with the TPU facing up so you can heat-seal gear attachment points to the top of the deck – you will just need to attach the deck to the packraft with additional strips of fabric around its perimeter instead of sealing it directly to the packraft’s tubes.
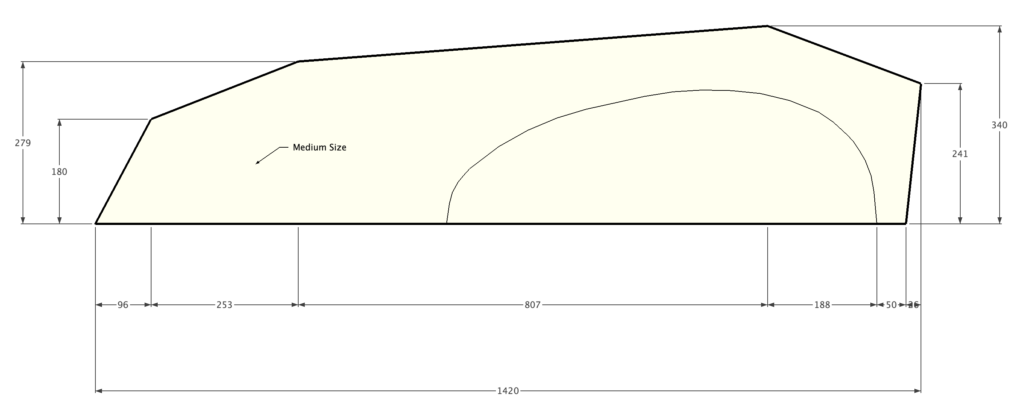
Eventually I will post plans for a spray skirt and make a video showing how I put everything together. Here are some dimensions to get you started:
Note: All measurements are in millimetres. Spray decks are symmetrical, so only half the deck is shown.
Small V2 Size spray deck dimensions:

Medium V2 Size spray deck dimensions:
Large V2 Size spray deck dimensions:

Cockpit opening:
(Depending on your body size and paddling experience, you may prefer a larger opening.) 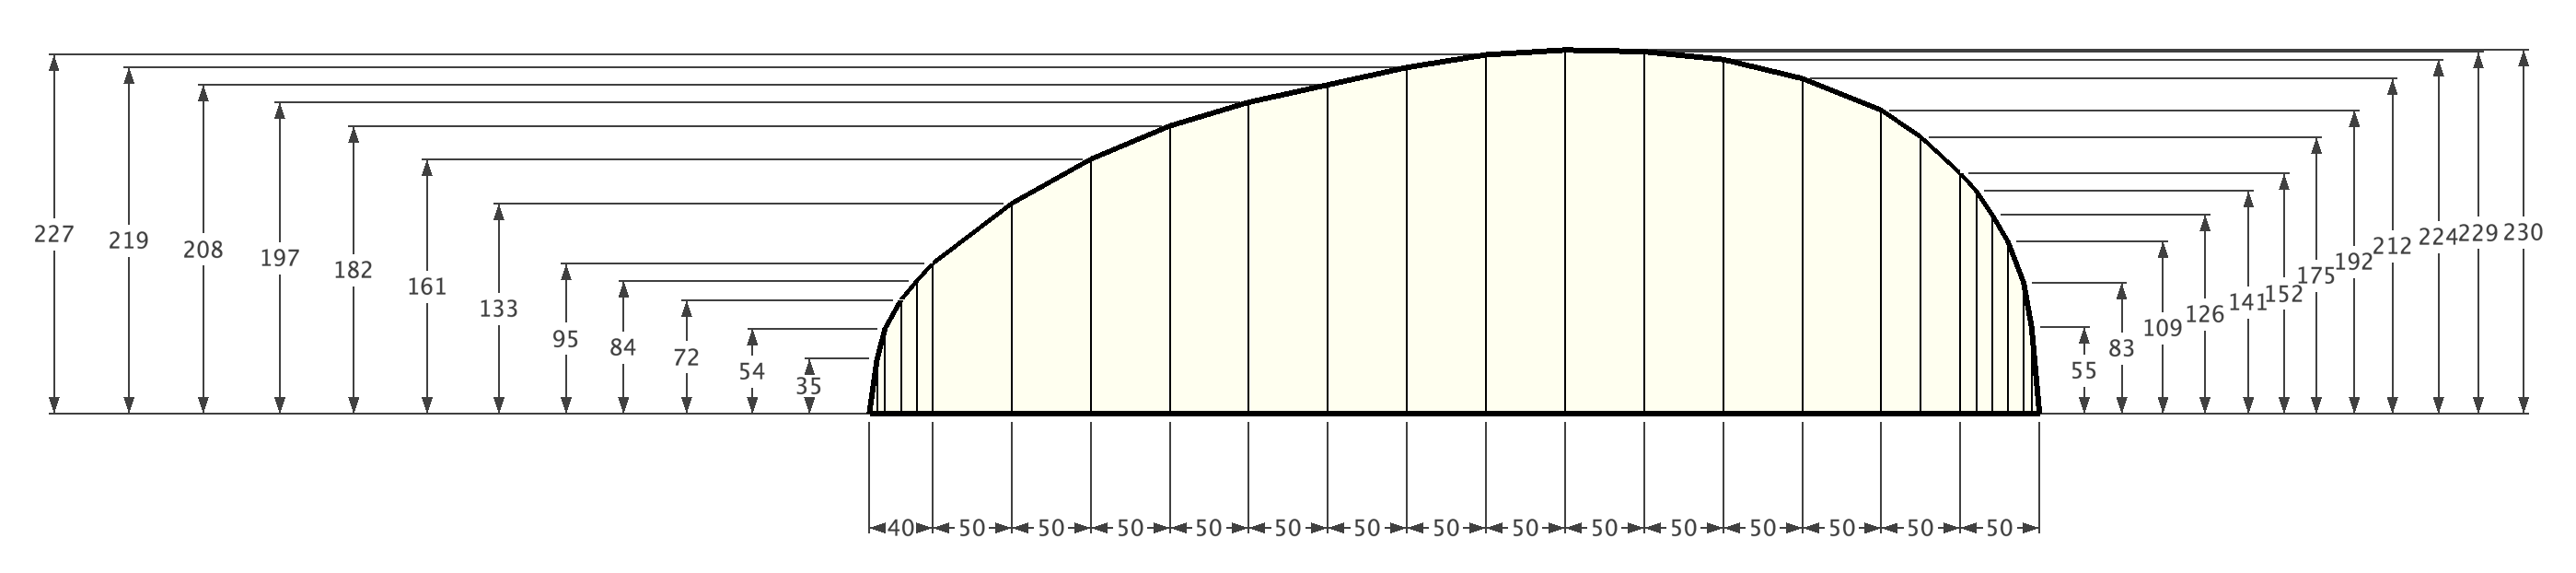
Coaming Detail:
This is a cross-section showing the detail of how the cockpit coaming sleeve is attached to the spray deck:
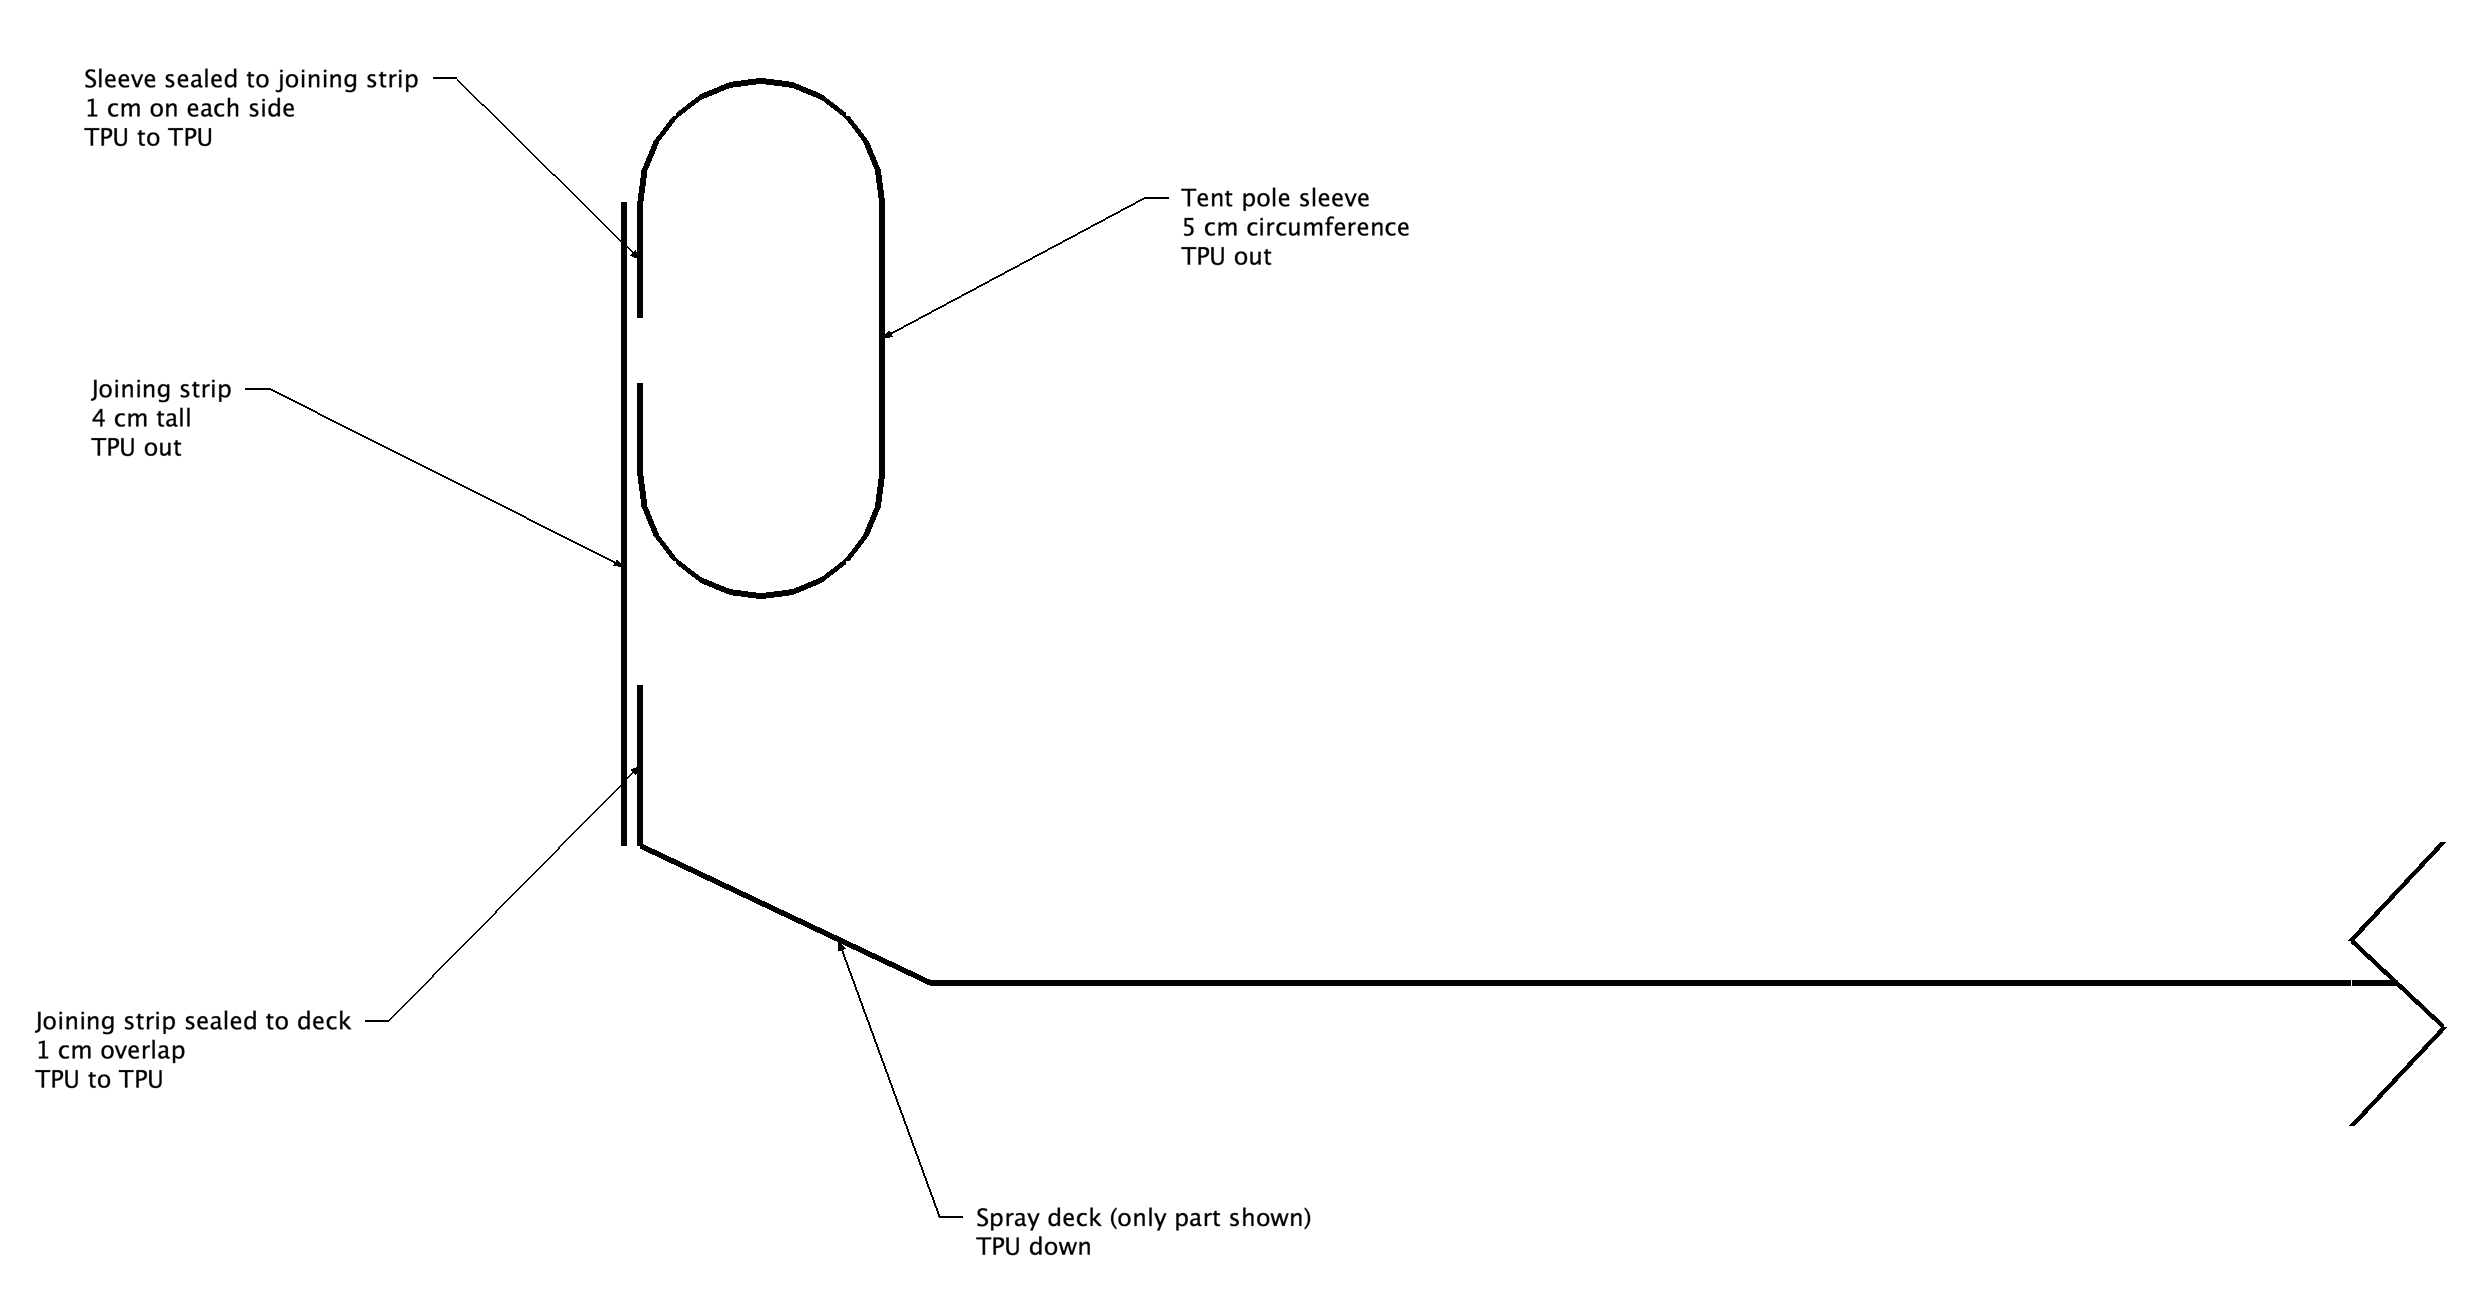 The tent pole sleeve is made from a strip of fabric 5 cm wide and long enough to wrap all the way around the cockpit opening. The joining sleeve is made from a strip of fabric 4 cm wide, the same length. Where the two ends of the coaming meet, they are spliced together with a small strip of fabric.
A hole is cut in the sleeve (in an area that will be covered by the spray skirt) for the tent pole or PEX tubing to slide in and out. The hole should be reinforced with a scrap of 560 GSM or 735 GSM fabric so it does not rip.
5 Comments
Jason G · June 23, 2019 at 1:17 pm
what would fit a kokepelli rouge lite…I’m looking to do a retro fit..thanks…if so have you ever done one with velcro that is removable…
Matt (Admin) · June 24, 2019 at 1:48 pm
Sorry, I don’t have a Rogue-Lite so I don’t know.
joe · May 11, 2017 at 4:27 pm
Hi, I’ve just finished my DIY packraft and taken for its first run down some grade II-III. Had a blast but stopping to bail out the boat got a bit tedious. Iv looked at spray deck options but want to retain the ability to do a solid trek into places so would like to keep the weight down. Do you think a half deck with a bent tent pole on the free edge to hold a bit of a pitch would be a worthwhile addition? Looking to direct the majority of the water that washes over the front of the boat off to the sides rather than ending up in the boat.
Awesome kit by the way, very happy with how it’s turned out!
Matt (Admin) · May 11, 2017 at 4:38 pm
Hi Joe – I’m glad your build went well and you’re putting your packraft to good use!
I think your half deck idea would be an easy way to keep most of the splashes out, and the bent tent pole (or maybe even just your knees) would keep the deck sloped so the water would run off the sides – good idea! If you give it a try, please let us know how it works out. Cheers!
New Spray Deck (Pictures!) – DIY Packraft · April 13, 2018 at 9:05 am
[…] Make a Spray Deck (V2) […]
Comments are closed.