In this step, we’re going to attach the tubing pieces to the floor of our packraft.
Start by laying out the floor piece with the shiny TPU-side up. If you have chosen to add a second floor piece to your packraft kit, you can set that aside until a later step.
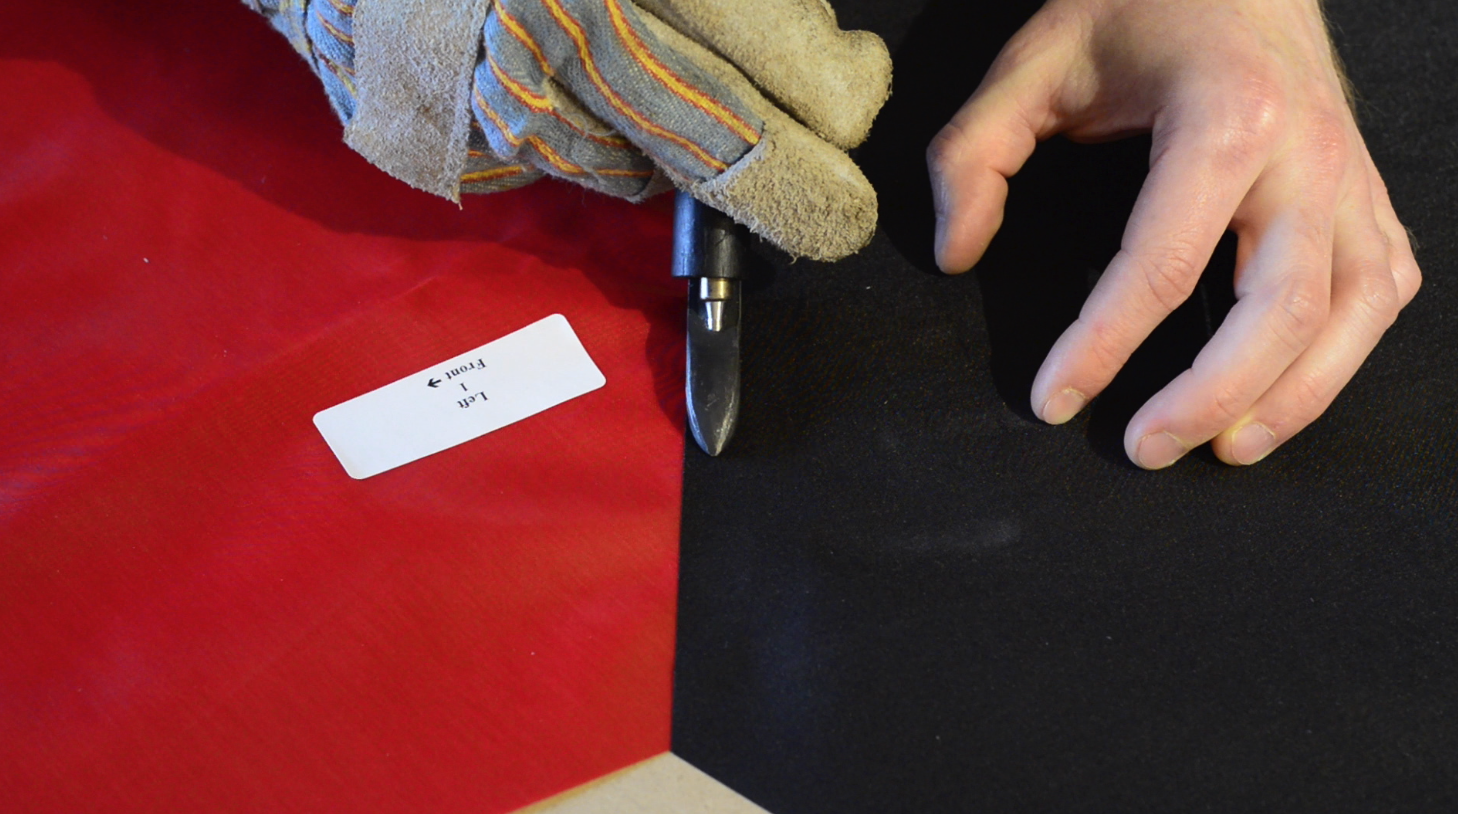
Now align one of the tubing pieces, TPU-side down, in between the two dots on the floor that correspond to its position. Double check that it is in the right place by referring to the stickers on the fabric pieces, and the following image.
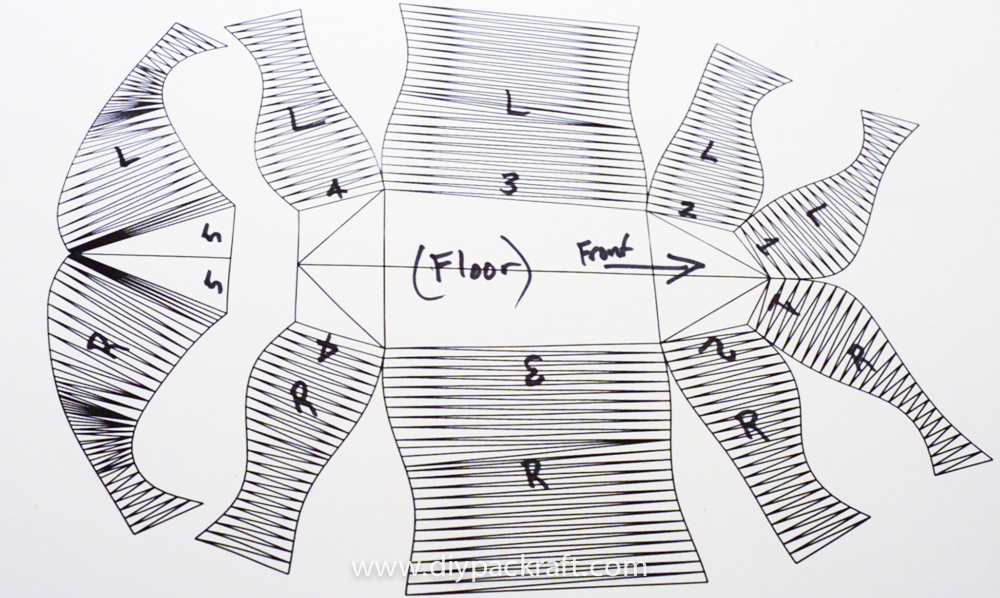
Do not confuse the Left and Right side pieces or your packraft will not fit together properly.
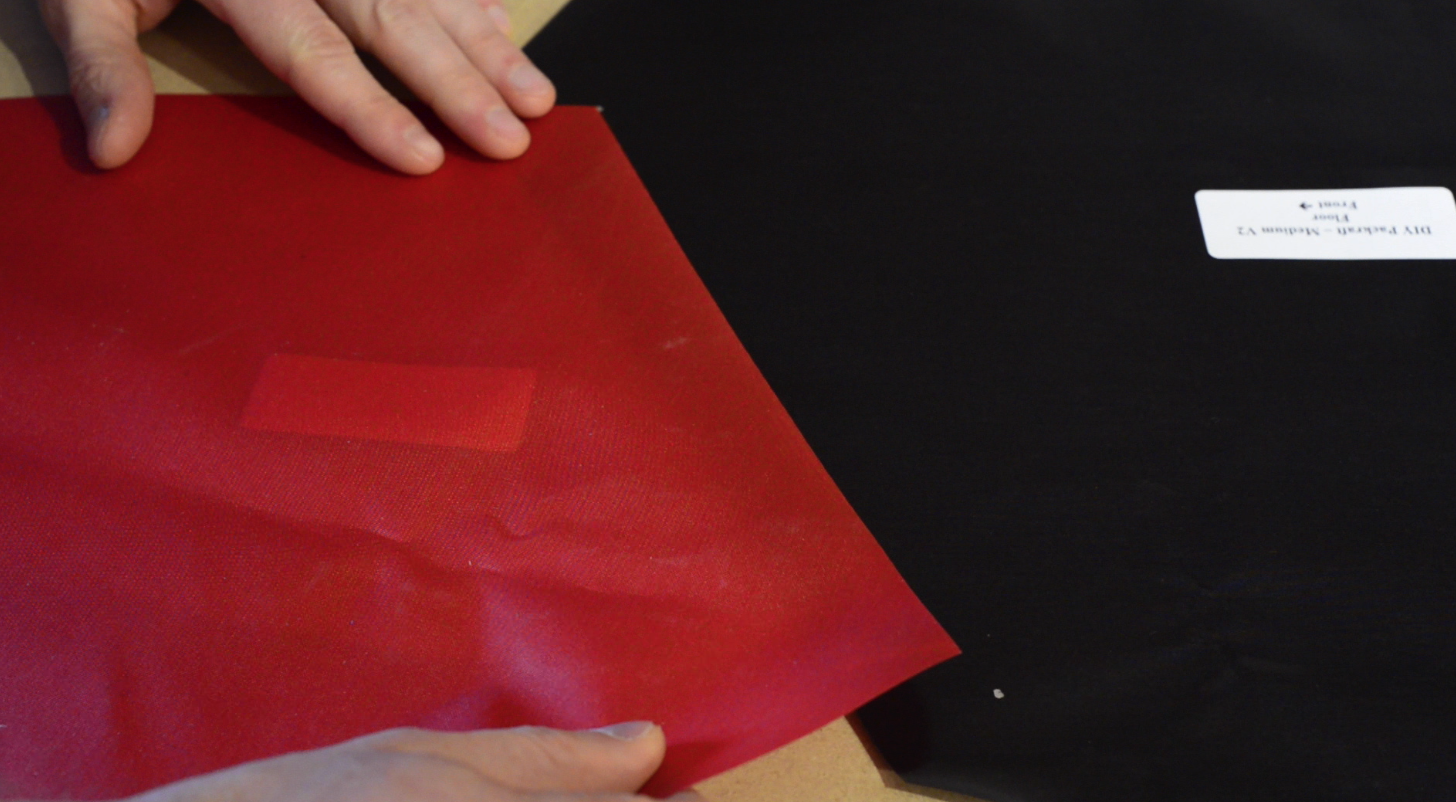
Aligning tube piece (red, TPU-side down) between dots on floor (black, TPU-side up).
With the tube piece aligned between the two dots, begin sealing it to the floor near the center of the joint with your heat-sealing iron. Work your way toward the ends, leaving 1.5-2 centimetres unsealed at each end (these ends will be sealed later).
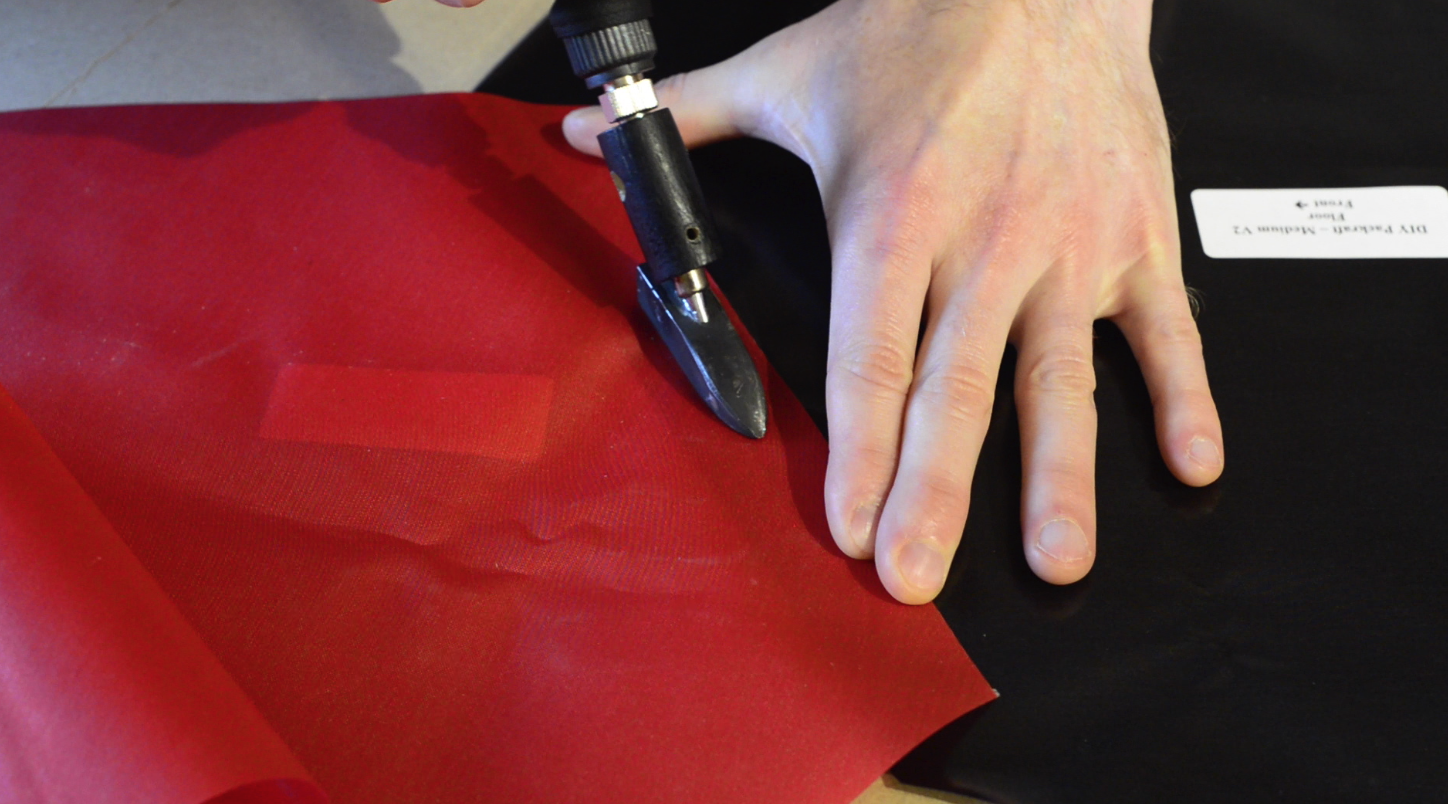
Bonding tube piece to floor using heat-sealing iron.
2 cm left unsealed at each end of tube-floor joint (for now)
Once the majority of the joint has been sealed, carefully work your iron along the edge of the seam, ensuring that you form a good bond right up to the edge of the floor fabric. If you’re worried about touching the TPU surface of the floor piece with your iron, you can cover the TPU with a piece of parchment paper. When the fabric is bonded to the edge, flip the pieces over and make sure the bond is complete to the edge of the tube piece.
Flip over and seal right to edge (leave 1.5-2 cm unsealed at each end).
After that tube pieces is sealed to the floor, you can bond the rest of the tube pieces to the floor, following the same procedure until all ten are done.
In the next step, we’ll join the tube pieces to each other, and the packraft will start to take shape.
Questions? Please post a comment below.
4 Comments
Josh DeBoer · July 28, 2017 at 7:32 pm
Hey Matt,
I’m currently working on step one and in the process of sealing piece #3 my the front of the piece is lined up well on the
dot of the floor but the rear edge ended up about 1/4-3/8″ inboard of the dot. Any idea on if this will cause any issues and what the best way to proceed is? Thanks!
Matt (Admin) · July 28, 2017 at 9:20 pm
Hi Josh,
Don’t worry – it should still work out fine. I would center piece 4 between 3 and 5 to distribute the gap evenly (i.e. turn one larger gap into two smaller gaps), and then make sure you cut the seam strips wide enough to overlap the tube fabric at least 1 cm on both sides of each gap. When you’re sealing the seams you’ll be able to close the gaps after a few inches by bringing the tube pieces together.
Cheers!
nick prasser · May 1, 2017 at 4:30 pm
Hi I am having trouble seeing how to orientate piece number 3. I have the large size kit I measured the two flat edges one is 97 cm the other is 98 cm. I can see that the indentation of the curving side is closer to one flat edge. I think by the illustration that the flat edge closest to the greatest point of indentation on the arc is pointing to the outside. Just want to make sure before it gets bonded.
Thanks
Matt (Admin) · May 1, 2017 at 4:38 pm
Hi Nick, if the stickers pointing towards the “front” of the packraft have come off, please check this page to make sure everything is oriented correctly. A method for finding the front of piece number 3 is shown at the bottom of the page. Thanks!