Evan Rodgers emailed to show me this simple and ingenious method of using a second Boston valve to create an inflation bag adapter that screws into the packraft’s Boston valve. Great idea! Thanks for sharing, Evan! Here’s what Evan wrote:
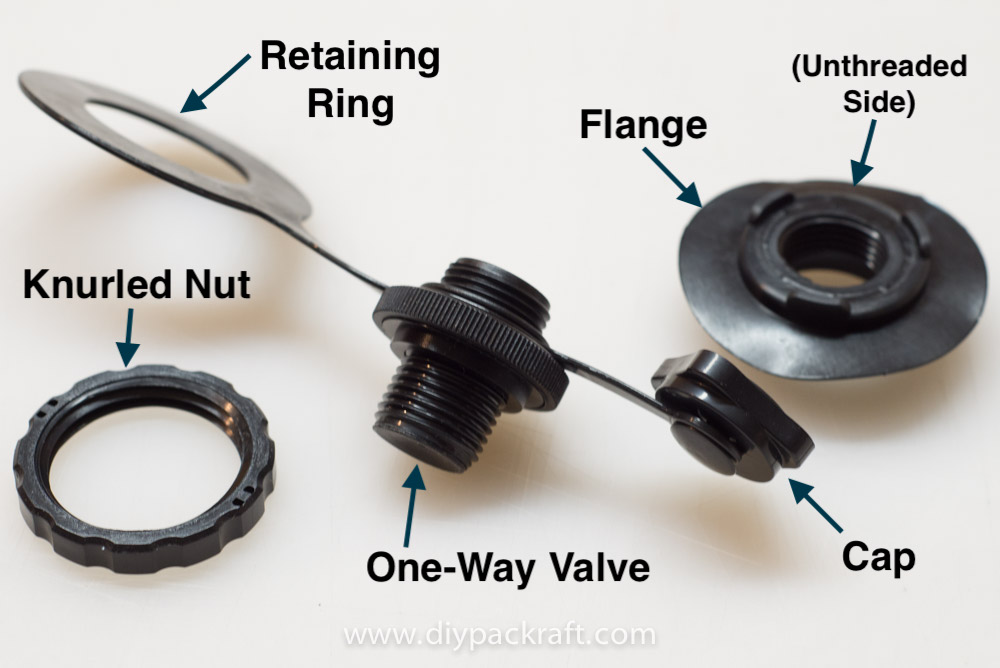
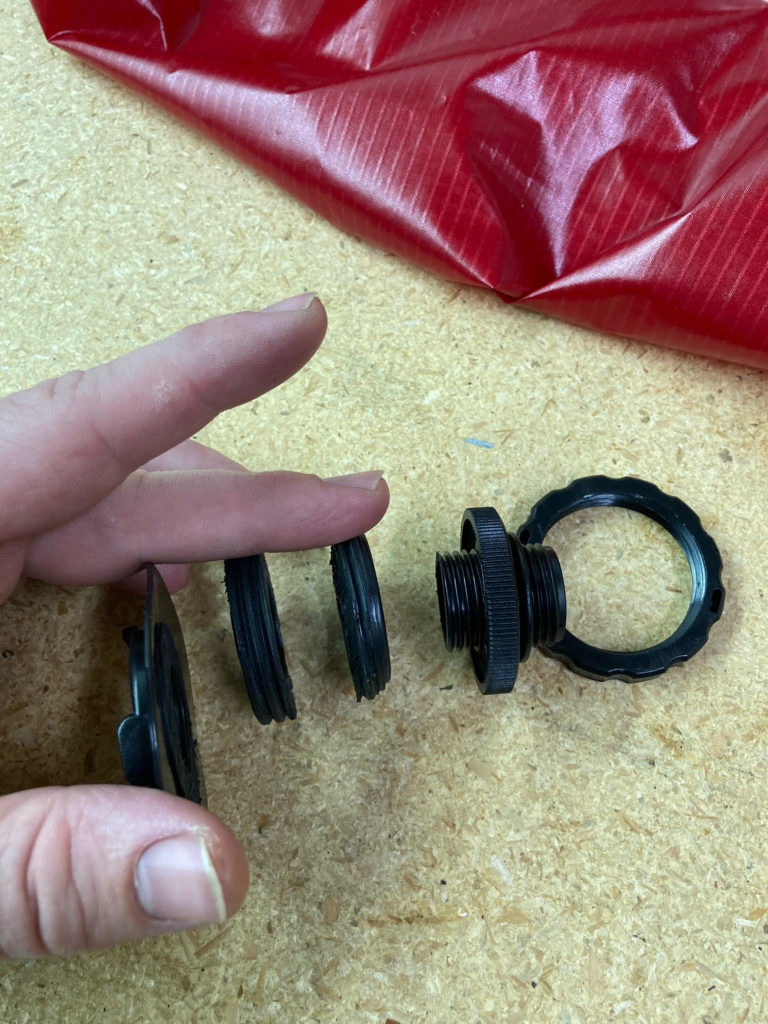
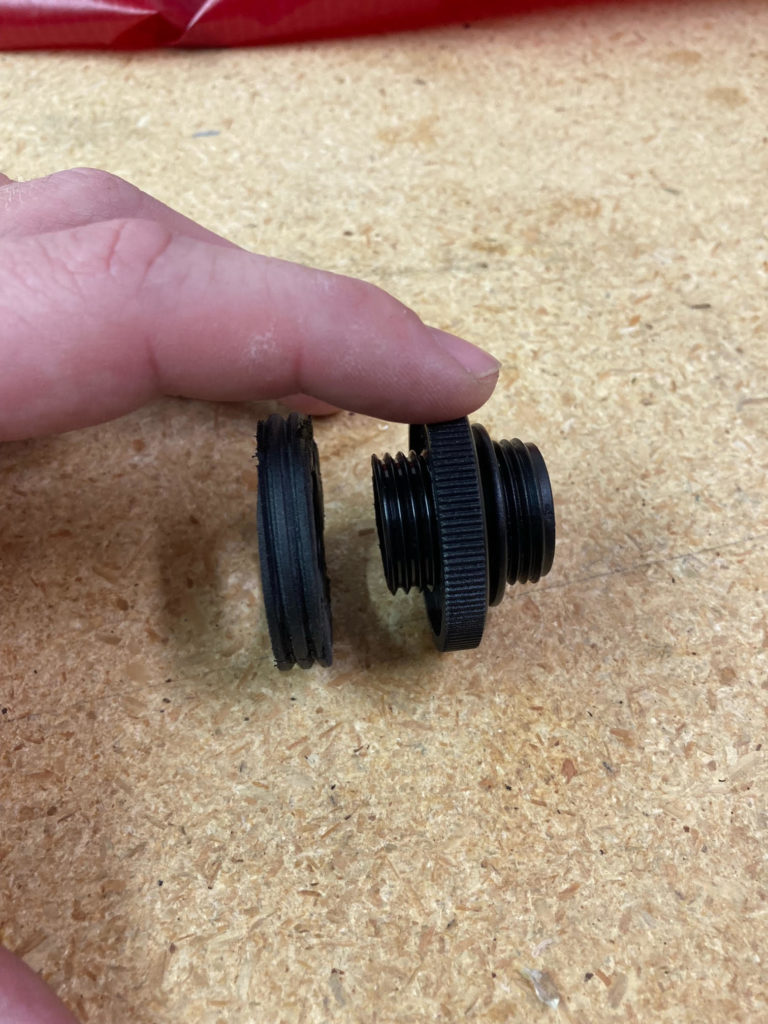
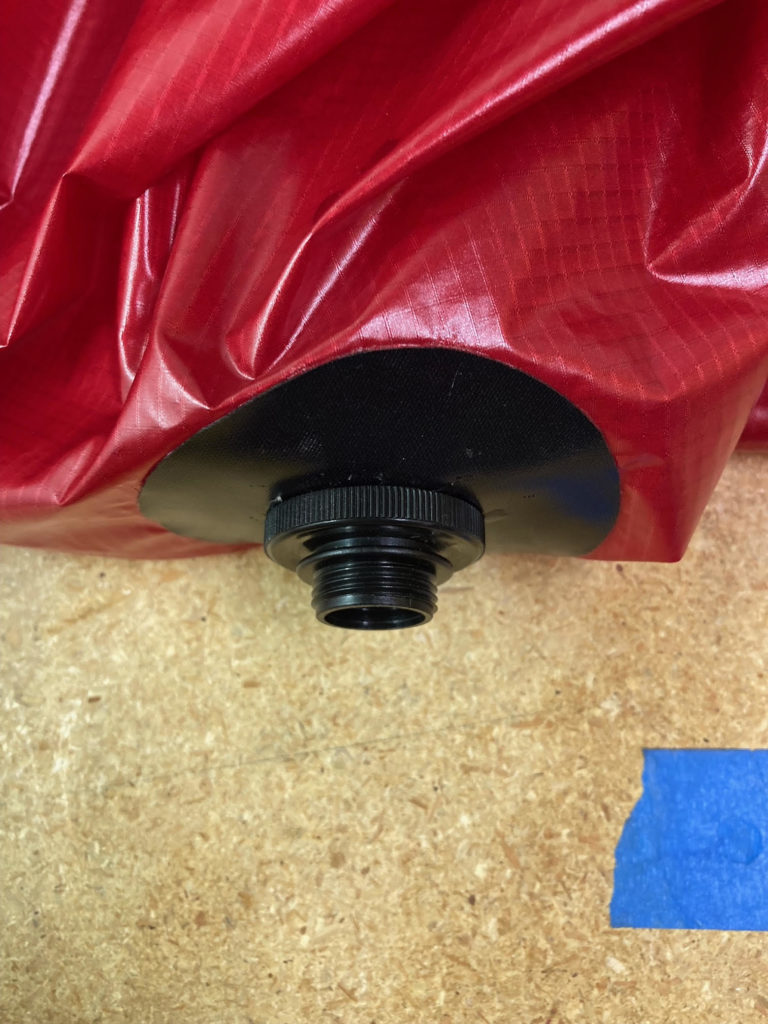
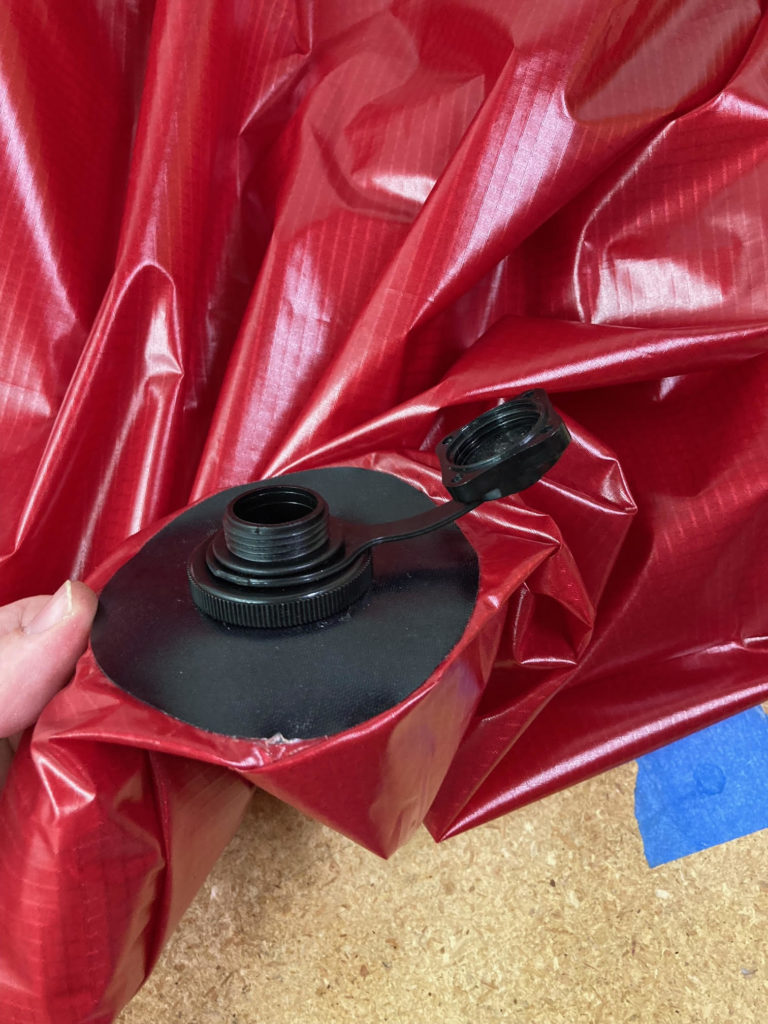
I recently ordered an extra Boston valve to test out my theory of creating a better attachment point from the inflation bag and boat than gluing the silicone tube to inflation bag, and I’m extremely excited with the result. As you’ll see in the photos, I’ve cut apart the Boston valve in a few places so that I can sandwich the TPU material between two threaded connections. Then when it’s all put together you can screw the inflation bag to the boat valve. The pictures will make more sense.
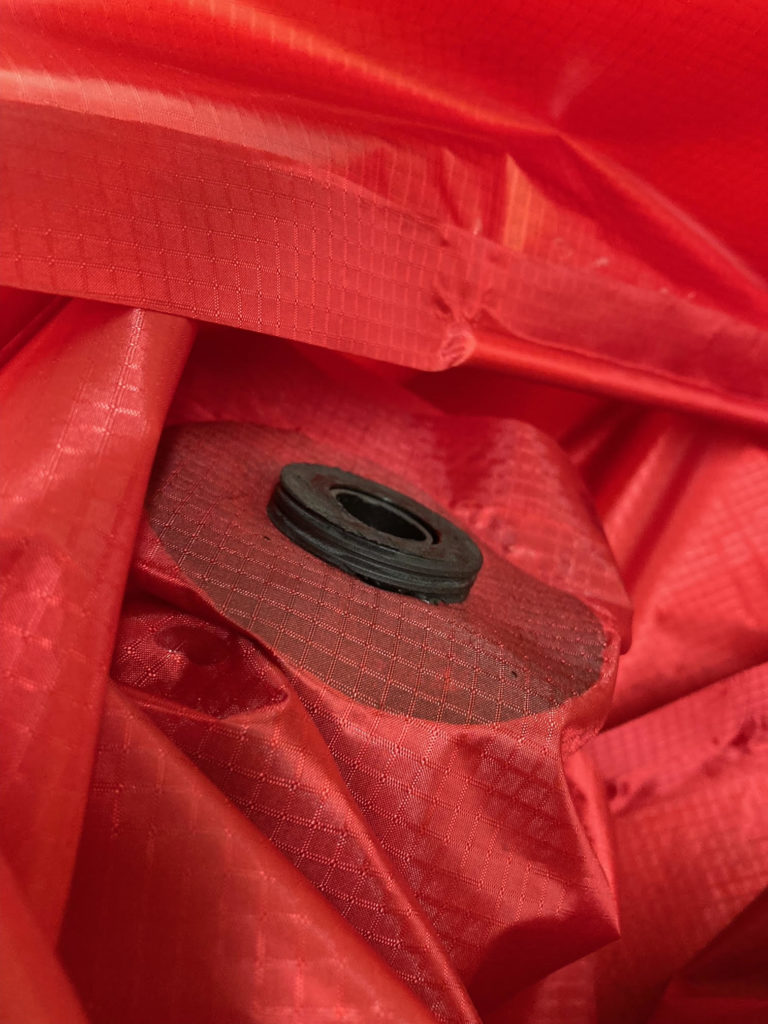
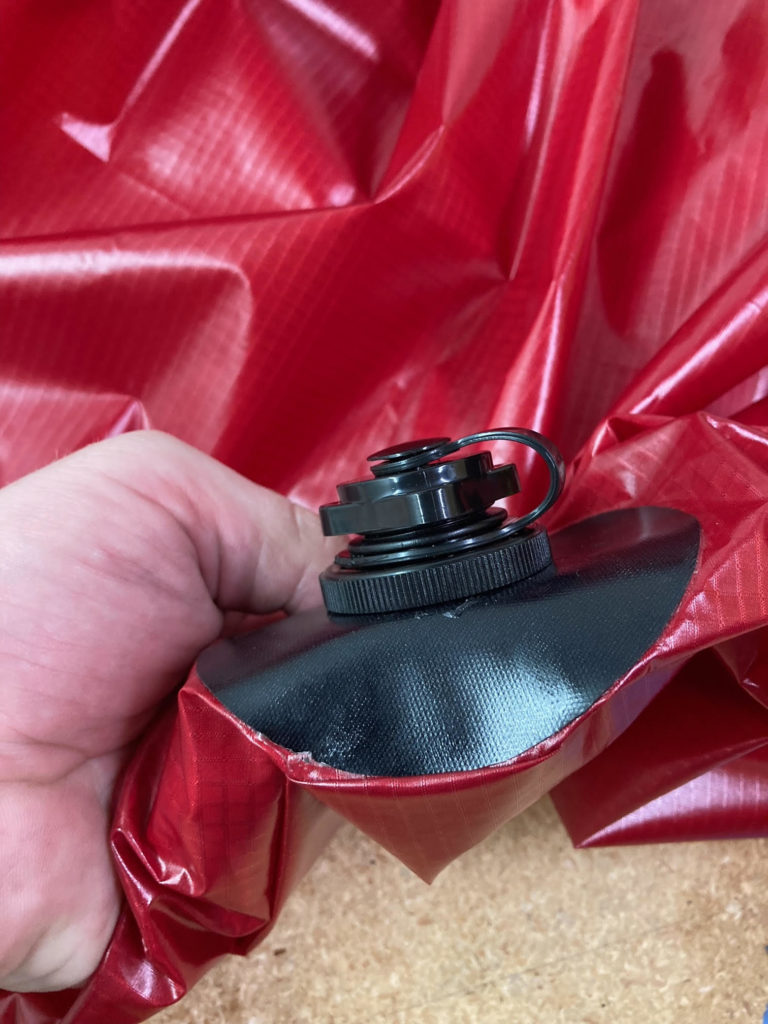
A couple added bonuses I realized after making it. First you could use the original cap as seen in the last photo, then make a roll top at the opening of the inflation bag, to then create a dry bag. Second, I ended up taking the rubber gasket out of the Boston valve where I sandwiched the TPU material, that rubber gasket makes a great spare to keep in the repair kit!
Anyway I was pretty excited with the result so I wanted to share. I’ll be ordering another valve for my second inflation bag.
Cheers,
Evan

Thanks for the tip, Evan! – Matt


6 Comments
William Archibald · June 28, 2026 at 11:55 am
Hi Matt
A fleet of us packrafters from Calgary will be heading to Nahanni river.
Someone mentioned with other packrafts that O rings have broken mid trip.
Had anyone ever experienced O-ring failure with DIY?
Would any replacement O-rings be available?
Love the rafts
Matt (Admin) · June 29, 2026 at 8:38 am
Hi William, that’s great!
I’ve never heard of an o-ring failure on a Boston valve, so replacements aren’t something I’ve looked into. If you’re concerned about it, maybe bring a small piece of rubber that you could cut a gasket out of in a pinch (like a resistance band or a balloon or something like that). Alternatively, you could buy an extra valve and pull the seals off of that.
Have an amazing trip!
Derrick · July 1, 2024 at 6:41 pm
If I understand correctly, cutting the Boston valve isn’t necessary. You just need a flange on the inflation bag and put a valve piece between the inflation bag flange and the packraft flange. This should work because I think flanges can be screwed to both ends of the value (with the cap open obviously). You can use a valve with the rubber bit removed to quickly inflate the packraft then switch to a valve with the rubber bit still there to top up the with the inflation bag (no longer needing to top off with your lungs). Is this correct? Is that how you have been using it? I’m considering getting another Boston valve for my inflation bag to try it out. Does it work well?
Matt (Admin) · July 2, 2024 at 8:21 am
Haha, I never thought of that, but you’re absolutely right – you could just iron the flange to the bag.
You might be able to screw the inflation bag flange onto the boat’s check valve after it’s screwed in for the final top-up… yes, I do think that would work. The downside is that screwing the bag on and off would almost certainly take longer than using your mouth for those last five or six breaths. It’s possible you could get a higher air pressure in the packraft using the bag, but because the threads aren’t a perfect match between the flange and the top side of the check valve, I’d be careful to avoid damaging them by trying to force a lot of air in.
I actually haven’t tried the valve-in-the-bag method myself, so if you test this before I get to it, please let us know how it works out!
Dwayne · May 29, 2024 at 9:28 pm
I found this 3d printed adapter posted on Printables.com. It is a perfect fit for the boston valve and, with a slight internal diameter adjustment, will fit snugly over the top-up inflation stems for the backrest and seat.
https://www.printables.com/model/809119-inflation-bag-adapter-for-packraft-boston-valve
Uncle Fred · May 5, 2024 at 4:05 pm
That’s really cool. I need to come up with an adapter that functions the same way for my pump but also supports the top-up valve.