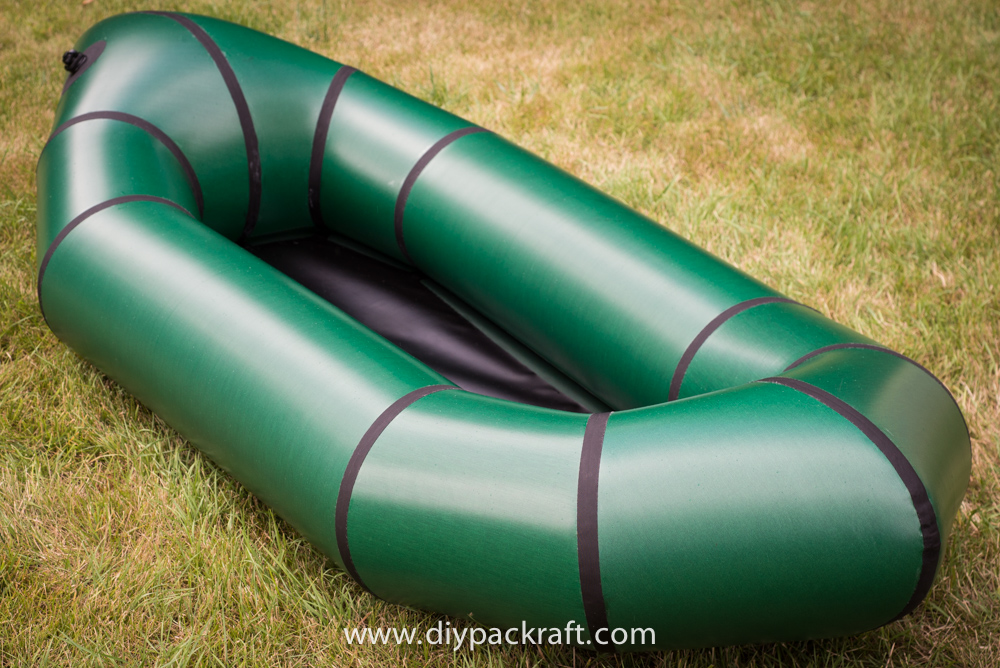
This is the V3 DIY Packraft made in the instruction pages below.
Note: These instructions are for the discontinued V3 kits. If you ordered a packraft kit after mid-2019 (e.g. a Skeena, Telkwa, 2-Person, etc.), it is not a V3 kit and you are on the wrong page.
Kit Checklist
Note: Do not use a blade to open your kit, as you may damage the fabric.
Before beginning construction, identify the parts of your kit and place the pieces someplace where they won’t get lost. Please unpack your kit carefully, as small pieces (like valves) can be overlooked when wrapped in fabric and/or packing materials. Each kit includes:
- Ten tube fabric pieces, numbered 1-5, L & R (Left and Right), with the forward direction indicated by an arrow
- One Boston valve (black, three pieces)
- One small valve for the seat (clear and black) – newer kits have a second top-up valve instead
- One top-up valve (black valve stem and black+white twist valve)
- One floor piece (black 420D or 1000D fabric, labeled with the size and forward arrow)
- Six seam strips (black), each ~2 m (6′) long
- Seat fabric, including top/bottom and three rectangular baffles (black)
- Inflation bag fabric (red lightweight 40D fabric)
- Inflation bag adapter tube (black, approximately 5 cm/2″ long)
- Scrap tube fabric (for heat sealing practice, making reinforcing strips and tie-downs, repairs, etc.)
- Scrap floor fabric (attached to floor – for heat sealing practice, repairs, making tie-downs, making an inflation bag, etc.)
- Airtight zipper (if ordered) + lubrication + strip of black 210D fabric large enough to mount zipper
Getting Started
Before starting on your packraft, take a few minutes to adjust your iron to the correct temperature and practice proper heat sealing technique. You may also want to build confidence by constructing your inflation bag and seat first.
- Practice Proper Heat Sealing Technique (important!)
- Inflation bag kit instructions
- Seat kit Instructions
You may also wish to modify your heat sealing iron to make it easier to use.
V3 DIY Packraft Kit Instructions
Note: Due to plagiarism, access to the following pages is limited to those who have purchased a V3 kit. The techniques are similar to those used in the V2 DIY Packraft instructions, which anyone can view, but the packraft design and assembly methods are improved.
Note: I frequently update instruction pages in response to questions from readers. If you do not have a tablet or computer where you will be constructing your packraft, you might choose to print the instructions – if you do so, I recommend printing them only as you need them to ensure they are up-to-date.
Your password for these pages is included in the letter packed with your kit (it is not the same as your Forum password).
Here is an overview video showing most steps of the construction process:
Step 1 – Separating Fabric Pieces
Step 2 – Drawing Alignment Marks on the Floor
Step 2.1 – Installing an Airtight Zipper (optional)
Step 3.1 – Joining Tube Piece #3 to Floor (Part 1)
Step 3.2 – Joining Tube Piece #3 to Floor (Part 2)
Step 4.1 – Adding Adjacent Tube Pieces (Part 1)
Step 4.2 – Adding Adjacent Tube Pieces (Part 2)
Step 4.3 – Adding Adjacent Tube Pieces (Part 3)
Step 5 – Installing the Inflation Valve
Step 7 – Locate & Seal Any Leaks
Step 8 – Top-Up Valve Placement & Installation
Step 9 – Apply Sealant to Seam Strips
Customer build reports with additional photos, tips, alternative methods, add-ons, etcetera:
- Adam DiPietro’s V3 DIY Packraft build report
- Dom Adcock’s convertible spray deck
- Eliot G.’s back band, spray deck, and thigh straps
- Ken S.’s build report with back band and floor insulation
Optional: Making Tie-Downs & Attachment Points, and Tie-Down Location Guide
Optional: V3 Spray Deck Plans
Questions? Leave a comment below!
9 Comments
Barbara · February 11, 2021 at 10:16 am
I’m curious – for the floor material with TPU on both sides (one shiny, one matte), what is the rationale for having the shiny side up? Is one able to build a Skeena/Telkwa with shiny side down? I’m thinking it would produce a more consistent outside of the packraft, and also avoid shine/possible sun reflection on the inside. Is it an aesthetic decision?
Matt (Admin) · February 11, 2021 at 12:01 pm
The matte side is actually up, but you’re welcome to flip it over.
SHAWN MEINHARDT · May 30, 2019 at 8:21 am
So, I am struggling with the final seam piece at the stern slit. Is there any way you could send a tutorial such as a video in slow motion of that section? Things just are not lining up for me at all. In the video provided it looks like part of the floor material is being cut as well as the tube fabric. Just can not get things lined up.
Matt (Admin) · May 30, 2019 at 8:40 am
I sent you a PM 🙂
Jen · April 11, 2019 at 8:48 am
Finished my packraft a couple of weeks ago. It still has substantial leaks but I’m still working on them and I’m pretty sure I can get it airtight at this point. I wanted to add some thoughts that I wish I had known before I started.
1. Irons- I started with the basic one in the video from amazon. As I am trying to fix leaks I ended up buying the clover and it had made a world of difference. the heat is more variable but the smaller head makes getting into tight spots so much easier.
2. The tpu fabric can overlap so I wish I had cut my strips longer to overlap and cut off leaks
3. The tpu doesn’t bond to the glue. I wish I had just heat sealed fabric over my holes instead of trying to fix them w glue first. Now that it’s slathered with glue I’m stuck trying to put more and more layers on unsuccessfully.
Overall I thought the setup and instructions were great. Thanks Matt!
noriyasu sutou · September 29, 2018 at 4:03 pm
I e-mailed it from Japan.
I know only some English. Can even I produce it?
This email makes a document in a translation site, too
Matt (Admin) · September 30, 2018 at 8:35 pm
Hello, please email me using the Contact page. Thanks!
Sorgmunter · April 10, 2018 at 2:19 pm
What do I have to do to watch the video on this side?
Matt (Admin) · April 10, 2018 at 3:15 pm
A password for the video above and the rest of the V3 instructions is included in the letter that comes with each V3 kit.