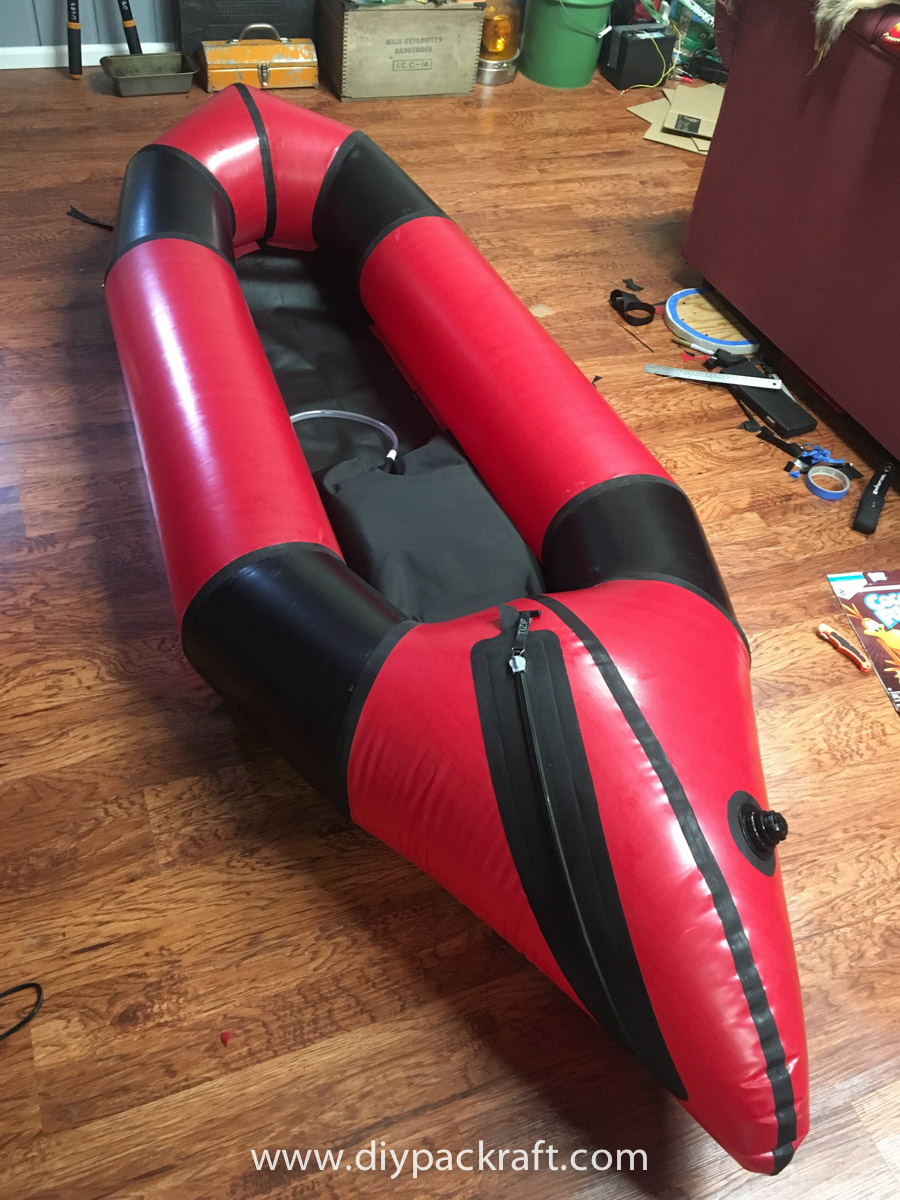
Adam DiPietro kindly sent this report featuring his very cool Deadpool-inspired red and black V3 DIY Packraft. I have made only minor edits to the text for formatting, clarity, and typos. I’ve also added a few comments of my own (in italics). – Matt
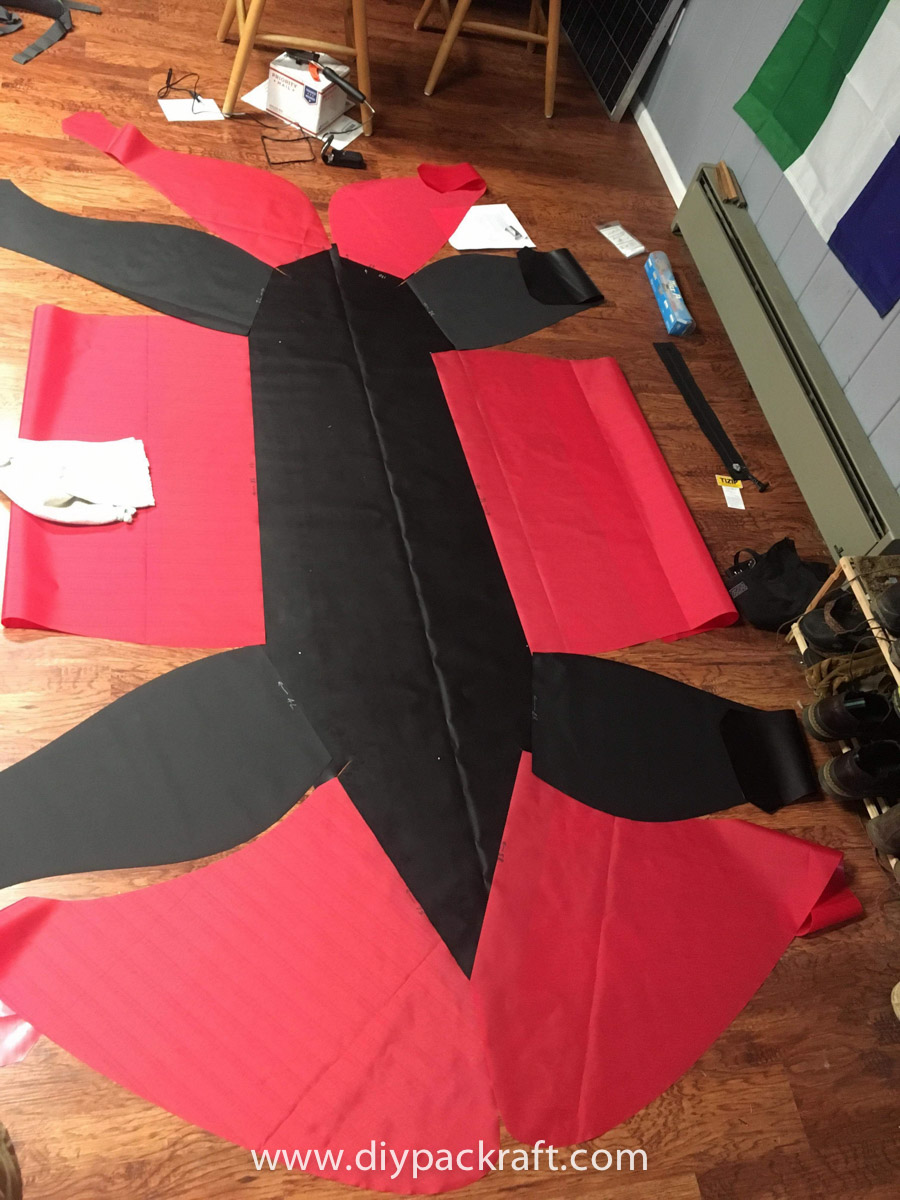
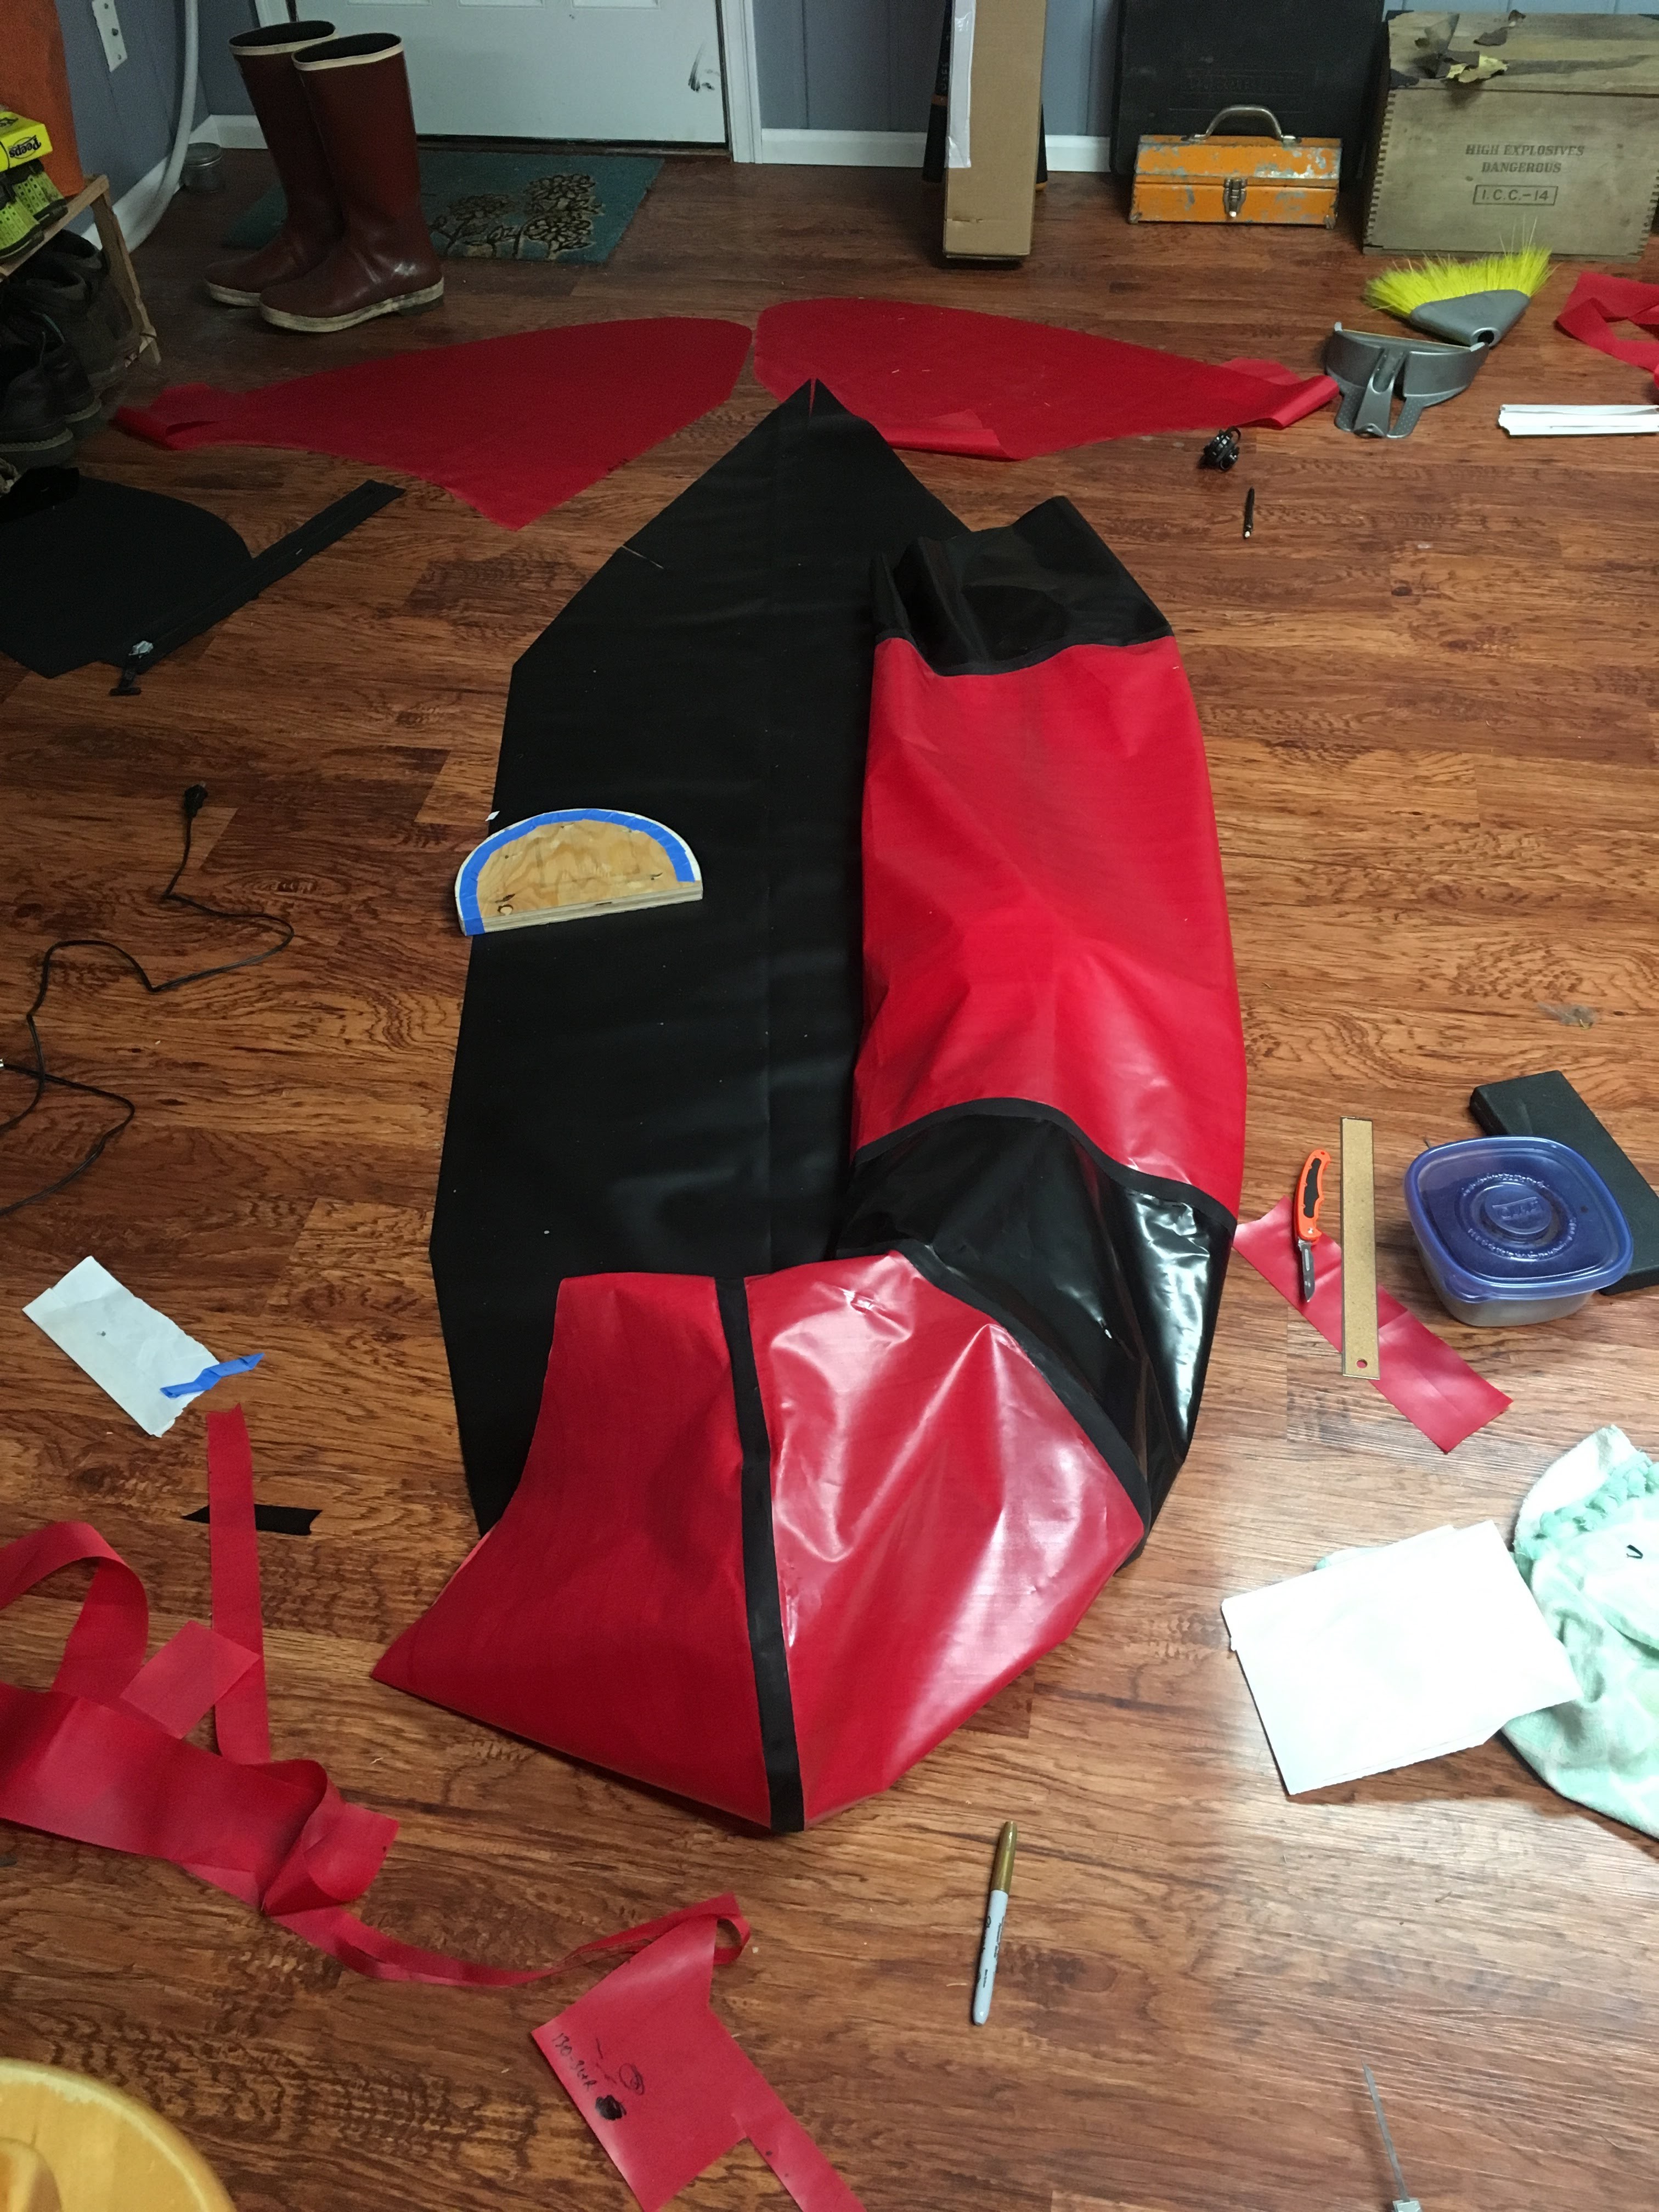
I began by cutting out the pieces. I was using a razor blade and found some of the scoring super tough to follow as it was lightly scored – 95% was good though. Take your time here – I spent close to 3 hours making sure I was following the pattern. [Yikes – that’s a long time! I’m working on a better cutting table for more consistent scoring that quickly pulls apart. – Matt] I then spread out all the pieces per the instructions in the V3 packraft build.
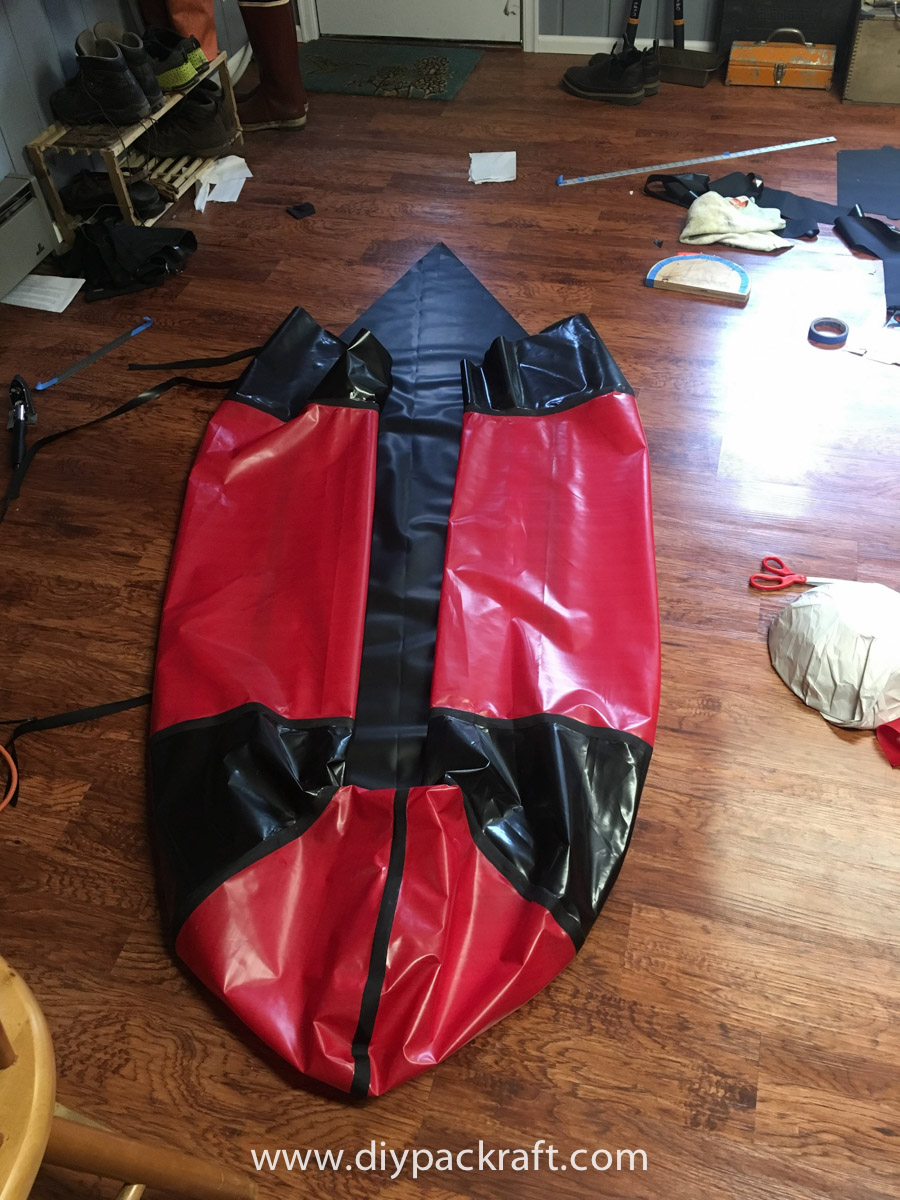
I tried installing the first seam using a bowl I had [i.e. using the technique shown in the V2 instruction videos]. DO NOT DO THAT. Go buy some wood and make the wooden jig that is mentioned in the V3 instructions. I couldn’t find any 1″ ply or MDF, so I just screwed two pieces of 7/16″ together. It ended up being just under 1″. I had to run over some some of the joints twice, offsetting the jig because it wasn’t quite wide enough to cover the whole seam. I think undersized is better than oversized, as there is no risk of cooking the material on either side of the seam. You can see the masking tape with sticky side out being held in place by some blue tape:
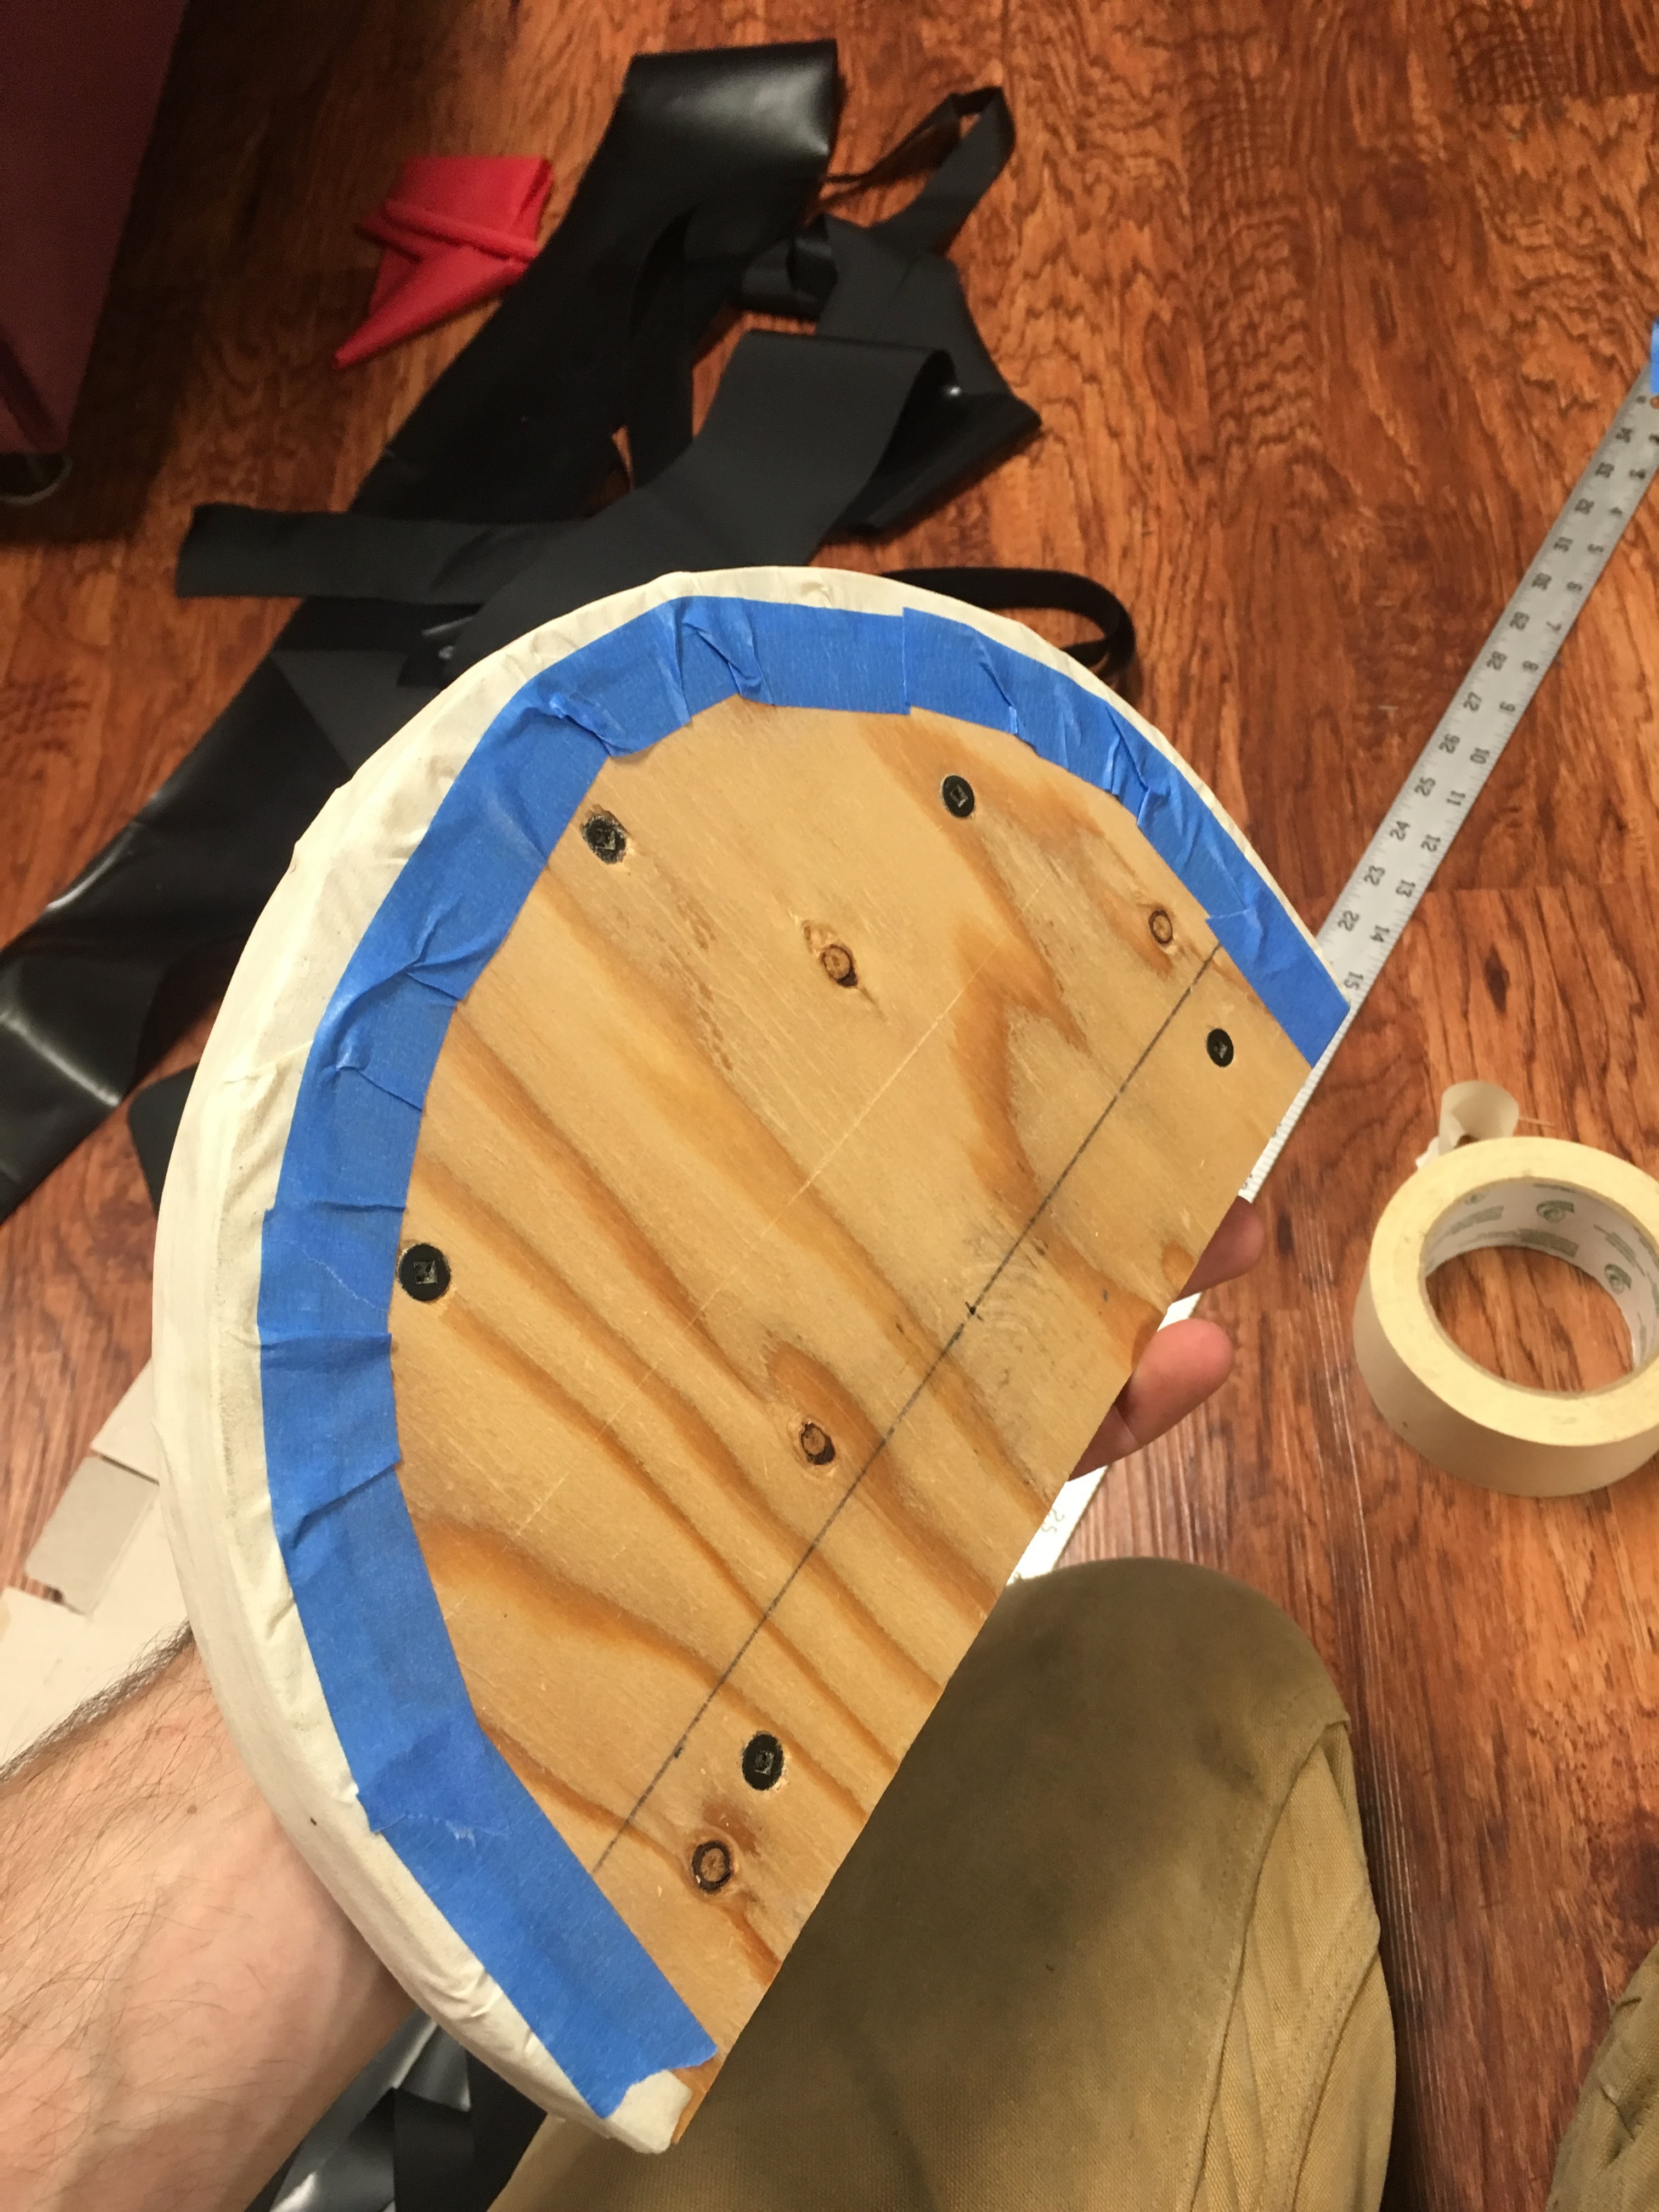
Seam sealing form made from two pieces of 7/8″ plywood screwed together.
I worked the seams in a clockwise direction from 3L gluing the inside seams per instructions in the V3 build. Noting really new to report here other than whatever you do, don’t touch the TPU side of the fabric with the iron. I set my iron to the MAX and it worked well.
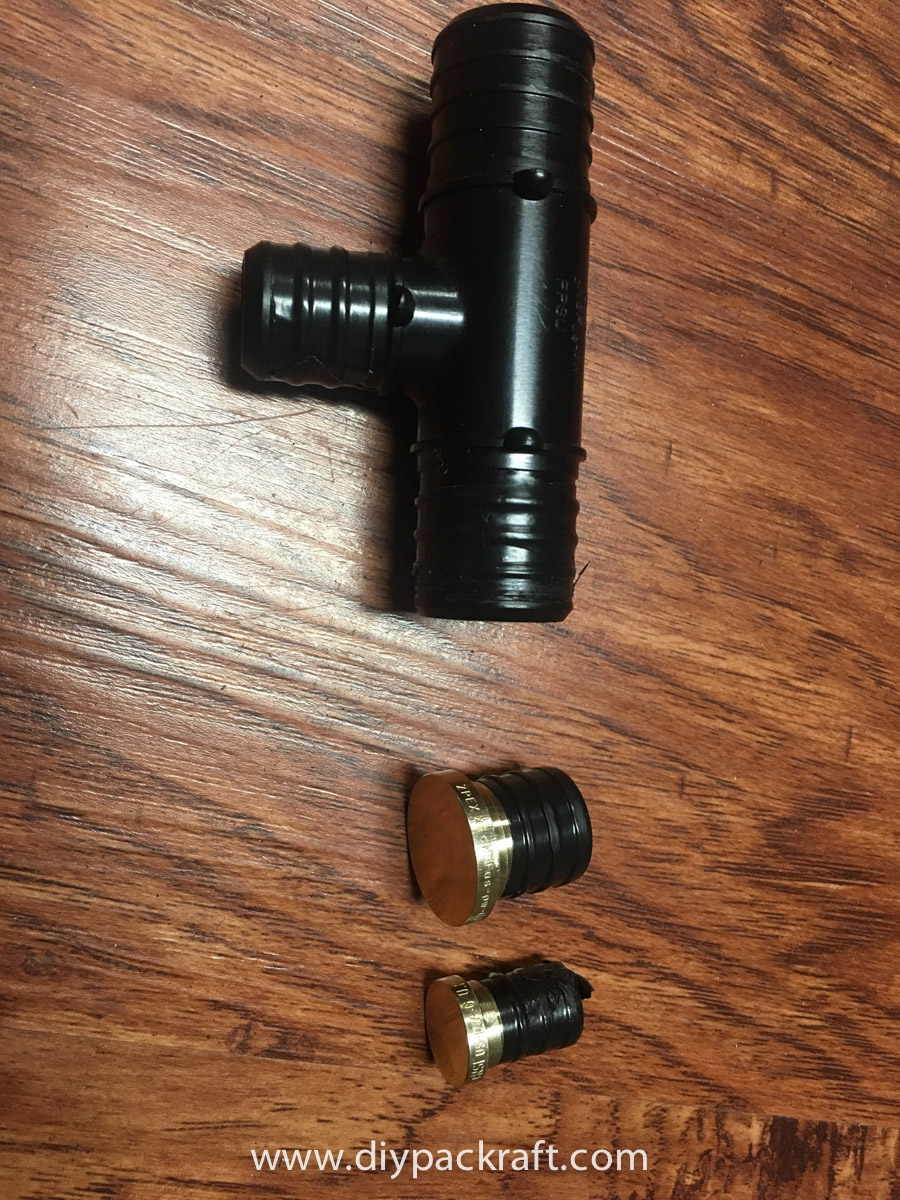
Some thoughts on the Inflation Bag: I found the top of the bag to be too narrow to effectively scoop air. There just isn’t enough space if you install the coat hangers. So I heated back up the seam and separated it about 3″ on either side of the end of the bag. Seems to increase its effectiveness. [Note: I have increased the size of the inflation bag fabric in kits shipped after April, 2018, so hopefully this won’t be an issue going forward. – Matt] I also found the rubber hose a challenge to use. So to the hardware store. I picked up a 1″ and 3/4″ T-connection and 2 brass plugs at 3/4″ and 1/2″ (these could be plastic to reduce weight, but I couldn’t find any). Some minor modifications had to be made. The inside of one of the 3/4″ ends of the ‘T’ had to be dremmeled out to make it large enough to insert the 3/4 ” plug and the 1/2″ brass plug needed some tape wrapped on it to increase the outer diameter to so it fit snug into the ‘T’. This allows you to use both the 2 way and the one way inputs of the Boston valve. Total inflation can now be achieved with the inflation bag, but I will note that the one way valve makes some awful noises when inflating… similar to an air raid siren. [Haha!]

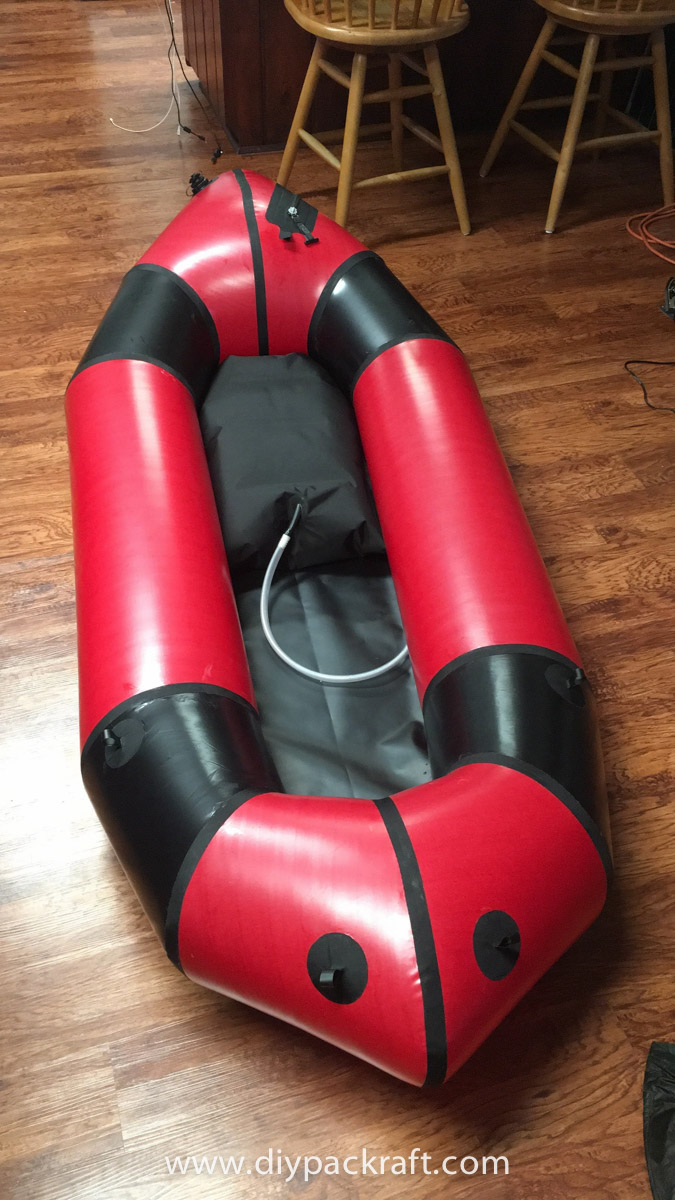
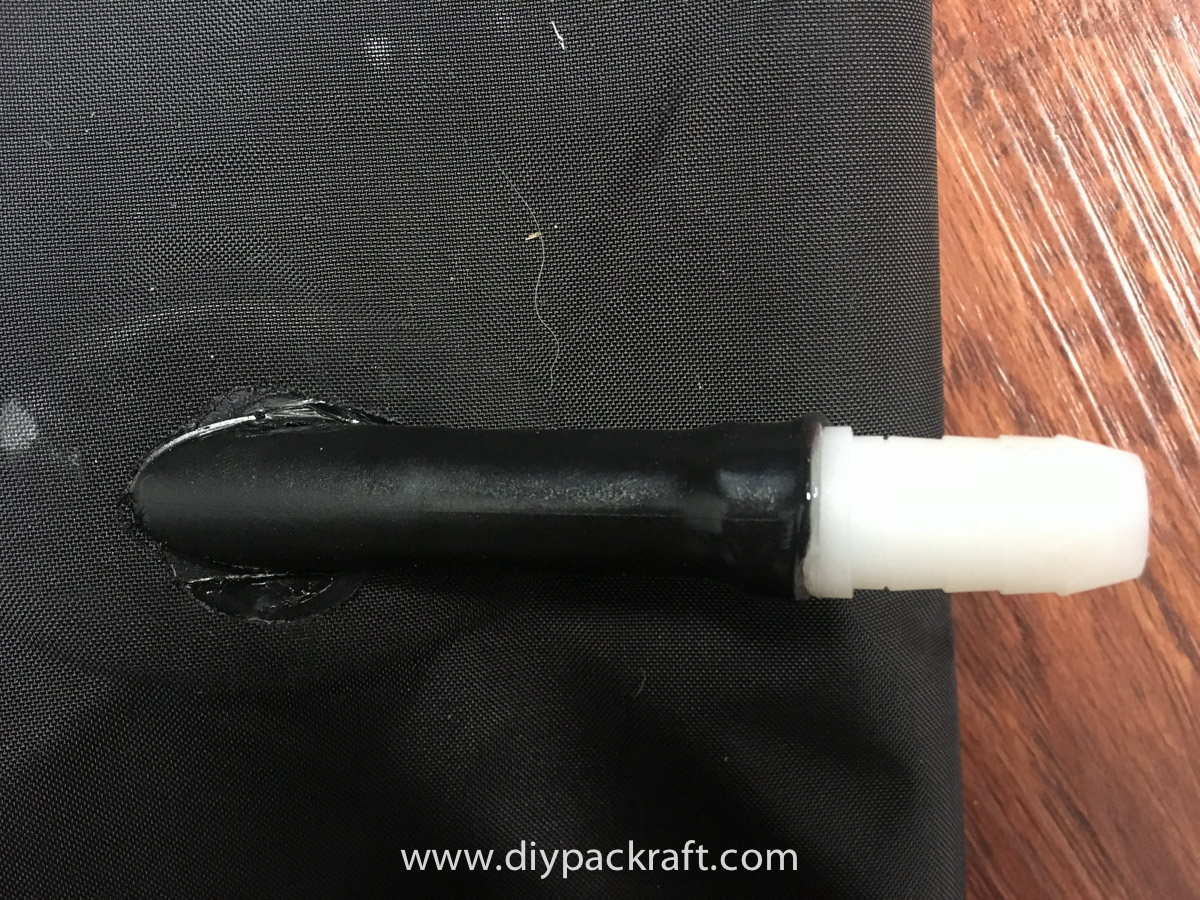
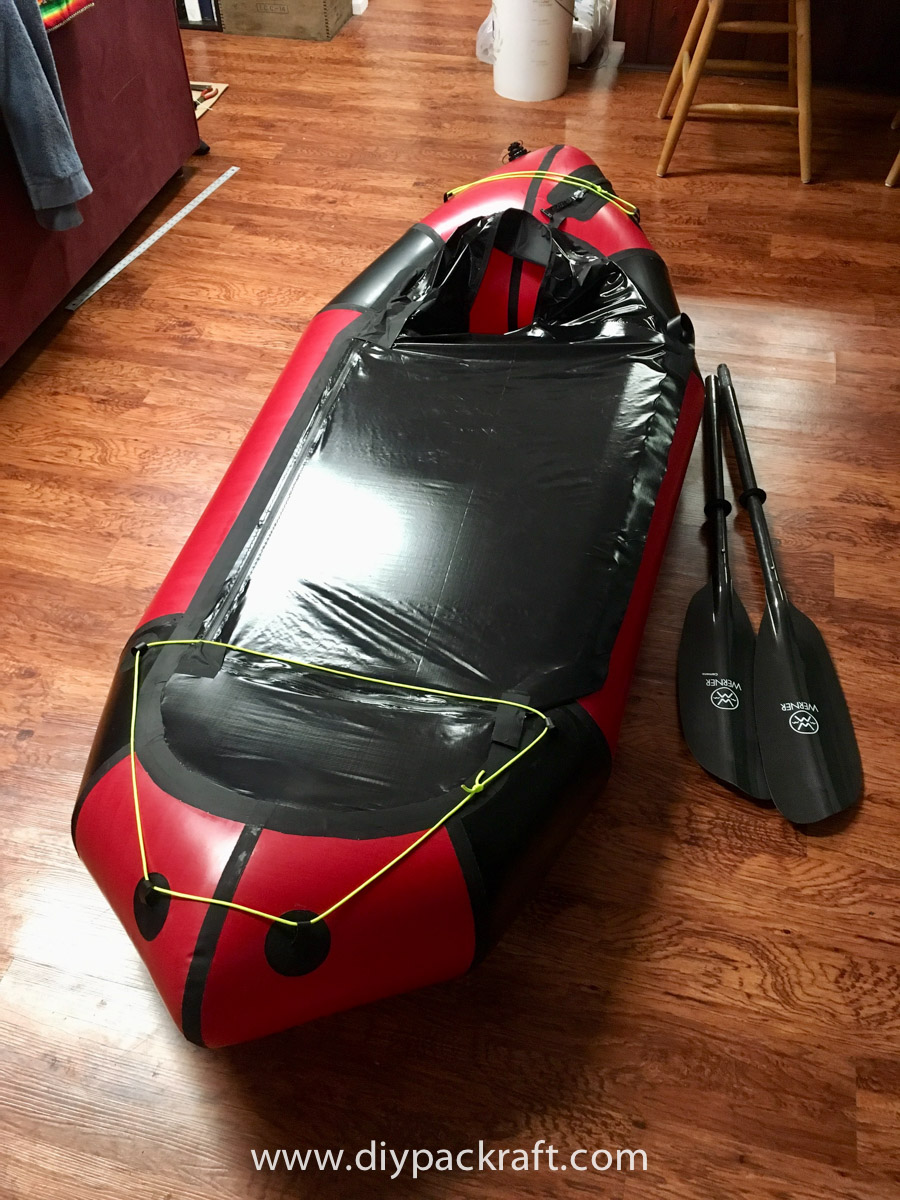
Some thoughts on the seat: I installed basically everything per instruction except the reinforcement strips. I fount it super hard to get all the reinforcing fabric to line up, so I just heat sealed the perimeter edges together without reinforcing. No issues yet and I bounced on it pretty good testing it. The clear plastic valve that comes with the kit well…. kinda stinks. 😉 So I used one of the top up valves and modified the pre-cut hole to be more of an ellipse, then heat sealed it right in. I then added 18″ of 1/2″ clear vinyl tubing and a plastic 1/2″ to 1/2″ hose connector. You really don’t need the full length of the connector so I hacked off all but about 1/2″, then heated up the end of the top up valve with a hair dryer and inserted the connector in it. I then glued the other end with some Aquaseal in the vinyl tubing. I can now add or release air while paddling. Second photo is of the seat in the boat installed with tubing. [Thanks for the feedback about the small seat valve – I’ll consider replacing it in the kits with a top-up valve. – Matt]
Thanks Matt, and happy packrafting! [Thank you, Adam! – Matt]