Approximate time: 1 hour
These instructions are for assembling the spray skirt kit available in the DIY Packraft shop.
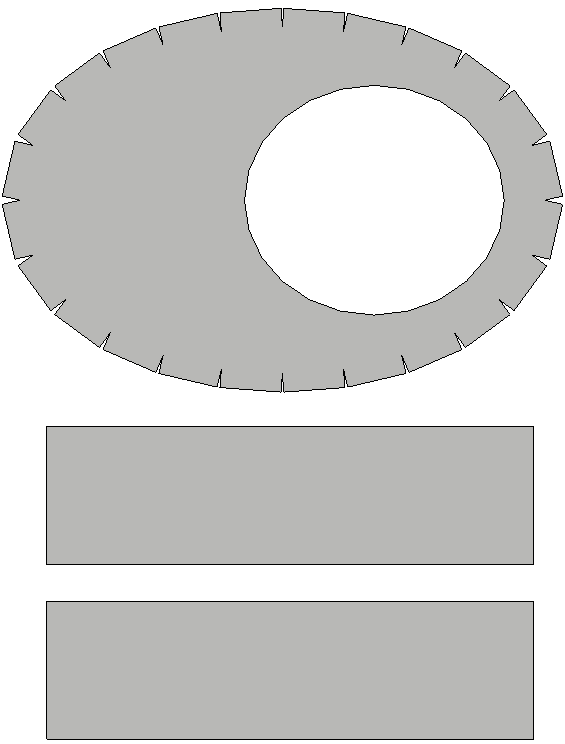
Start by separating the fabric pieces from the scrap fabric using scissors, so you have three pieces of fabric shaped like this:

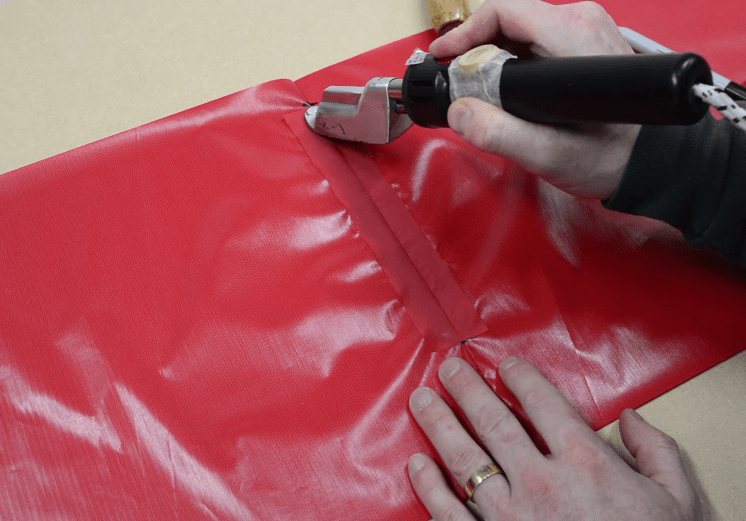
Set aside the elliptical piece and lay out the two rectangles, one on top of the other, with the TPU sides facing each other. Seal the ends of the two rectangles together so they make one long rectangle.
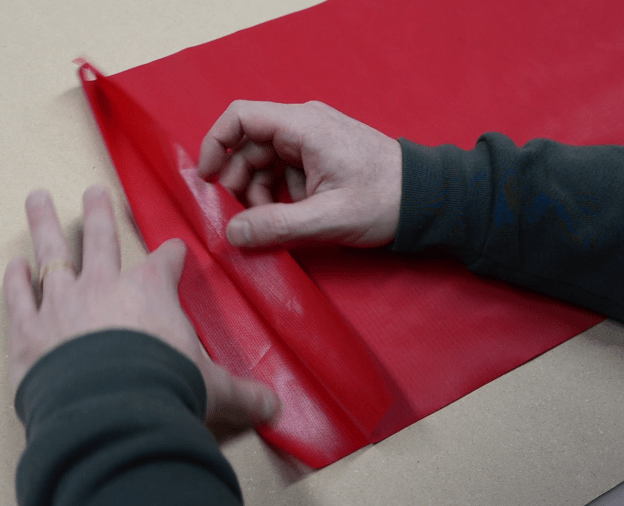

Open up the sealed joint like a book to expose the TPU side and make two marks, one about 8 cm (3″) from the one edge, and the other about 2 cm (¾”) from the other edge. Then cut a scrap of fabric, about the width of your iron, to fit between these two marks, and seal it over the seam.
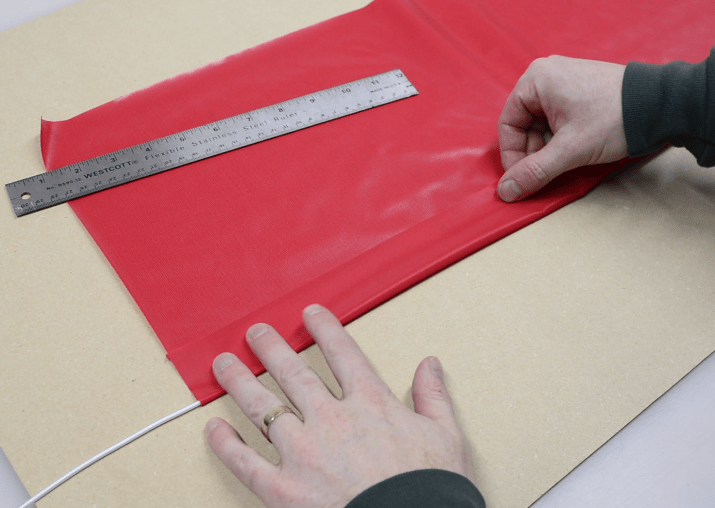
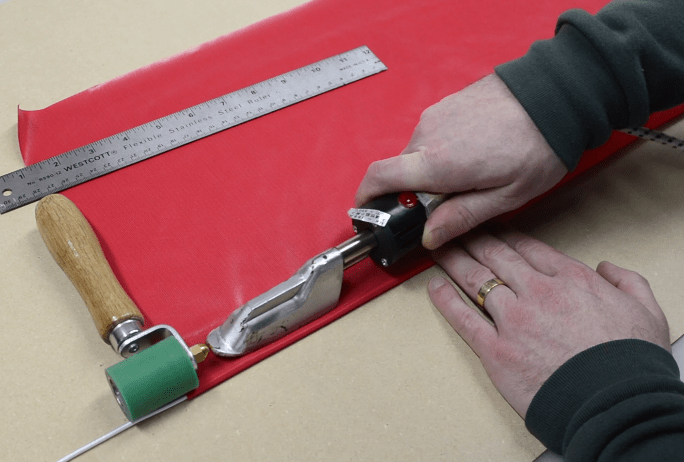
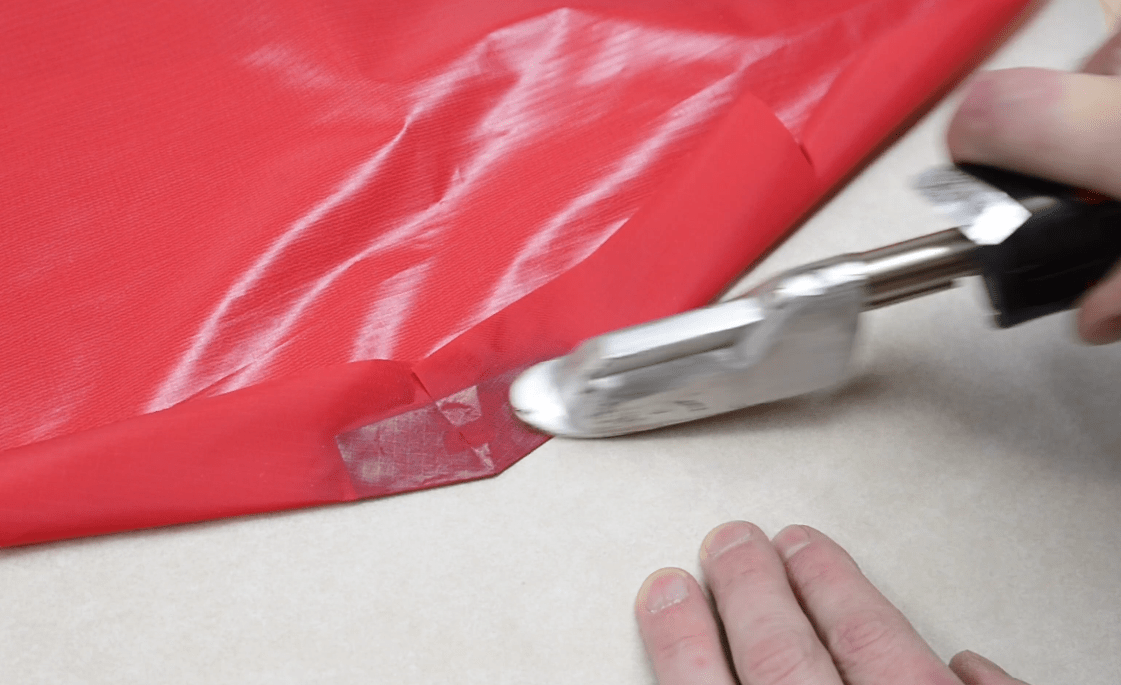
Lay out the piece of shock cord along the edge of the fabric rectangle (on the side with 8 cm / 3″ exposed at the seam), and fold about 4 cm (1.5″) of the fabric over the shock cord. Seal the fold in place to create a sleeve that the shock cord can slide within.
Note: Do not weld right up to the edge of the shock cord or it will not slide through the sleeve easily when the cord is tightened and the fabric bunches up around it. Leave at least a 1 cm (3/8″) wide sleeve here (wider is probably better).
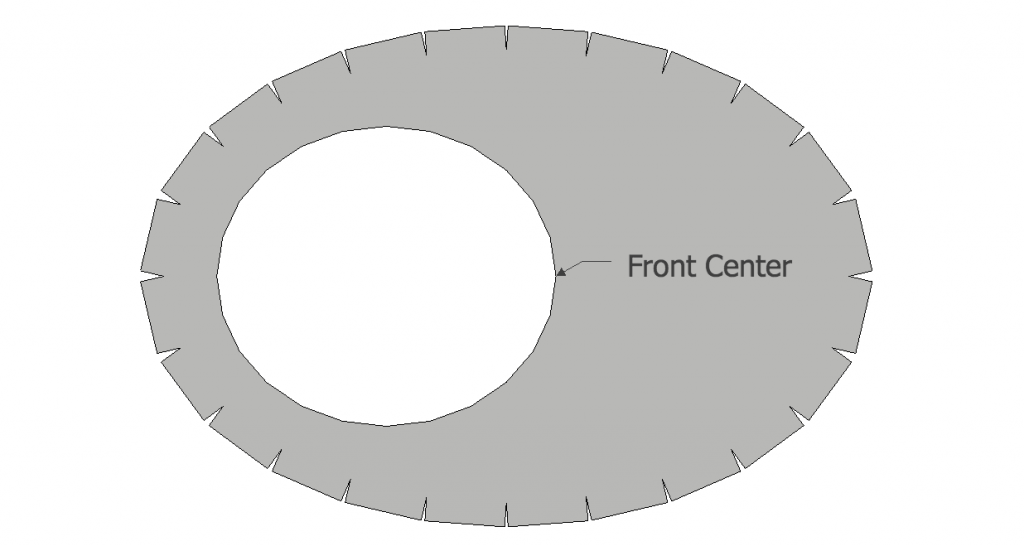
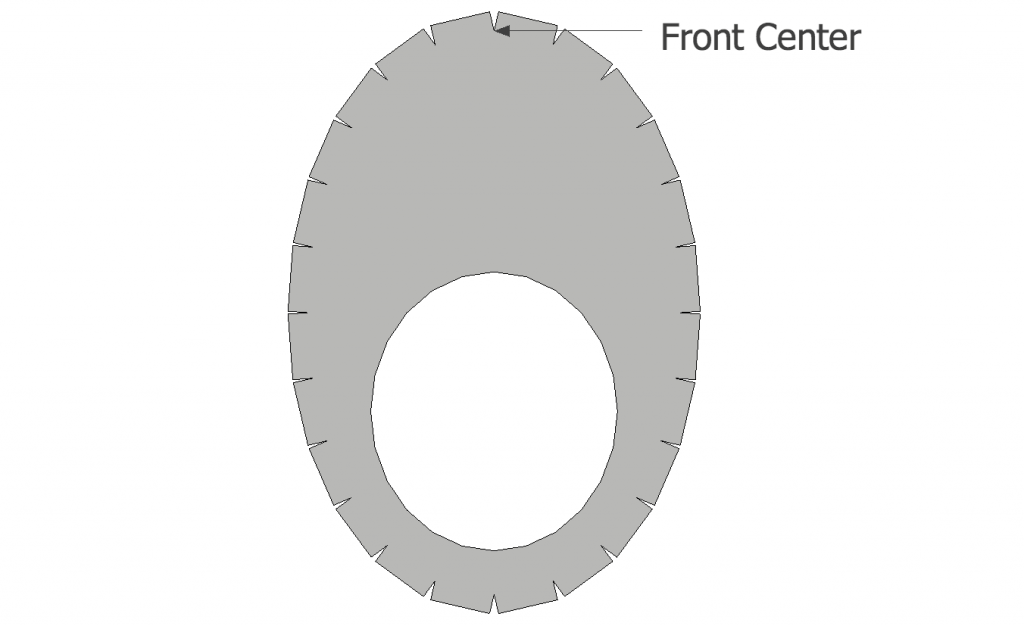
Mark the front of the hole in the elliptical fabric piece, TPU side up:
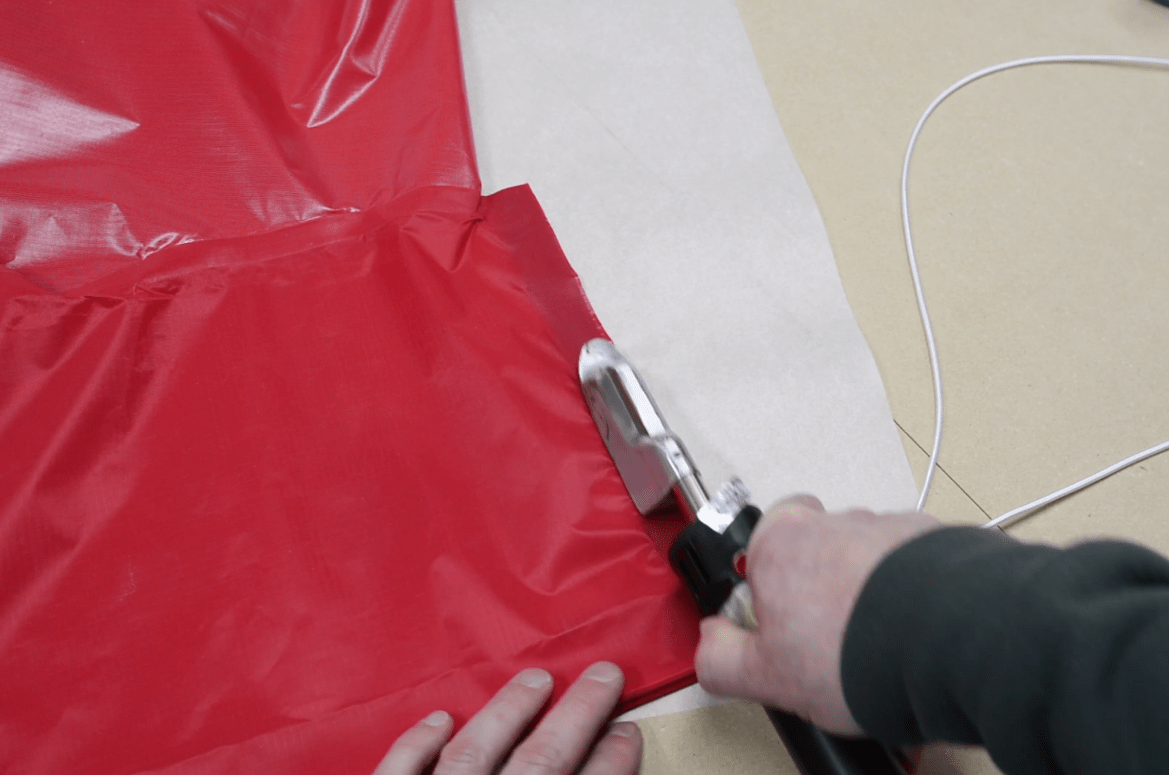
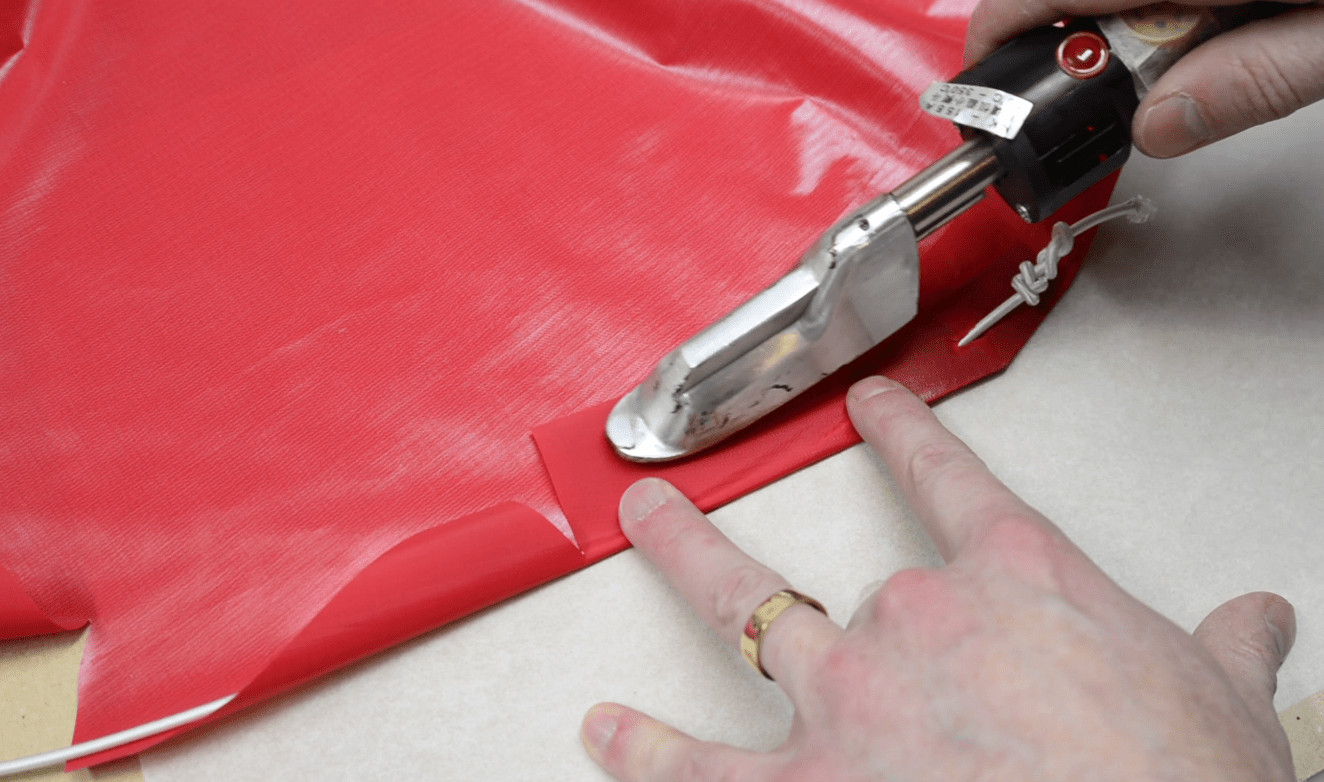
Line up the fabric rectangle so the long edge opposite the shock cord sleeve overlaps the front edge of the hole by about 1.5 cm (1/2″), TPU side down. The end of the rectangle should extend a few cm past the mark you made at the front of the hole (this will provide a surface for the other end of the rectangle to attach to later).
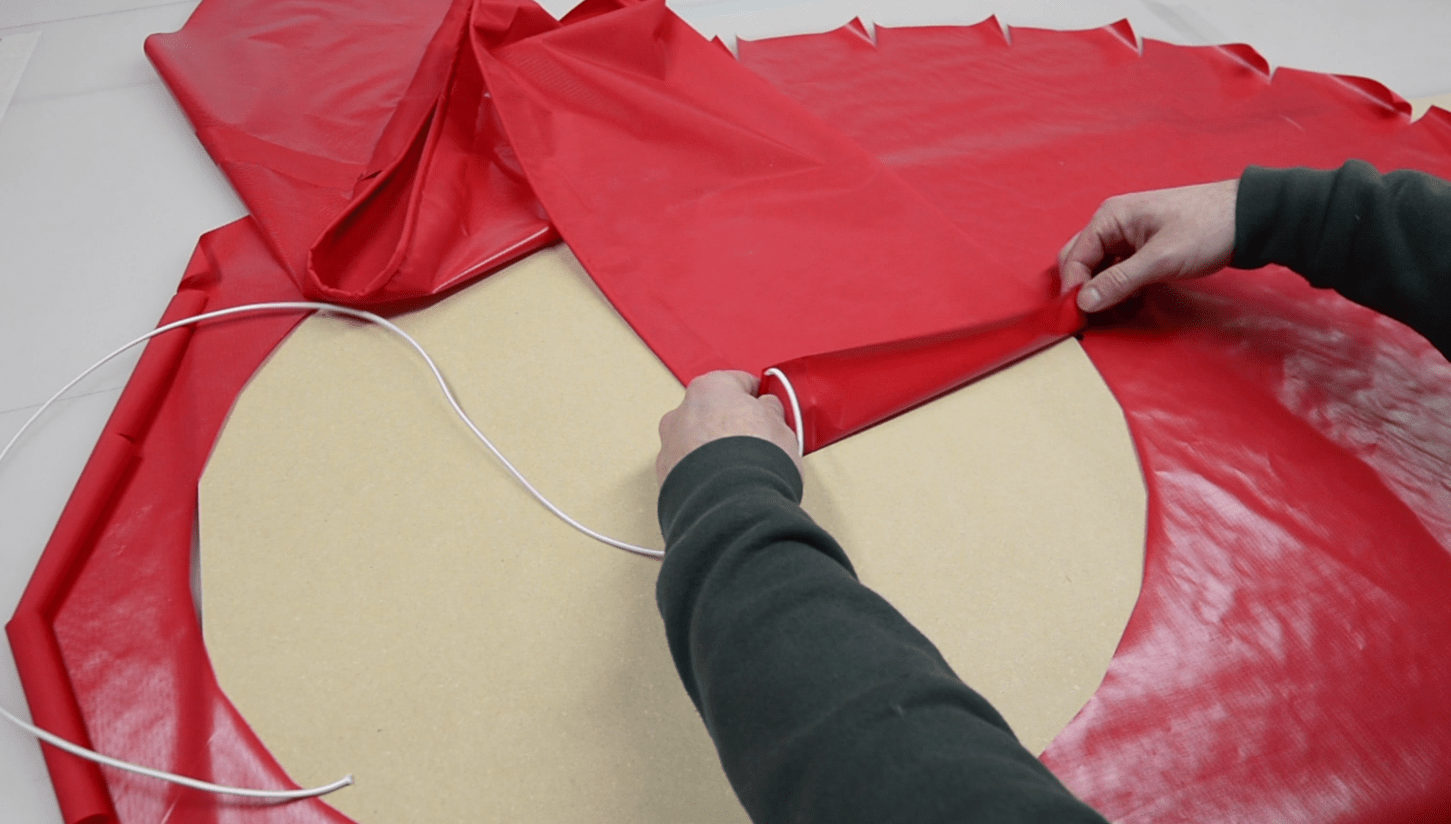
Use your iron to seal a short section of the edge of the rectangle to the edge of the hole (don’t forget to use parchment paper under the fabric here). Leave the few cm of the rectangle that extends past the center mark unsealed.
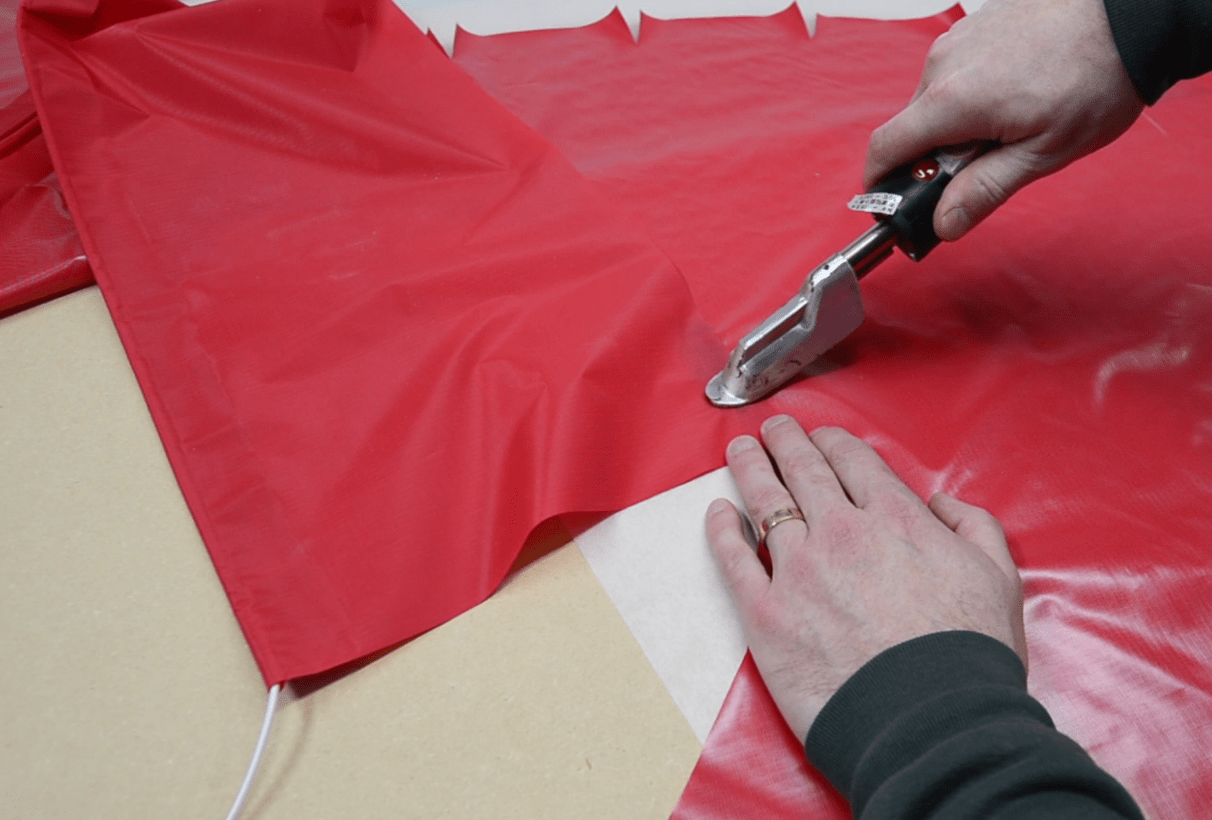
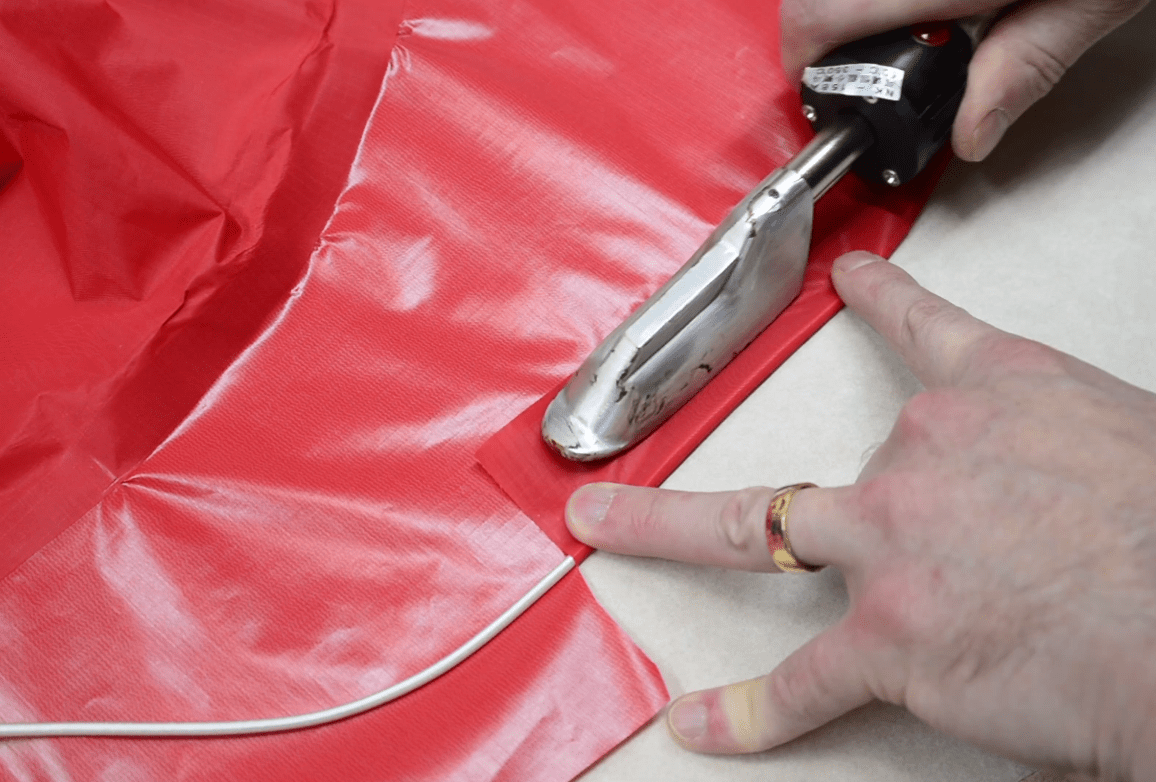
Continue welding the rectangle around the edge of the hole, sealing one straight section at a time, maintaining an overlap of about 1.5 cm (1/2″), working your way all the way around the hole. You may have to seal in some small wrinkles to make this work, which is okay, but you’ll want this seam to be waterproof, so make sure you don’t leave any holes or gaps.
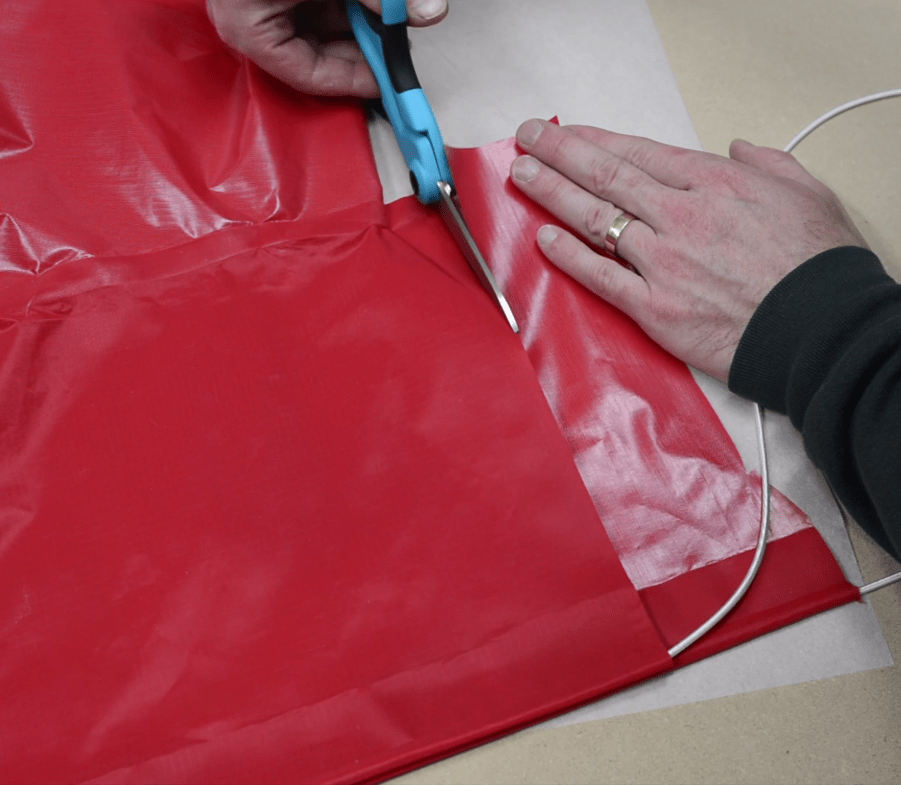
As you near the front, you may find it easier to trim off some of the extra length from the rectangle. I’ve purposely made it longer than required so there’s no chance you’ll come up short, and if you need to enlarge the hole in the skirt to make it fit around your waist and chest, that’s no problem.
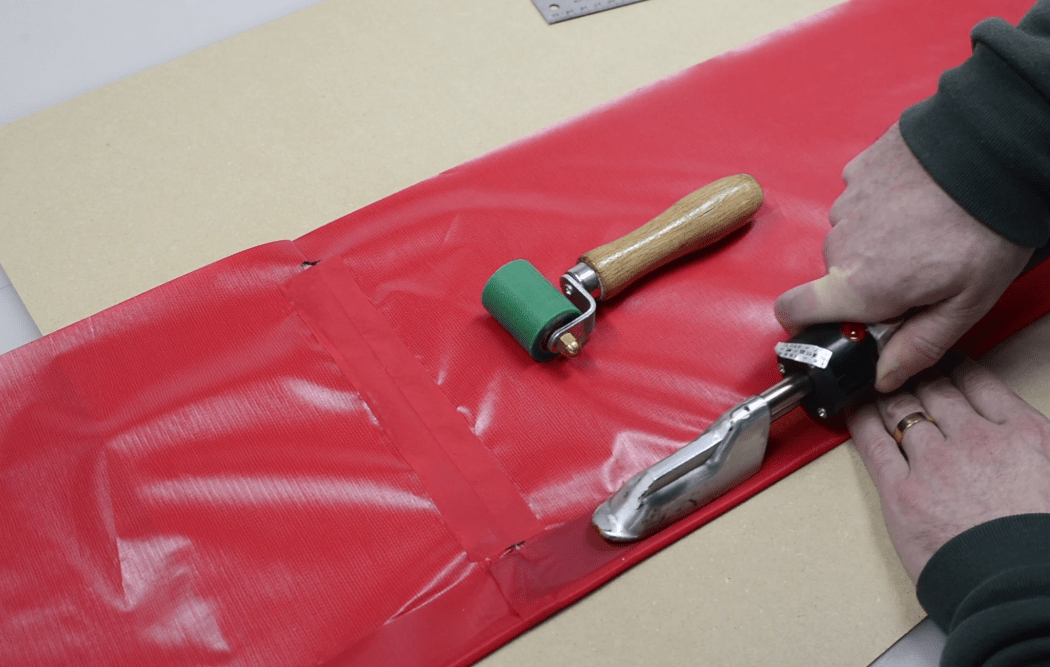
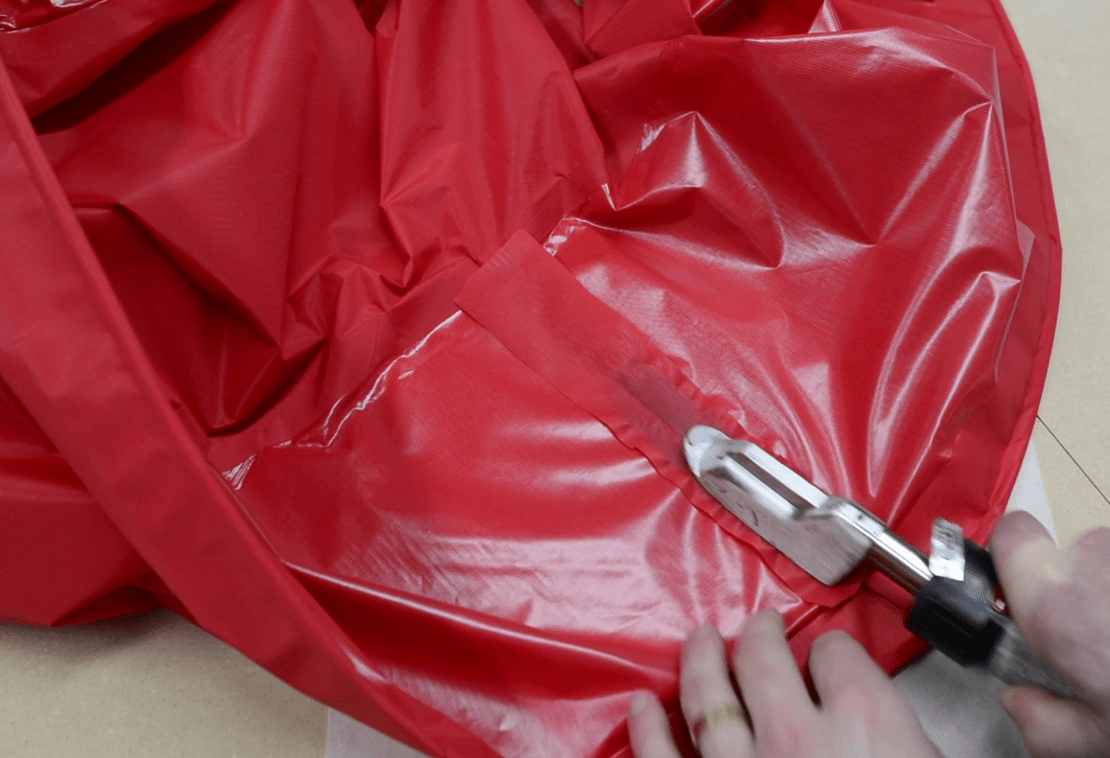
Close up the rectangle into a cylinder by sealing the free edges together, and then reinforce this weld by sealing a scrap of fabric along the inside of the seam. Make sure there’s no gap in the weld where this seam butts up against the edge of the hole.
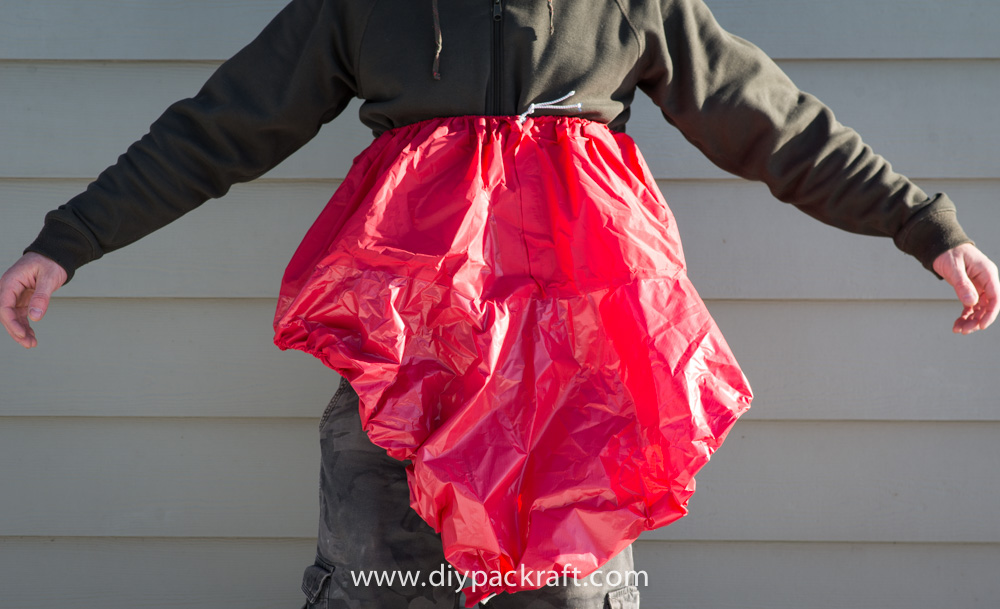
Now you can tighten the shock cord by pulling one end through the sleeve until it fits snugly but comfortably around your chest. Cut off the excess shock cord (you’ll need this later) and tie the ends of the shock cord in the sleeve together. If you want it to be easily adjustable, thread them through a spring-loaded drawstring cord lock (not included) before tying them together.
Next, find the front center of the spray skirt and mark it with your pen:
Cut a piece of scrap floor fabric (left over from your packraft kit) into a rectangle about 5 cm (2″) long and 2 cm (¾”) wide. Cut a hole in the middle large enough for two strands of shock cord to fit through. Trim one of the long edges of the rectangle to a slight point, so the tabs along the edge of the skirt can easily fold over top of it.
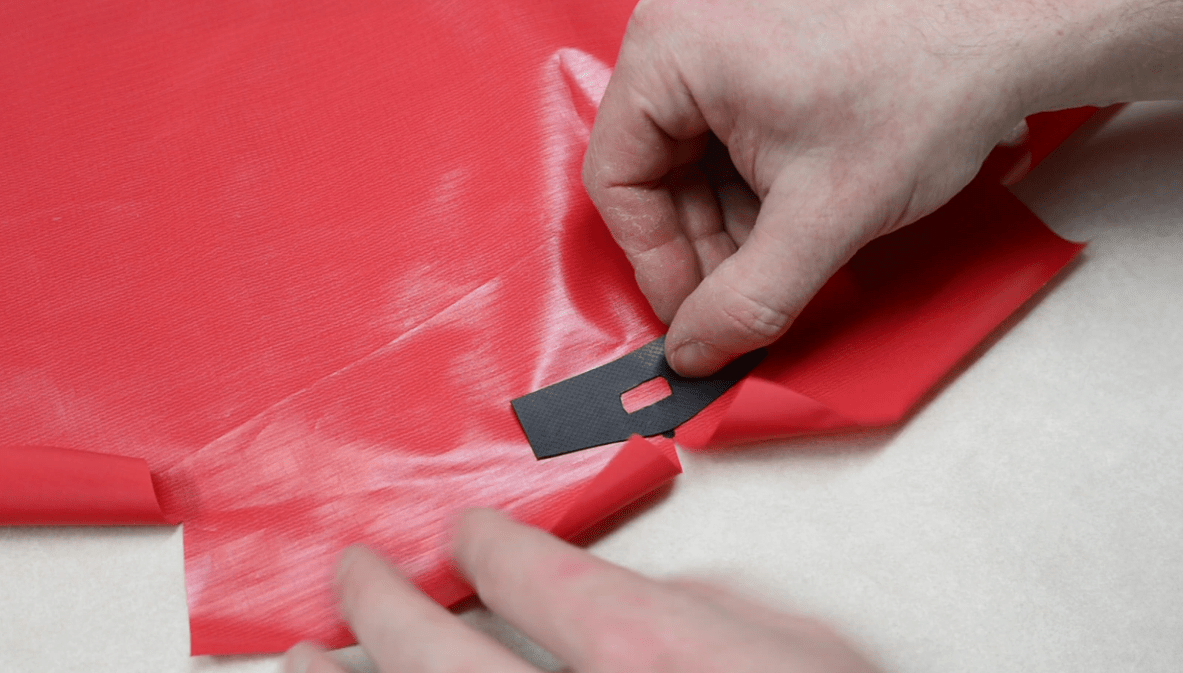
Fold the front two tabs of the skirt fabric over the rectangle and seal them to it with your iron. Caution: If you linger too long here with the iron, the floor fabric piece will weld to the skirt fabric not only on the side you are ironing, but on the bottom as well, and then you will be unable to insert the shock cord. To prevent this from happening, use the floor fabric piece as a stencil and cut a piece of parchment paper to fit under it while you are ironing (not shown). You can leave the parchment paper in there permanently or slide it out after you have ironed the tabs to the floor fabric piece.
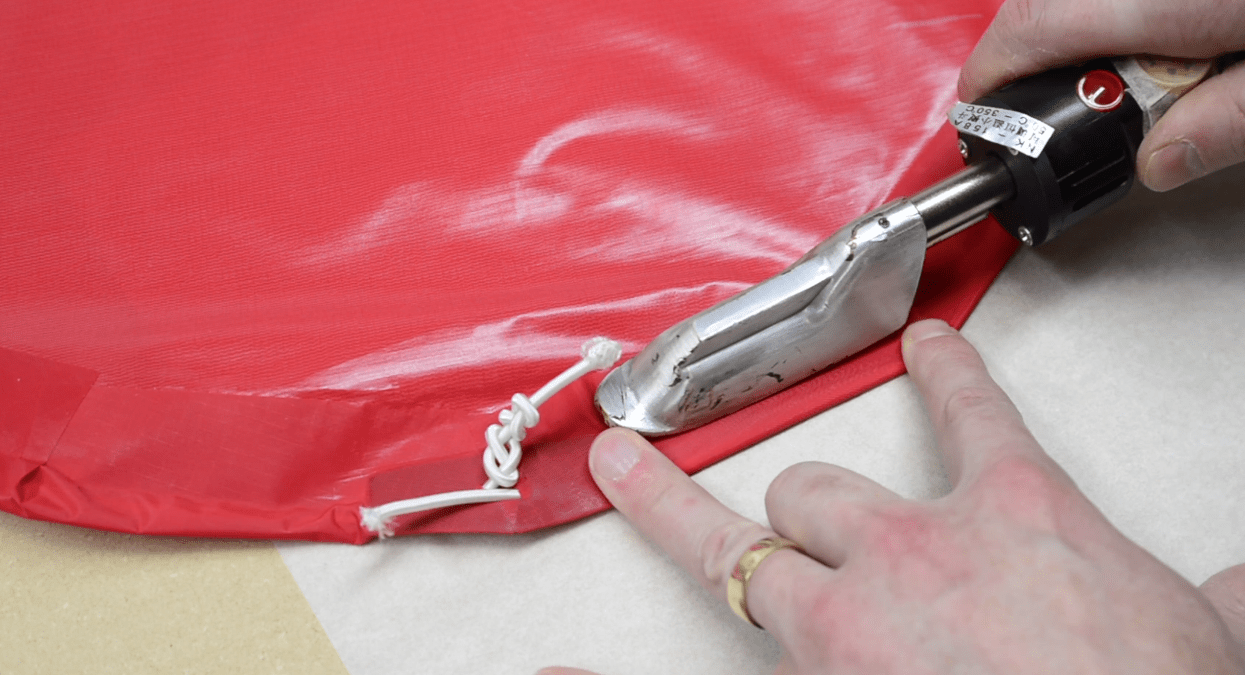
Then thread one end of the remaining shock cord through the hole and tie a knot in it so it won’t pull through.
Fold the fabric tabs over the shock cord and seal them in place to create a sleeve that the shock cord can slide through. Don’t worry about the fact that there will be holes in the sleeve where the tabs overlap each other – these areas don’t need to be waterproof.
Note how I only weld a strip as wide as my iron here, aligning the edge of the iron with the edge of the tab. If you weld too close to the shock cord, the resulting sleeve will create too much friction for the shock cord to slide through when the cord is tightened and the fabric bunches up around it.
Continue sealing the tabs over the shock cord all the way around the edge of the skirt until you’re back at the front. (Pull the shock cord through the finished sleeve as necessary if it’s not long enough.) Thread the second end of the shock cord through the reinforced eyelet you made from the floor fabric, and then seal the last tab in place.
Tighten the shock cord by pulling one or both ends farther through the eyelet.
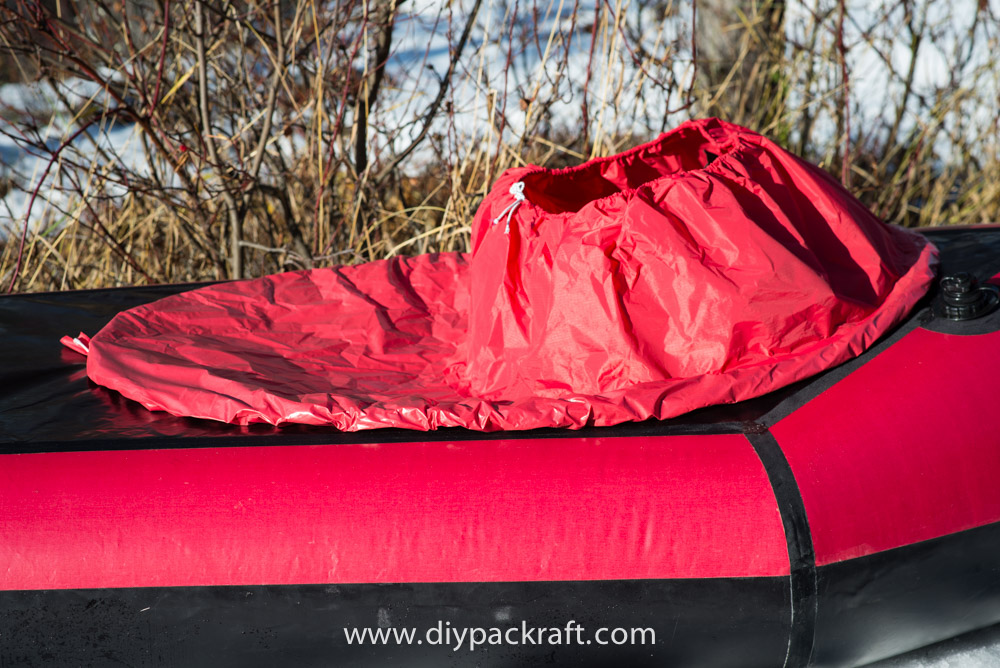
Set the desired tension by securing the spray skirt over the spray deck coaming and adjusting the length of the shock cord inside the sleeve. It should be snug enough that it won’t implode too easily if a wave comes over the deck, but it should still be easy to remove by pulling up on the ends of the shock cord.
Tie a flag of fabric or some other handle to the shock cord so it’s easy to grab, even if you happen to find yourself upside down under water.
Questions? Leave a comment below!
5 Comments
lucas s. · July 4, 2021 at 7:52 pm
The spray deck and spray skirt is made by wich fabric GSM below?
115 GSM (3.4 oz) ripstop nylon with heat sealable TPU coating – Yellow
190 GSM (5.6 oz) ripstop nylon with heat sealable TPU coatings on both sides – Black
yoshi · June 23, 2021 at 4:09 pm
I ran into that issue with the kit. I think it’s important to ensure a good sized groove for the shock cord to go through – bigger than I allowed. I was more careful when I did the bottom part and that helped the cord slide through better. On a related note – the part where it says to weld the little piece of flooring (eyelet) – have to make sure to put something between the main skirt part and the little rectangle piece as I almost melted everything together (since the floor had TPU on both sides) but was able to pry a way for the cord to go in.
Matt (Admin) · June 24, 2021 at 8:21 am
Thanks yoshi – I have added a “caution” and a “note” about these things above.
John · May 18, 2020 at 1:58 pm
I made my own skirt using the same fabric from the deck, but I have problems tightening it with the shock cord. The fabric seems to stiff. Are you using a thinner, more elastic fabric? I have problems both on the upper and the lower part. What diameter is your shock cord? Mine is 2,5 cm. Any advices or possible solution is appreciated. Cheers!
Matt (Admin) · May 18, 2020 at 4:01 pm
I use 1/8″ shock cord and a lightweight ripstop fabric (about 100 grams per square meter). Maybe you can use a lighter fabric for the edge of your skirt?