Design, text and pictures by Gustav K., with minor editing by me. Thanks, Gustav! – Matt
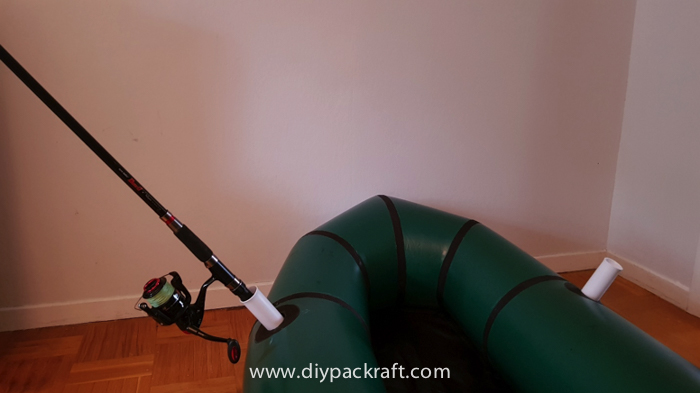
Gustav’s Rod Holder Version 1.1
- Please read through the instructions and the final notes and followup comment before picking up the scissors
- All measurements in metric
- Cost is around 5€ or $6 for three rod holders if you have leftovers from making the packraft
- Weight is around 30 g added to packraft and 70 g for the plastic tube insert (carbon fiber is an option but not for 5€/meter)
- Post build attachment without an airtight zipper in the packraft is probably close to impossible
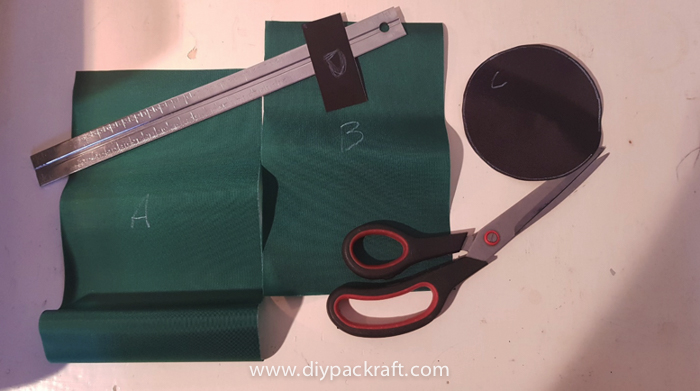
1. Basic Cut outs
Start with the basic cut outs and label at least A & B to avoid a mix-up.
250 GSM (8 oz, 210D) Fabric or similar (standard DIY Packraft tube fabric):
A – Outer tube: 145 x 275 mm
B – Inner tube: 143 x 220 mm
C – Top circle: 110 mm diameter
560GSM (17 oz, 420D) or 735 GSM (22 oz, 1000D) fabric (DIY Packraft floor fabric):
D – Bottom joint patch: 30 x approx. 70 mm (don’t cut final length yet)
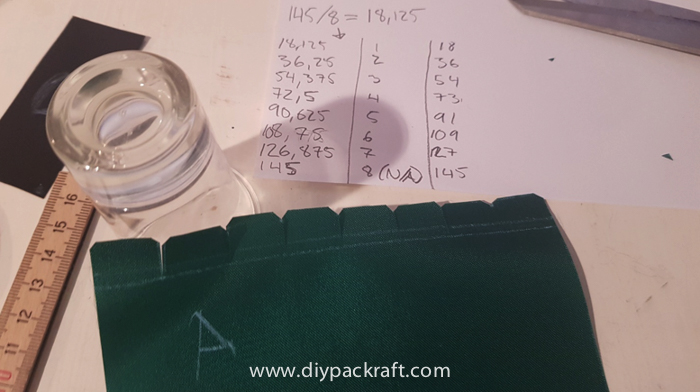
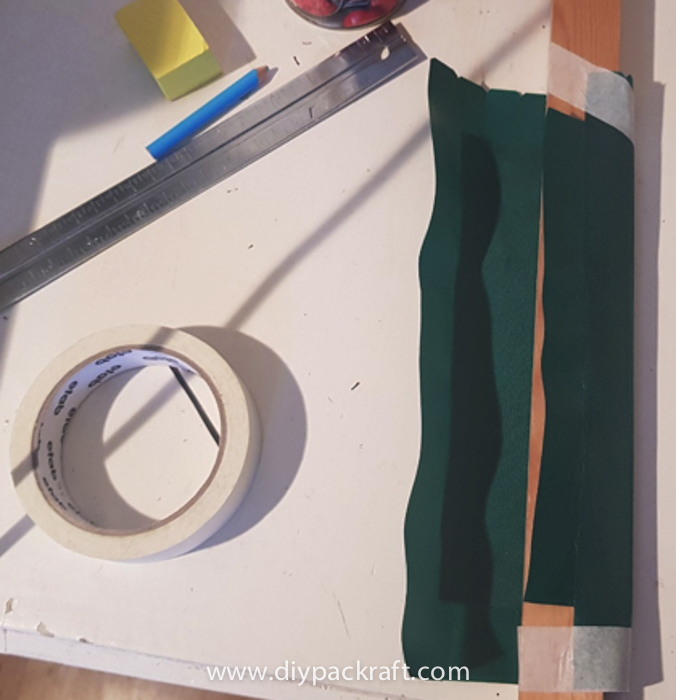
2. Cut out the outer flaps on piece A
- Mark a line 12 mm down from one of the shorter sides
- Now make marks with the following intervals;
- 18, 36, 54, 73, 91, 109 and 127 mm
- Cut down to the marked line and trim the corners
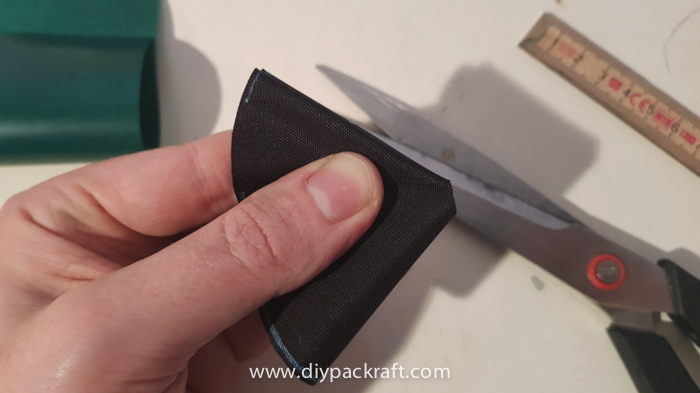
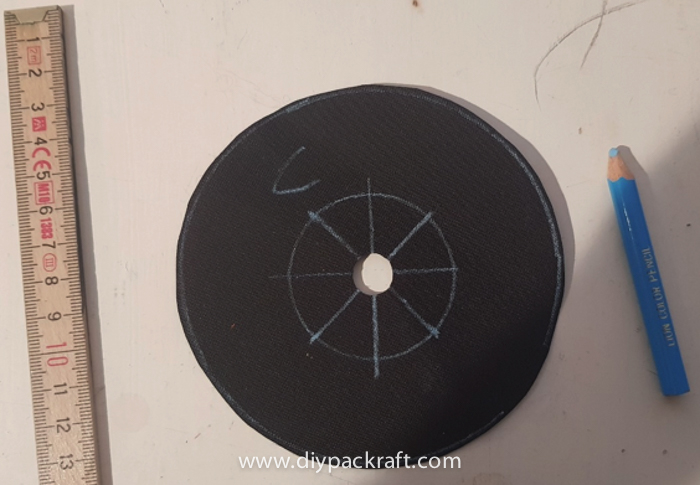
3. Cut out the circle
- Find the middle and cut a small hole
- Mark out a 45 mm diameter circle in the center
- Now divide this circle in 8 pieces
- Cut them out and trim the point flat
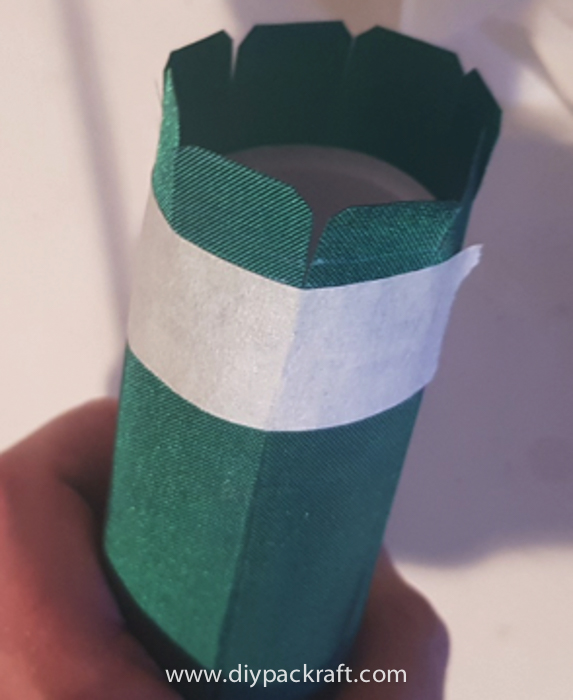
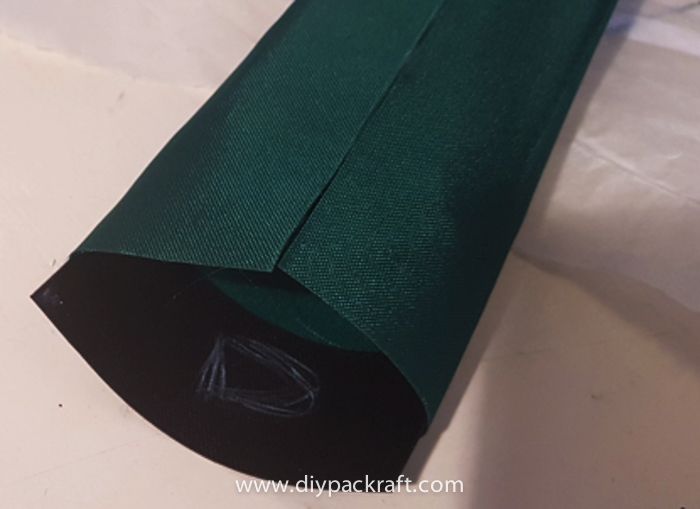
4. Making the tube
- Piece B over Piece A like the picture
and heat seal them together - Complete the tube and make sure you
have Piece A on the outside, a piece of wood on the inside and some tape to
hold it together helps

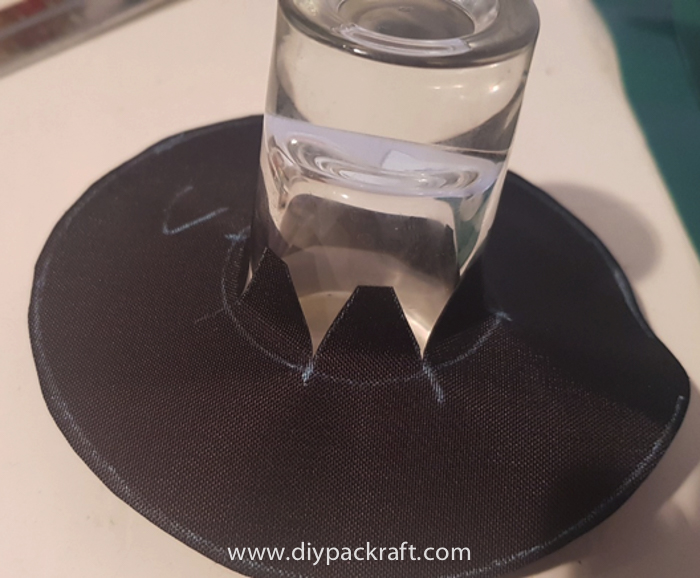
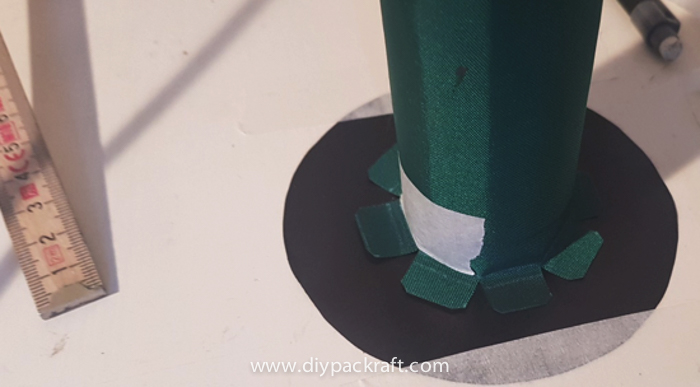
5. Attaching the tube to the top
- Take a stack of papers and roll them
up tight, then place them inside of the tube making sure you leave a gap for
the flaps - Put some masking tape over the rest
of the open joint - Place the tube on the circle with
the TPU sides touching. Make sure it is centered, the shape is round and that
there is an offset between the flaps from the tube and the circle, marking some
lines might help with the alignment - Heat seal the tubes, make sure you
don’t squeeze the tube together by beginning by attach from the outside and go
towards the center - Flip it over and now heat seal the
inside flaps, a piece of wood to raise it up from the workbench and a
flashlight can be helpful


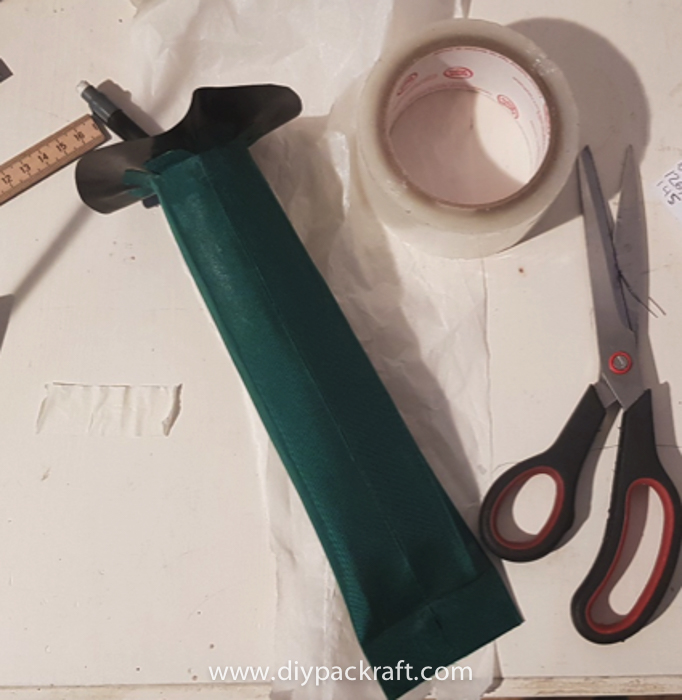
6. Closing the Tube
- Put the patch of double sided TPU fabric inside the tube, cut the length of the patch so it won’t fold or wrinkle but still fills up as much as possible. The piece shall overlap with a couple of mm with piece B inside the tube
- Heat seal with a lot of pressure making sure you press TPU to all corners and joints
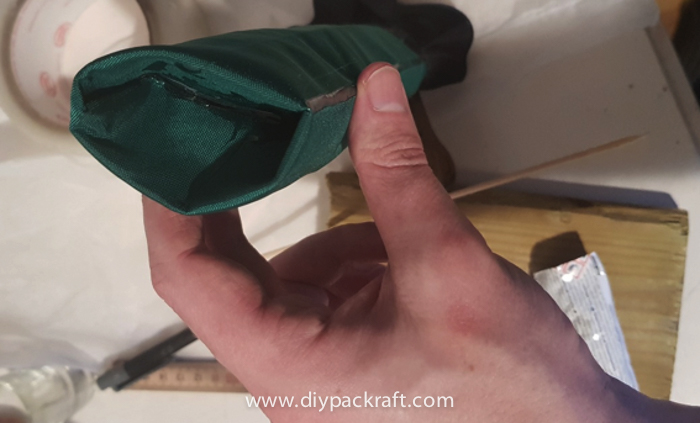
7. Just to be safe
- Put some Seam Grip or Aquasure on risky areas and inside the tube at the bottom, make sure its stretch out when drying overnight to prevent glue from sticking in the wrong places
- You might want to add some areas with Seam grip inside the tube to create friction to the plastic tube (see final notes)

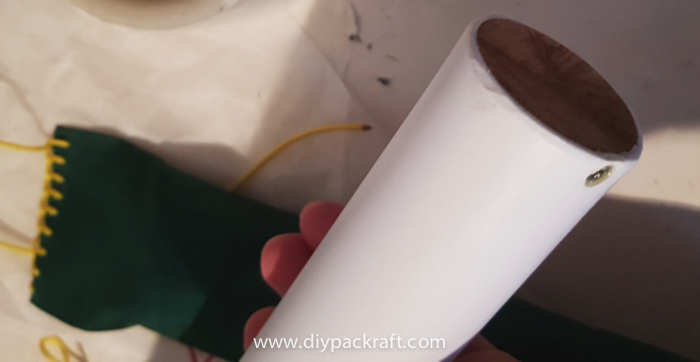
8. Making the tube insert
This tube is made for bathroom sinks etc. 40 mm wide on the outside 5€ for a meter of tubing
- Cut the tube to desired length depending on your type of rod, mine is 290 mm
- Trim all ends with a knife (sanding/filing makes a mess in plastic)
- Plug one end with whatever you have, I picked wood but a bit of plastic might be better
- Make the open end a bit wider by dipping it down in boiling water and then press it hard over a beer bottle or similar and hold it in place until it cools down
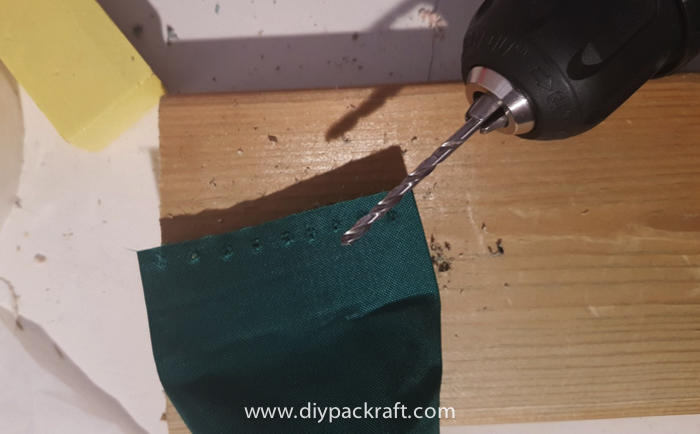
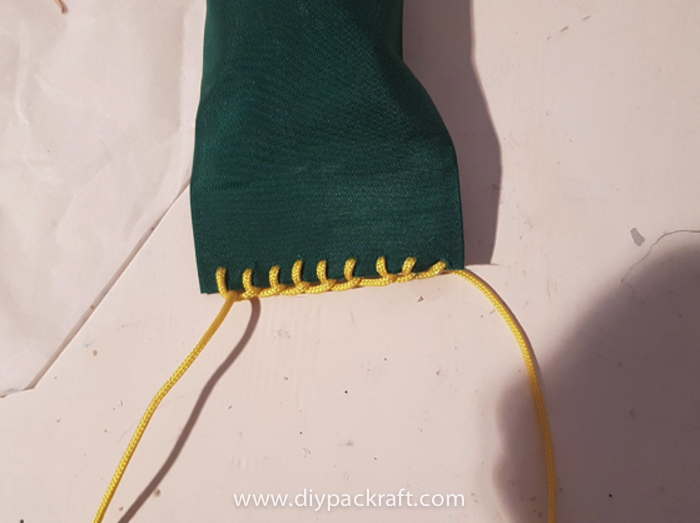
9. Preparing attachment
- Drill some holes evenly in the end (a hole punch might be better)
- Braid some cord leaving enough left for tying it to the floor
- Place attachment points inside the packraft mine are 20 and 110 mm towards the stern from the 3-4 tube section joint (but I recommend 0mm and 140 mm for better adjustment) and made from basic strips with a patch in the loop and heat sealed to the floor. I made this during construction but might be possible later as well but it not going to be as easy
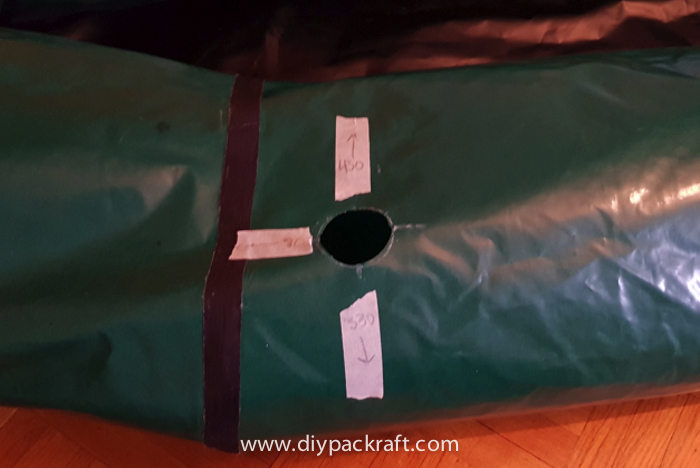
- Measure out the hole and brace yourself for the cut, this is easiest done with the packraft inflated, center of the hole should be 430mm from the inside of the floor, 330 mm from the outside of the floor joint and 80 mm from the center of the 3-4 tube section strip
- Make the cut 45 mm in diameter
10. Final attachment
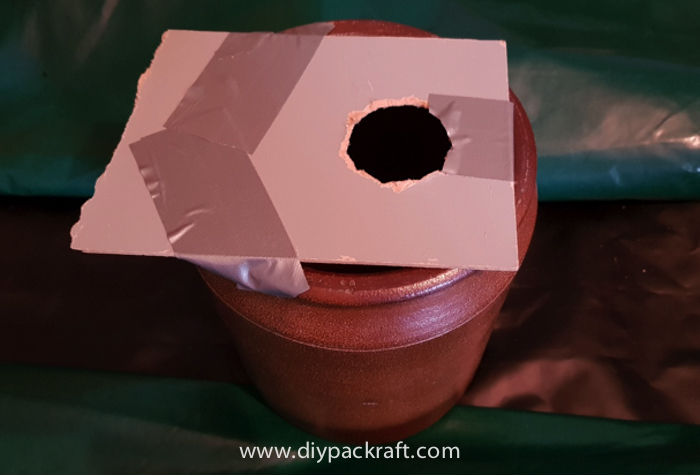
- Make an easy support and place it inside and make sure it wont shift during heat sealing
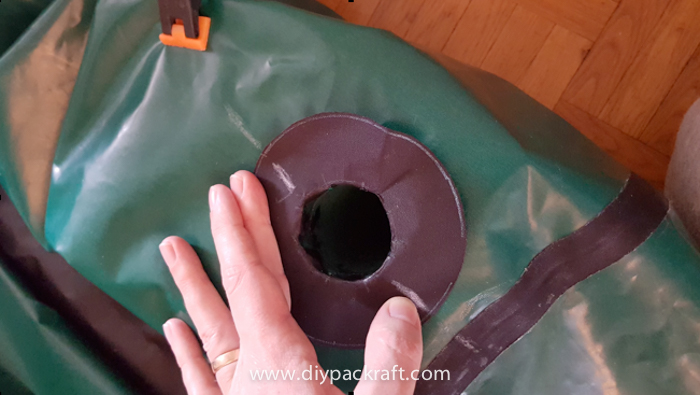
- Place the rod holder inside and make sure that the cord ends will point toward your attachment points (marking it out helps)
- Heat seal
- Stretch yourself inside the raft and tie them it together (start tight)
- Pump it up, insert the plastic tubes when you switch between pump and blowing manually
- Repeat step 5-6 for a perfect fit

Final notes and disclaimer
All measurement is from V3 size 140cm/55” packraft
I have just “dry tested” this rod holder and feel confident it should work but don’t have any reports from the water or how it will hold together after some wear.
Placement is up to you, mine was done with following in mind:
- Minimum interference with:
- Paddling when rigged for trolling
- Spray deck (planned)
- Other attachment points
- Reachable from seat
- Good visibility (not behind me)
- Pointing outside but not too much so
it interfere when going ashore, tilted slightly backwards for better trolling
position - Inside attachment in the floor
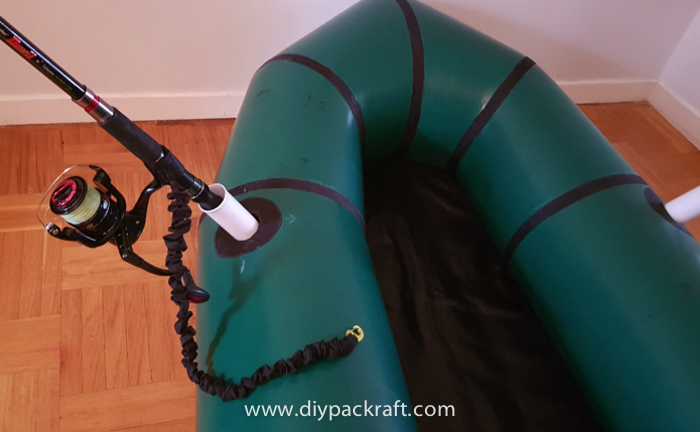
- You should use a rod leash as in last picture (easy DIY +20 g in total)
- It might be a good idea to drill a hole in the plastic tube and strap it to an attachment point (2A in location guide) this will probably add some robustness
- Building time is approx. 3-4h for one, it is not harder then the packraft (note I used a 25 mm wide “leather” iron)
- This rod holder will interfere with internal gear storage; if you want to have carabiners or similar to detach it from the floor the attachment points inside at the floor should be farther apart
- Attachment points can be farther apart for more room for adjustments or carabiners but to far will compromise sturdiness in sideways direction
- There is not that much friction between plastic rod and the rod holder tube, this can be adjusted by coating the inside of the tube with some Seam Grip
- This is a very light weight solution at approximately 30 g in fixed weight +70 g for the plastic tube but I think “the packraft table” is a more sturdy if that is more important then weight (not tried it)
- These plans is free for private use with the hope that you one day publish your plans and ideas or give me feedback on how to improve these plans
1 Comment
Gustav Kraft · September 4, 2020 at 7:23 am
So life (bunch of kids) came in the way and I haven’t used the raft as much as I would like too but so far the rod holders holds up nice. Trolling with them is not a problem but going full speed you feel that they are a bit to close to you, so if possible I would move them more towards the bow. I also intend to attach the plastic inserts with a cord from the top to an attachment point on the bow to get some more stiffness when getting a bite.