Assembly time: approximately 2 hours
Introduction:
This drybag project is designed to introduce you to all of the DIY Packraft heat sealing techniques. It’s intended as a stepping stone for people who want to gain some confidence before assembling a packraft, but it can also be a standalone project.
By assembling a drybag you will develop all of the skills you need to assemble any of the DIY Packraft kits.
1. Separate & Identify Kit Parts
Each drybag kit includes:
- One plastic side release buckle (two pieces)
- One plastic D-ring
- One large piece of colored fabric with the bag shape scored into it. When separating the bag fabric from the surrounding scraps, use scissors in sections that don’t come apart easily with a gentle tug – if you force them apart by pulling, the bag fabric could rip).
- One black fabric seam strip with TPU (plastic coating) on one side, approximately 2 m (6′) long and 30 mm (1.2″) wide
- One black fabric strip with TPU on both sides, approximately 1.4 m (4.5′) long and 25 mm (1″) wide
- One piece of parchment paper (silicone baking paper)
Note: The drybag can be made smaller by shortening its length – simply trim fabric off the square end of the bag fabric until it is the desired length:

2. Practice Heat Sealing
If this is your first heat sealing project then it’s essential to practice heat sealing on scrap fabric before you begin assembling your drybag. (Scrap fabric is included in the kit.)
Everything you need to know about irons and the heat sealing technique is posted on the Heat Sealing page.
Tip: When watching the instructional videos, you can press the arrow keys on your keyboard to scrub back and forth, and if you click on the gear icon in the video player you can adjust the video resolution and playback speed.
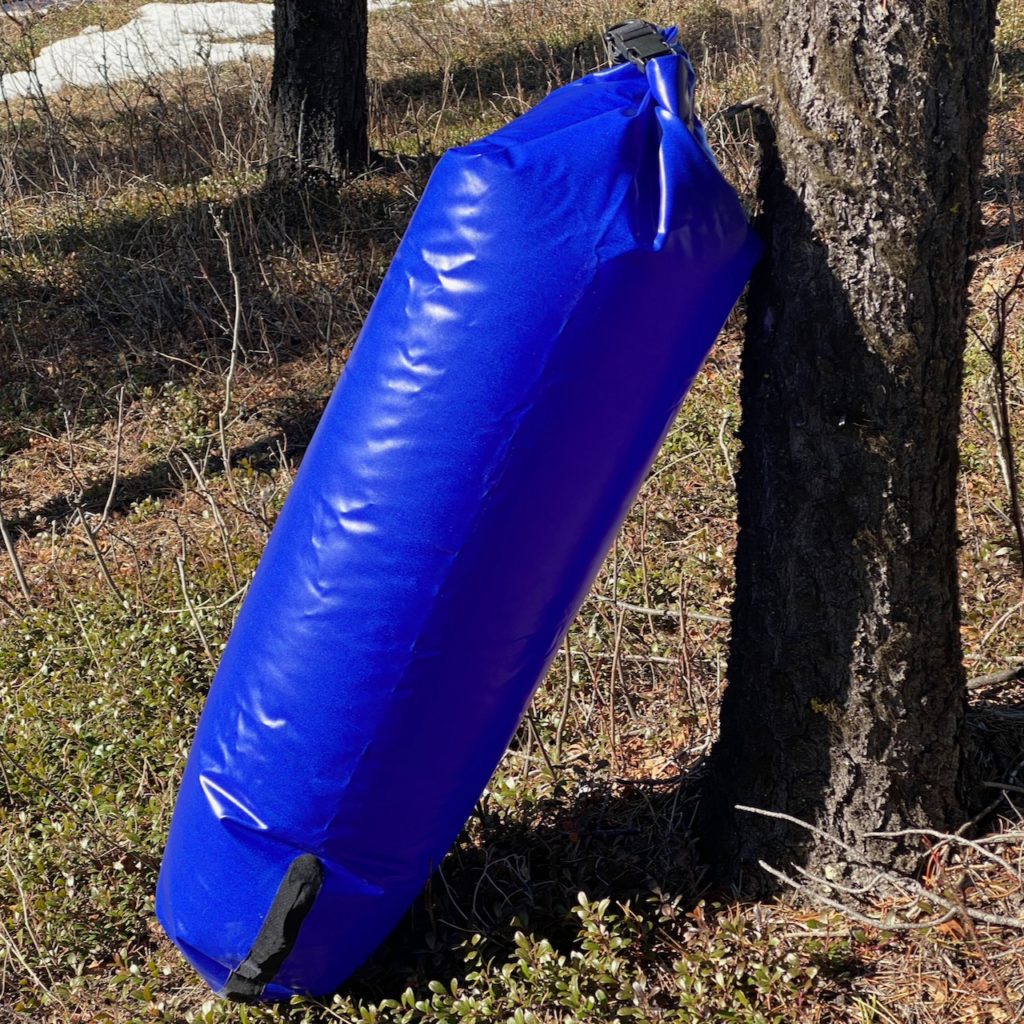
3. Assemble the Drybag
This video shows how to assemble the drybag:
4. Optional – Seam Sealant
A perfectly heat sealed seam will be airtight and waterproof, but few of us are perfect, so you may choose to apply some polyurethane sealant to the seam strip. This adds a layer of insurance, and if you apply it to the exposed black fabric side of the strip then it will also protect the edges from fraying over time.
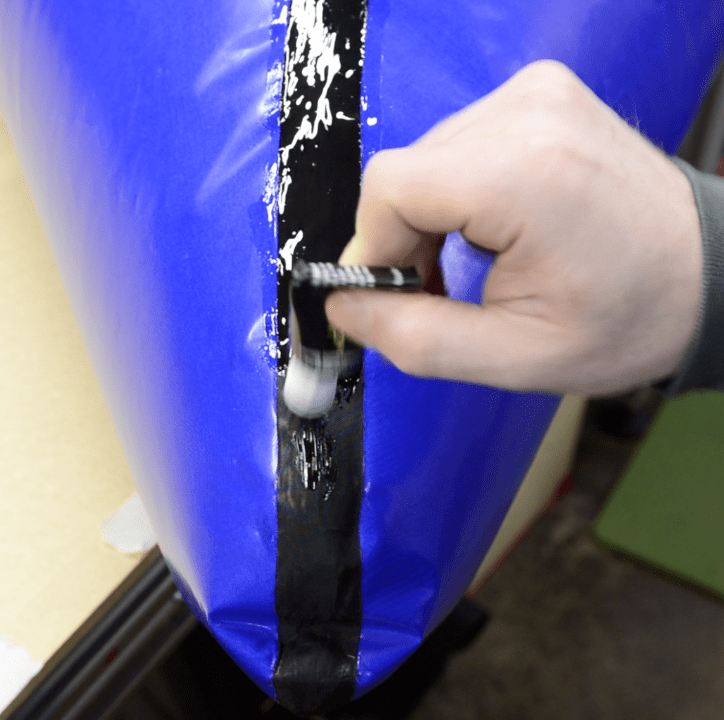
Polyurethane sealants are not all the same, and some do not adhere well to the DIY Packraft fabrics. The best ones I have found are Seam Grip+WP, Aquaseal, and Aquasure – all made by Gear Aid.
I generally recommend that people use Seam Grip+WP because it comes in slightly larger tubes compared to Aquaseal or Aquasure (you get more for the same price) and it is less viscous (thinner) so the same amount will cover a larger area. They are all equally good products though.
Do not confuse “Seam Grip+WP” with “Seam Grip+SIL” – the names are unfortunately similar, but they are very different products! Seam Grip+SIL is a silicone sealant and it will not stick to the DIY Packraft fabrics.
All of the recommended sealants will feel dry to the touch after about eight hours, but they will stick to themselves for several days until they are fully cured, so don’t roll up your drybag too soon. If you don’t want to wait several days then you can rub some talcum powder on the surface of the sealant to prevent it from sticking to itself (but that will leave a whitish residue on the surface of the sealant).
Note that these Gear Aid products are good sealants, but they do not work well as adhesives for gluing things together – for that you will need a different product such as HH-66 or Stabond.
5. Optional – Add More Attachment Points
Depending on how you plan to use your drybag, you may want to add more attachment points.
The Tie-Downs & Attachment Points page shows how to make several different types of attachment points from scrap fabric.
If you have a question, please post a comment below!
4 Comments
Hilary Nystrom · May 14, 2026 at 4:00 pm
Could you make a dry bag by welding the seams in the same manner as you’d sew the seams? Then turn the bag inside out to use? So the shiny side would be on the interior? I guess I’m curious why you chose this method?
Matt (Admin) · May 15, 2026 at 9:10 am
Yes, there are lots of ways to make a bag, I chose this way because it’s similar to the way the packrafts are constructed, so it’s good practice for people who are making a packraft.
Daniel · August 3, 2023 at 10:52 am
Thanks for the instructions. I made a drybag with scrap material, it worked fine. I just noticed that one needs 4 to 5 rolls at the top to securely close the bag (not unfolding under pressure). I added a small ribbon of plastic as stiffener like I do with my self made DCF drybags and then it only needs 3 to 4 folds at the top to close securely. I used light tpu fabrics, thus this may differ with the heavy fabrics?
Matt (Admin) · August 3, 2023 at 11:06 am
That could be the case. I also find that it depends on which way you clip the buckle together after rolling – if you close the buckle on the same side as the roll then it’s not secure, but if you bend the roll backwards and close the buckle that way then it’s more secure because it can’t unroll.