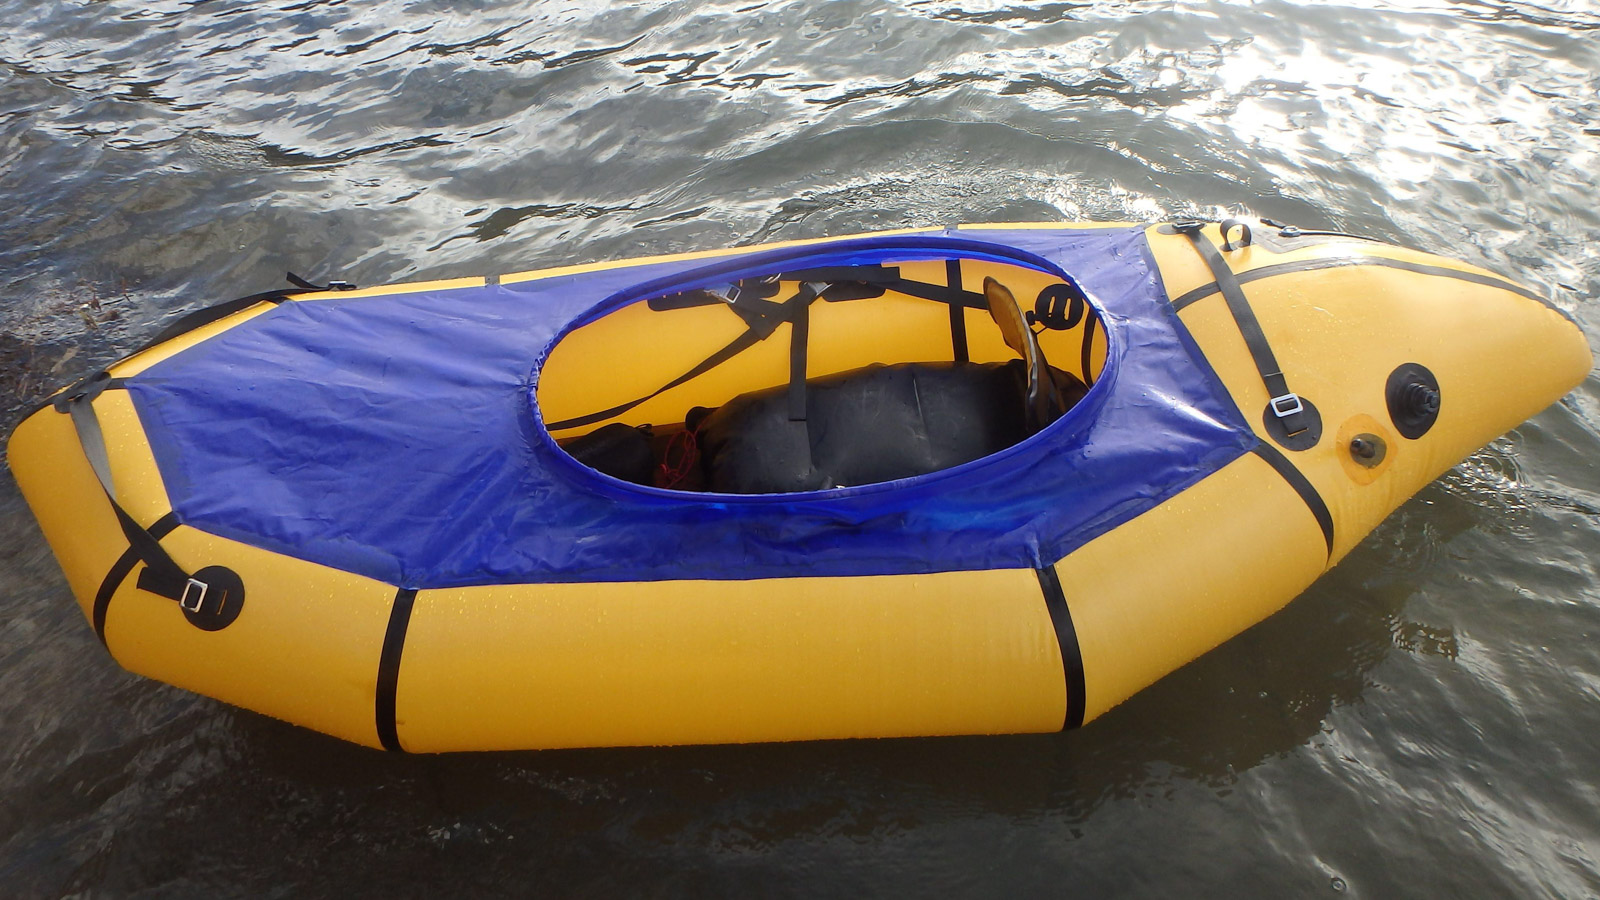
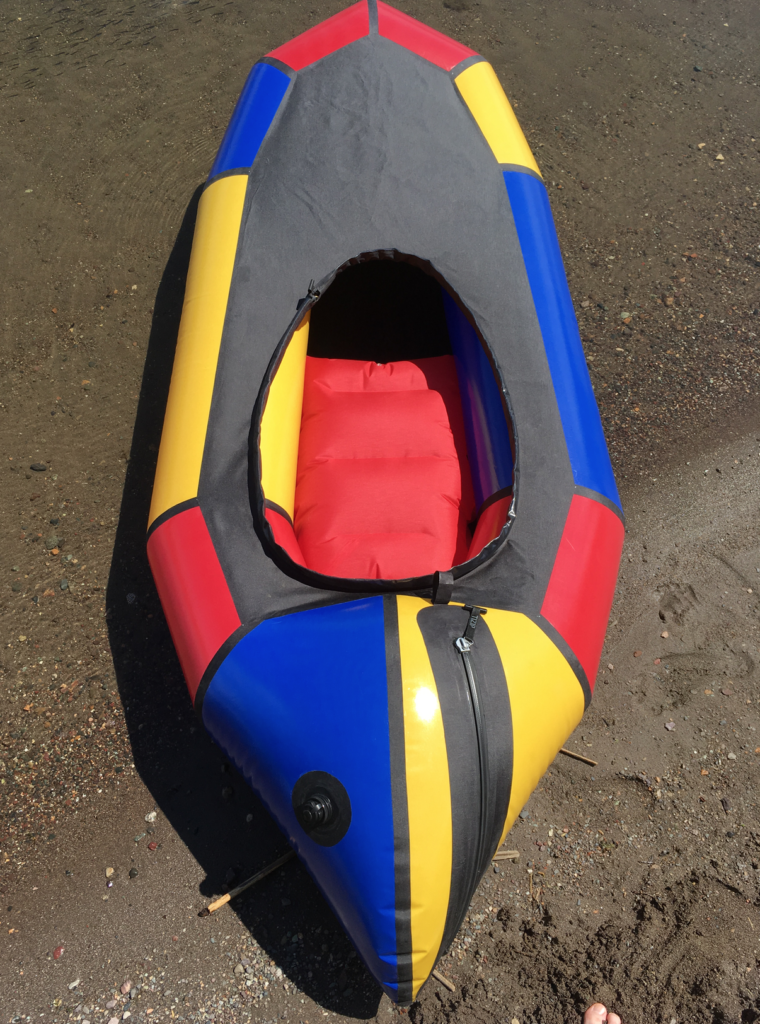
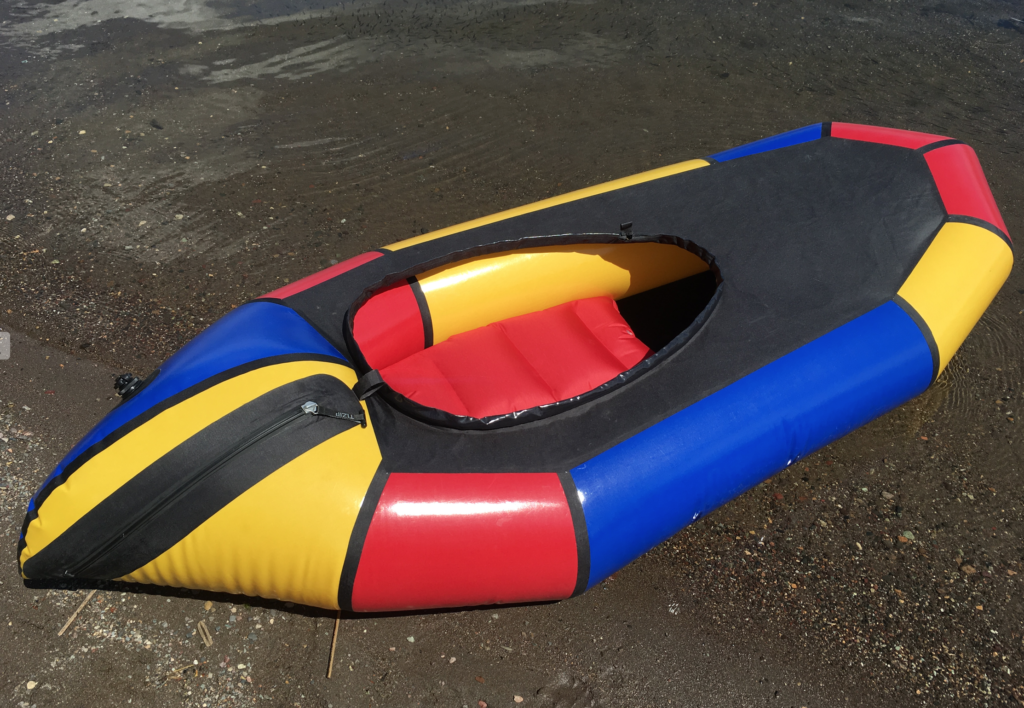
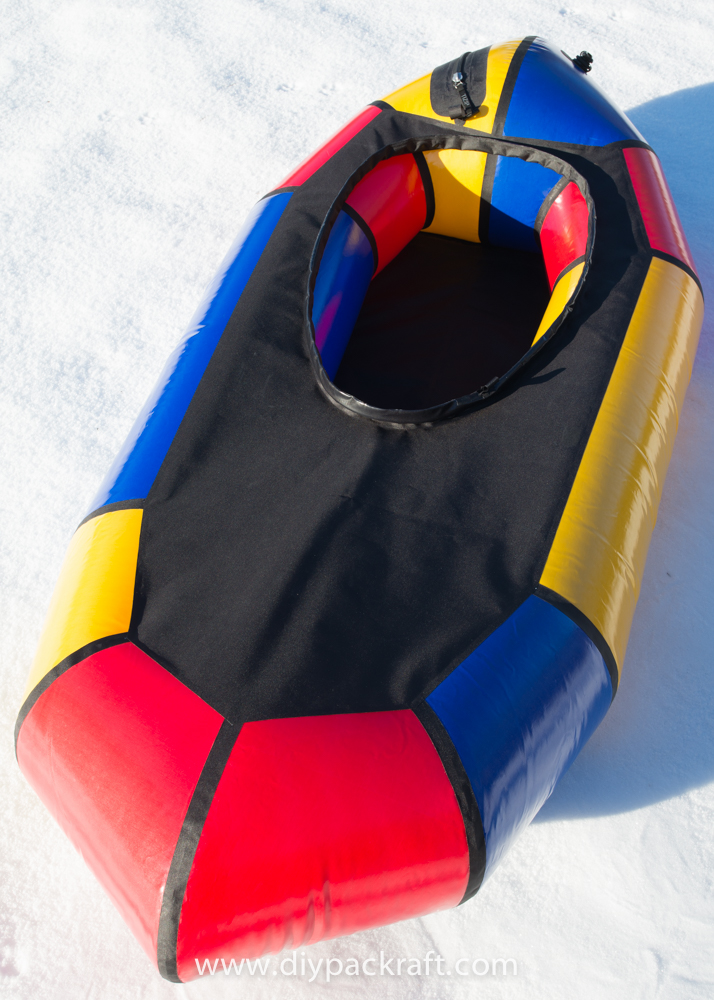
Eliot’s V3 DIY Packraft with spray deck, back band, and thigh straps.
Note: Most of the text and photos are by Eliot G. I’ve edited the text for clarity and formatted it for the website, but all credit for the back band and thigh straps goes to Eliot! My comments are in italics. When installing anything in your packraft that could restrict your movement, careful thought should be given to preventing entrapment during a capsize. Be sure to practice wet exits in still water before venturing into moving water, and don’t paddle alone! Also check out detailed pictures of Dom Adcock’s convertible spray deck, back band, and thigh straps. -Matt
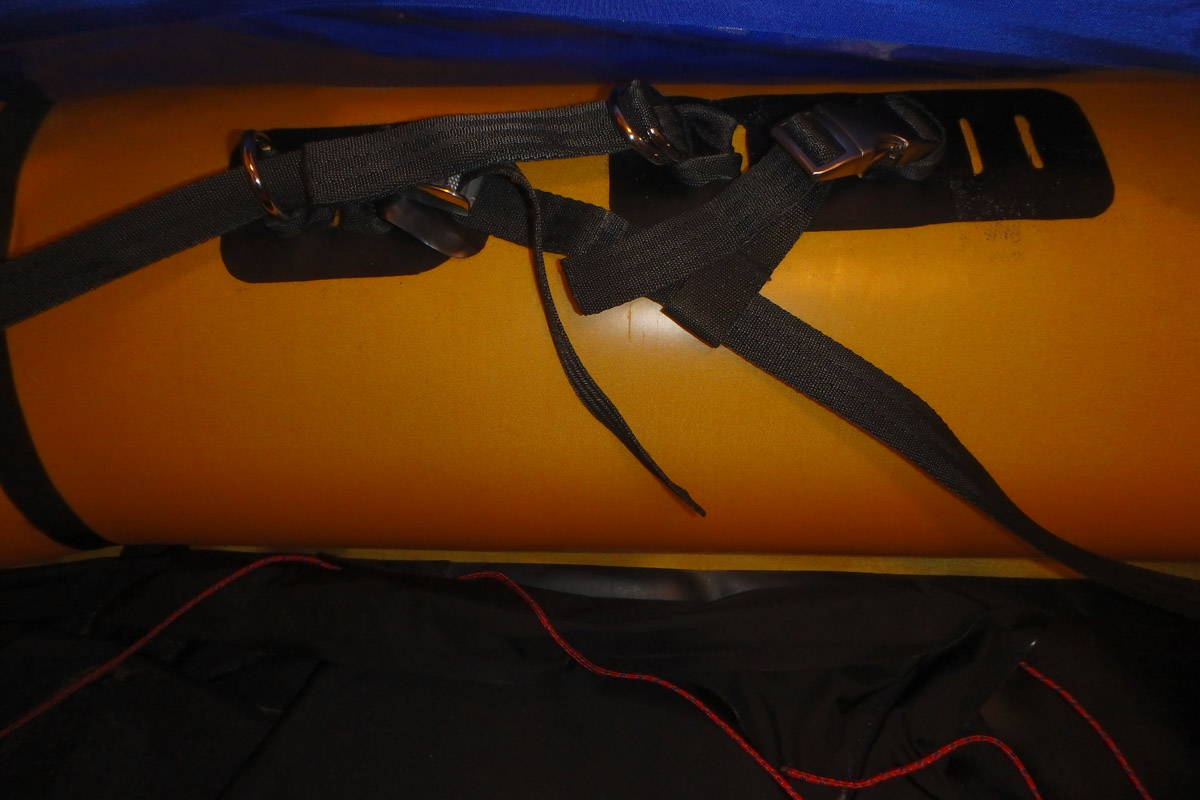
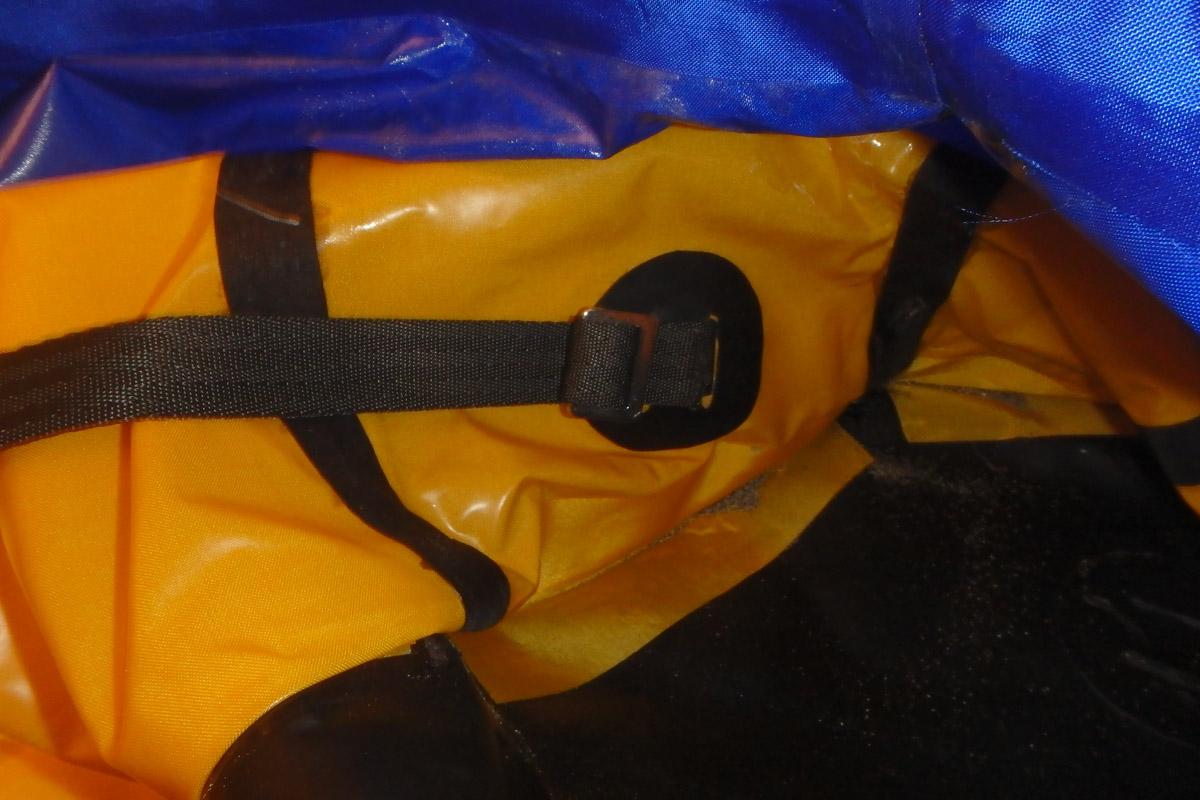
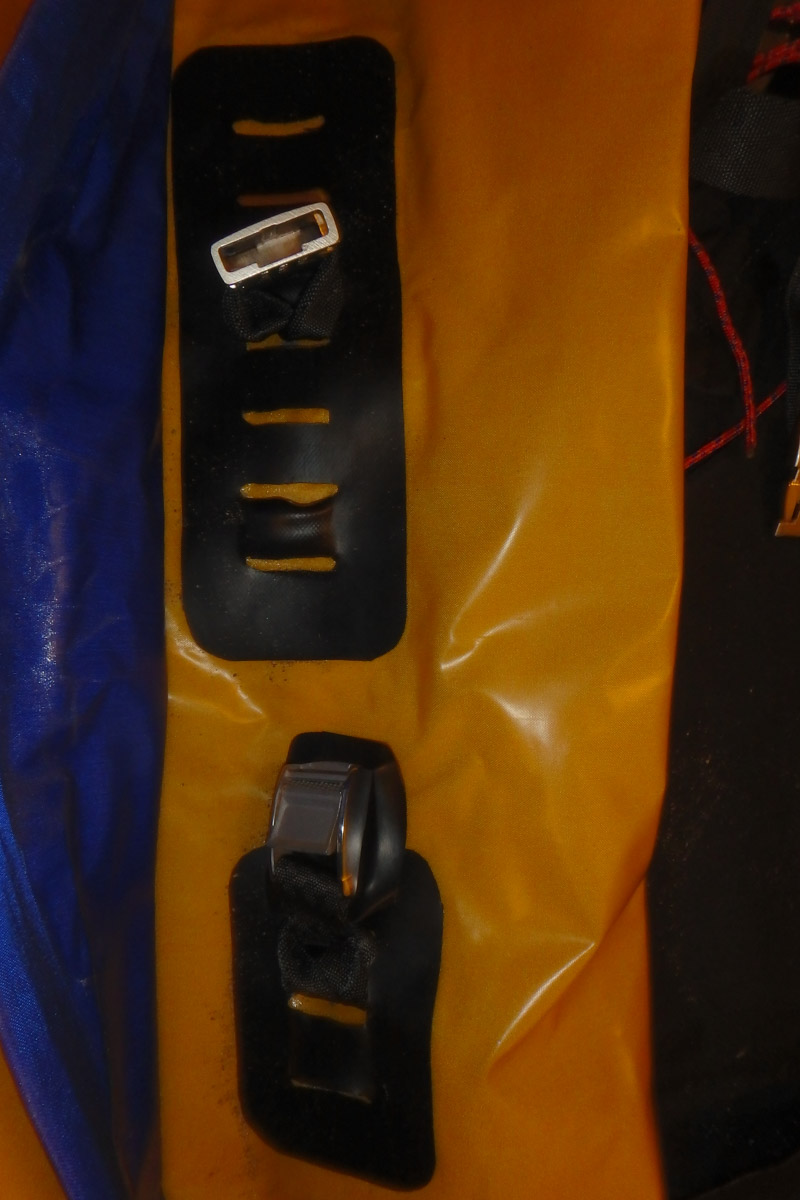
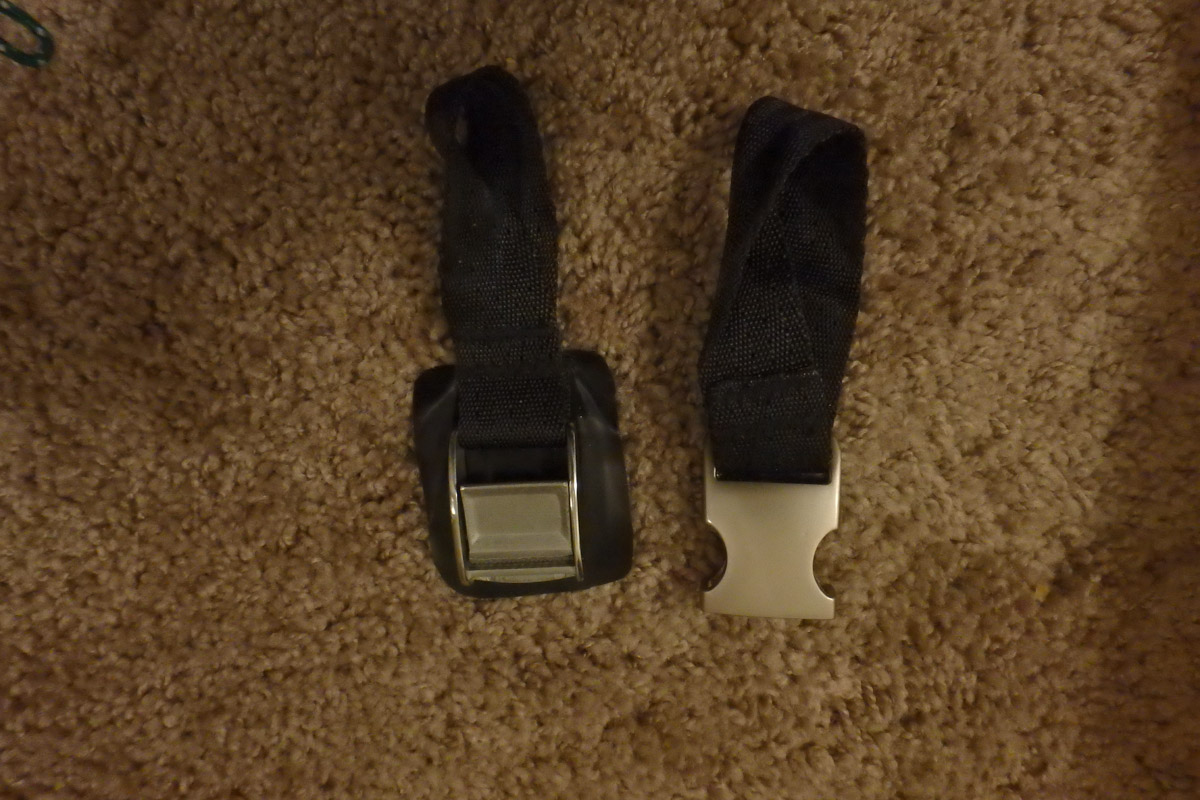
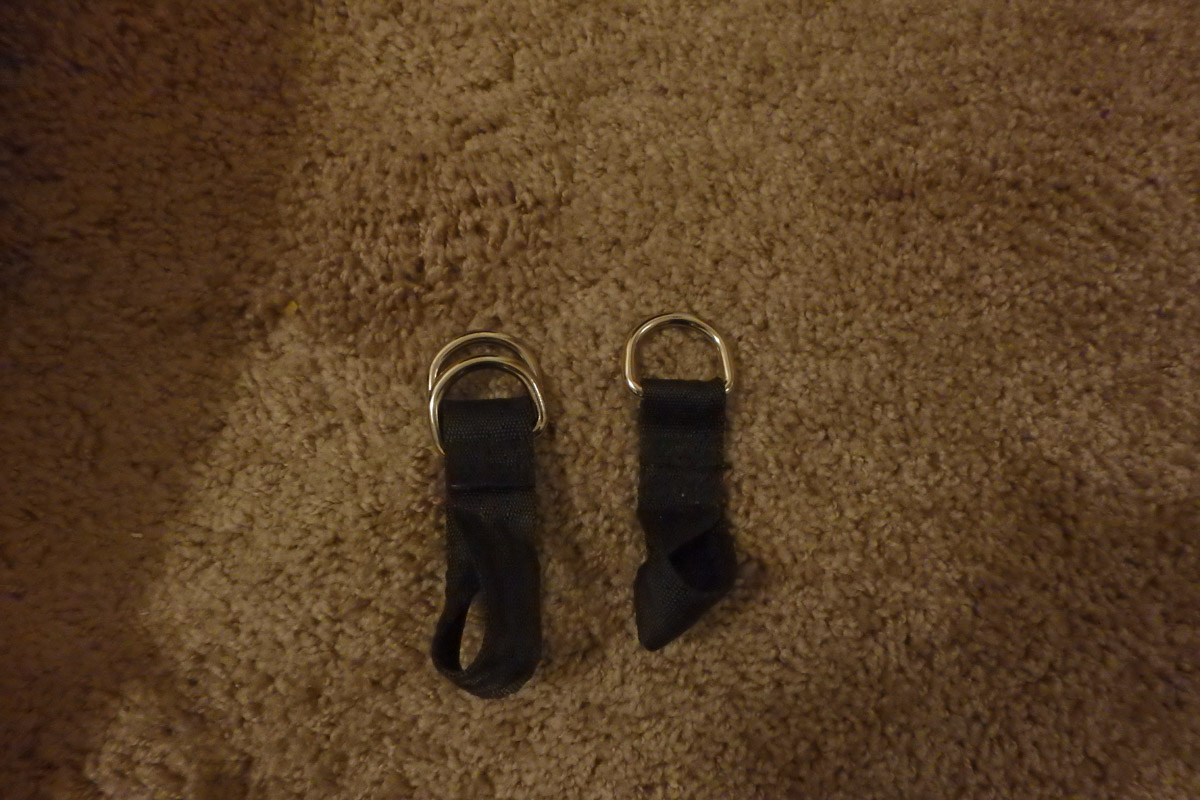
I used Bruce Campbell’s excellent tie point construction method for the anchor points. They’re formed from extra 1000D double coated floor material with a 1″ square of 210d heat sealed between the slots to keep it from sealing to the tube. The webbing for the straps is 1″ wide low stretch polyester. Hardware-wise, I used two slide buckles for the lower thigh strap attachment points, 2 cam buckles for the thigh strap adjustments, two aluminum quick release buckles for the thigh strap third point straps and six D-rings for the back band guides and adjustment.
I used a sewing machine to bar tack the webbing into loops required for the short bits to girth hitch into the anchors for the buckles and D-rings.
The cam buckles for thigh strap adjustment have a small bit of 210D fabric sewn to the webbing loop to create an abrasion guard under the buckle, similar to how heavy duty raft cam straps are constructed. Note: With a bit of planning, it’s possible to make similar fittings without any sewing, so if you don’t have access to a sewing machine, don’t dispair!
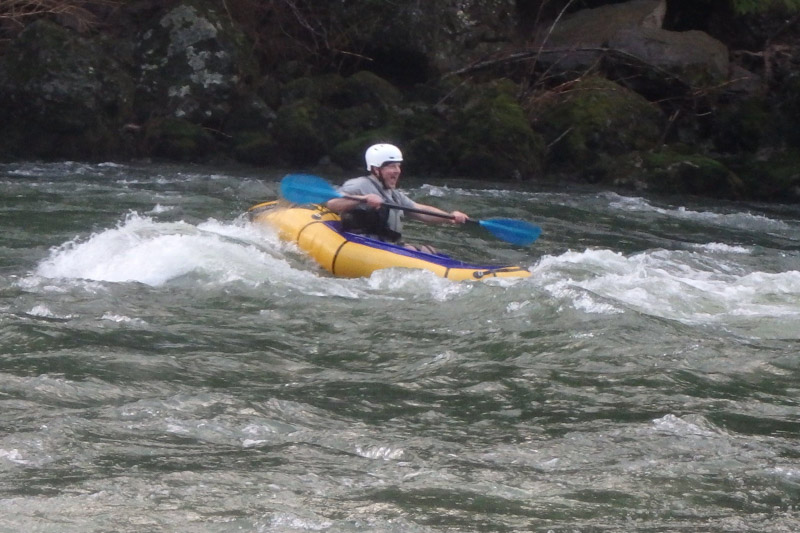
Paddling with the thigh straps, back band, and spray deck.
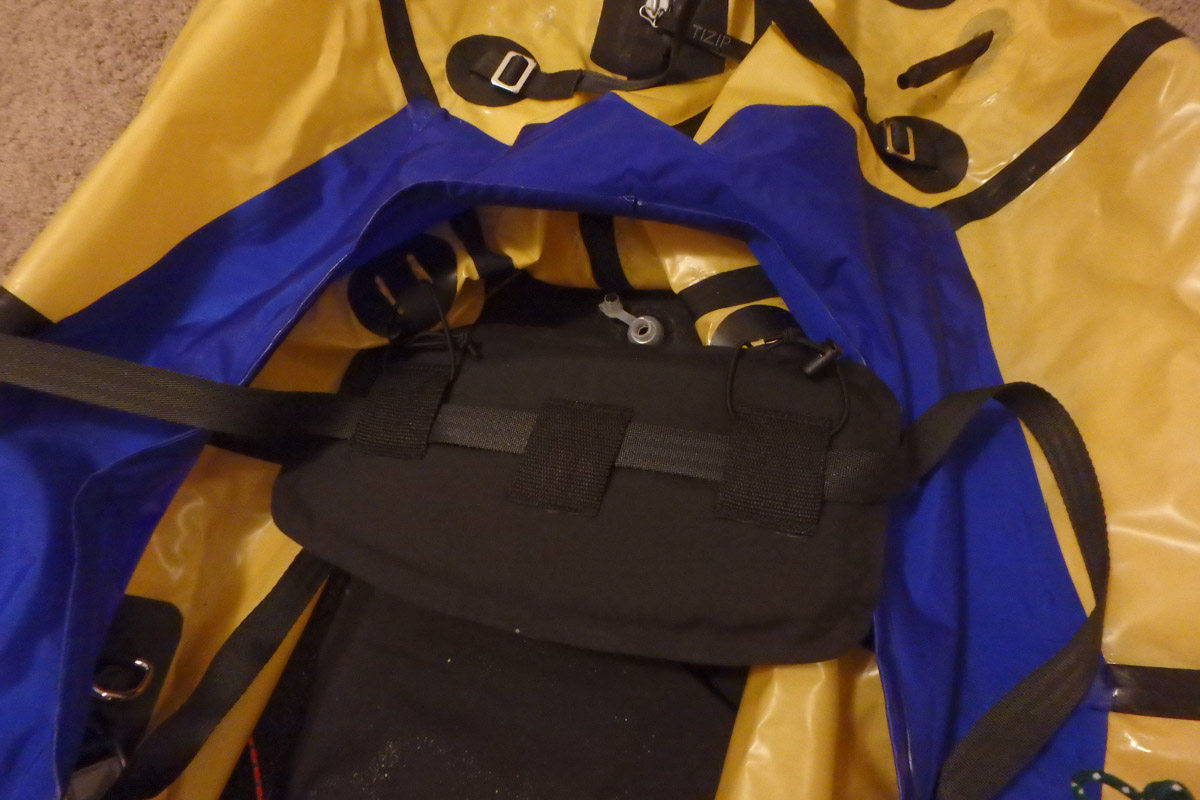
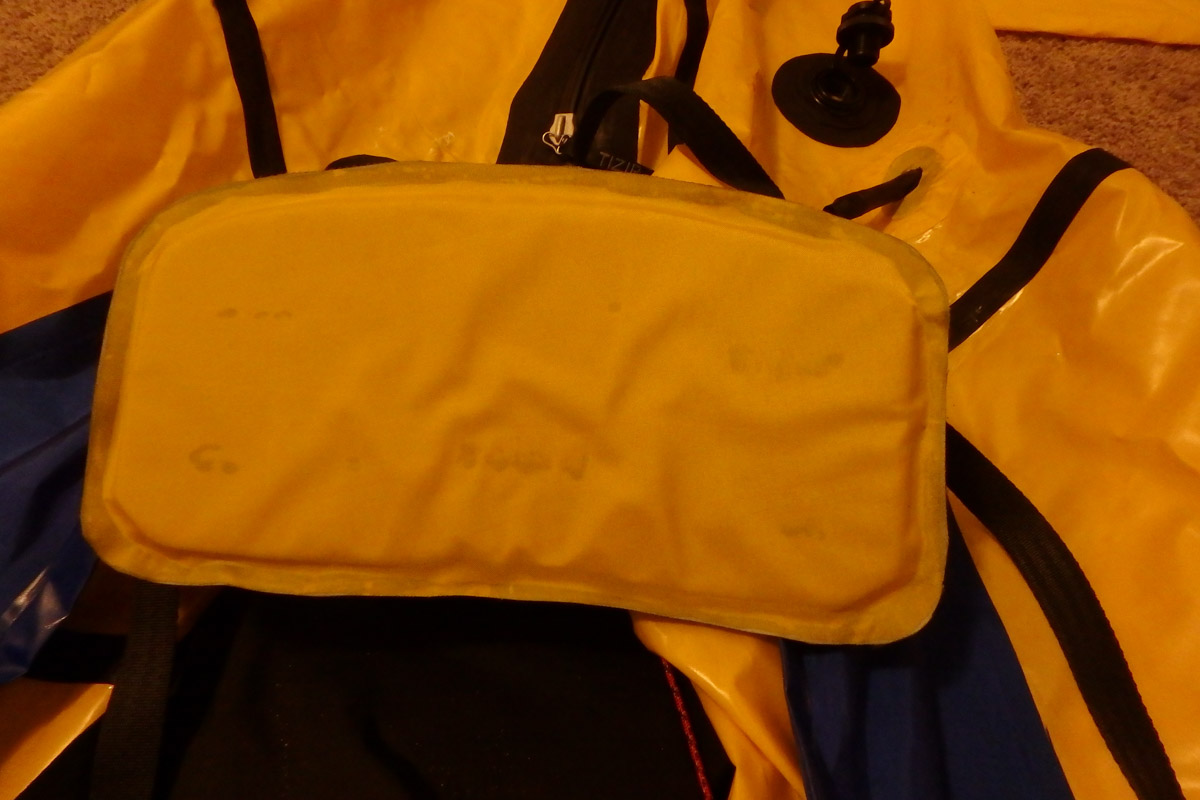
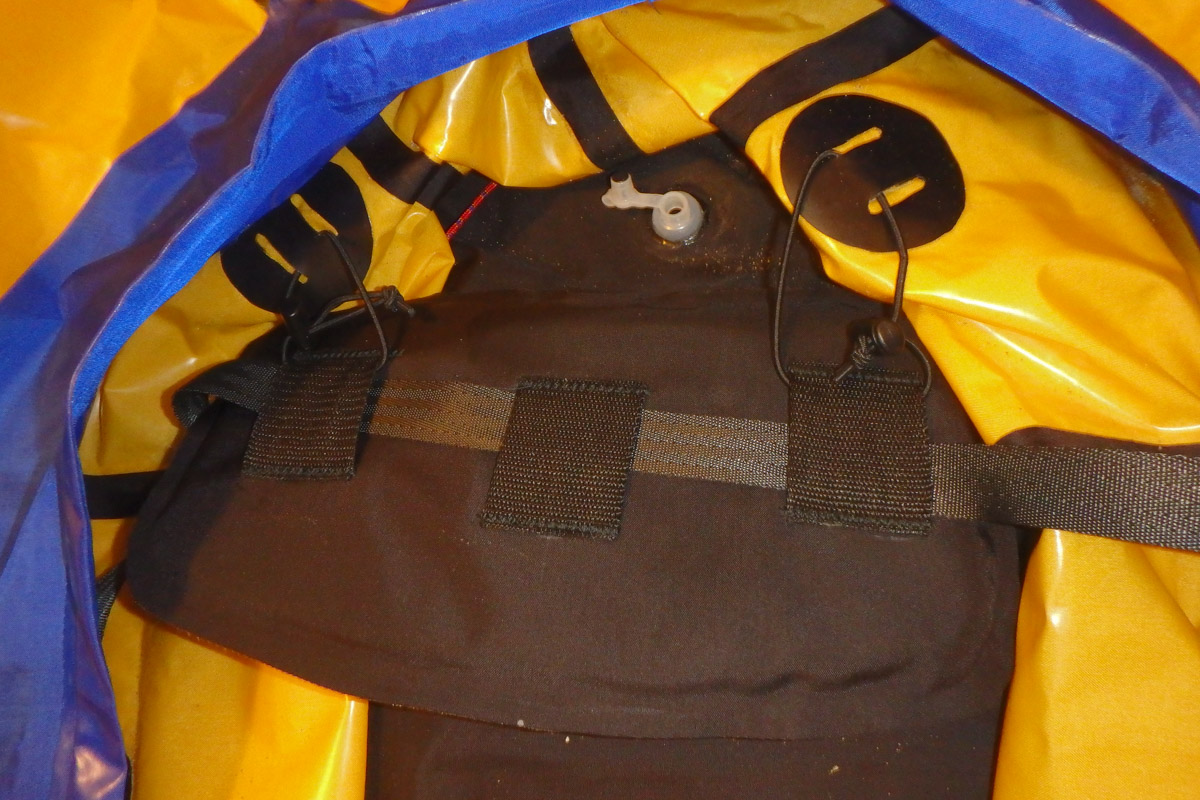
Back Band Details:
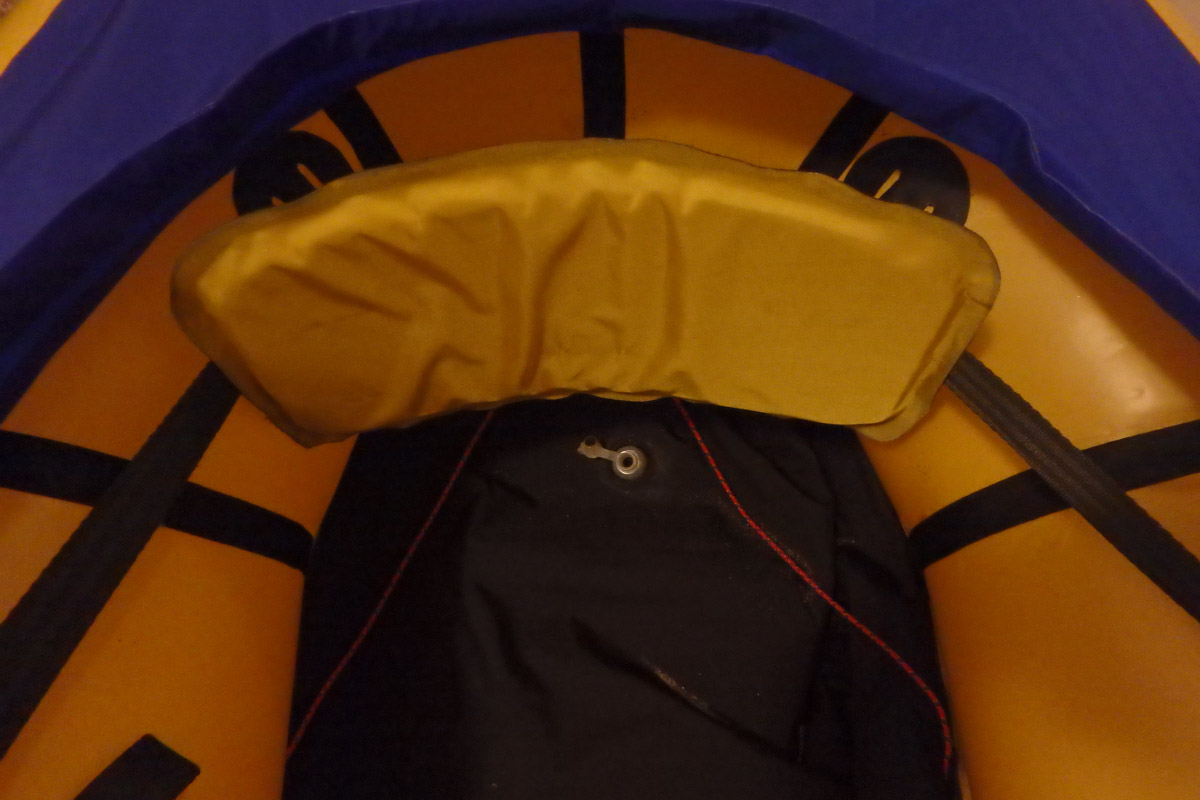
A back band is an alternative to an inflatable back rest; it provides back support and a comfortable paddling position.
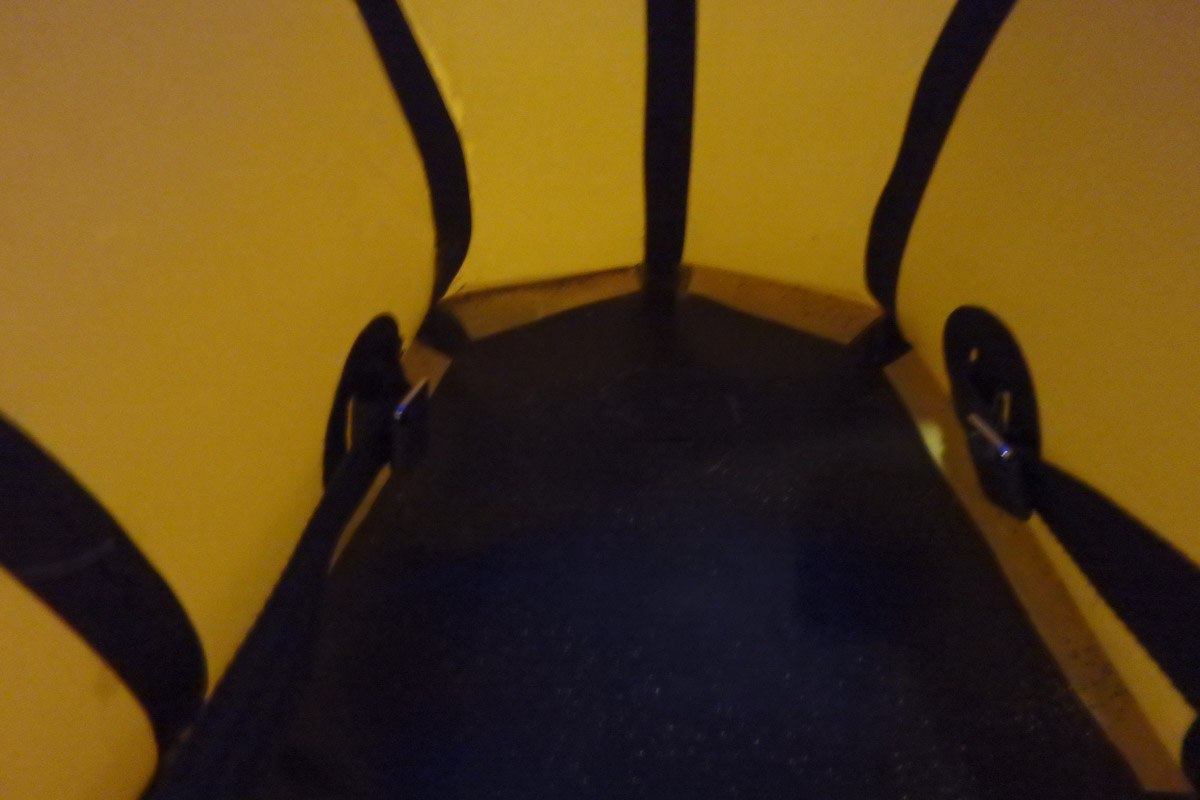
The backband is made from two pieces of the 210D heat seal fabric with a piece of minicell foam sealed in the middle. The shape is pretty much a rectangle with a very slight arch on the long edges. An old camping mat or any closed cell foam of an appropriate stiffness could be used. The back piece of fabric has three bits of webbing sewn to form loops for the webbing belt and the stabilizers prior to heat sealing. The stabilizers are formed from two small loops of bungee/shock cord with a cordlock to adjust the tension. These are anchored to the tubes just behind the seat and help keep the band from sagging lower on the back.
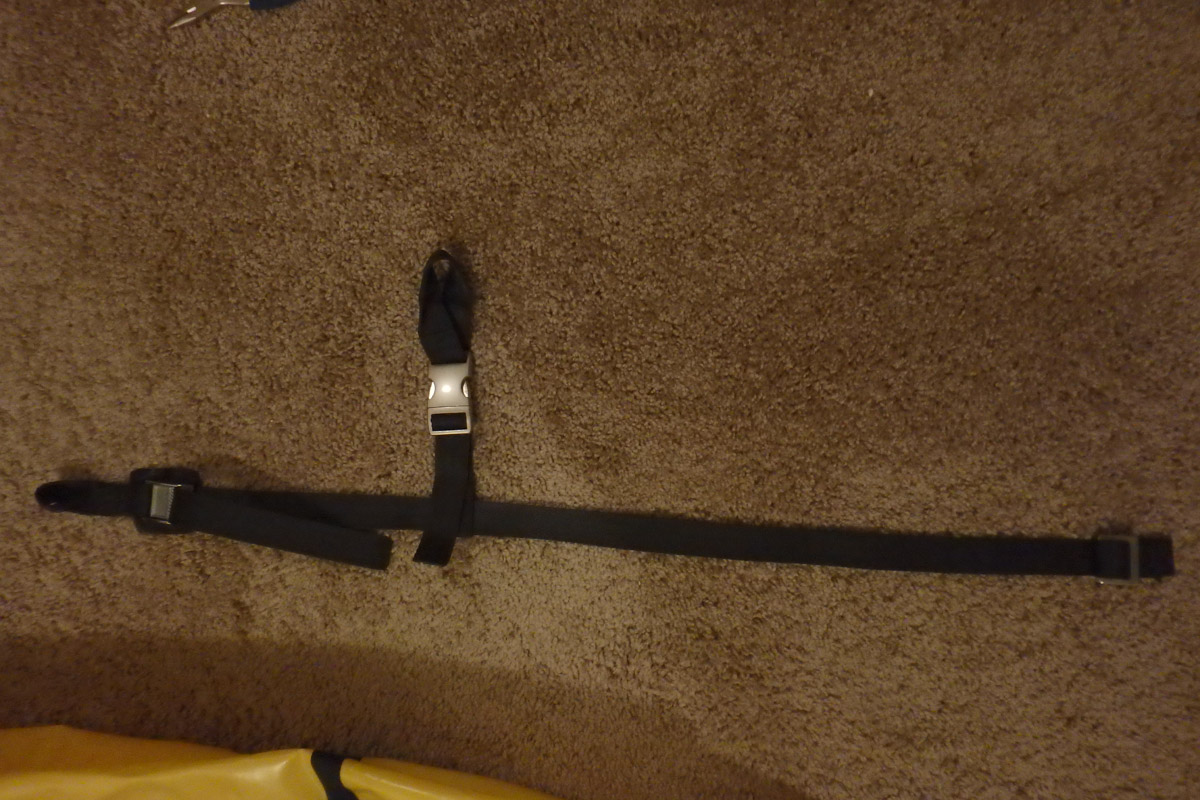
Thigh Straps Details:
Thigh straps allow you to draw paddling power from your core muscles more efficiently by providing a surface for your legs to pull against.
The thigh straps are pretty simple. I put the quick release in the knee attachment point as an experiment for entrapment mitigation (also, I had those fancy aluminum ones I wanted to try out!). I don’t think this is totally necessary, just that the strap has some adjustment.
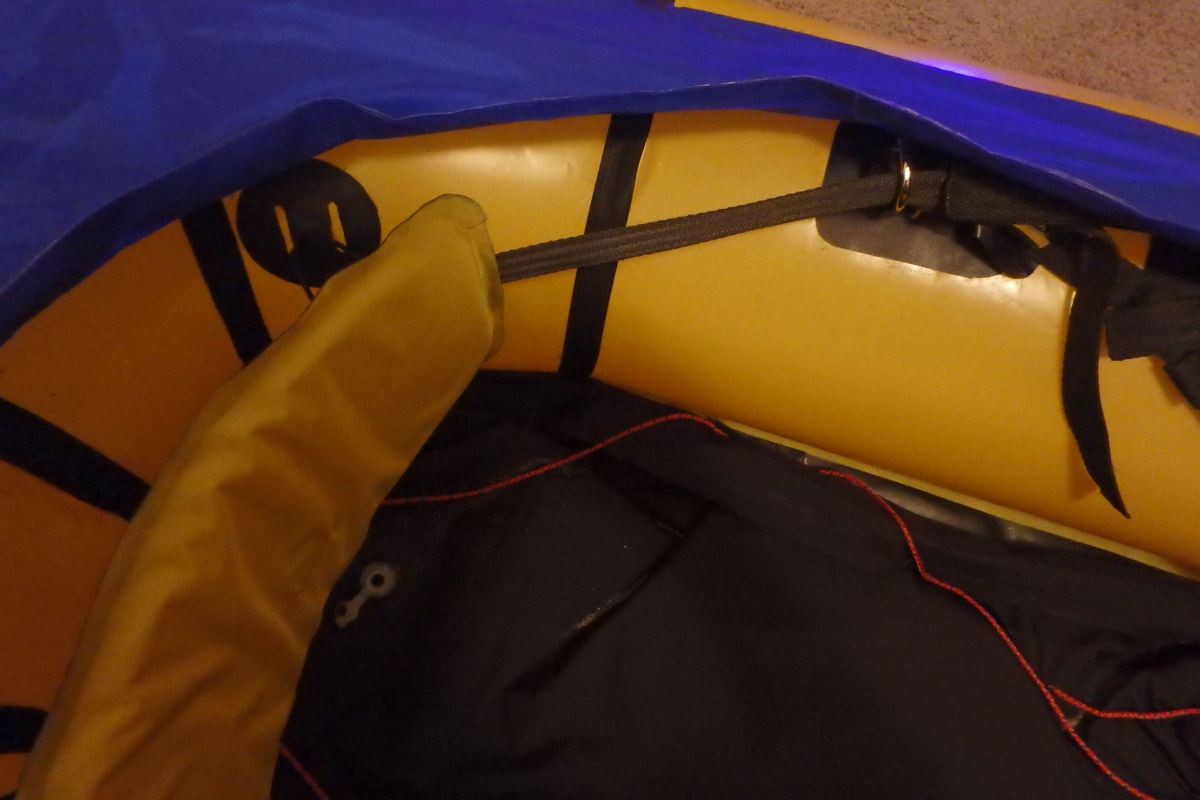
The general idea is that the lower anchor point is just above and behind the ankle joint on the inner tube walls. The upper anchor point is on the upper edge of the tube, somewhere between just behind the mid-thigh to just forward of the hips. This anchor has a guide d-ring for the backband belt in the aft spot and the cam buckle for the thigh strap in the forward spot. Third point (knee point) is anchored about 150mm forward of the upper point. This anchor has a couple attachment points on it so the third point can be shifted forward or aft if required. This anchor also has the backband belt adjusters on it in the aft position.
I installed the anchors after completing and leak checking the raft. I put the seat in and sat in the boat, figured out where everything needed to go and marked the anchor points. I used heat sealing where possible but had to glue the lower anchors on for the thigh straps due to access difficulties through the zipper. A strip of parchment paper laced through the webbing slot kept the Aquaseal from bonding it to the tube. After the anchors were in, I just laced the webbing in temporarily to figure out lengths before sewing everything and rigging the boat.
The rod that forms the coaming is currently a single piece of 3/8″ OD, 1/4″ ID Polyethylene (PEX) tubing. This is available at most hardware stores in North America for installation in household plumbing as an alternative to copper or CPVC. There is a short section of 1/4″ aluminum tube inserted as a joining piece. After initial tests, I installed a longer piece of the polyethylene tube used for the coaming and I am now getting a reliable and easy to install interface with a standard whitewater kayak spray skirt (IR shockwave). I can barely get the tube into the sleeve and can’t even get a joiner tube in to connect the sections. The fabric sleeve seems to be keeping enough tension on it though for it to not move much. Note: This is an area I am still working on too.
I think I would increase the size of the sleeve used for the coaming in the future to allow for a deeper lip (I followed Matt’s plans for the spray deck pretty exactly with some small tweaks for my desired cockpit size and boat).
Thanks to Eliot for this report!
5 Comments
Theodore Clifford Martin
· September 6, 2018 at 12:18 pm
Iminstalling some tie off discs and using HH-66 vinyl cement , green and white label . It has bonded well and though I havent used the raft to tie off a backpach , I really think the glue is solid and will tear off the urethane coating before it fails . Used 2 coats on each surface .

5 Comments
Theodore Clifford Martin · September 6, 2018 at 12:18 pm
Iminstalling some tie off discs and using HH-66 vinyl cement , green and white label . It has bonded well and though I havent used the raft to tie off a backpach , I really think the glue is solid and will tear off the urethane coating before it fails . Used 2 coats on each surface .
Marcus Fridley · June 24, 2021 at 7:23 am
Any feedback on using the HH-66 glue? Matt?
Matt (Admin) · June 24, 2021 at 7:58 am
It’s not available here, so I still haven’t tried it myself, but I’ve only heard good things about it.
Ryan · July 5, 2018 at 8:08 pm
Just curious, were the tie points heat sealed to the raft before or after construction?
I would prefer to use the stronger double sided TPU 420D over single sided 210D with a 1″ square in the middle but my raft is already assembled.
Has anyone had good experience attaching them with adhesive, similar to other packraft offerings? If so, what kind of adhesive did you use?
Matt (Admin) · July 6, 2018 at 9:14 am
Hi Ryan – have you checked out the new attachment point video? That method might work for you. Cheers!