Home › Forums › DIY Packrafts › DIY Packraft Photos
- This topic has 273 replies, 80 voices, and was last updated 1 week, 6 days ago by
 Matt (Admin).
-
CreatorTopic
-
December 13, 2016 at 11:19 pm #1956Matt (Admin)Keymaster
Post pictures of your DIY Packraft here!
Please re-size your images before uploading so they are under 300 KB or they may not load properly.
New: If you don’t tell me otherwise, I’ll assume it’s okay for me to re-post your images elsewhere on this website and/or on social media (with credit given to you, of course!). If you don’t want me to do this, please let me know. Thanks!
-
This topic was modified 9 years, 6 months ago by Matt (Admin).
-
This topic was modified 9 years, 6 months ago by Matt (Admin).
-
This topic was modified 9 years, 6 months ago by Matt (Admin).
-
This topic was modified 9 years, 3 months ago by Matt (Admin).
-
This topic was modified 7 years, 1 month ago by Matt (Admin).
-
This topic was modified 3 years ago by Matt (Admin). Reason: Added note requesting permission to re-post images
-
This topic was modified 1 year, 9 months ago by Matt (Admin).
-
This topic was modified 9 years, 6 months ago by
-
CreatorTopic
-
AuthorReplies
-
-
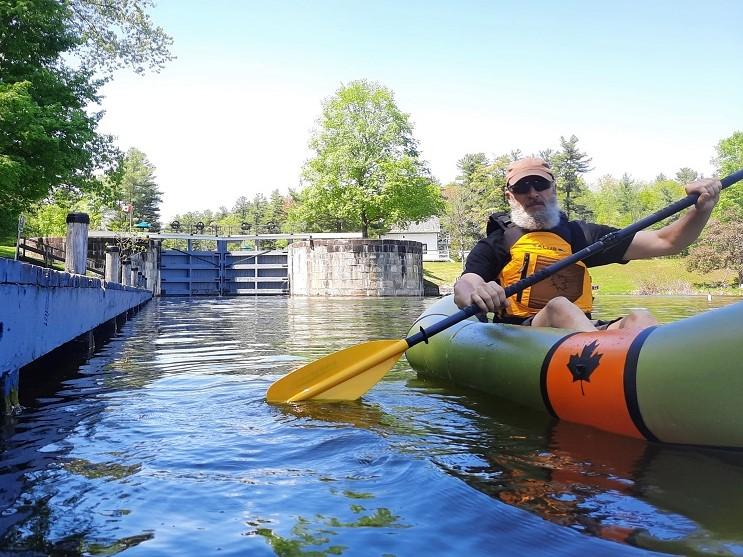
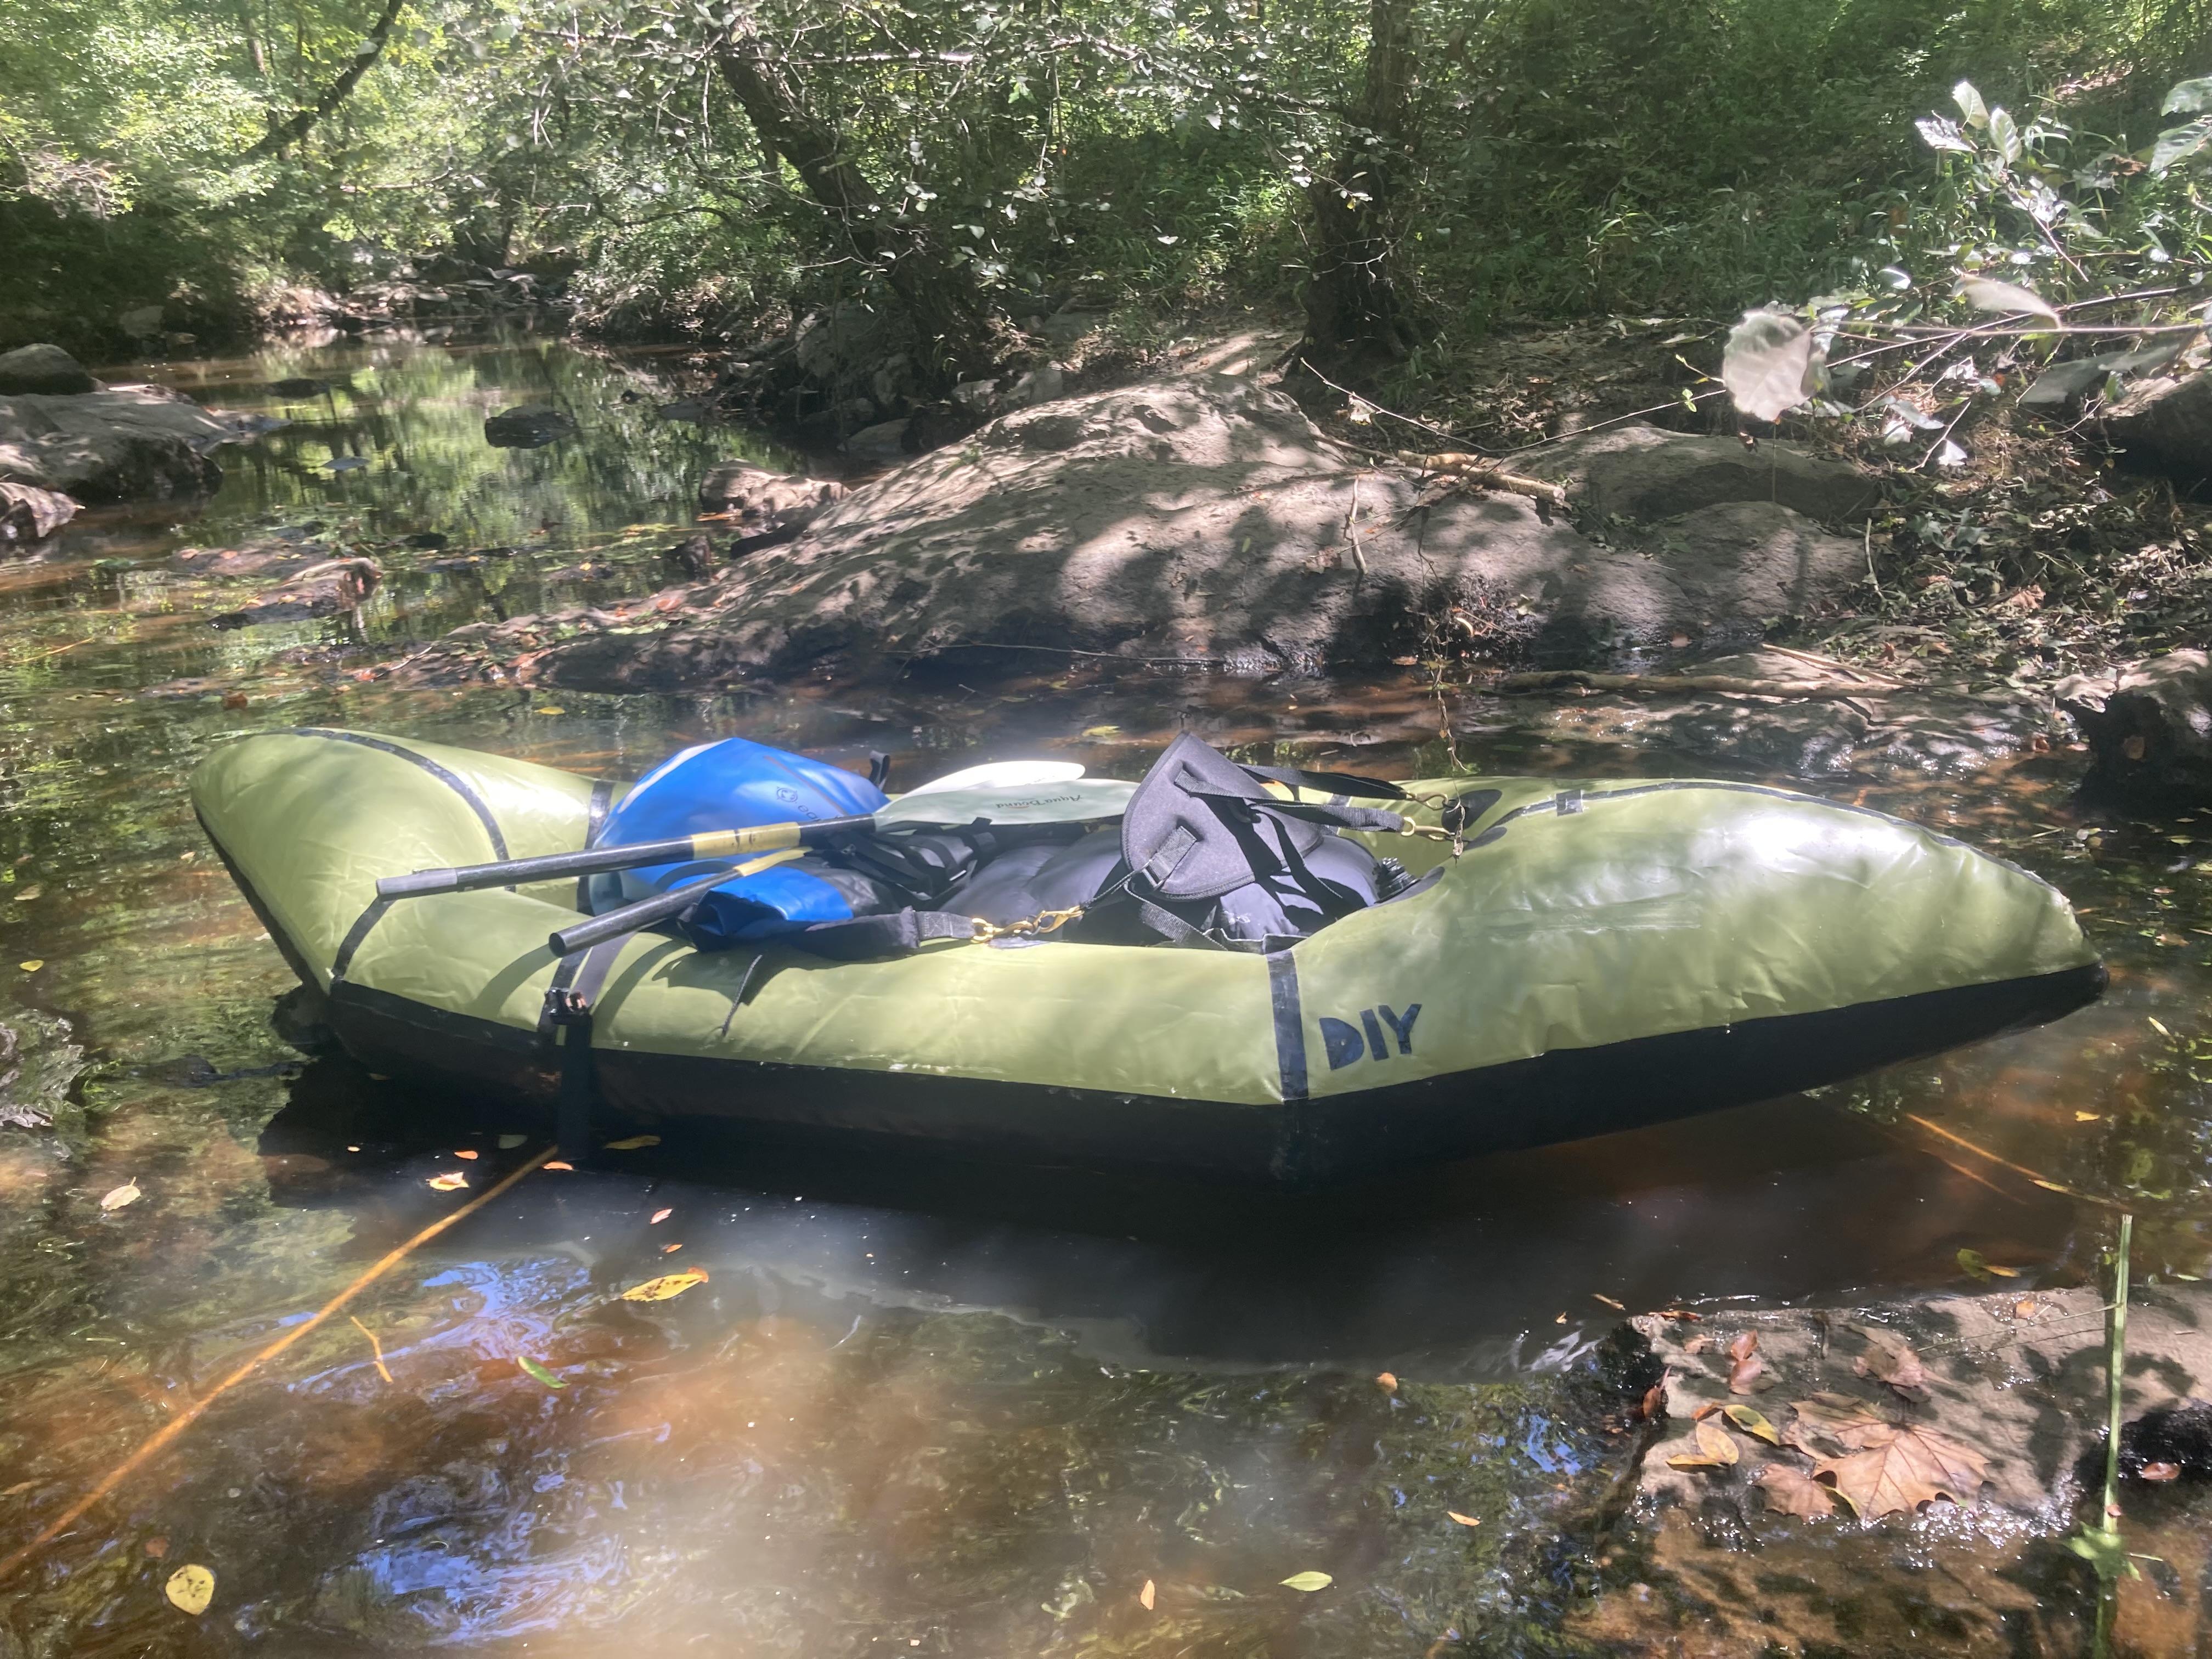
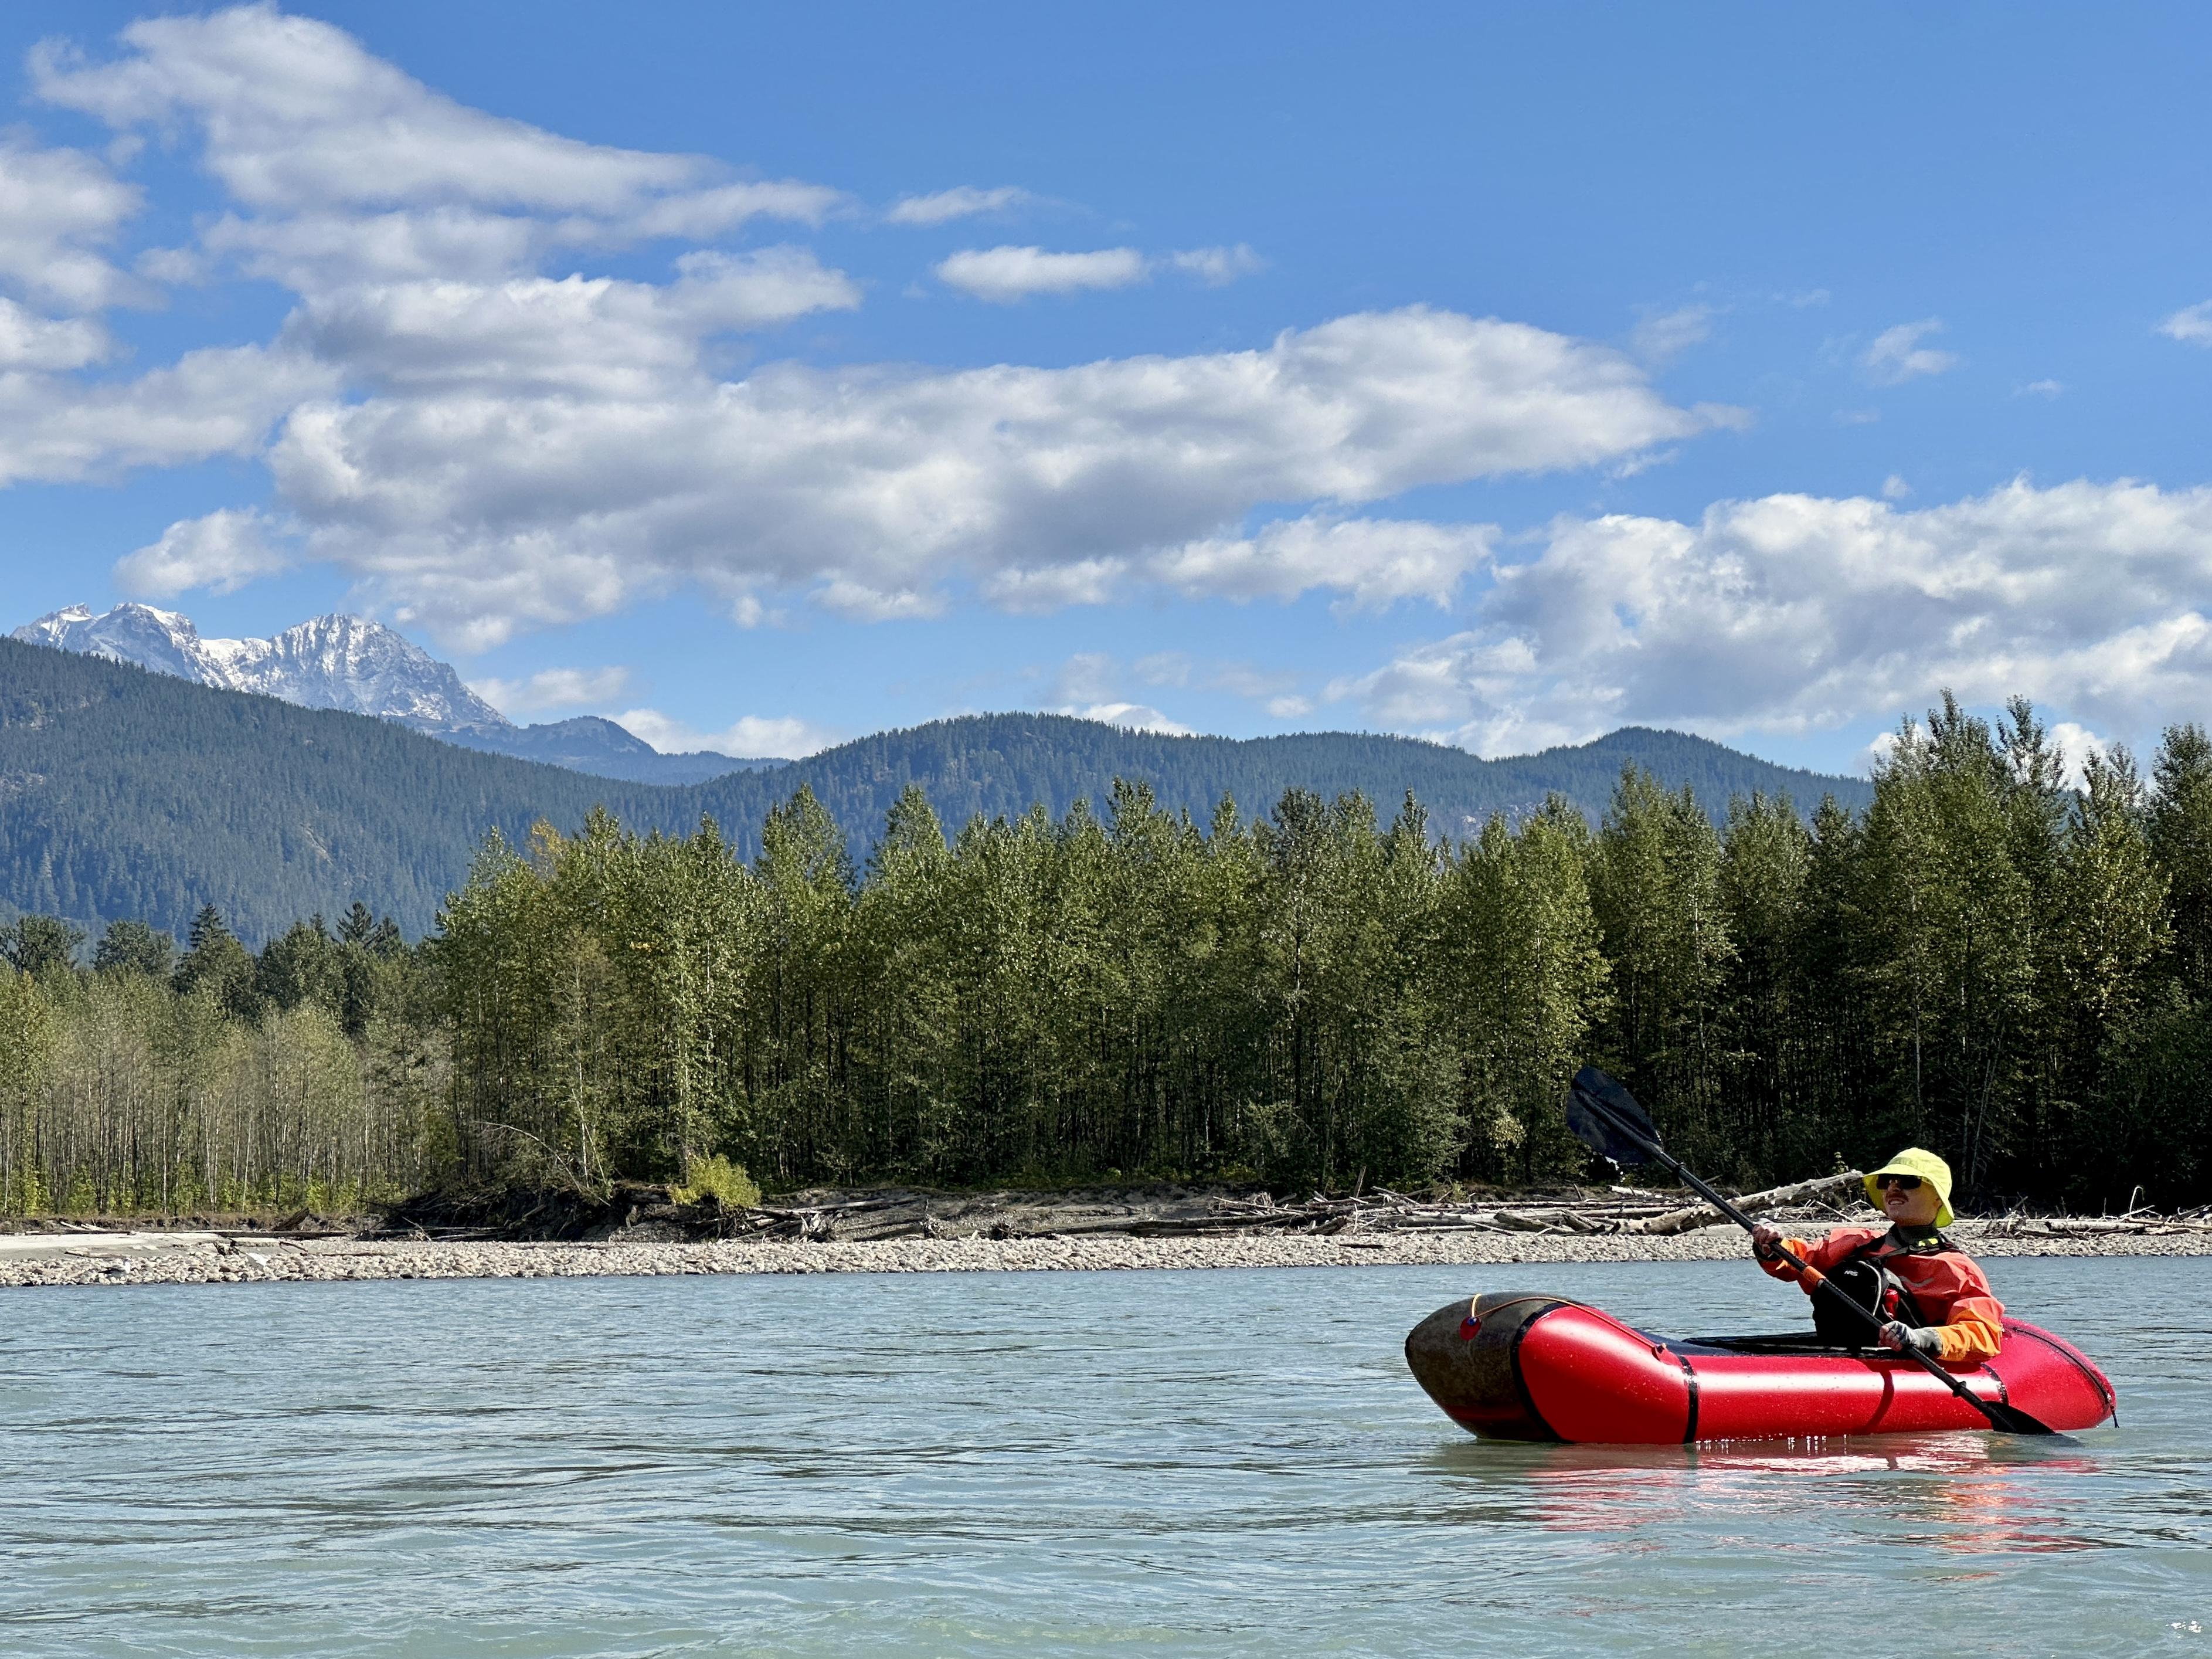
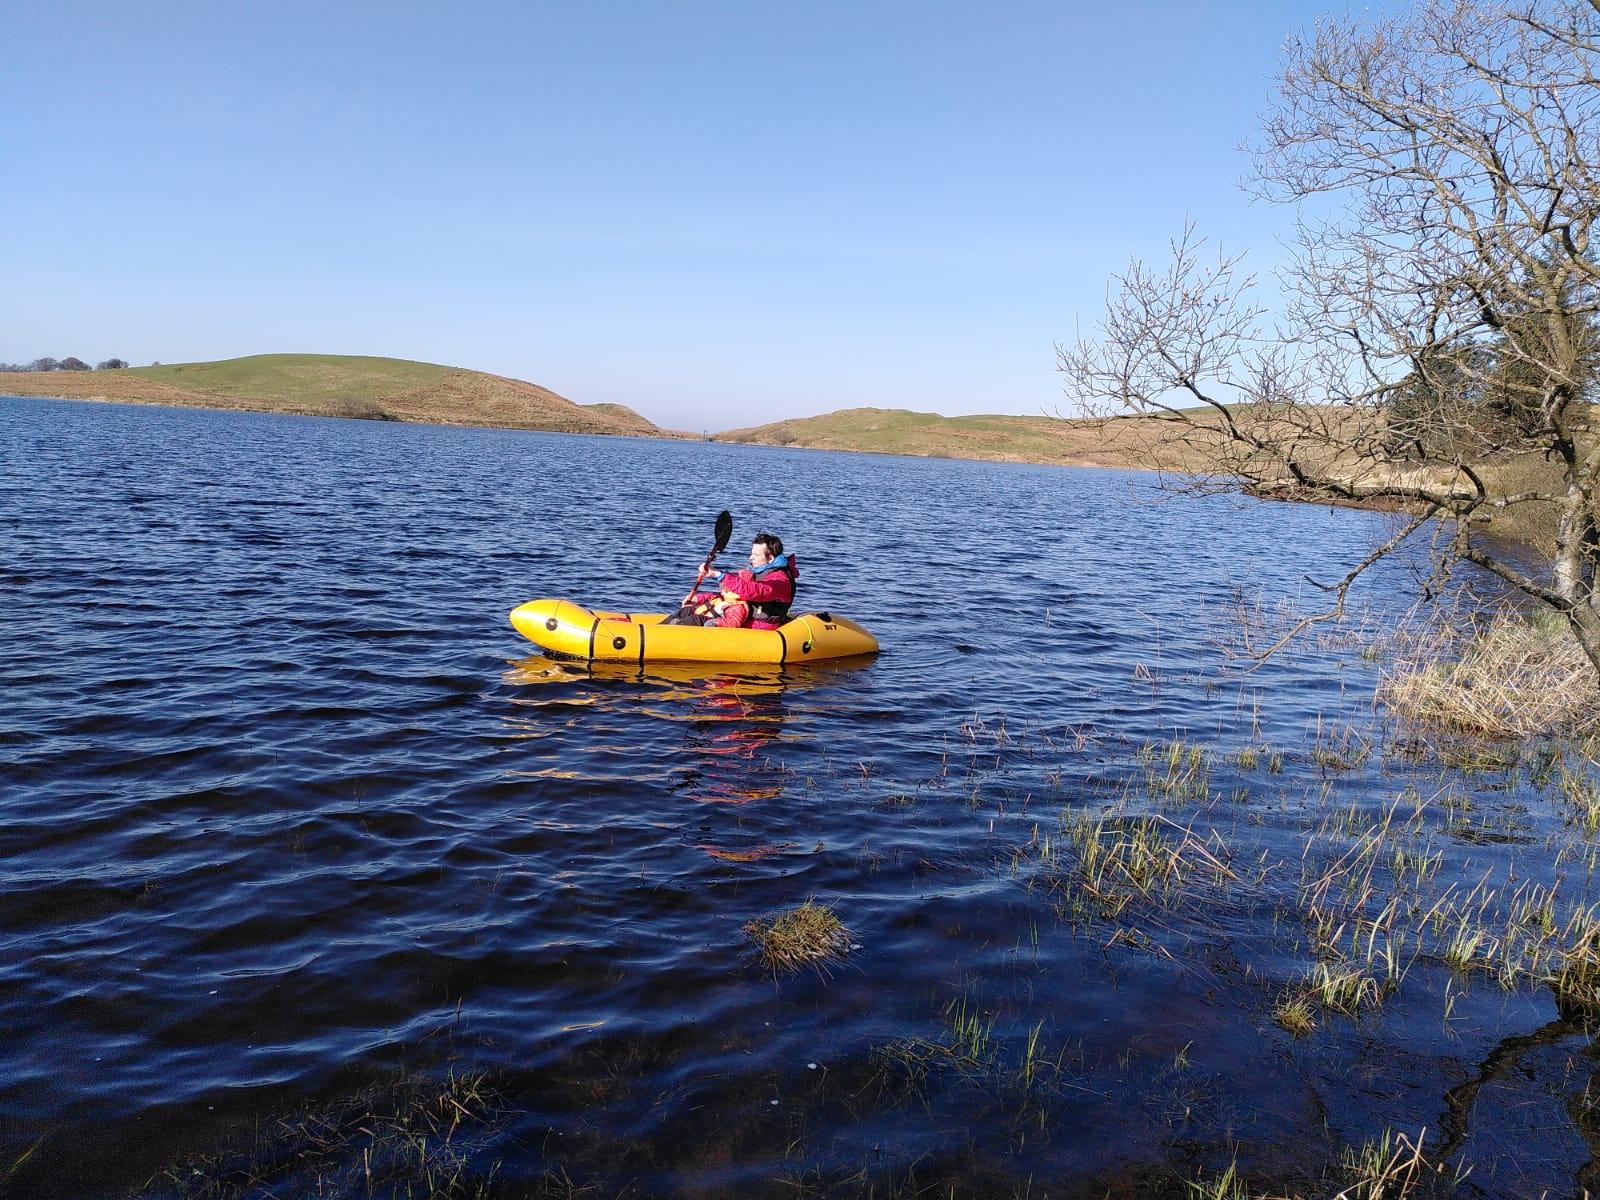
September 11, 2025 at 8:57 pm #21006joesParticipant
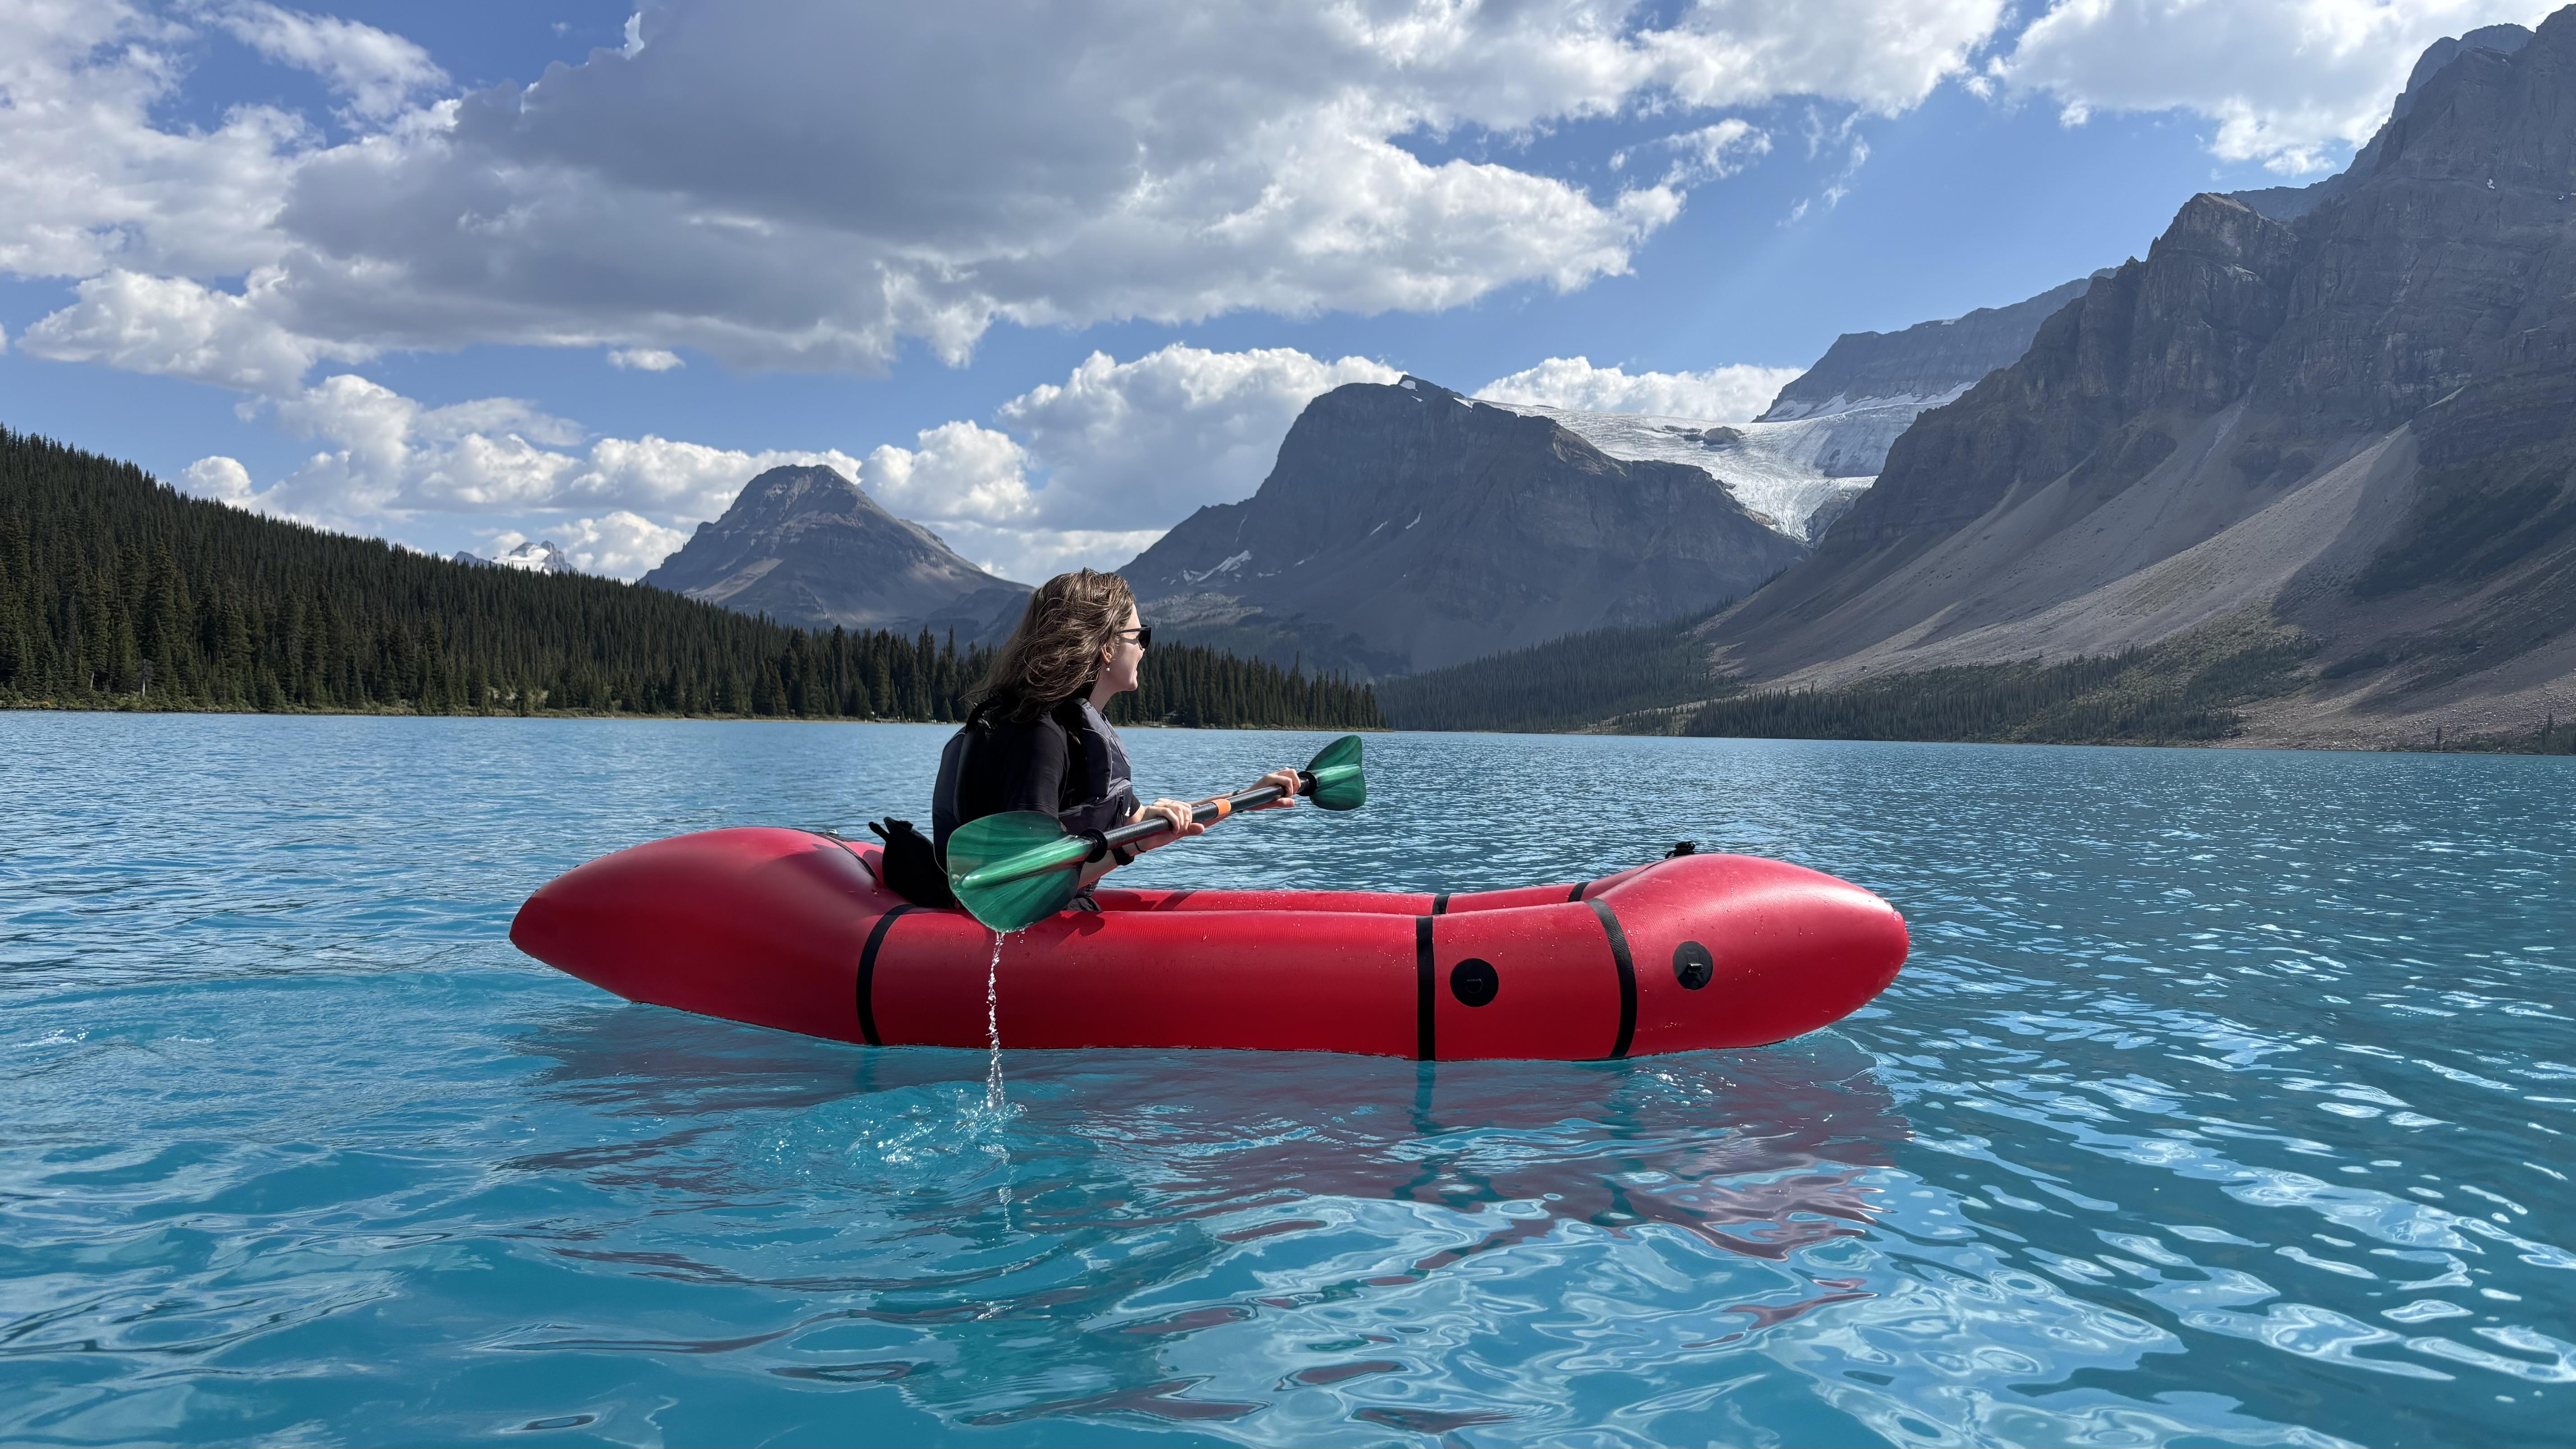
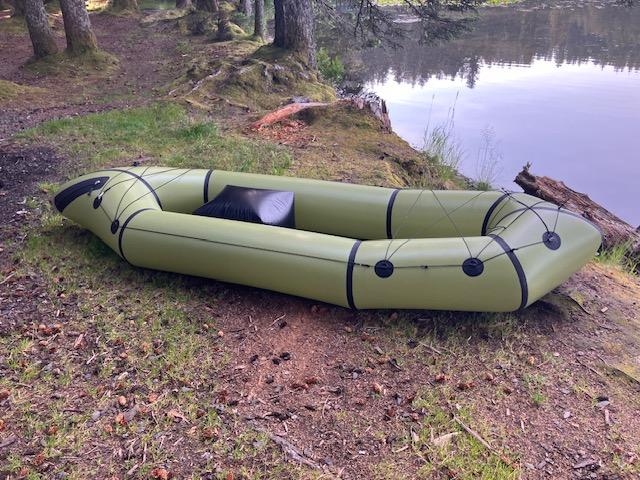
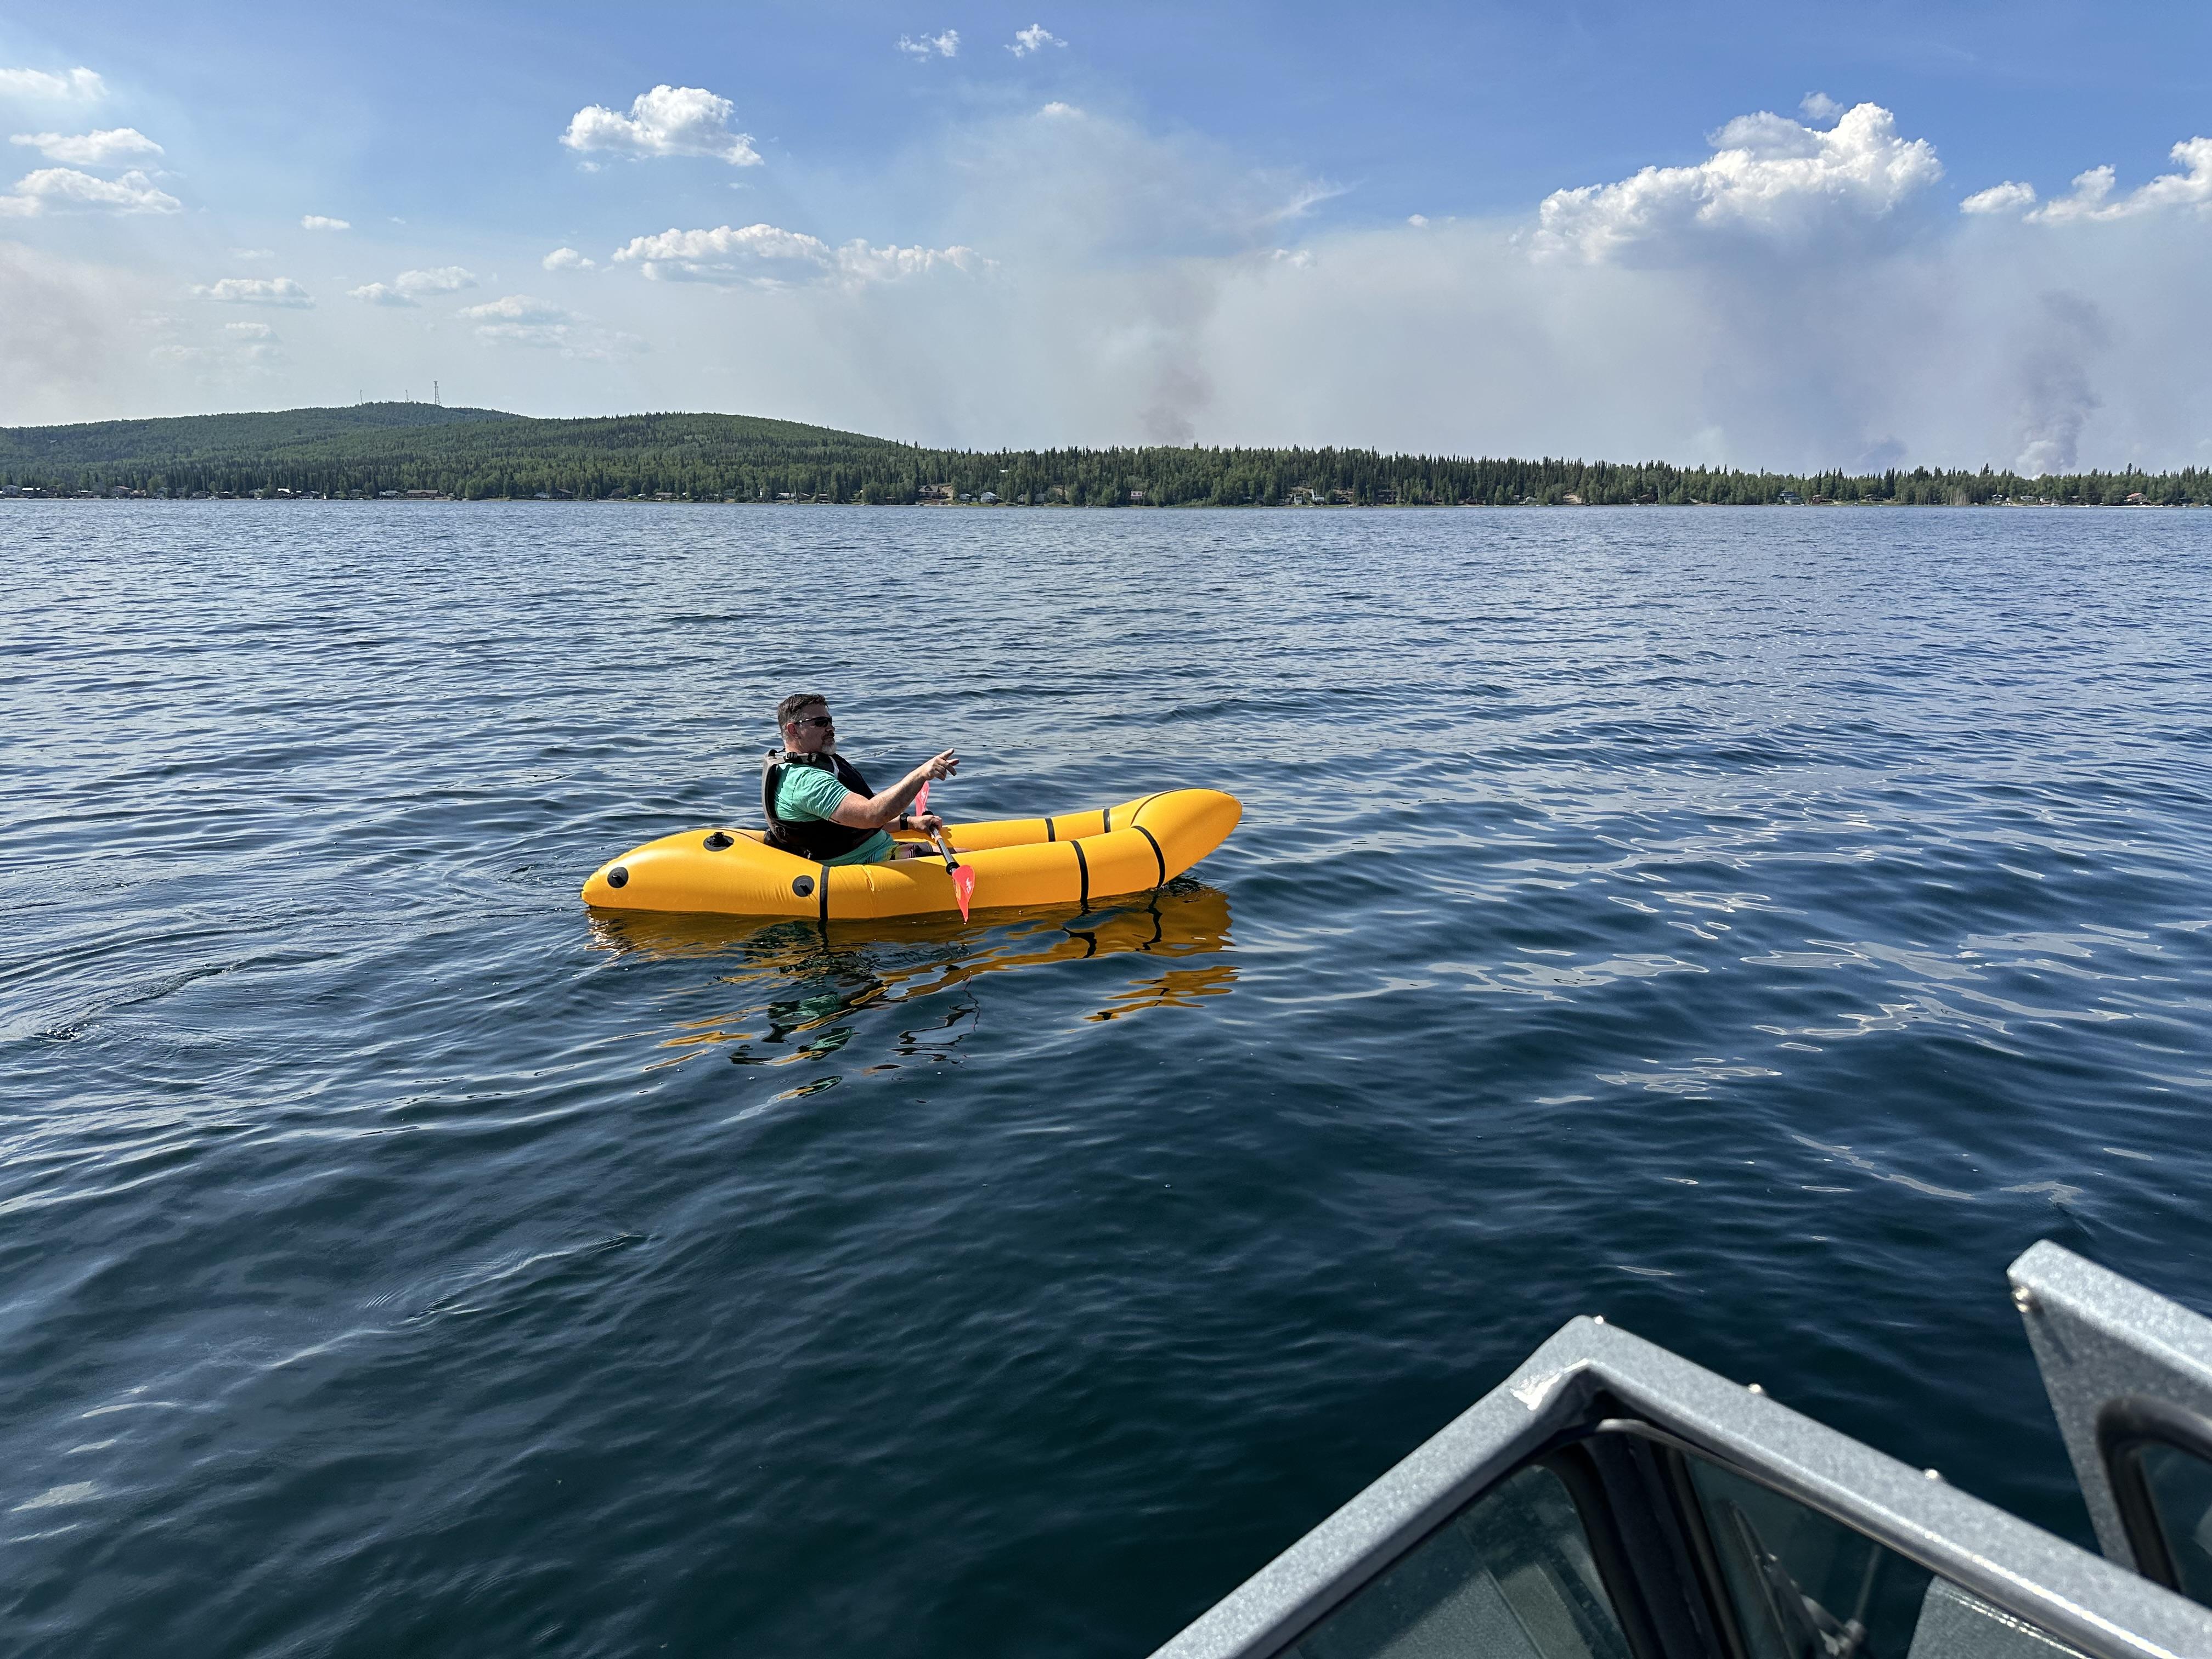
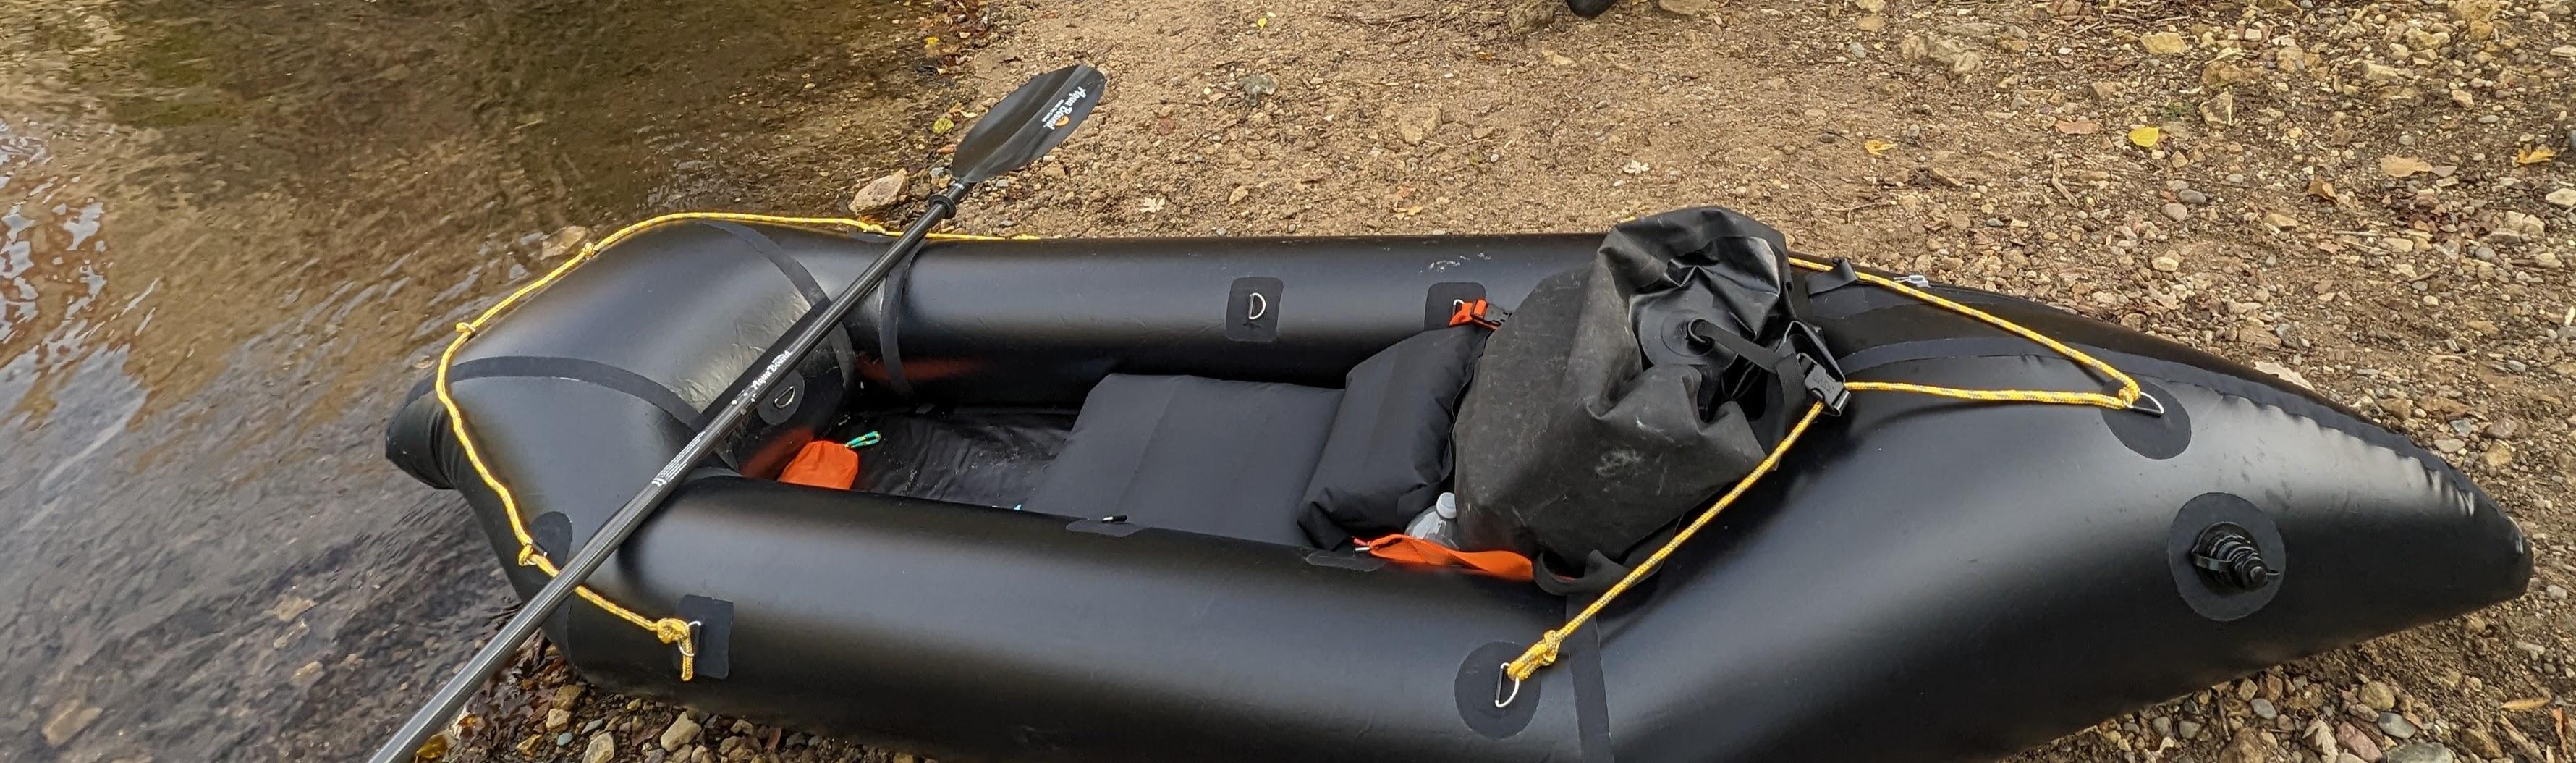
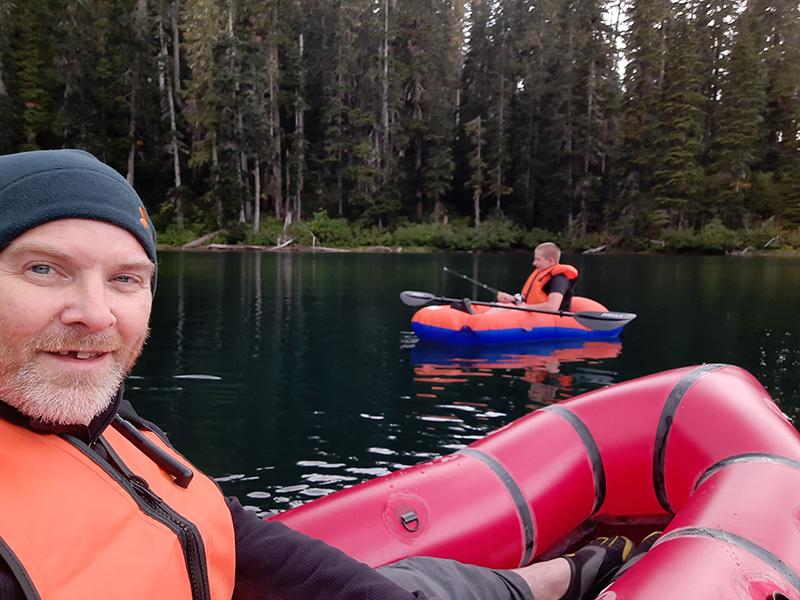
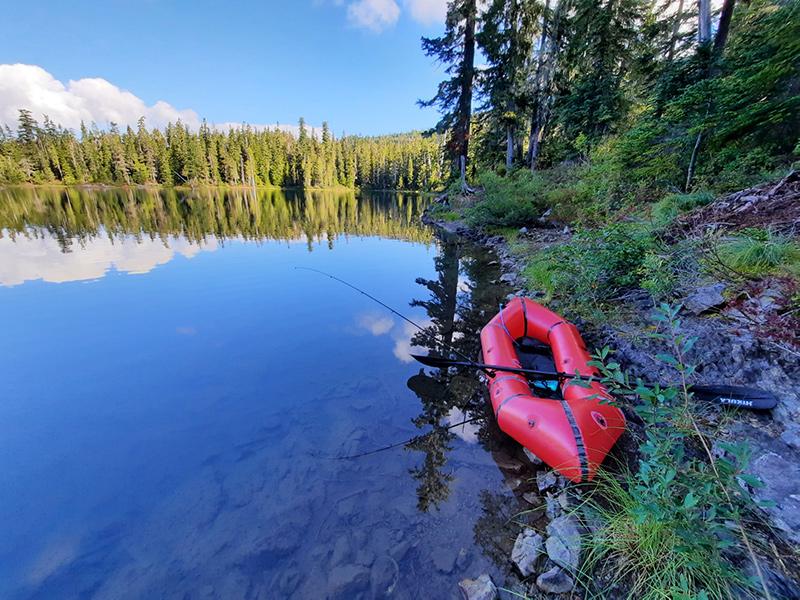
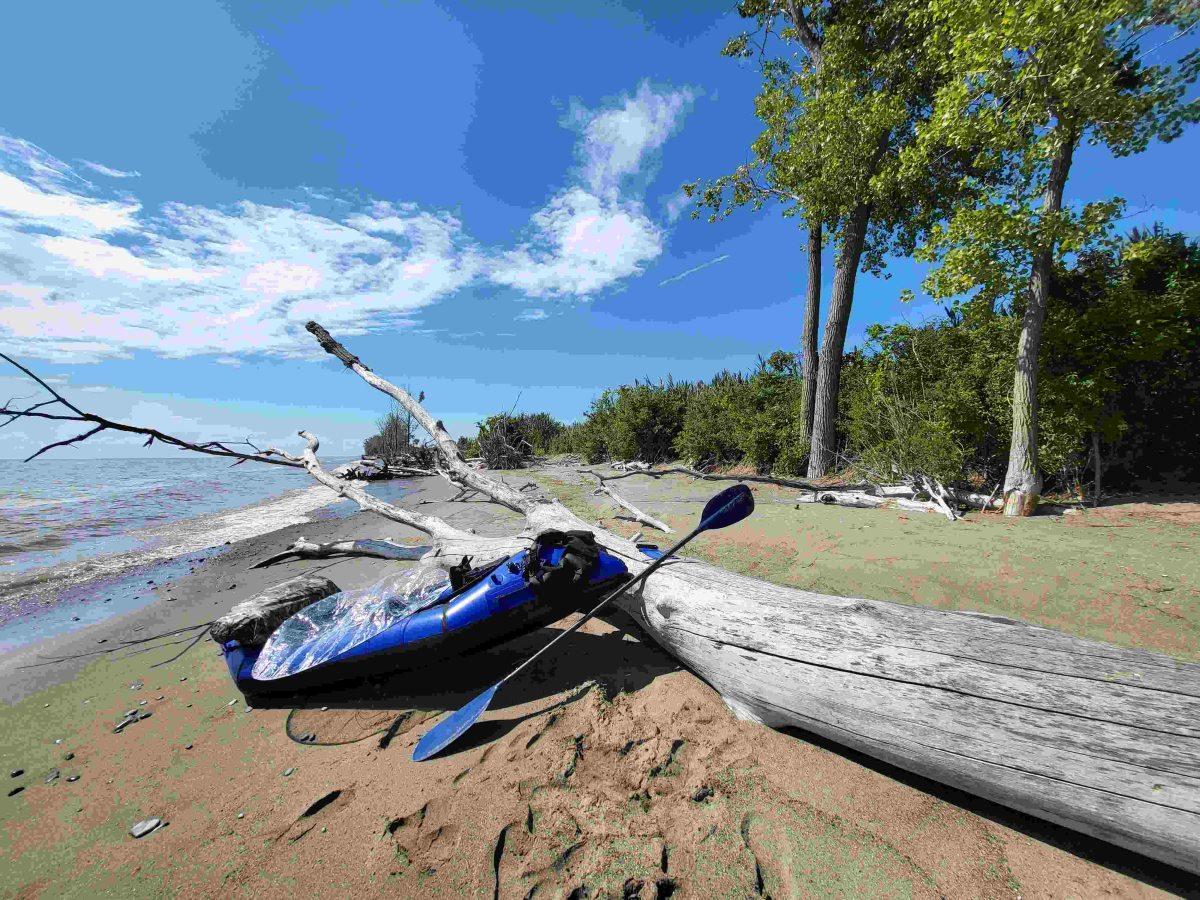
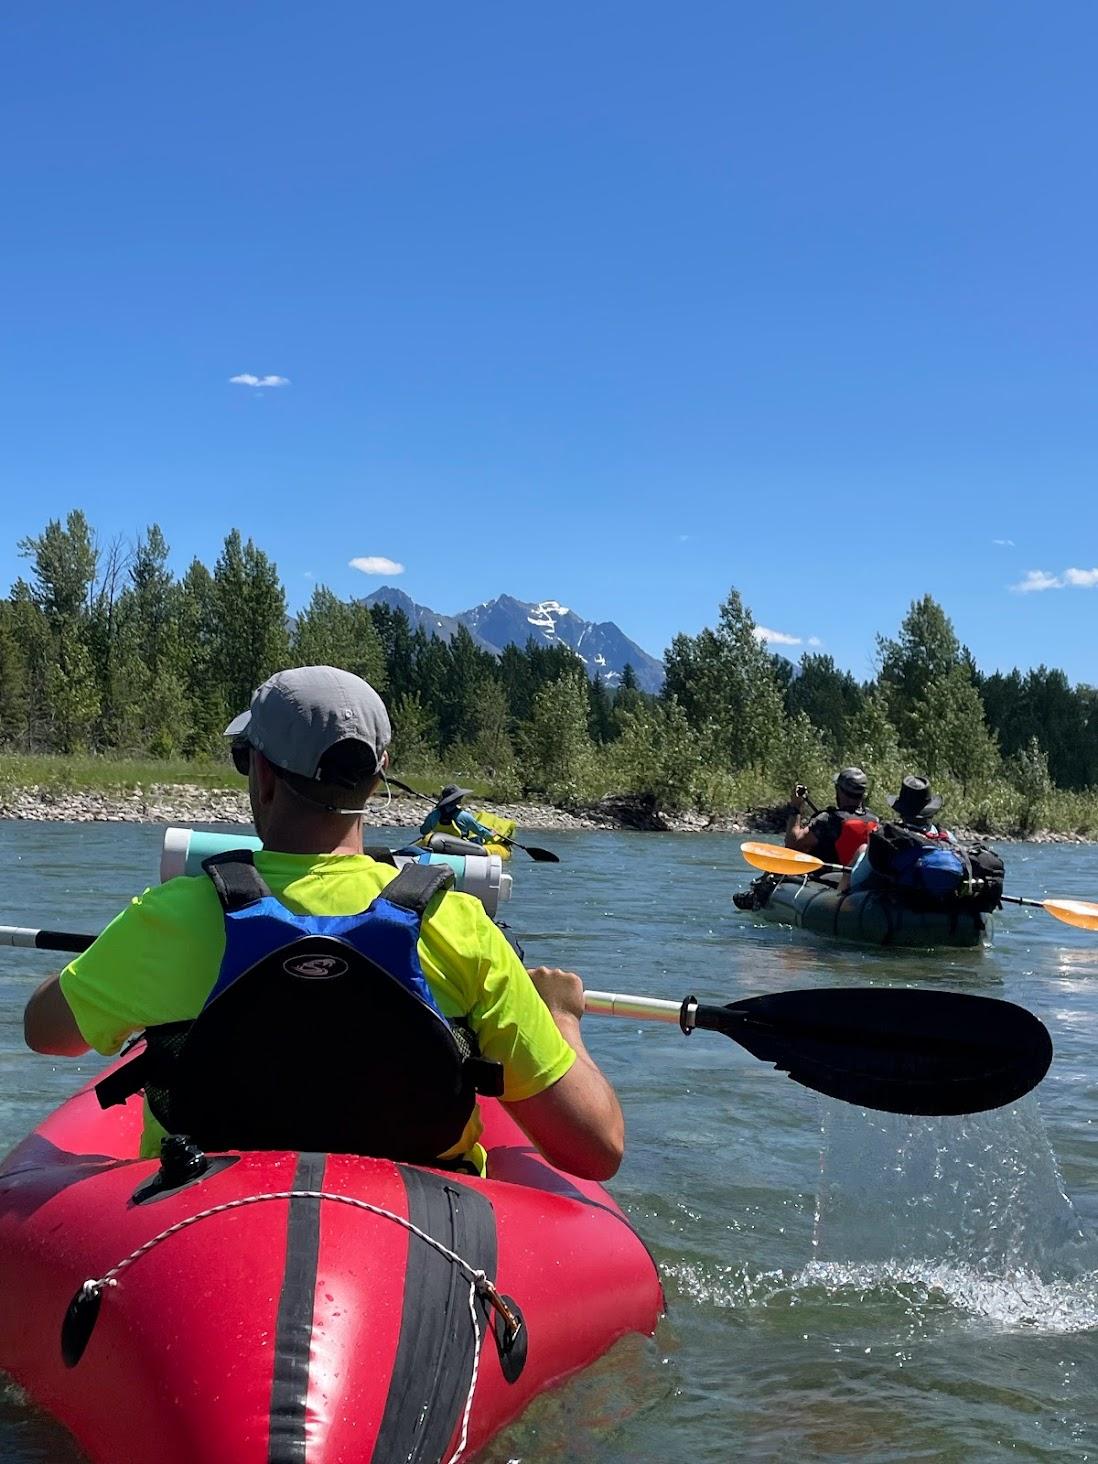
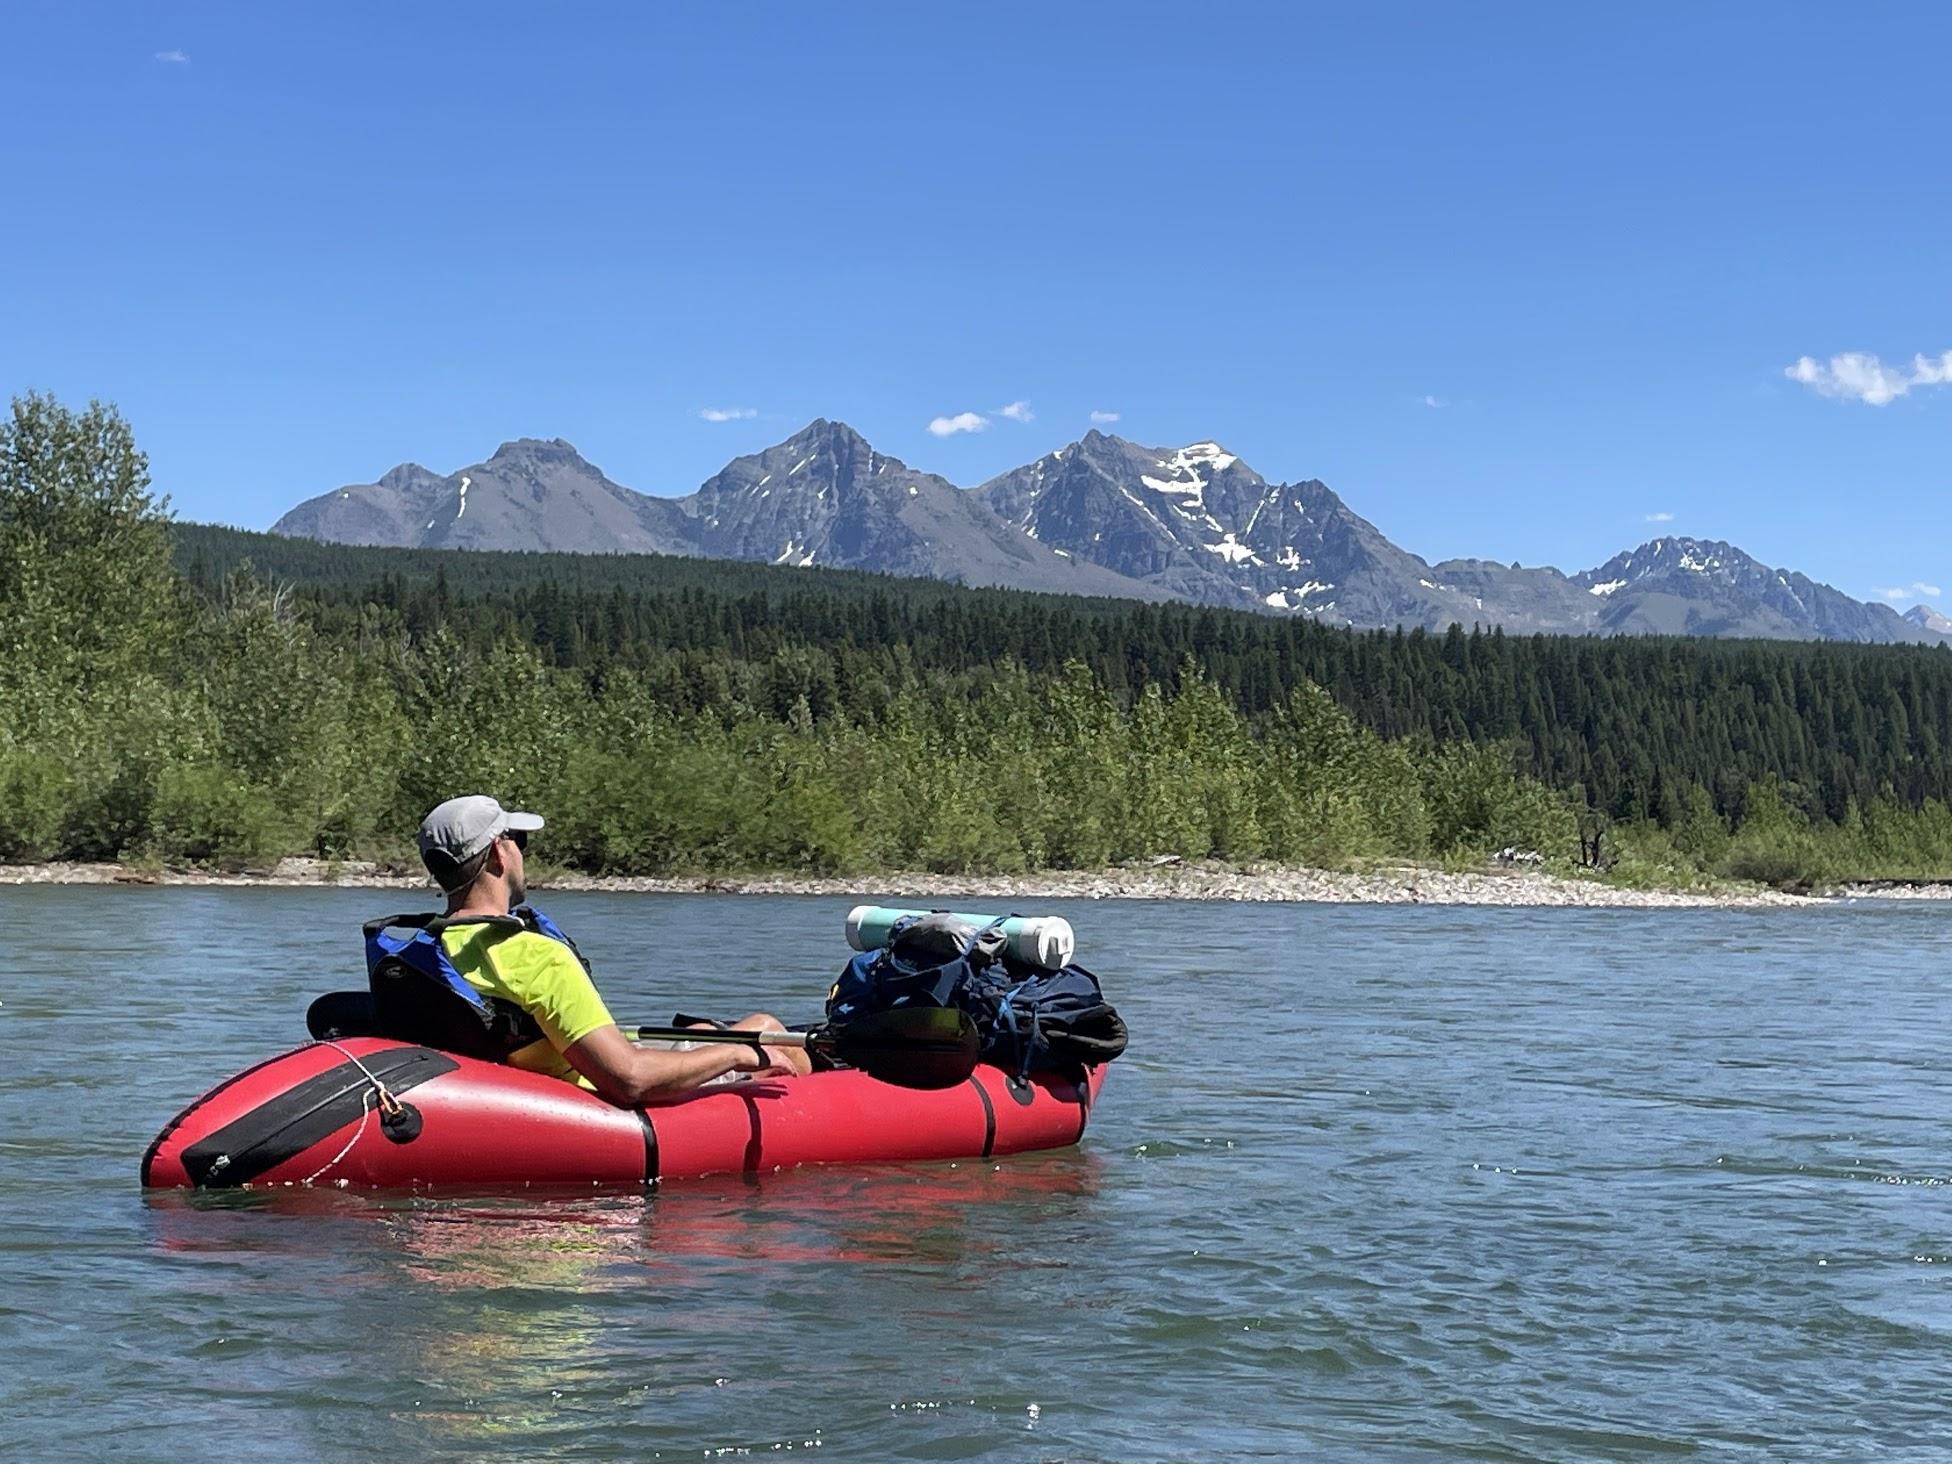
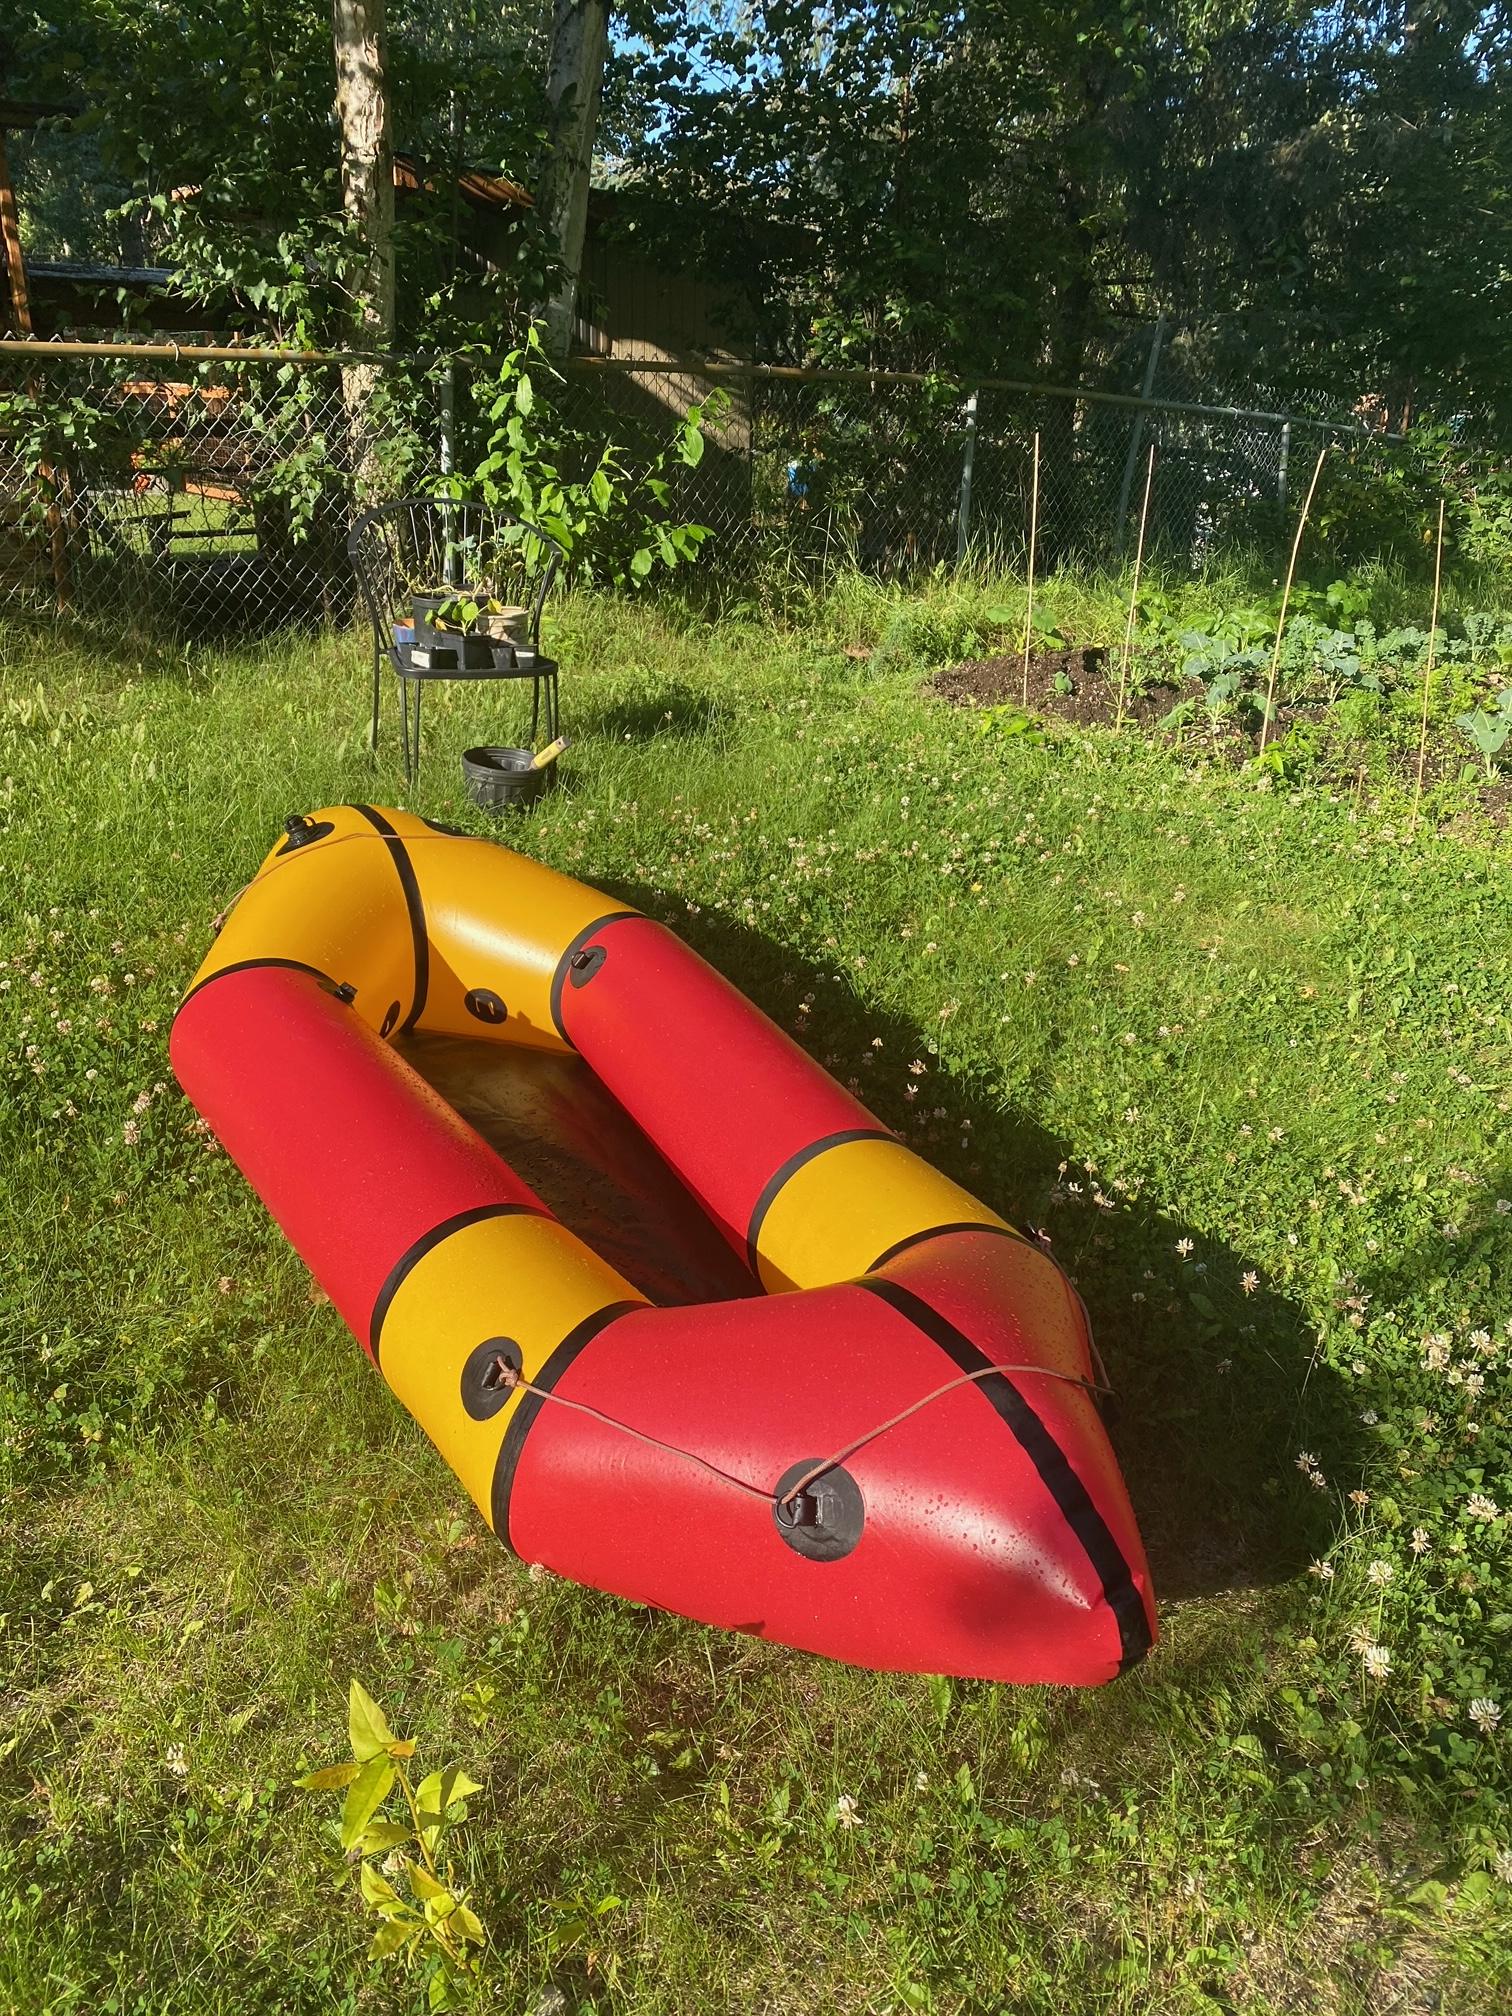
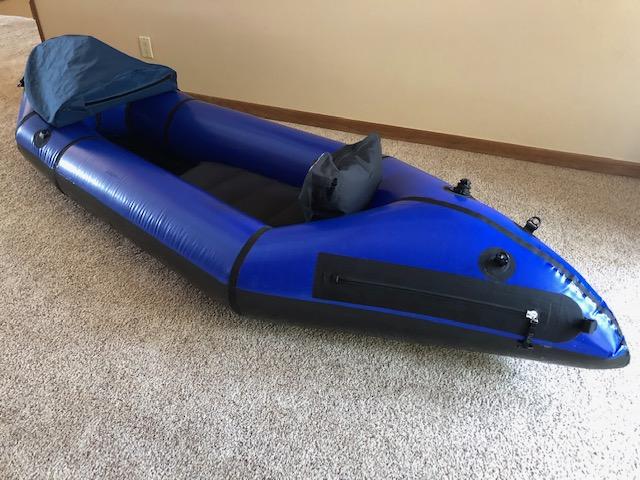
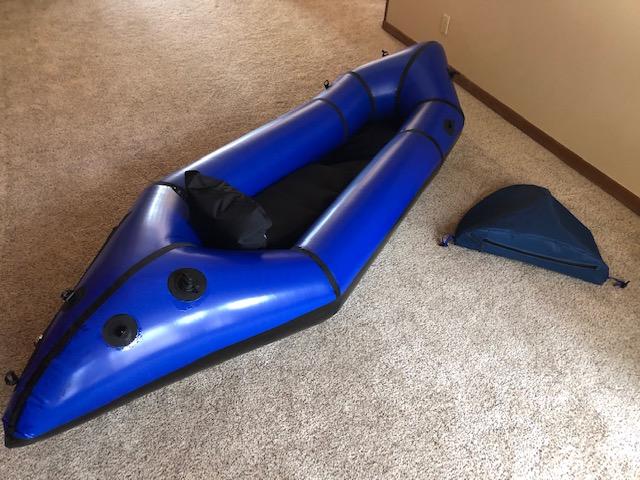
Having a casual on Bow Lake in the Rockies (Alberta). First of three packrafts I’ve made – two ultralight and one Skeena. What you don’t see in the photo is the six or so patches I’ve done from taking it down rivers it’s not made for. Though, the worst hole is from a portage that crossed paths with a raspberry bush. The ultralight rafts can get you down some class II, but that sometimes means a few scars.
-
September 12, 2025 at 8:57 am #21007Matt (Admin)Keymaster
Great work, Joe – and gorgeous shot! Thanks for the feedback about the Ultralight – it sounds like you’ve had some great adventures.
-
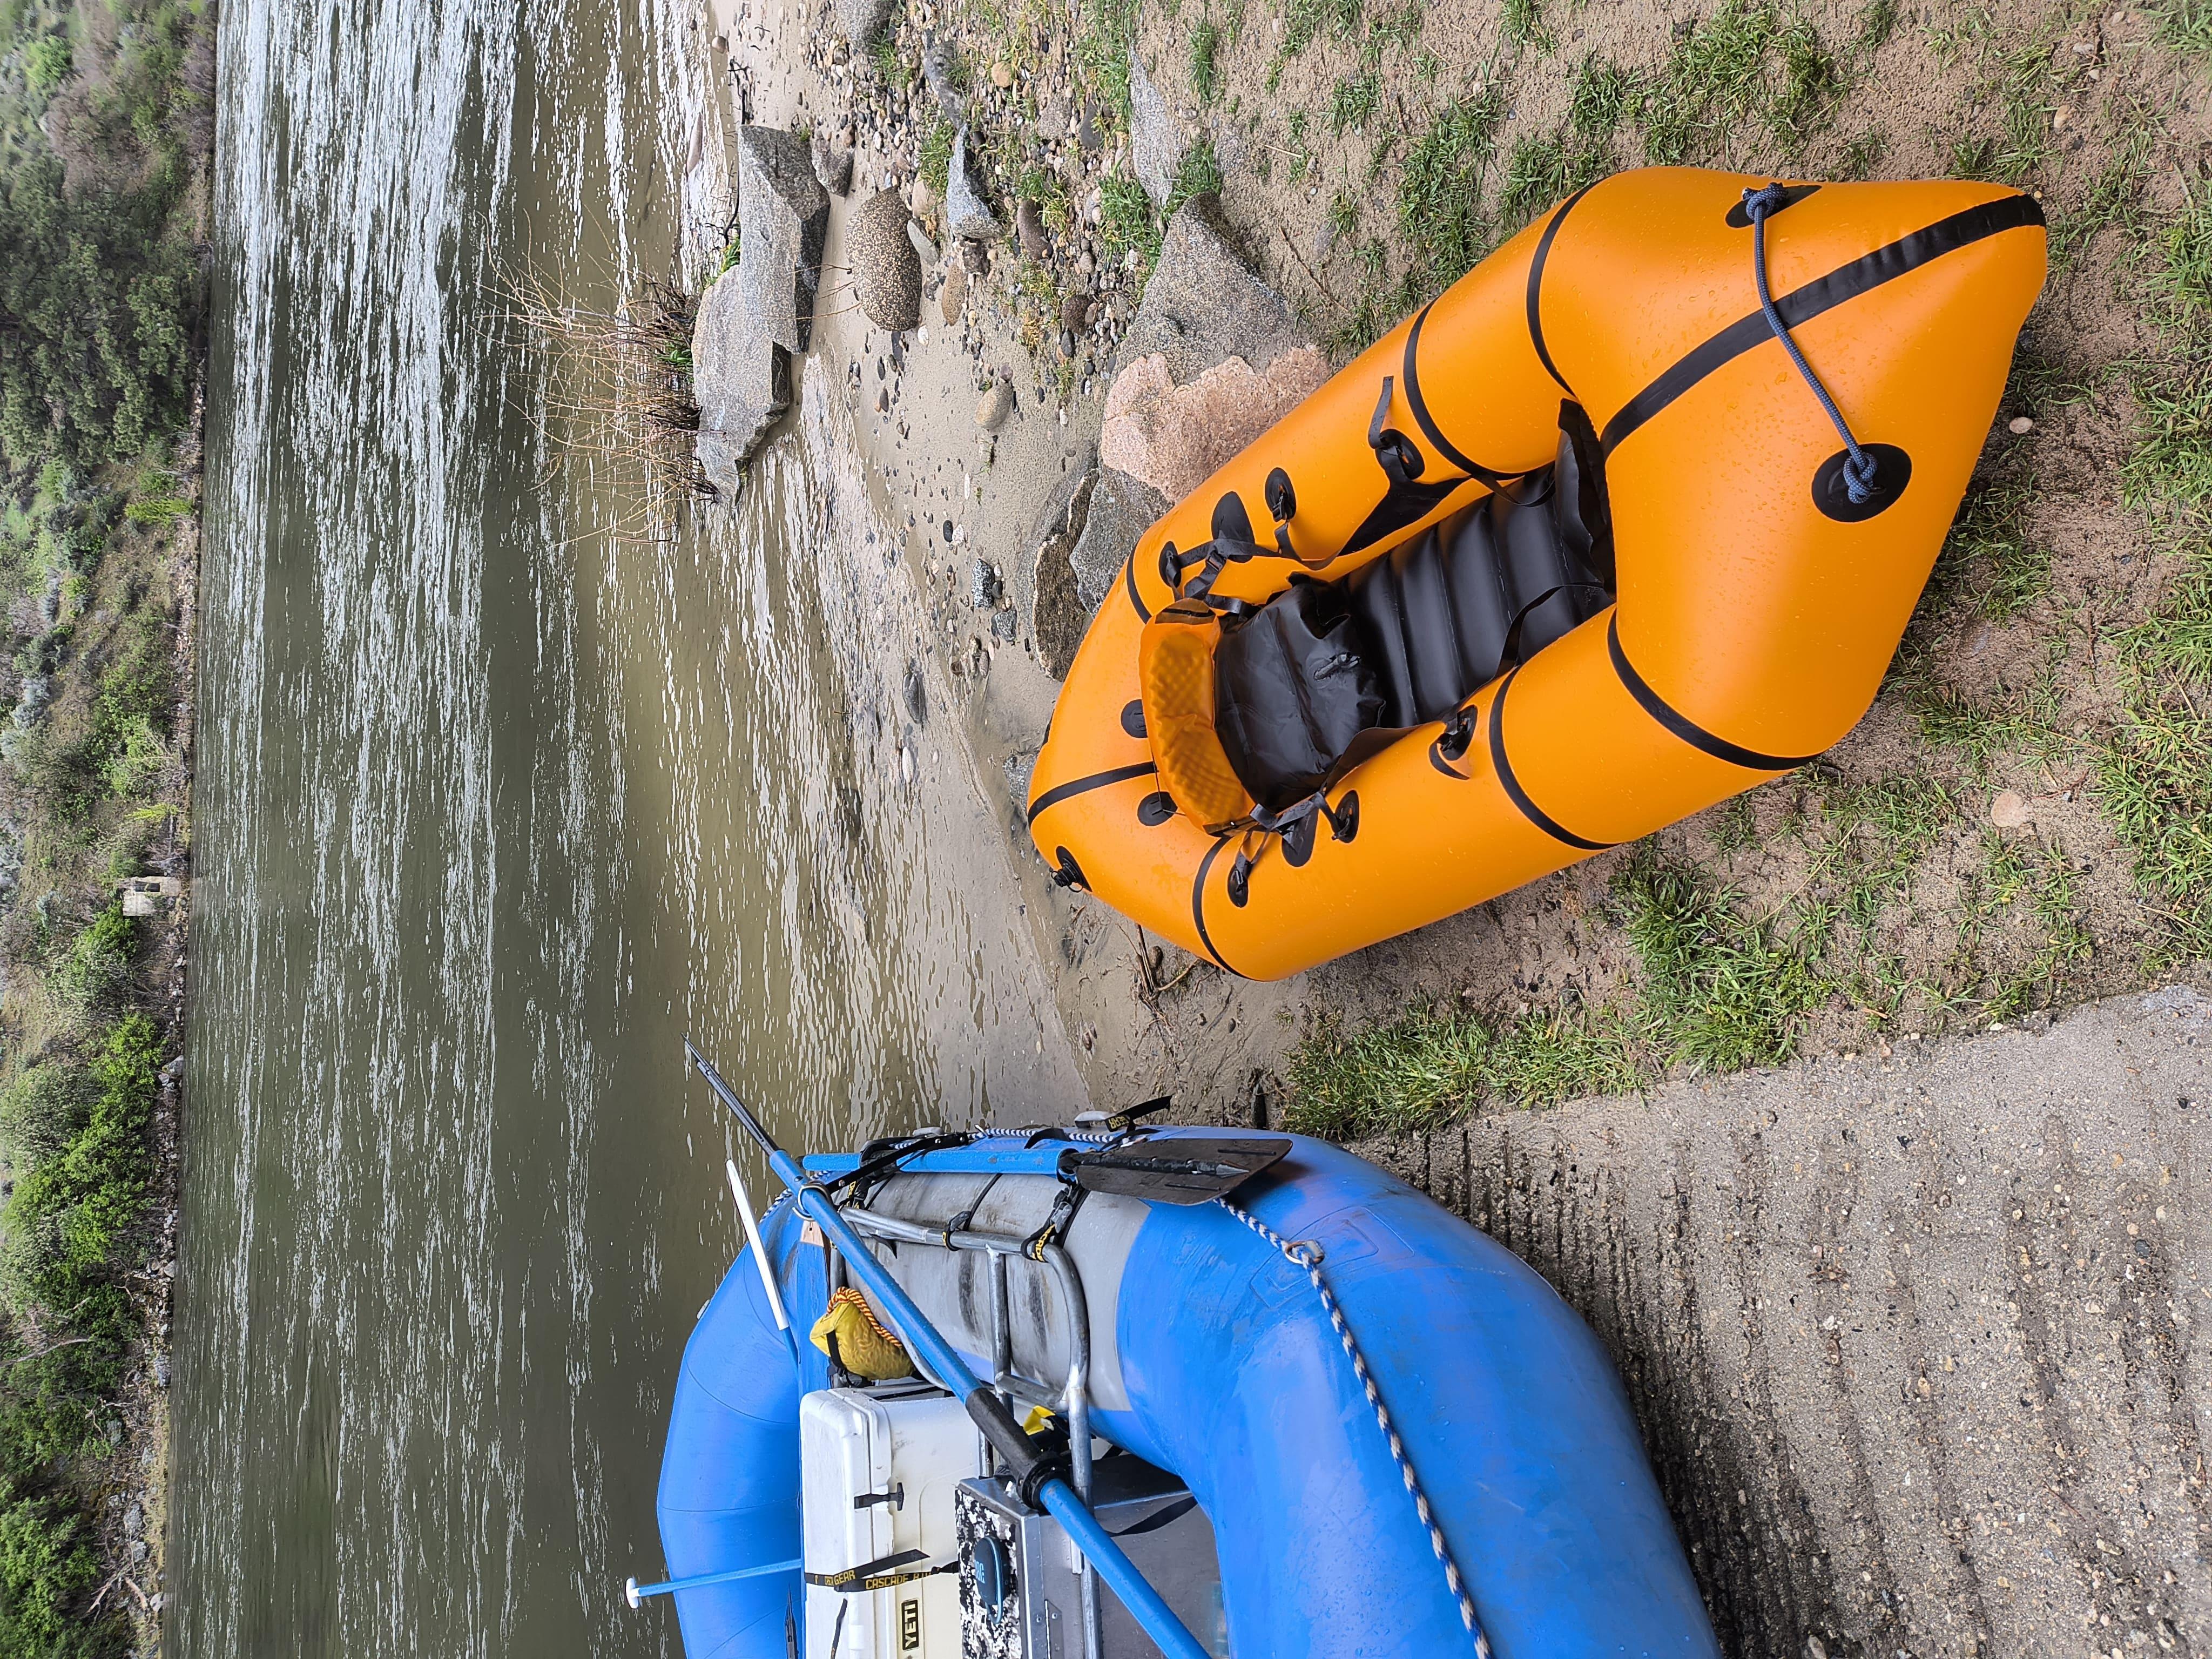
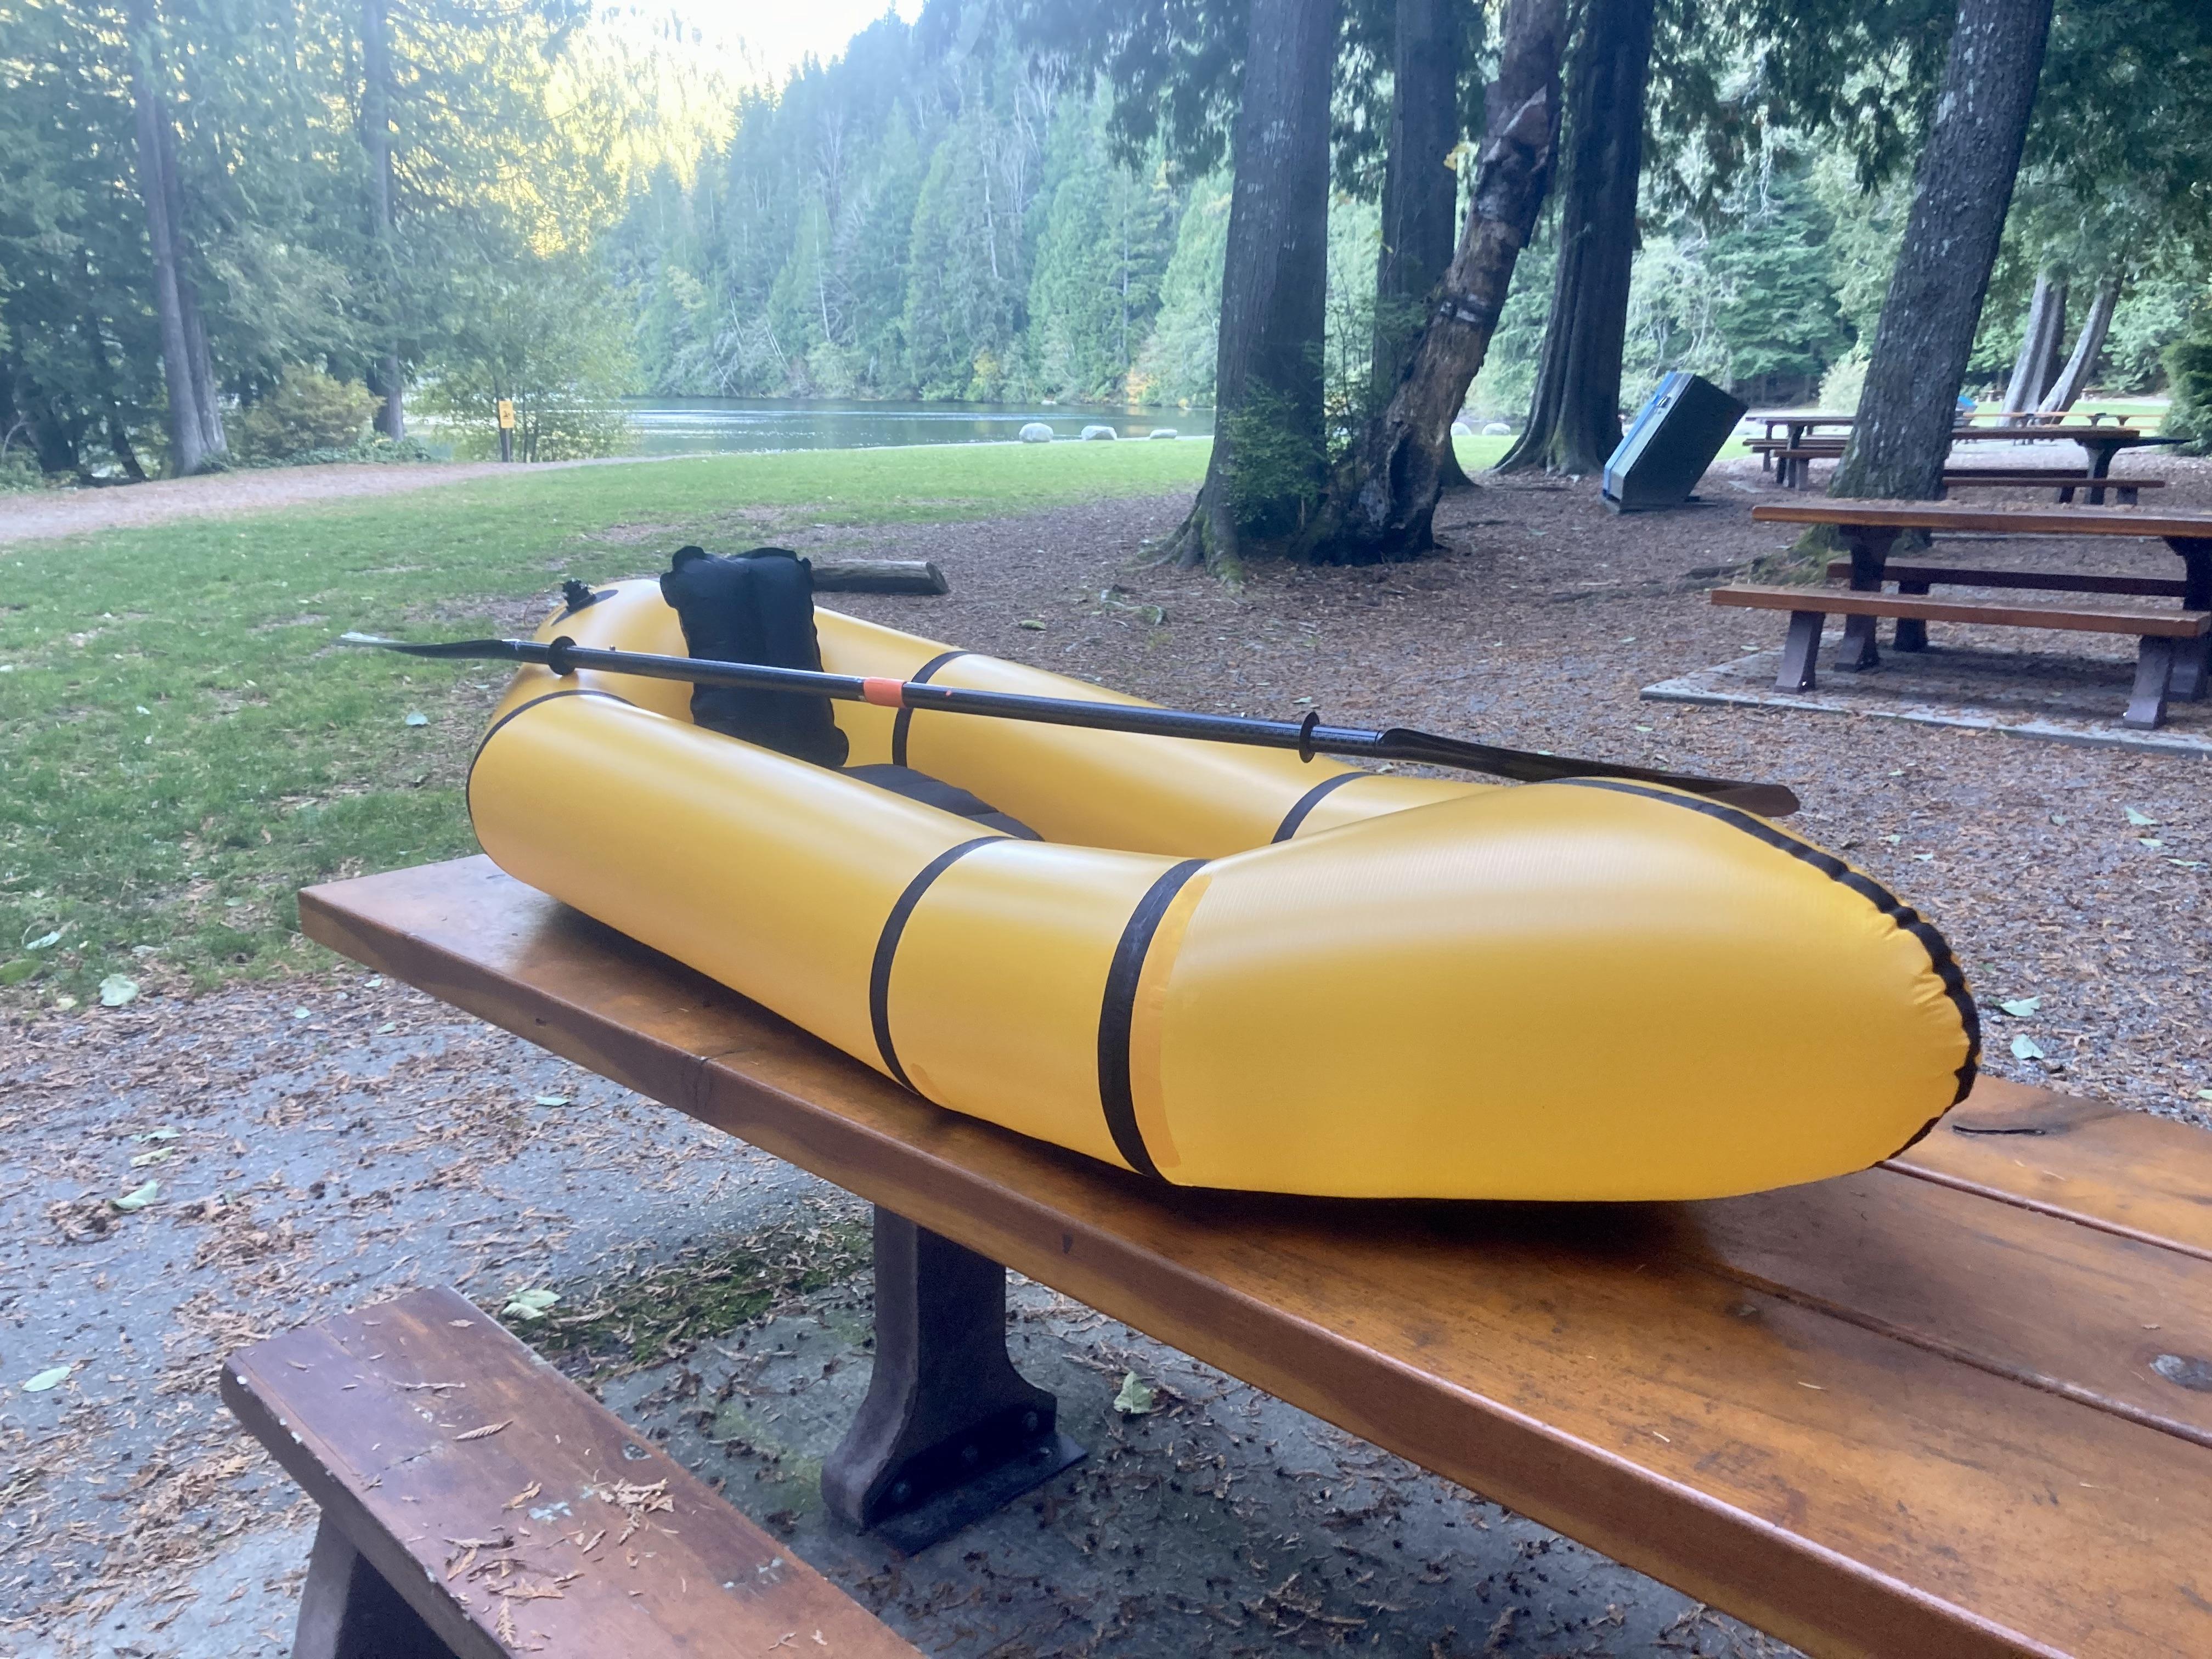
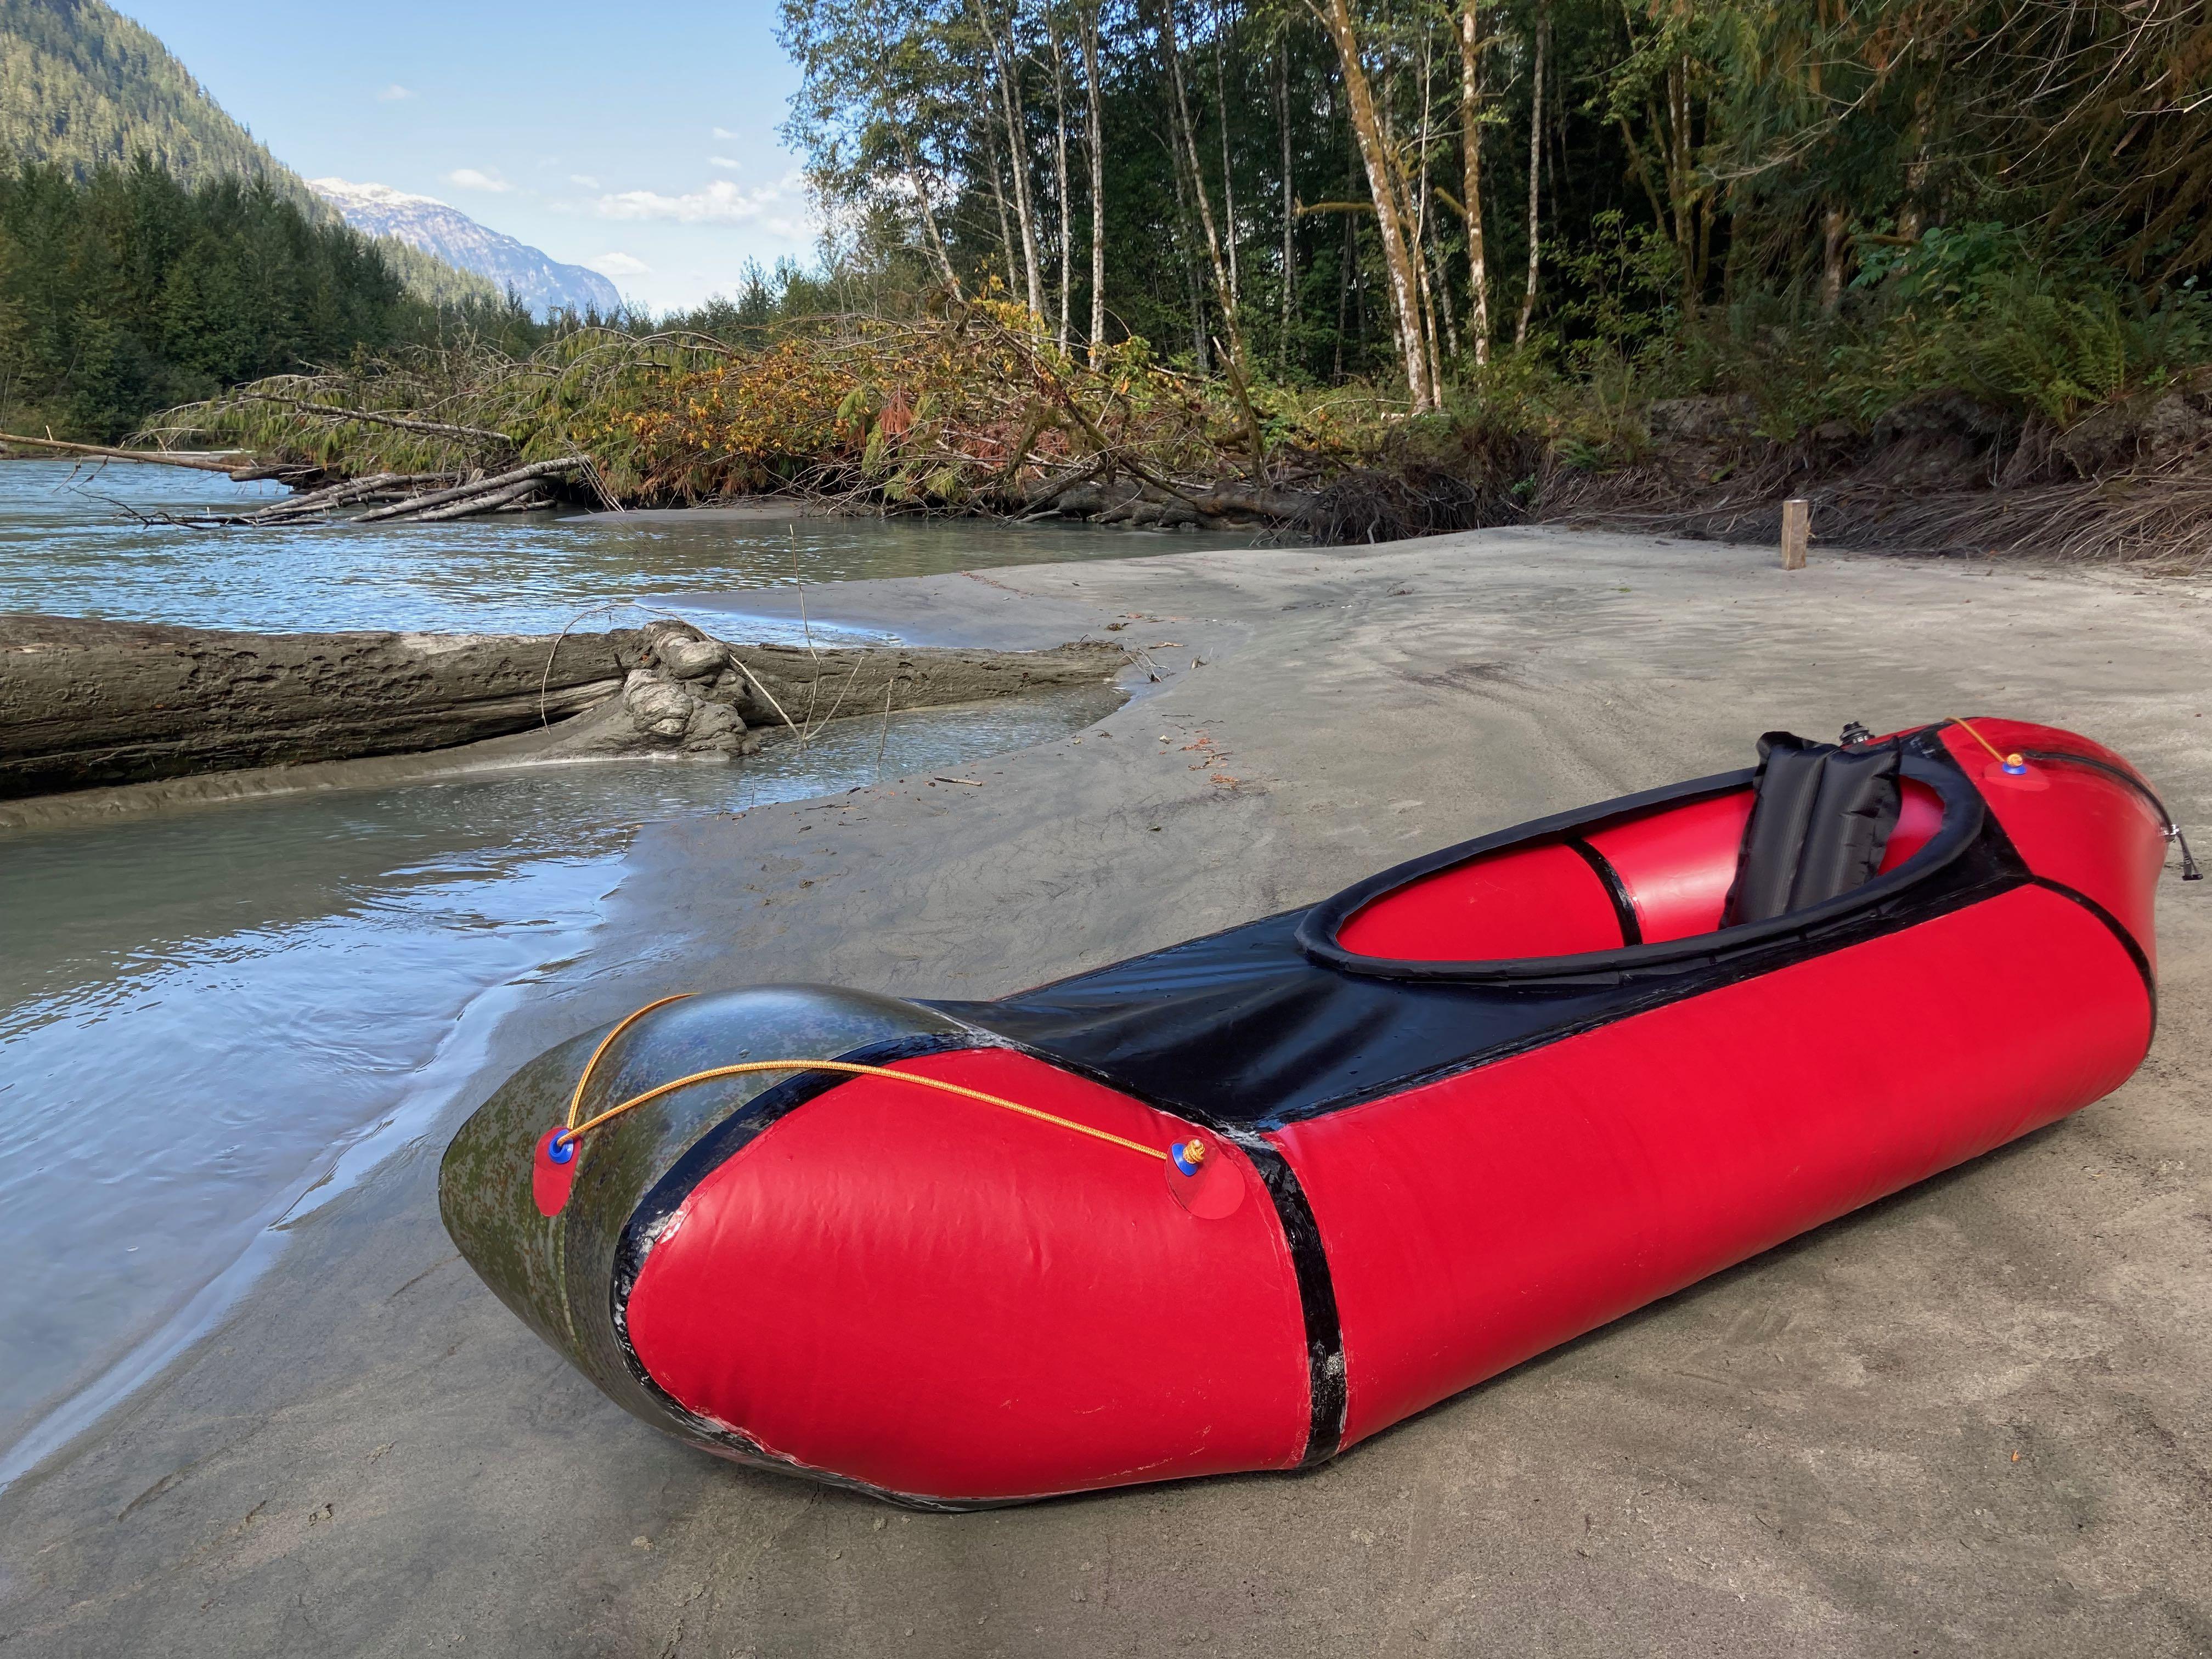
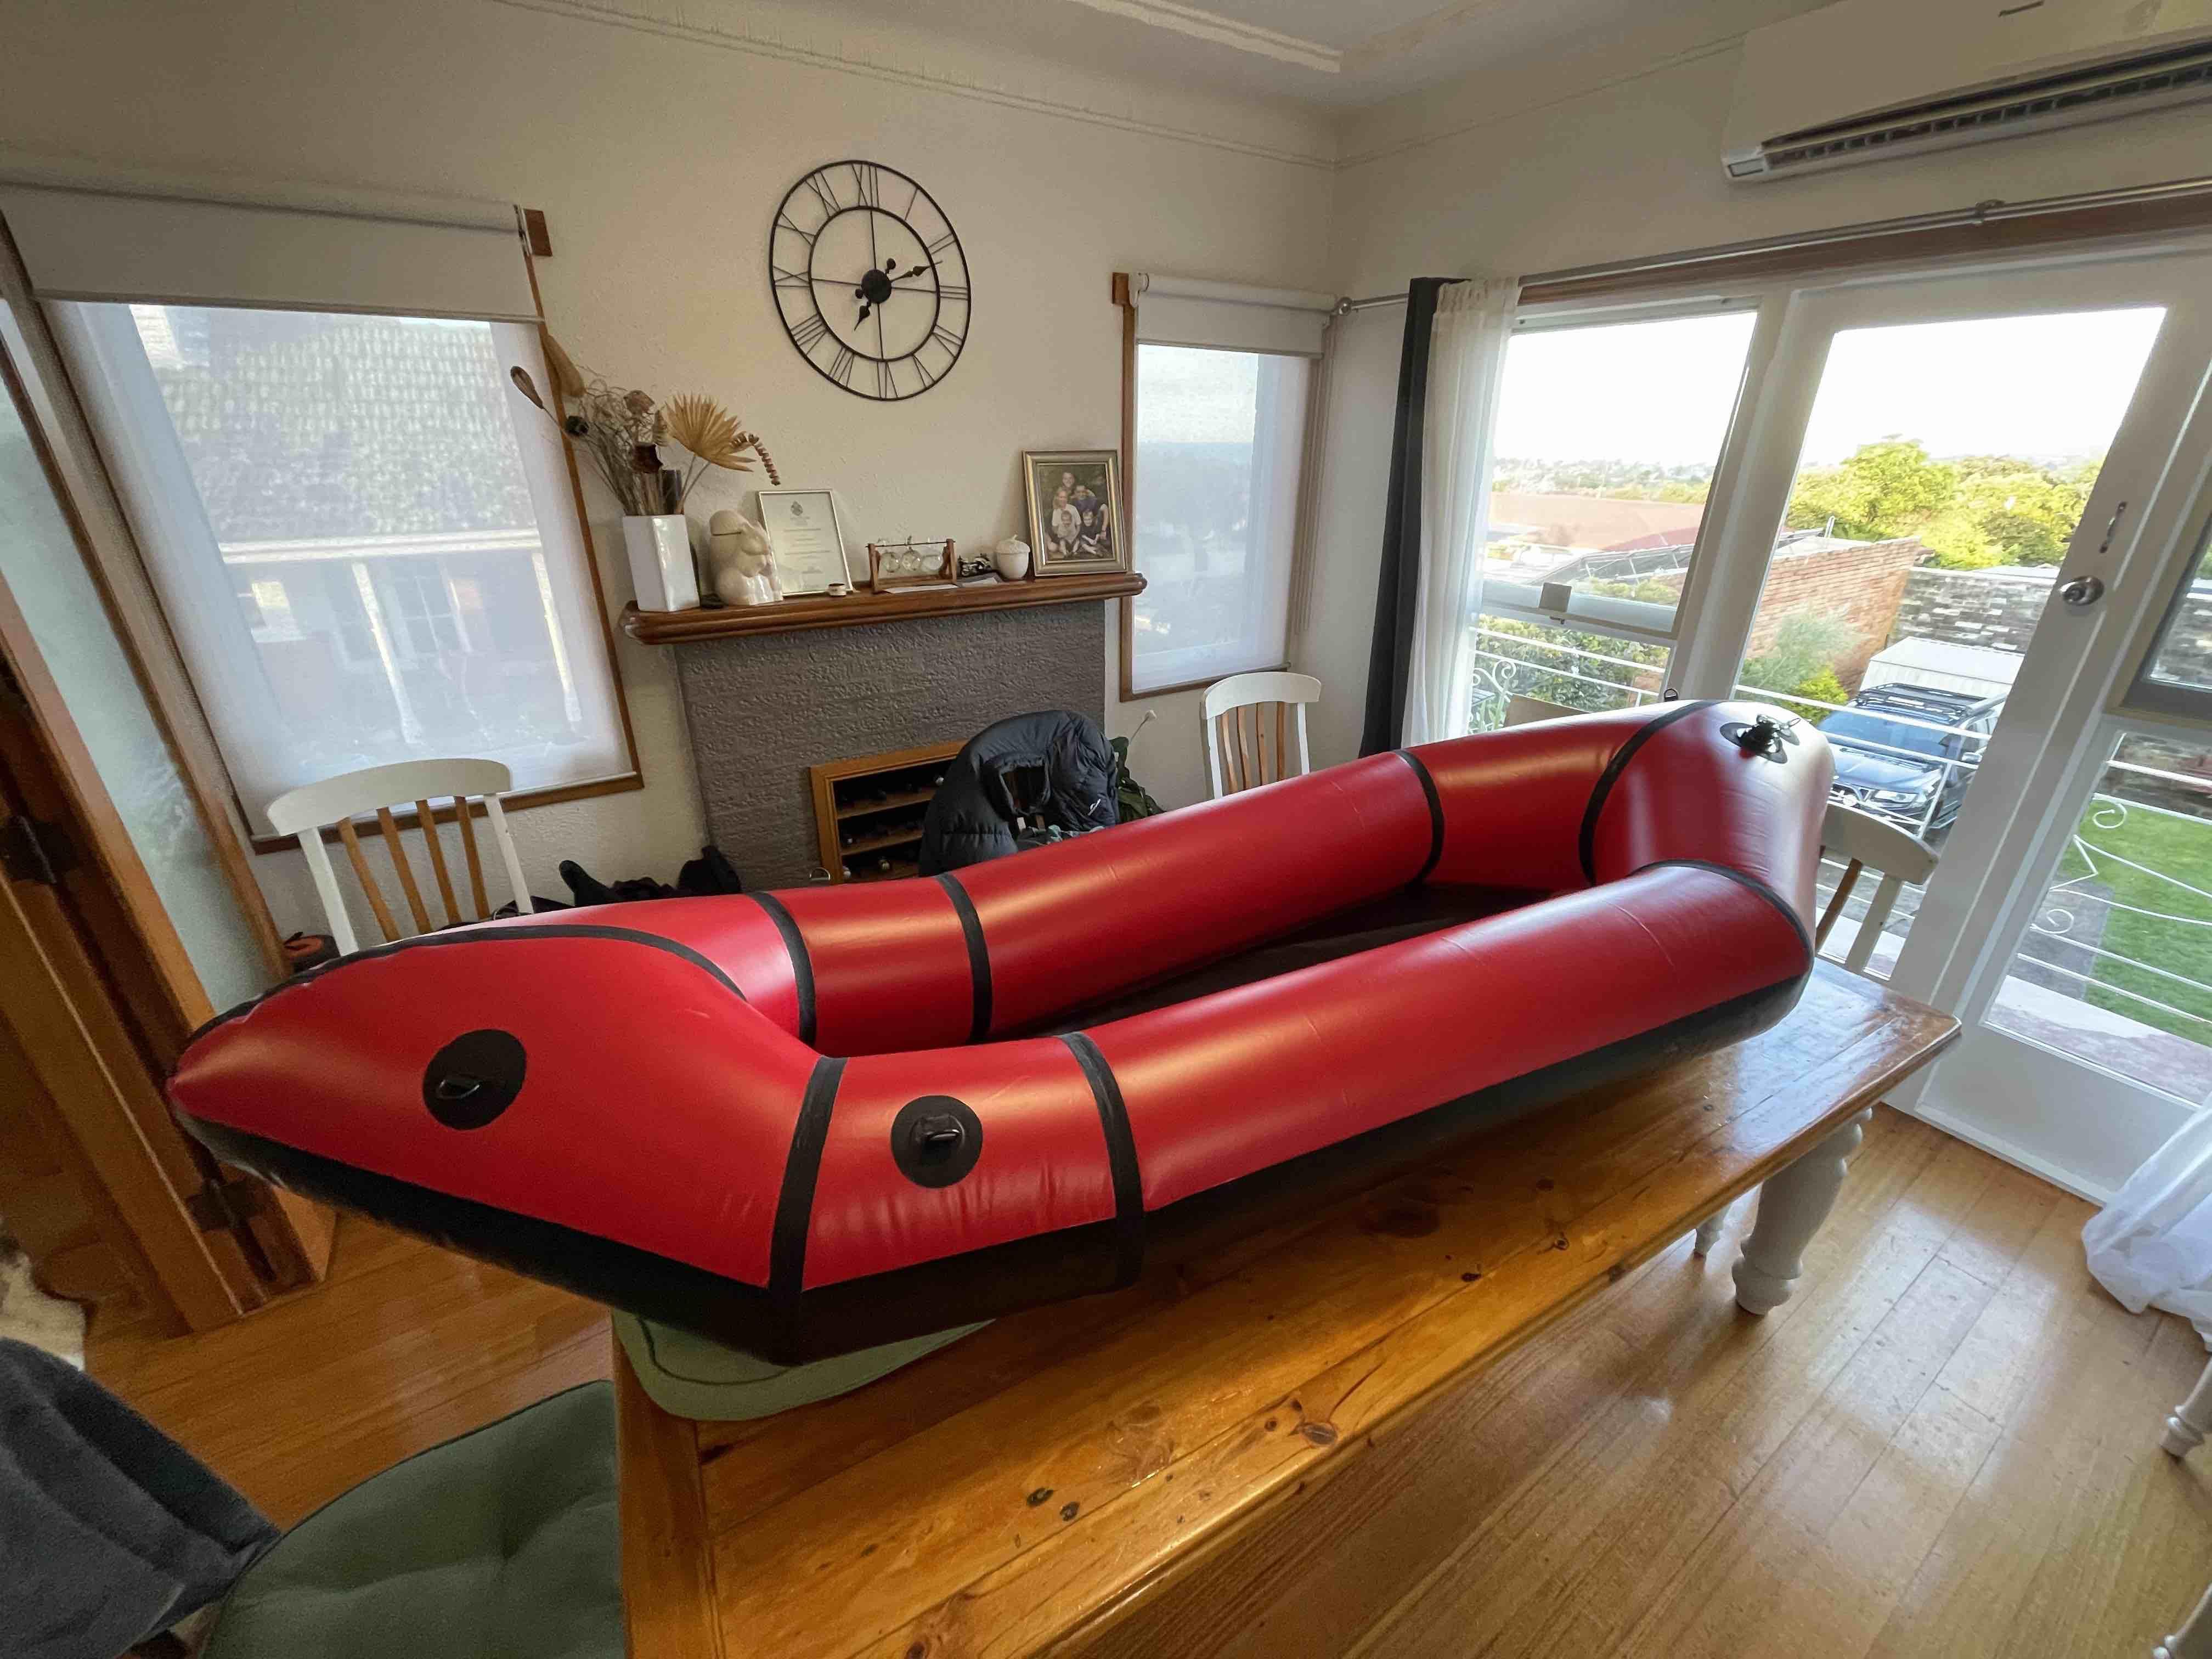
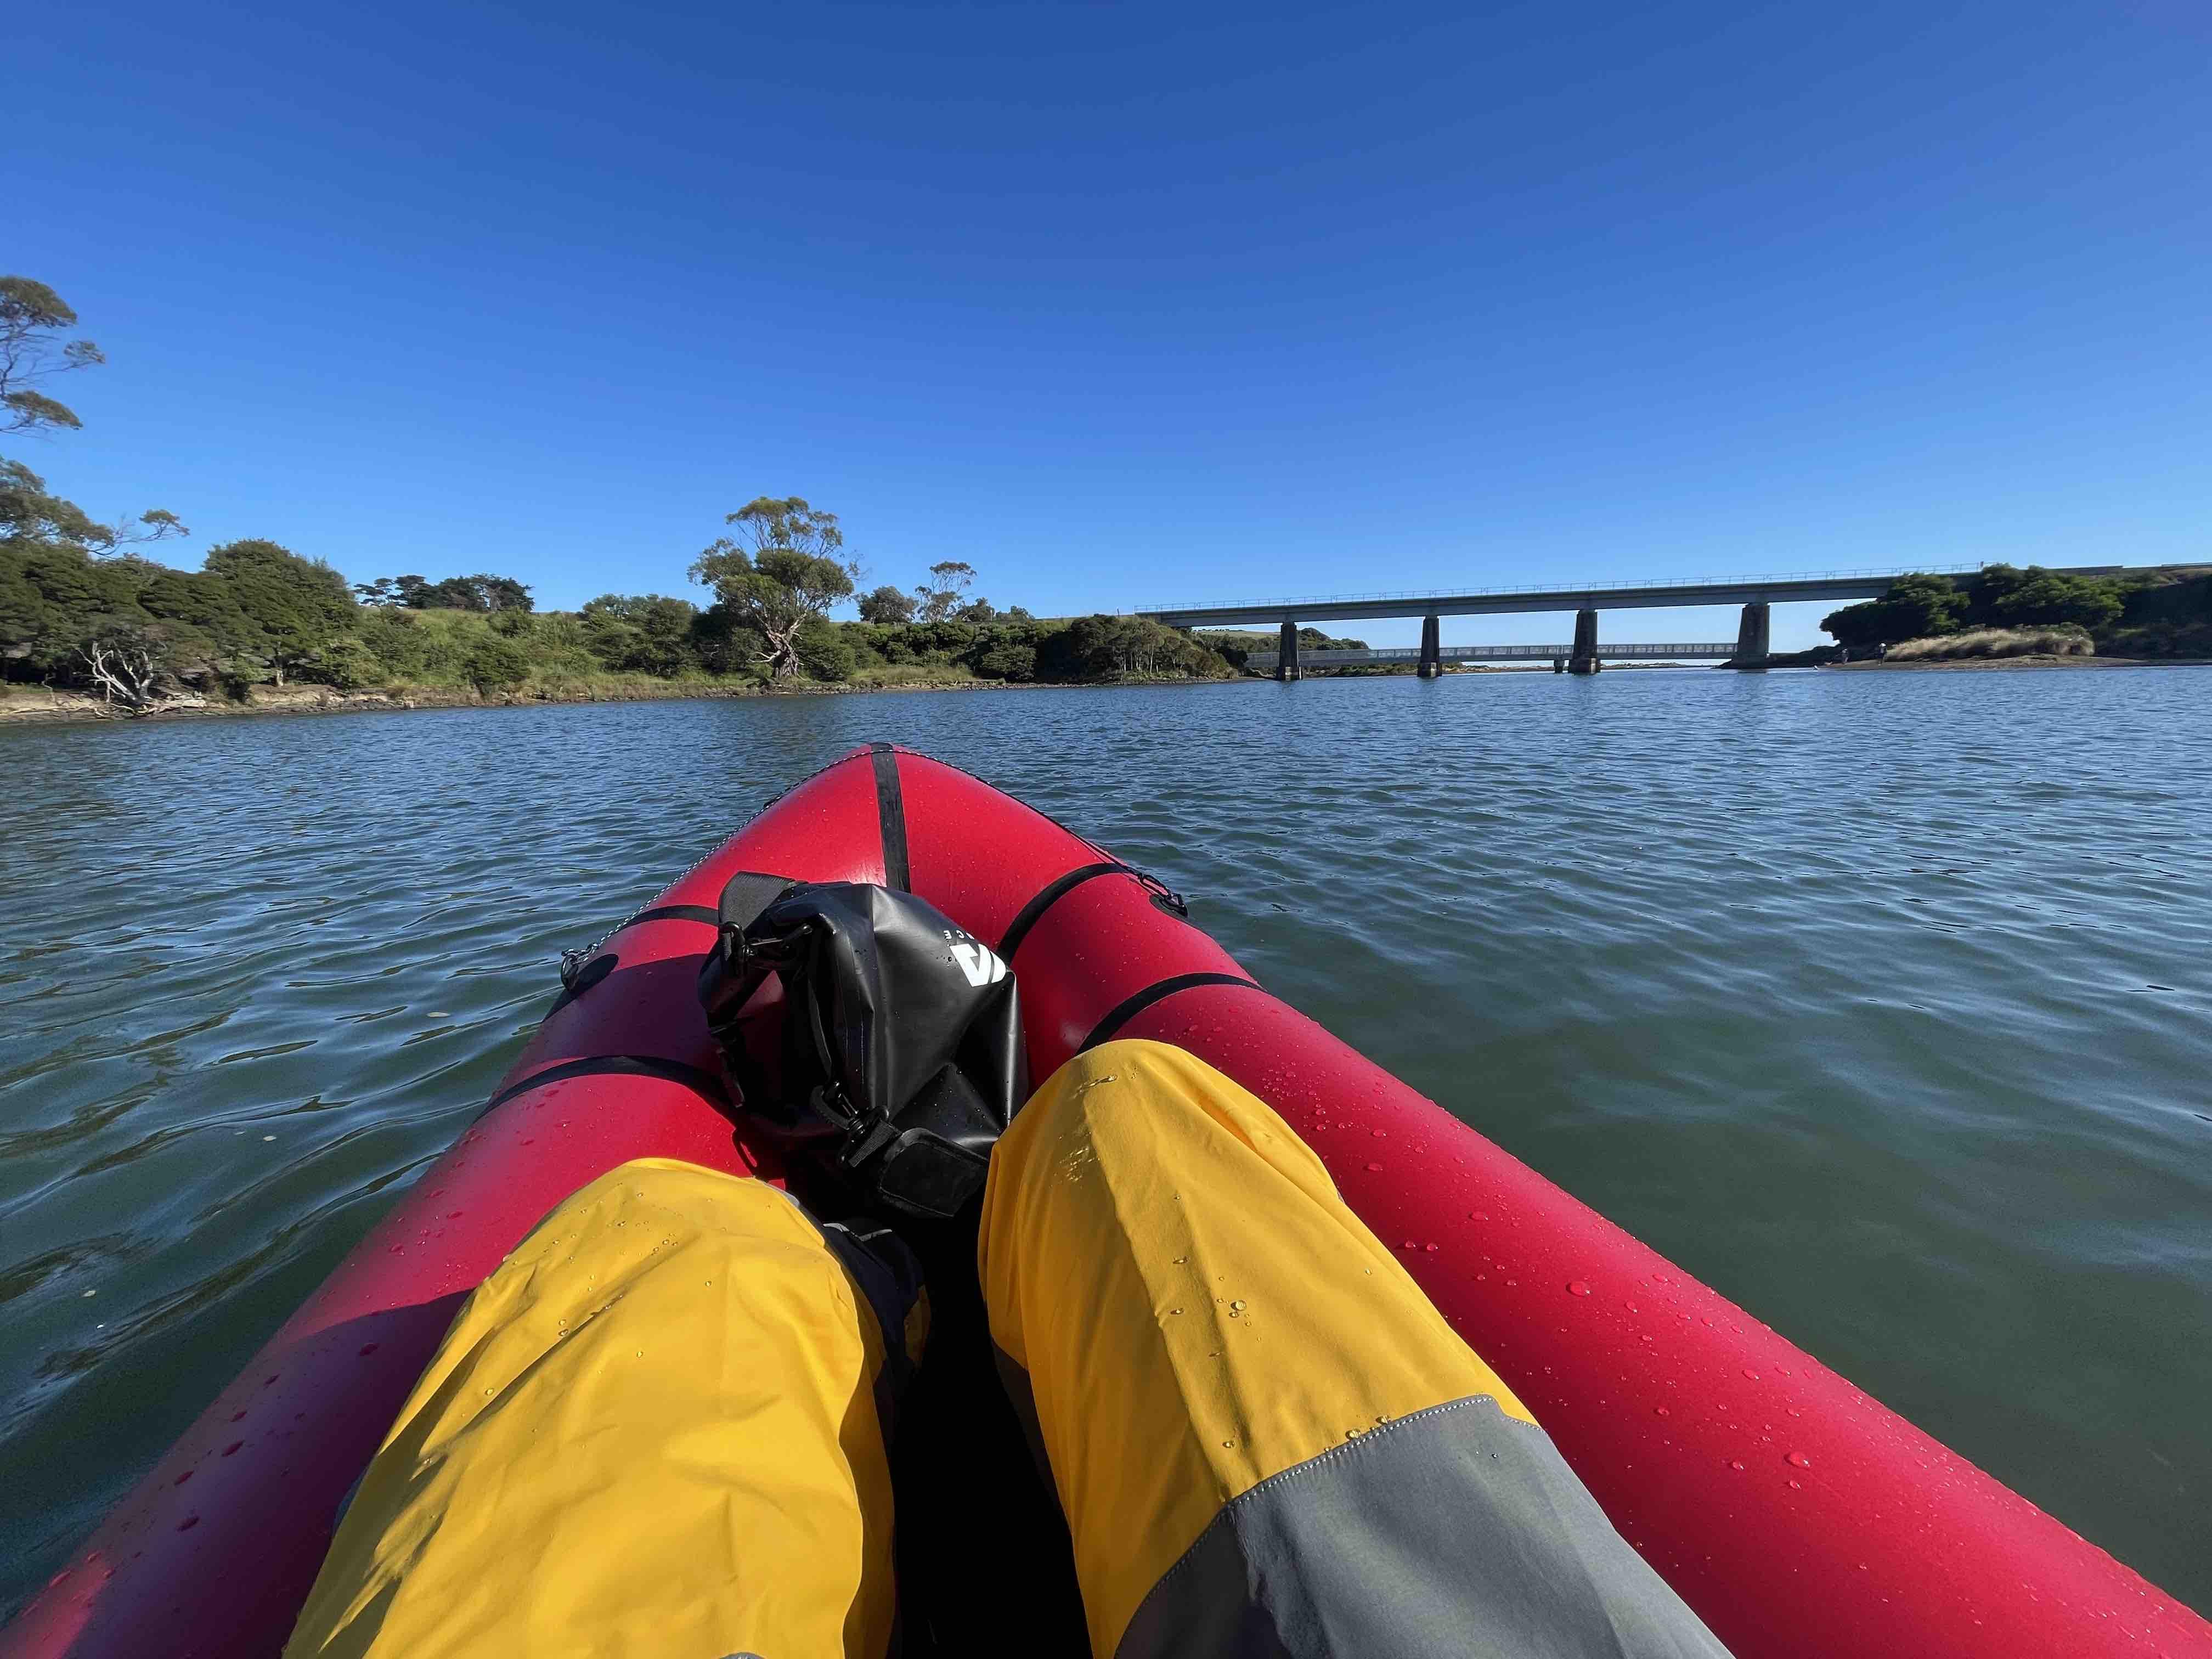
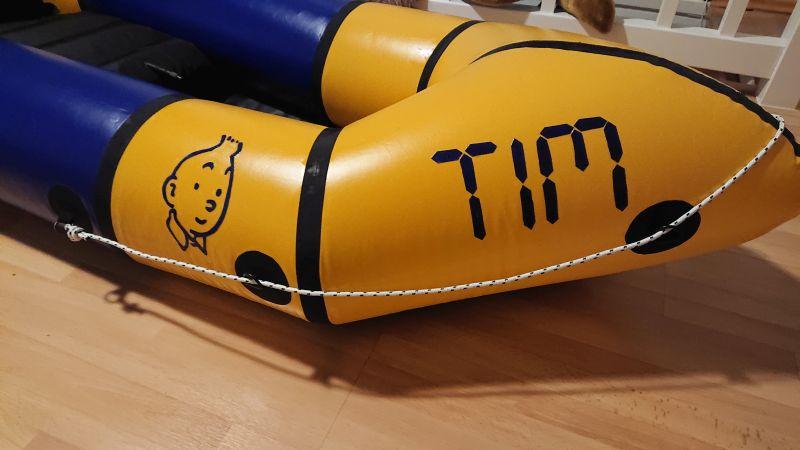
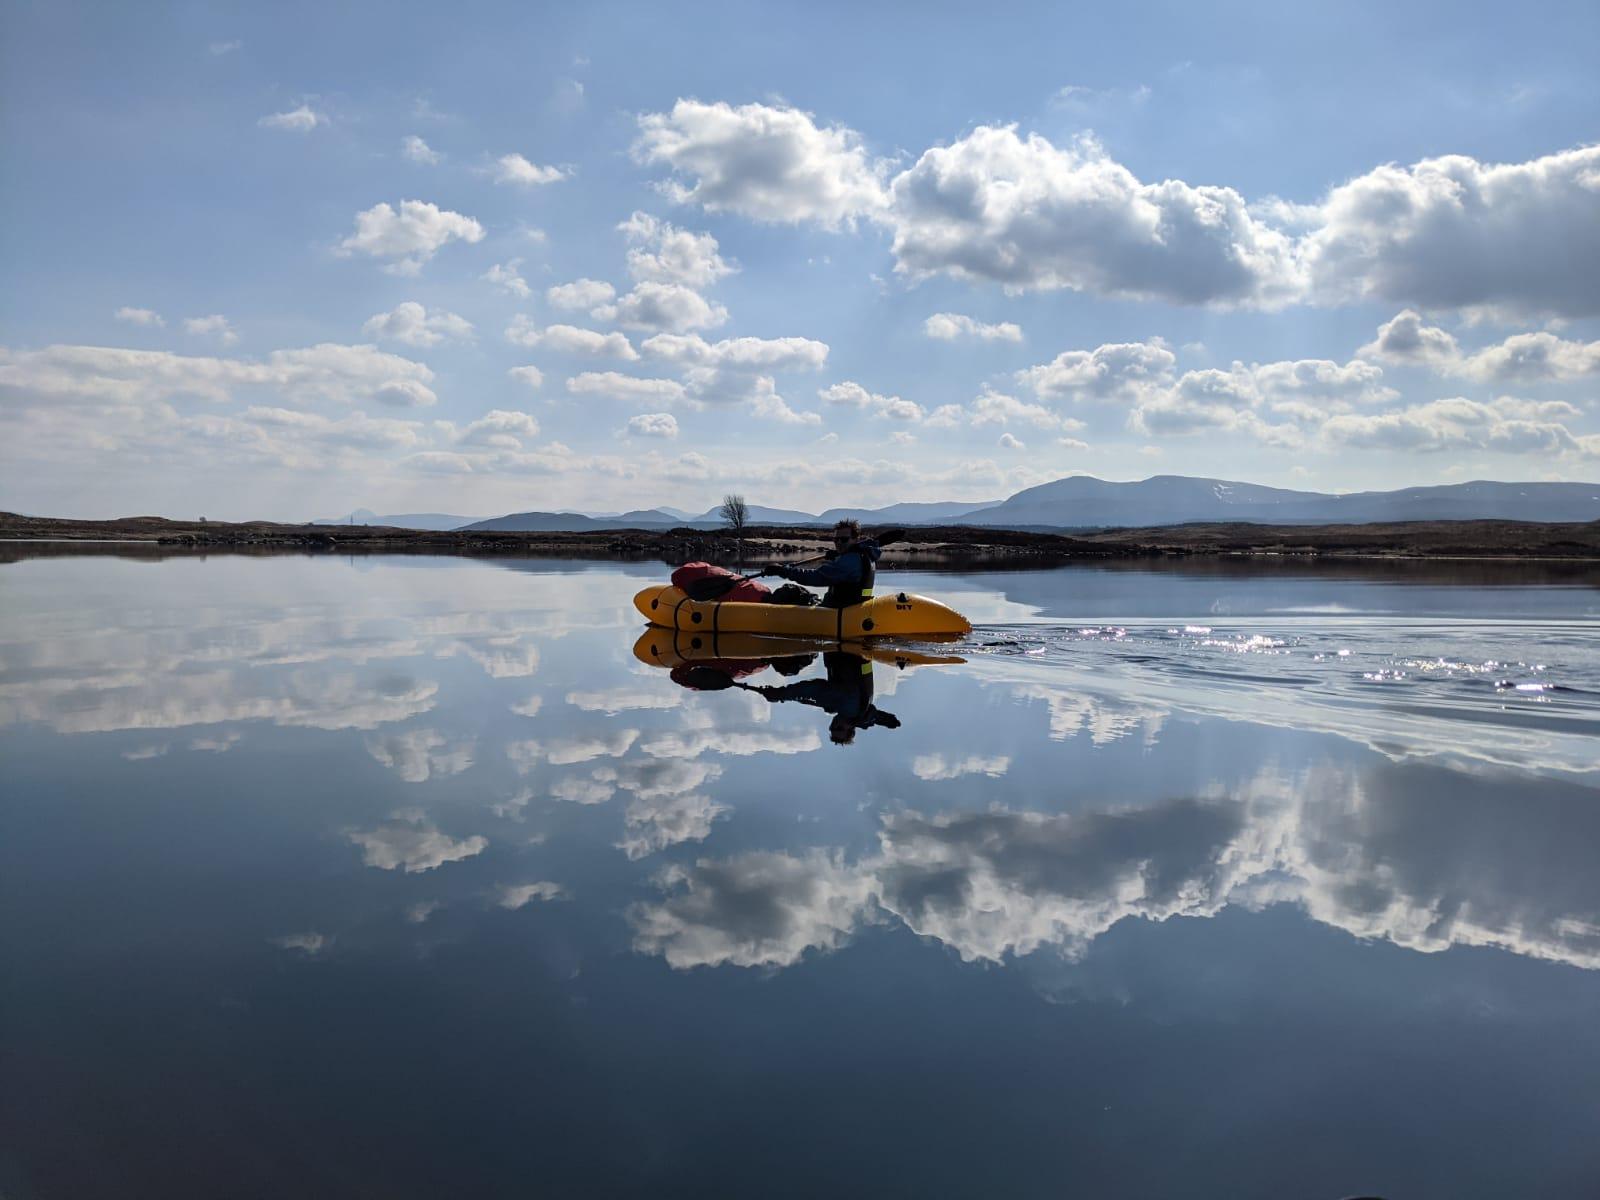
June 4, 2026 at 8:22 pm #21888joesParticipant
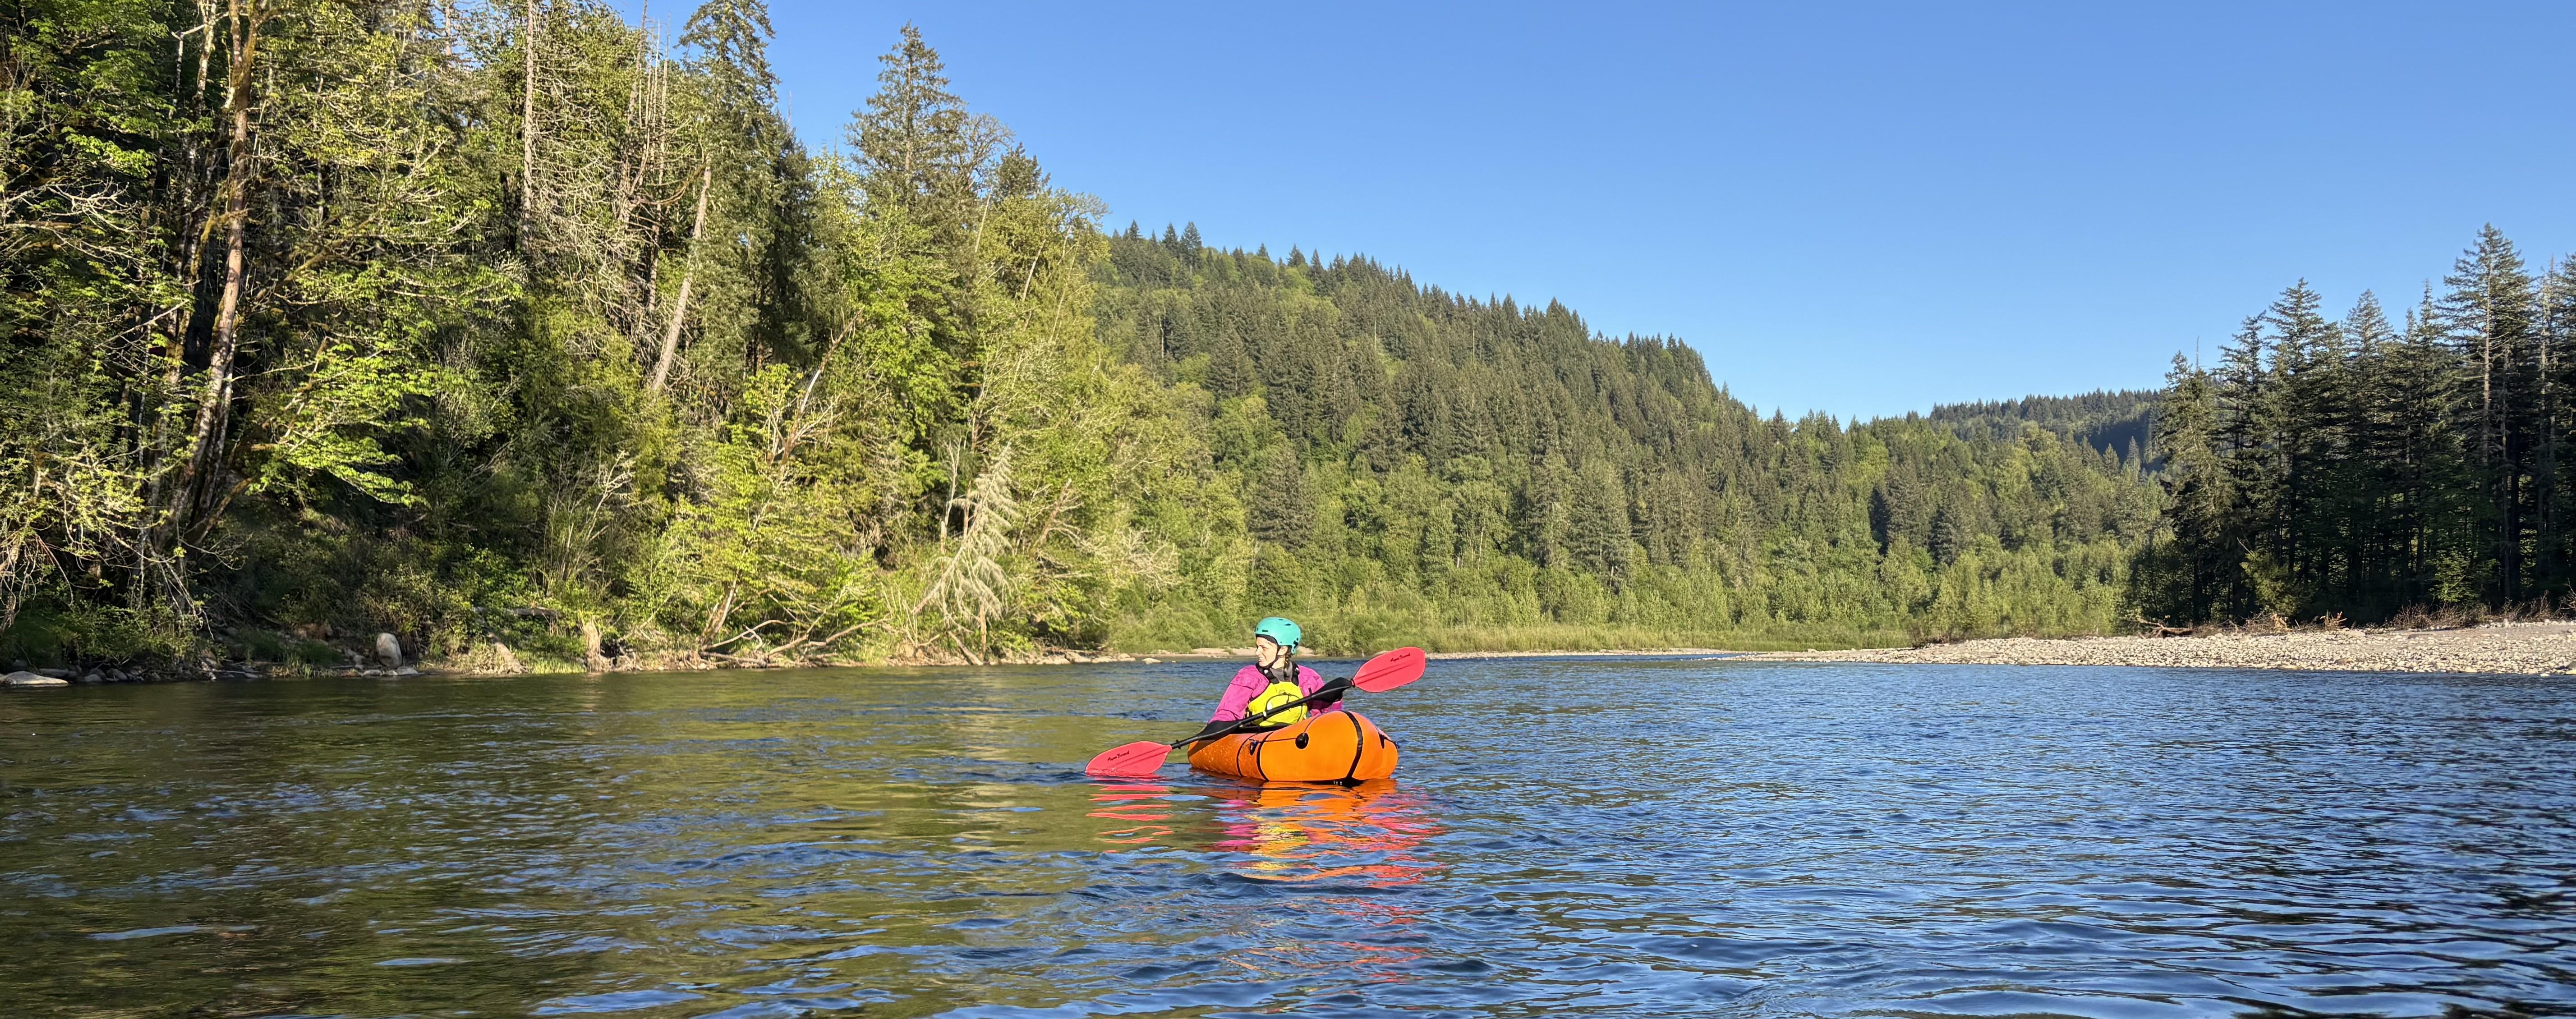
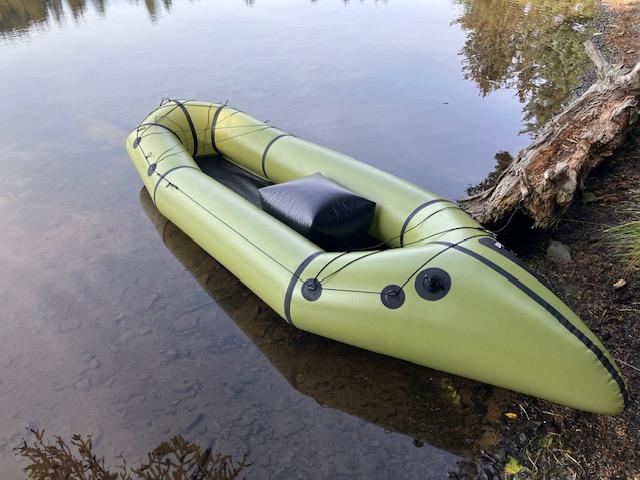
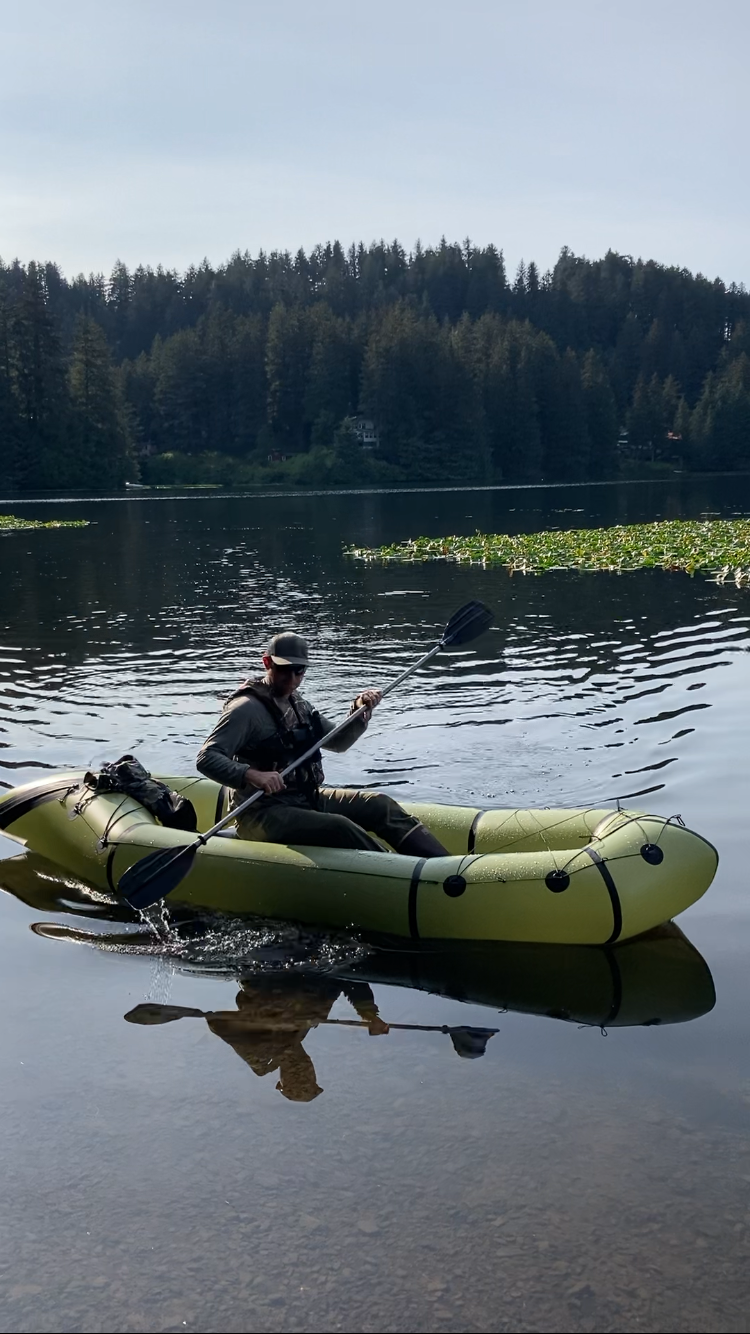
Here’s a less than informational photo of the Skeena I made. This is a calm section of Sandy river in Oregon. Very stable boat, even in class III. My partner has been using it and it’s been the perfect boat to learn on – time to upgrade however..
Any timeline on when/if a multi-coloured Chilko will show up? Curious what’s happening here before I pull the trigger, new boat looks fantastic.
-
June 5, 2026 at 8:43 am #21889Matt (Admin)Keymaster
Awesome, thanks for posting! I can probably do a multi for you next week – send me an email to discuss. Cheers!
-
-
-
-
August 12, 2025 at 11:10 am #20824LeeParticipant
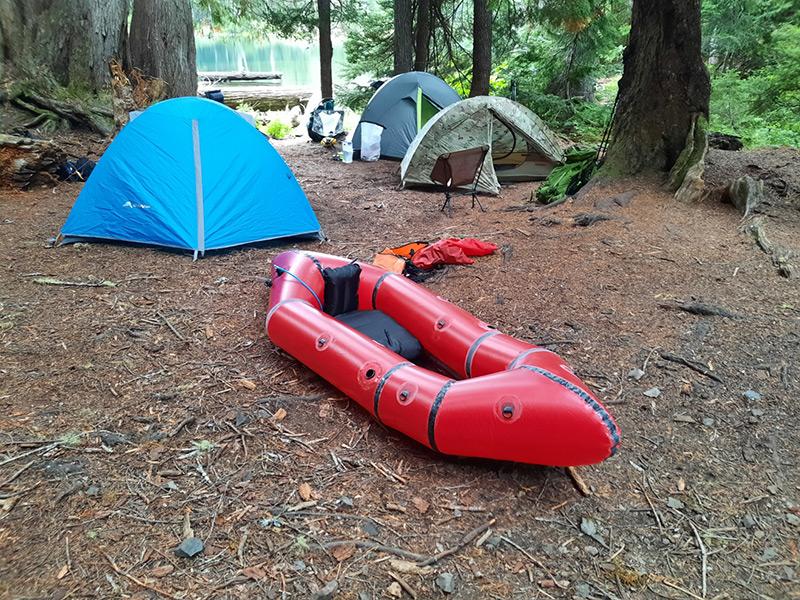
Finished the lightweight packraft. First trip was across echo lake, then a short hike to ralston lake in desolation wilderness. This one took less time but I made more mistake and I think the thinner fabric is less forgiving with welding mistakes. Took a while to get all the leaks patched up. It did great though and it’s going to come with me on a lot of trips.
-
August 12, 2025 at 1:16 pm #20826Matt (Admin)Keymaster
Awesome! What a great location – and thanks for the feedback about the kits!
-
-
July 10, 2025 at 2:47 pm #20699LeeParticipant
Finished building the Atlin a couple weeks ago and have already taken it on several trips. So far just fishing trips, low stress stuff as I get familiar with things. I plan on bikepacking and hopefully taking it on some class 1/2 rivers. I’ve been scouting some places and trying to find something beginner friendly in my area. Just received the ultralight packraft today and started on that one😅. I’ll probably end up with a skeena as well as my skill level increases and I want to push it more.
-
July 14, 2025 at 9:16 am #20733Matt (Admin)Keymaster
Great photos, Lee, and excellent work! Thanks for sharing!
-
-
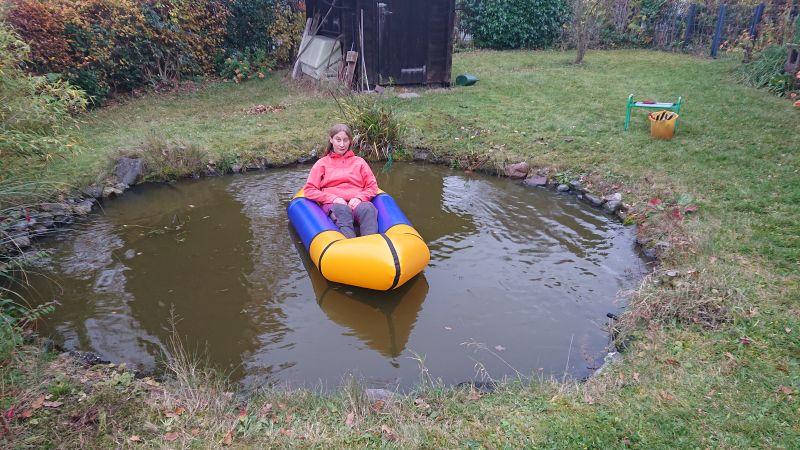
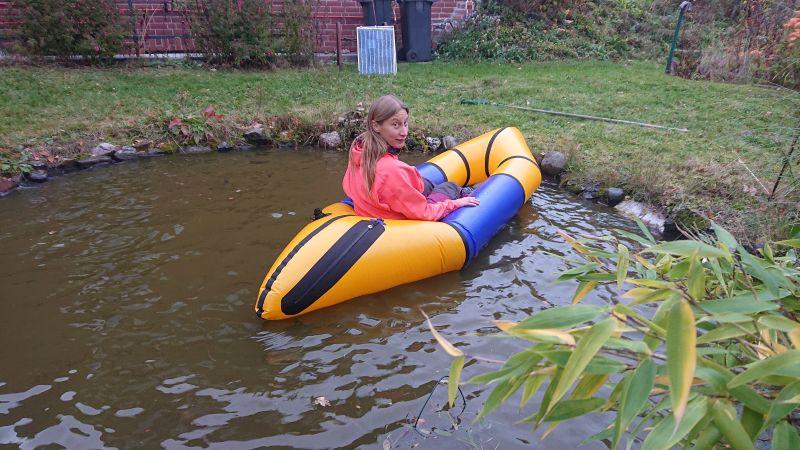
May 16, 2025 at 1:50 pm #20546oldcanuckParticipant
First splash with one of the new DIYPackrafts I made this winter!
I couldn’t be happier. It handles just like an old creek boat kayak I had years ago but lighter, is much more controllable than my canoe and is going to see a TON of time on the water throughout Canada. Thanks again for making these kits Matt!
-
May 16, 2025 at 4:15 pm #20547Matt (Admin)Keymaster
Fantastic! I’m glad to hear it! Enjoy the summer 🙂
-
-
May 9, 2025 at 9:58 am #20525gbarkerParticipant
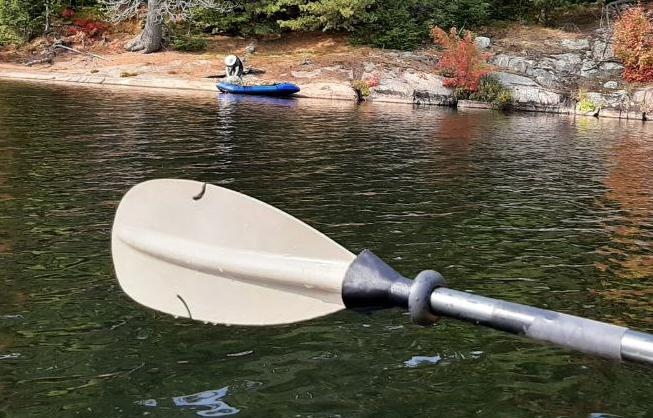
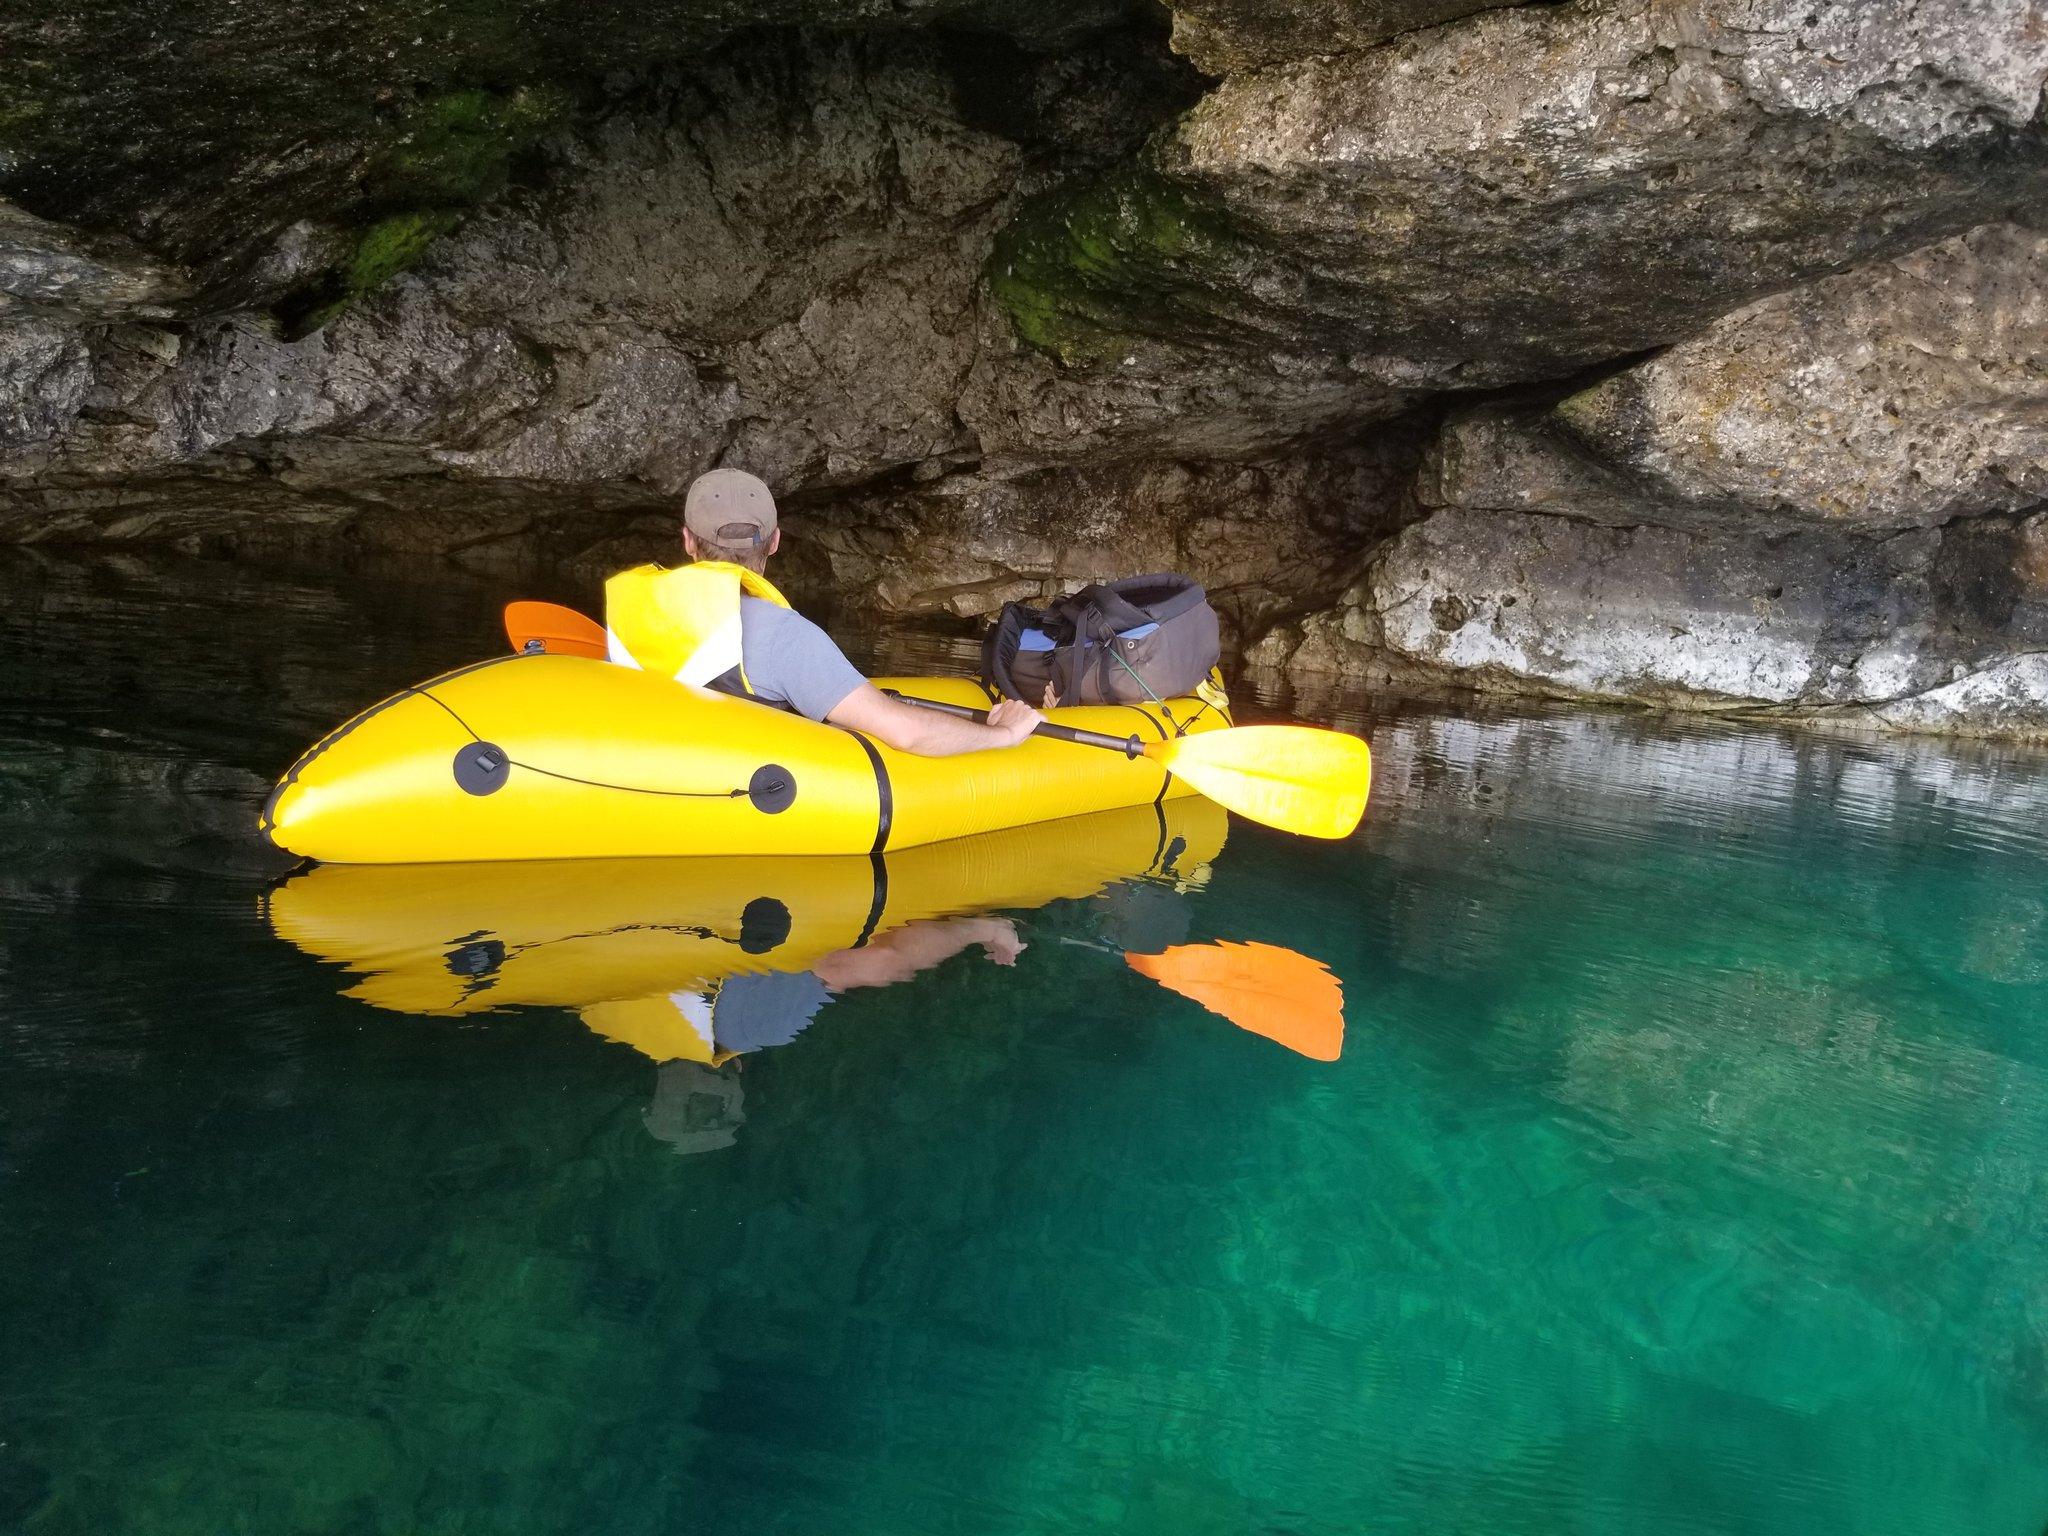
Loving my Skeena here in the UK! Here is a little taste of my first sea paddle in her.
-
This reply was modified 1 year, 1 month ago by gbarker.
-
May 9, 2025 at 10:36 am #20527Matt (Admin)Keymaster
Very cool! I love the underwater shots. Congratulations!
-
This reply was modified 1 year, 1 month ago by
-
May 5, 2025 at 3:47 pm #20513burrowsaParticipant
First test paddle of my Atlin:
I need to go back and made some attachment points but so far I’m loving it. The kit instruction videos were really easy to follow and final result handles really well.
-
May 5, 2025 at 4:32 pm #20514Matt (Admin)Keymaster
Awesome! Thanks for posting! And once you get some weight on the bow, you’ll find that it doesn’t turn so much when you paddle. Congratulations!
-
-
April 30, 2025 at 9:49 pm #20497lwschaefParticipant
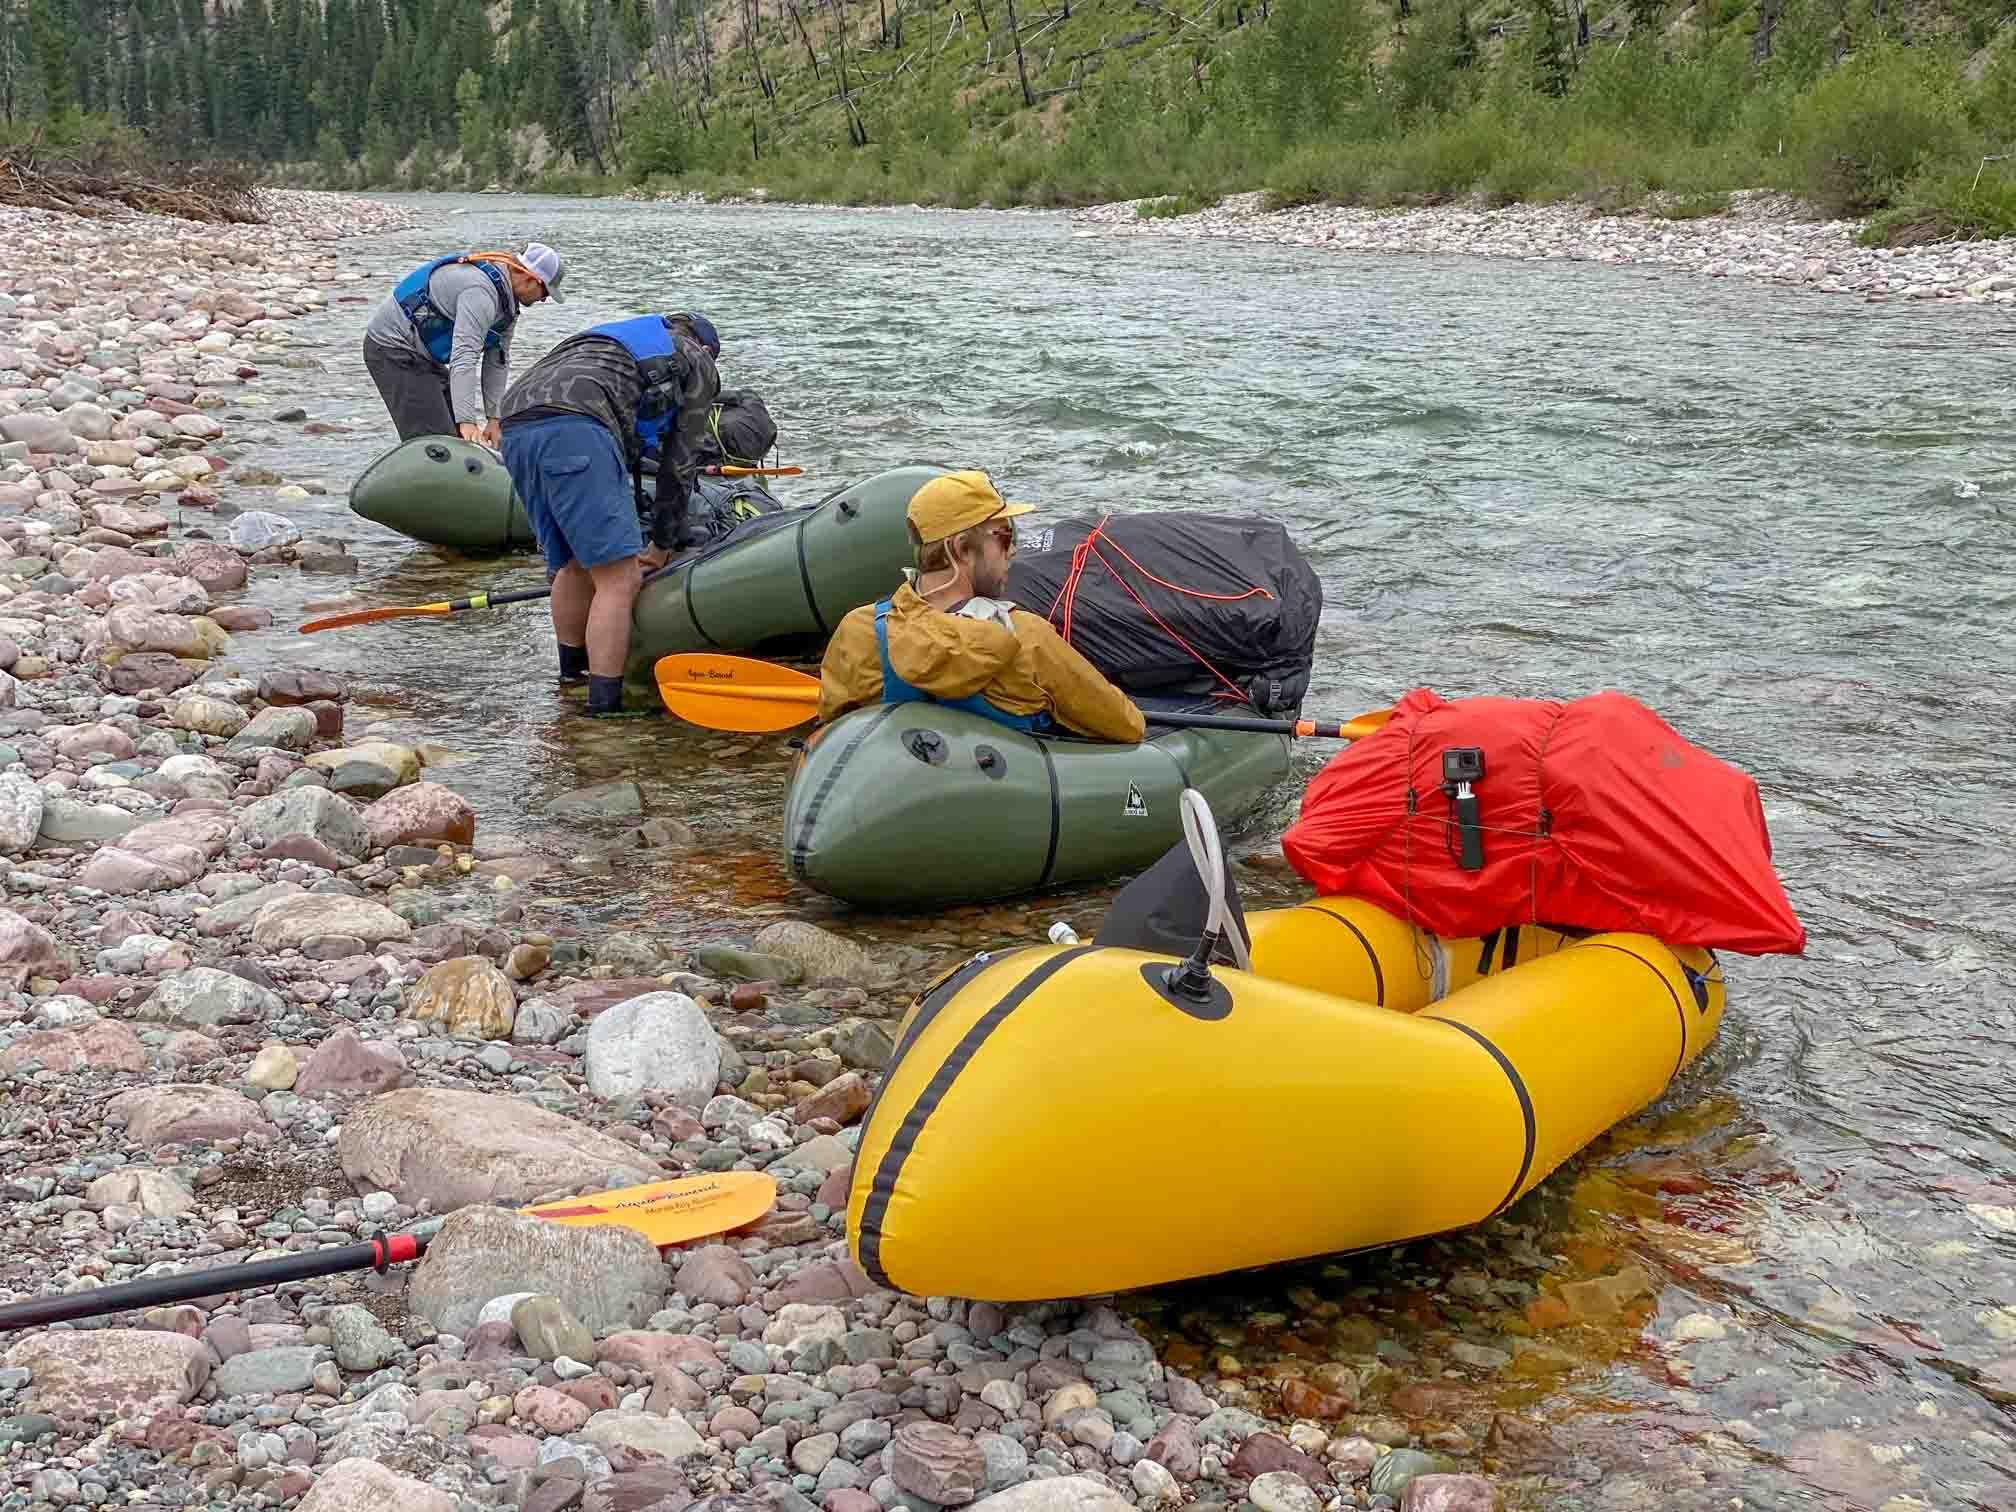
It has now been a couple of weeks of dialing in my Skeena! I’ve used Matt’s awesome all-around platform to create a more whitewater-savvy self-bailing boat with a backband, full-length inflatable floor for stability and edging, and a foot pillow. I’m super happy with how the boat has performed thus far in my local whitewater park and a few river trips in up to class III water, and I’m excited to push it further as I progress my paddling ability. Currently building one for my girlfriend, and the welding definitely goes a lot smoother the second time around. Maybe I’ll post a more detailed build report once I get the second raft done, but for now I’ll share a few photos.
-
May 2, 2025 at 4:10 pm #20505Matt (Admin)Keymaster
Great work! Excellent job on the self-bailing setup – I look forward to seeing more!
-
May 1, 2025 at 12:10 pm #20502chanchito17Participant
I want to see more pics of the self bailer bottom of your raft. The orange is amazing!
-
May 4, 2025 at 8:55 am #20509lwschaefParticipant
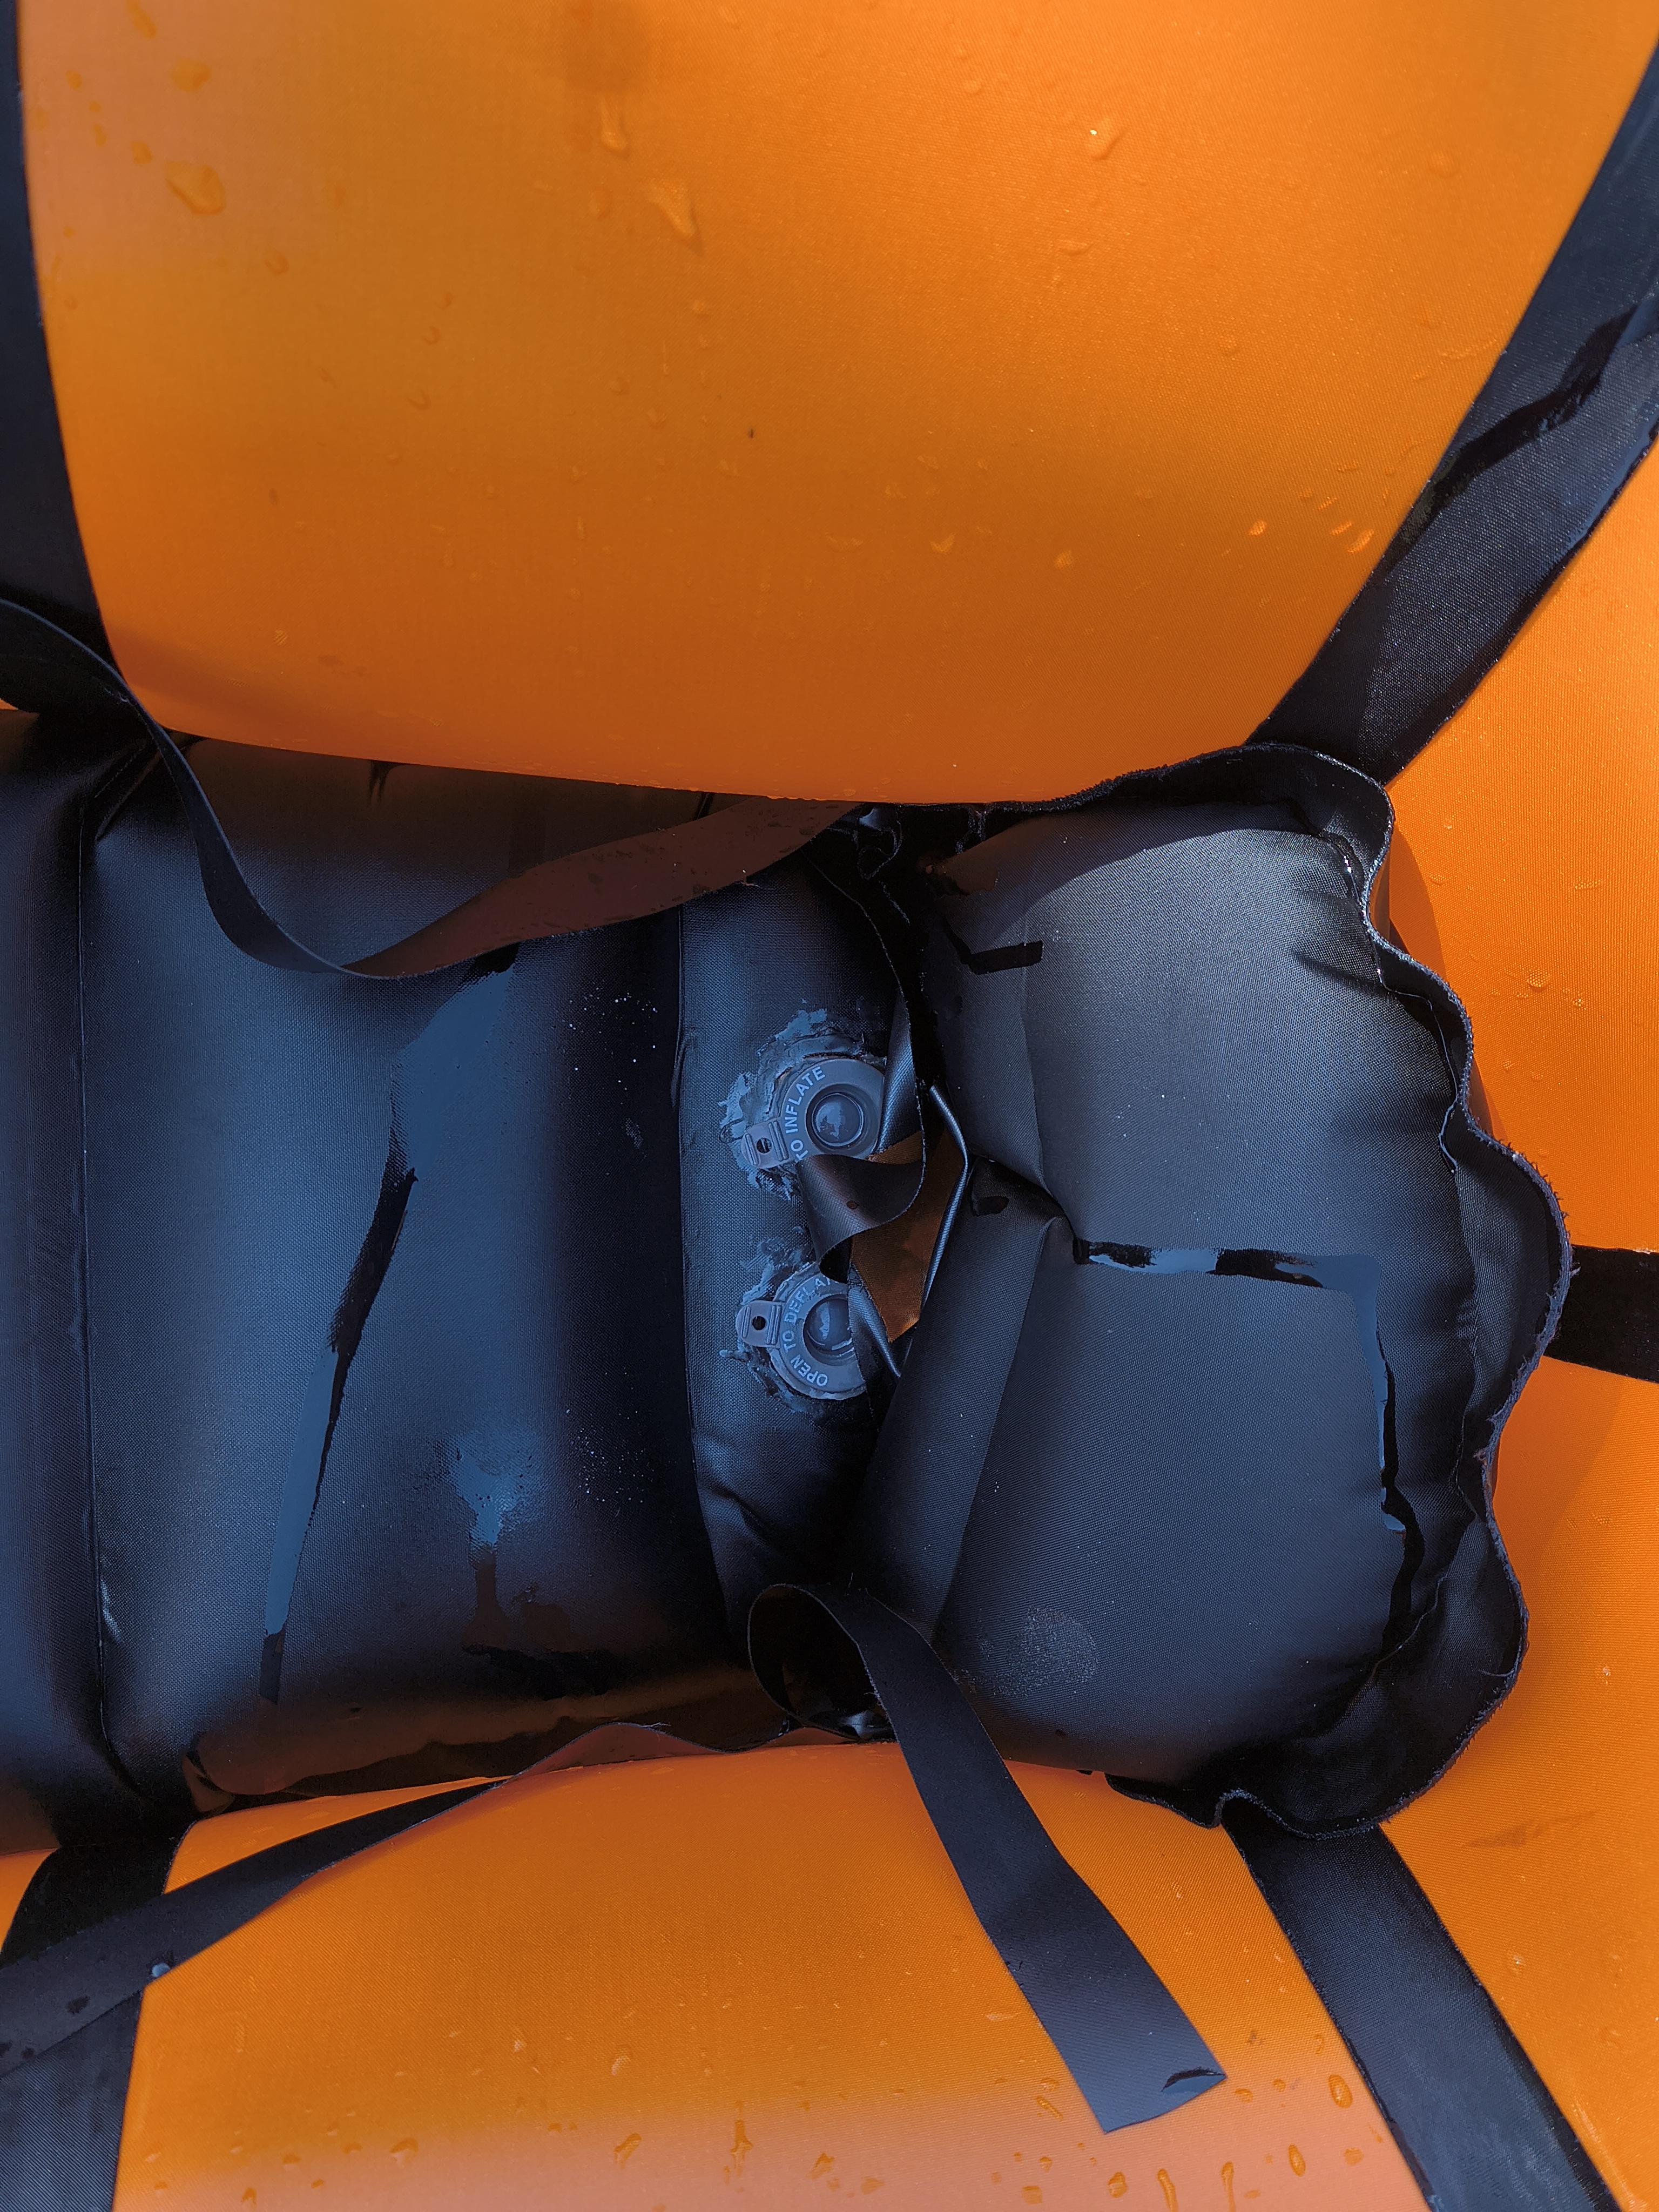
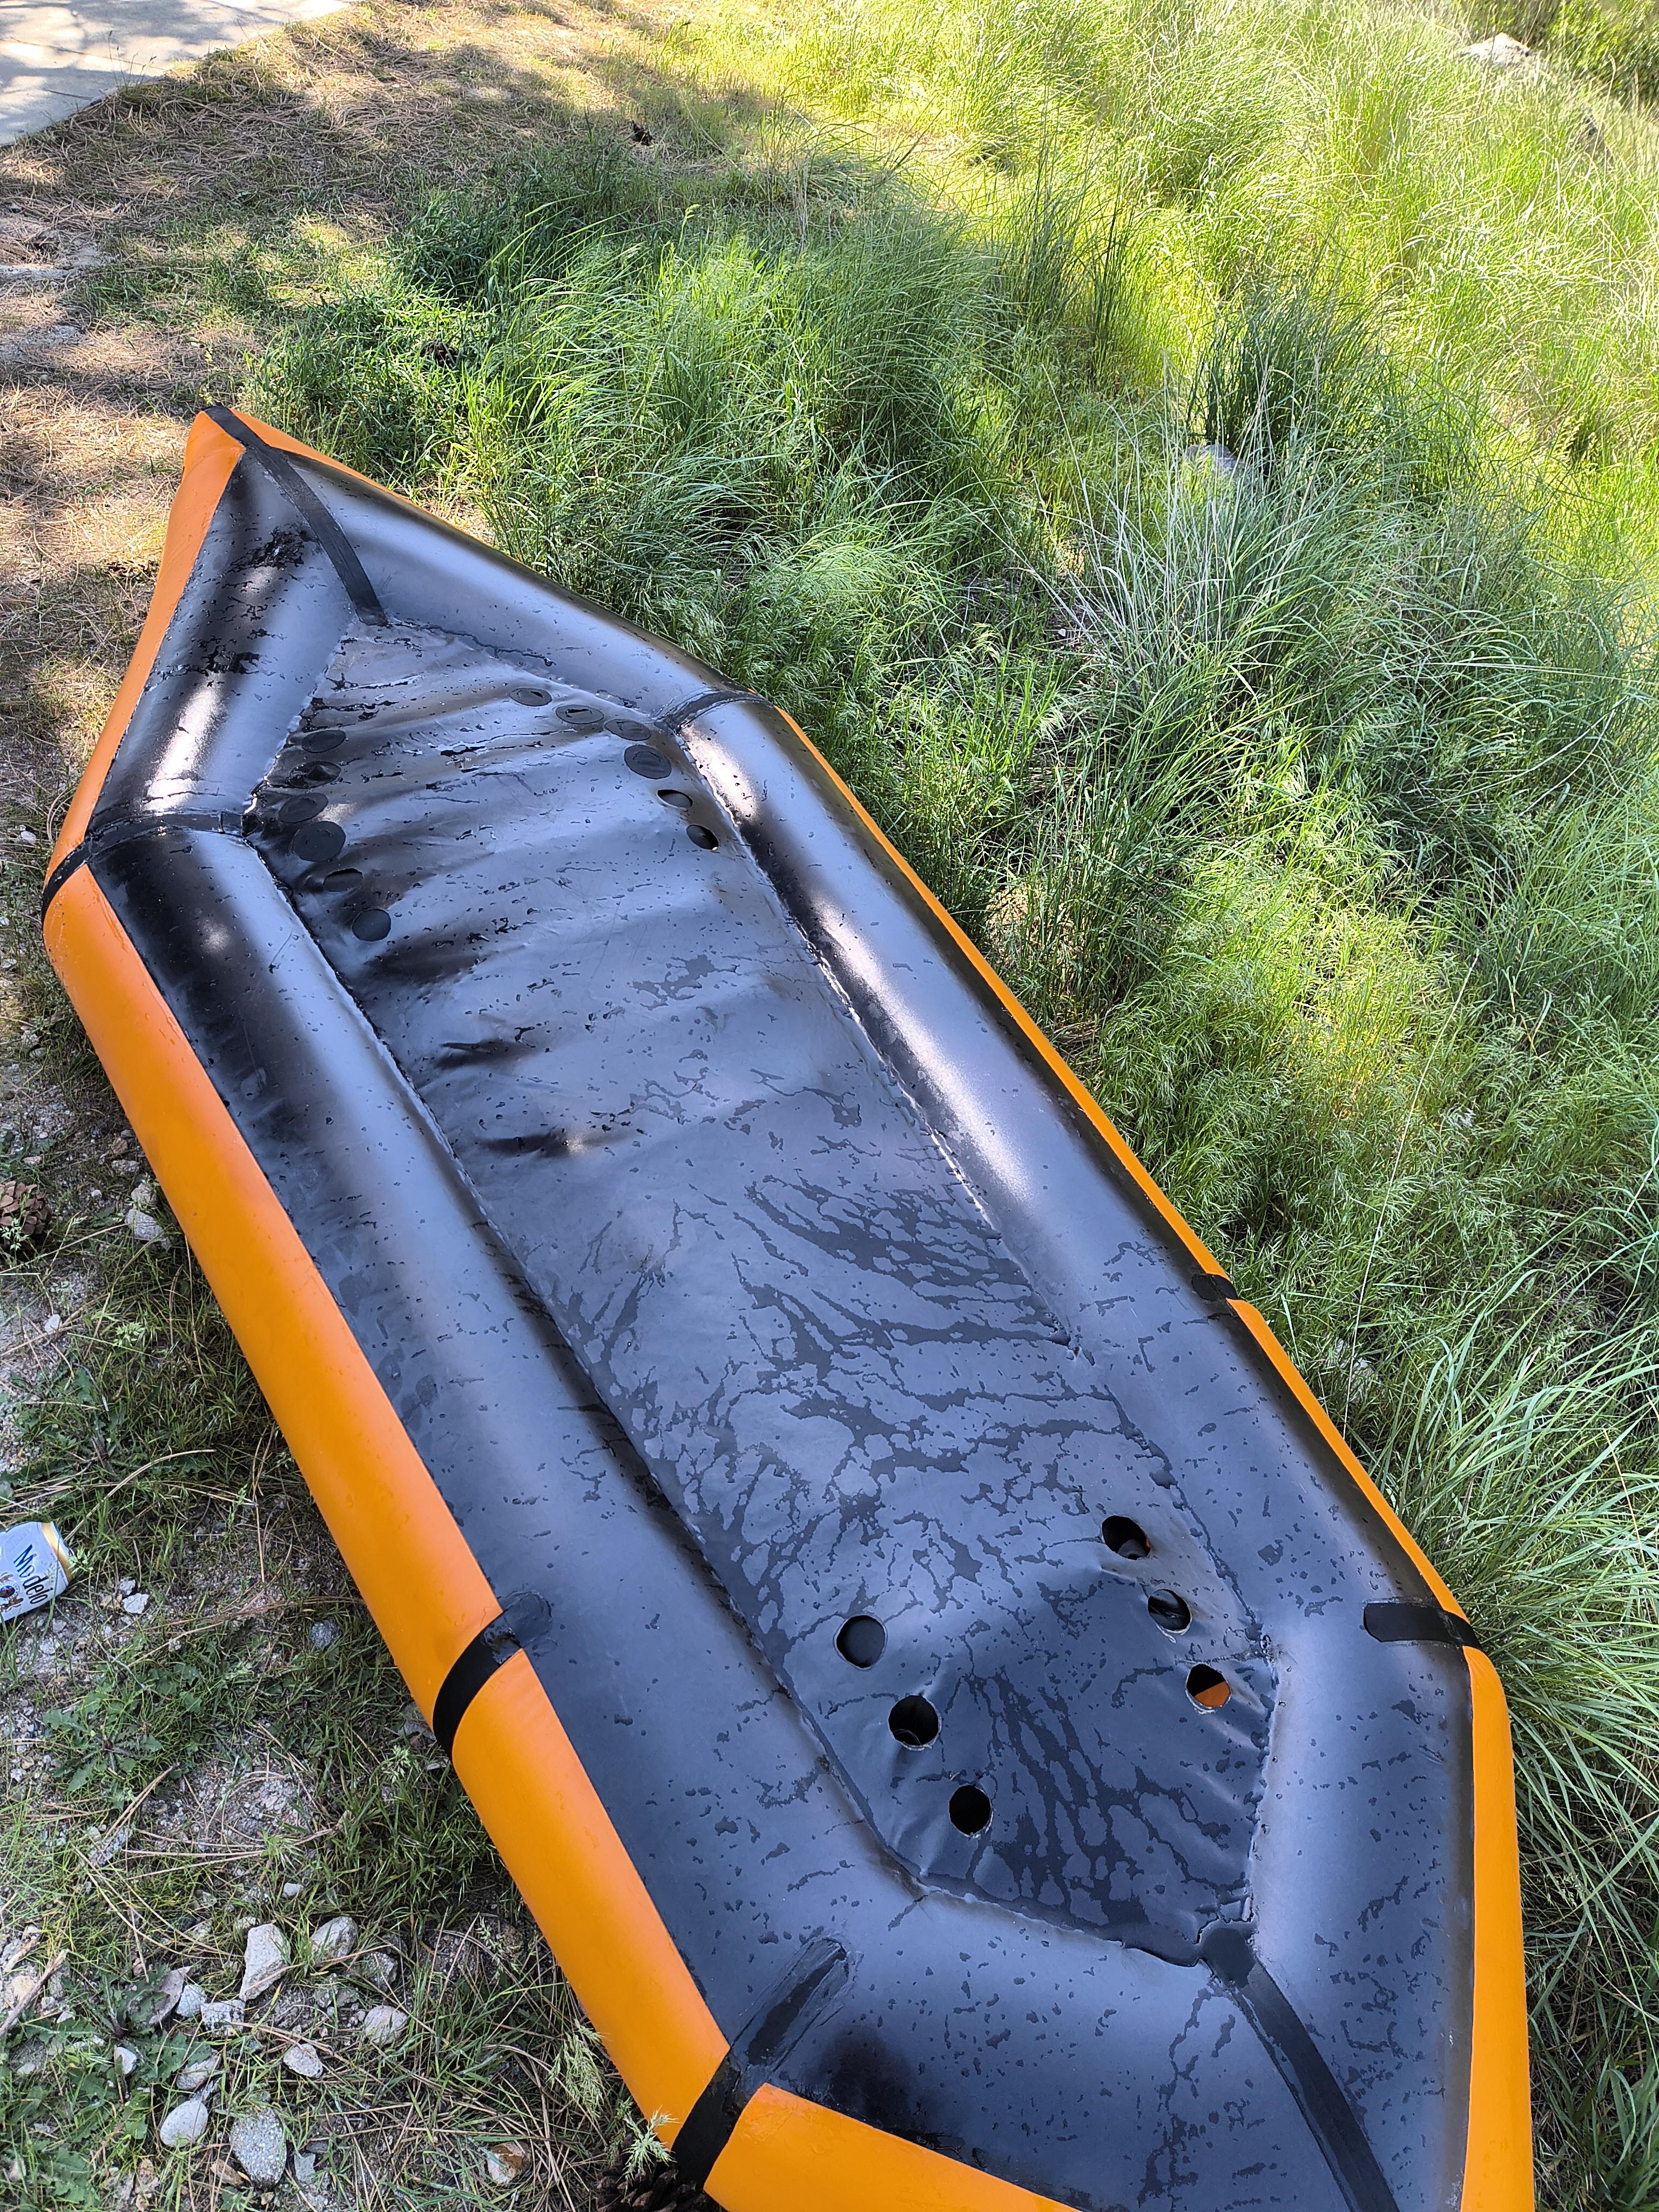
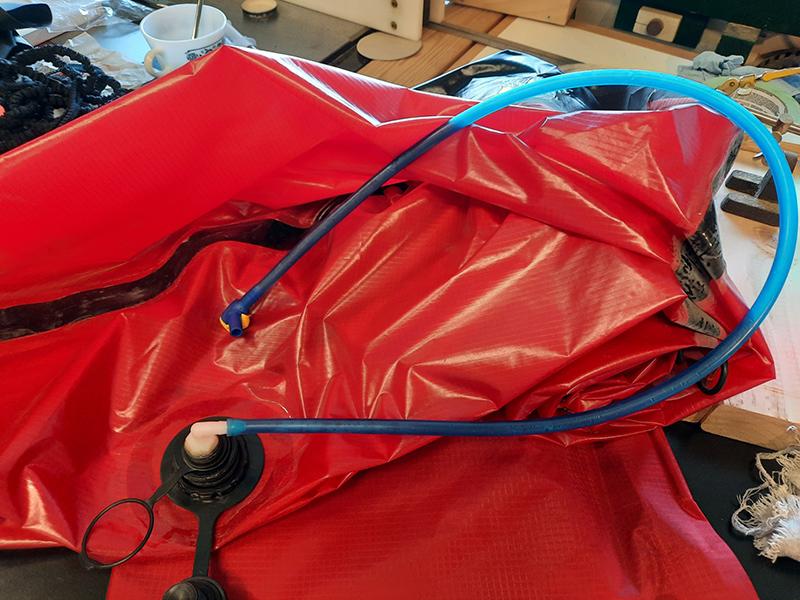
Here are a few more photos of the setup. 6 holes on each side of the stern, and 3 on each side towards the bow. As you can see, the first few holes in the back are reinforced with patches of extra seat/floor fabric, with flaps cut into them for drainage without letting in excess water. Since I am mostly paddling high-volume rivers right now and I’m not too concerned about snagging the bottom, I haven’t gotten around to doing this to the rest of the holes. When I do, I will probably also redo the existing reinforcements and flaps to make them look cleaner. For the floor, I basically just traced the seat fabric, and then extended the straight lines all the way to where the foot pillow (reshaped inflatable backband) sits. The baffles are 2in tall and spaced every 15cm (woohoo mixing units). The valves are from an old sleeping pad. The inflatable floor sits under the tubes and pushes down and tightens up the little bit of slack in the floor fabric to create a bit of an edge on either side for secondary stability in addition to displacing more water and allowing a self-bailing setup to be less sluggish. Let me know if y’all have any more questions, or if you’d like more detailed how-tos on how I made the floor, foot pillow, backband, or self-bailing holes. Thanks!
-
-
-
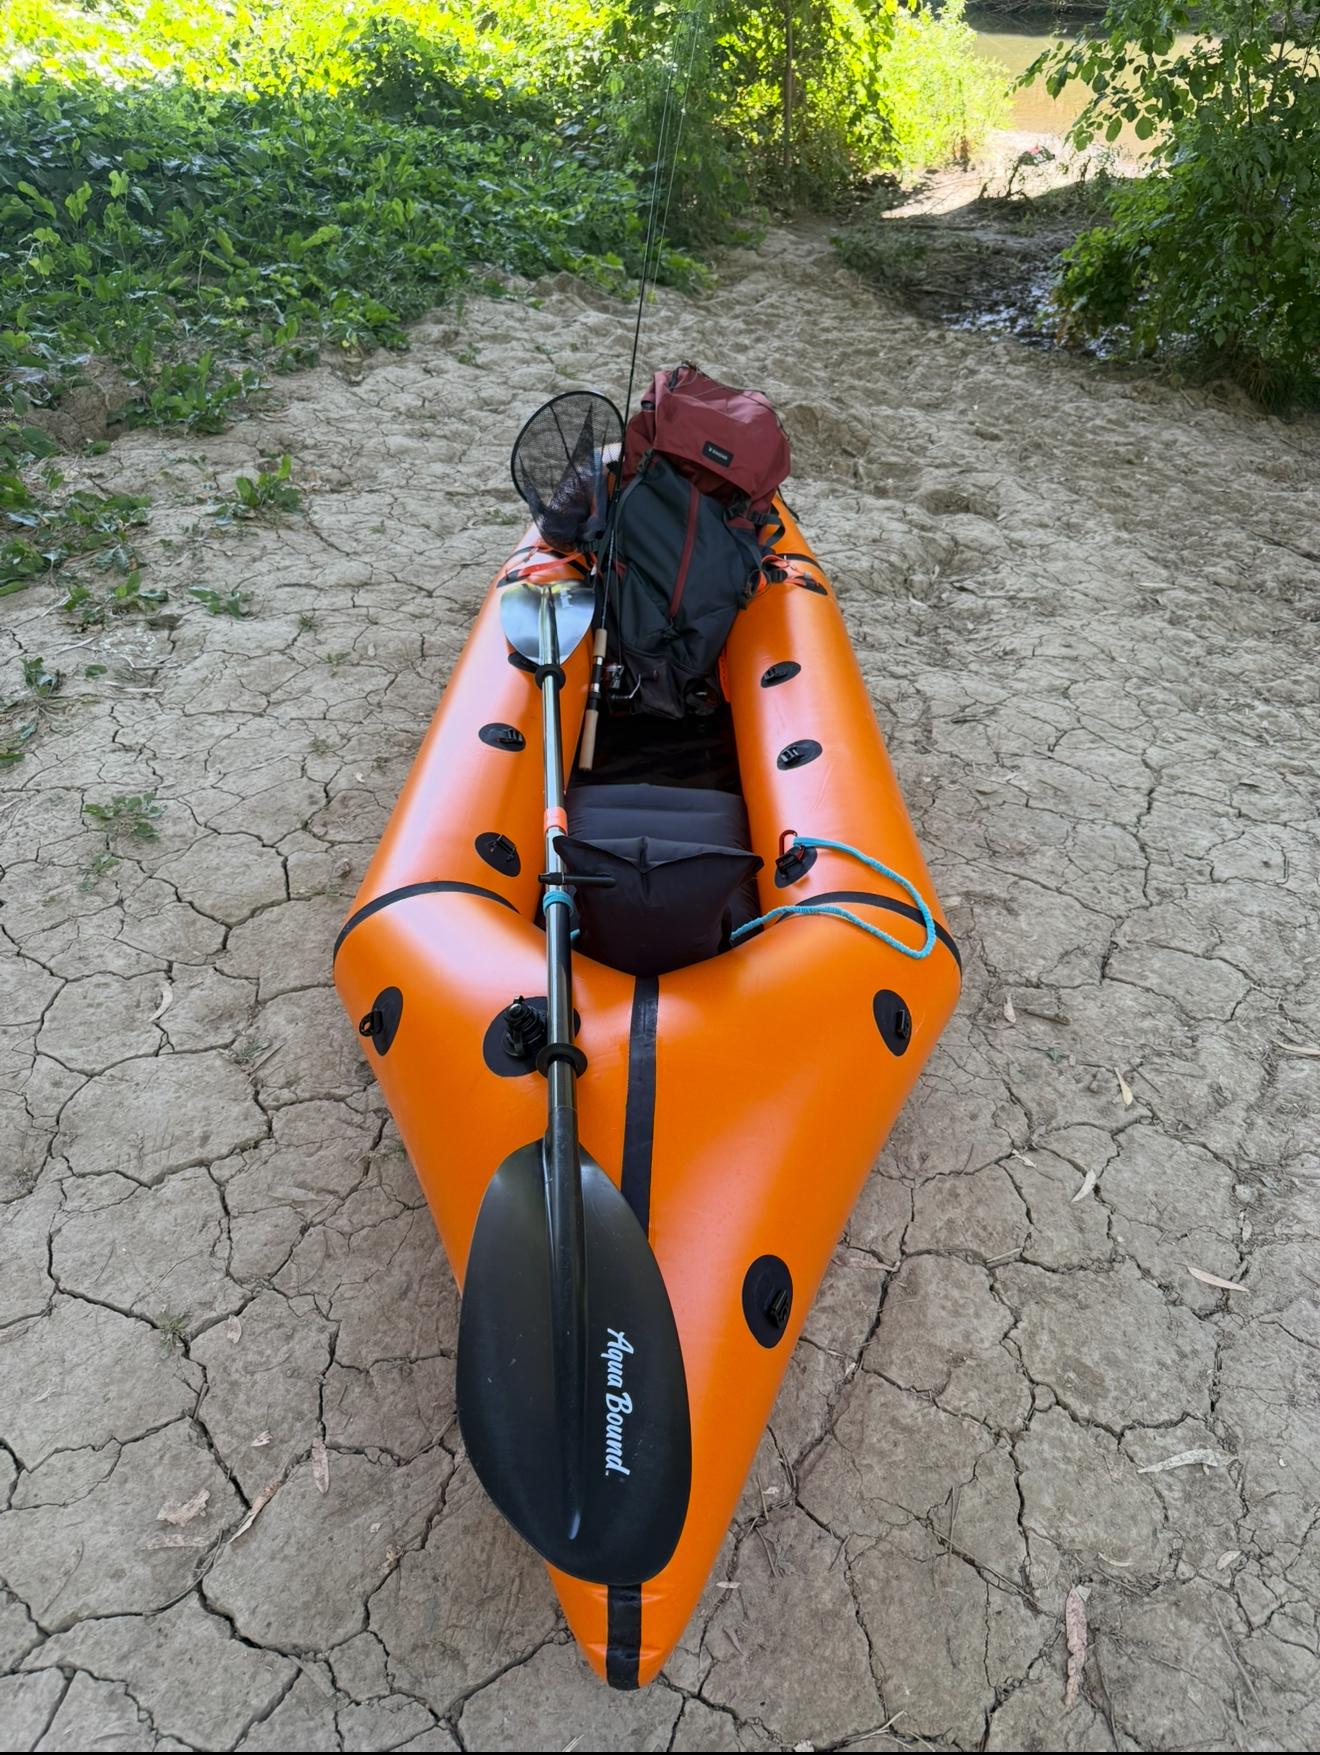
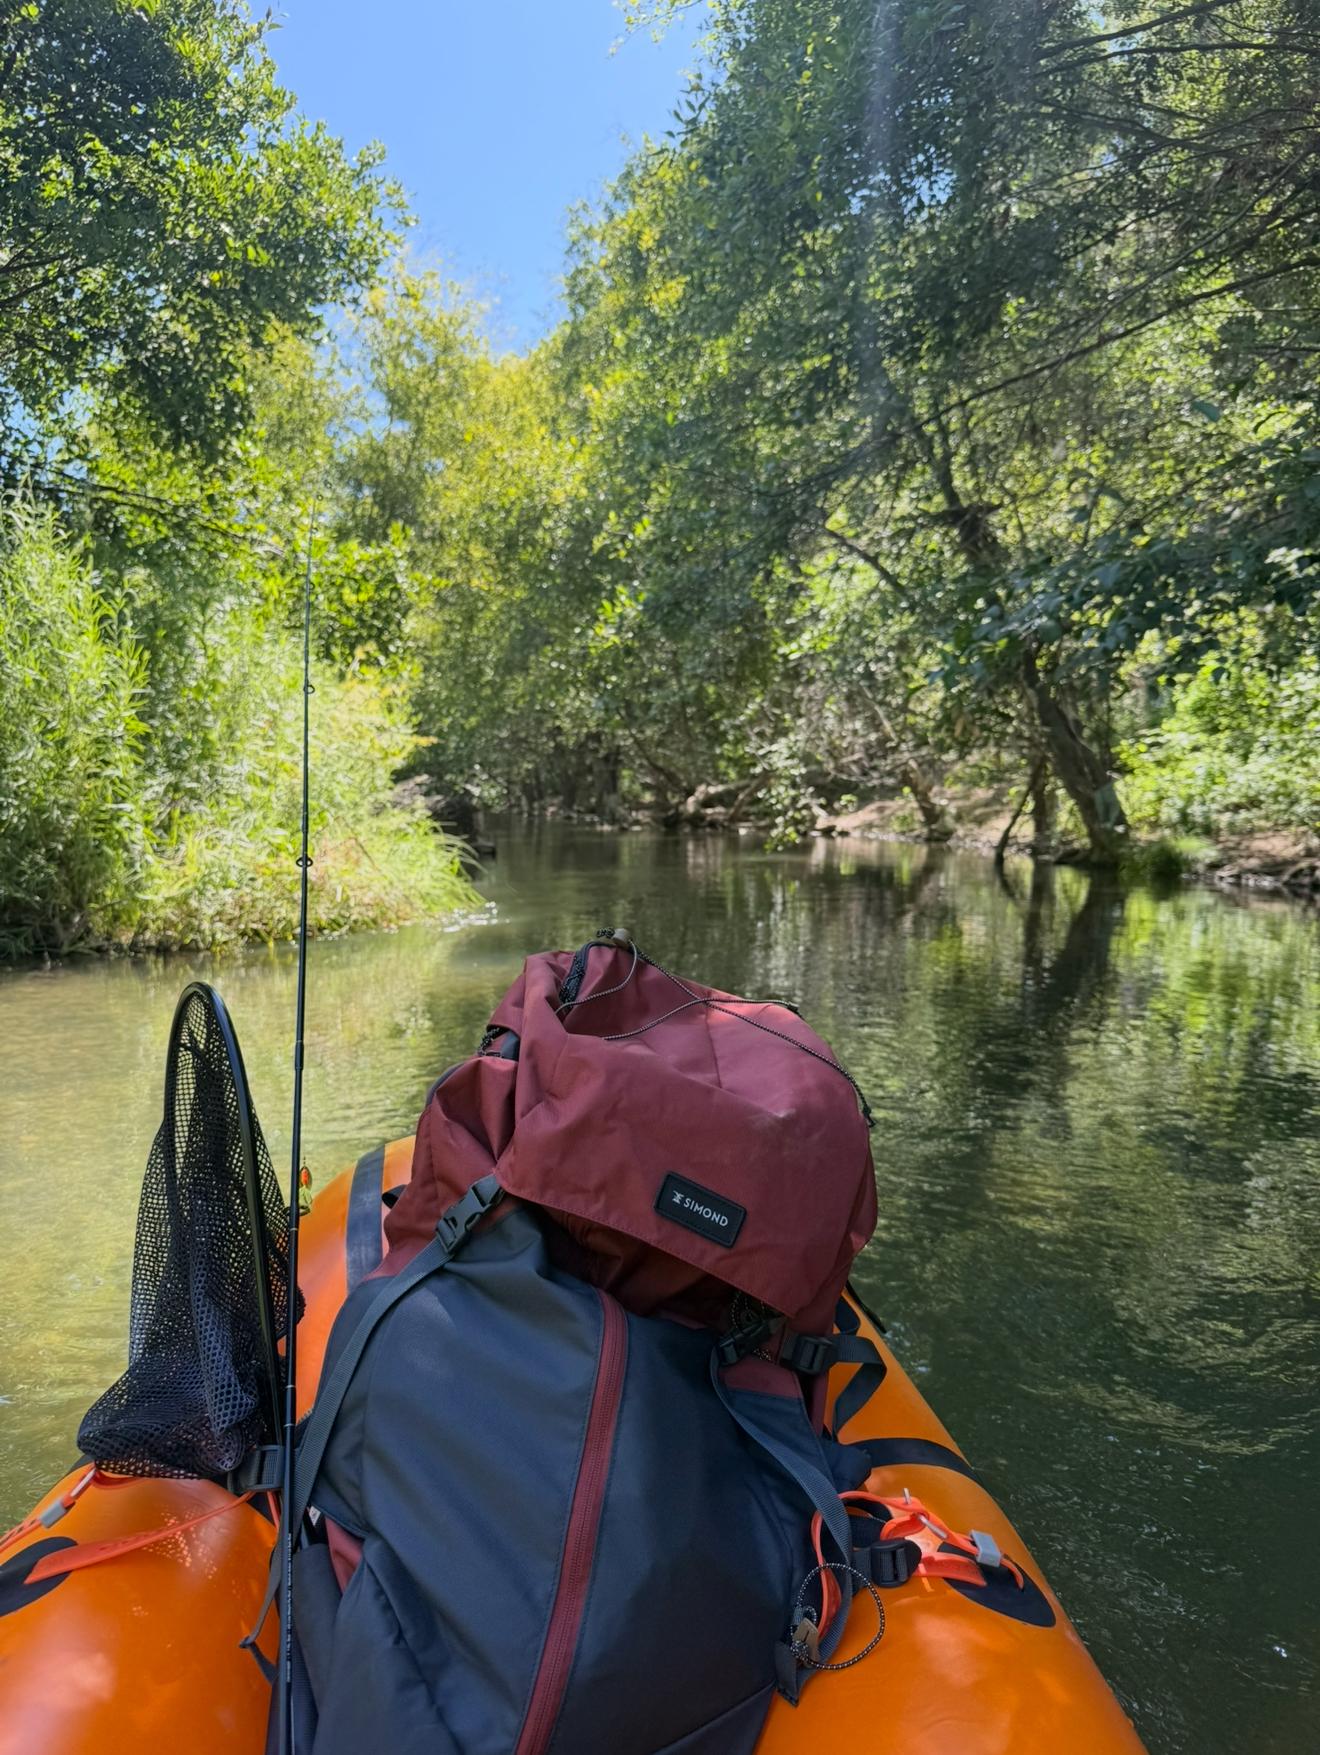
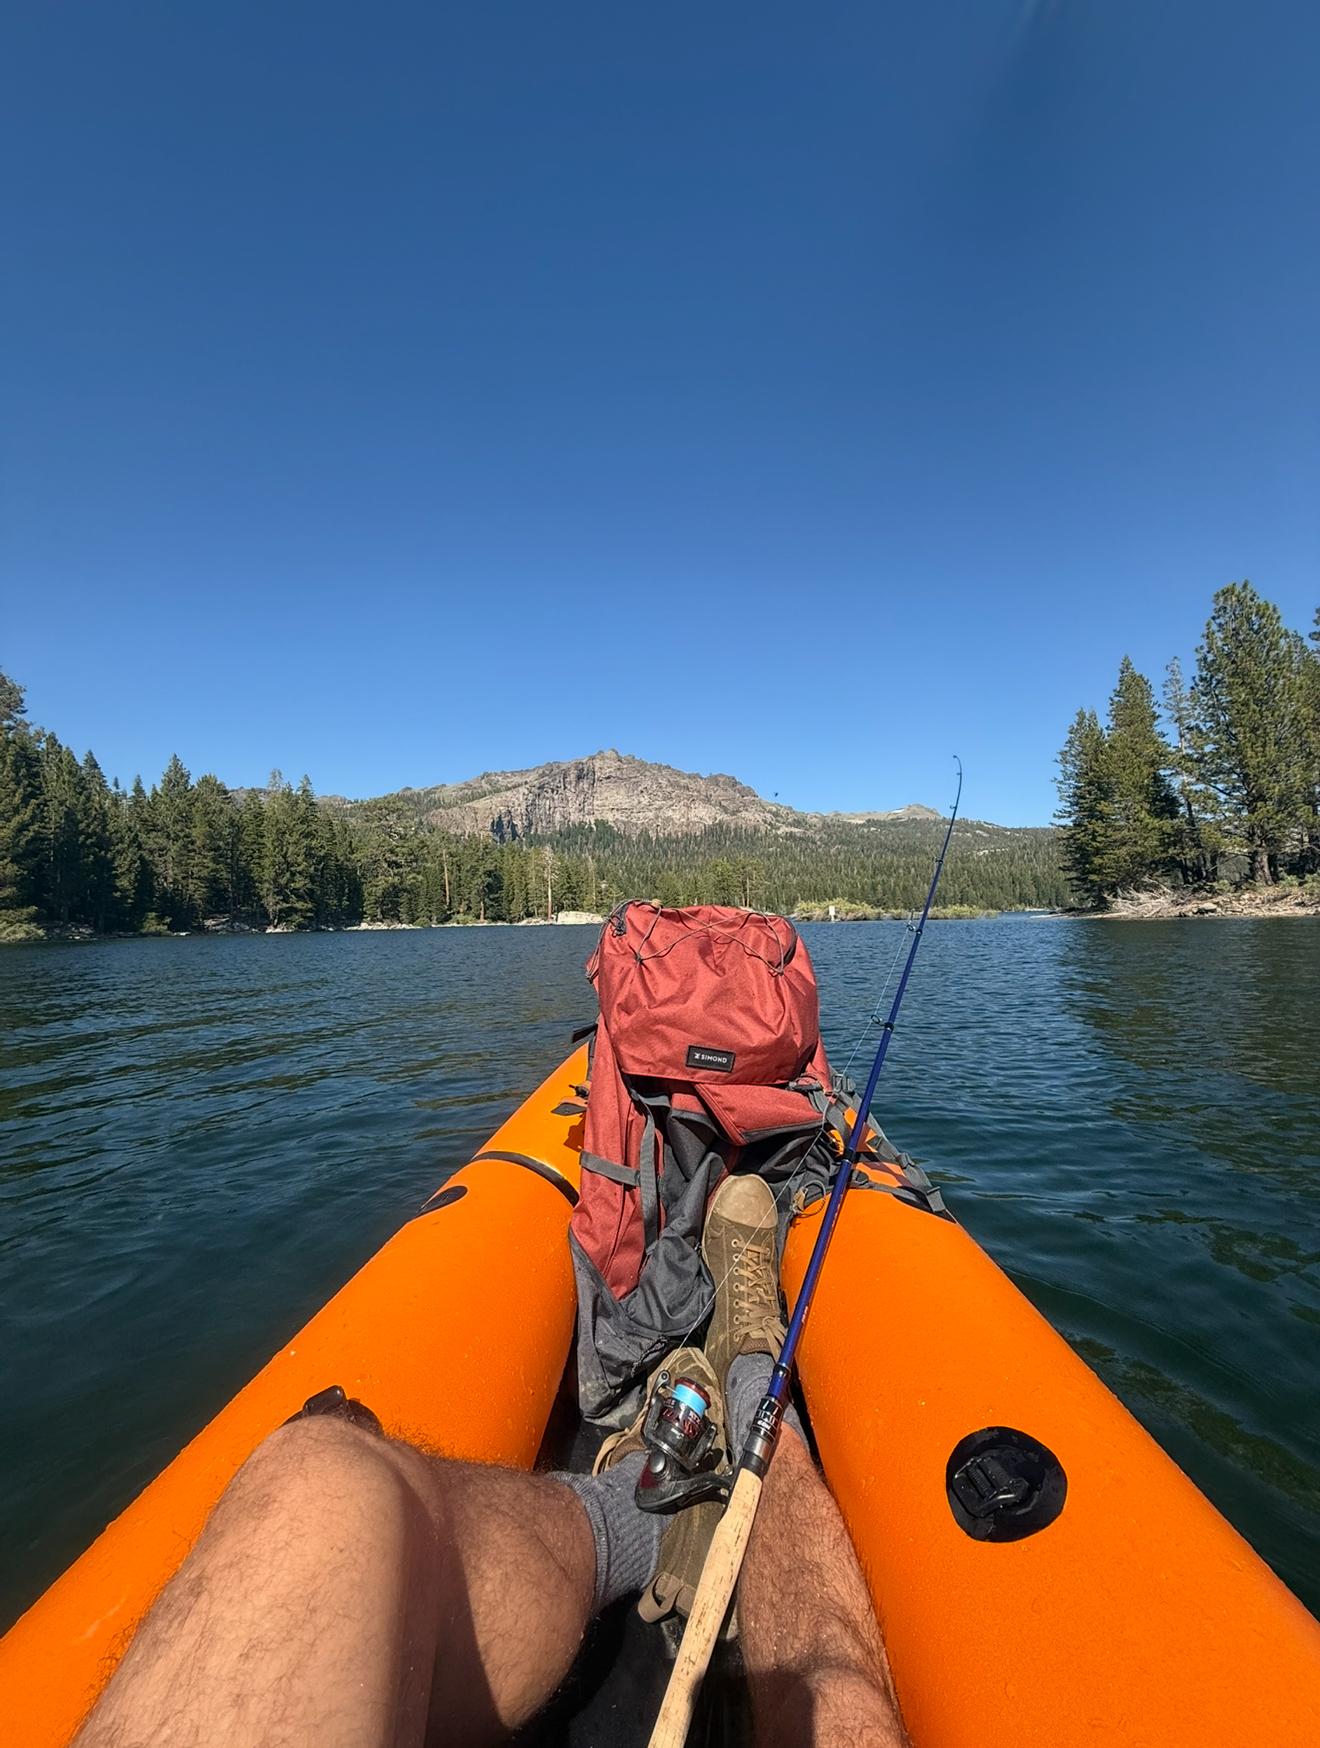
December 3, 2024 at 3:48 pm #19942OffgridParticipant
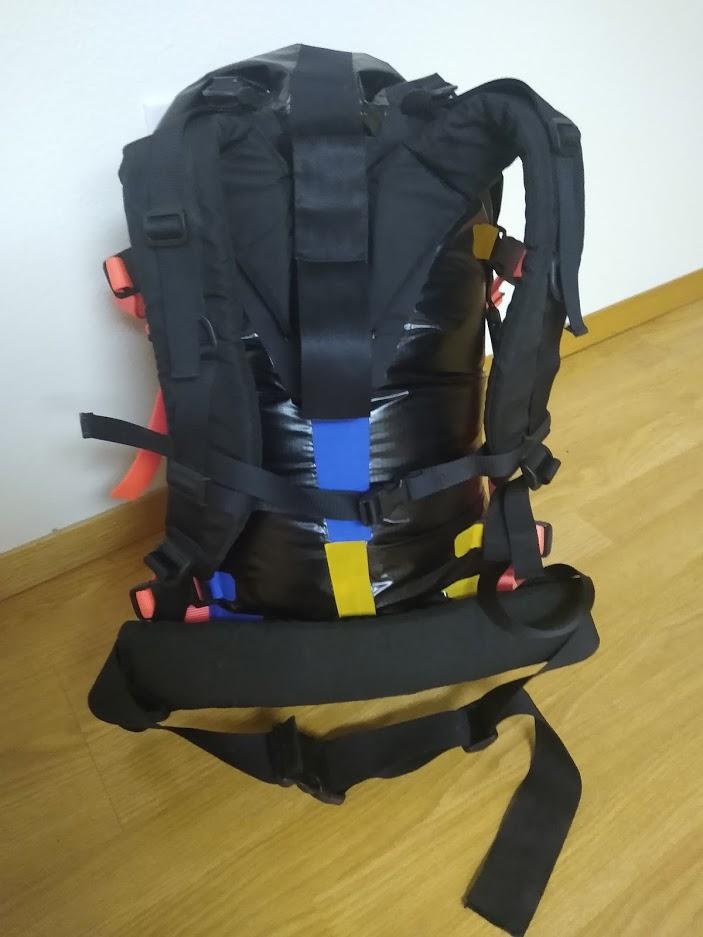
 The rafts fit right into my self built and designed Pacific crest Sideloader pack. Built the pack before i knew I was getting into pack rafts. It works perfectly!
-
This reply was modified 1 year, 6 months ago by Offgrid.
-
December 5, 2024 at 10:19 am #19948Matt (Admin)Keymaster
Very cool design! It looks light and functional, with the easily accessible sit pad and mesh pocket. Thanks for sharing!
-
December 5, 2024 at 1:40 pm #19951OffgridParticipant
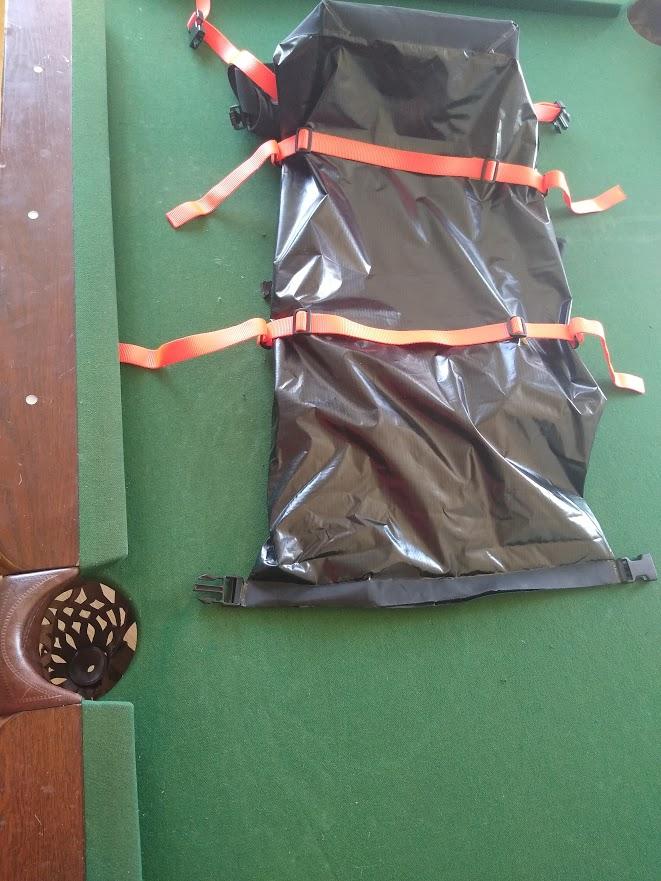
The pack is made out of the TPU coated dyneema woven fabric from RSBTR (venom). It has a frame, is 60 liters and weighs 2 lbs. (907 grams). It has compartments for tent, water bladder, quilt/pad, Bear Vault 500, clothes and now a DIY packraft. I have your Skeena and Ultralight and either of them will fit in top compartment. The Advanced Elements ultra light paddle works great for lake paddling. The pack fits into the dry bag, and I have added side release buckles and straps to the bow of my rafts, so I can quickly and securely snap my pack to the rafts. The Flextail Tiny Pump fills both the Skeena and Ultra light in about 5 minutes. Top them off with a few breaths and they are good to go.
As far a ripping a hole in the ultra-light, it was a long shallow lake with avalanche knocked down trees in it. I knew they were there, but the sun angle was wrong, and I couldn’t see anything below the surface and missed seeing one. Just tore a hole in the bottom not the air bladders. Just got my butt wet. As far as your suggestion to piece together scrap pieces, I checked what I had and figured I would wait until I can get a full-sized piece of the 450 bottom material. Being not as limber and flexible as my younger days, I find it is best for me to launch with seat right at the shoreline and the front out in the lake and push off. The idea is to just reinforce the seat area that takes the abrasion from launches and is the most likely area to catch a sharp object under the surface.
Thanks again for putting the R and D into these designs and making them available. Also thanks for making the TPU fabric available again. I think you did the right thing limiting the orders of large quantities as those are most likely the people that are going to use your engineered material to compete with you.
-
This reply was modified 1 year, 6 months ago by Offgrid.
-
December 7, 2024 at 3:50 pm #19957Matt (Admin)Keymaster
Very cool indeed!
I’m glad that the damage wasn’t too bad. If you email me with the dimensions you want, I’ll see if I have a large enough scrap I can set aside for you.
Cheers!
-
December 7, 2024 at 4:04 pm #19958OffgridParticipant
About 61 x 50 CM. Any movement on the strike?
-
December 17, 2024 at 2:10 pm #20019Matt (Admin)Keymaster
The postal strike ended today – yay!
I’m sure I have a scrap of fabric big enough for you. Send me an email and we can work out it.
-
-
-
This reply was modified 1 year, 6 months ago by
-
-
This reply was modified 1 year, 6 months ago by
-
October 29, 2024 at 9:41 am #19821Matt (Admin)Keymaster
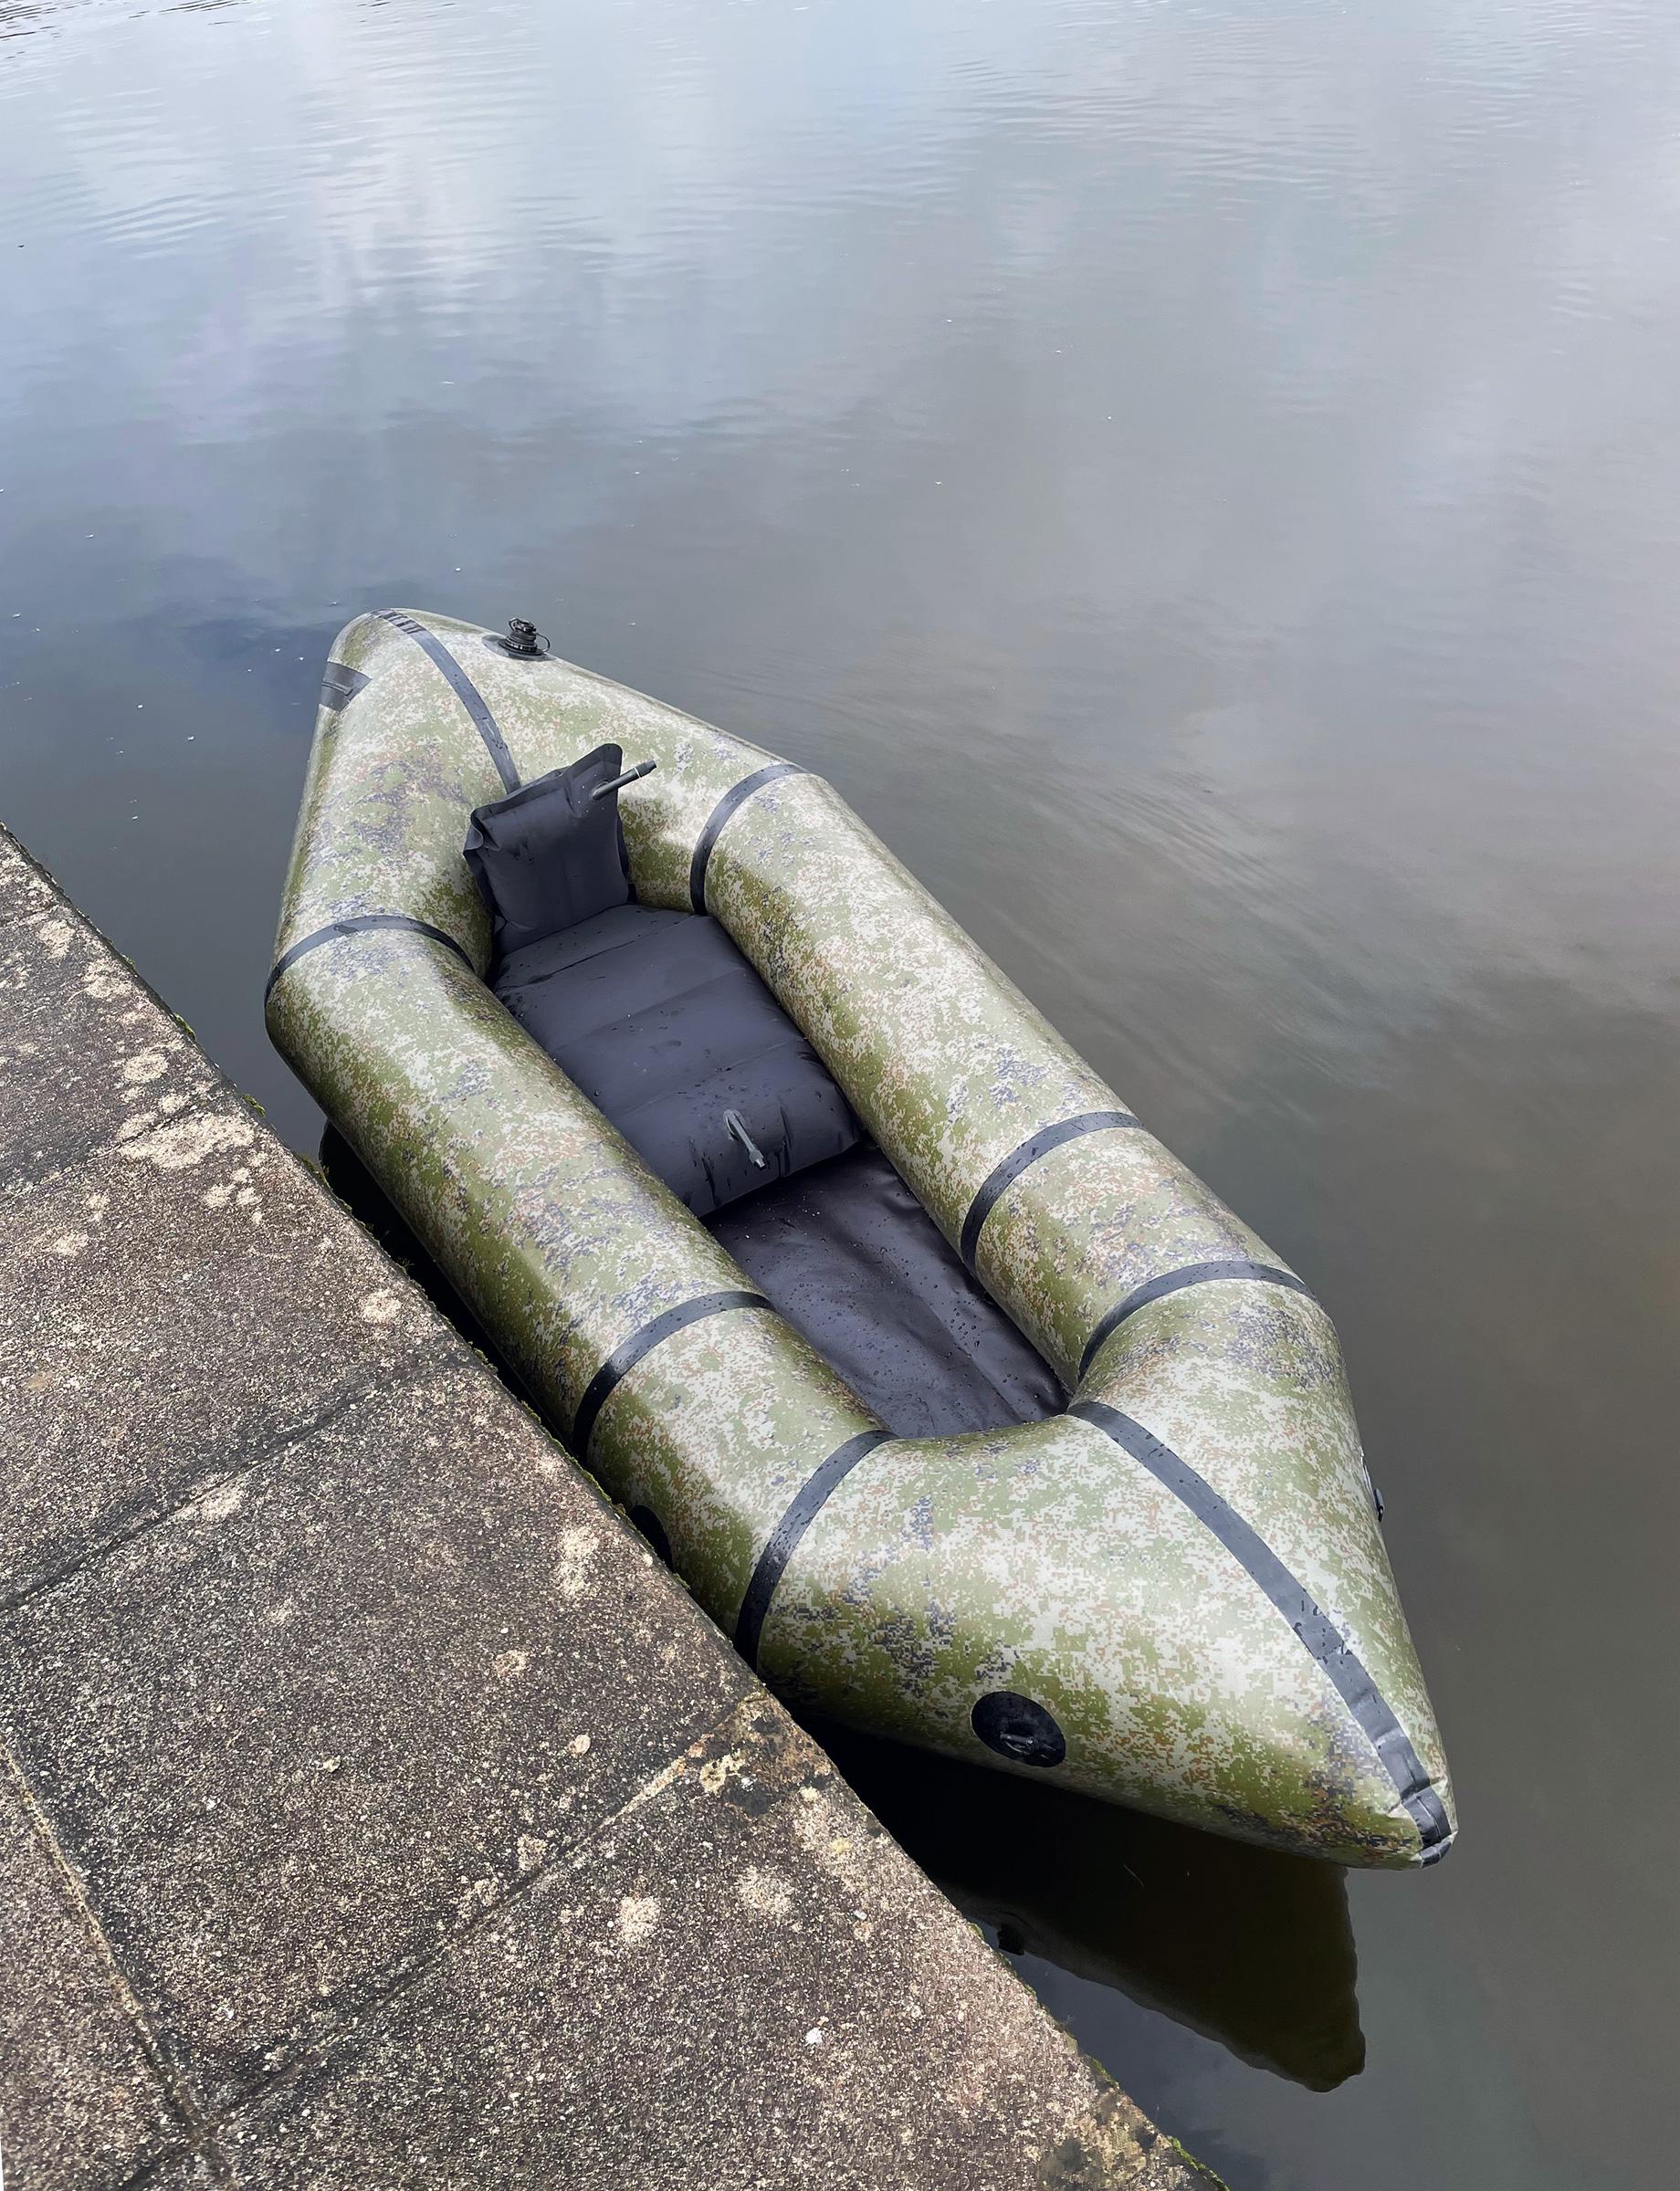
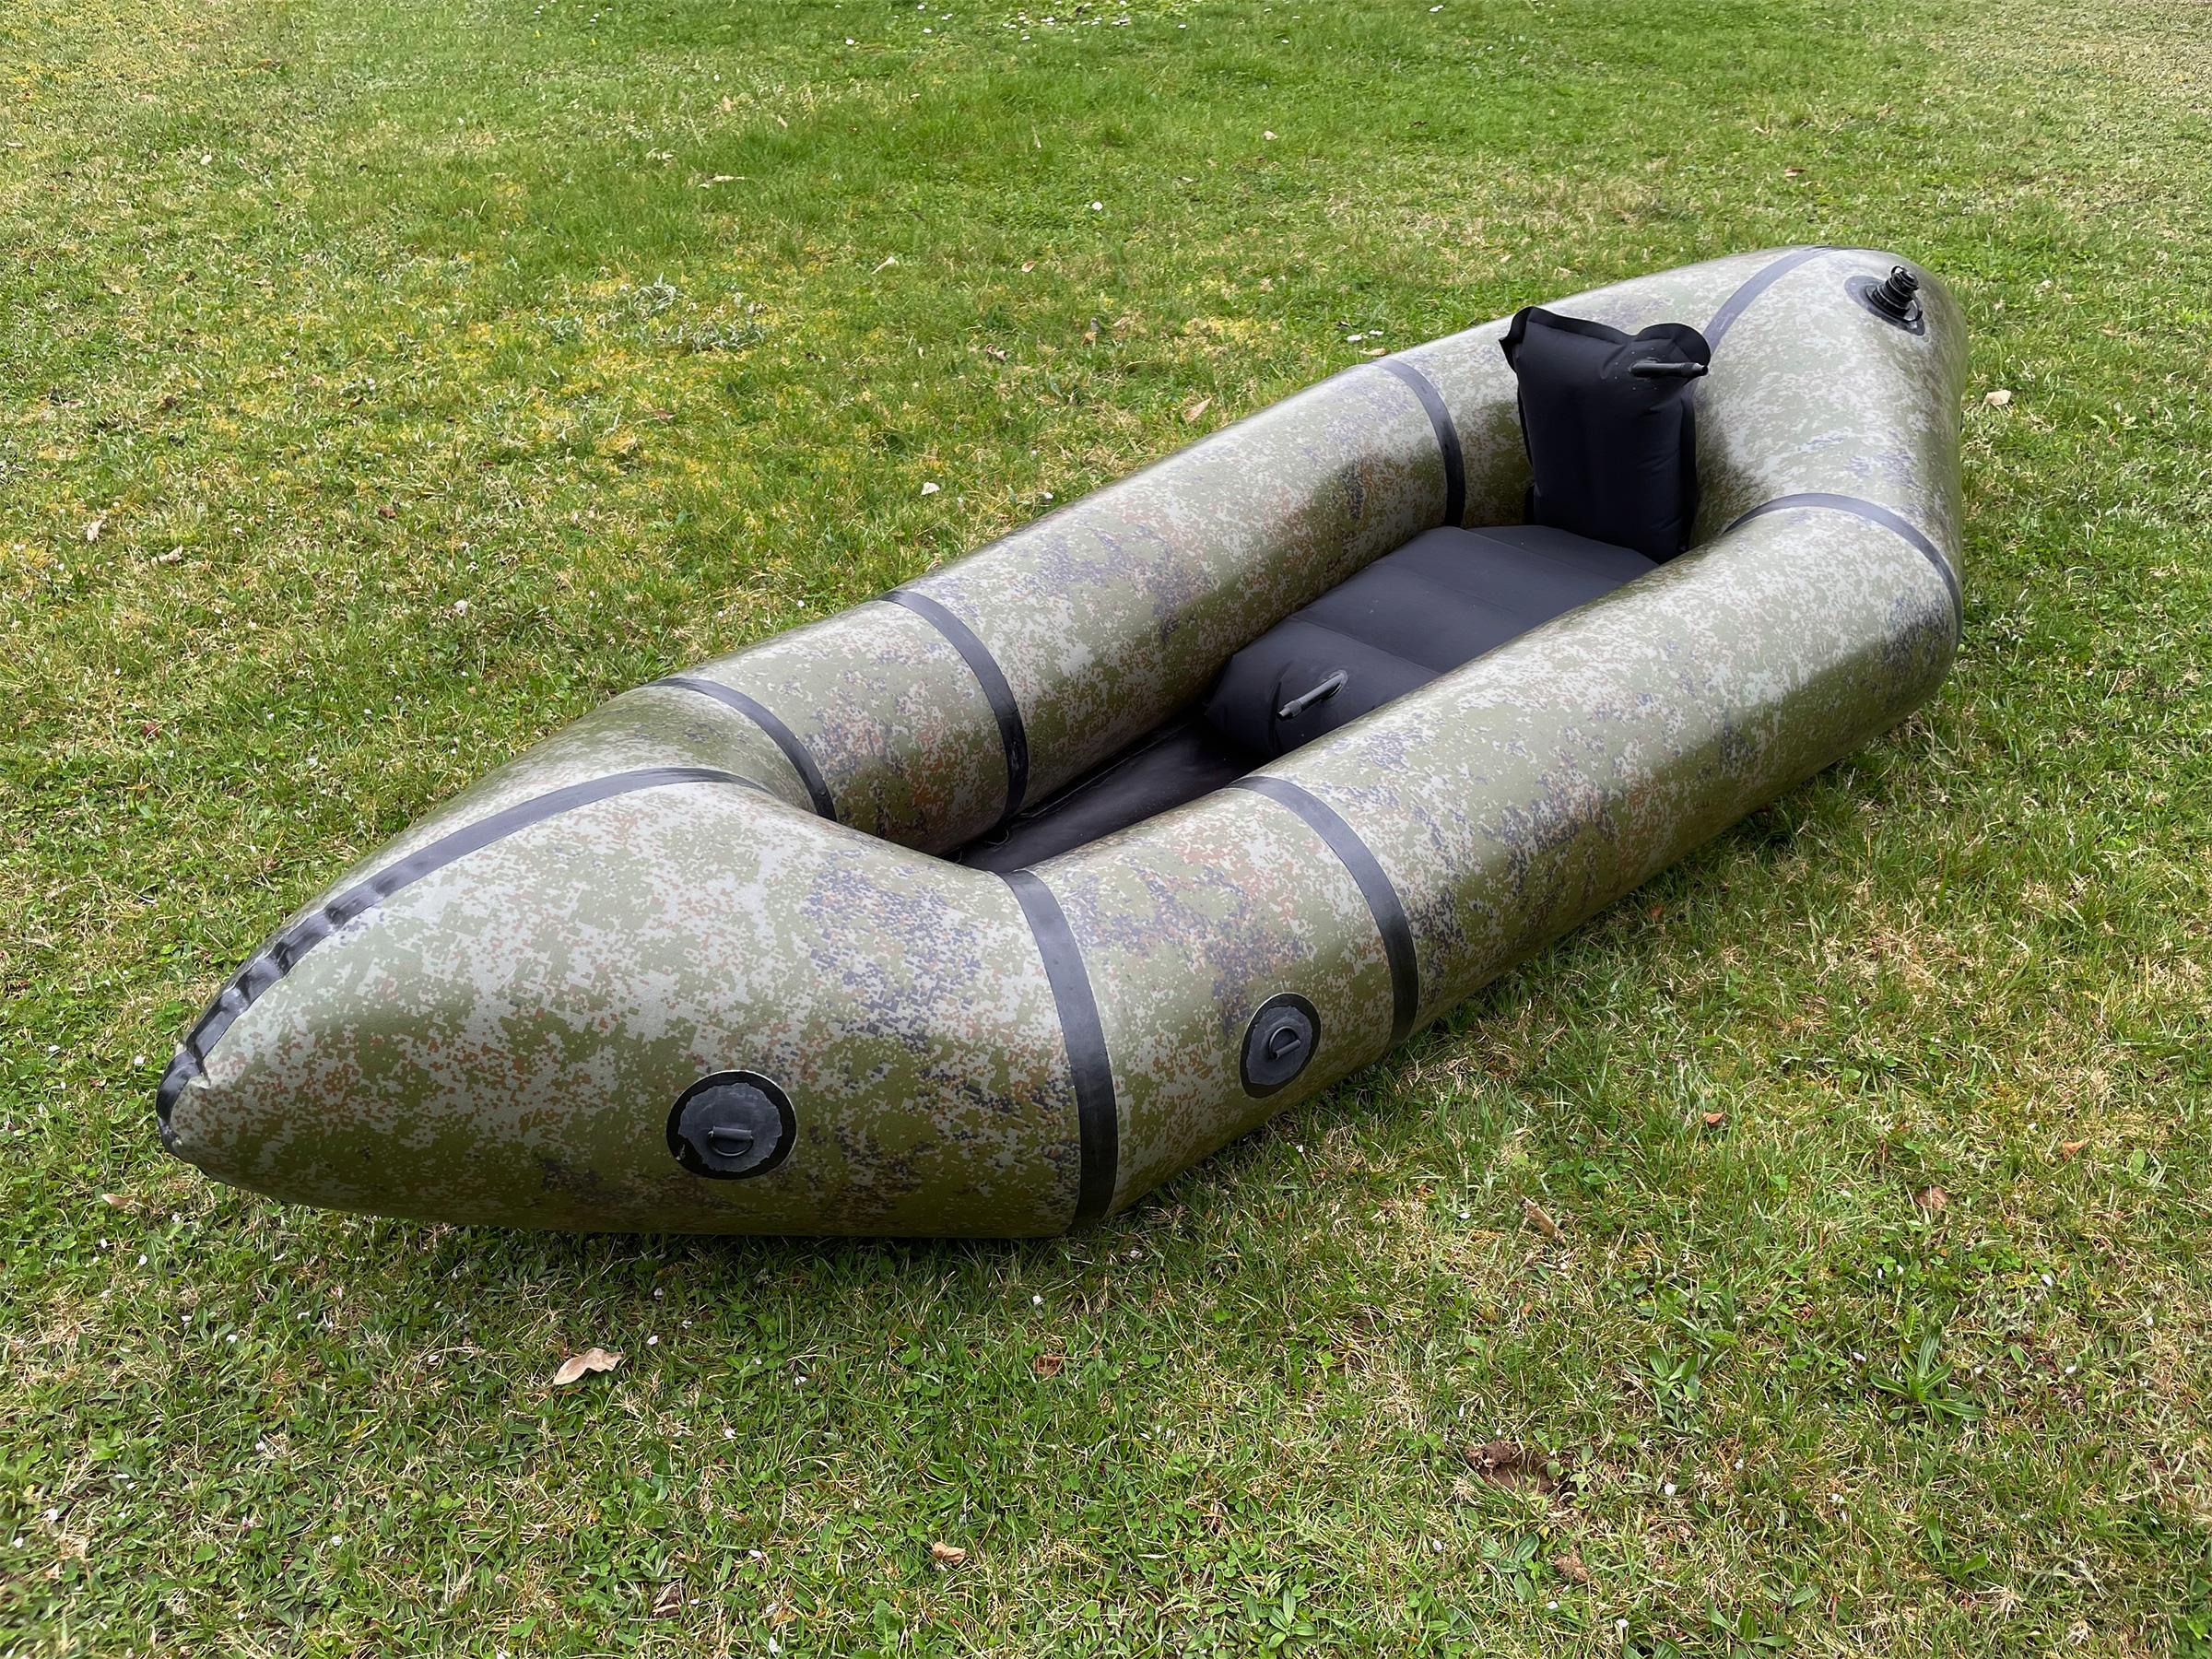
Tim Riddles sent me these photos of his Telkwa with a really creative camouflage pattern, and I thought it was so cool I had to share them here 🙂
-
December 3, 2024 at 3:26 pm #19941OffgridParticipant
<p style=”text-align: left;”>
 </p>A picture of my ultralight raft. Had a great time rafting some of the lakes in the Trinity Alps of California. Unfortunately i did find the tear limit on the bottom. Submerged log with a sharp stob. Now I am waiting for the postal strike to be over so I can order some heavy bottom fabric to reinforce below the seat area. Great rafts Matt
-
December 5, 2024 at 10:17 am #19947Matt (Admin)Keymaster
Beautiful! And thanks for telling me about the log encounter – I think that’s the first one I’ve heard about, so it’s good to know. Did it damage the seat, too?
One option to patch and reinforce the floor under the seat is to use some of the scrap floor or tube fabric (or inflation bag fabric). It wouldn’t be pretty though. If you use the tube fabric then I would spread a thin layer of Seam Grip+WP over it to protect from abrasion and prevent it from soaking up water. Cheers!
-
-
-
August 26, 2024 at 8:41 am #19612zachschiadaParticipant
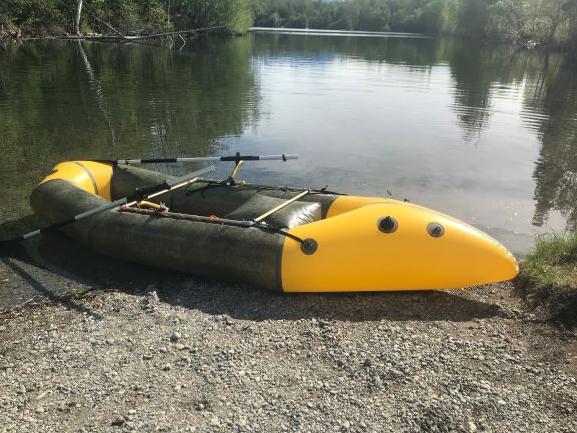
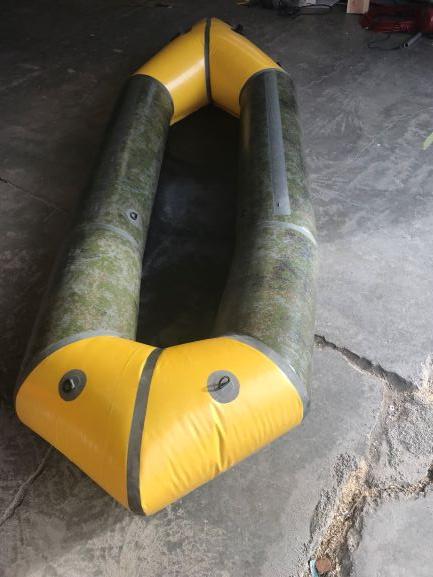
It has been a few months since I used my raft since it has been raining a lot and I have been using my hard boat. This past Saturday though, water was low so I was able to do some exploring with my packraft. I ended up hiking about a mile to my local lake’s spillway. I had to wade another quarter mile or so through the creek and under a neat tunnel under the railroad before I reached the deeper water at the spillway. Did a quick cliff jump and then headed downstream to the next bridge with a quick pack up of my raft into my backpack and walk back to my car. Was a bit more hiking than rafting, but so cool to have the portability of the packraft to do mini adventures like this. I look forward to more trips like this and am thankful that there is this affordable option to go on adventures most won’t be able to do.-
August 26, 2024 at 3:20 pm #19622Matt (Admin)Keymaster
That’s great, Zach! It sounds like a cool mini-adventure, and just the sort of thing packrafts are great for. Cheers!
-
-
August 16, 2024 at 4:28 pm #19501EricNortParticipant
I am really loving my first ultralight packraft (“first” because I am hoping to build a second with a couple more fishing rod holders added along with some other improvements). It is nearing a year old now as I finished the build in early September of 2023. These pictures are from a 3-day backpacking/fishing trip I just did with a couple of my hiking partners. The lake is Spectacle Lake in the Alpine Lakes Wilderness of Washington State.
The only major issue I have had is with the seat and backrest losing air. And that is only because they were the first components I assembled and I made some mistakes in the build / learning process. The seat I was able to repair but I damaged the valve stem on the back rest with my heating iron. I ordered a new seat and backrest kit today to replace the originals. Hopefully I will do better assembling them the second time around!
The packraft is typically strapped to the back of my backpack at the bottom with a foam sitting pad wrapped around it for protection. The raft, seat, backrest, inflatable PFD, and lanyards for my paddle and fishing pole all go into the inflation sack.
I just liked seeing the shadow of the packraft on the lake bottom.
My hiking partners both brought inflatable dinghies to fish from.
-
August 22, 2024 at 2:49 pm #19586Matt (Admin)Keymaster
Thanks for posting these great pictures, Eric! That looks like an amazing trip – gotta love those clear mountain lakes. I’m glad the fishing rod holders worked, too – I think you’re the first person to try that in the Ultralight. Fantastic!
-
-
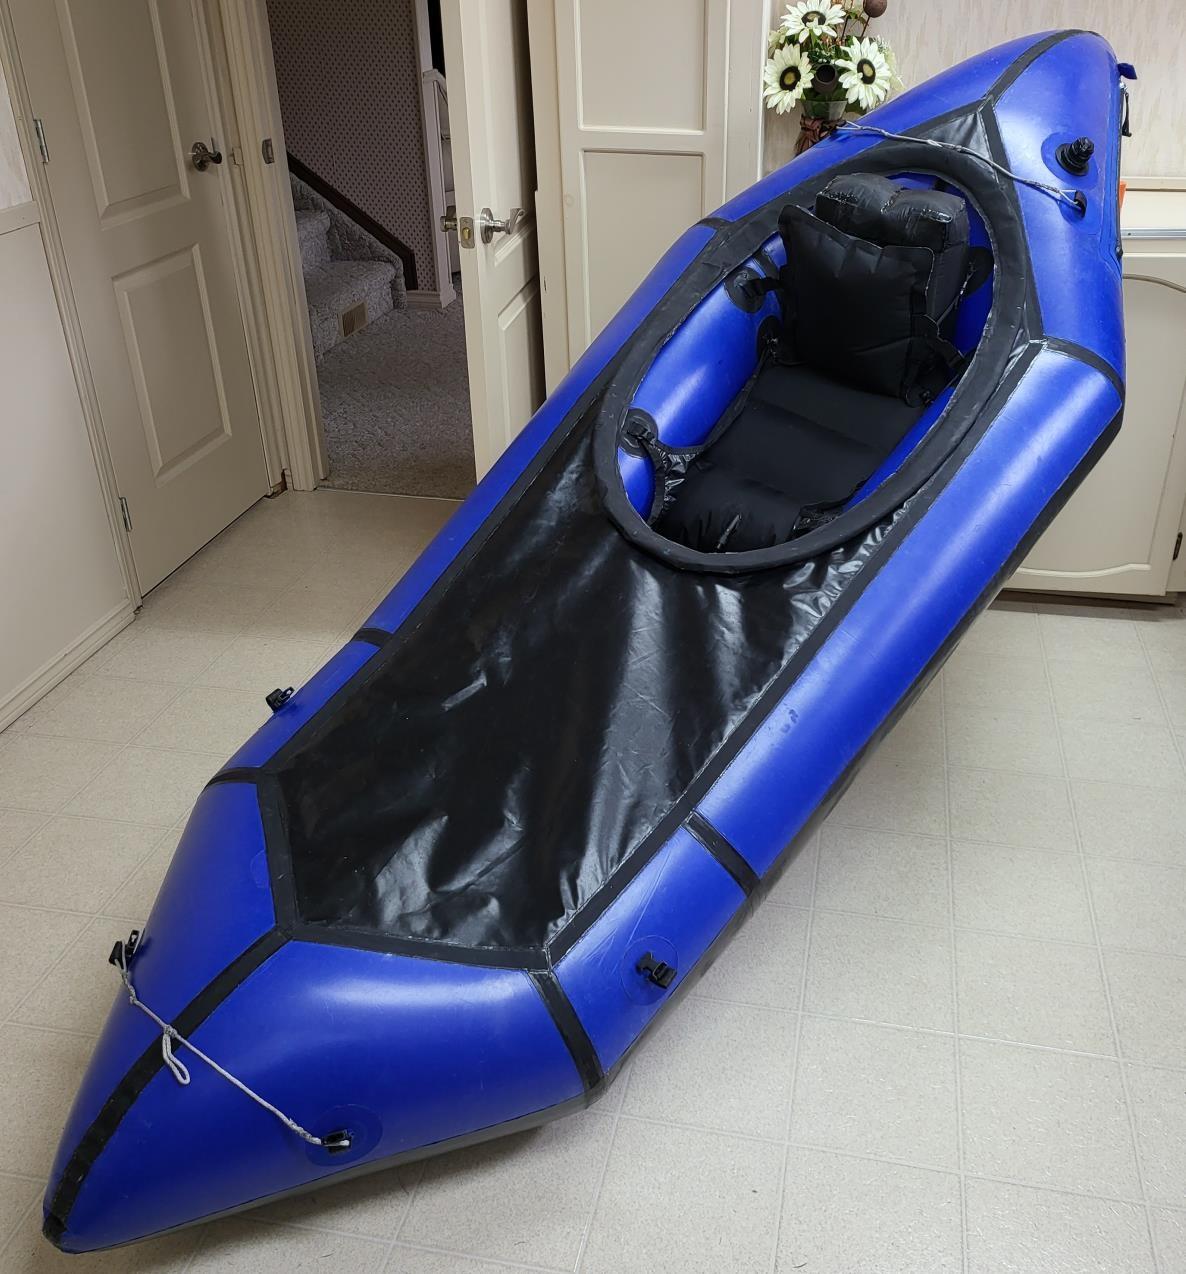
August 4, 2024 at 12:07 am #19479OpieParticipant
Here are some pics of my green 2P DIY Packraft. I haven’t seen too many finished 2P photos or packrafts in the newer green color and I wanted to share them. (You have permission to use the photos Matt) To start off let me say I love the color especially contrasted with black trim. This project was one of the most challenging projects I have tackled yet but very rewarding too. I have built a lot of projects over the years such as tents, packs, saddles, wood projects, welding projects, auto work etc. Most of the time I have built up the skills to completing a project of this size but on this one, it was zero to a hundred because of my inexperience with welding tpu. The most difficult part was welding eight different panels without knowing if I was making good welds. I had an enormous level of satisfaction and relief when I finally inflated the raft and only had one small leak. The leak was at the base of a seam on the inside of 2L and 3L. The raft would hold air but required about 5-8 breaths after a day. I fixed it with some aquaseal and now it holds airtight for at least 24 hours and only seems to fluctuate with temperature changes.
Performance seems awesome, although this is my first packraft so I don’t have anything to compare to. I purchased the 2p to haul heavy loads solo and have not tried 2 people yet. I have canoes and have paddled a fair bit but this is quite different. I have found that with the 2p seat height, paddling solo with a single canoe paddle actually works very well on flat water. The kayak paddle seems to work better on moving water. I was able to hit a few small white water sections with no trouble at all. The river I’m paddling here in Kodiak is shallow and I was able to transit in only 4 inches of water at times while only mildly touching the river bed. Hitting rocks on the bottom only lightly scuffed the bottom and the floor appears extremely durable. Overall I feel confident to take this raft on its intended purpose of hunting the north slope of the Brooks Range in Alaska at the end of August.
I worked on the raft after work for 14 consecutive days (a lot of really late nights). The build took me 50-60 hrs to get to the inflation stage. I took an unknown amount of time to build and decide on placement of the tie down points afterwards. My wife is thrilled that I’m done working on it as now I can help watch our 8 month old son again. As others have stated, I also recommend taking plenty of time when tackling this project. I used strait edges rulers and tapes and marked everything out with tailors chalk and silver sharpie to ensure every weld went as well as possible. I measured and re-measured everything to limit mistakes. All in all I’m very pleased with the outcome of the build.
Instructions were great and only left me scratching my head a few times. I will ad the things I found helpful in the tips and tricks section.
Let me know if anyone has any questions or would like to see more detailed photos of the 2P in green. Thank you for making these kits Matt!
-
August 22, 2024 at 2:42 pm #19585Matt (Admin)Keymaster
Thanks for this detailed report, Opie – it looks like you did great work! I plan to post this in the Customer Build Reports gallery along with your tips and tricks so this doesn’t get buried in the forum thread. I think you’re the first person to provide such detailed feedback about the 2-Person build – thanks!
-
August 4, 2024 at 11:06 pm #19481Christian001Participant
Very nice color! Makes it even harder to decide on my next one.
-
-
June 24, 2024 at 2:48 pm #19317Jim WolvertonParticipant
I’m excited to report that I was able to take my new Skeena out on the water for the first time yesterday. I took the spring class through the Folk School in Fairbanks, Alaska with Bruce Campbell. The kit that Matt provides is great, and his instructions and videos go above and beyond. Combine that with the knowledge that Bruce has from building many of these and teaching so many classes, and I feel like I had a cheat code for building this. It took me two months, but that was only working on it a few hours each week outside of the class times. Now my family wants me to put one together for each member. I will be ordering more kits from Matt and staying busy this winter. Here are some pictures of the new boat on Harding Lake (feel free to repost/use them Matt). I was surprised at how much more comfortable it is than my kayak. I’ll be adding more attachment points and a personal logo in the future.
-
This reply was modified 1 year, 11 months ago by Jim Wolverton.
-
This reply was modified 1 year, 11 months ago by Jim Wolverton.
-
This reply was modified 1 year, 11 months ago by Jim Wolverton.
-
This reply was modified 1 year, 11 months ago by Jim Wolverton.
-
June 25, 2024 at 11:43 am #19324Matt (Admin)Keymaster
That’s awesome! Congratulations, Jim, and thanks for posting!
I had the pleasure of finally meeting Bruce and his family recently – what a great guy!
-
This reply was modified 1 year, 11 months ago by
-
June 2, 2024 at 5:07 am #19178SylvainParticipant
I’ve completed my first Skeena build in +/- 45 hrs (I took my time, but could have done this a bit faster though with better wooden forms, I’ll get back to it below), it steadily holds air for 2–3 days in a row without deflating more than one (very) little breath! So very happy with the result.
(the zipper might seem off but it’s not the 50cm one, it’s a 40cm I found for cheap in EU)
A few things that happened :
- Once I put tubes 3 and 2 side by side at the start of the build, I had a 1cm overflow from one floor slit to another, both on the right and left side. I simply trimmed off 1cm from 2L and 2R where the junction between 3 and 2 is done, figured it’d work out in the end, and have had no issue afterwards.
- Seamgrip. Lots of Seamgrip. The docs mention that one 28g tube is enough for the entire packraft, I may have overdone this a bit but I covered all the inner seams and all the outer seams (inner floor, outer floor, tubes) and probably spent a good 6 or 7 tubes for the entire thing.
- I had an iron die on me and blow a fuse after a few hours working on the packraft: I live in EU and used a plug adapter instead of taking the few minutes to manually change the plug. The adapter probably had a contact failure or something while I moved the iron around and I had to wait a few days to be able to build again: better safe than stuck, change your plugs beforehand!
- I didn’t notice that the tape I put on the temperature dial went a little off when the build was almost finished and I was welding the attachment points: the iron went 30°C hotter than needed and I melted the fabric piece I was ironing on the packraft. Quite disappointing as everything went flawlessly until then, but I finished welding it properly, and put 2 thin coats of seam grip over the entire attachment point: so far no trouble. I put twice the tape over it after that.
A few things that I picked from the comments / forum:
- I saw it mentioned somewhere so I tried using a silicon sheet (60×40cm, 1mm thick) under the parchment paper, and cut some bands that I placed under the masking tape on my wooden forms. I felt that I produced better (as in – more even) welds with it than directly on my workbench.
- I had a really, really hard time figuring out how to weld the front seam. Tried a bunch of forms, never got a satisfying weld, started doing quite a mess, until I figured that both shapes might as well be welded flat. The docs mentioned it as a possible alternative but didn’t go in lengths about it, I checked the comment to see if anyone had done it with success: someone did! So I tried it myself and what a relief, this went very smoothly and it all ended with a very nice weld. The only downside might be that it’s quite impossible not to make the strip overflow a little and ironing about 1–2mm of the strip on itself, therefore the seam looks somehow « pointy », but I can totally live with that given how easier it was (and how cleaner it turned out instead of the mess I probably would have done with inner wooden forms). I didn’t bother trying with the forms for the rear seam and directly went for this technique.
A few things I’d probably do differently for a second build:
- I’d make diamond-shaped attachment points like the ones of Mekong’s packrafts instead of the round ones, in order to be able to weld them as much as possible with the flat end of my iron in large patches instead of a lot of little welds with the pointy side as I feel I could’ve done a stronger job this way. The masking technique with a cutout circle in the parchment paper didn’t work out for me, I ended up damaging the TPU although covered by the baking paper.
- In retrospect I would have prefered to weld the attachment points on flat fabric instead of adding them at the very end, especially the two on the floor as welding them properly once the tubes are added, either with the packraft inflated / deflated turned out to be quite difficult as the most « confined side » of the attachment was a bit hard to reach with a hot iron. I feel it would have been way easier to do it a bit earlier and would have been more confident in my welds.
- Totally on me, but I’d make a wider wooden form. I made the flat of my wooden form only 3-4mm wider than my iron, but it turned out to be too narrow as I didn’t always perfectly center the junction of the tubes and ended up having to do multiple passes to make sure all sides are perfectly welded. Probably lost a good bunch of hours here.
Overall I’m thrilled with the experience and the packraft! I can’t emphasize enough the quality and thoroughness of the documentation you put together Matt, I felt accompanied every step of the way so huge thanks for that!
-
June 25, 2024 at 3:25 pm #19325Matt (Admin)Keymaster
Awesome! Thanks again for the feedback, Sylvain 😀
-
May 27, 2024 at 4:58 pm #19163KeytreeParticipant
I finished up my Skeena build much more quickly than the Atlin. Probably about 20 hours or so. Second time through was much easier. I went for a simple, small boat this time and omitted the TZip. I really like the color!
I figured having a second boat would be helpful if I wanted to bring a friend with. Also I joked with some canoe friends of mine that if the Atlin had an issue, I could just bring a backup boat!
It had a micro hole along the final seam that I ended up using the glue tube through the Boston valve method to fix. It worked fine. I was able to do nearly all of the seam sealing except the final seam with the inside out method.
The only other issue I encountered with this was that iron, the Aliexpress leather iron model has started to lose it’s three screws. I made it through the build but I don’t know how long it’s going to last. I tried put them back in but it seems they are just too small to get a sufficient grip with the threads.
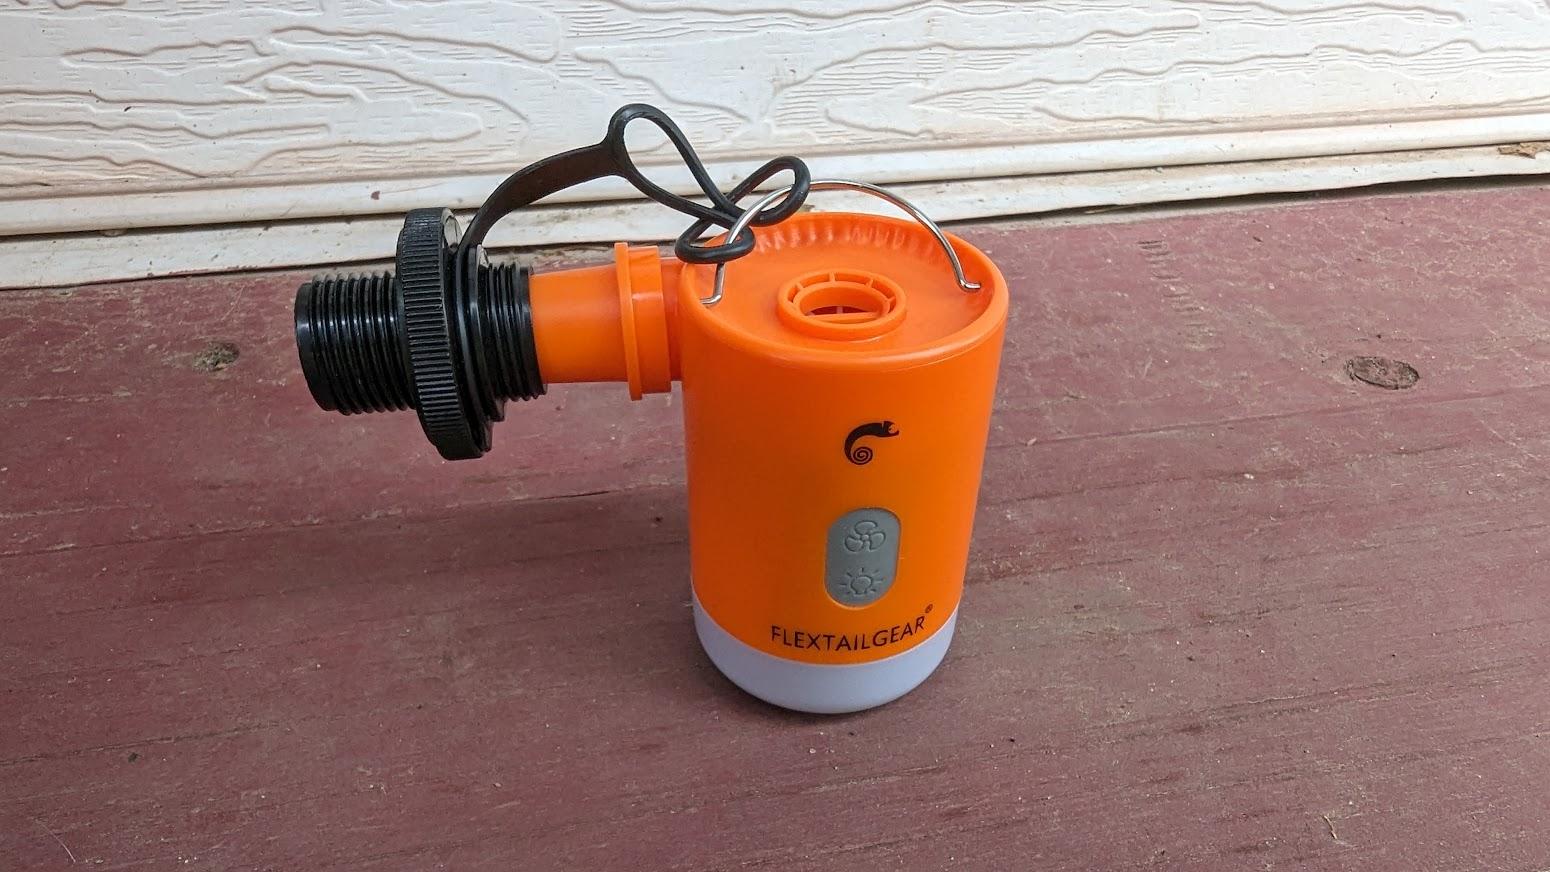
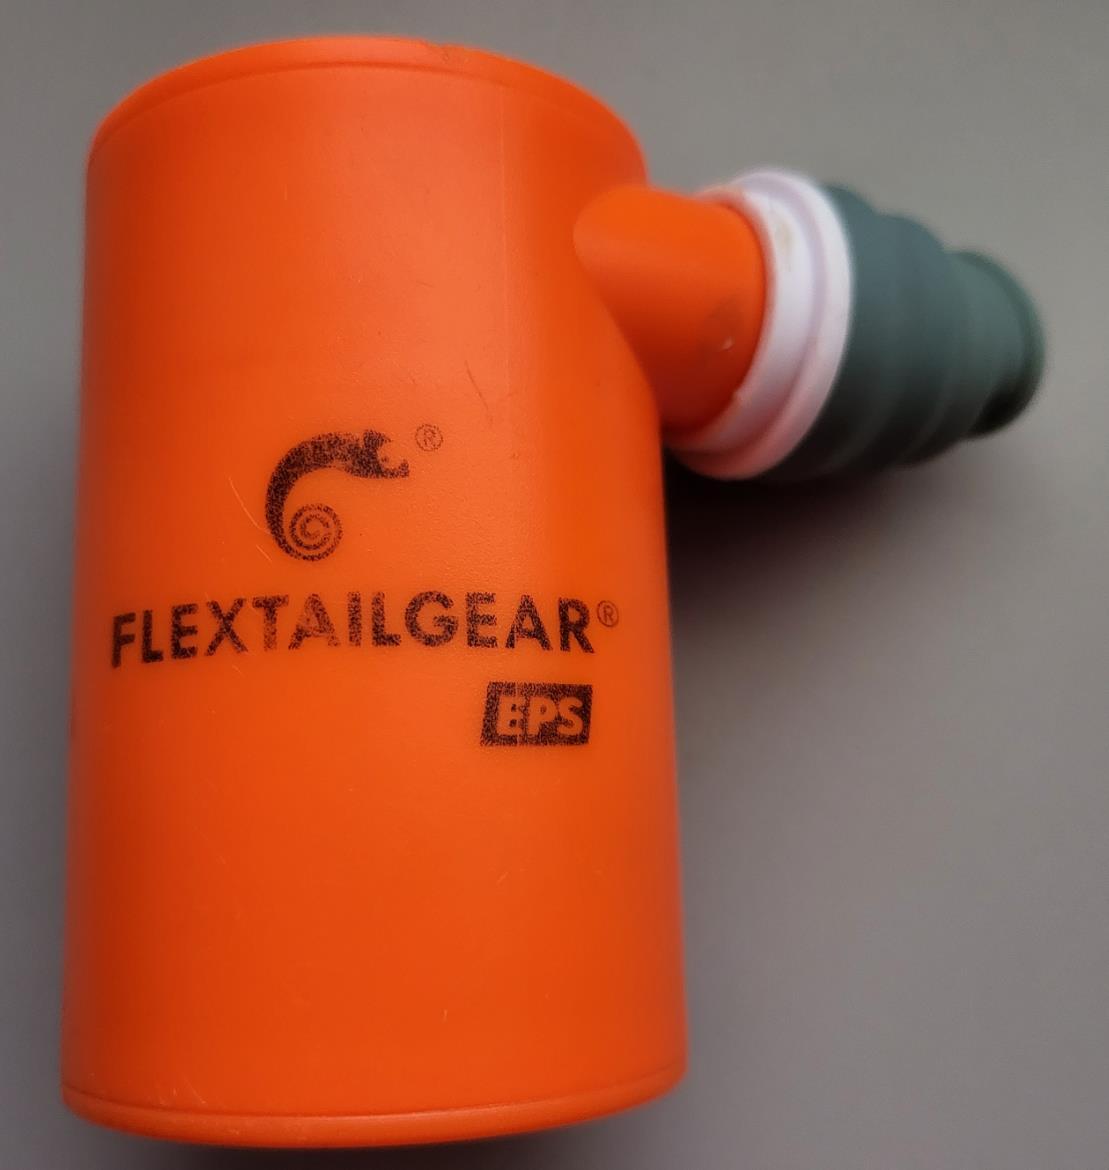
I use the Flextailgear inflator so I made a drybag out of the cloth for the inflation bag instead. I was able to take apart another Boston value so I can just screw the Flextail inflator right into the valve so I don’t have to hold it as it inflates.
Next project is figuring out a way to attach this stuff to a bike!
Thanks for making the kits Matt!
-
May 31, 2024 at 9:19 am #19172Matt (Admin)Keymaster
Excellent work, and great ideas! Thanks for sharing, Kaytree!
-
-
October 26, 2023 at 10:28 am #18448KeytreeParticipant
Here is my Atlin build. I was able to finish it in about two weeks working at about the 40 hours total time. I got it in the longest length possible even though I would fit in the smallest, figuring it might have a bit of a tracking and speed advantage with the longer length. Selected black just before the green and orange came up as options. Have taken it out on flatwater and a class 1 river here in Wisconsin before the winter arrives. Really happy with the kit and the build!
I am thinking about getting another as it was a lot of fun to build and I could see having a second available for a paddling companion. Maybe not the Atlin again to have a bit of choices for different missions.
Challenges with black is it’s tough to see the underlying fabric edge when joining to the bottom fabric especially. Need to feel it a bit more. I got it together and haven’t found any leaks yet which surprised me that it held air well first try! I did have an issue on matching the front seam lengths on the left side. Ended up shortening the wrong edge and gave it a bit of a dinosaur head shape. Cosmetic only.
Thanks for making these kits!
-
October 26, 2023 at 11:04 am #18449Matt (Admin)Keymaster
Thanks for posting – the black Atlin looks really cool! You’re ready for some special ops now. I’ve been waffling back and forth about offering black as one of the standard options for the reason you mentioned.
I’ve made that dinosaur head (haha!) mistake myself, so don’t sweat it. Your boat still looks great!
-
-
October 25, 2023 at 9:29 pm #18446ClydeParticipant
Here’s the newest addition to my boat quiver, the Ultralight.
I found the Ultralight kit took me about half of the time of my Atlin build. Altogether, this project took me 27.5 hours to complete.
-
October 26, 2023 at 9:12 am #18447Matt (Admin)Keymaster
Thanks for posting, Clyde – it looks like you did a great job! And thanks for logging your time and showing the final weight – that’s really useful. Cheers!
-
-
September 26, 2023 at 5:35 pm #18368ClydeParticipant
Here’s My new 120cm Atlin! The project was my first packraft build and took me about a month and a half to complete, working on it a bit every day.
It’s adventure time for now, but I look forward to starting on another DIY packraft in the near future.
-
September 27, 2023 at 8:41 am #18369Matt (Admin)Keymaster
Great work, Clyde, and thanks for the feedback about your experience! It looks like you have a beautiful playground there for adventures, so enjoy!
-
-
September 11, 2023 at 12:10 pm #18299EricNortParticipant
I have completed my build of the Ultralight Packraft with fishing rod holders added. The build went much quicker than I expected and I had it completed in about three weeks. I worked on it on nearly a daily basis and was thrilled to have it ready to bring along on a backpacking trip to Flapjack Lakes in Olympic National Park this past weekend.
There was a minor leak I was aware of but hadn’t located before the trip (loss rate of a couple breaths every 30 minutes) but Gear Aid Tenacious Tape worked great to patch the leak once I did locate it. The leak was coming from one of the intersections of the floor panel and tube joints even after seam sealing all the internal joints and seams. To mitigate the leak I made a top-up tube using an extra Boston valve, 90° nylon barbed fitting, and extra Camelbak hose I had from an old bladder. I used JB Weld Plastic Bonder to glue the nylon fitting inside the Boston valve. After taping the leak in camp though I didn’t have any noticeable loss of pressure over the two full days the raft was inflated.
The fishing rod holders worked great. I thought they might have been the source of the leak, but thankfully weren’t! I highly recommend them to anyone who will be using their packraft for fishing. I followed the design included in the How-To section.
The other raft in some of the pictures is my son’s Klymit Litewater Dinghy which I included just for comparison. My boy enjoys it but I found it to be very uncomfortable to use over long periods. The seat and backrest of the ultralight packraft kit are a definite plus!
Matt, thanks for a great design and kit!
Liberal seam sealing for added seam durability:
Top-up tube assembly:

Lots of feisty brookies in this lake!
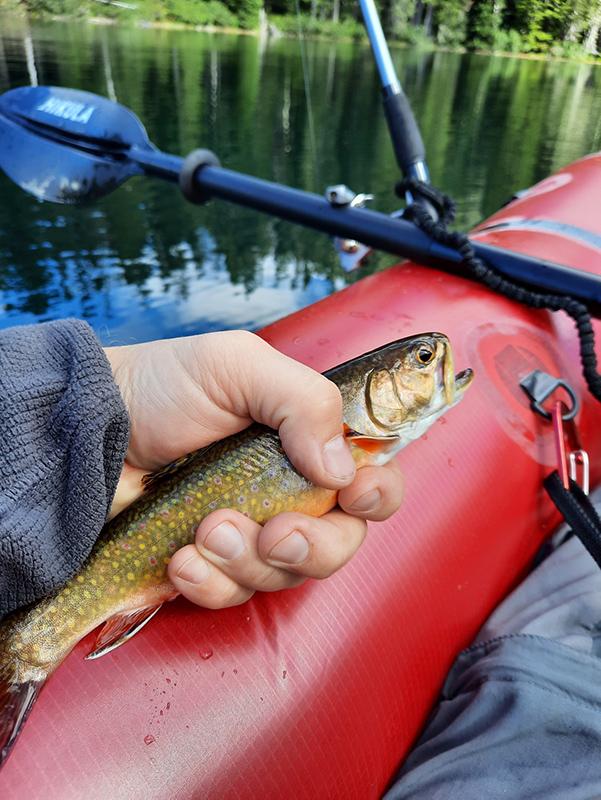
Side-by-side
-
September 23, 2023 at 8:18 pm #18363EricNortParticipant
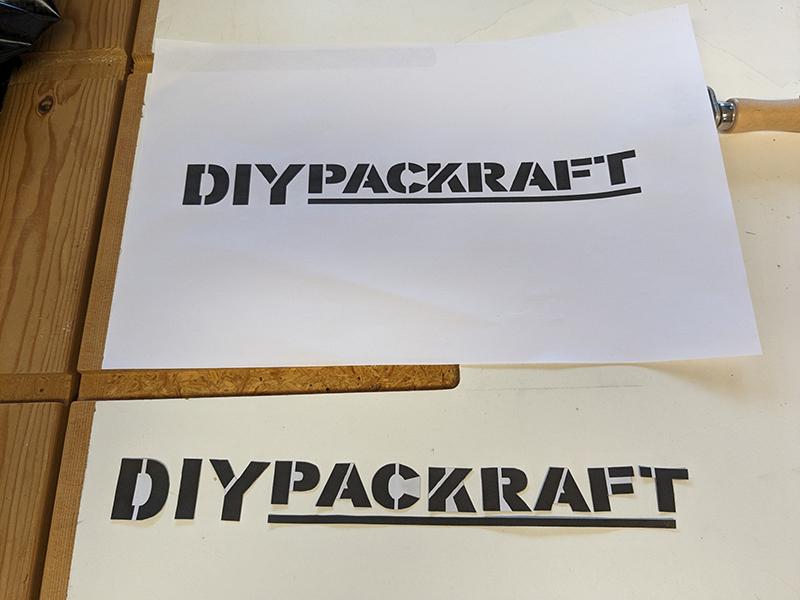
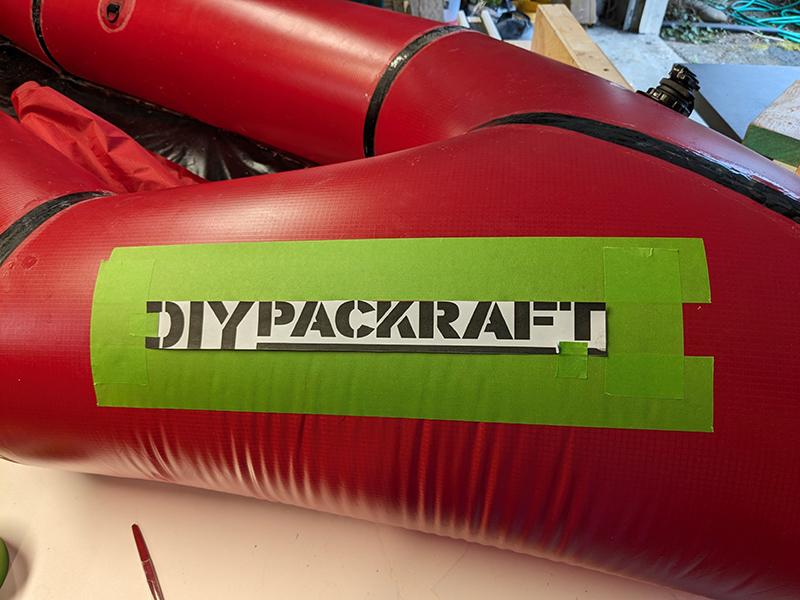
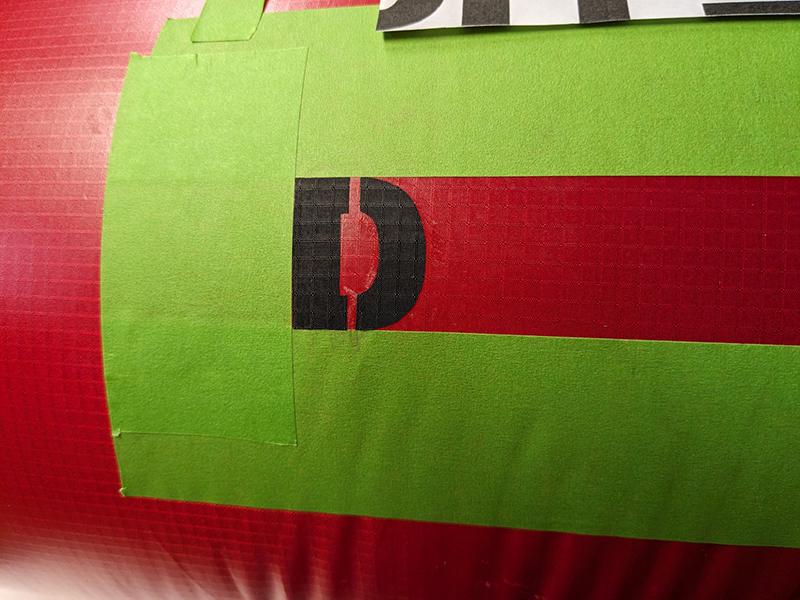
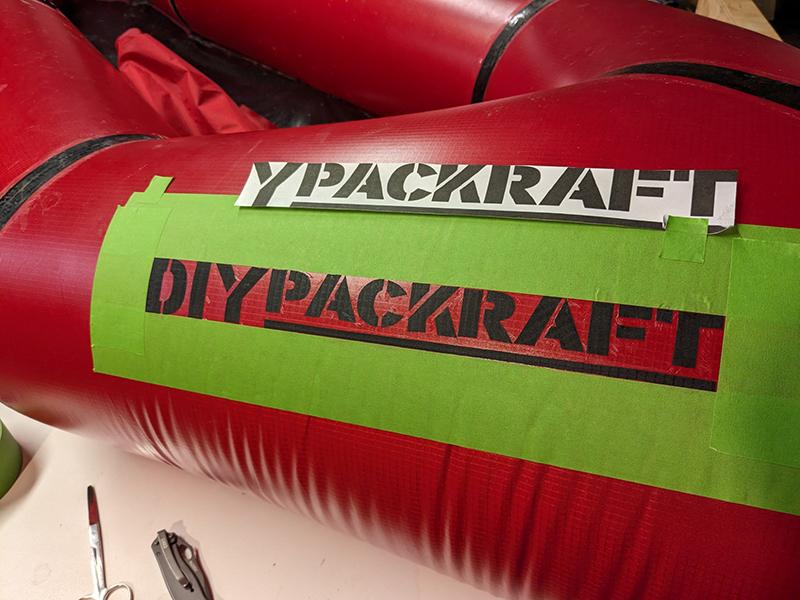
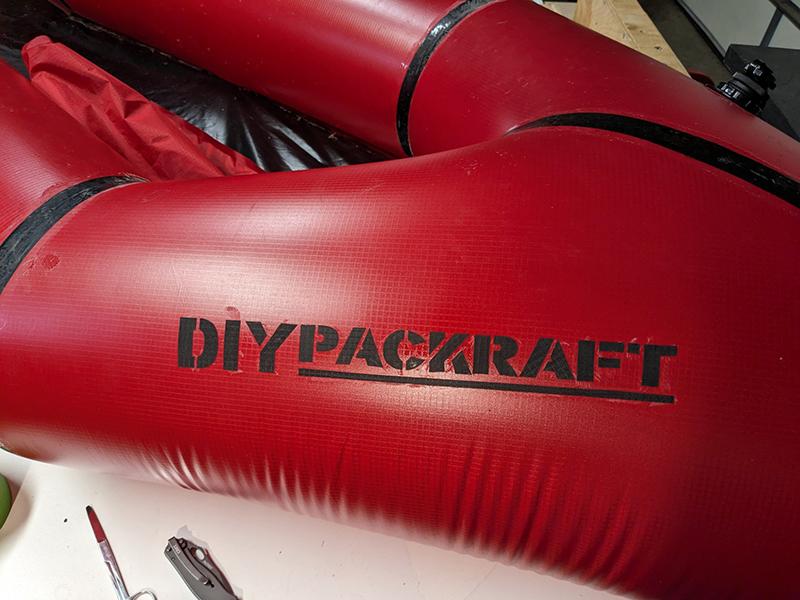
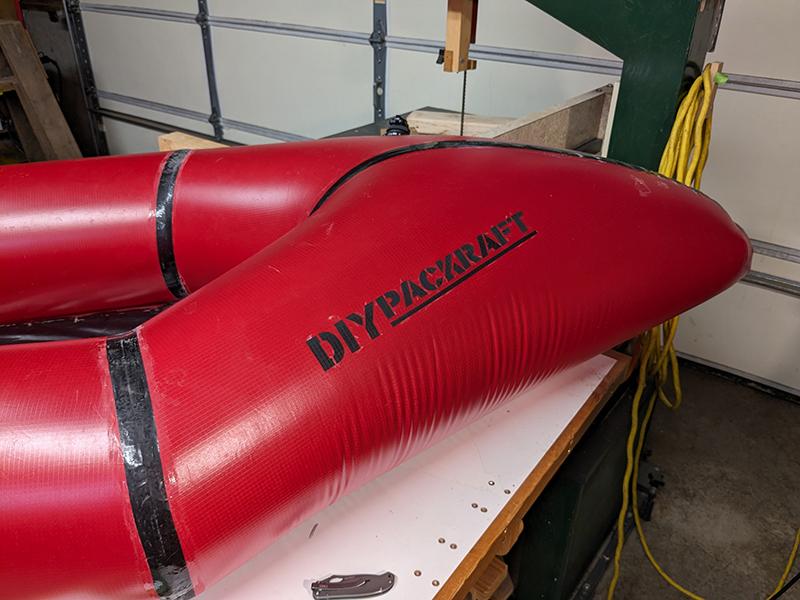
I thought it would look good with the logo on it so I did that this weekend. I downloaded the logo and printed it out full scale on 11″x17″ paper. One sheet was used for alignment, cut down to just the edges of the letters and line, and the other used to transfer the letter patterns to the fabric (used leftovers from the seat cushion). To simplify the stenciling process I put double-sided tape on the backside of the patterns, stuck painter’s tape to that, then stuck the painter’s tape to the fabric. The double-sided tape was too hard to get off the fabric – I learned that early in the build while doing tube seams – but painter’s tape releases from the fabric very easily. The print-out taped to the raft above the logo was just for a reference because I placed the letters individually by eye-balling them. The “K” came out a little wonky, but over all I am pretty happy with it!
-
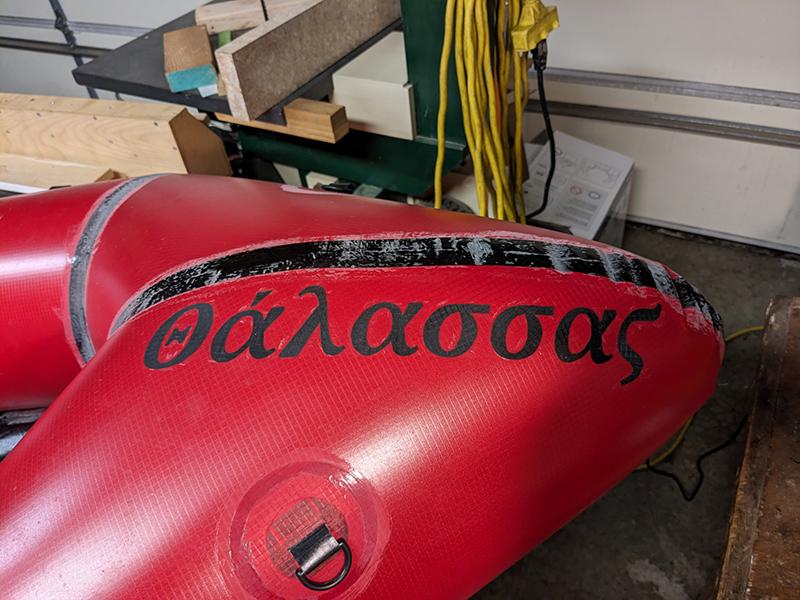
October 4, 2023 at 12:31 pm #18381EricNortParticipant
I decided my packraft needed a name. It is Greek for “Of the Lake” with θάλασσας pronounced Thalassas.
-
October 5, 2023 at 8:22 am #18382Matt (Admin)Keymaster
I love it!
The Greek letters remind me of all those physics classes I took…
-
-
September 26, 2023 at 10:22 am #18366Matt (Admin)Keymaster
Wow, Eric – having done this myself, I know how much work you put into it! Great result – thanks for sharing!
-
-
September 12, 2023 at 9:28 am #18302Matt (Admin)Keymaster
Outstanding! I’m so glad the rod holders worked out. Great work, and thanks for sharing! It looks like you’ve already been to some stunning places. Cheers
-
-
August 13, 2023 at 5:57 am #18234OlleParticipant
After making a V3 three years ago, last winter I built an ultralight. The experience probably made me a bit quicker and I definitely had fewer leaks after sealing the packraft shut the first time. Also, I found the small squares on the thin material useful getting straight lines with the iron.
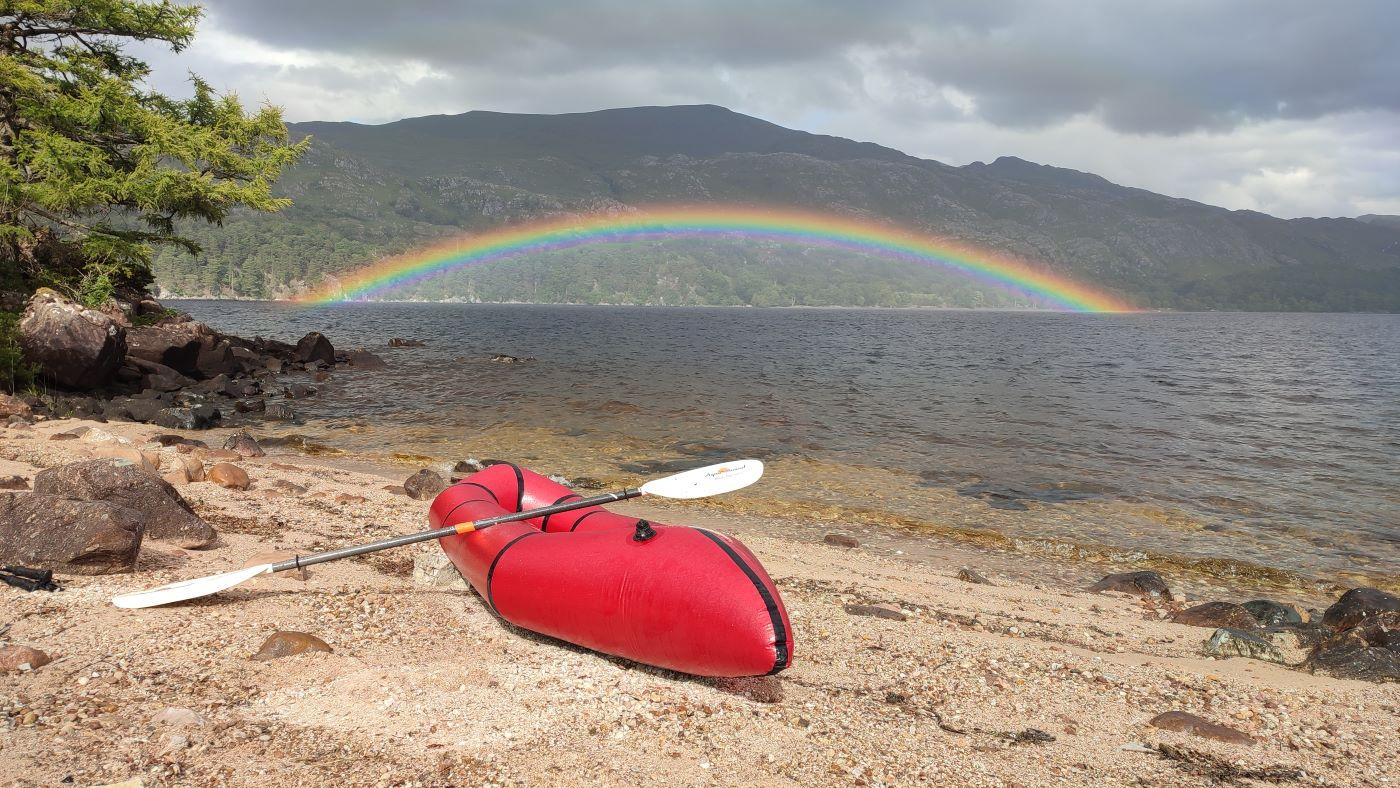
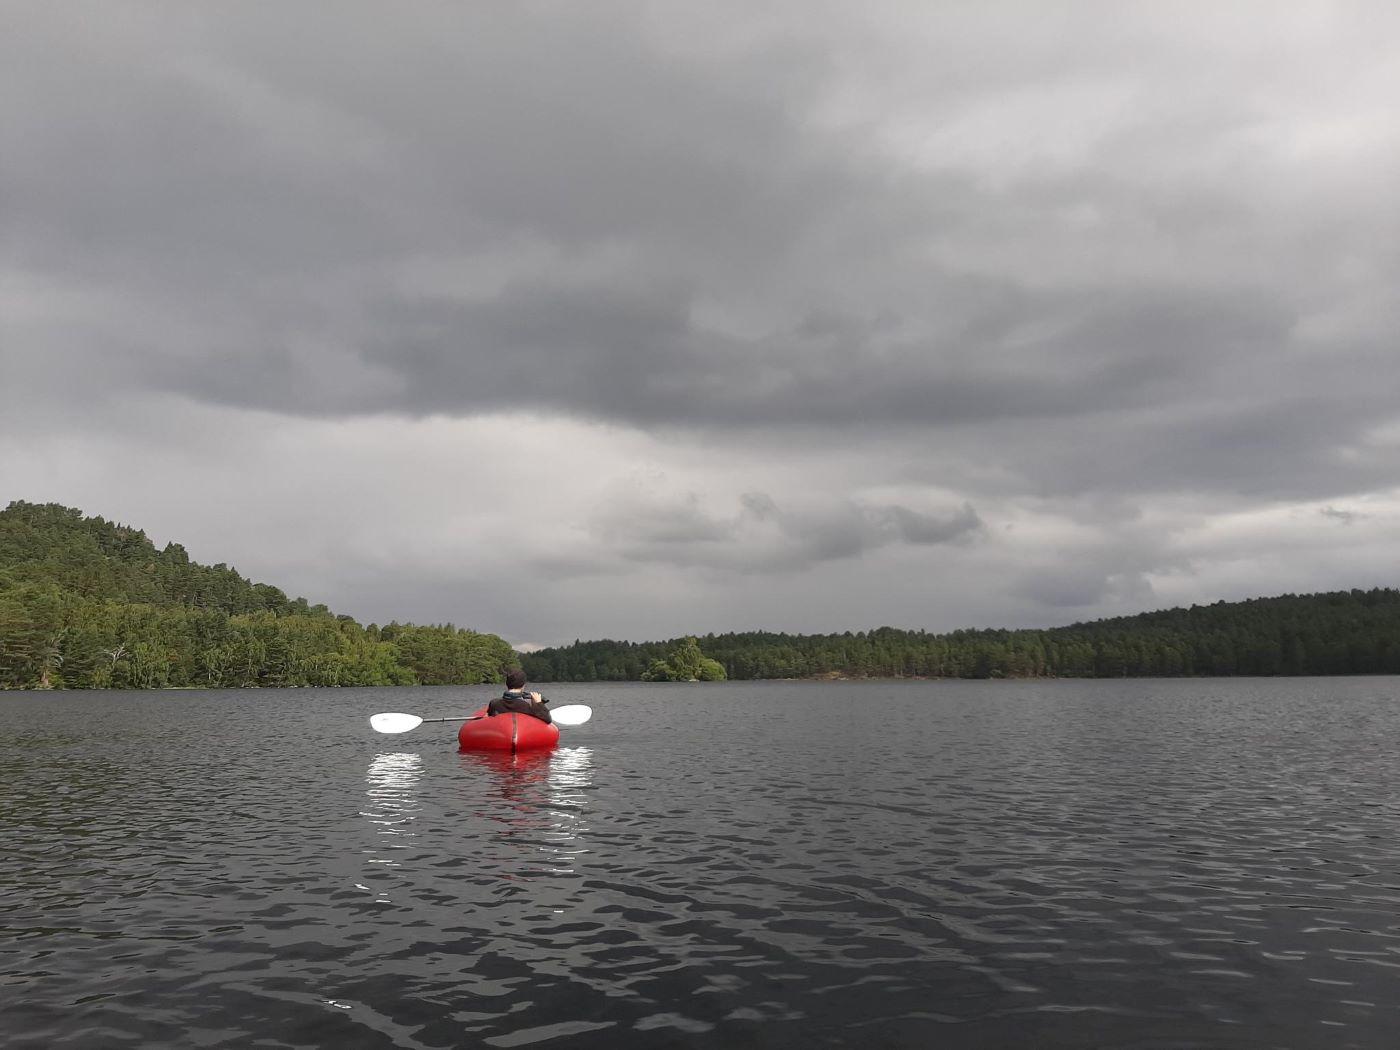
Right after finishing I took it to northern Spain for a week. The thin fabric made me hesitant at first, but the packraft survived the muddy waters, giving me enough confidence to take it with me on a longer trip to Scotland where I climbed the munroes and paddles on the lochs this summer. I still feel my heart skipping when scratching a rock, but again the packraft survived without any punctures or other damage. I love how incredibly light it is and how small it packs compared to my V3, whilst still giving me all the opportunities of crossing water and exploring hidden islands.
Thanks Matt for making all of this possible! (and feel free to repost any pictures)

-
July 27, 2023 at 10:45 pm #18128n8atakParticipant
-
July 28, 2023 at 1:29 pm #18143Matt (Admin)Keymaster
Great job, and thanks for posting! Cool accessories, too!
-
July 27, 2023 at 10:47 pm #18130n8atakParticipant

-
July 27, 2023 at 10:48 pm #18131
-
-
-
June 9, 2023 at 7:19 pm #17871DancingDragonsParticipant
I plan to give a more detailed writeup about my experience with the Ultralight, encompassing everything from building to modding to hiking to paddling. For now, though, enjoy this crunchy picture as well as this imgur album for some highlights of my time with my new getaway
carboat!
I was introduced to packrafts when looking for an alternative to an IK or inflatable boat for flat water – all the options I’d seen were too heavy/bulky or out of my budget. Packrafts solved problem one but were very pricey pieces of gear so I’m glad I went the DIY route. I chose the Ultralight kit since I valued its diminutive size when rolled and extremely light weight. I’m glad I did! All my gear for a day trip fits in a single small backpack + 10L drybag and I hardly break a sweat on even the longest portages.
Since this is primarily a flatwater/slow current vessel I modded it to take on a skeg. It really does make a world of difference in terms of tracking! Once I get the design down pat I plan to release it on printables.com with a host of options to choose from that should be suitable for both deep and shallow water 🙂
Thanks, Matt, for allowing me to fall in love with the water again!
-
June 15, 2023 at 5:32 am #17934Christian001Participant
And yes, show us more of your skeg. Especially, how you attached it to your raft.
-
June 15, 2023 at 5:29 am #17933Christian001Participant
Would love to hear your experience with the durability of that UL packraft. I have one as well, and am always a little bit in fear, that it could rip apart at some small stone/rock beneath the water surface.
My UL packraft is built with the older UL fabric. I don’t know, if the newer fabric is more durable or if there is any difference. Maybe Matt can say something about it.
Christian
-
August 2, 2023 at 9:31 am #18168DancingDragonsParticipant
I’ve replied to Matt with skeg pictures 🙂
As for durability, I’ve found that I no longer worry – I’ve seen marine life and debris brush up through the floor enough times and it still causes concern, but nothing yet has caused a breach or puncture. I don’t drag it along shore or docks, and I only launch and land directly in the water to reduce the amount of abrasion the bottom would take. If I had to make a change to the design I would suggest a slightly thicker floor while preserving the use of 70D for the tube. That would be enough to quell all my concerns for flatwater use!
-
June 15, 2023 at 8:43 am #17936Matt (Admin)Keymaster
Hi Christian, I sympathize with that fear! It took me some time before I felt comfortable paddling in the Ultralight packrafts. The newer Ultralight fabric is very similar to the older fabric – to achieve the packraft’s very light weight we must use a very lightweight fabric or reduce the size and capabilities of the boat.
As a confidence building exercise, it might be a good idea to use some of your scrap ultralight fabric and a valve to make a small inflatable pillow (or even just use a piece of scrap fabric held in your hand) and then take it to the shore and scrape it over sticks and stones in the water to see how durable it is. It is not indestructible, but you may find that it is more durable than you expect.
-
August 2, 2023 at 9:54 am #18170DancingDragonsParticipant
Hi Matt, I noticed that though the floor fabric is heavier due to it being double sided TPU, it isn’t actually stronger than the tube fabric since the base fabric appears to be the same. I understand the UL isn’t a very popular item for you, but is it in the cards for a future revision to have a sturdier floor fabric option? I imagine that maybe the tube fabric from the other packrafts would be a decent option moving from 70D to ~210D
-
August 2, 2023 at 5:21 pm #18173Matt (Admin)Keymaster
Yeah, that’s something I’ve thought about, but once there’s TPU on both sides of the standard tube fabric then it’s only slightly lighter than the standard 450 GSM floor fabric – the difference isn’t big enough to make it worthwhile on a floor that’s about one square meter (it might save 50 or 100 grams compared to using the standard weight floor fabric). It might work to use thinner TPU coatings, but until I hear about people actually puncturing the ultralight floors (as opposed to being worried about it happening) then it’s probably not going to be a priority.
Also keep in mind that the floor inside the cockpit isn’t required to keep the packraft afloat. I’m currently developing a self-bailer and the platform is a Skeena with a bunch of holes cut in the floor. When I paddle it, the water only comes up in the cockpit a couple of inches and it still performs fine – the tubes provide way more than enough flotation.
One possible option for the Ultralight would be to reinforce the floor fabric where it’s exposed inside the tubes by heat sealing a layer of tube fabric over it… but yeah, I haven’t heard of anyone puncturing an Ultralight yet, other than me when I was doing something stupid (to see what would happen, I let myself get pushed over a small log jam in a shallow stream and the current basically impaled me on sharp sticks – easily avoidable).
-
August 3, 2023 at 12:17 pm #18203DancingDragonsParticipant
I had a similar idea about making my ultralight self bailing by extending the seat into a full length inflatable floor and cutting bailing ports into the original floor (and reinforcing around them) since I found that the seat alone gave nearly enough buoyancy to keep my behind above water. I imagine that with a full length inflatable floor + a slightly thicker seat you would get self bailing capabilities without getting too wet (though being damp is a given)
Unfortunately finding comparable fabrics is proving difficult unless I buy on a B2B platform like alibaba. The lightest stuff I can get appears to be 210D based and is much too heavy for my liking.
-
-
-
-
-
June 14, 2023 at 9:12 am #17878Matt (Admin)Keymaster
I don’t think my previous response got posted… I wrote something like:
Great work! Thanks for posting the photos and your thoughts.
I’d be really interested in reading more about your experience with the Ulralight. I haven’t received much feedback about that model, and if I can post it as a Customer Build Report (under the Gallery menu) then I think it could help potential builders decide if an Ultralight is right for them. Just send me an email if that’s something you’d like to do.
And that’s a great photo! Do you mind if I use it elsewhere on the site and/or on social media?
Please keep us posted about the skeg – I’m quite interested in that too!
-
August 2, 2023 at 9:28 am #18167DancingDragonsParticipant
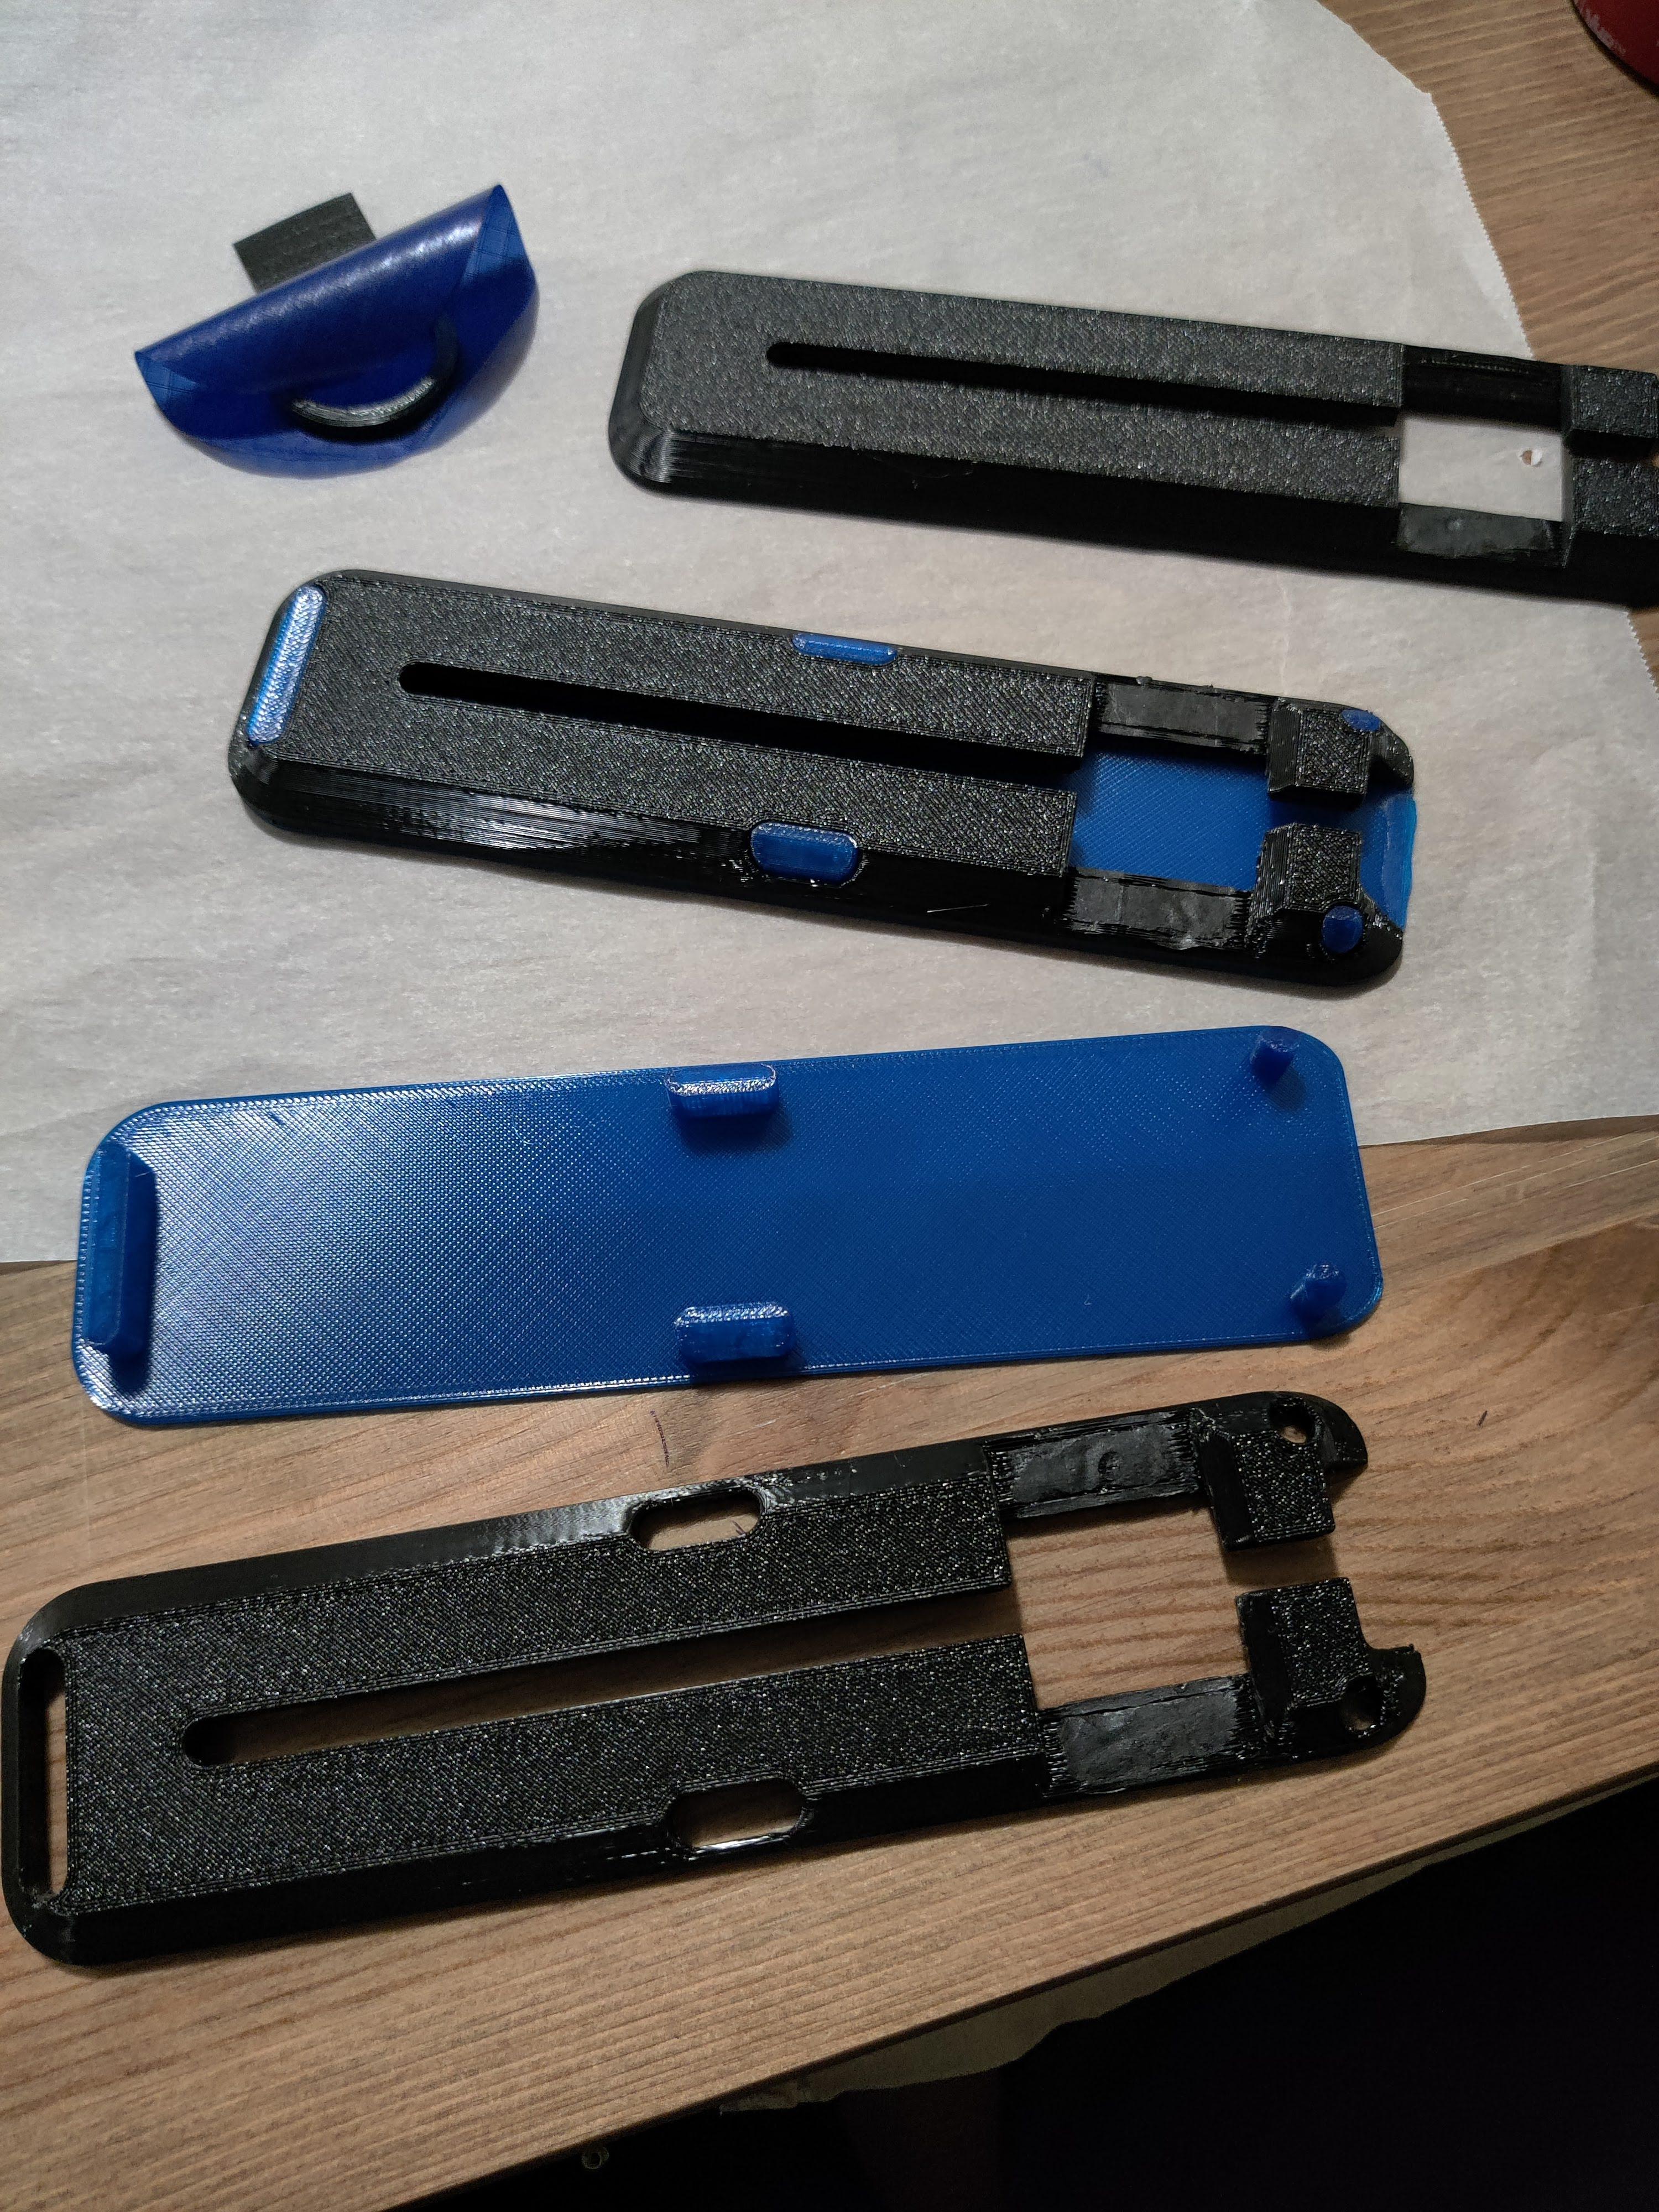
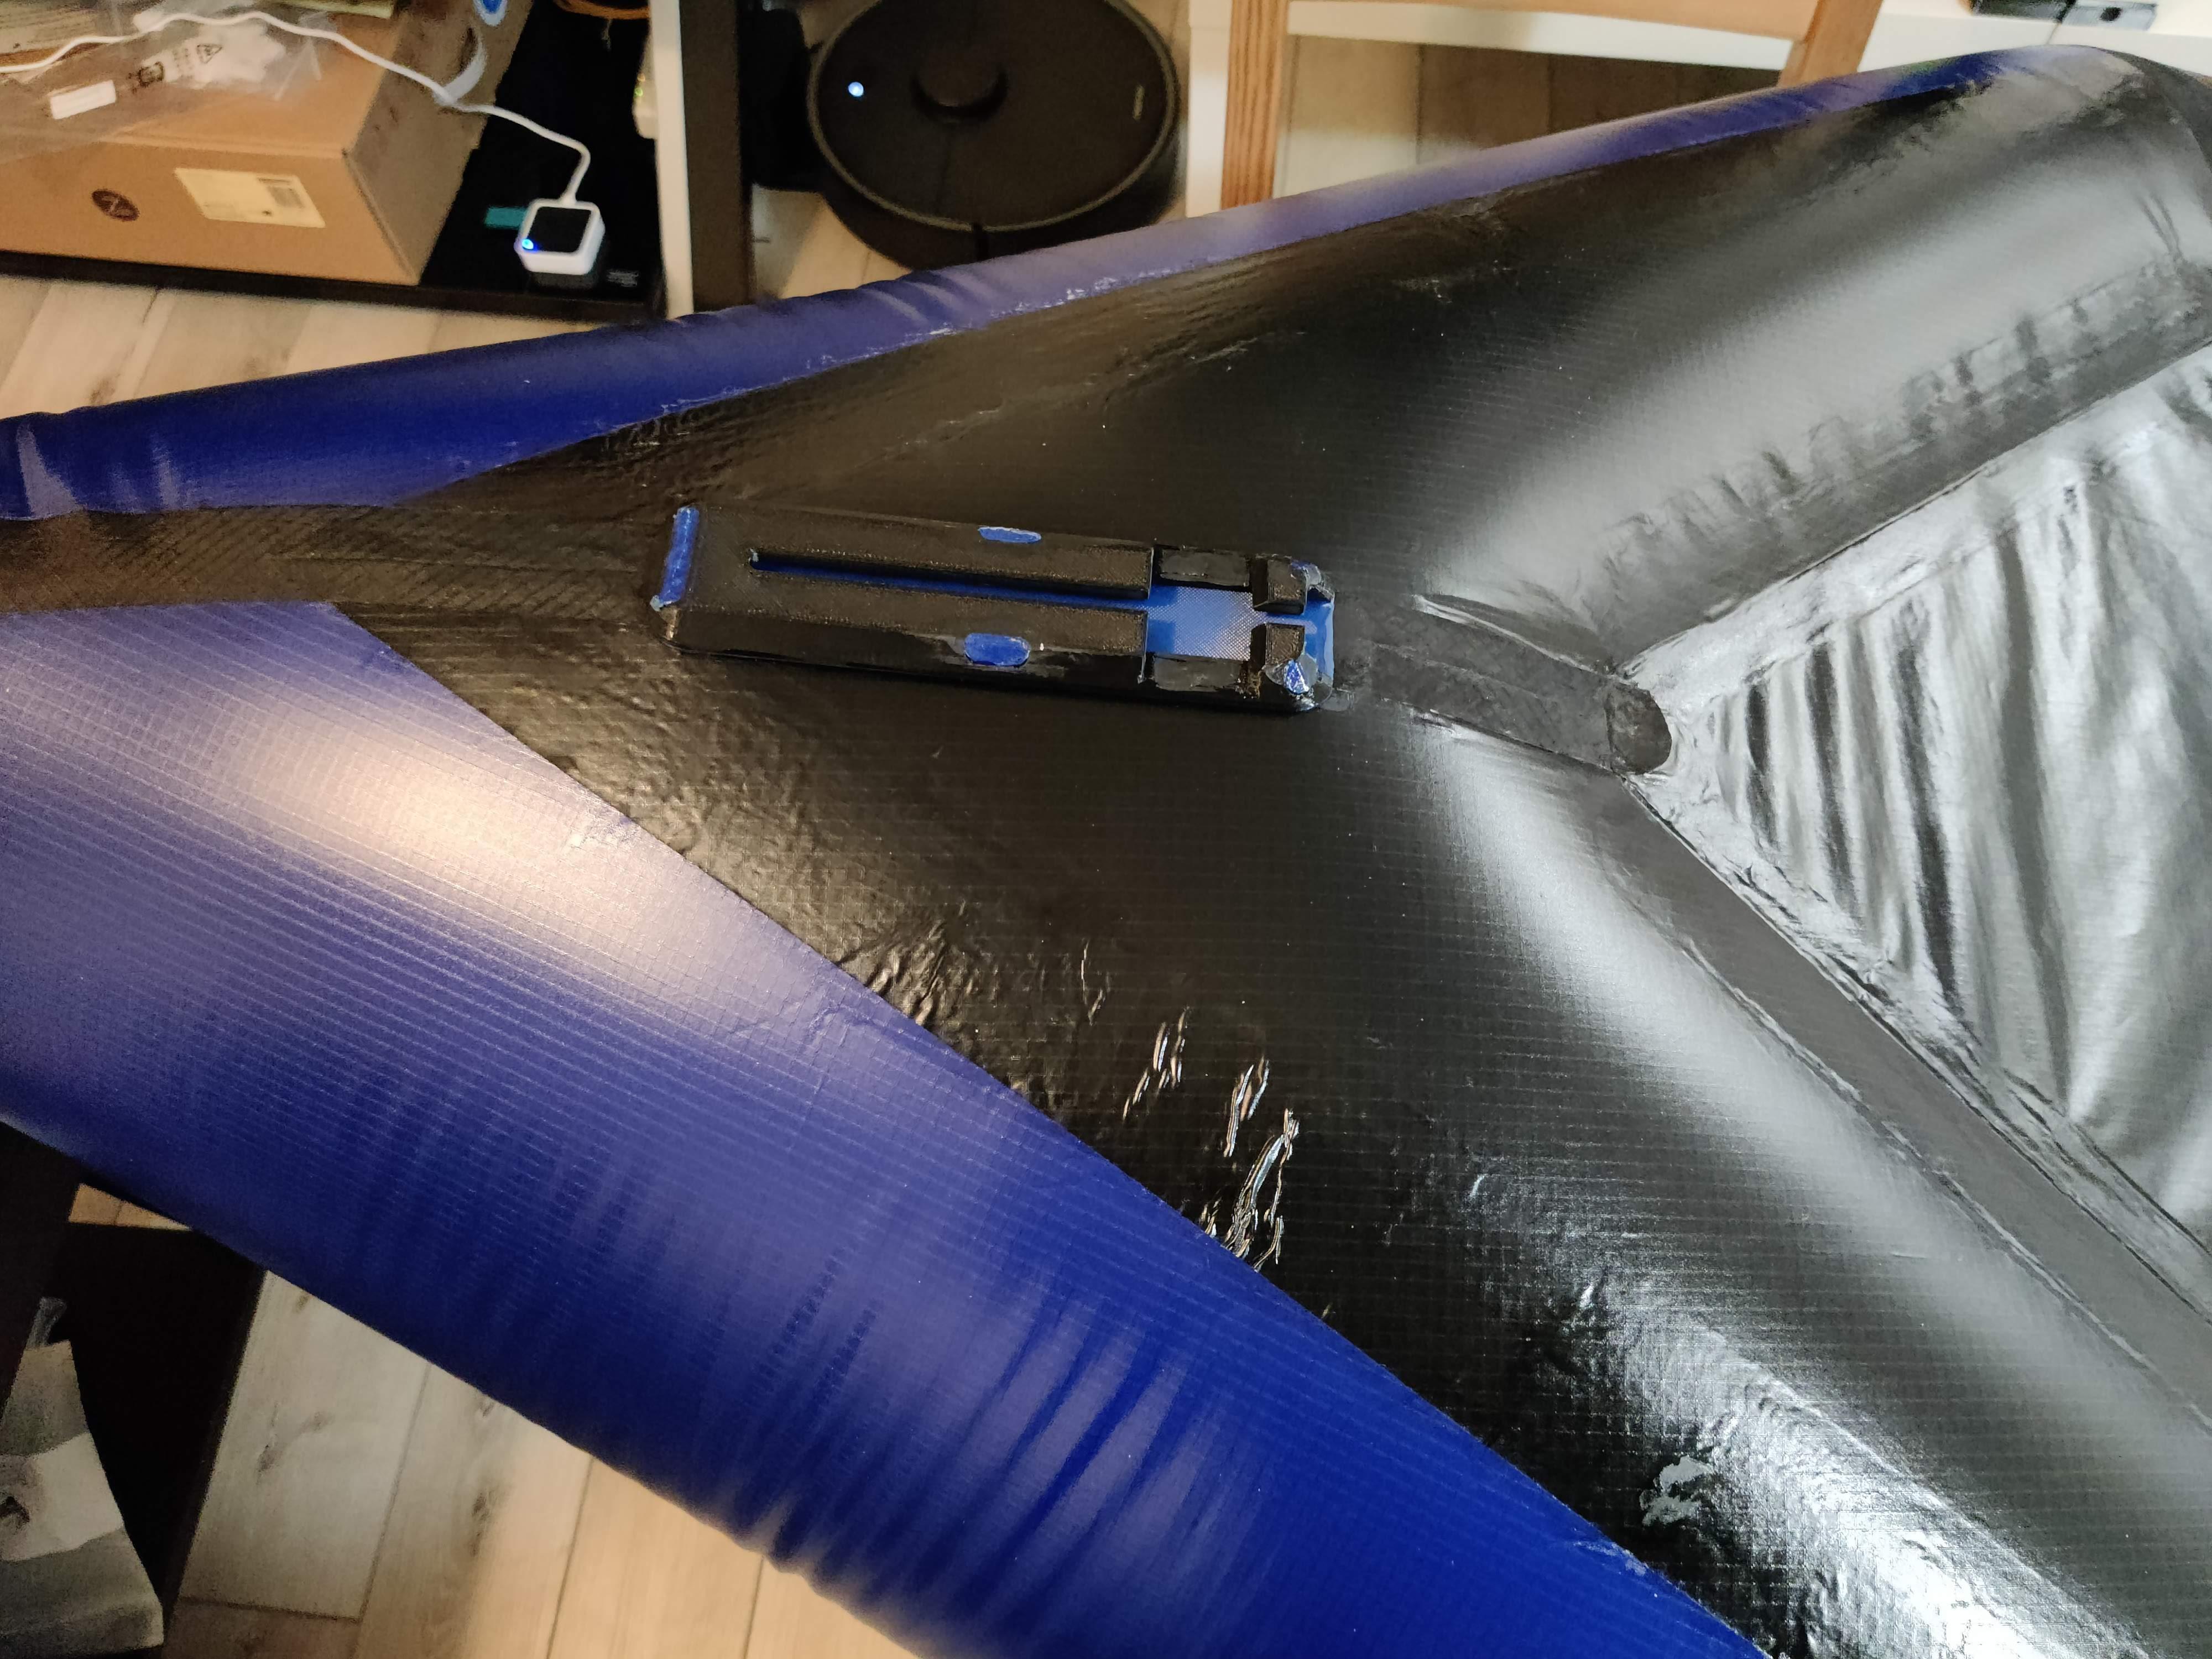
Hi Matt, you absolutely can use this photo! As for the skeg, I don’t have any pictures of the current revision but here is what V1.0 looked like. As you can see it’s a two part design to make printing easy (three if you count the skeg) and is compatible with Intex skegs. Base is TPU and top is PETG, but V2.0 is all TPU since I have determined that with a high enough infill the top is stiff enough to constrain even a deep skeg when crabbing. To attach to the raft I prepped a section of seam with aquaseal, then HH-66ed the base to that section to ensure a good plastic-plastic bond instead of trying to glue directly to the fabric. The top is then heatsealed/welded to the bottom piece on the tabs you can see.
-
-
-
December 9, 2022 at 7:16 pm #16816Uncle FredParticipant
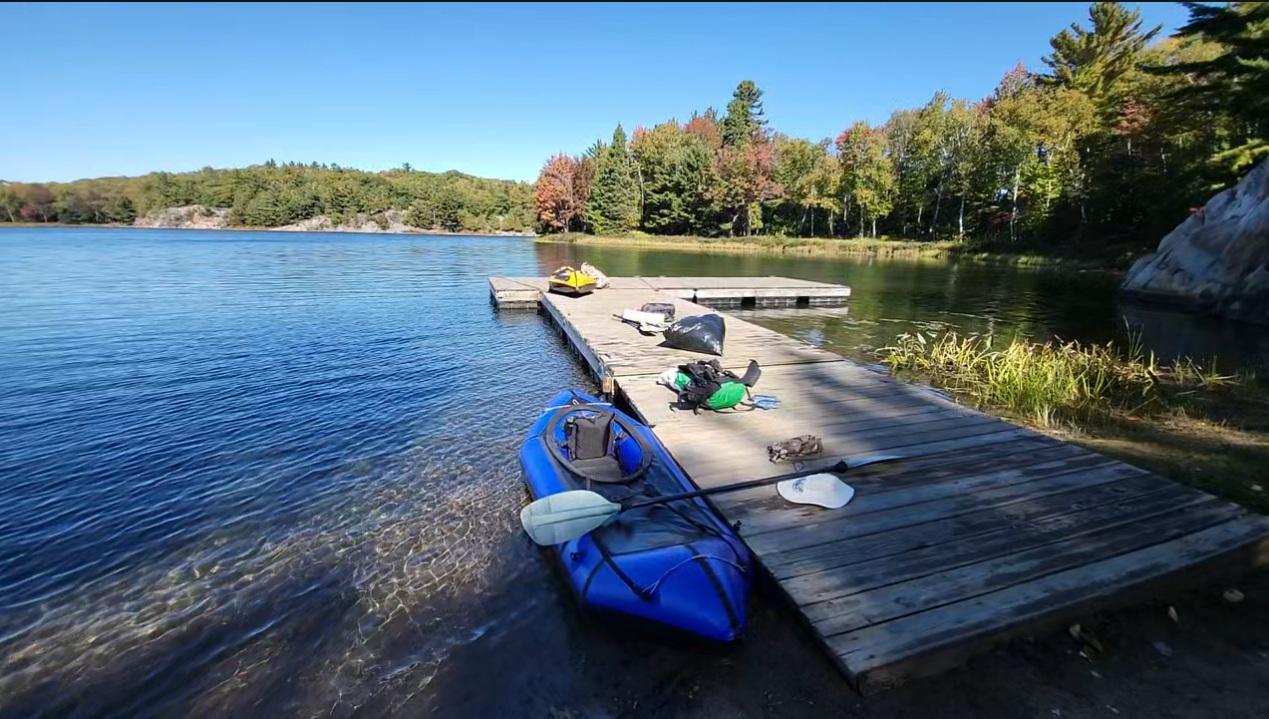
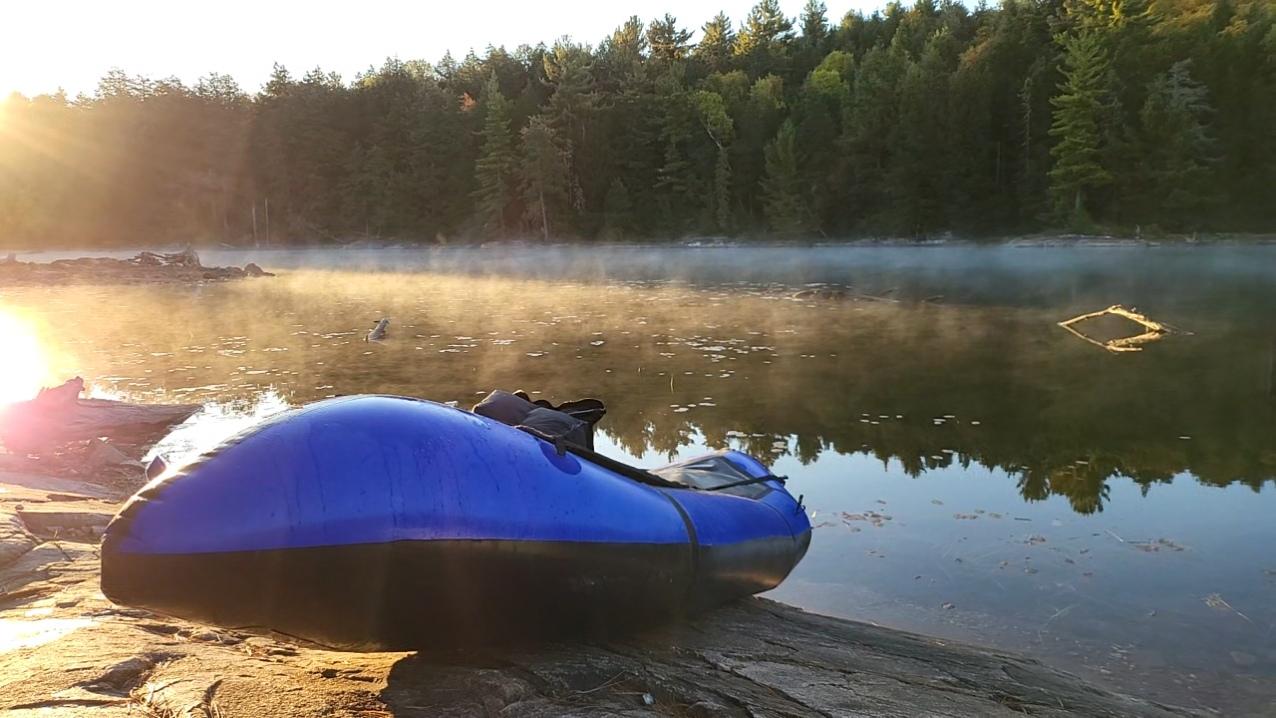
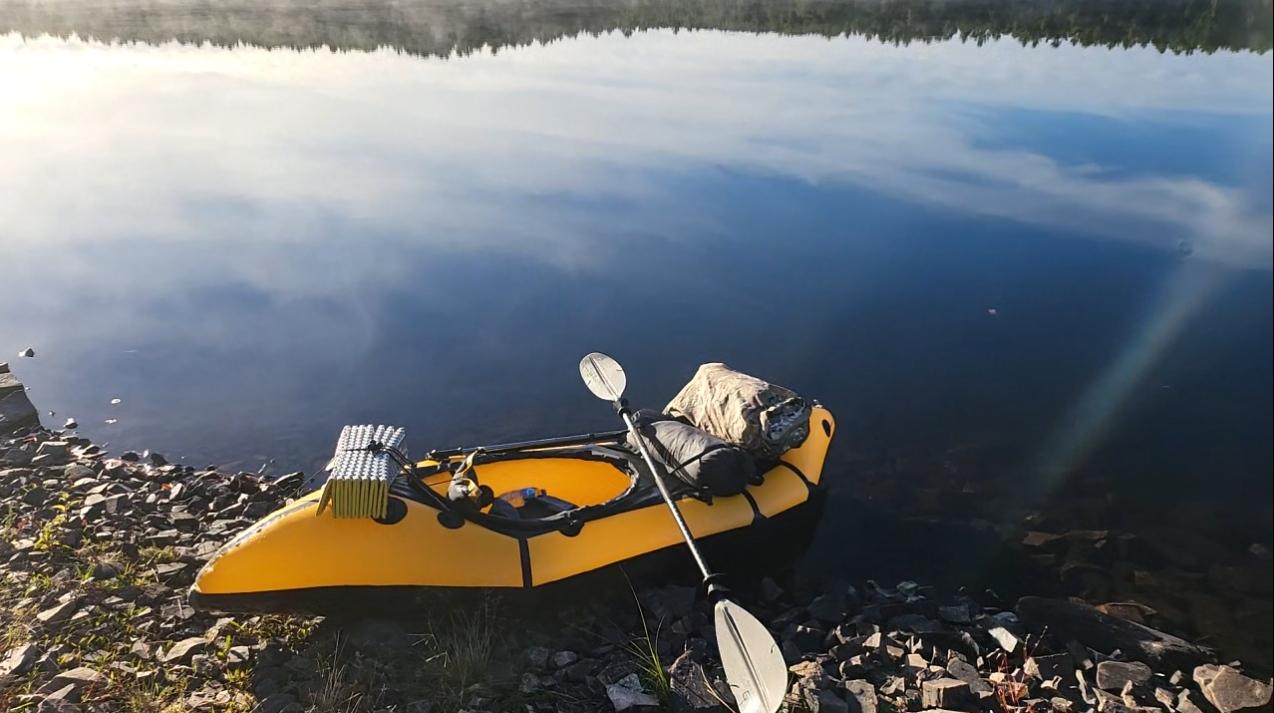
I’d like to thank Matt for his DIY kit. This has become one heck of a memorable project. It’s made me confident in crafting items and repairing all kinds of things. This adventure has also opened up places to travel that I never considered.
Below is our most recent trip: 85km of hiking and portaging across Ontario’s Killarney Provincial Park. We did it in 3 nights, and four days. The adventure included assisting a helicopter rescue of a woman at Silver Peak.
-
This reply was modified 3 years, 6 months ago by Uncle Fred.
-
December 9, 2022 at 7:46 pm #16822Uncle FredParticipant
Packrafts seem to be almost unknown in Ontario. Everyone I encounter asks what these boats are. Canoeists gawk at them. People approach asking if I could build them a raft.
Portages are amazing with packrafts. For anything over 400m we roll them up and strap them to our packs. Hiking a portage with a boat is no longer a chore.
Building the boats was fun but took a lot of time. Most of the effort was spent building out the accessories, testing, and leak-fixing.
A few things I’d do differently:
If I built another boat, I’d weld wider overlaps and reinforcement strips for everything.
I’d buy way more Seam Grip. I used it a lot. On my first boat, it became a kind of crutch for some bad welds.
I’d seam grip in reinforcement patches over the corner joints.
I’d shuffle the coaming tube around the slot more before cutting it to size. The larger, the better.
Attachment point style 1 needs revision. This is the version with two slits. I found that after a couple of test trips, Four of these attachment points started to leak from webbing abrasion. To fix this, all these attachment points required sealing from the inside. This style should be updated to account for this problem.
A few things I did:
Every exposed edge of fabric got an application of Seam Grip. This avoids fraying.
On my spray skirt and deck, I added velcro strips and marked the spots with paint. The velcro allows for quicker sprayskirt attachment. A few strips of velcro are not enough to get you stuck in the boat.
Added a pull loop on the front of the spray skirt for rapid exit.
Added a tab on the rear of the skirt and the deck ring to better line up the rear velcro.
Added suspenders to the spray skirt. The spray skirt has a habit of slowly falling down without them.
I replaced the coaming ring with a larger and thicker nylon tube. The Tube can be found on Amazon Canada item# “B07KVNJF8H”. It’s 3/8″ ID 0.47″ OD, 10 feet. This tube offers a much more sturdy ring:
I made custom 4-point adjustable leg straps. Here is the form for anyone that wants it:
Note that the dimensions might be a little different if you are a taller person. I’m pretty small at 5′-7″. 3/4 polypropylene was used (avoid Nylon as it absorbs water) on the bottom edge and the top “U” shape. I used 1/2″ webbing on the two side slopes.
To make the leg straps, you can iron 150GSM leftovers to the webbing. You’ll also need to sew it down. Ironing is not enough, it will delaminate. I don’t have a sewing machine so I sewed it by hand. Consider using a UHMWPE thread rather than Nylon. Nylon isn’t nearly as strong, abrasion resistant, and absorbs water. In Canada, you can get this cheaply and easily at Amazon Canada item#”B081X6P9HT”. Reaction fishing tackle. Use 65lbs.
For comfort, you may want to use the welding iron to merge the 1/2″ and 3/4″ straps where they intersect. You can use a welding iron to completely merge polypropylene webbing easily. It’s a lot less likely to snag on clothes if you do this.
Next, add attachment points and D rings. Be sure to test where the attachment points should go by sitting in your boat. You can make the straps adjustable. This involves looping the bottom webbing through the front attachment point and back through a tri-glide or cam-buckle placed near where those two measurement arrows meet. Personally, I don’t find I need to adjust my leg straps and would just skip this feature if I had to make leg straps again.
I built five additional attachment points into the backrest to hold it firmly in place.
I made a separate inflatable fill bag to sit behind the backrest. This makes it so the backrest sits firm, upright, and forward. It’s a huge quality-of-life improvement to the feel. This upgrade should come standard for the boats. Here is how I built it:
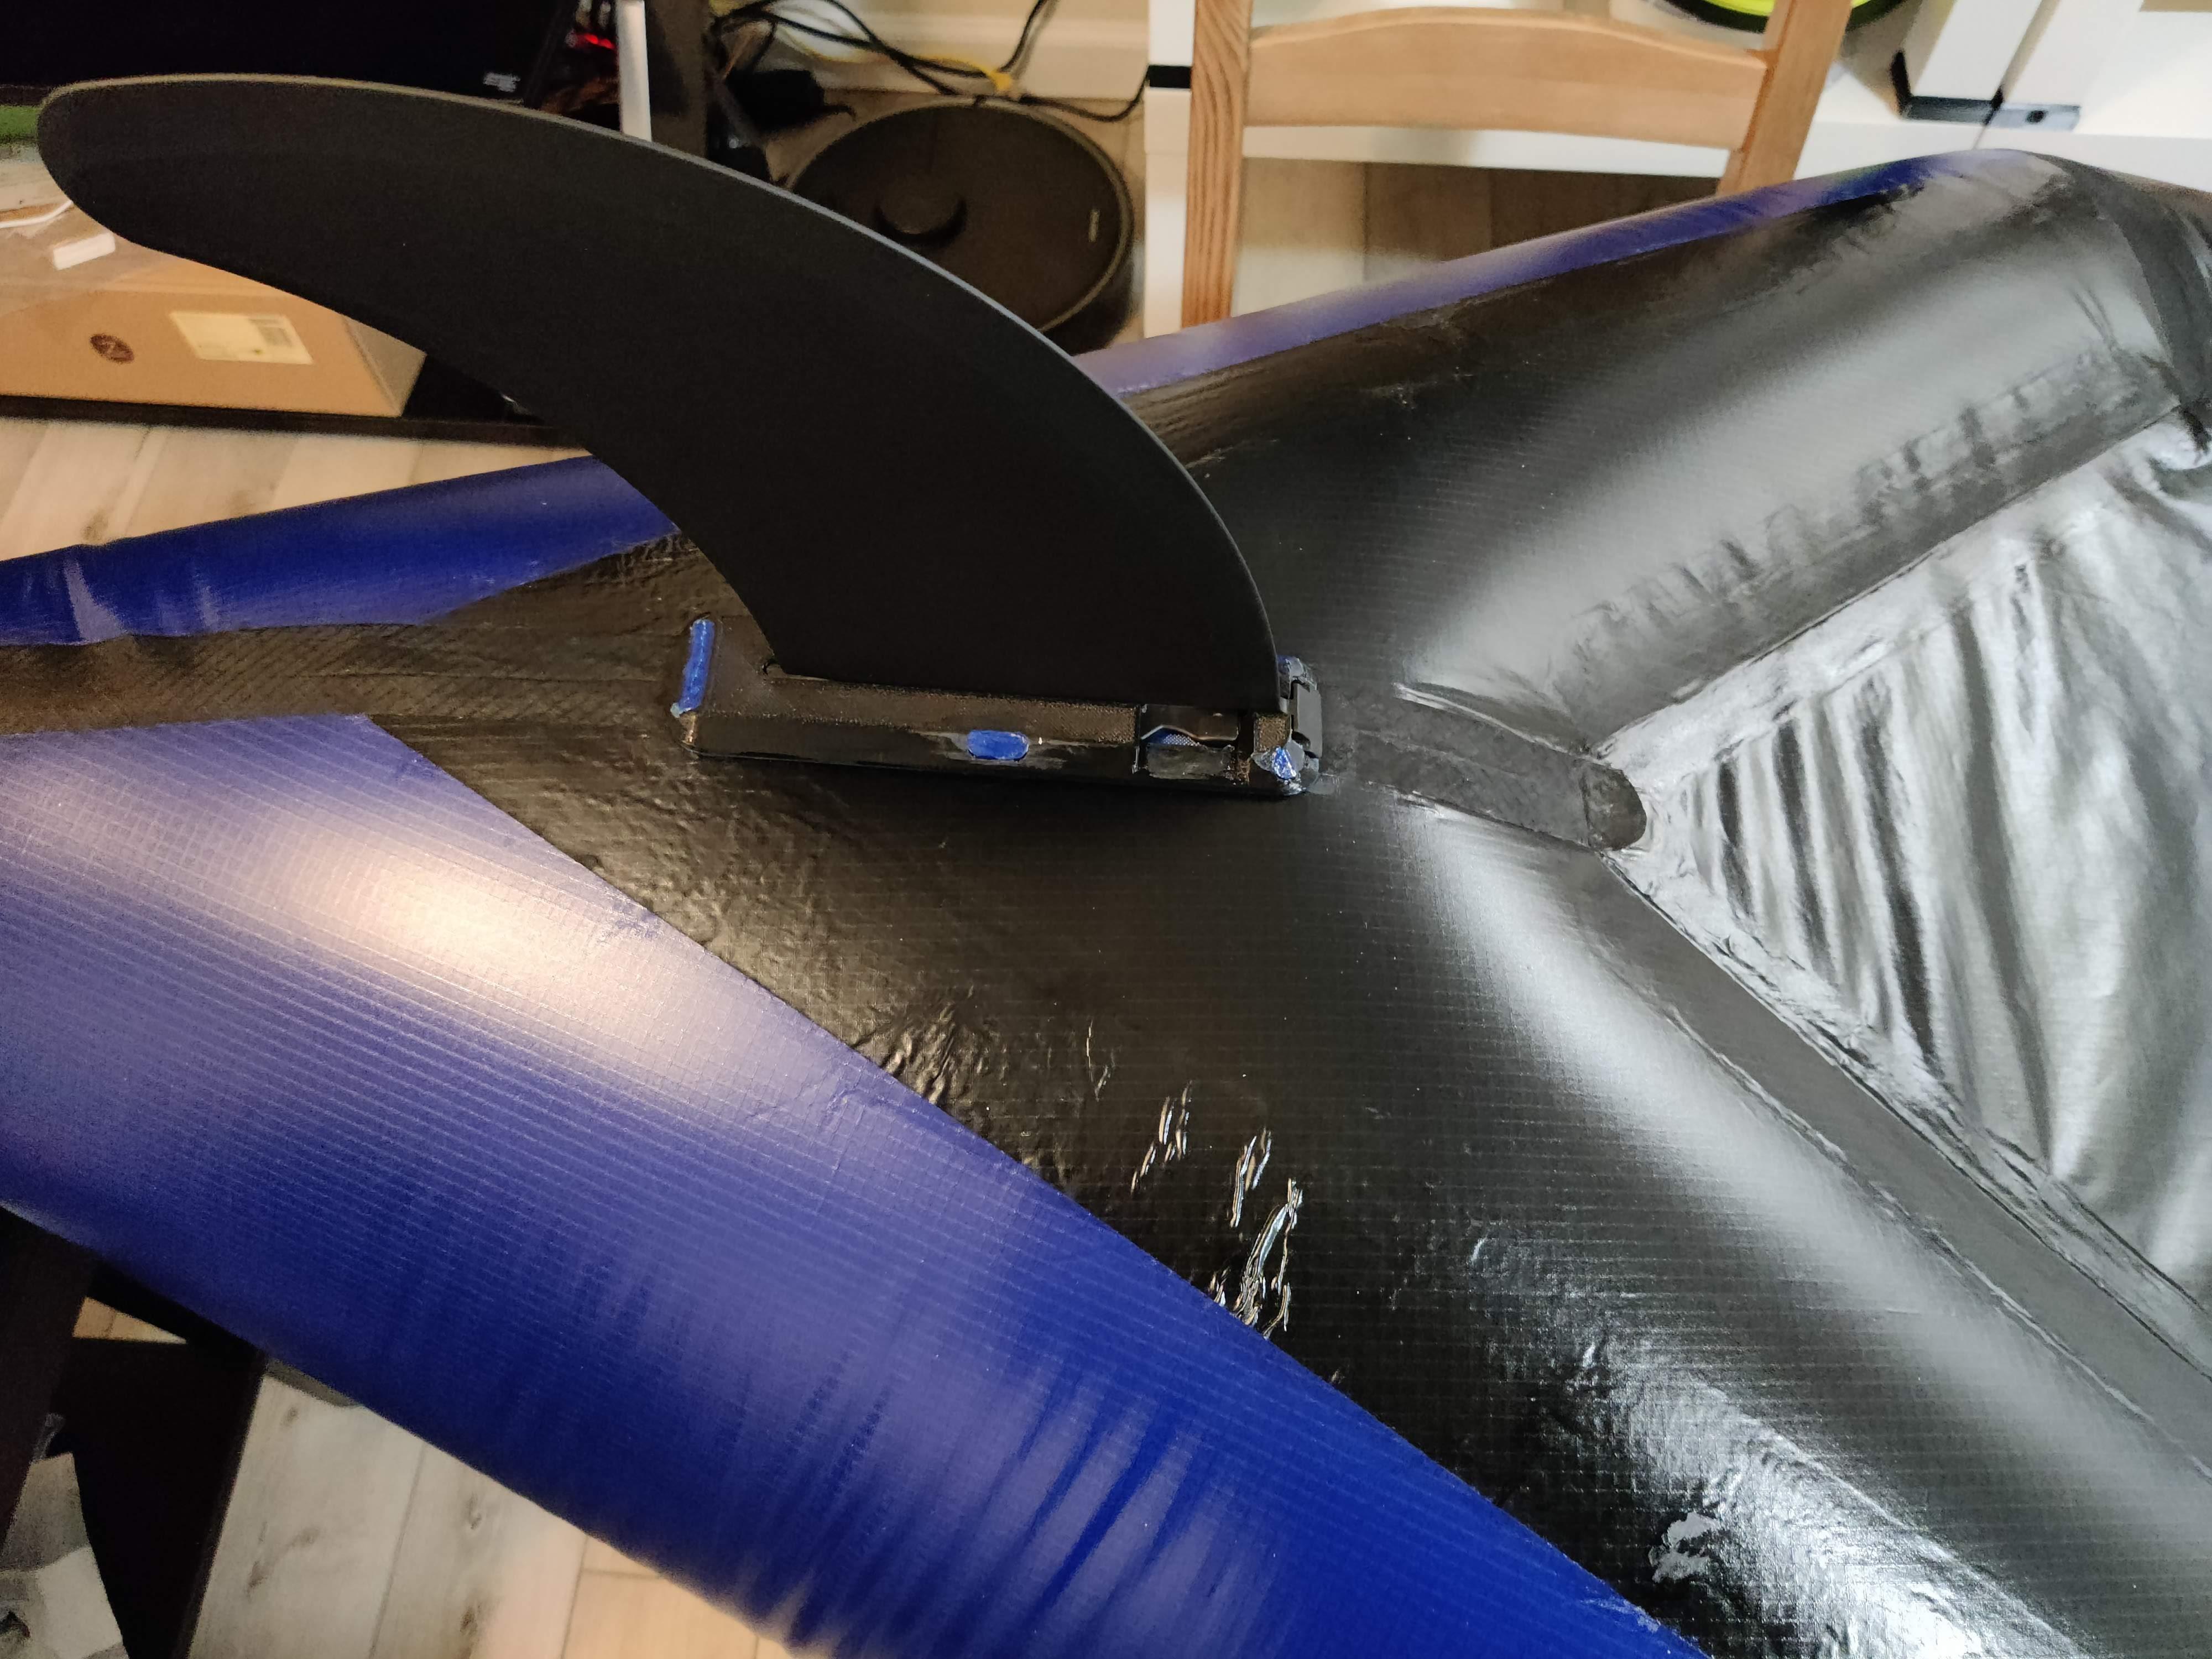
I added an MRS skeg to the rear:
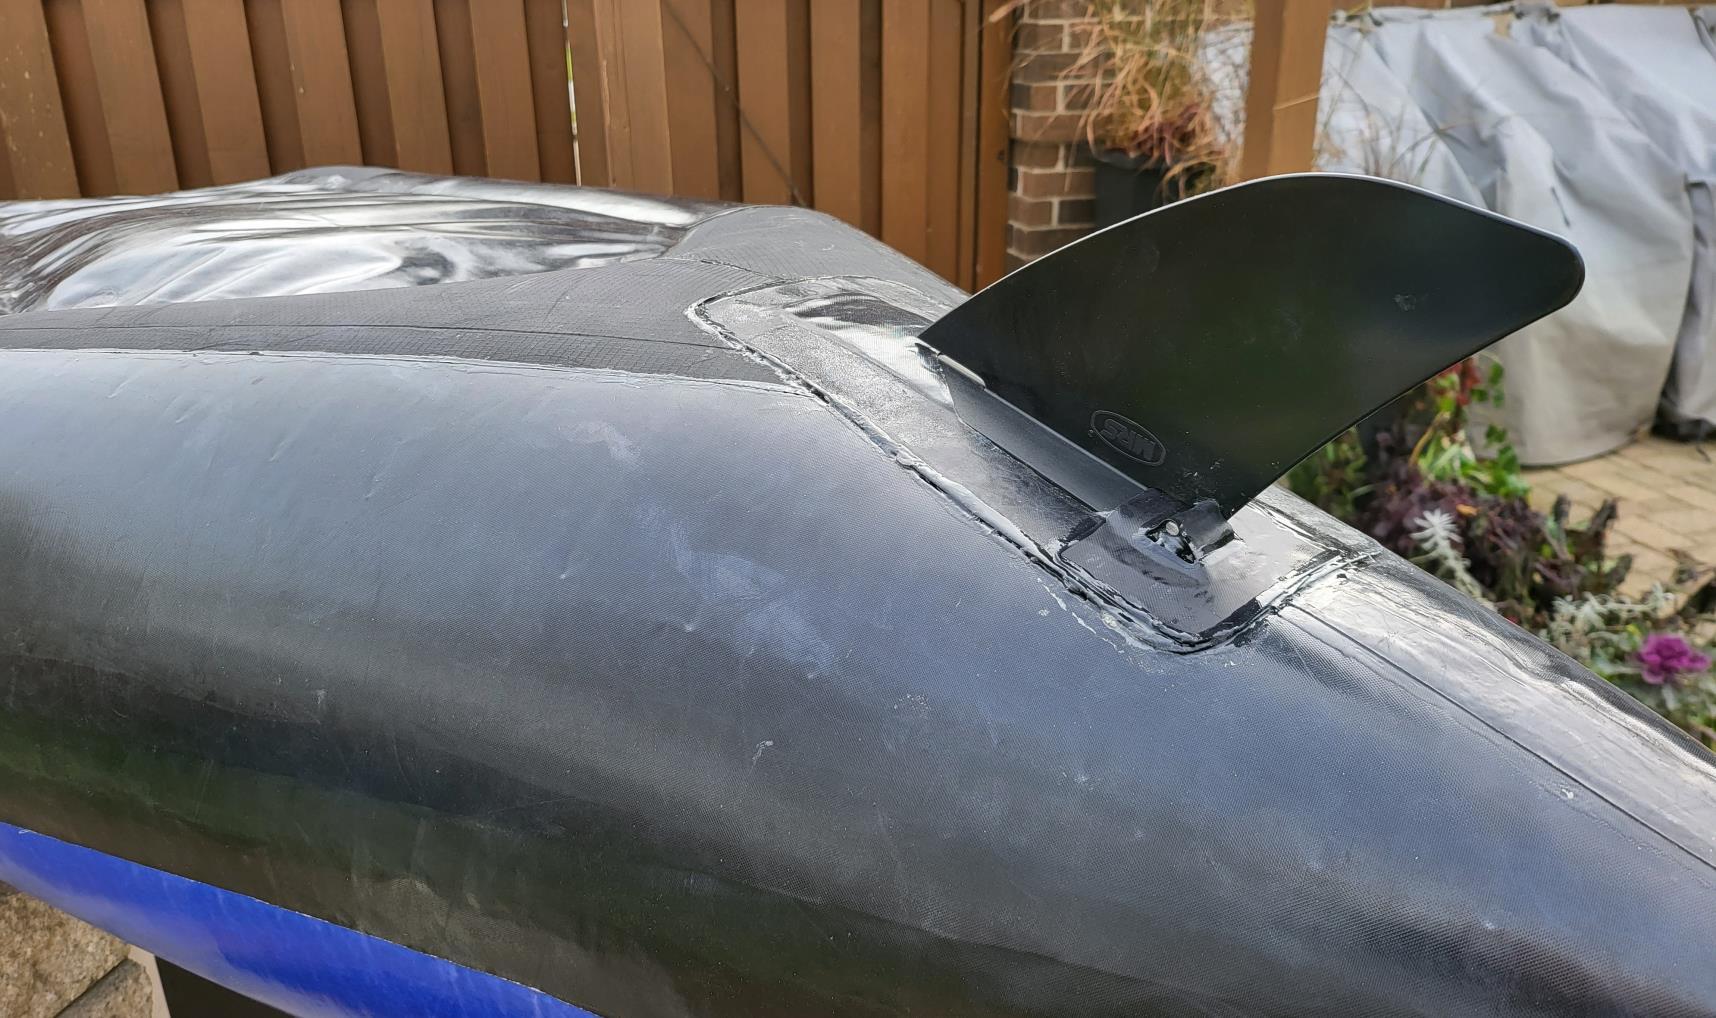
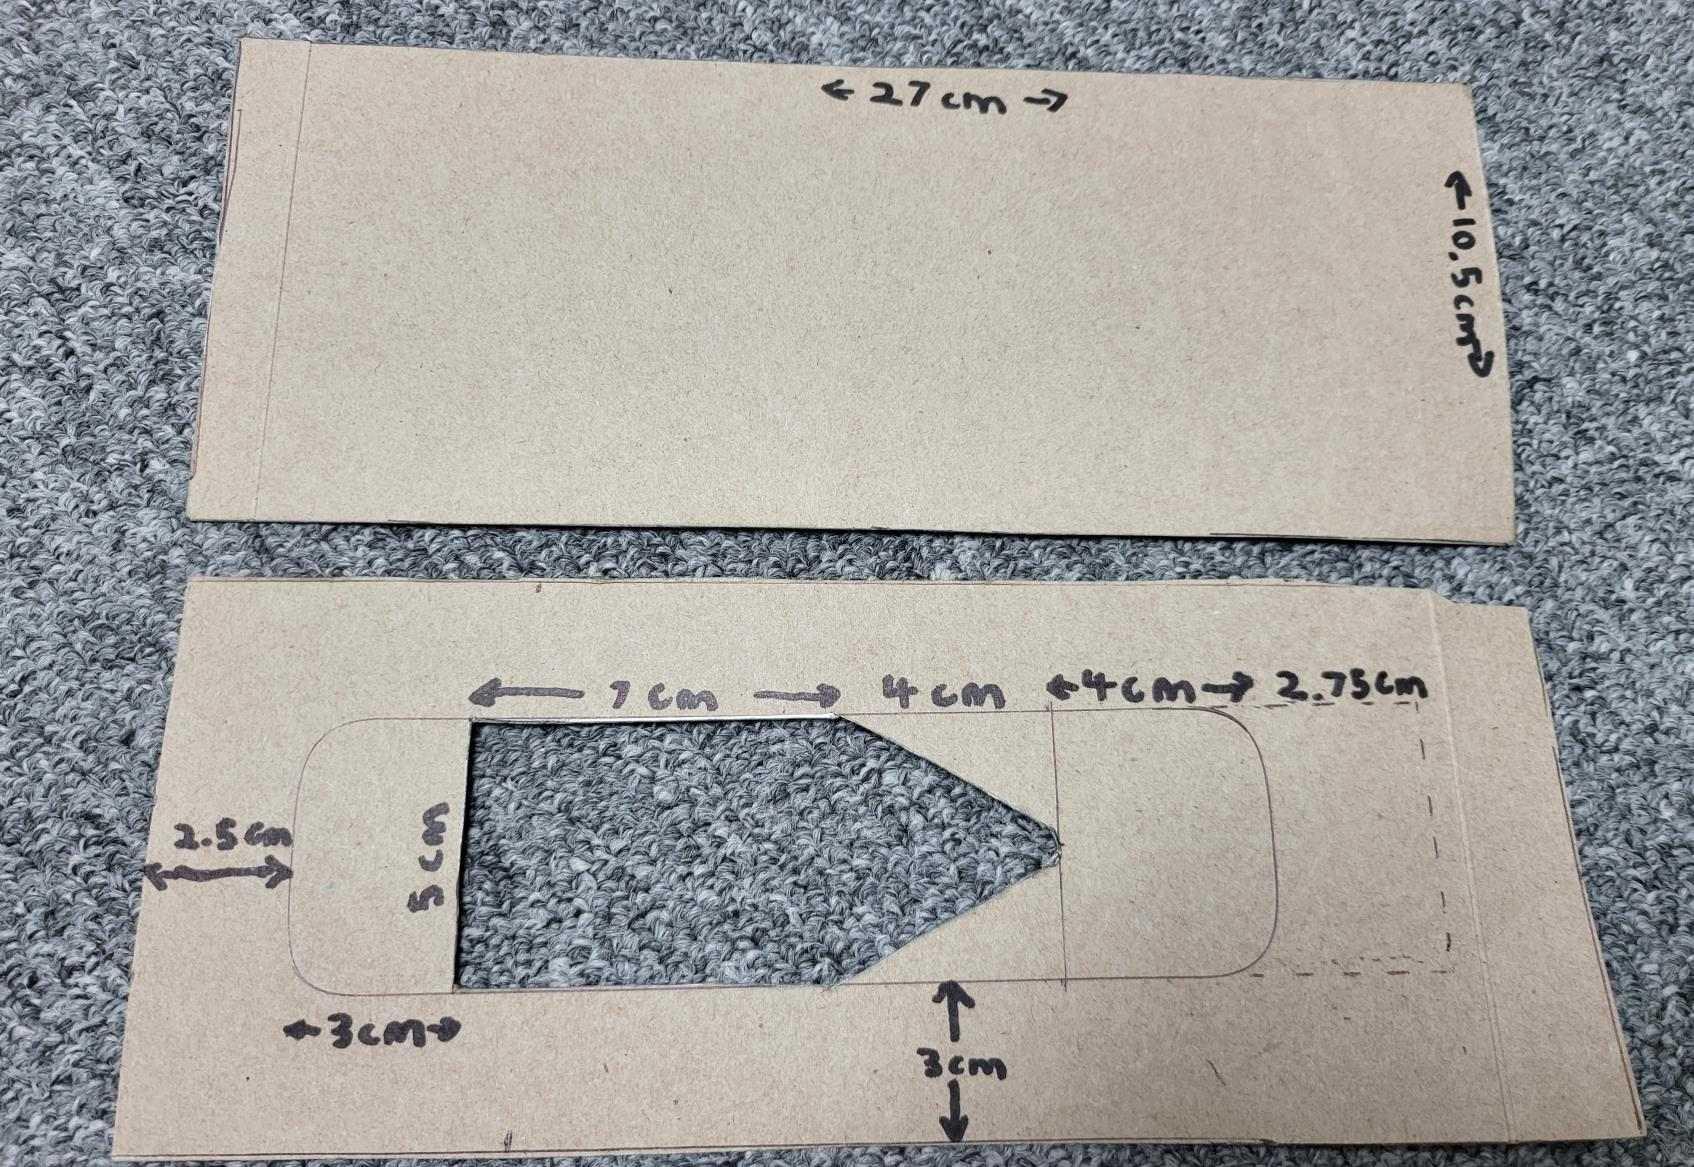
A skeg is a must-have for any flatwater paddling. The difference using the skeg is huge. With a skeg, the boat travels further without paddling and doesn’t immediately spin around if you stop paddling. A slot can be made using leftover fabric. Use a base layer of 250GSM, then glue together a layer of 480 and 250:
Be aware that a slot, no matter how tight, will allow the skeg to fall out if caught on something underwater. To prevent that, you could opt to glue it in permanently. There may be an issue for whitewater trips, but I’ve found the boat stern simply rolls over objects like a balloon. Still, it’s possible to design the setup to make it removable. I used something called a binding post and screw.
In Canada, you can get these in aluminum at Home Depot. Stick one end into a drill and use a file to grind down each head. Be sure to leave a little head on the screw. Drill out the existing MRS Skeg hole larger to accommodate the screw. To attach it to the boat, you will need to build up the area under the dowel. I used some double-sided 3M rubber tape plus Seam Grip, but anything rubbery with Seam Grip is a good choice. Once it’s level, cut a rectangular strip of 480GSM and Seam Grip that down on top. You should now have a kind of “hill” with the binding post inside it. Apply additional liberal applications of seam grip to fill any spaces. Be sure not to get it inside the threading. Lastly, cut out a rectangle of 250GSM with a thin rectangle hole inside it. This hole is the opening for the thread. Seam grip that down across everything to give it rock-solid reinforcement.
I noticed areas on the bottom have higher abrasion from beaching actions. To avoid any issues, I added abrasion reinforcement strips. Some of that can be seen in the bottom picture above. This allows me to grind the bottom up against rocky shorelines with basically zero fear of punctures.
There is a little pump from Flextail Gear that is invaluable.
Seam Grip on the included pump attachments as shown above. In this configuration, you can stick the pump directly onto the Boston Value and fill it to about 95% full. It will even stay attached while filling so you can do other tasks. As an added bonus, it will also directly fit over the valve stems Matt sells too. The battery is good for several days of field use. It uses USB-C to charge and fills up two rafts several times a day easily. I love it so much, I’ve even replaced my Thermarest sleeping pad valve with Matt’s stem valve and just use this pump.
There’s an inflatable lifejacket that pairs well with packrafts called the Anfibio Buoy Boy. It’s not cheap, but it’s good for most conditions and far superior to a foam jacket in terms of portability. I wear mine for the hiking portions in deflated state as a vest.
You’ll see that the raft comes with buckles on the front attachment points. I’ve sewn on straps and mating buckles onto a drybag. This makes for easy gear attachment:
I’ve also built my own sail and 5-piece paddle. The sail uses the metal ring from an old ripped-up photography reflector dish I scavenged. I then sewed on Windowblind film. This sells cheaply on Amazon: item#: “B015PY2BY8”. Duck MAX Strength Heavy Duty Insulating Film Window Kit. Seam Grip the stitching to prevent tears, and apply strips of clear 3m construction sheathing tape. This is the stuff Matt recommends for quick field boat repairs.
The five-piece paddle is a cannibalized used Werner paddle. They appear frequently on Facebook Marketplace. I bought carbon-fiber tubes from Aliexpress in 25×21 x500mm x 2 pcs for the inner tubes and 29×25 x500mm x 2 pcs for the outer tubes. This directly matches the industry standard paddle shaft thickness. The inner tubes had to be sanded a bit and epoxy’d in. I drilled holes and added spring clips Amazon ID# “B07T29Y5X8”. The paddles can now fit in my backpack. I created a carbide attachment point and use the shaft as a walking stick, and it’s also the perfect height for my Dan Durston X-Mid tent pole.
Last thing! I used the TPU fabric to create drip catchers for the paddle and for a friend’s paddle, as shown below:
Okay. I think that’s it for now. There’s a ton I could get into, but I think that’s long enough, lol.
One last point: the fabric. It’s not entirely too much to say that I am heartbroken that we can’t access more of that fabric. I know it’s difficult to get ahold of it, and Matt has indicated that direct fabric sales may not be on the cards.
I hope Matt can reconsider. There is so much utility with that TPU fabric. There are experiments I’d love to attempt with it. For starters, I’ve been tossing around the idea of a gigantic, ovular, inflatable sail for the Great Lakes. Is it crazy? Perhaps.
Get that fabric into my hands, and we’ll see just how crazy it really is.
-
This reply was modified 3 years, 6 months ago by Matt (Admin). Reason: Fixing reverse chronological order
-
December 10, 2022 at 4:59 pm #16823Uncle FredParticipant
Below are photos that didn’t make it into the build posting below. For some reason, if I add too many pictures, it either deletes the post or does strange things to the images.
Referenced pump and glued-on included accessory configuration that fits both the Boston valves and the top-up valves. Note that for both, the pump friction fits on so well that it can be left unattended until about 90-95% full inflation.
Below is an image of the aluminum binding post and screw. These are a lightweight and great option for a secure removable skeg. Originally I only had the skeg sitting in a slot. After my first trip, both rafts lost their skegs, necessitating this upgrade.
Again, I can’t recommend a skeg enough. A skeg offers a very noticeable improvement to the way the boat tracks in the water. It seems less energy is wasted in lateral movements with a skeg. When we each lost our skegs, we knew within a few strokes that they were gone.
Below is the form for the backrest support:
The idea here is to create a firm, forward, and upright sitting stance. It’s much easier to maintain speed for long river and lake paddles with something like this. Of course, you could also put a dry bag behind your seat, but I find this solution isn’t ideal as drybags tend to compress and shift downwards.
-
This reply was modified 3 years, 6 months ago by Uncle Fred.
-
December 12, 2022 at 9:26 am #16829Matt (Admin)Keymaster
Hi Fred, this is great – thanks for posting! There’s lots to learn from here and I’d like to move it to a dedicated “build report” page so more people will see it. If you’re up for it, I might ask you for some more pictures to illustrate the text.
Cheers!
-
December 12, 2022 at 3:52 pm #16849Uncle FredParticipant
Hi Matt! Hope all is well. Yes, I’d be happy to have any of these projects benefit you or others on your site.
I could possibly write dedicated step-by-step instructions with diagrams for the leg straps, backrest, sail, removable skeg mount, or anything else here. Contact me by email if you like (same email as my account).
-
This reply was modified 3 years, 6 months ago by Uncle Fred.
-
December 20, 2022 at 10:43 pm #16884Christian001Participant
That would be absolutely great! Also would love to see more details on your paddle modification.
-
December 21, 2022 at 8:58 am #16885Matt (Admin)Keymaster
Hi Christian, here’s a video showing how I modified my paddle (it sounds like Uncle Fred did something similar): https://www.diypackraft.com/2019/09/19/convert-a-kayak-paddle-to-a-packraft-paddle/
Also, here’s a post about how another person made his own paddle from carbon fiber tubes and sheets, in case you want to try making one from scratch: https://www.diypackraft.com/2017/03/27/diy-5-piece-carbon-paddle/
-
-
December 13, 2022 at 11:21 am #16873Matt (Admin)Keymaster
Email sent!
-
This reply was modified 3 years, 6 months ago by
-
-
This reply was modified 3 years, 6 months ago by
-
This reply was modified 3 years, 6 months ago by
-
This reply was modified 3 years, 6 months ago by
-
November 3, 2022 at 6:10 pm #16756DamoParticipant
So it took about a week to build my Telkwa. Sure I made a few errors – overheating certain areas – accidentally touching areas of TPU that I shouldn’t have touched. But I am super happy with how it turned out – only 2 small leaks at completion that were fixed promptly with a touch up using the heating iron.
I would definitely make some changes for my next one, like the position of the TiZip – I would alter that to be at the top of the rear centre seam. I have already ordered a few extra supplies to attach the spray skirt in place with waterproof zippers so it can be rolled/tucked away.
Taking it for a test paddle next week and I will compare it to my previously purchased Anfibio Rafts.
-
November 4, 2022 at 9:28 am #16758Matt (Admin)Keymaster
Excellent work, Damo! I look forward to your feedback. Thanks for posting!
-
December 17, 2022 at 3:12 pm #16878DamoParticipant
I finally found time from work and good weather to take the completed raft for a maiden voyage. Compared to my Anfibio Delta MX rafts this thing is faster to paddle on the flat water, yes it would benefit from a skeg, so that will happen in the future. The cockpit feels smaller (widthwise) than the Anfibio, but the side tubes are also bigger and give better floatation, the bow sits out of the water and cuts through with ease. The Anfibio is symmetrical front to back, so it suffers from not having a leading front design. The Anfibio is lighter at 1.8kg in stripped format, the Telkwa stripped came in at 2.3kg so the extra weight is noticed – but the extra strength and protection is worth it.
Also I am nearing completion of my first attempt at a semi removable spray deck – I’m not sure I want it on permanently, so I’m trying to install TPU waterproof zippers to 80% of the deck before I commit to installing it. Fitting Velcro would be a great option to make it 100% removable, but TPU backed velcro is impossible to locate and I’m still unsure on appropriate glue for accessories to be permanently attached. If anyone has suggestions I’m open to them.
I also need to address a crease in the overlap (reinforcing) fabric at the rear of the raft, when sealing this I got to a point where folding it to seal it was much easier, however the fabric now has a noticeable white crease mark where the black fabric has at first glance separated at the threads – it is still water and air tight.
Also my Aliexpress Packraft 2 piece semi drysuit arrived and I must say for the $100AUD I’m impressed with the quality and the fact I remained totally dry while getting in and out of the raft to launch and retrieve, it will be put to the test in more depth at a later stage.
-
-
-
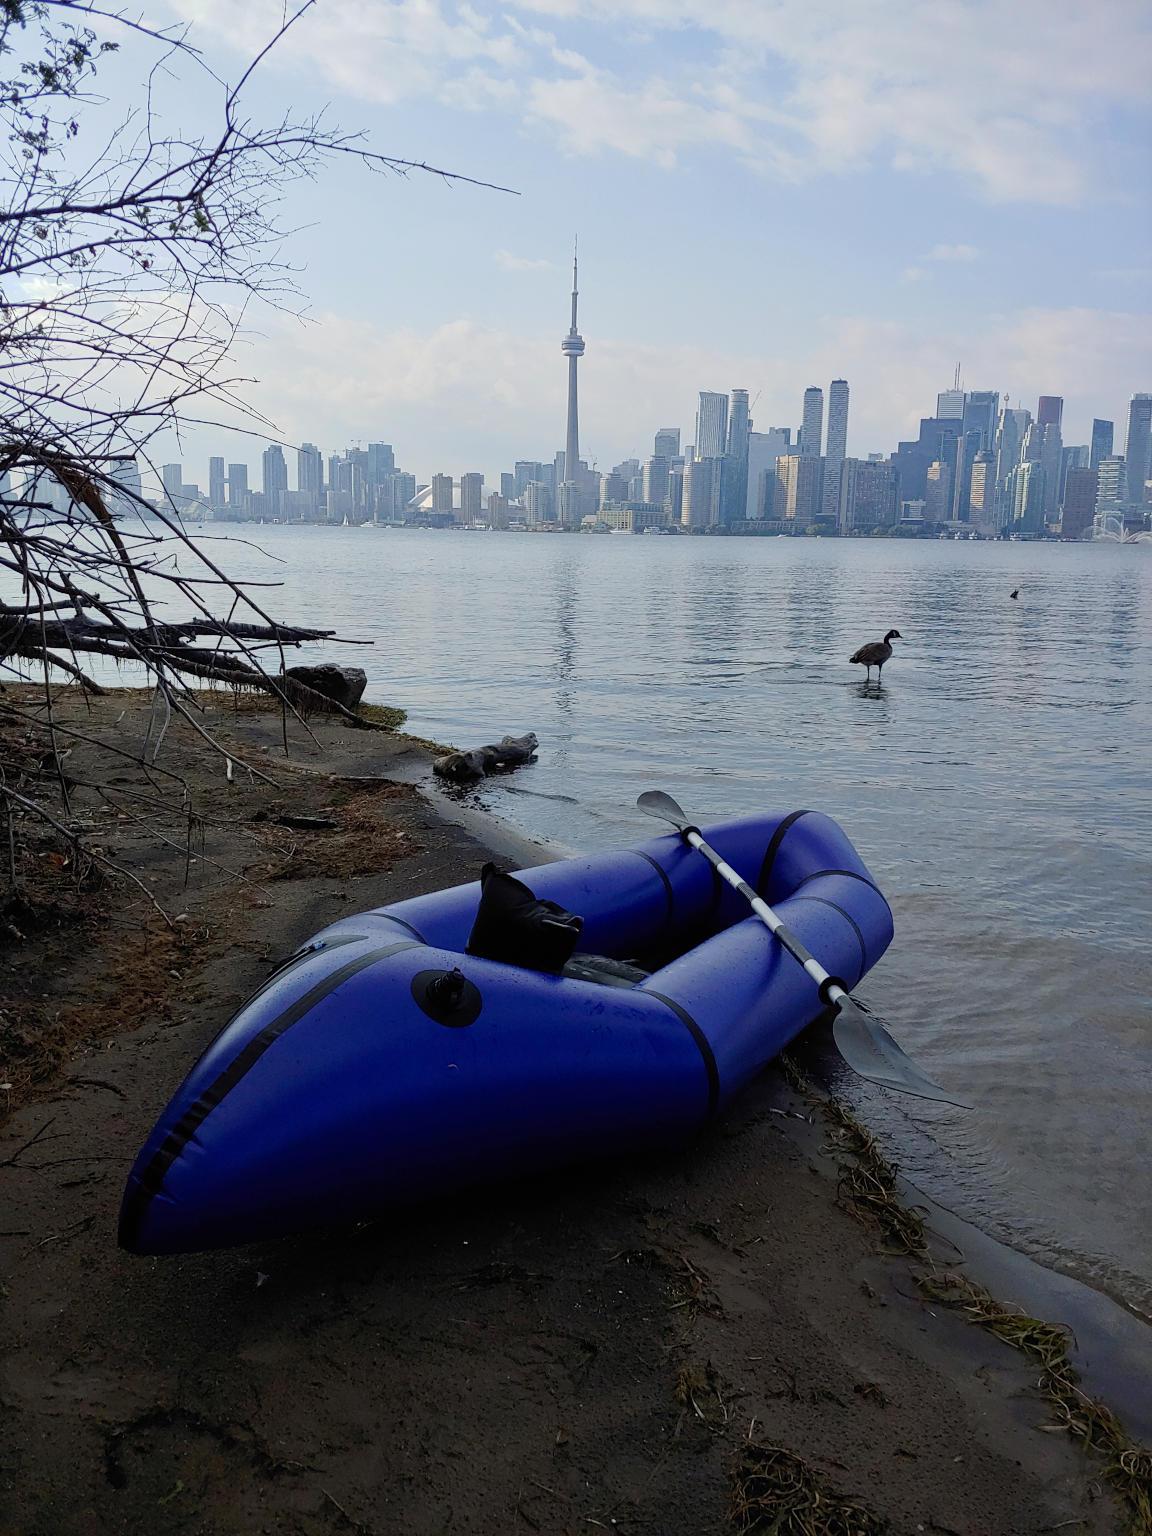
September 19, 2022 at 5:29 pm #16608DerrickParticipant
I took my Skeena out for a paddle this weekend around the Toronto Islands.
-
September 20, 2022 at 8:19 am #16609Matt (Admin)Keymaster
Wow, beautiful – thanks for sharing!
-
-
August 1, 2022 at 5:34 am #16535benbueParticipant
Finished my first Skeena this spring and just got back from a 4 day float down the North Fork of the Flathead river in Montana (USA). Big water because of a wet spring, lots of class 2+ waves but the Skeena performed just as well as the Alpacas in the group. I believe this raft outperformed the Kokopelli Hornet-Lite rafts floating with us by sitting higher in the water and needing less bailing after big waves.
Thanks for great directions and a fun process of constructing this boat. Other than one small leak that developed in the seat (from poor heat sealing technique on my part), no issues with this beauty.
-
August 2, 2022 at 2:50 pm #16538chanchito17Participant
This DIY project really attracts a certain type of person… so many pics say “Finished my first boat” indicating that they loved the project and plan to do more!! I’m the same, and all my friends are asking about how to make their own. Luc Mehl, the alaskan packraft Guru, even gave approval of my boat “bubbles” when I took his swift water rescue course.
Check out the Anfibio Revo XL. They have an interesting way to make their boats optionally self bailing, that wouldn’t be too hard to do on these boats. I’ve got the skirt on mine, but on MY next boat I’ll probably add that option.
-
August 8, 2022 at 12:21 pm #16563Matt (Admin)Keymaster
Haha, that’s great! This project really does appeal to a certain type of person – there’s surely another type that ends up shelving it unfinished, but those people don’t tell me about it so it’s hard to know how many there are. It is pretty gratifying to see the “repeat offenders” though!
I think you’re right that the Anfibio self-bailing tube would be easy to replicate.
Cheers
-
-
August 1, 2022 at 12:02 pm #16536Matt (Admin)Keymaster
Awesome! Thanks for the feedback!
-
-
June 10, 2022 at 10:33 pm #16407LeslieParticipant
Maiden voyage for ‘Poppy the Packraft’ and ‘Trout’n about’, Pye Lake Vancouver Island

-
June 13, 2022 at 7:35 pm #16410Matt (Admin)Keymaster
Beautiful! How did you make the logos? They look great!
-
June 21, 2022 at 8:34 am #16421LeslieParticipant
I created a design and then drew it on the back of a sheet of light coloured dressmakers carbon paper. I put the carbon paper design over a suitable scrap of TPU fabric and traced my design… transferring the image on to the fabric. Then I cut out the design and heat sealed it onto the hull. The transfer lines wash off.
-
June 22, 2022 at 6:04 pm #16423Matt (Admin)Keymaster
Very cool 🙂
-
-
-
-
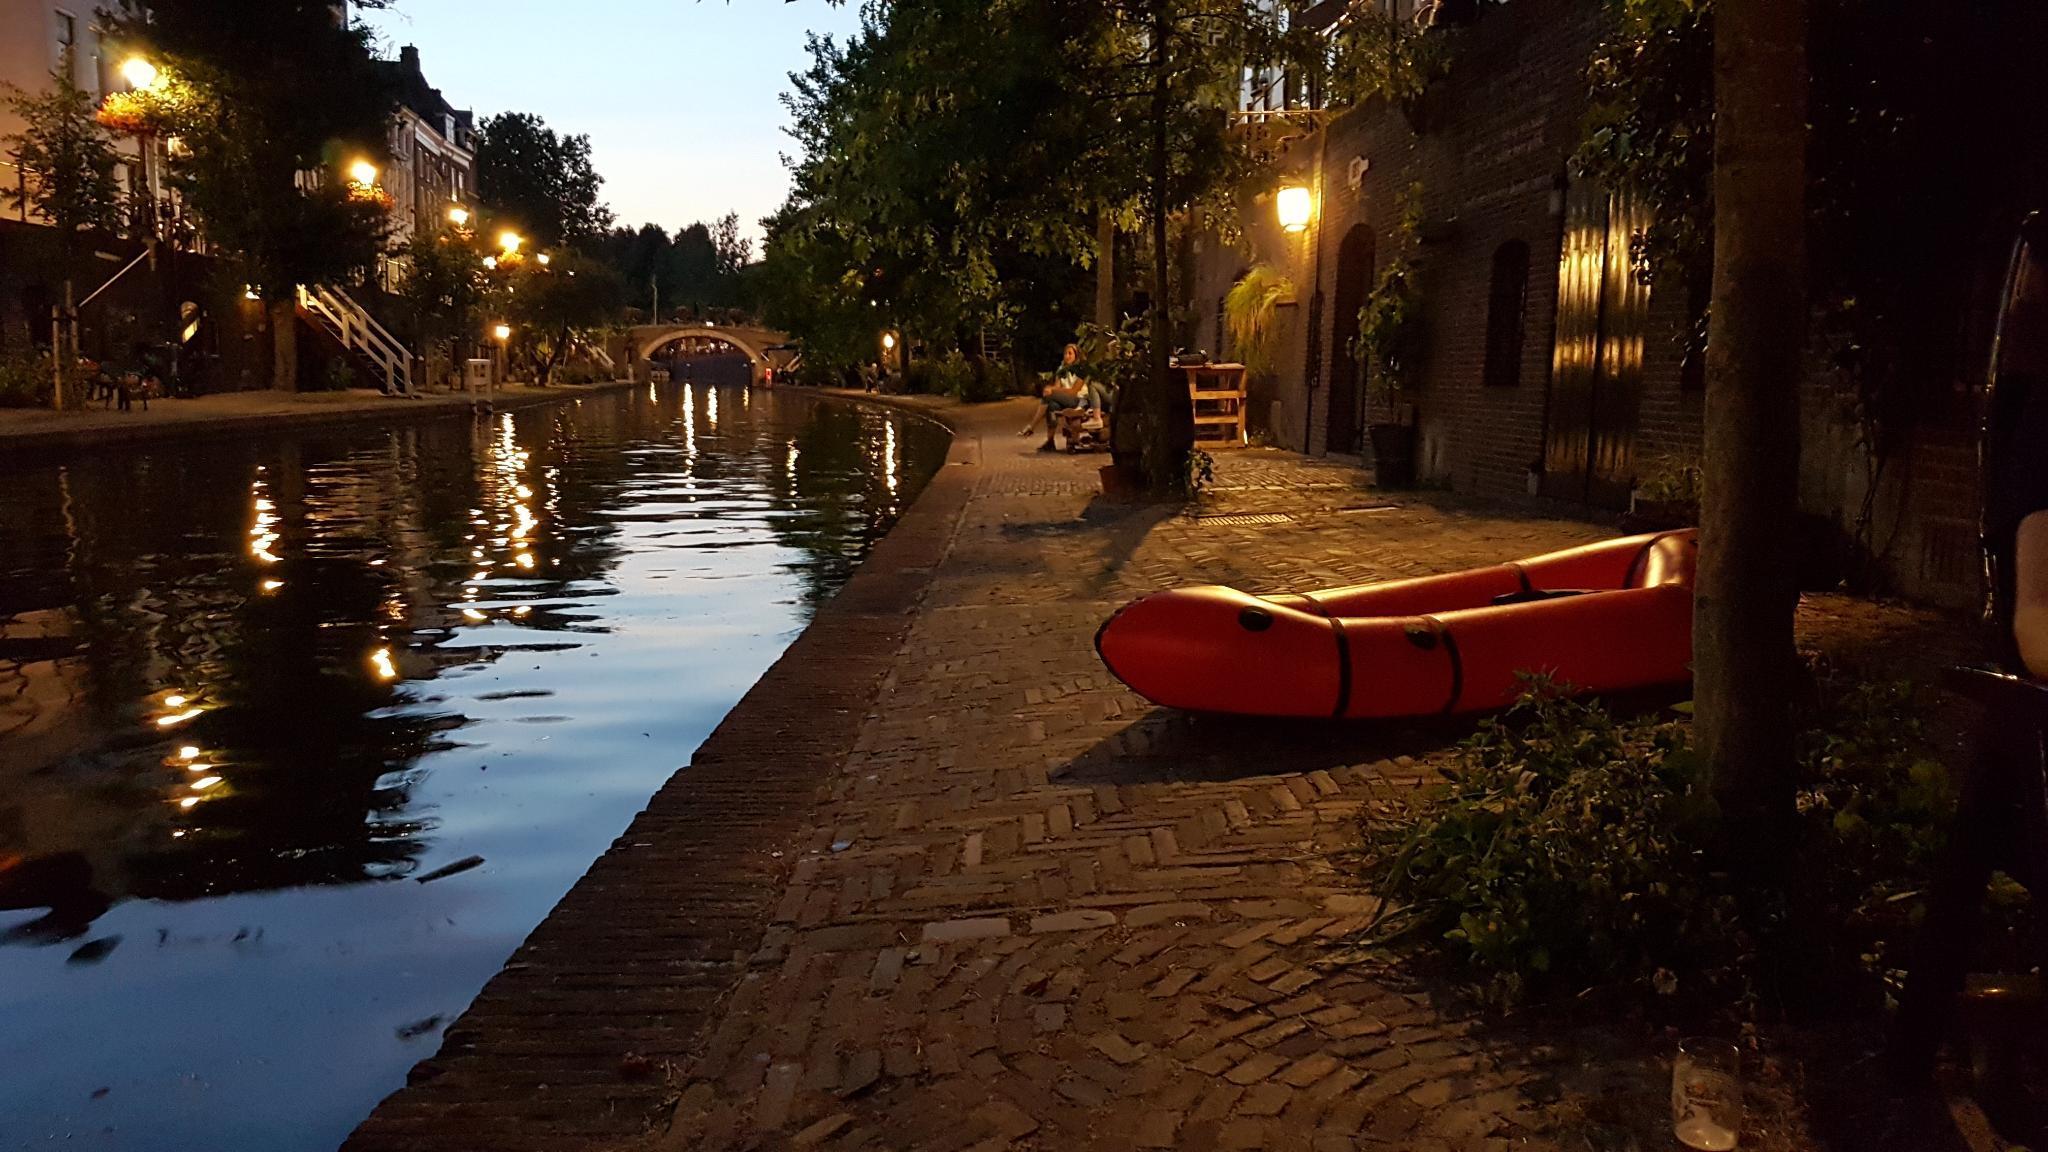
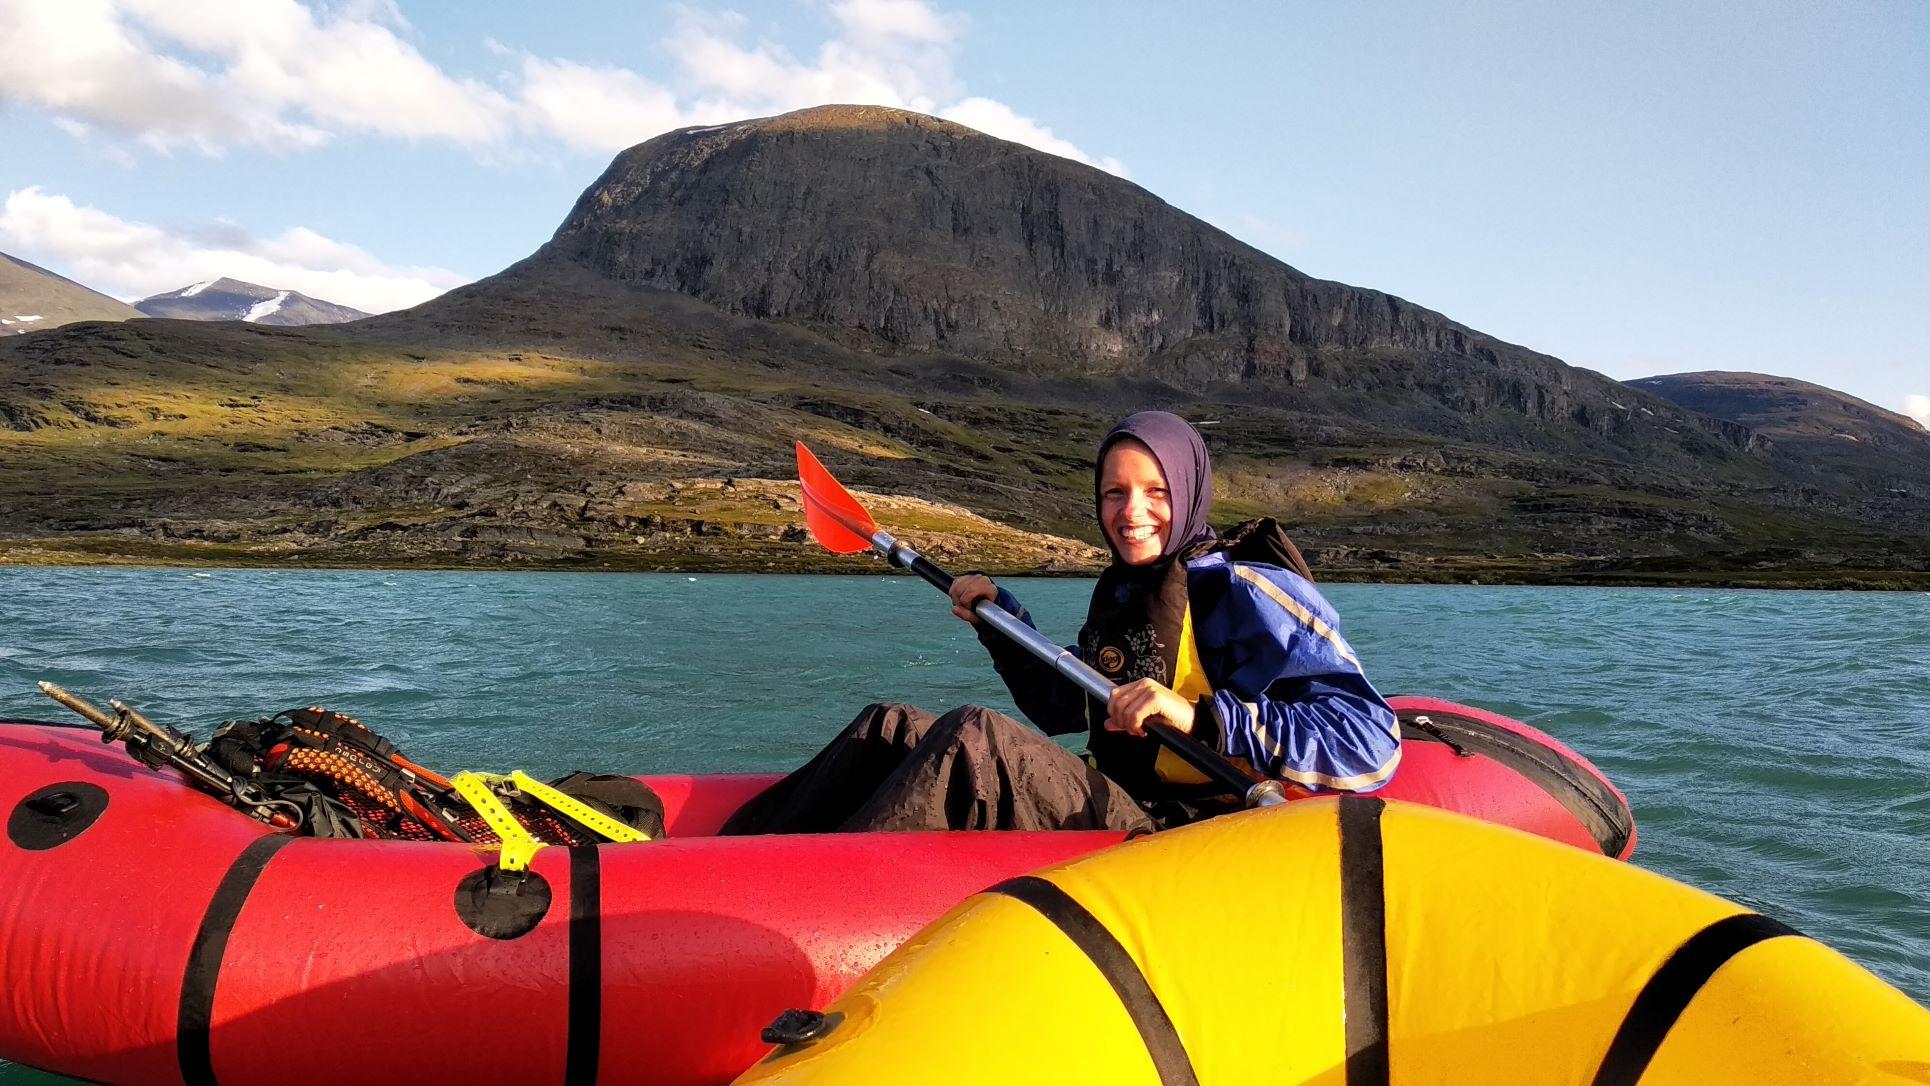
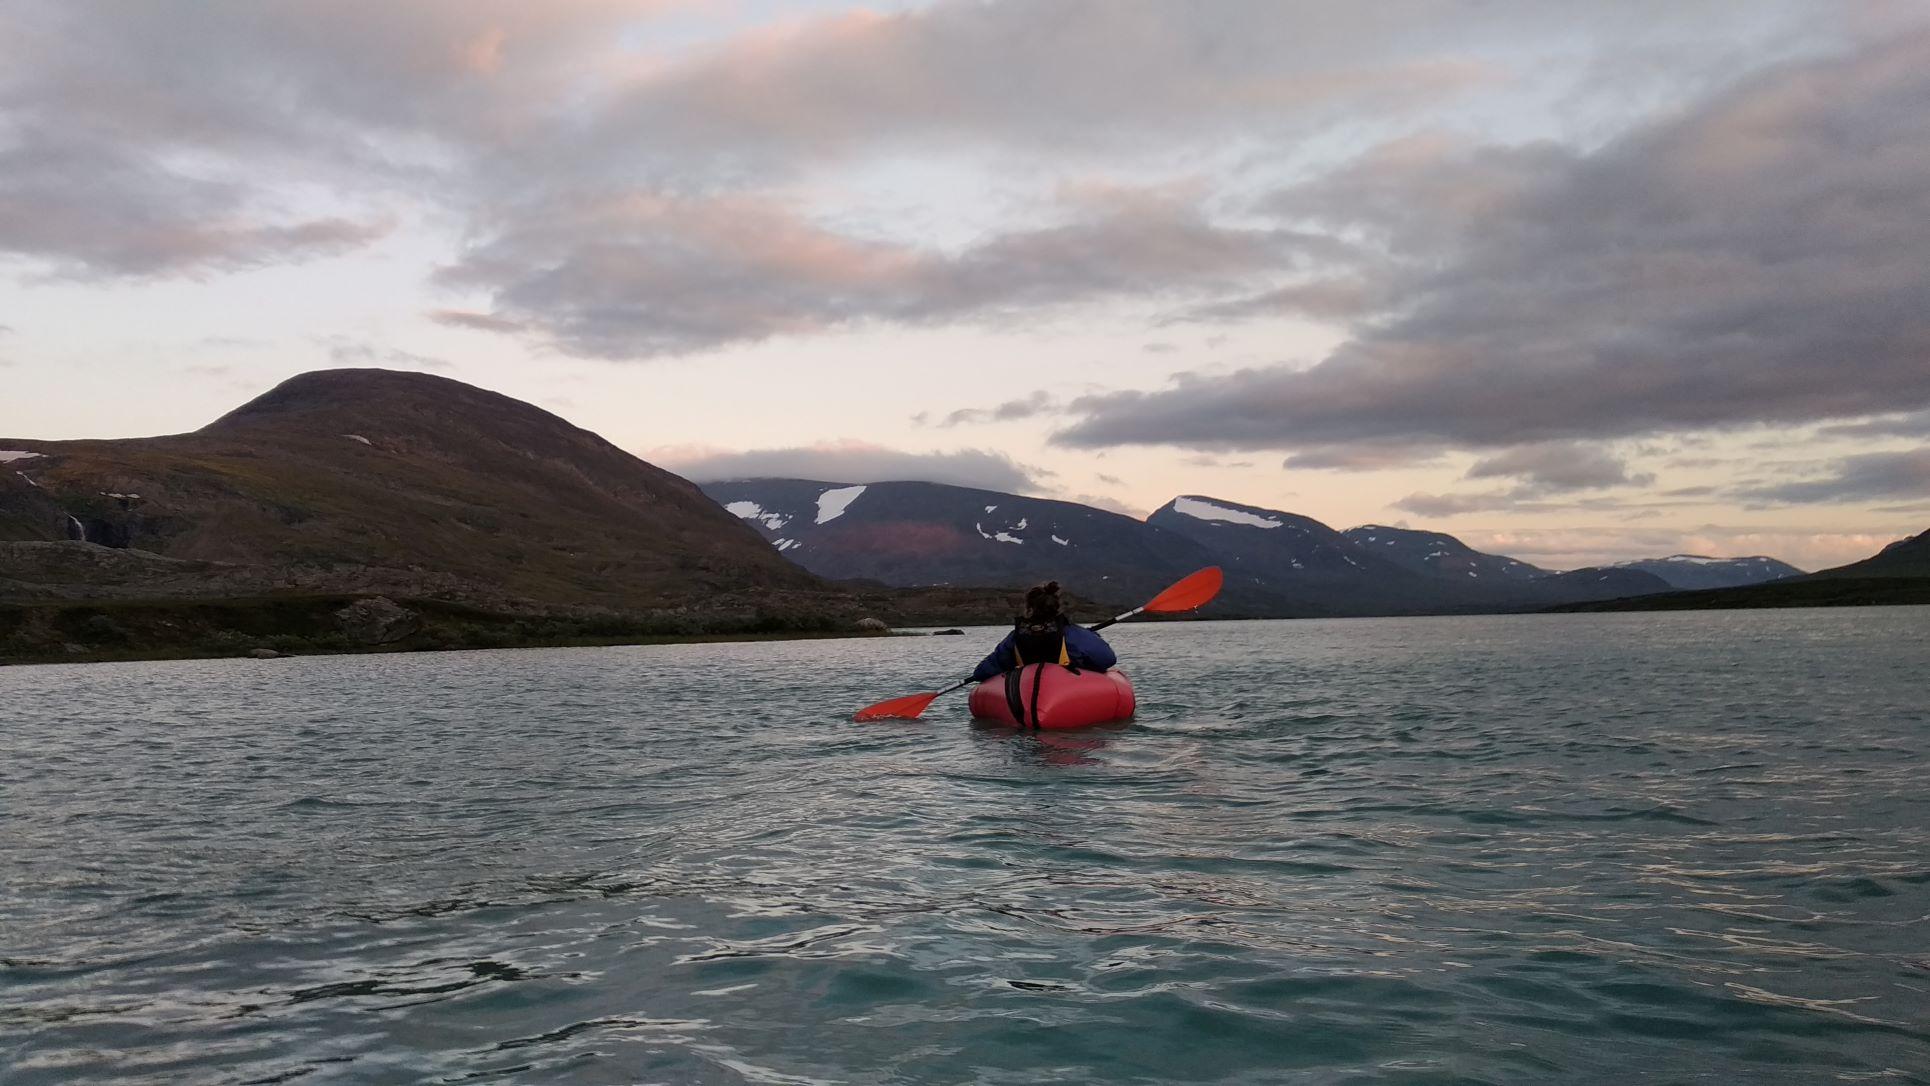
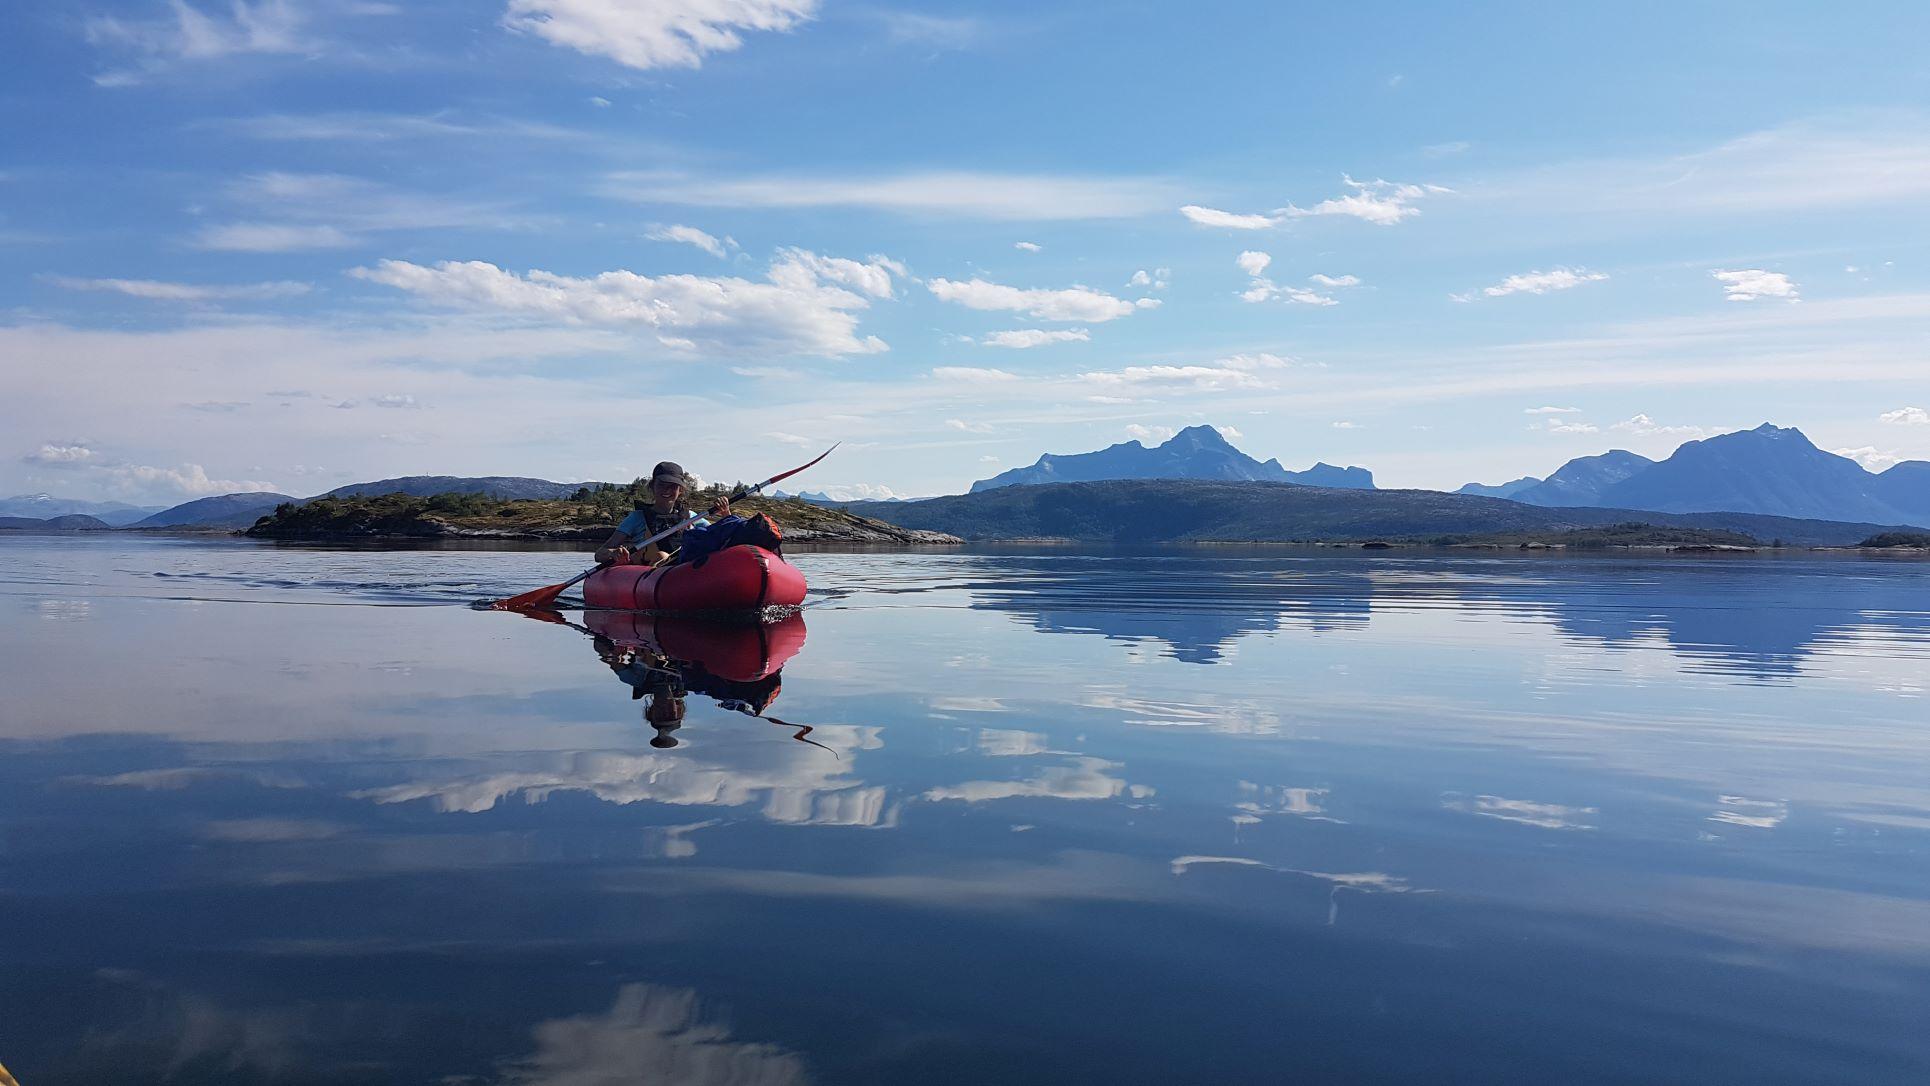
January 22, 2022 at 1:23 pm #15670NienkeParticipant
I built this Skeena last summer. After a maiden voyage in the canals of Utrecht I took it to Swedish and Norwegian Lapland and had a great trip!
-
January 22, 2022 at 4:25 pm #15671Matt (Admin)Keymaster
Gorgeous photos! Thanks for posting!
-
-
January 7, 2022 at 9:58 am #15570Kerstin76Participant
We ordered 2 Skeena, blue and yellow in June, hoping that we would be on the water later that summer. Unforunately, DHL (Express) in Germany screw up and we only started building in October.
The first one is ready by now and the maiden voyage was in my mother’s pond, just the right size for the boat!
As you can see it was still leaking; after a few minutes on the water it shrink (more than just caused by the temperature change).
With the help of soap and water I could fix about 10 small leaks; one was a pain close to the zipper, which took three attempts.
Finally, all is ready and a name given. You may guess how the other boat will look like and be called 😉
We hope for an early spring, so we can finally go out in the real water!
-
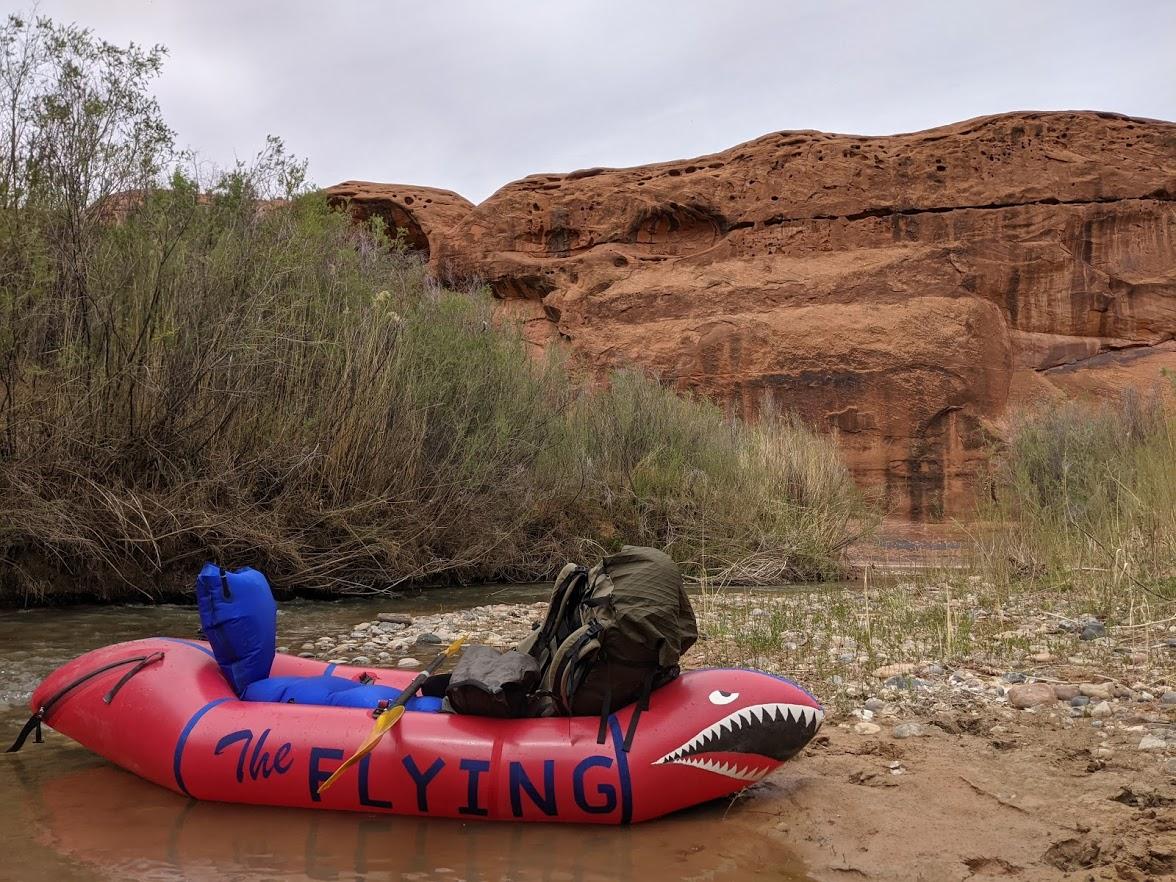
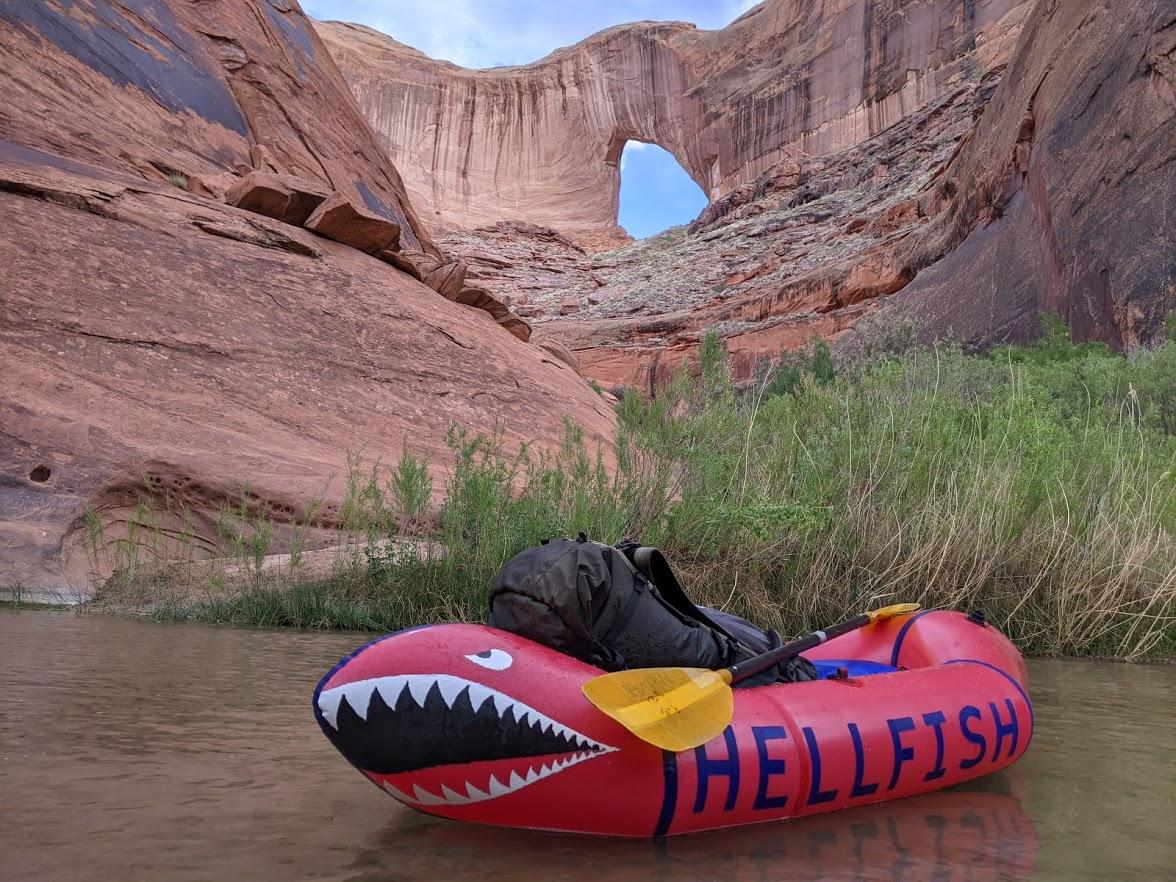
December 6, 2021 at 8:31 pm #15494AaronParticipant
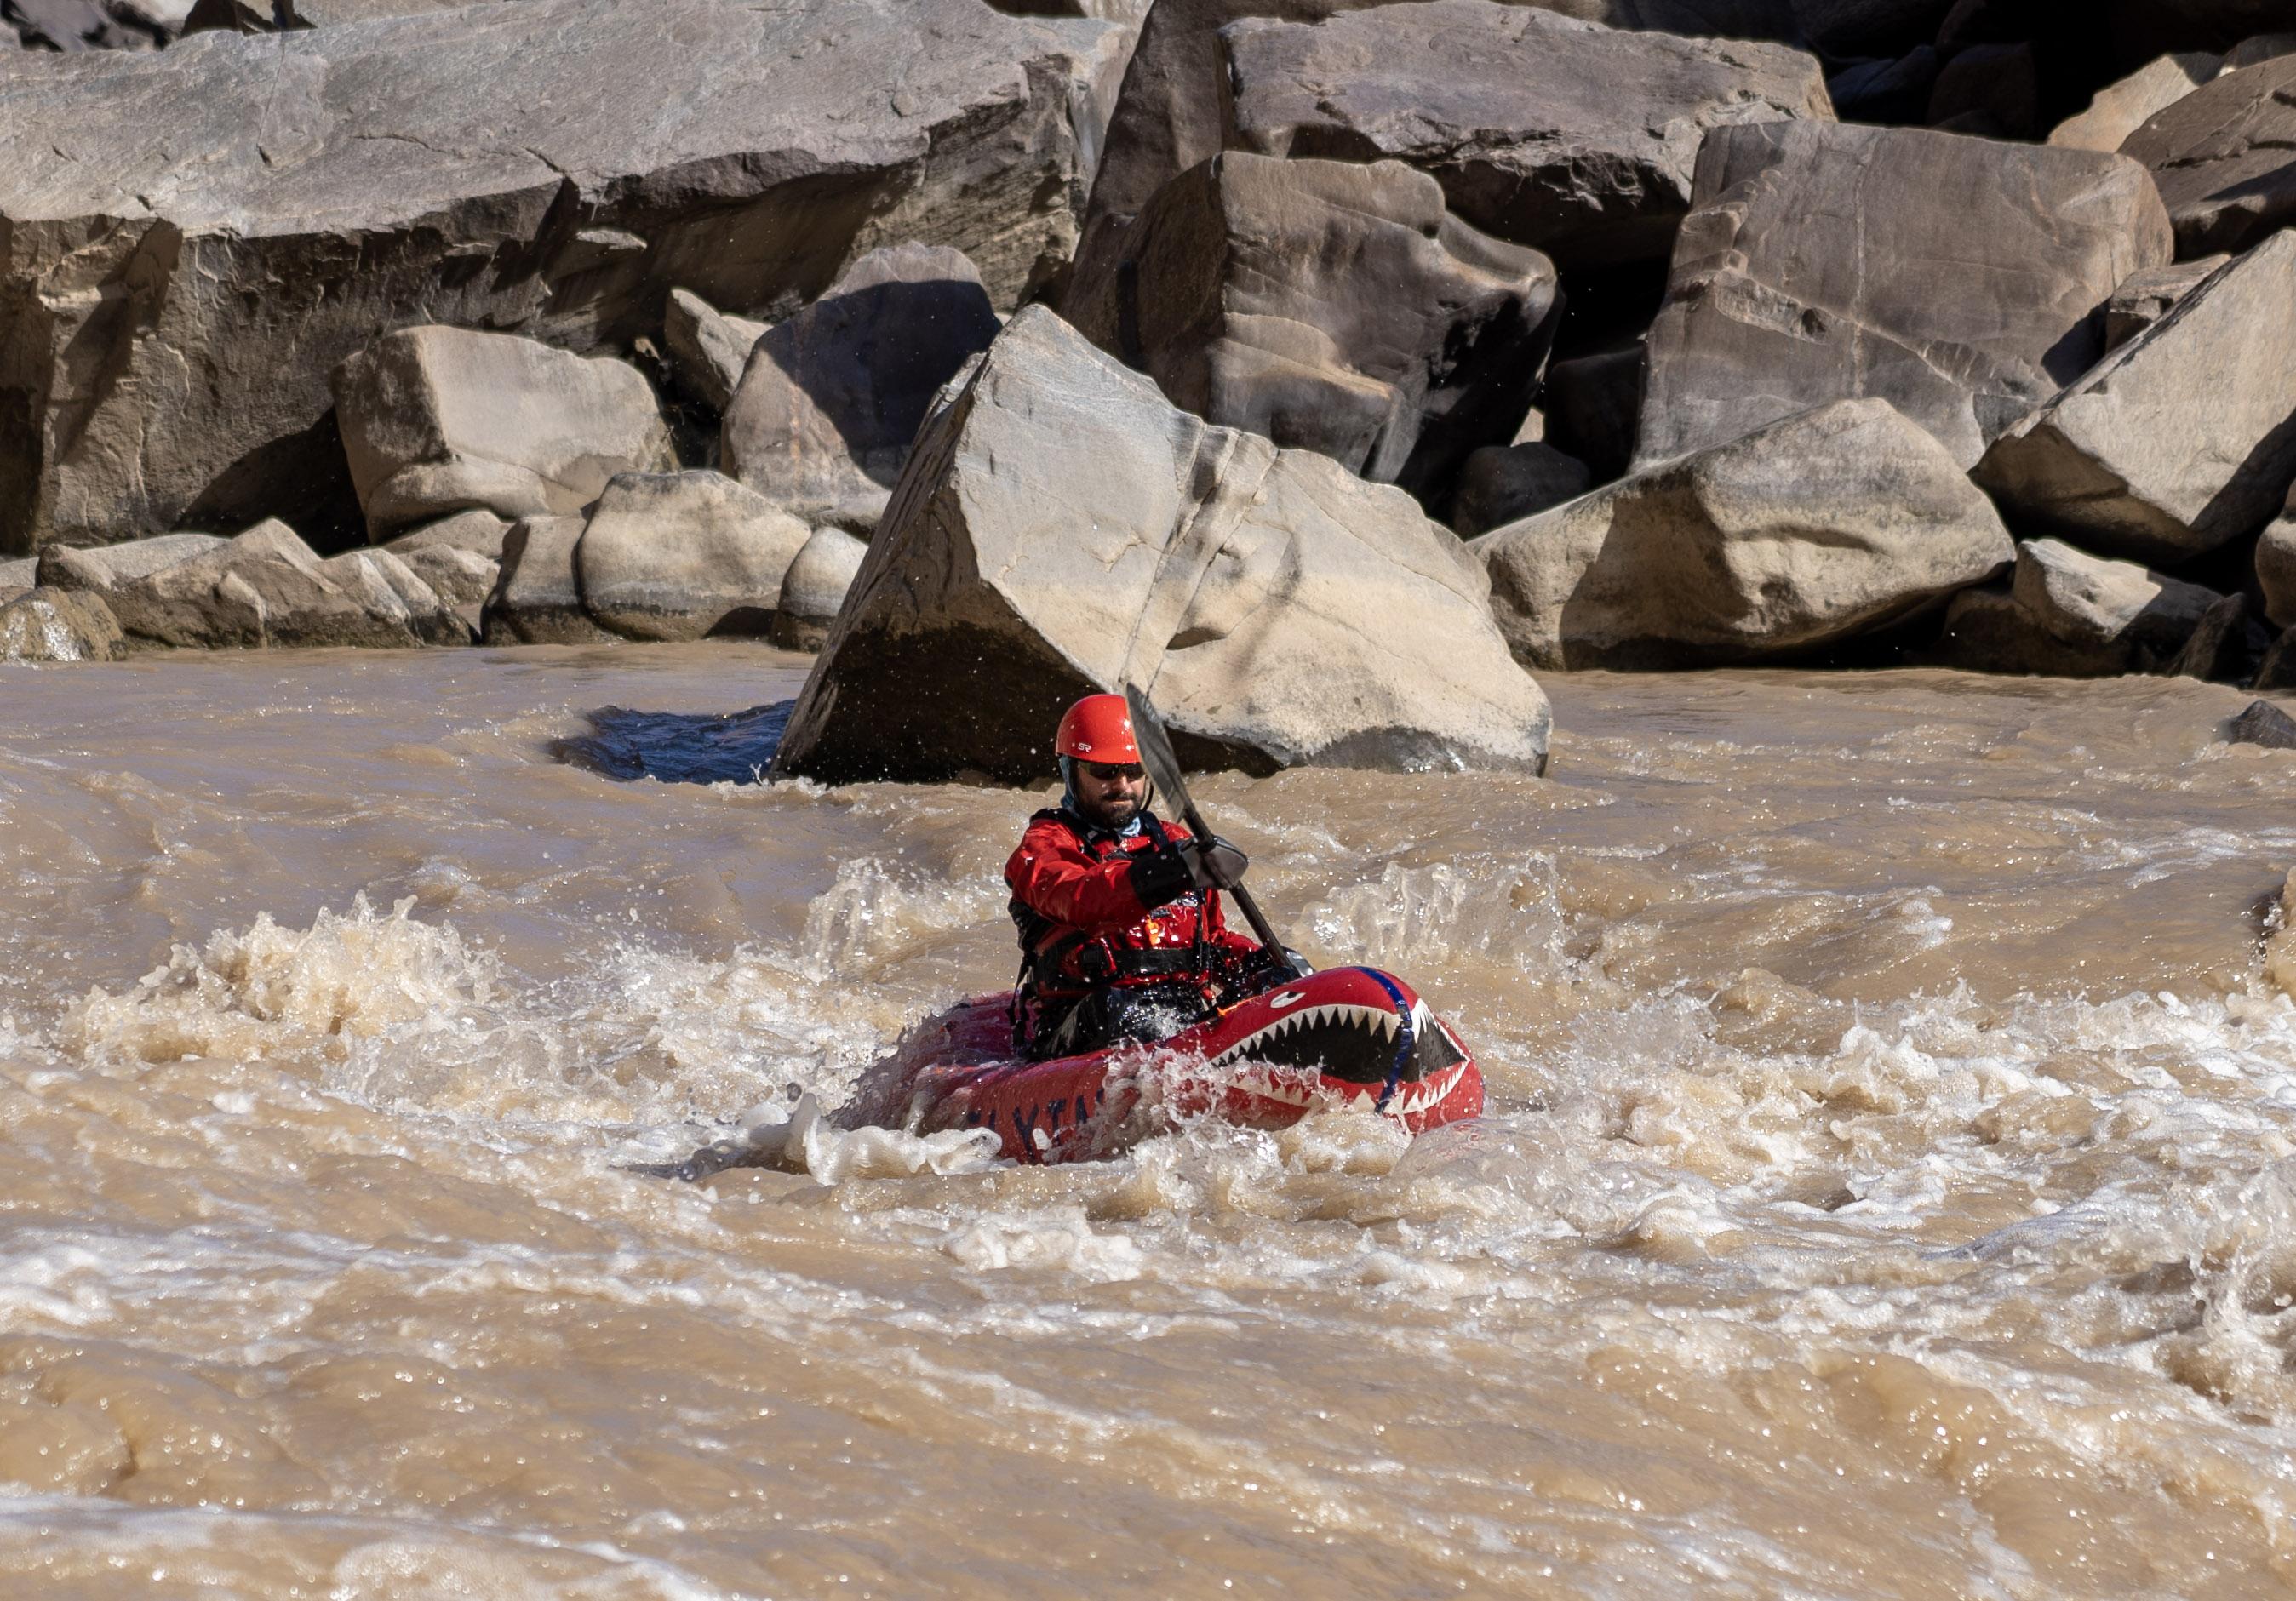
Here are some pictures from a Westwater Canyon trip that I went on in October. I tagged along with a very friendly group of experienced packrafters, one of whom risked a precarious perch to take some excellent photos of people paddling through Skull Rapid. The rocks in the backround are some of the oldest in North America, dating back to the Precambrian era. I had a blast on this trip, and my Skeena handled very well through some Class II/III waves.
-
December 8, 2021 at 8:16 am #15500Matt (Admin)Keymaster
Wow – very cool photos! It looks like a great time!
-
December 7, 2021 at 4:45 pm #15496krstahlParticipant
I love the paint job. It looks like The Flying Hellfish is devouring the waves!
-
-
August 13, 2021 at 10:37 am #15035krstahlParticipant
I just finished my 5th DIYpackraft (one V3, three Telkwas) and now my first Skeena. I found the process is getting easier but it still takes me about 35 hours. This one held air very tightly overnight despite 4 of the tiniest leaks in various places. The biggest mistake I made was using the Ty-zip location for the Telkwa instead of the Skeena. I wanted the Ty-Zip lower on the side but I forgot to take into account for the Telkwa’s higher, wrap-around floor when making the measurements. I think that will put the Skeena Ty-Zip under the water line when in use. That should not matter as long as the zipper stays tight and I don’t drag the zipper pull on rocks or debris.
-
October 27, 2021 at 10:07 am #15359krstahlParticipant
I was finally able to get my Skeena onto a mountain lake. Here I am on Island Lake (9,500′) in the Beartooth Mtns of Montana in late September. The peaks in the center background are all over 12k’ in elevation. This is the first time I have ever seen ALL of the snow gone from the peaks, at any time of year, in my life time.
-
October 27, 2021 at 11:45 am #15360Matt (Admin)Keymaster
Great shot, Ken! It’s scary how dry things are though…
-
-
August 13, 2021 at 11:23 am #15038Matt (Admin)Keymaster
Excellent work as usual, Ken!
I think the zipper will be fine there, but if you notice any issues, please tell us. Thanks!
-
-
July 27, 2021 at 5:37 pm #14937anacognateParticipant
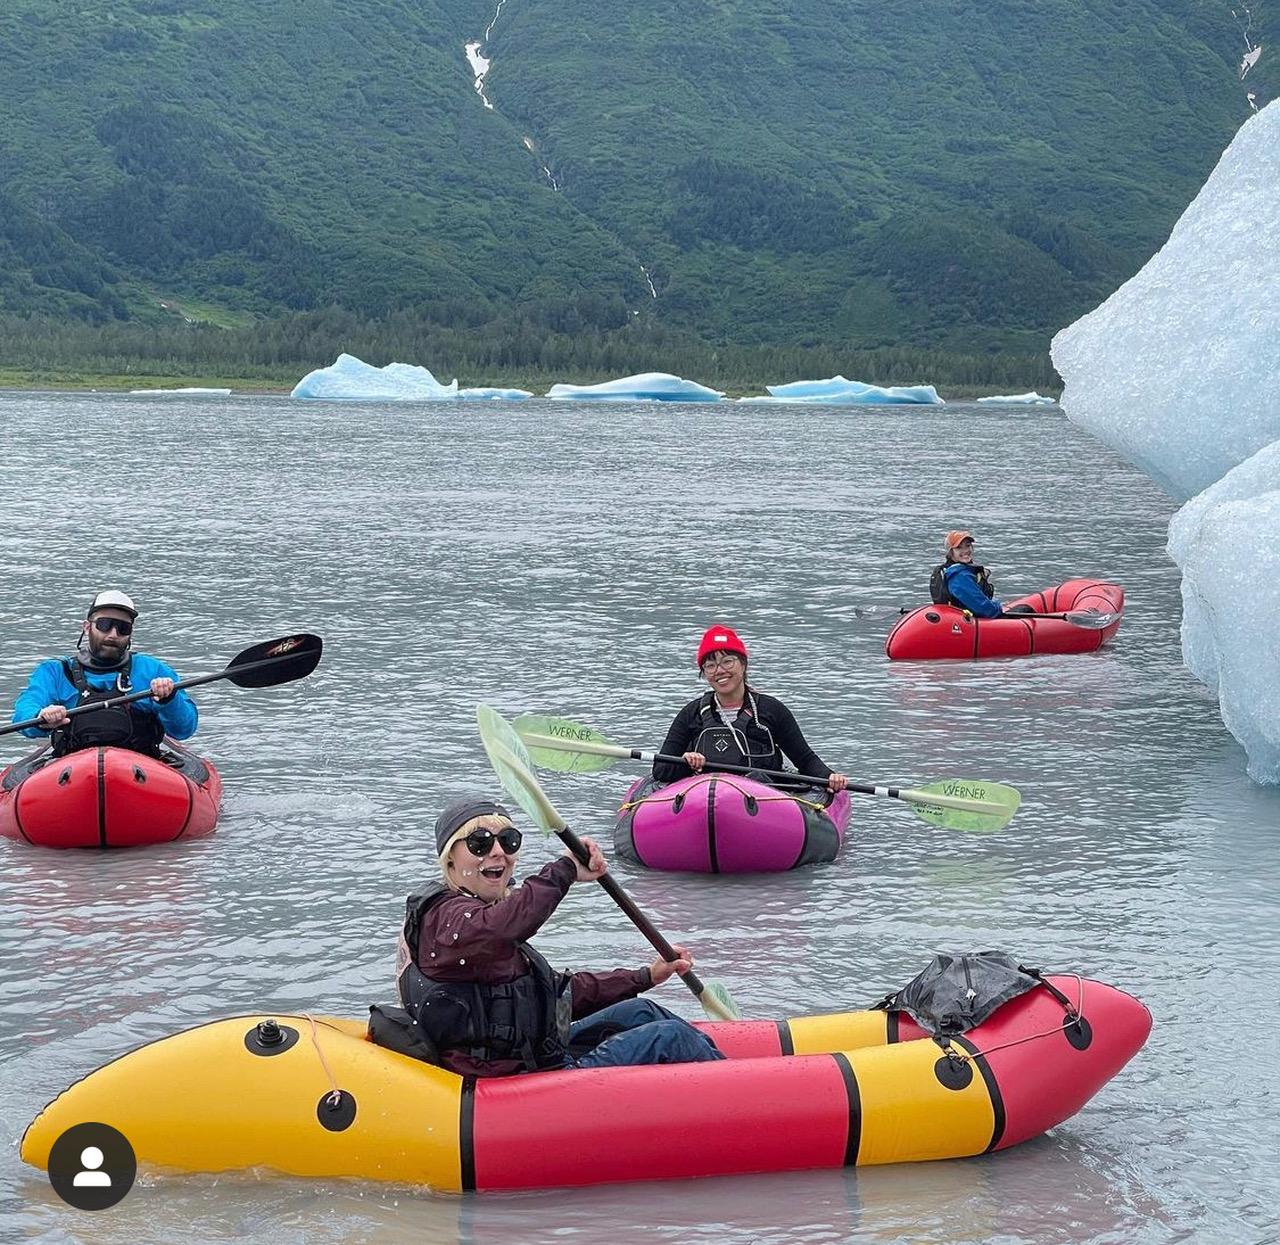
 Here’s my Skeena (front and center) in action exploring some icebergs outside of Spencer Glacier in Alaska!
Loved the build process, found it to be super satisfying to weld with the leather iron- this was my first DIY raft and I am so proud of how it turned out, haven’t found any leaks to speak of after a few times out on lakes and the 12 miles of Class 1-2 river after exploring this glacial lake.
From start to finish it probably took me about 35-40 hours, finished it up in about 2 weeks with a bit of work every day. I was a little surprised at how fast it came together, but I was hooked after the first segment was sealed on!
I’m on the fence on whether I want to add a spray deck or not, playing around with the idea of designing a cruiser deck for rainy days.
-
August 3, 2021 at 1:34 pm #14966Matt (Admin)Keymaster
Congratulations on the excellent work! What a cool place to explore, too!
-
-
July 18, 2021 at 12:32 pm #14902heatshearParticipant
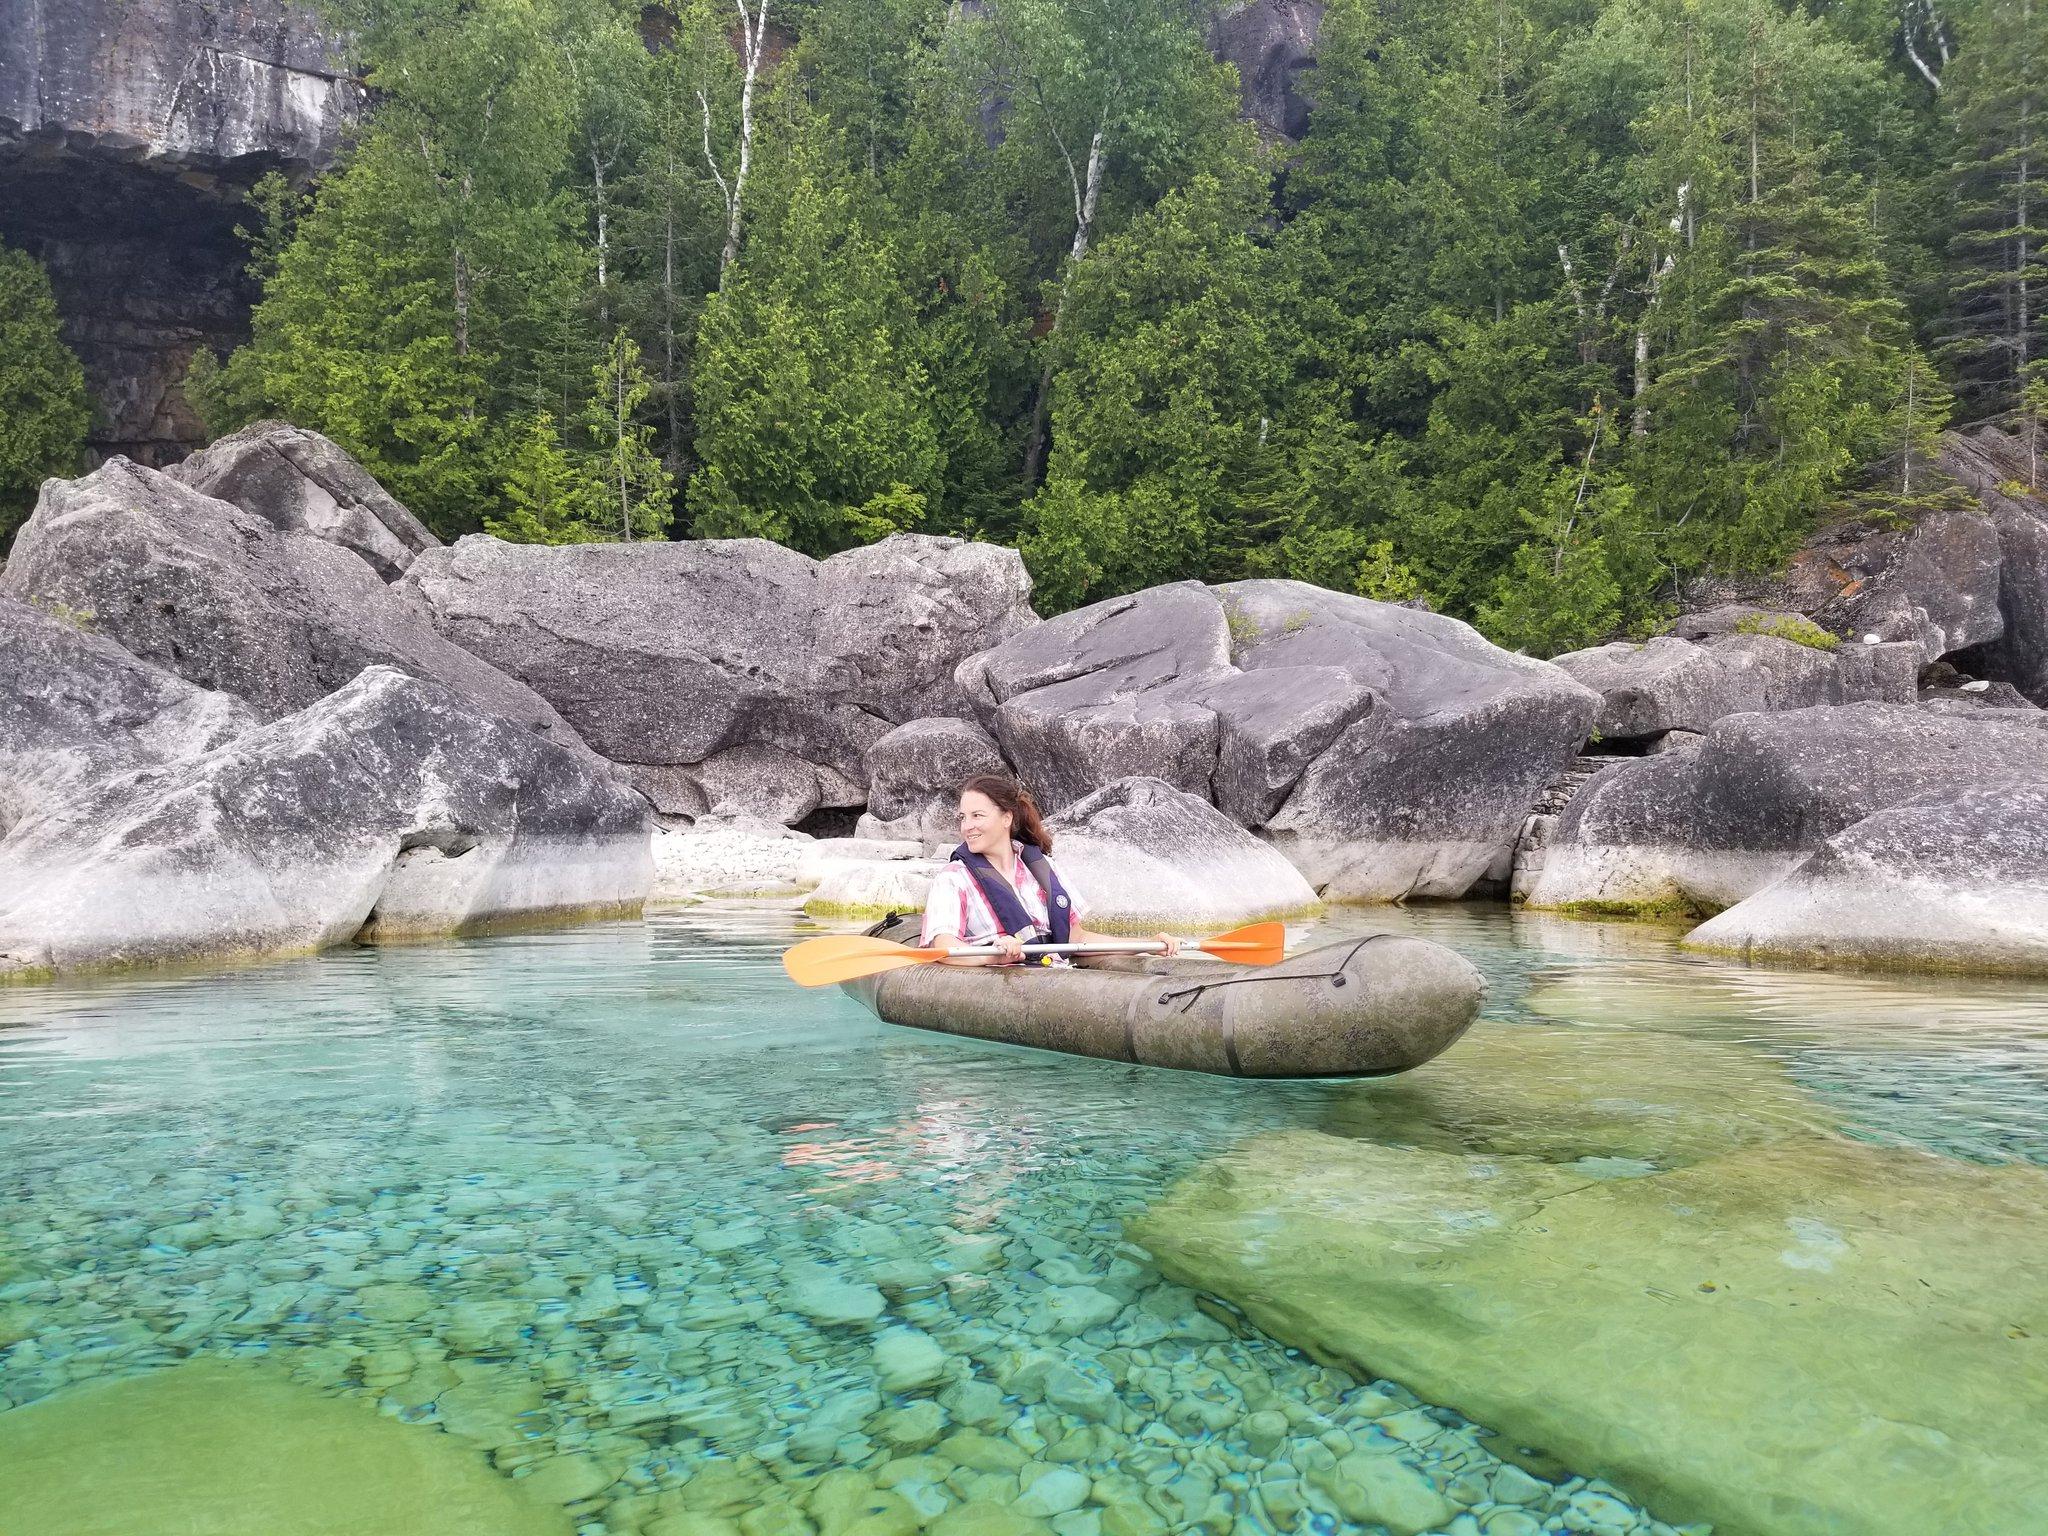
Two packrafts made for a spectacular camping trip near Tobermory (Bruce Peninsula). I got an answer to my question of “how fast are these?”: the trip included a 6.5 km non-stop paddle on calm open water with no wind – this took 1:40, meaning we averaged a speed of 3.9 km/h in heavily loaded boats, relaxed level of effort. More photos of the trip
-
May 5, 2023 at 6:15 am #17763ABartelsParticipant
Hi Heatshear,
Great Packrafts!
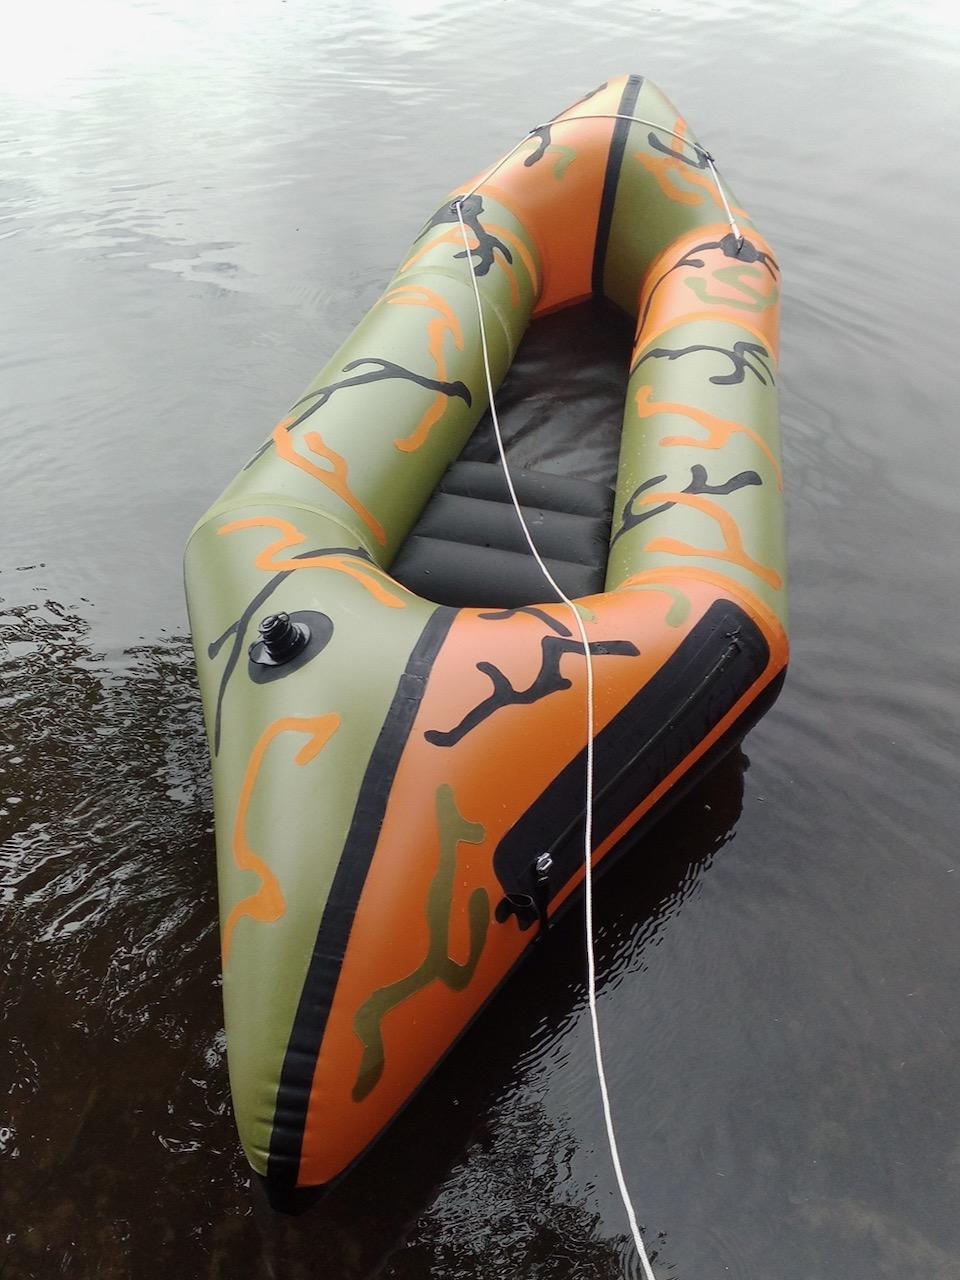
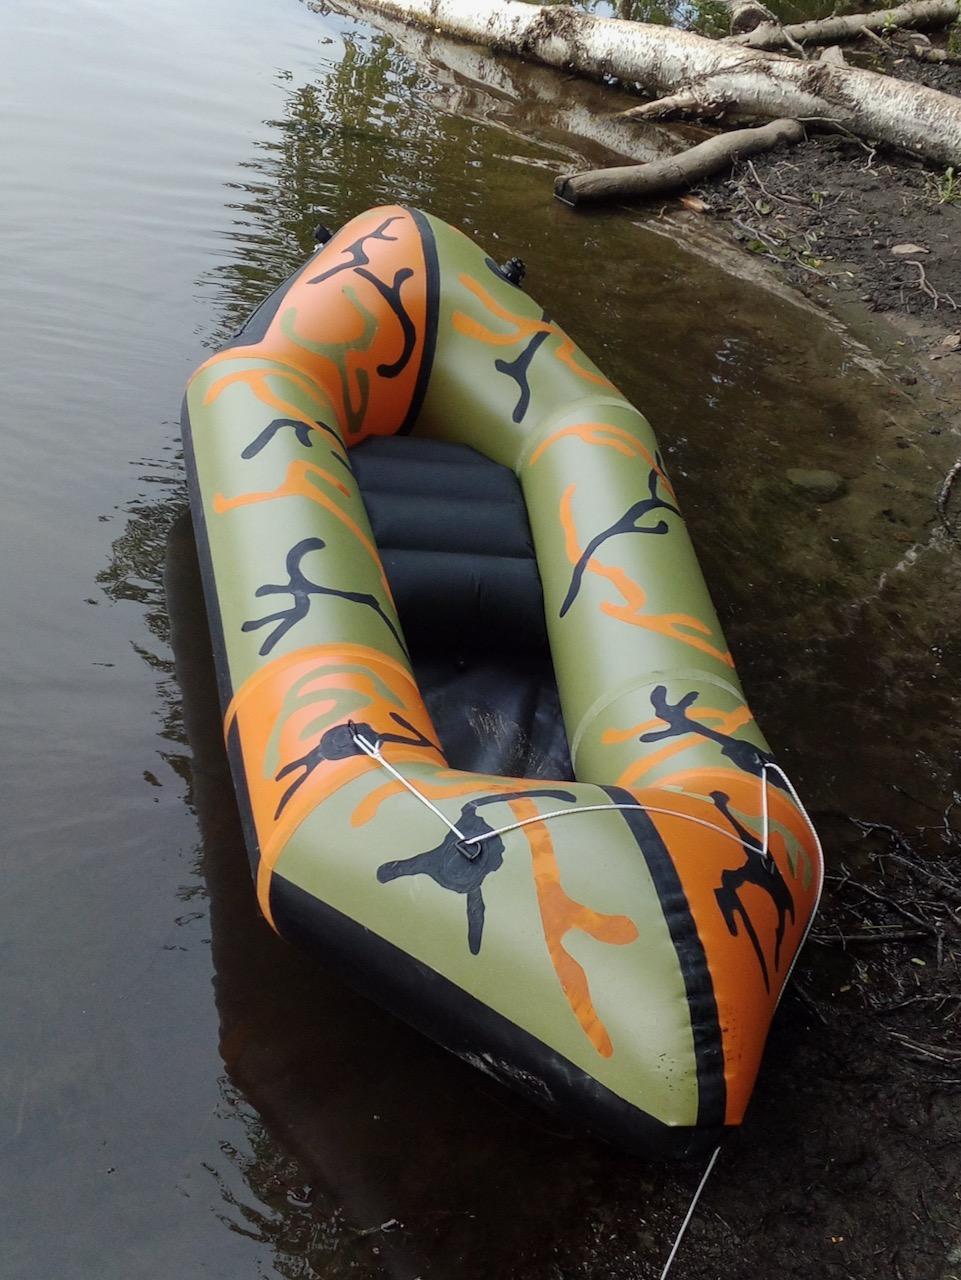
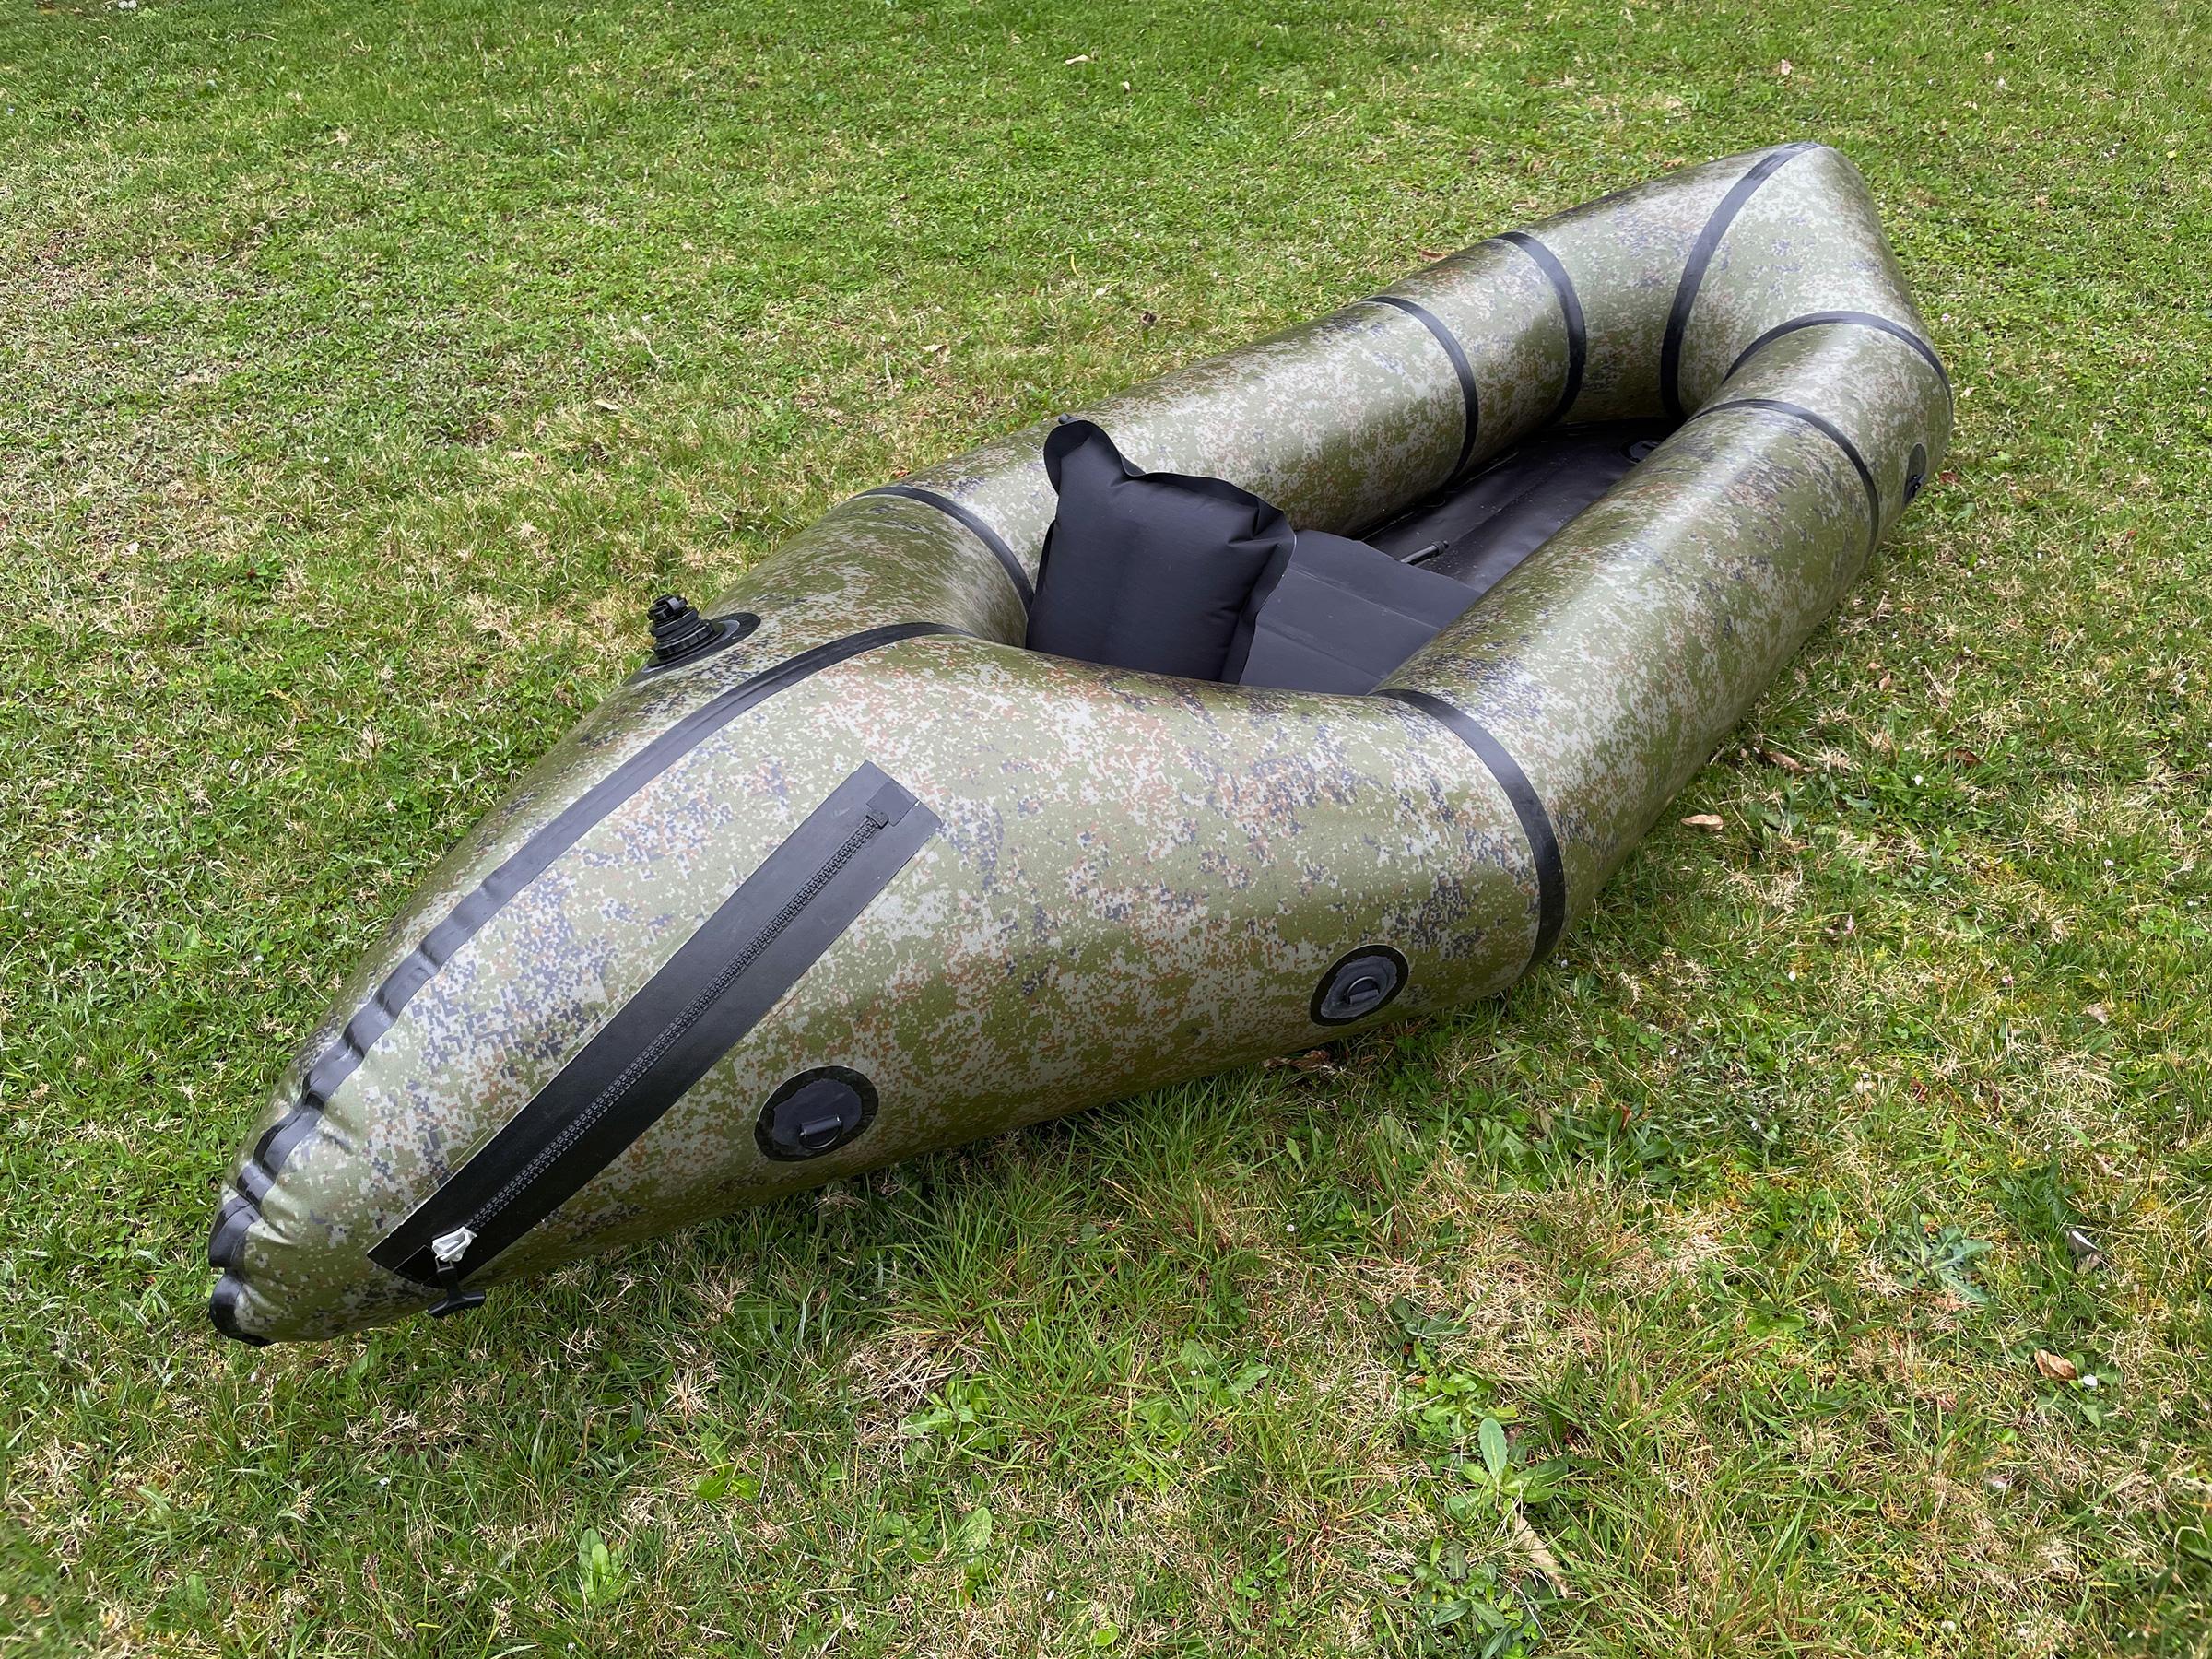
If I may ask, where did you source that camo material, im dreaming of a more Stealth packraft. 🙂Best regards August
-
July 20, 2021 at 12:48 pm #14908Matt (Admin)Keymaster
Well done! And what a gorgeous location! Thanks for posting 🙂
-
-
June 14, 2021 at 7:45 pm #14676kdfisherParticipant
Finished, mainly.
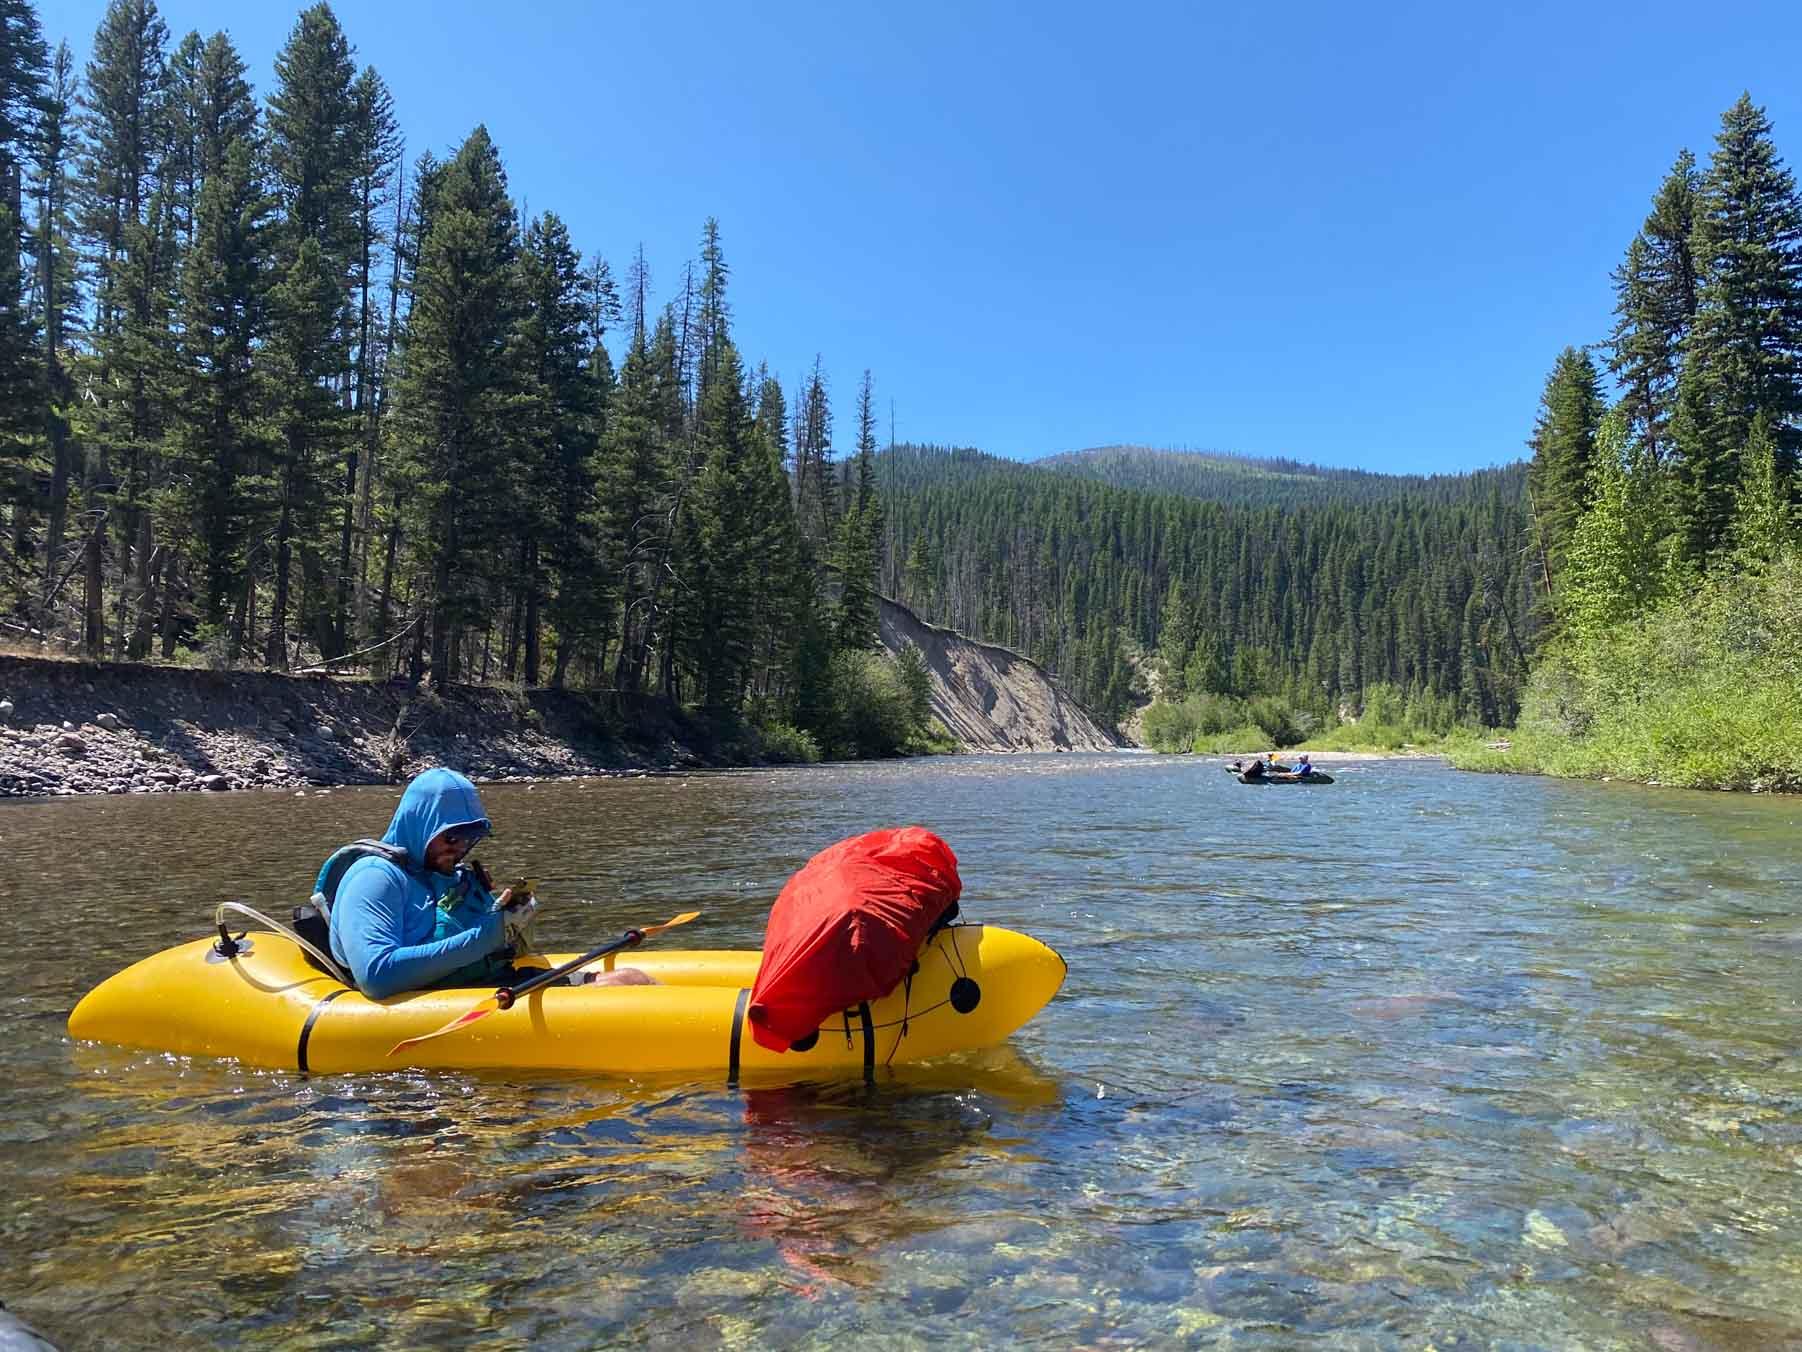
I built the two person packraft. I prefer the canoeing, followed by rowing, with kayaking coming in third. So I wanted a packraft I could could canoe paddle or row. So I also made a rowing frame from old yagi antenna elements I had laying around, some conduit fittings and some UHMW plastic for the oar yokes. I gave it the first test run with my boy’s kayak paddles sans one blade. So far I’m pretty happy with the performance. Rowing the packraft is certainly the straightest I’ve ever traveled in a packraft.
 n
nI designed the rowing frame around a traditional raft frame, ie, square-ish, instead of trying to bend it to the floor. Since I’m sitting in the higher seat, instead of lower like the kayak-style seats, I’m less worried about entrapment. I went longer with the side poles to lever out the rotation forces. I figured that would reduce the strain on any one particular tiedown. I have four d-ring holddowns to reduce forward-backward movement of the the frame, while I can lace the frame to the tube tops with a longer tiedown pictured at bottom. I might end up adding a couple more D-rings to snugs things up in the future. This gives me some latitude in moving the frame fore or aft to balance the load if it’s just me or if I have a companion.
Here is the rowing frame broke down for transport. Packraft was 8.2lbs and the frame was 3.4lbs. I think I can shave off a few more ounces by trimming the UHMW oarlocks. I’m waiting for my designated oars -standup board paddles which I’ve ordered- before doing so, however. Currently, they are stiff enough to keep the oars in place but can allow for the oars to be yanked out with enough pry-ing force.
Here are the tube-top tiedowns.
I had a moderate amount of leaks after first-inflation. Large ones mainly at the zipper and a couple at the inside tube-tube-floor area. Some really small ones elsewhere.
I used three different size wood blocks for the curves, ranging from 12″ to 3″ in diameter. Might have slowed me down, but helped me lay the fabric down just-so for ironing. I also used a couple of flat boards wrapped in the silicone paper to iron on. One other trick, I found midway through, was to use a short piece of seam, to use as a jig. I put a mid-mark on that and then slid that along my seams I was going to iron to quickly dash the mid-line along the length.
-Daniel
-
June 16, 2021 at 7:33 am #14683Matt (Admin)Keymaster
Wonderful! Thanks for sharing the details of your rowing rig – very cool!
-
-
June 3, 2021 at 5:54 pm #14584Mr MikeParticipant
Completed Telkwa Report
Between Matt’s detailed instructions and scouring the forums I was able to find all of the answers to my build questions. Lots of great information in the forums from other builders thanks!
Including seat, backrest, and tie downs I was 40 hours build time.

I spent extra time carefully fitting and heat sealing where the tube and seam pieces all join at the floor. Only one leak on a floor joint at 3/4 that I hadn’t applied the seam grip. I was able to weld and correct. I found that once the boat was inflated it was easy to check all of the welded seams and edges. I rolled a ball around the inside to use as a form and sealed any loose edges on the seam joints.
I glued on the tube tie down pads with HH-66 adhesive. I tried a couple test patches and it seems to be a very strong bond.
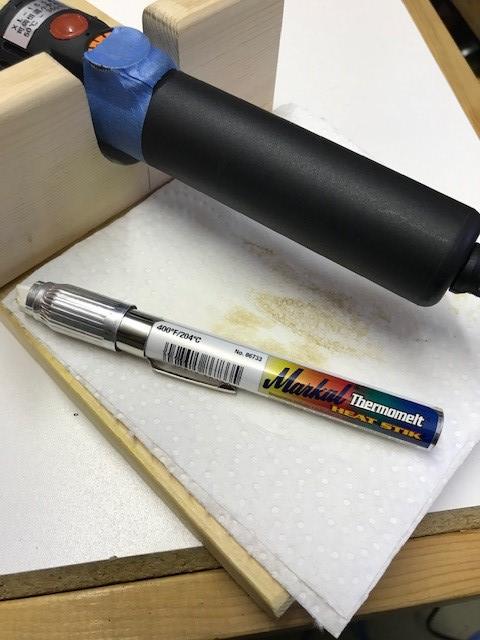
Iron and heat setting – during fabric heat seal testing I was looking for a way to confirm how hot the iron was before beginning on the packraft. I ended up using a thermomelt stick to set-up and monitor the irons temperature. I was able to adjust my iron to be maximum 400F or very close. I kept the thermomelt on my iron stand to easily check temperature until I was more comfortable with the whole process. I found I would have to watch that the iron would not drop too much temperature when completing the long wide flat tube to floor seams. I would slow down a bit to keep the iron in the correct heat range.
Mike
-
June 16, 2021 at 7:34 am #14684Matt (Admin)Keymaster
Great work, Mike, and thanks for the tips! Cheers
-
-
May 12, 2021 at 1:21 pm #14397chanchito17Participant
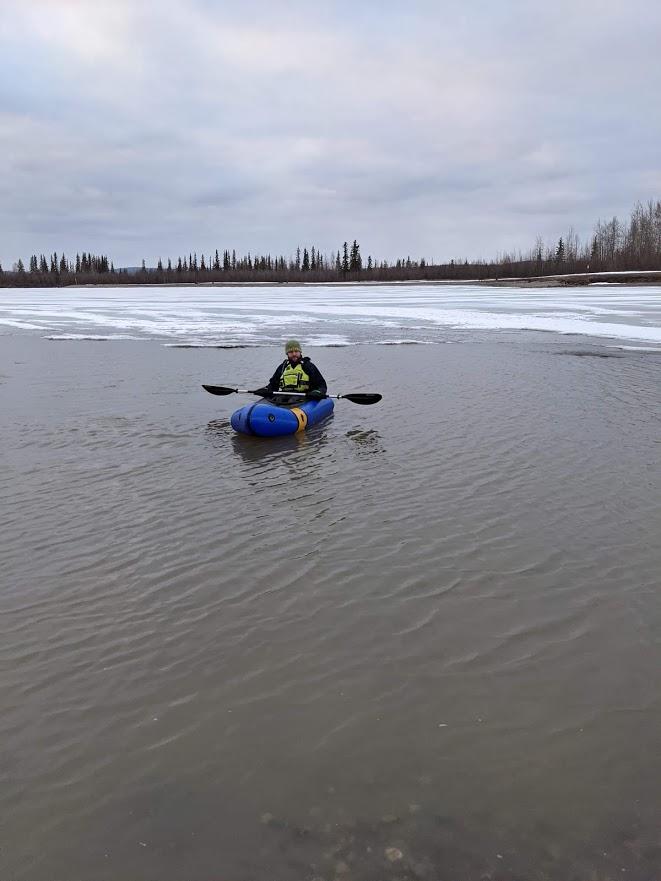
Finished my Skeena! What an awesome project. Wish I had the hot air gun for those hard to form end welds- like many folks on here, I used far too much aquaseal and patches to stop leaks once done. On the next one (the process is so addictive!!) I’m sure there will be perfect welds.
I couldn’t wait to try it out… Unfortunately in Fairbanks, it seems we are always waiting for the river to either freeze or melt. Here’s the maiden voyage at 2 degrees C in a local lake
Highly suggest getting the multicolored fabric- with the leftover scraps and the ripstop fabric for the inflation bag, as well as an old backpack strap/belt I found, I was able to make a matching waterproof backpack to carry the packraft around. (I already had an inflation bag from a friend that I made fit the DIY packraft).
I’m not sure how durable the TPU coated ripstop fabric will be for a backpack. It held up for a few hikes with climbing gear, so I’m confident. Of course, if it does get holes, I can just iron on 210D fabric scraps to seal it up again. I didn’t have to sew a single thing for this bag.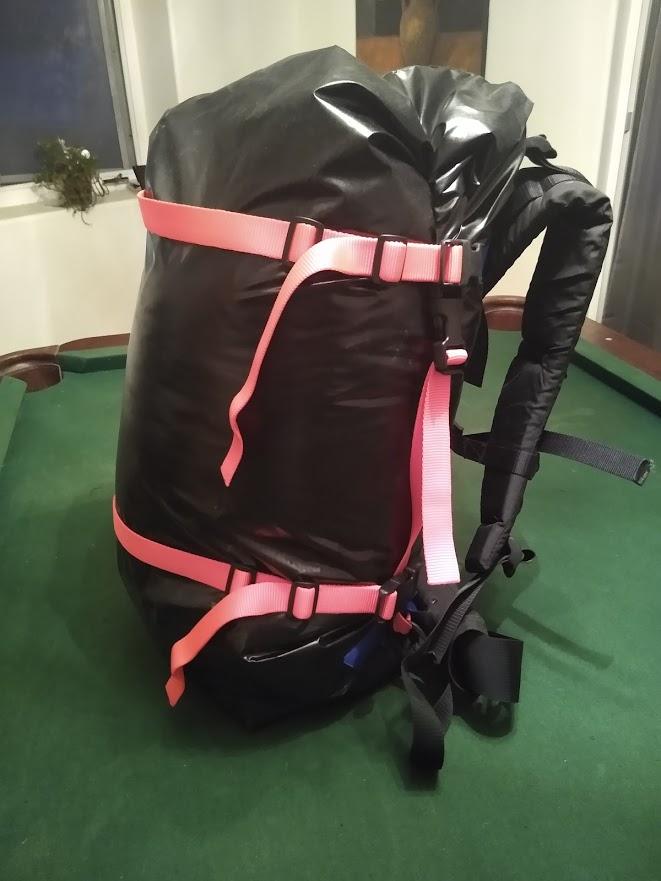
I CAN’T STOP THINKING ABOUT TPU FABRIC!! Thanks DIY packraft! All my friends are jealous.
-
May 13, 2021 at 8:41 am #14428Matt (Admin)Keymaster
Right on! The packraft looks great and so does the backpack – well done!
I’m sure people would be interested in more detail about the backpack, so if have any assembly shots or more photos showing how you attached things, I’d be happy to post them on the blog where more people will see (with credit to you, of course).
Enjoy the summer while it lasts!
-
-
May 6, 2021 at 1:19 pm #14347AaronParticipant
I finished my DIY Skeena kit a few months ago, and just got back from a 4-day trip on the Escalante. The river was running low and I scraped the bottom and sides against plenty of rocks, but fabric still looks in fine shape. Before the trip I converted it into a self-bailer and I’m really pleased with how it turned out. I cut down an old Thermarest to use as the inflatable floor insert (I think it was Bruce who recommended that in the forum). I think I’m going to make a new seat and shorten the baffles by an inch or two so I don’t sit quite so high, but other than that it worked exactly like I hoped it would. The top portion of my seat was leaking pretty quickly. I got tired of regularly blowing it back up and decided to just leave it deflated.
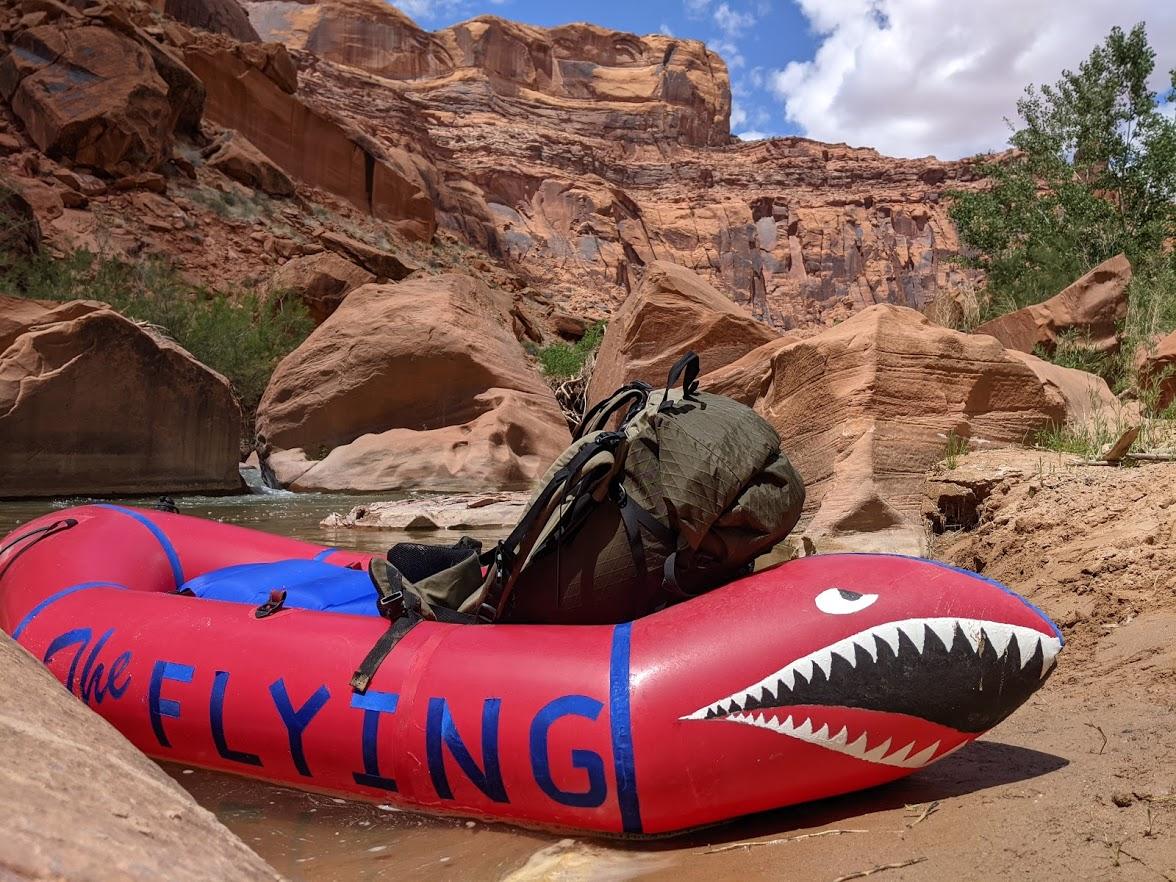
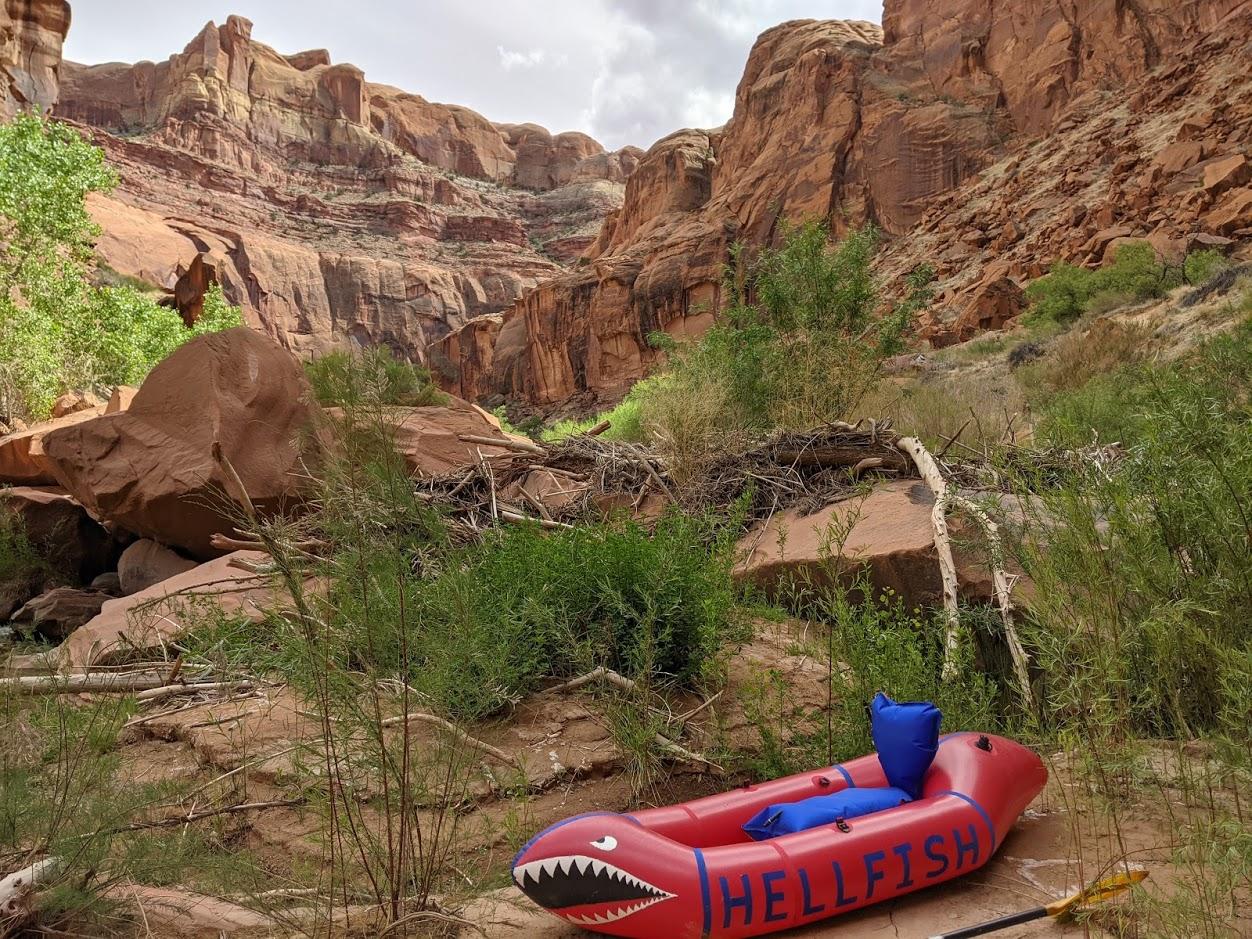
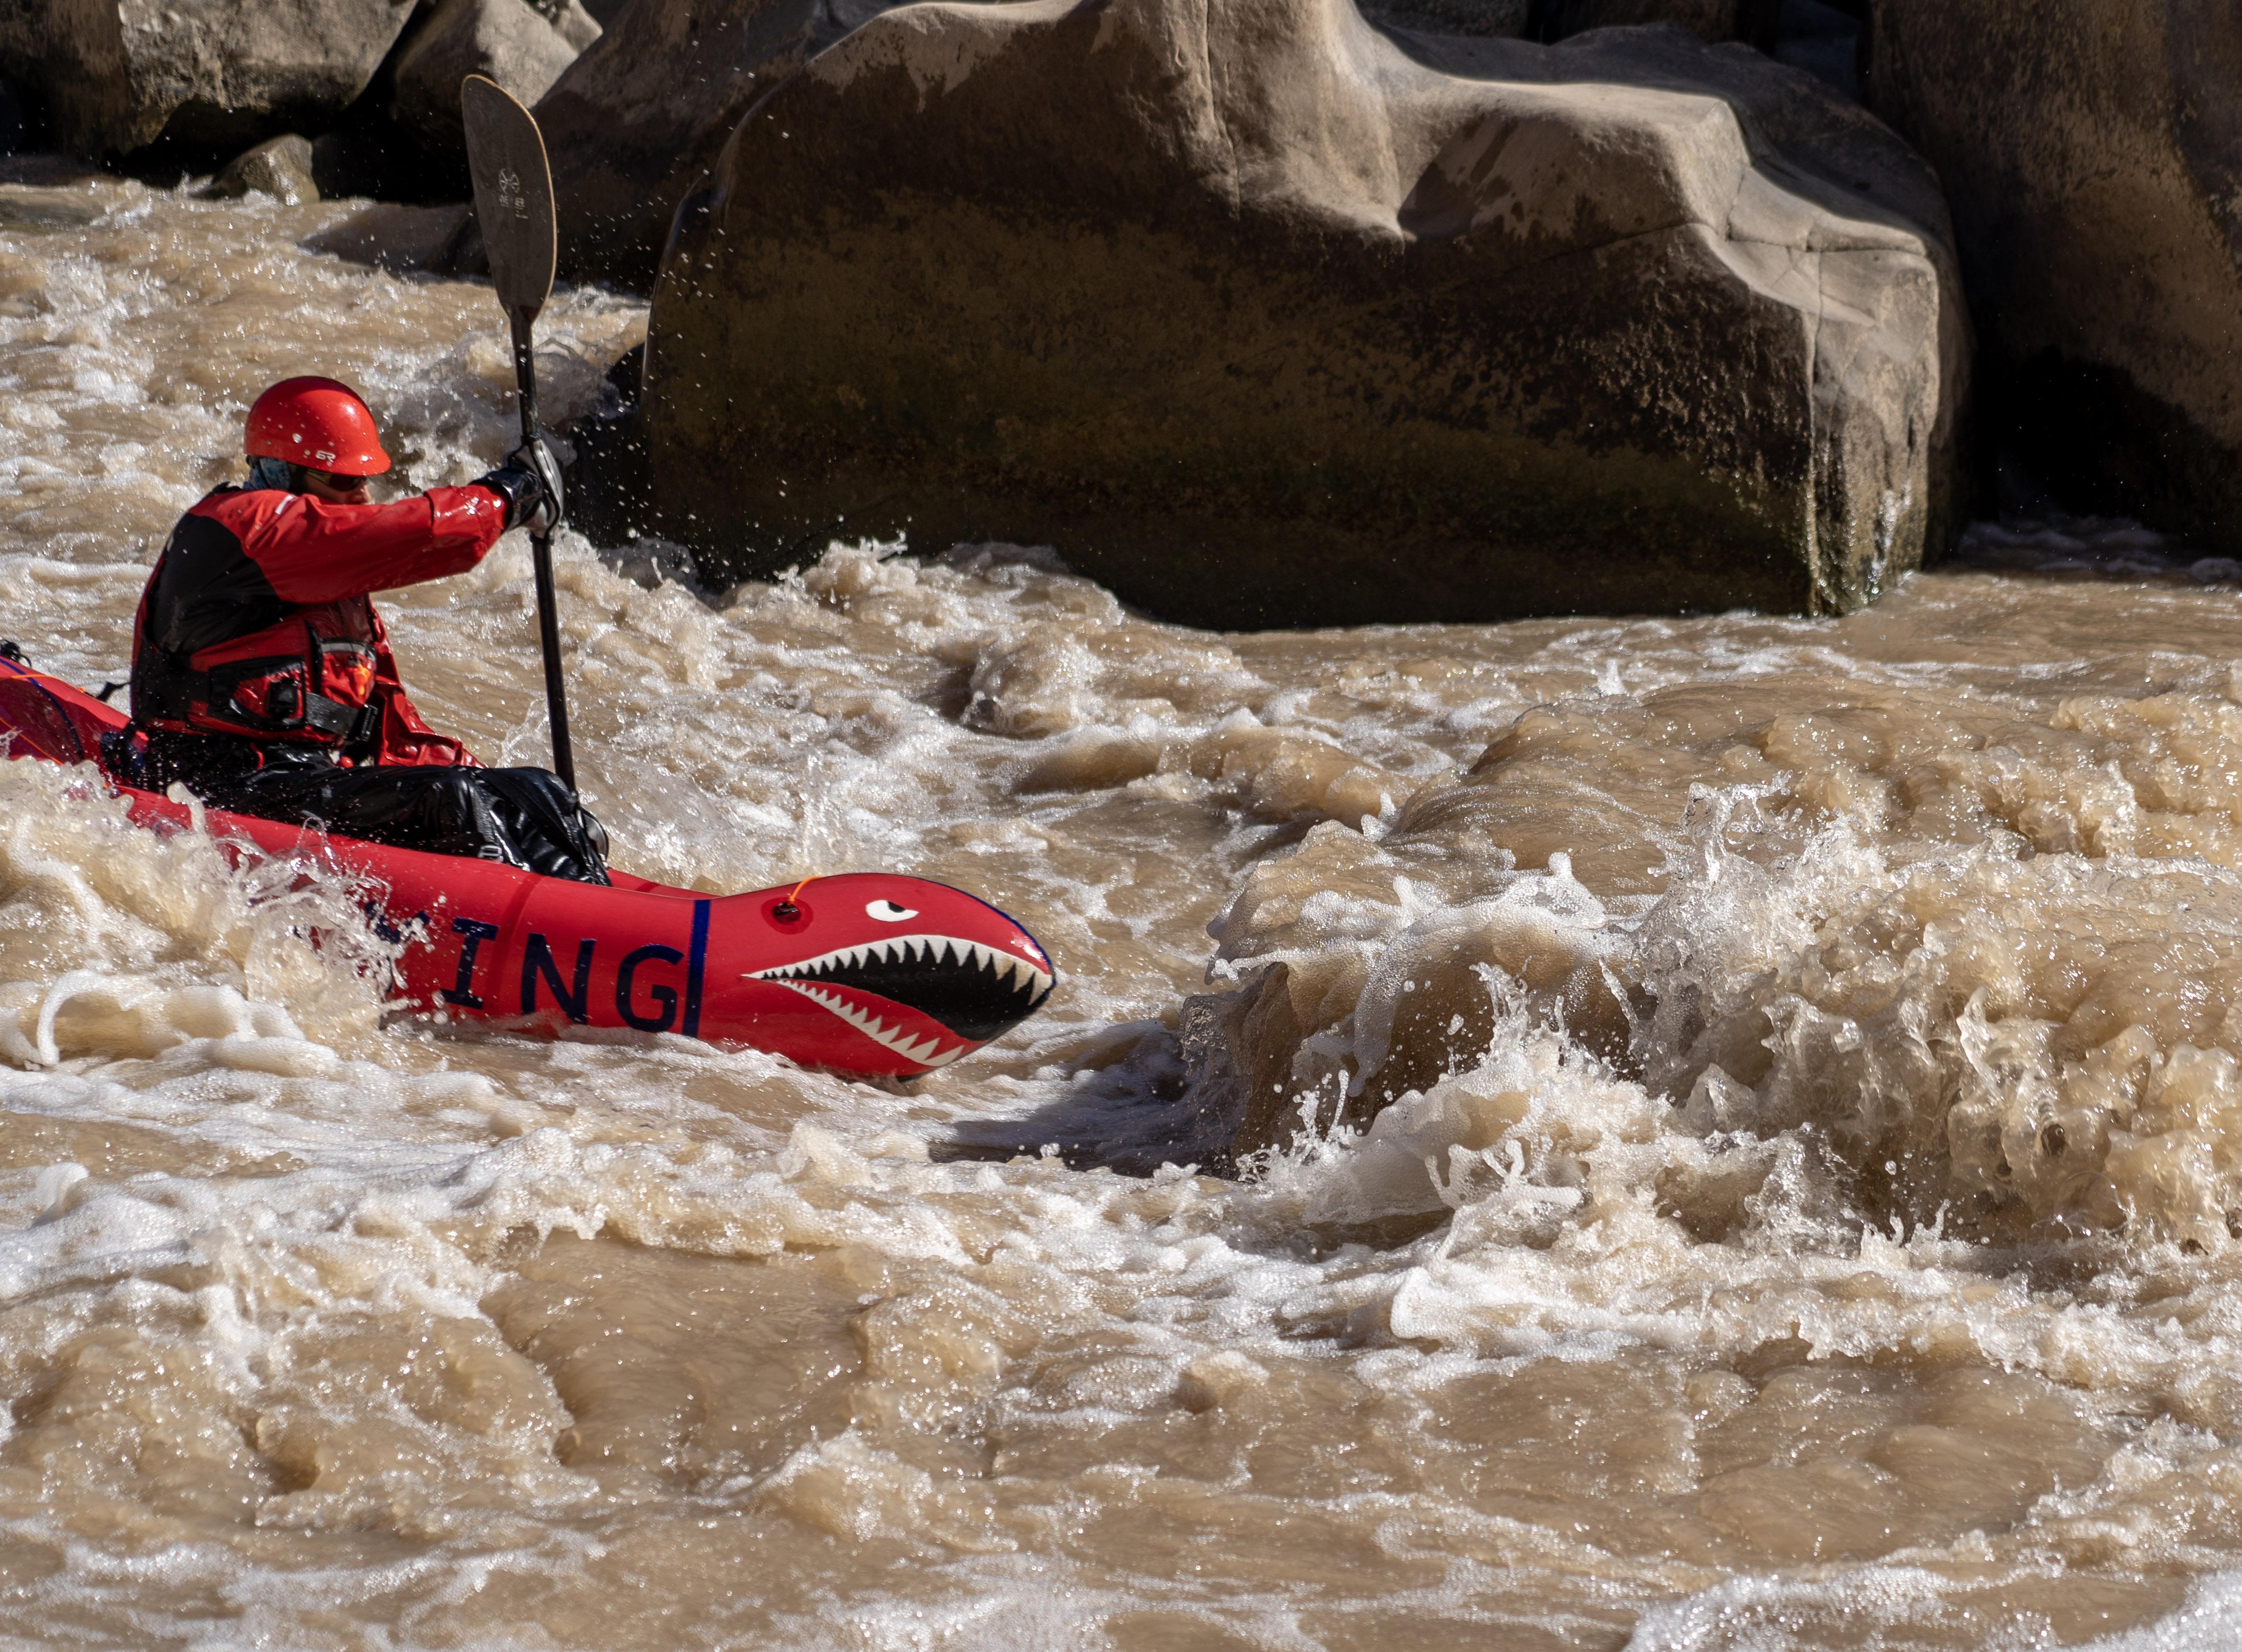
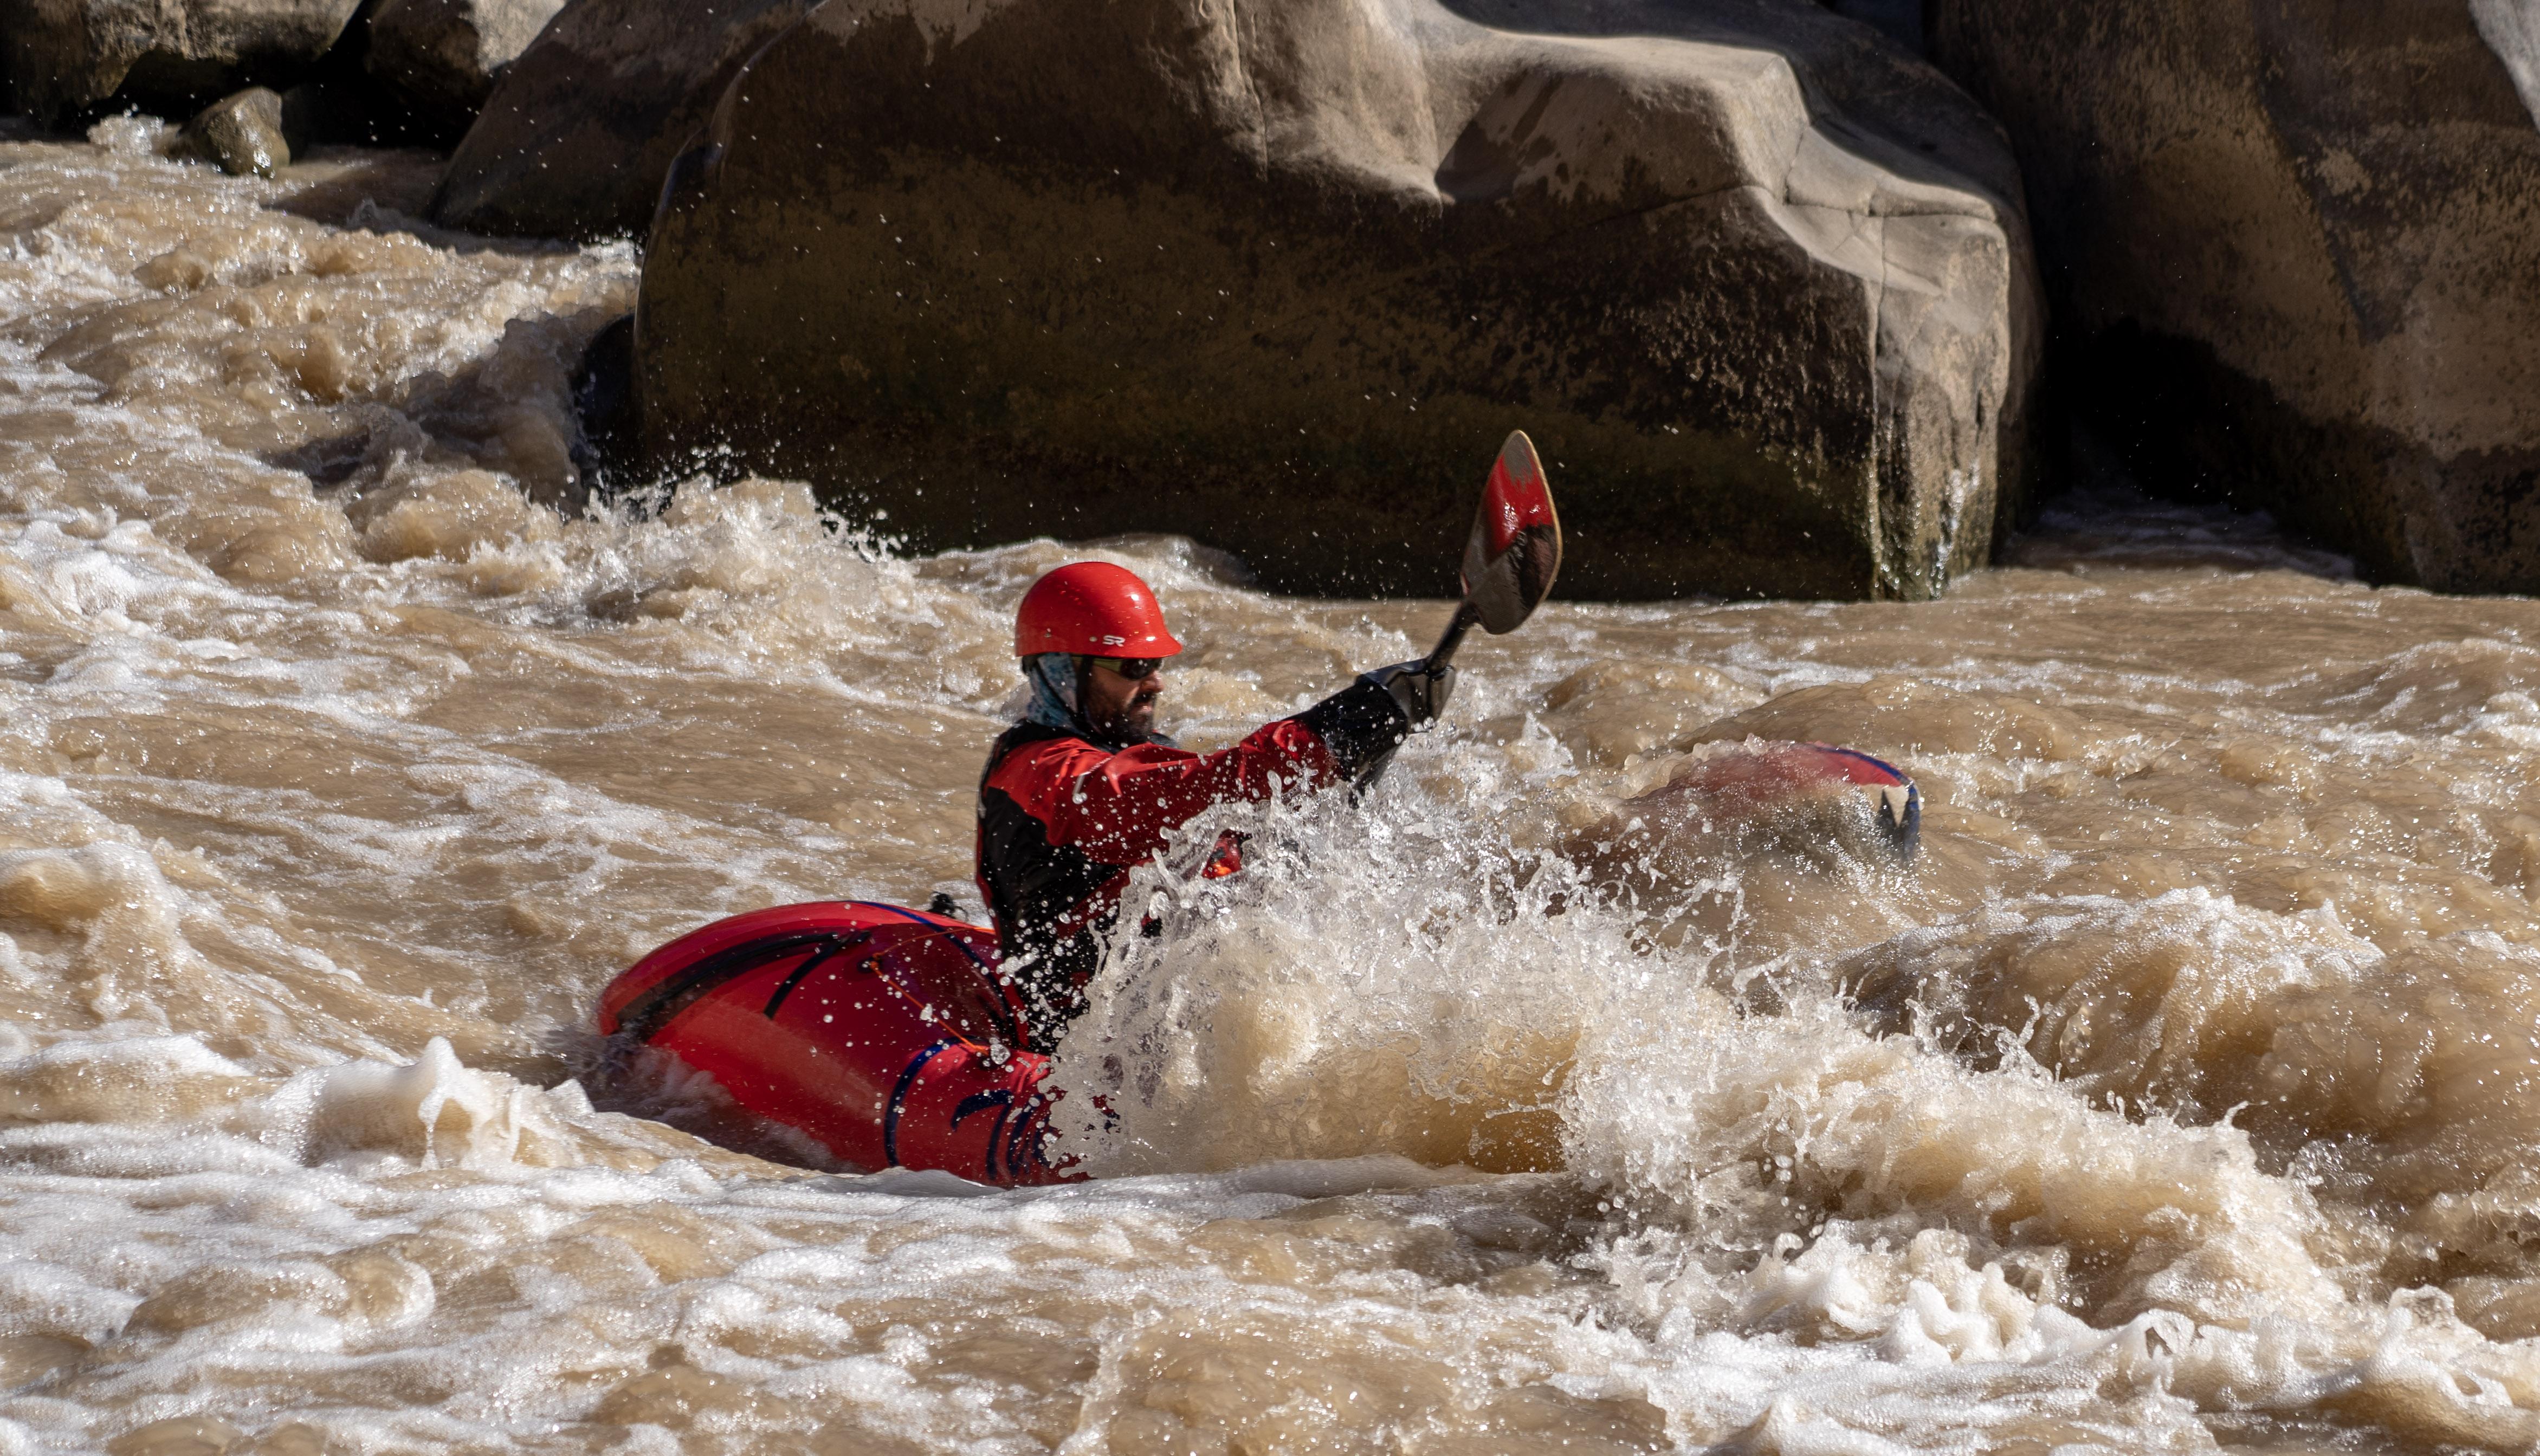
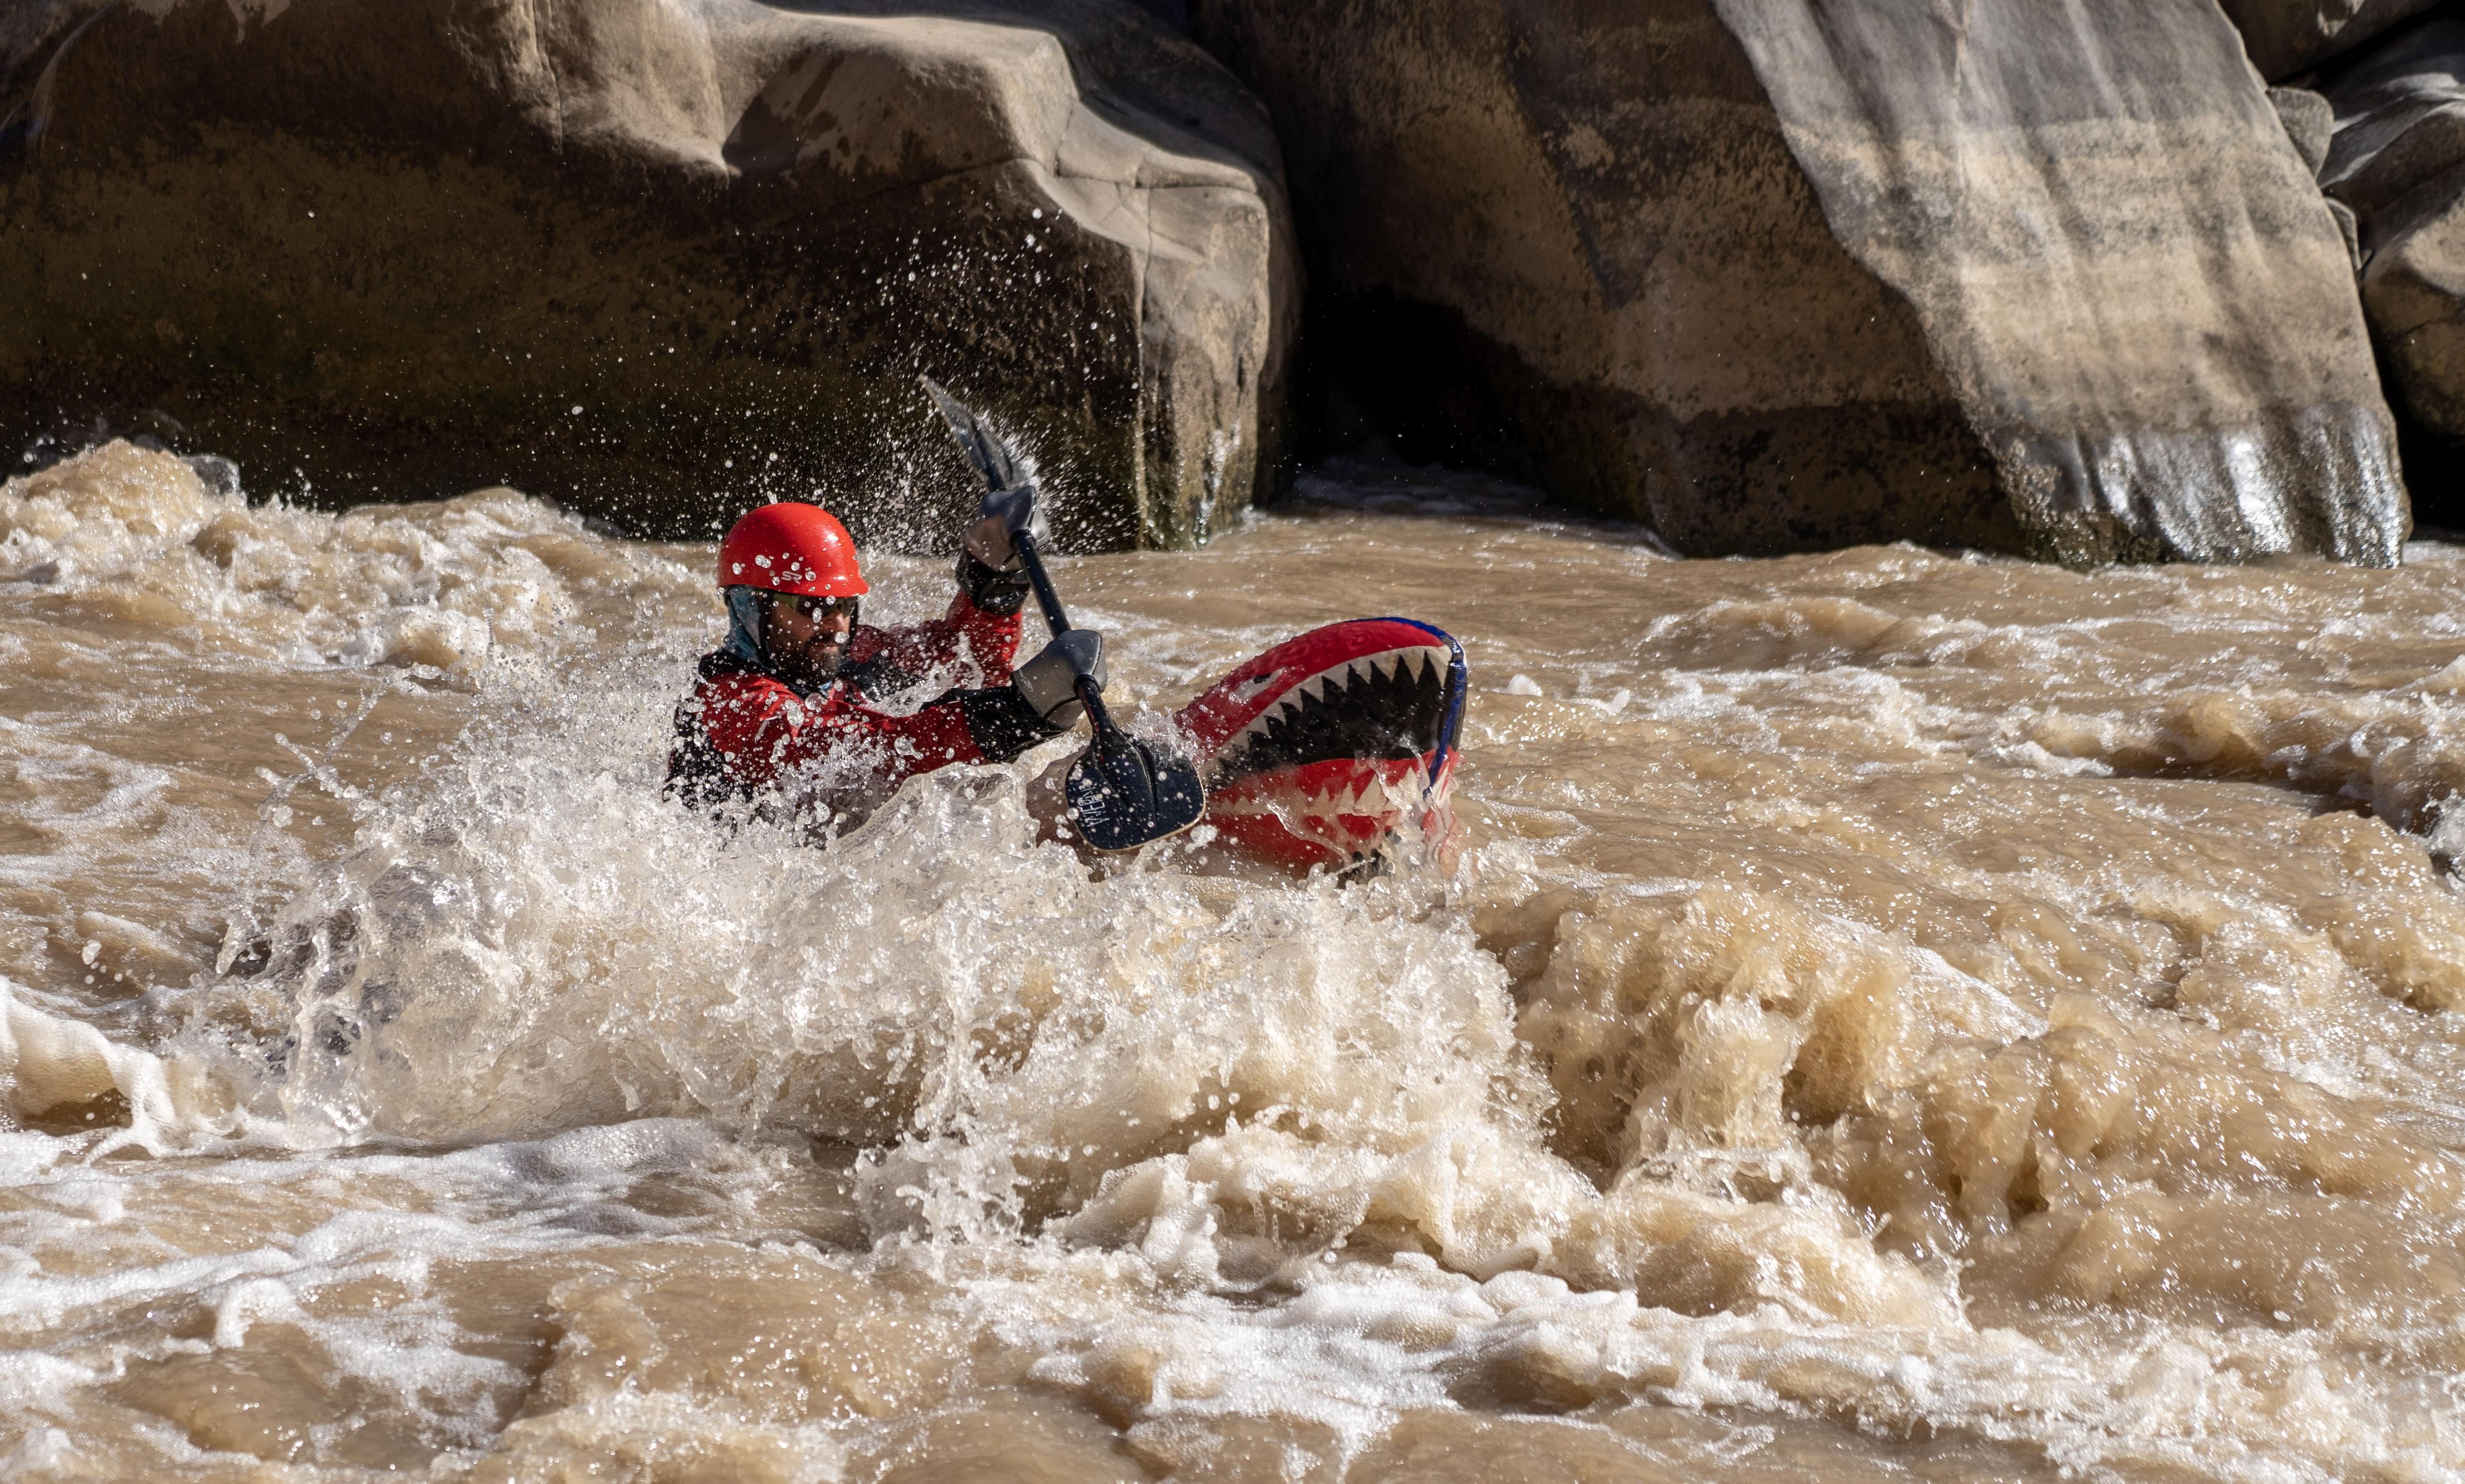
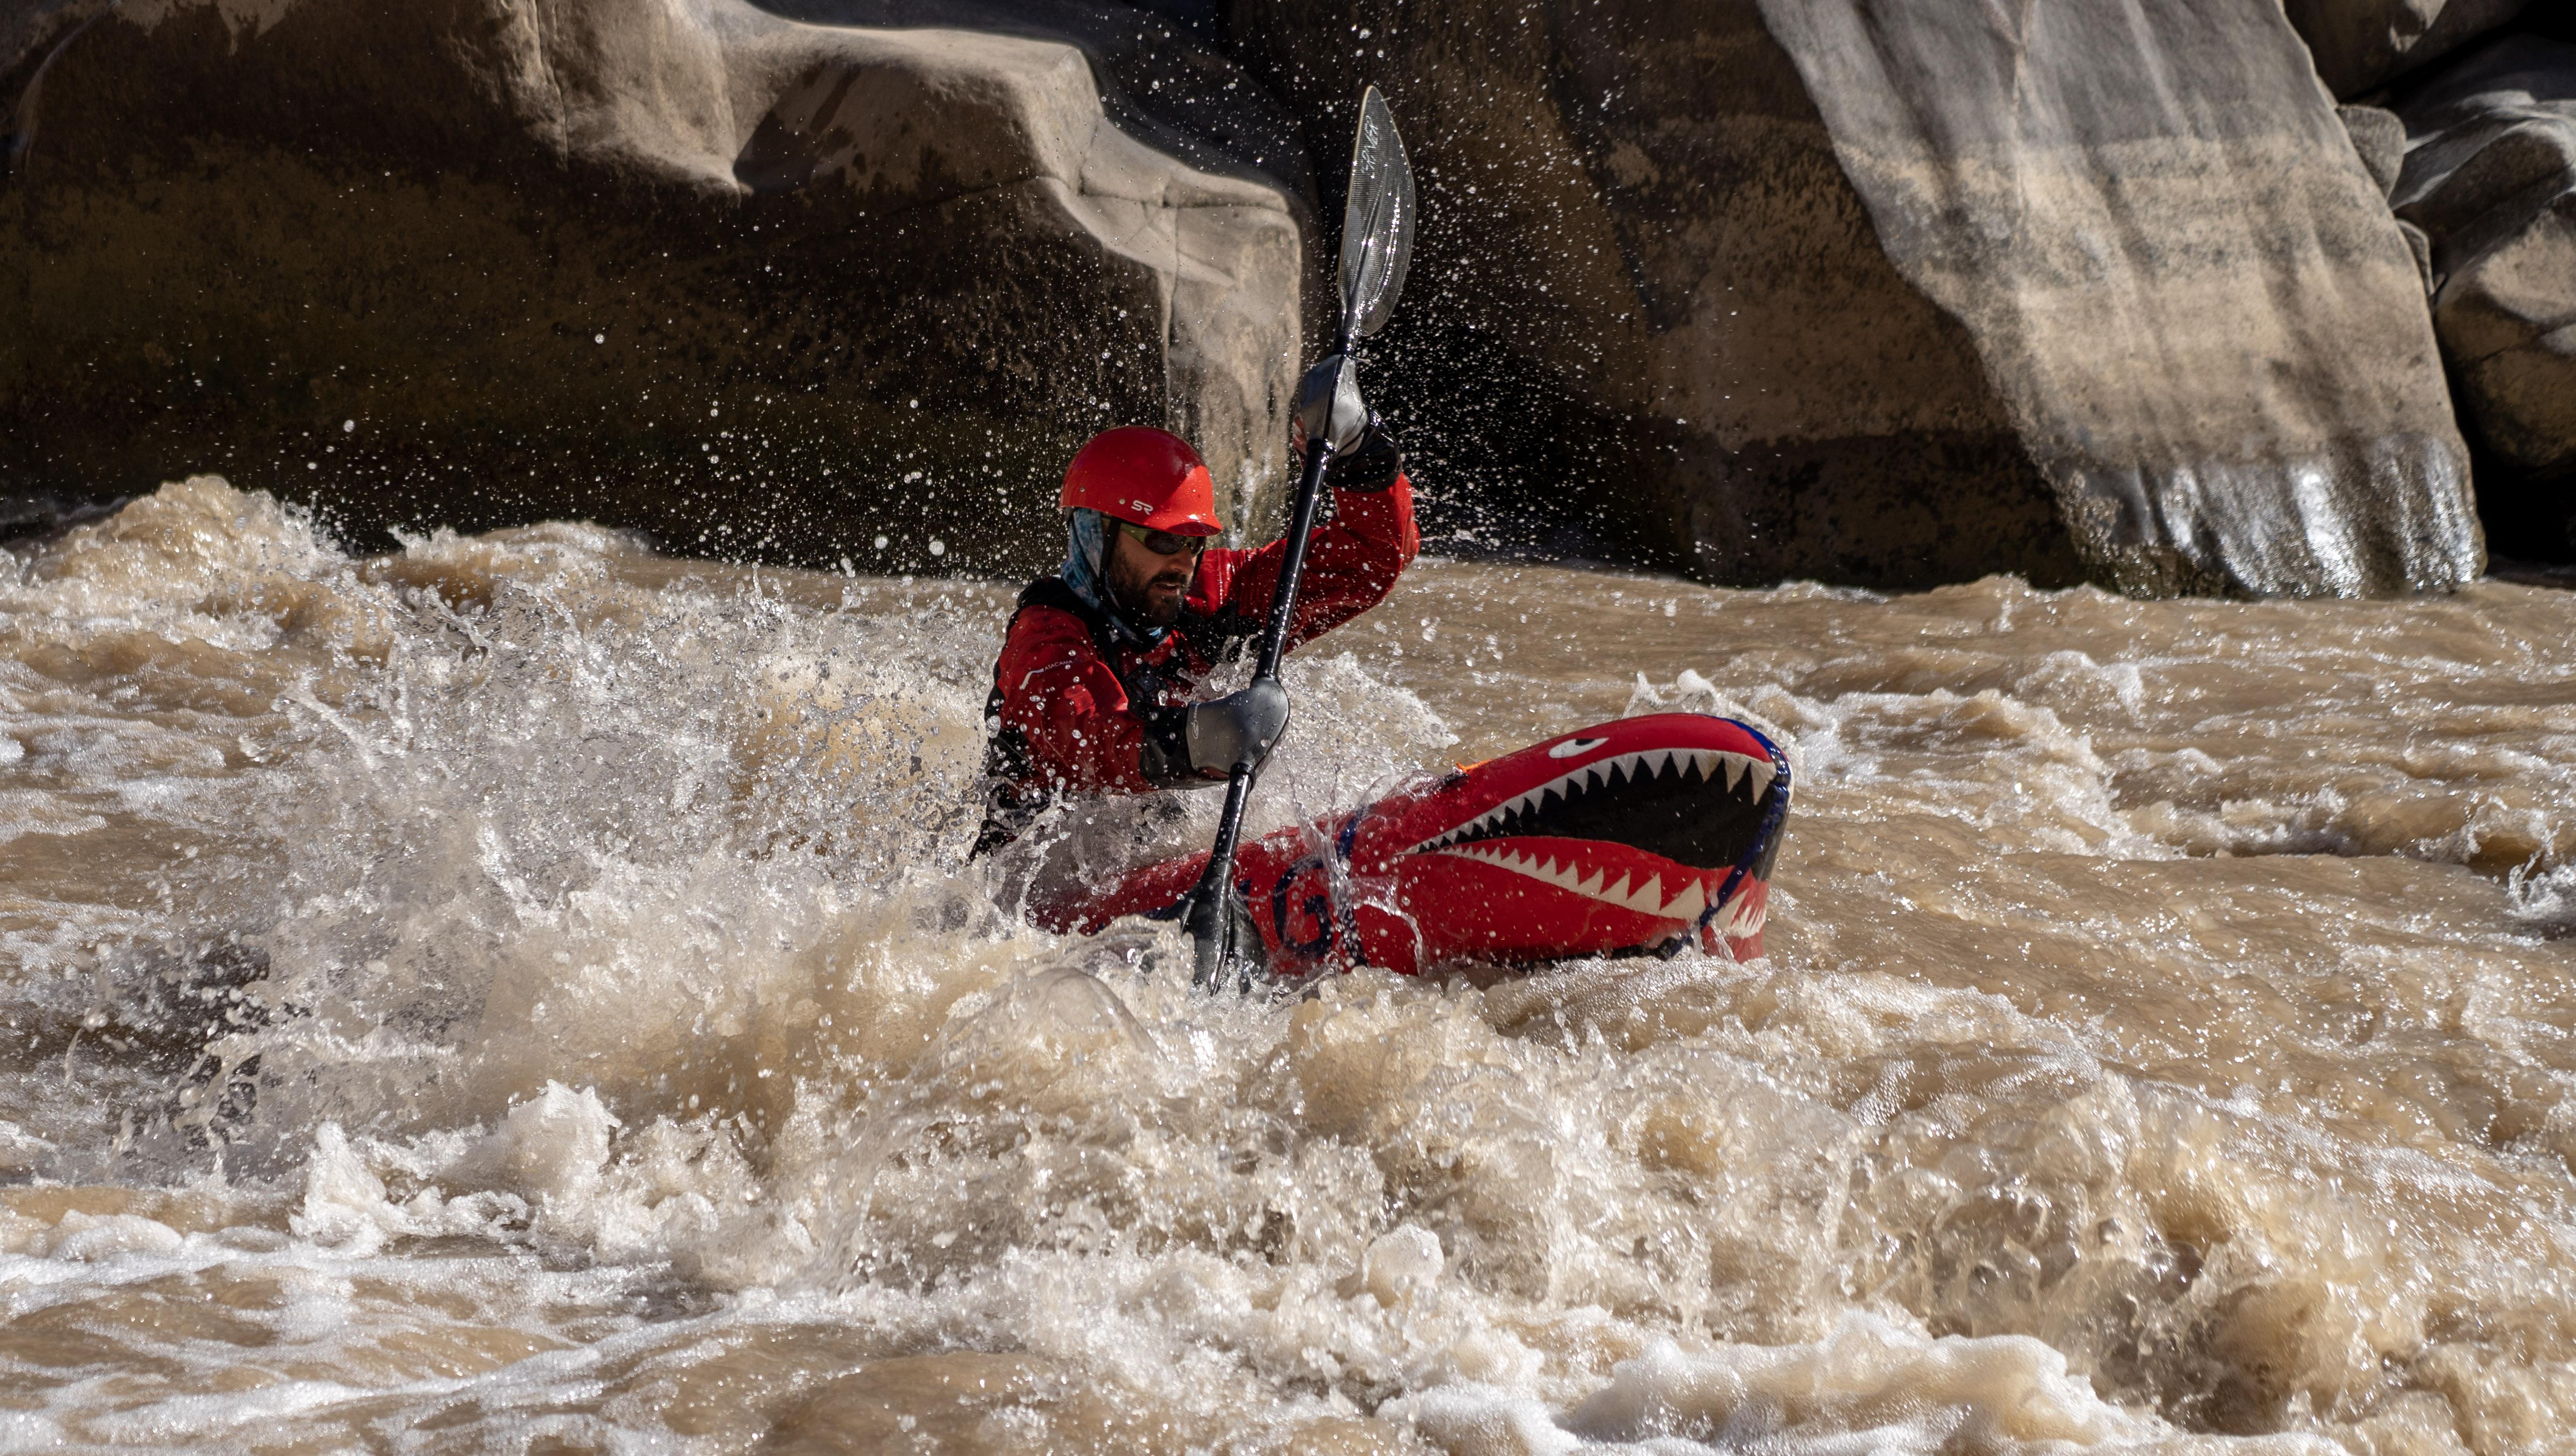
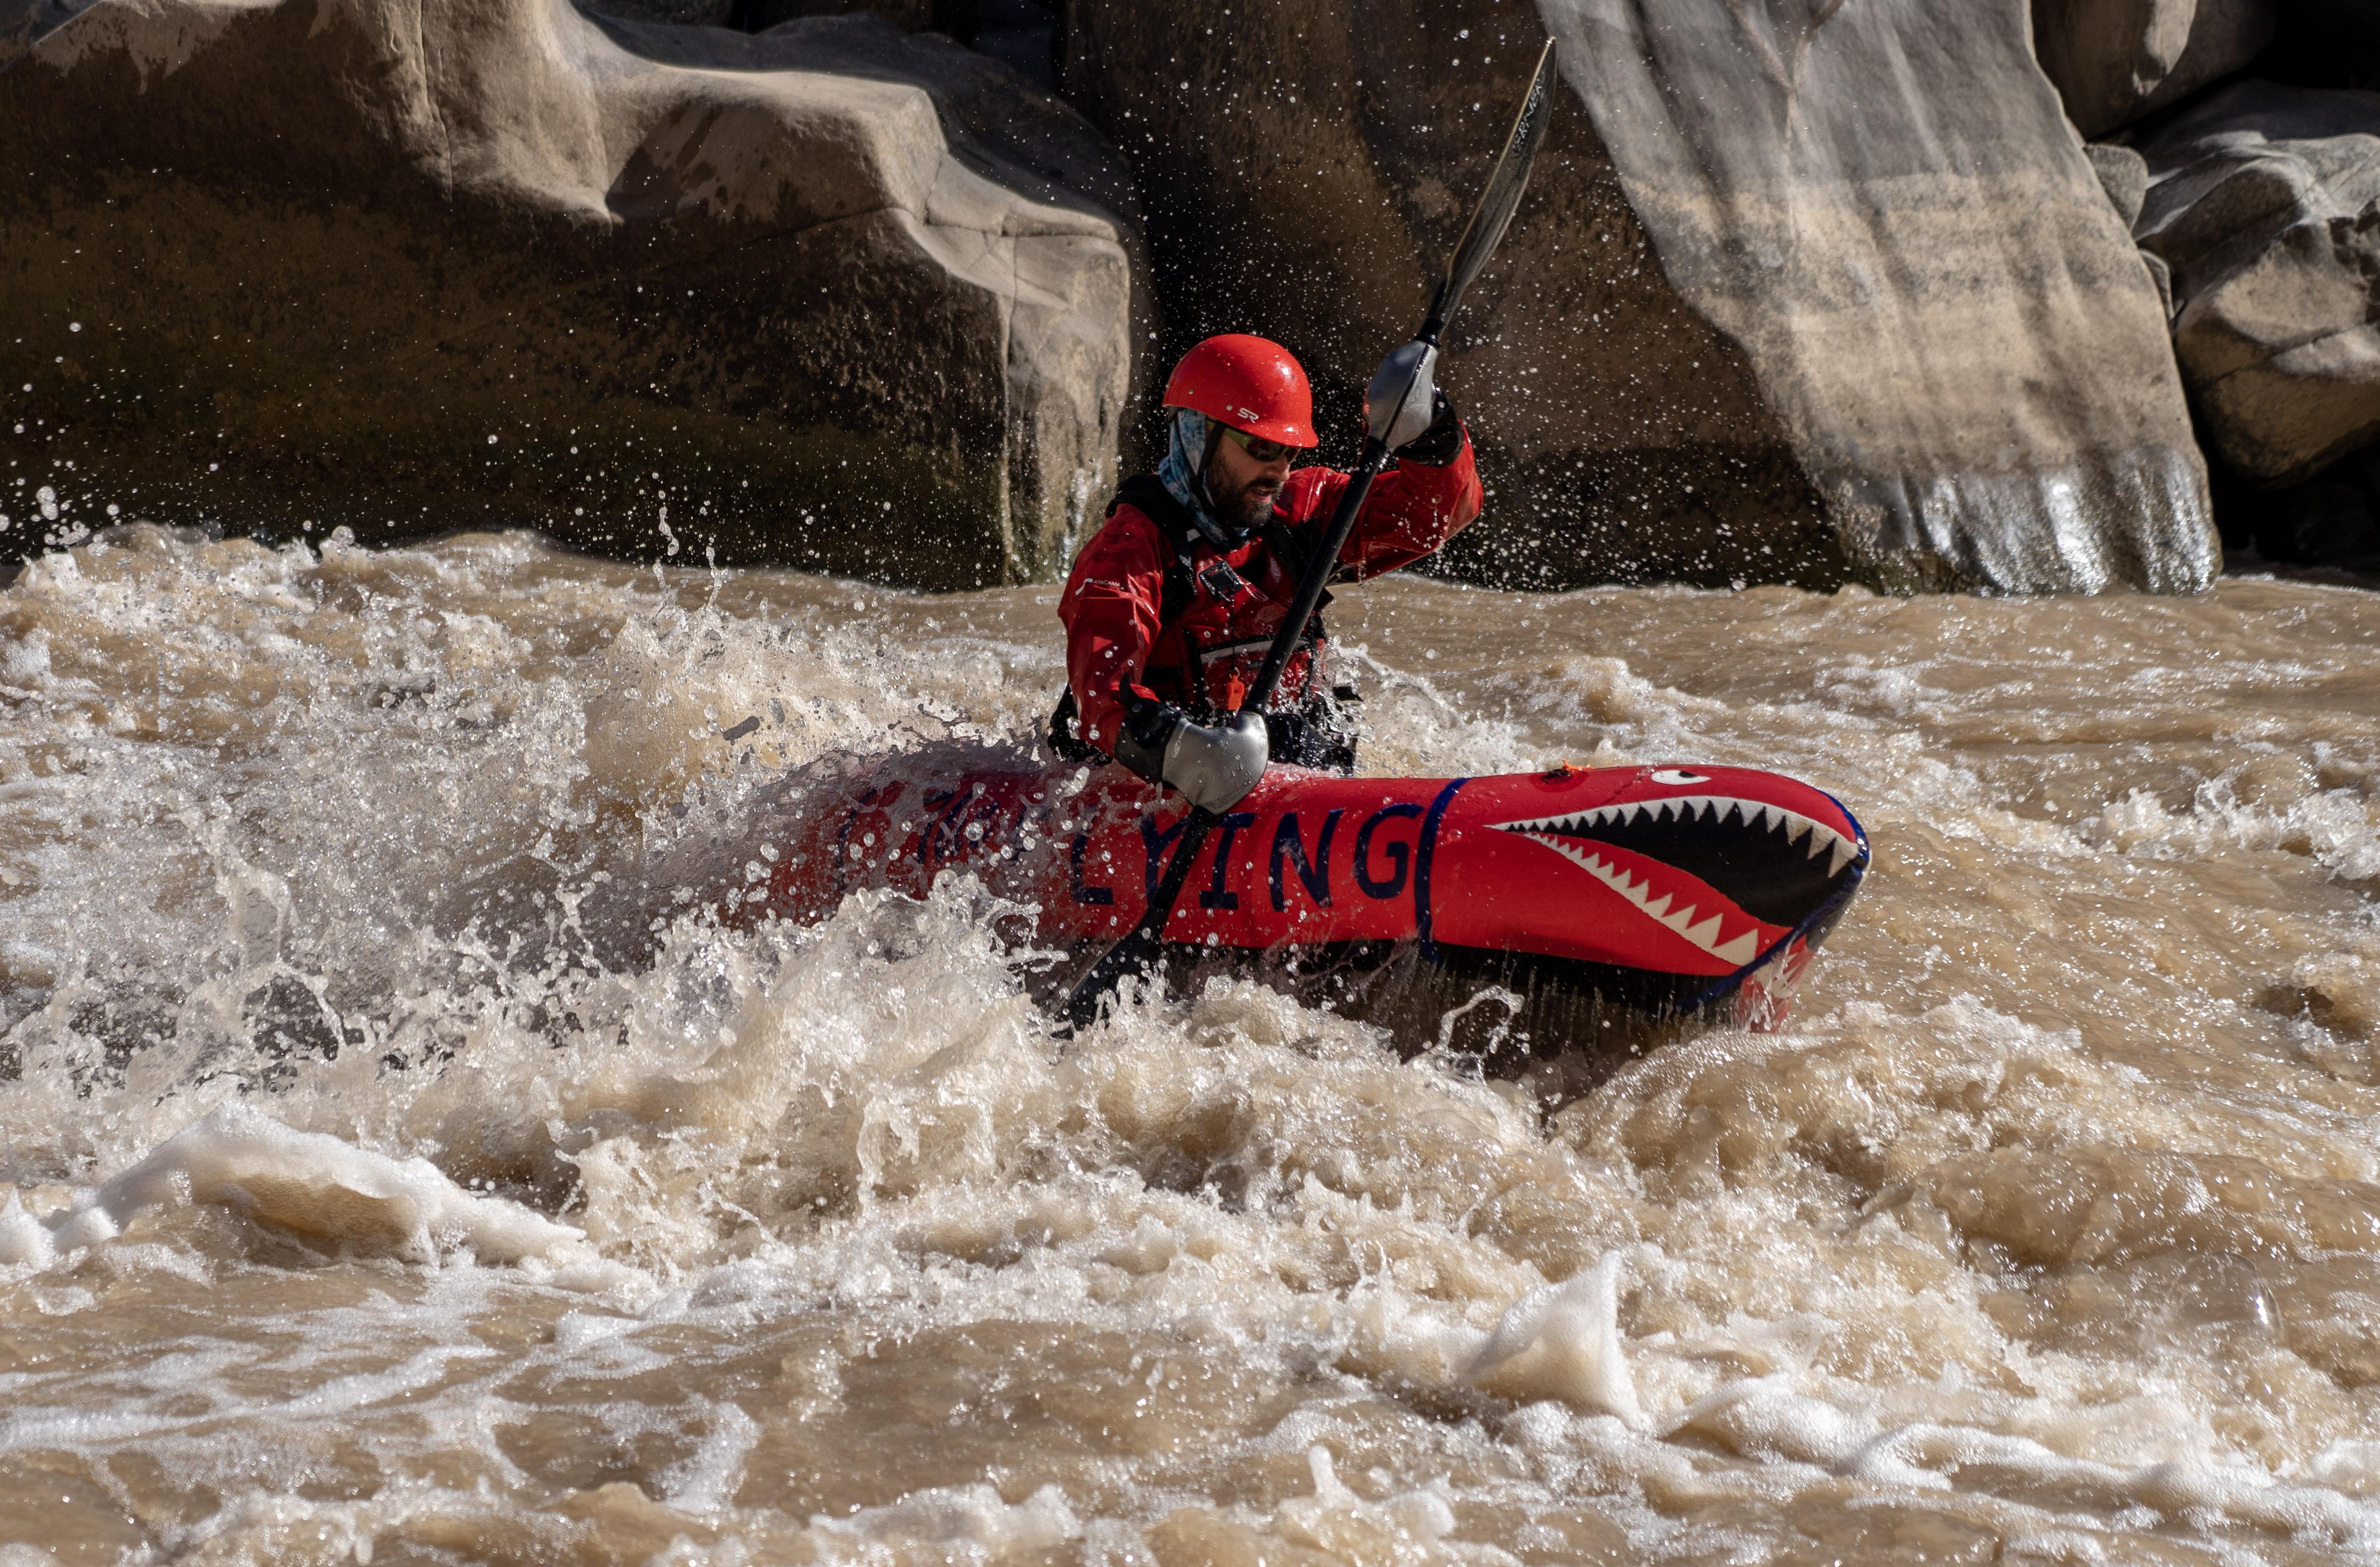
I used pieces of extra seam strip fabric to iron on the name (“the Flying Hellfish”). I had a friend of mine who’s a talented artist draw in the jaws and eyes with a sharpie, and I used seam grip mixed with white or black ceramic pigment to paint his design. The red part above the lower jaw is supposed to be the tongue, but it didn’t turn out quite how I wanted it to. I’m going to use more black seam grip to modify the shape of it a bit. It seems very durable, to answer a question posed elsewhere in the forum.
-
May 7, 2021 at 8:19 am #14354Matt (Admin)Keymaster
Great scenery, and fantastic work on the packraft! I love it!
-
May 7, 2021 at 11:45 am #14361AaronParticipant
Thanks Przemek and Matt! I’m looking forward to starting on my Telkwa kit, it arrived a couple weeks ago. DIY Packraft was a really great idea Matt, I’ve been wanting to do this trip for years but didn’t have $1,000 to pony up for an Alpacka. Plus it was fun to customize the boat and really make it unique.
-
-
May 6, 2021 at 2:11 pm #14349Przemek MarekParticipant
Wow, the jaws are fantastic! Nice job!
-
-
April 25, 2021 at 6:03 pm #14277AaronParticipant
I started building a Skeena back in April 2020 and finished it in June for this trip to the Bob Marshall Wilderness in Montana in August.
Here it is next to a few Alpacka Classics.
Some thoughts on the build –
It definitely took longer than anticipated to make, I was probably close to 60 hours on it. I do think one factor was the iron size and this being my first time doing anything like this. Due to covid and wait times, I didn’t have time to get a leather iron from aliexpress. If I were to make another one of these I would get the leather iron in addition to the larger Hangar iron I used.
I went with no top up valve and just made a tube for the Boston valve, a tip I saw on here somewhere. It worked great.
Building it took more space than anticipated
The tips were very hard to seal as I couldn’t find a bowl with the right form, would potentially try to make a wooden form for the next one. Very glad I had the zipper though to be able to get in there.
Seat took a long time, but I think that was due to it being the first thing I did and was very meticulous in creating the reinforcement strips and probably didn’t really need to be.
I only had a couple small leaks when I finished and that was due to me accidentally getting the iron too close a couple times and touching the tip to it.
Here is a pretty extensive album of the build process that I documented along the way!
-
April 27, 2021 at 4:56 pm #14297Matt (Admin)Keymaster
Great work, Aaron, and thanks for the feedback!
Just a note regarding the seats, for anyone considering a DIY Packraft build: I’ve totally redesigned the seats for 2021 so they’re much easier/faster to assemble and much less likely to develop leaks.
-
April 28, 2021 at 9:35 pm #14306AaronParticipant
That’s good to hear as mine currently has a leak I need to diagnose! Is it possible to purchase just a seat?
-
April 29, 2021 at 6:54 pm #14311Matt (Admin)Keymaster
You bet! Just shoot me an email.
-
-
-
-
March 28, 2021 at 12:05 pm #14055Przemek MarekParticipant
Coming across Matt’s website was one of the best things that happened in 2020. Even though I was in the middle of another lockdown DIY project, after about 5 minutes I knew I just need to make one of these too…
As so many others here noted before, the instructions and a great forum make the construction a pretty straightforward perocess – big thanks Matt! My Skeena took about 35h to make, and after 2 rounds of sealing (one hiss at the floor at the 1R/2R seam, and then some touchups along the seams and a couple of spots where I touched the TPU with the iron) it seems to be holding the air nicely now. Weather permitting, I hope to get it onto a small loch near Glasgow next weekend, and hopefully somewhere far north as soon as the lockdown rules allow after that.
-
March 31, 2021 at 8:38 am #14079Matt (Admin)Keymaster
Thanks! Beautiful work – I hope to see it in the wild when you’re able to travel north!
-
April 3, 2021 at 6:20 am #14097Przemek MarekParticipant
First time on the water today, worked great! Now just need to wait till your lockdown end, hopefully end of April…
-
April 4, 2021 at 2:21 pm #14103Matt (Admin)Keymaster
Wonderful!
-
April 17, 2021 at 11:54 am #14215Przemek MarekParticipant
And we’re finally allowed to travel around Scotland! So I took my Skeena out to Loch Laidon on typical Scottish weather day 😉
-
April 17, 2021 at 12:21 pm #14217Matt (Admin)Keymaster
Gorgeous!
-
-
-
-
-
-
March 26, 2021 at 11:26 am #14042BarbaraParticipant
Here’s my winter project – the 2021 Skeena 130cm on its maiden voyage near Canmore, Alberta. Took about 35 hours. Super impressed.
-
March 26, 2021 at 12:30 pm #14043Matt (Admin)Keymaster
What a beautiful spot for a maiden voyage! Excellent work, and thanks for posting, Barbara!
-
-
March 25, 2021 at 11:58 pm #14041Uncle FredParticipant
It looks like 2021 rafts are starting to come together. Can’t wait to see what people come up with.
-
March 25, 2021 at 8:10 pm #14035gbrunwoParticipant
I finished my Telkwa today. I also made a Bow Bag out of some X-Pack material that I had left-over from making bike packs. Like others on the forum, it took me several rounds of searching and patching leaks with Aquaseal. However, I finally have it ready for its maiden voyage here in Colorado.
-
March 26, 2021 at 5:13 pm #14046Matt (Admin)Keymaster
Awesome! Great bow bag, too! Cheers 😀
-
-
March 22, 2021 at 3:04 pm #14015Christian001Participant
I finished my third packraft a couple of weeks ago. This time it was an Ultralight.
Matt, you wrote this is the easiest, but for me it was more difficult than the others. The fabric is so thin, that I was afraid I will damage it just from looking at it. I was very carefully and quite slow. In the last hour, when I finished the last bit of the rear seam I did one final mistake. I put my hot air gun for a split second near the fabric and burned a hole in it :-(. But fortunately, I could fix this quite easily.
I sealed all seams with a double layer of Aquaseal. Have not a tiny leak so far!
Again, it was a great project! Your instructions are absolutely awesome. Never have seen something that detailed.
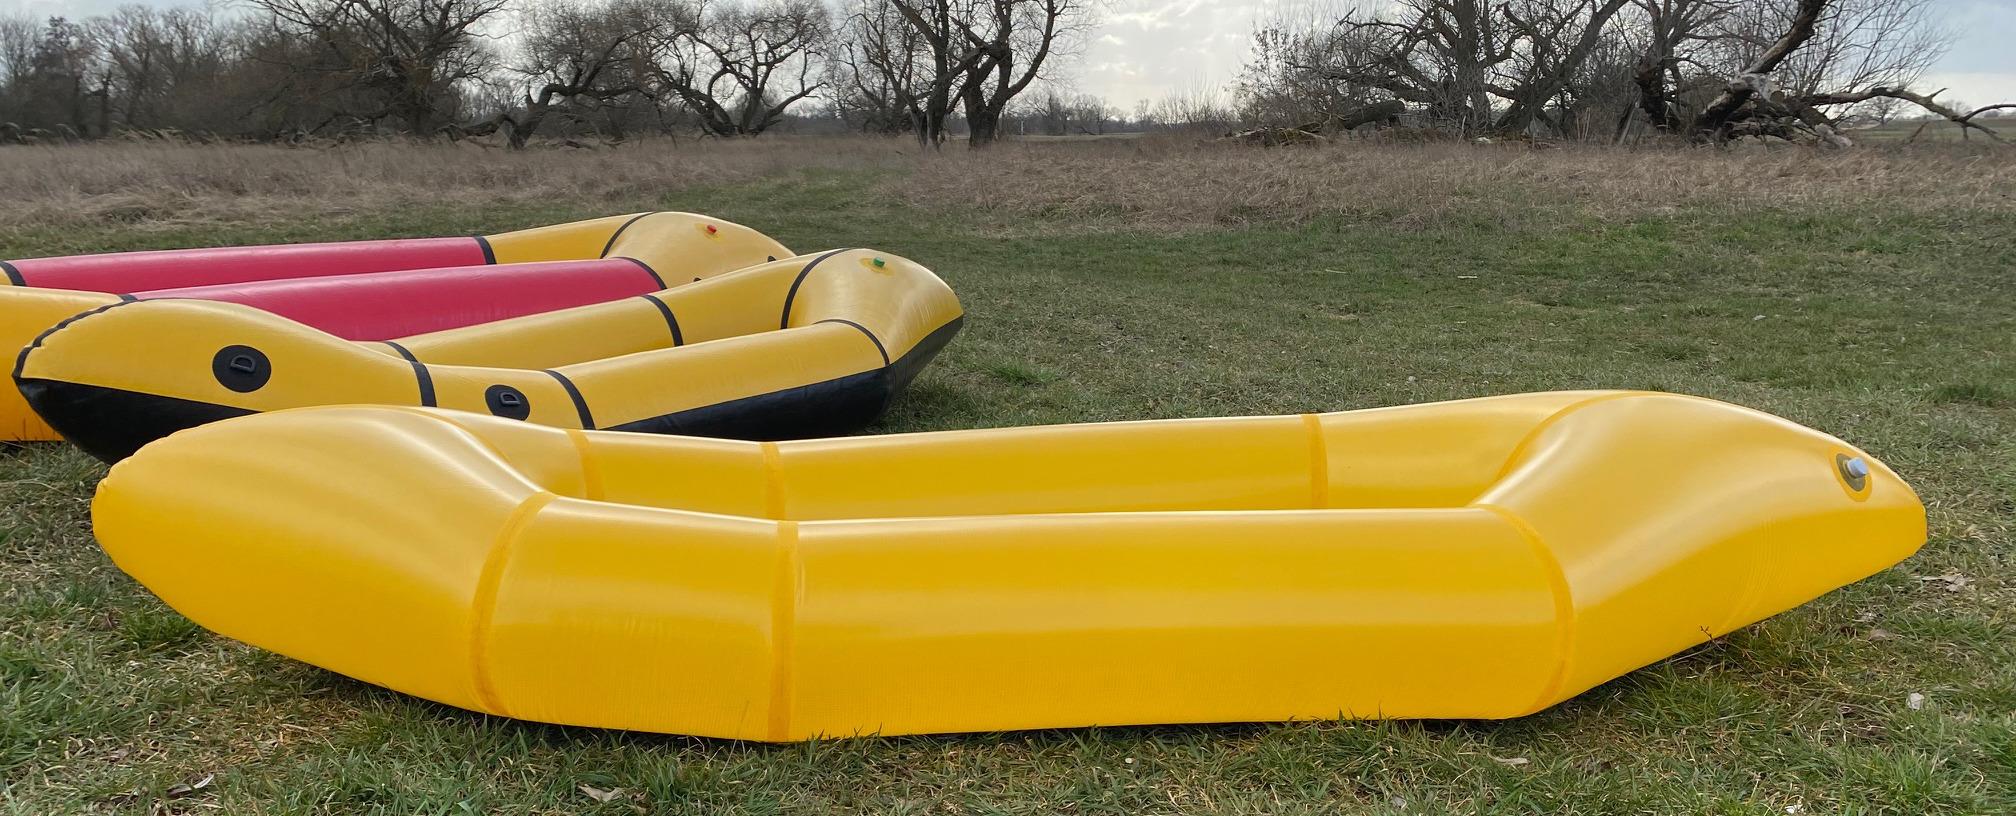
And here one picture of my packraft fleet. Only the Skeena is missing. Will build that too.
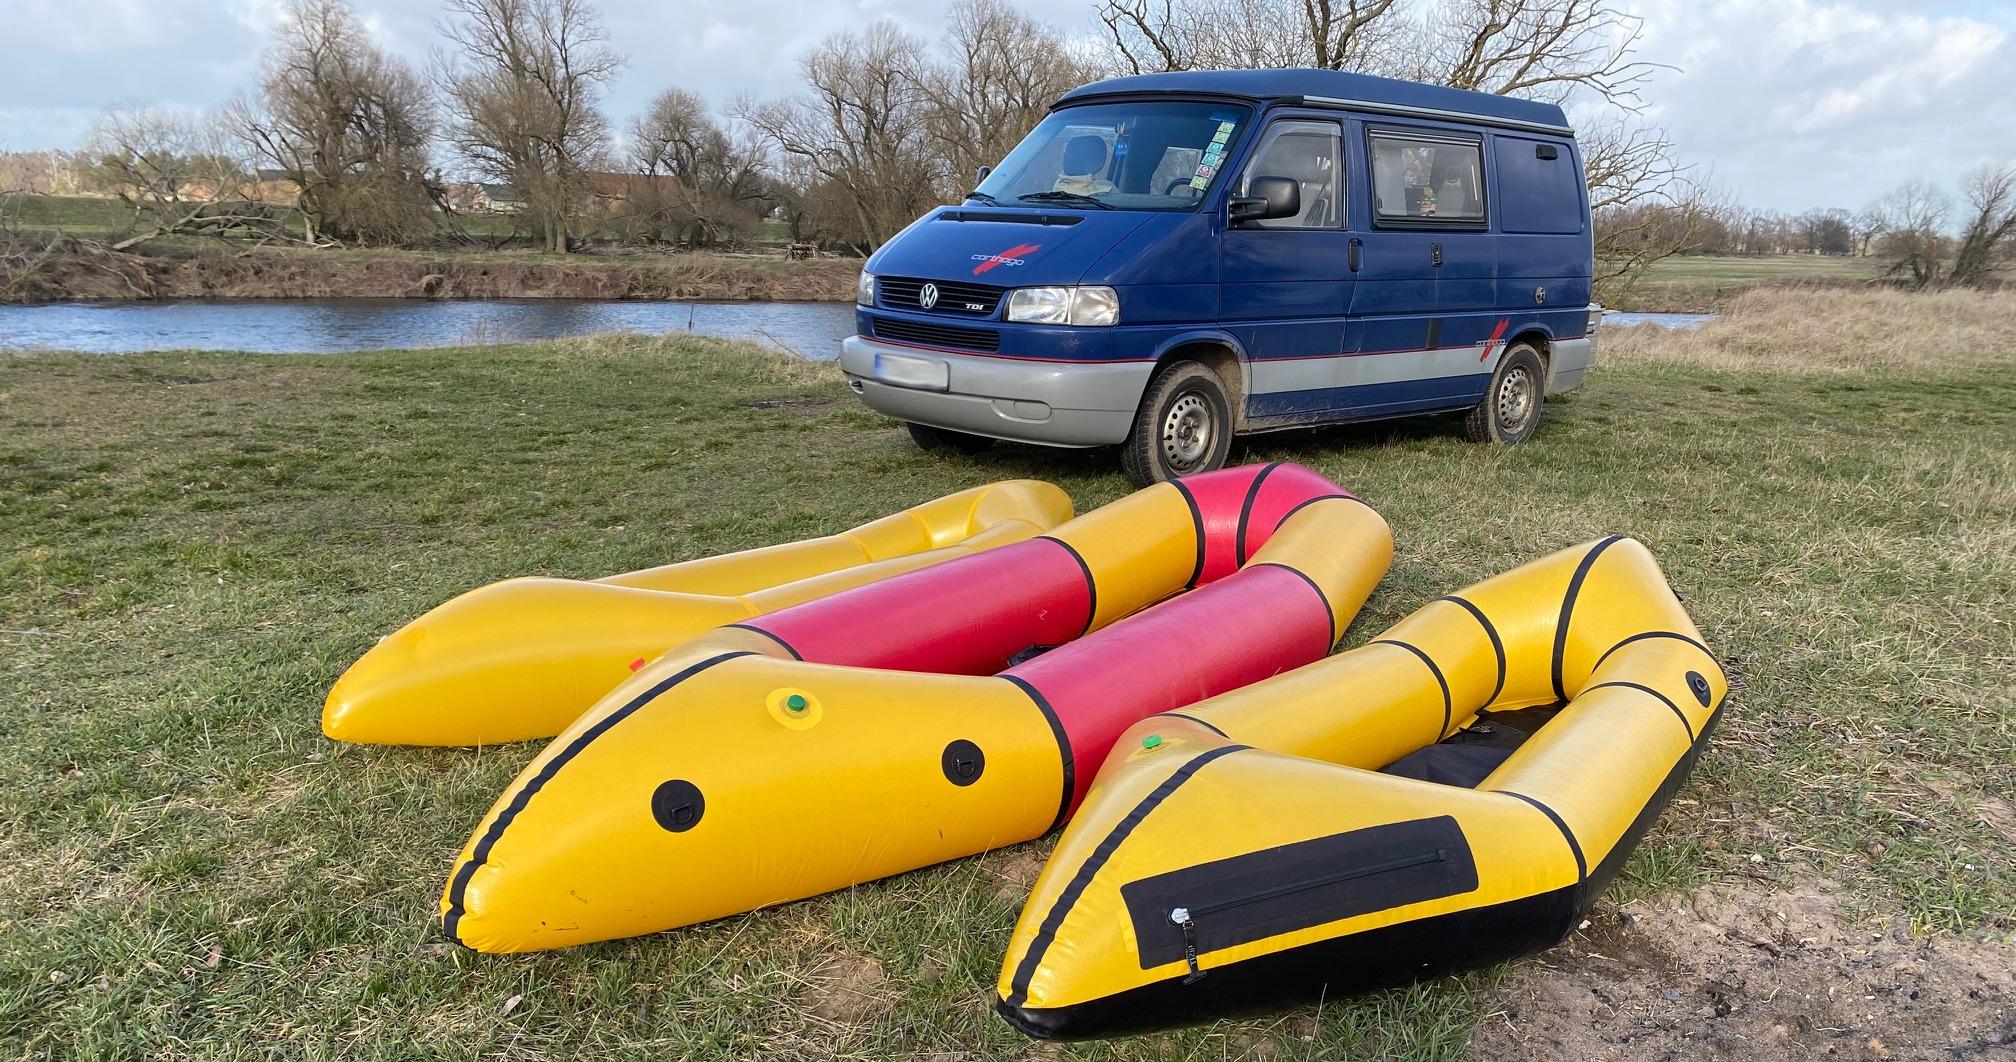
Christian
-
March 23, 2021 at 9:04 am #14020Matt (Admin)Keymaster
Beautiful work, Christian – they all look flawless!
Thanks for the feedback about your experience with the Ultralight fabric, too.
Happy paddling!
-
-
February 10, 2021 at 5:01 pm #13750legslegumParticipant
Finally getting around to posting some shots of my first Telkwa build this summer! Matt’s instructions really are unbelievably good. It took me about 60 hours because I am nothing if not a little obsessive, but less quality guidance would have had me crying instead of wrapping this up with a finished boat that I couldn’t be more stoked on! The nose came out a teeny bit wonky, but I was definitely a little too casual about matching the sides up and trimming them to fit in the last hour of work. Still holds air like a champ!
Took it super slow and it made a great break from my bananas day job. Looking forward to starting in on boat #2 in a few weeks as a way to usher in the warmer weather!
Thanks for making such an awesome product/project, Matt!
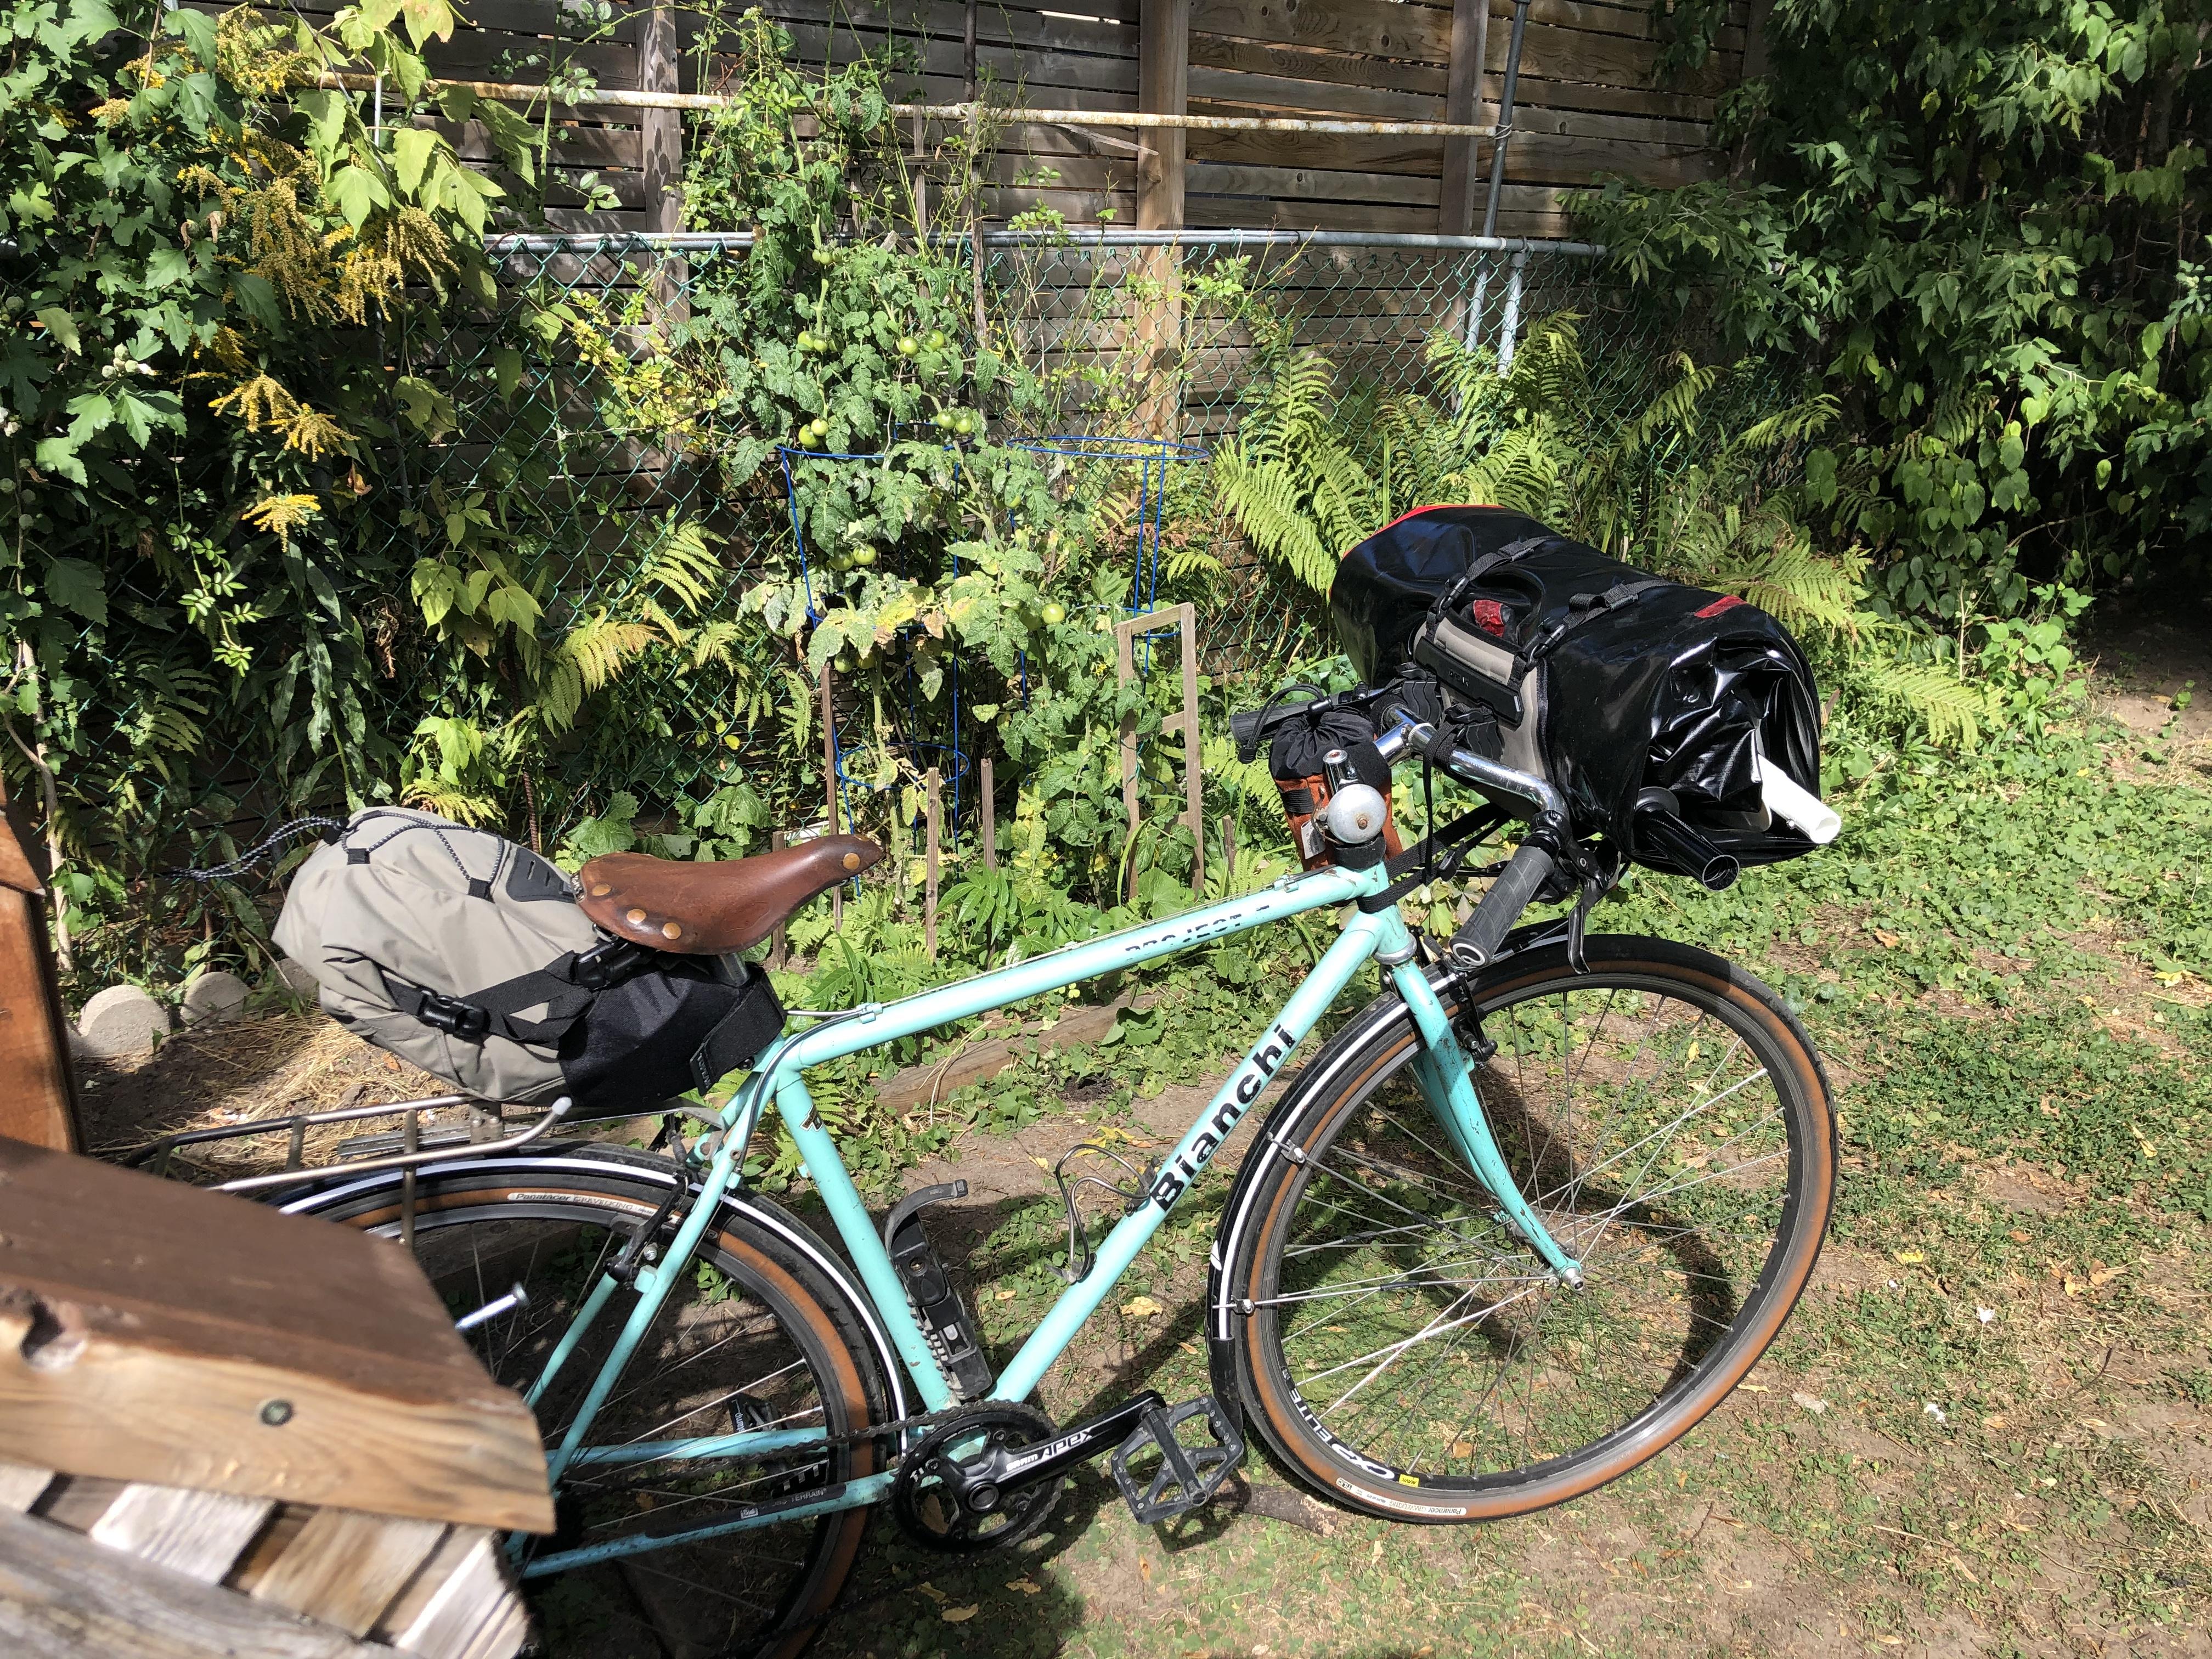
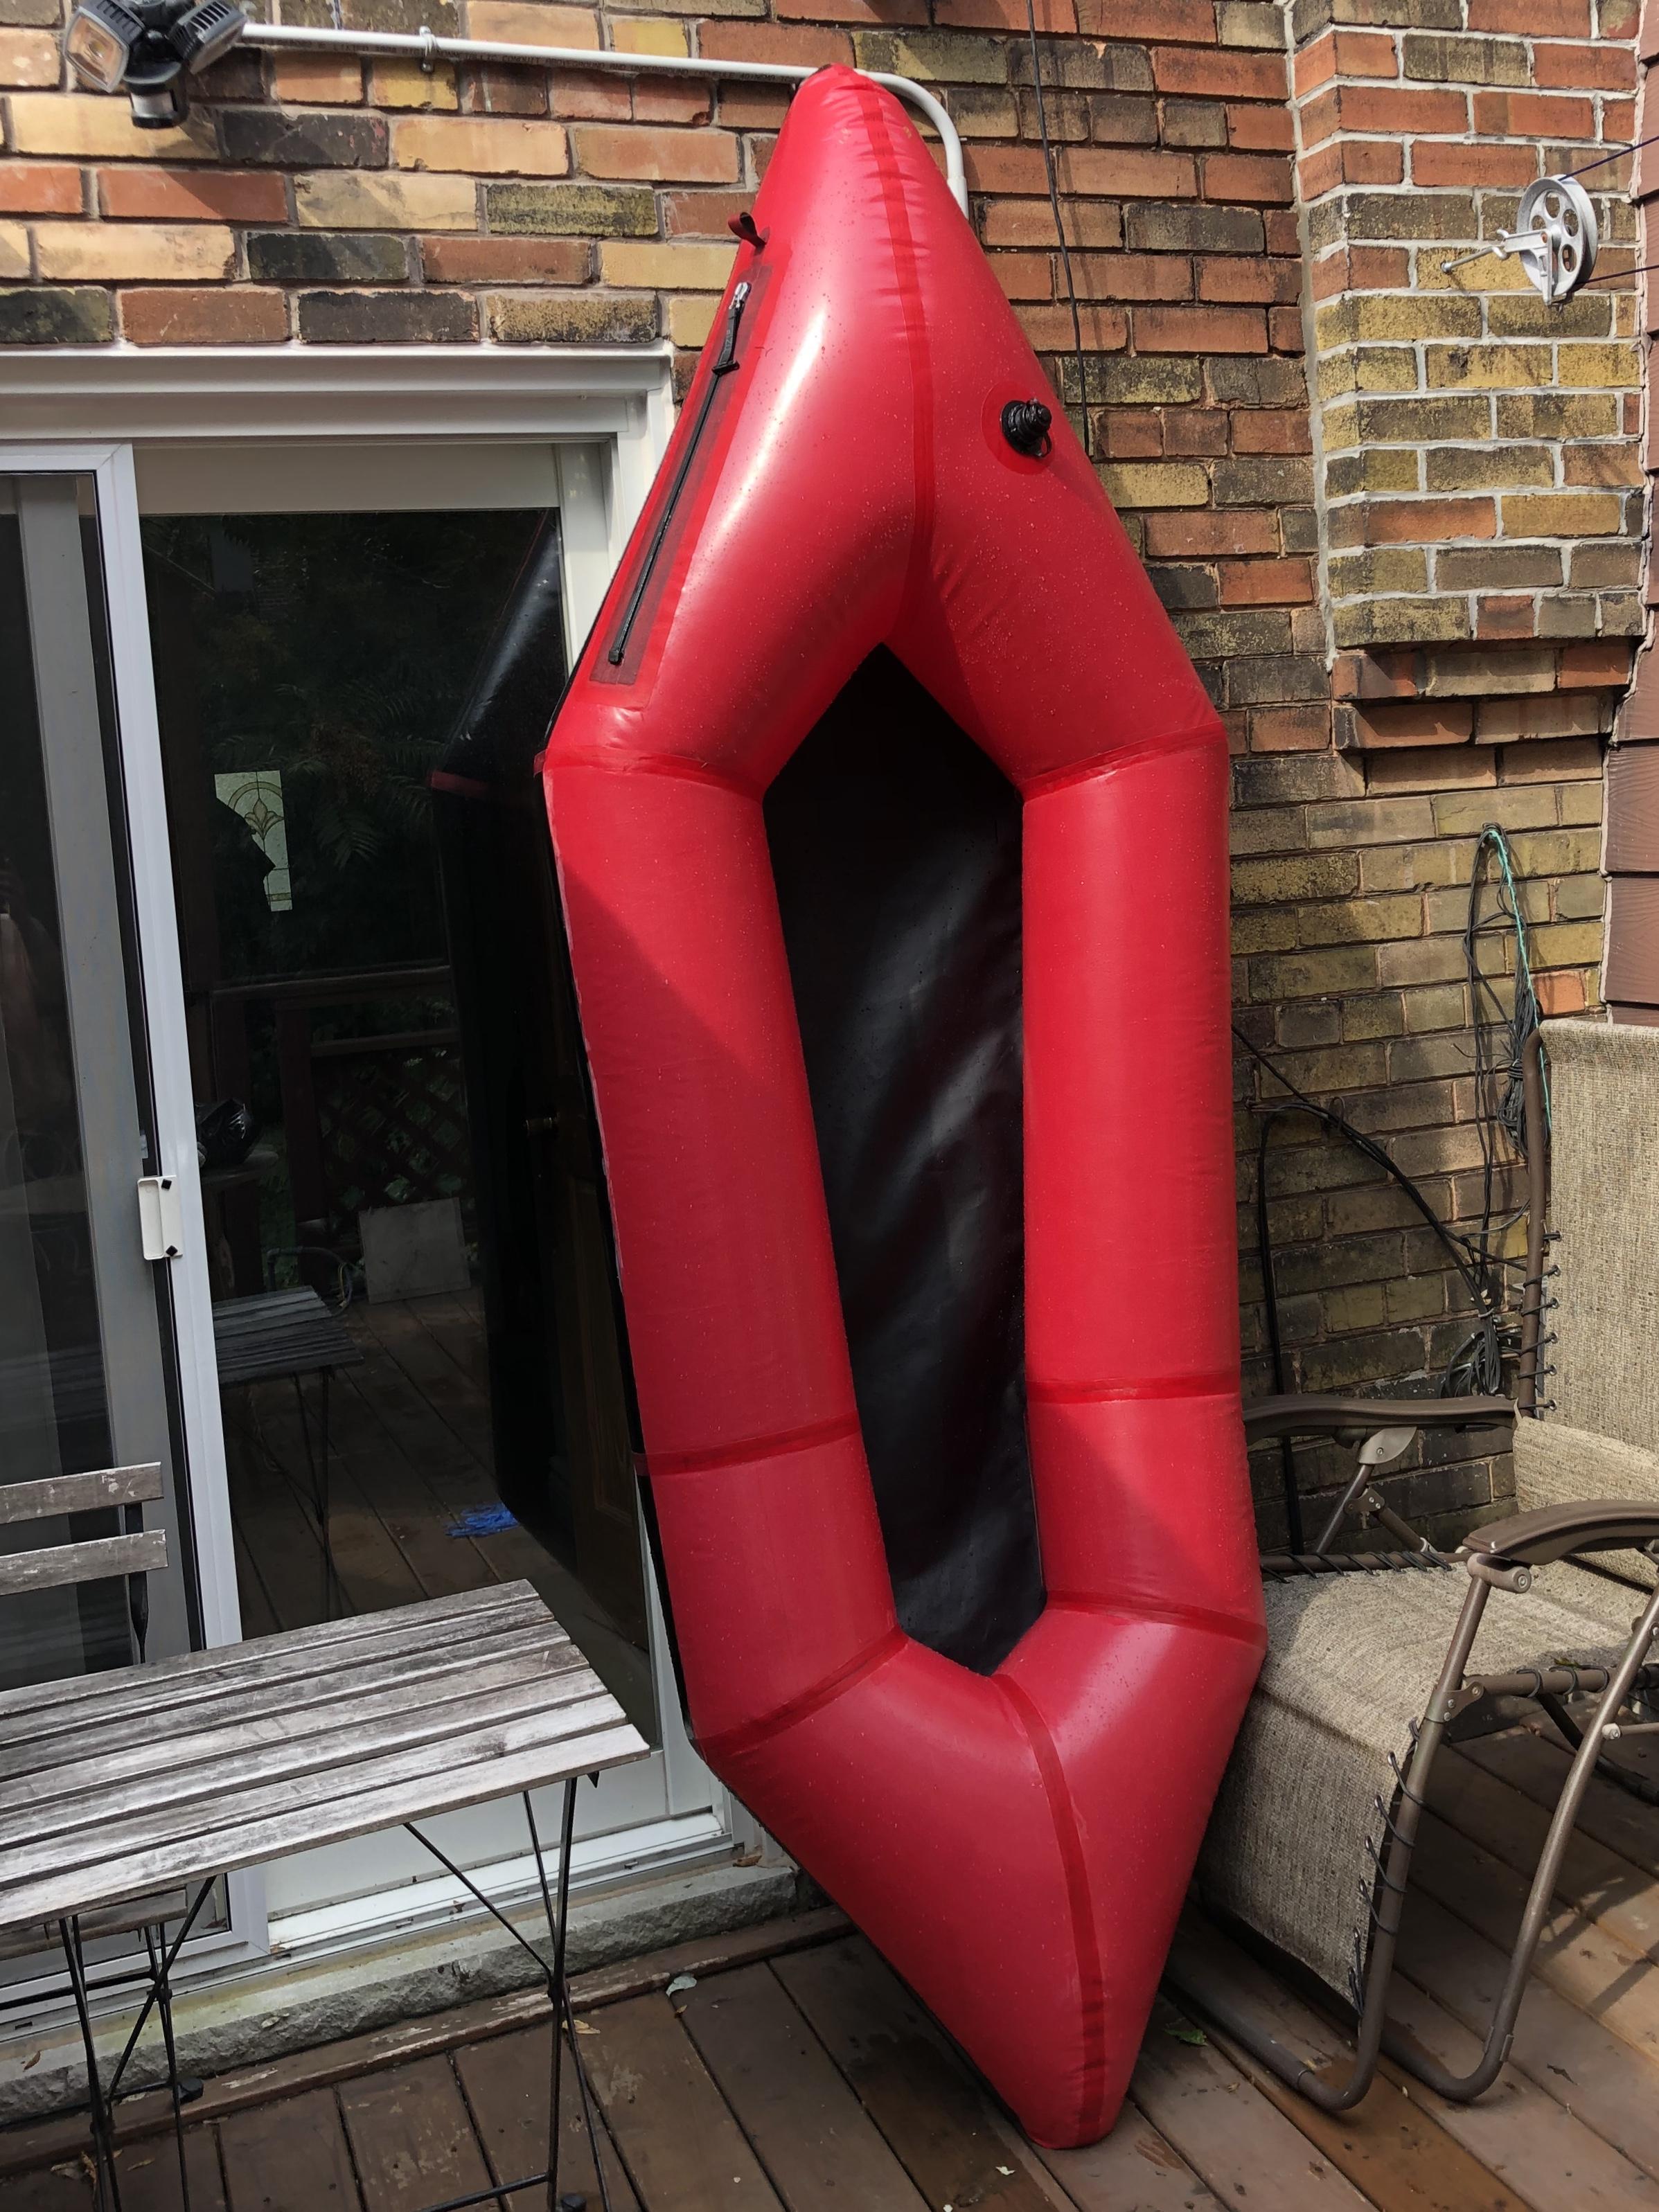
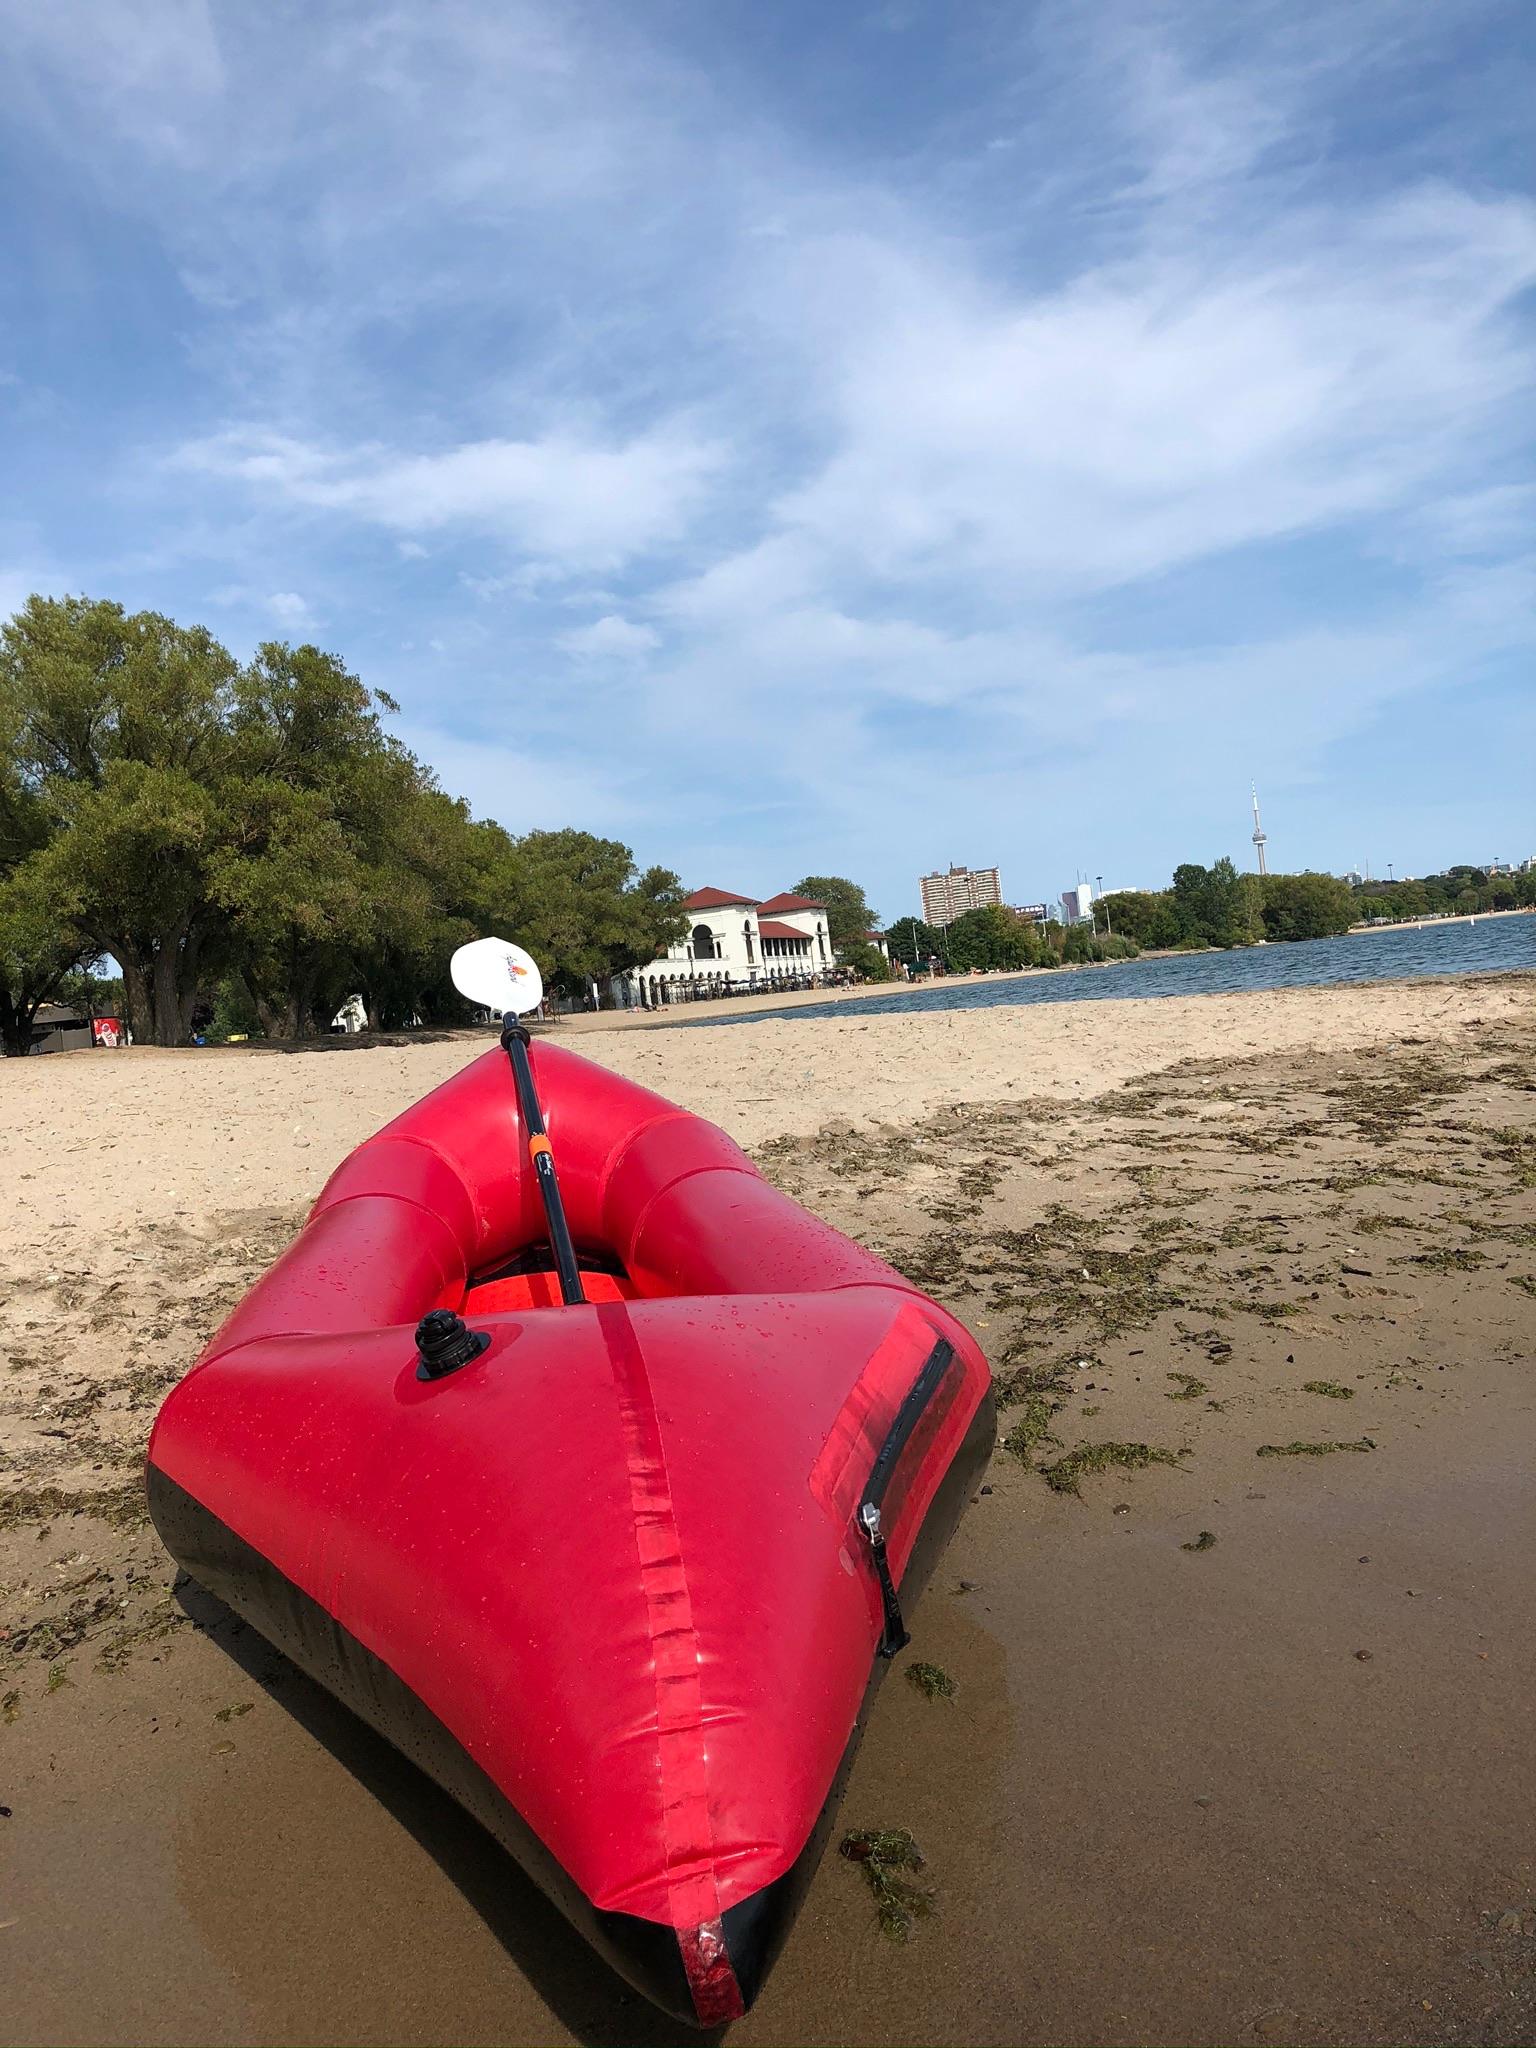
-
February 11, 2021 at 12:23 pm #13758Matt (Admin)Keymaster
Cool! Excellent work, and thanks for posting!
-
-
December 17, 2020 at 5:32 am #13390PhilBParticipant
I thought I’d share some posts of my completed summer project (Skeena).
Testing on the river by my home:
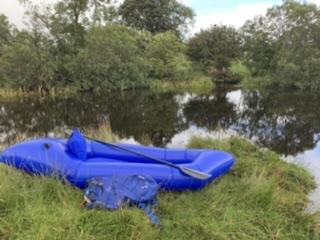
First outing in the Lake District NP (U.K.): my girlfriend and I hiked over Place Fell and down the other side. I paddled and she did a trail run back to the car…
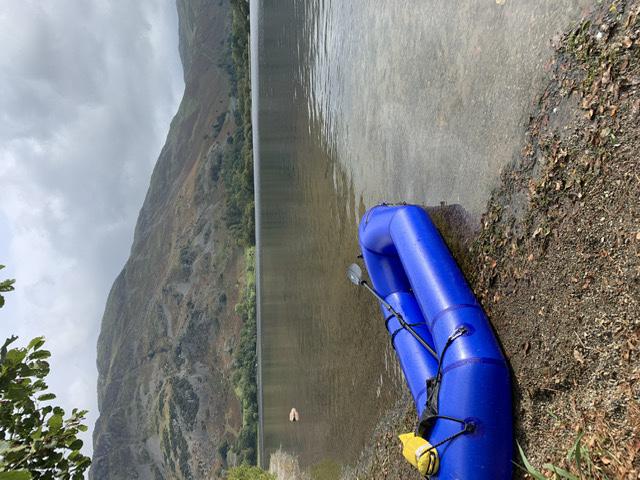
Our first overnight tour was across Rannoch Mor. We caught the train from Rannoch to Bridge of Orchy, then walked up the West Highland way before heading cross country to the rivers and lochs of one of the U.K.s largest peat bogs – much more fun than it sounds and perfectly possible in the lunchtime train.

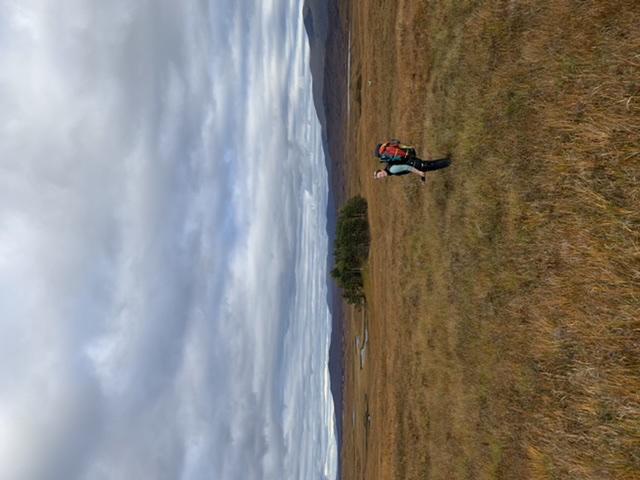
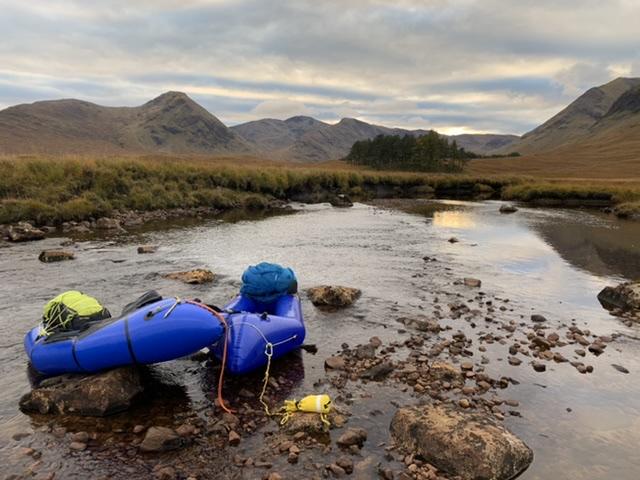
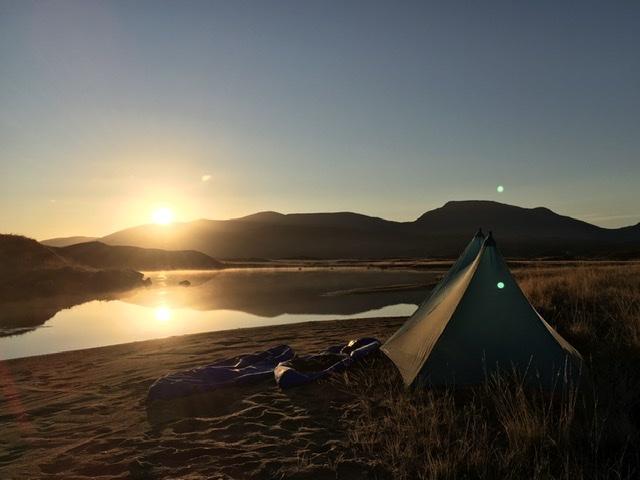
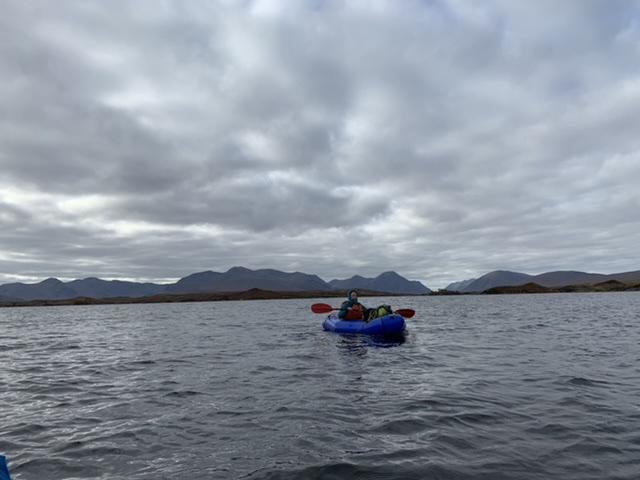
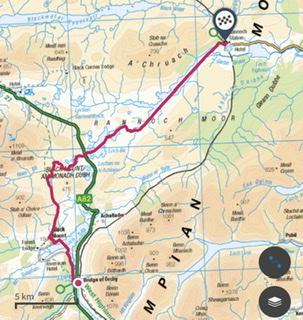
-
January 12, 2021 at 4:24 am #13447xraymtbParticipant
Looks great. I’m in the process of building a Skeena with the same trips (and more) in mind.
-
December 18, 2020 at 8:29 am #13393Matt (Admin)Keymaster
Fantastic! Thanks for posting!
-
-
November 26, 2020 at 1:49 pm #13336jlrose09Participant
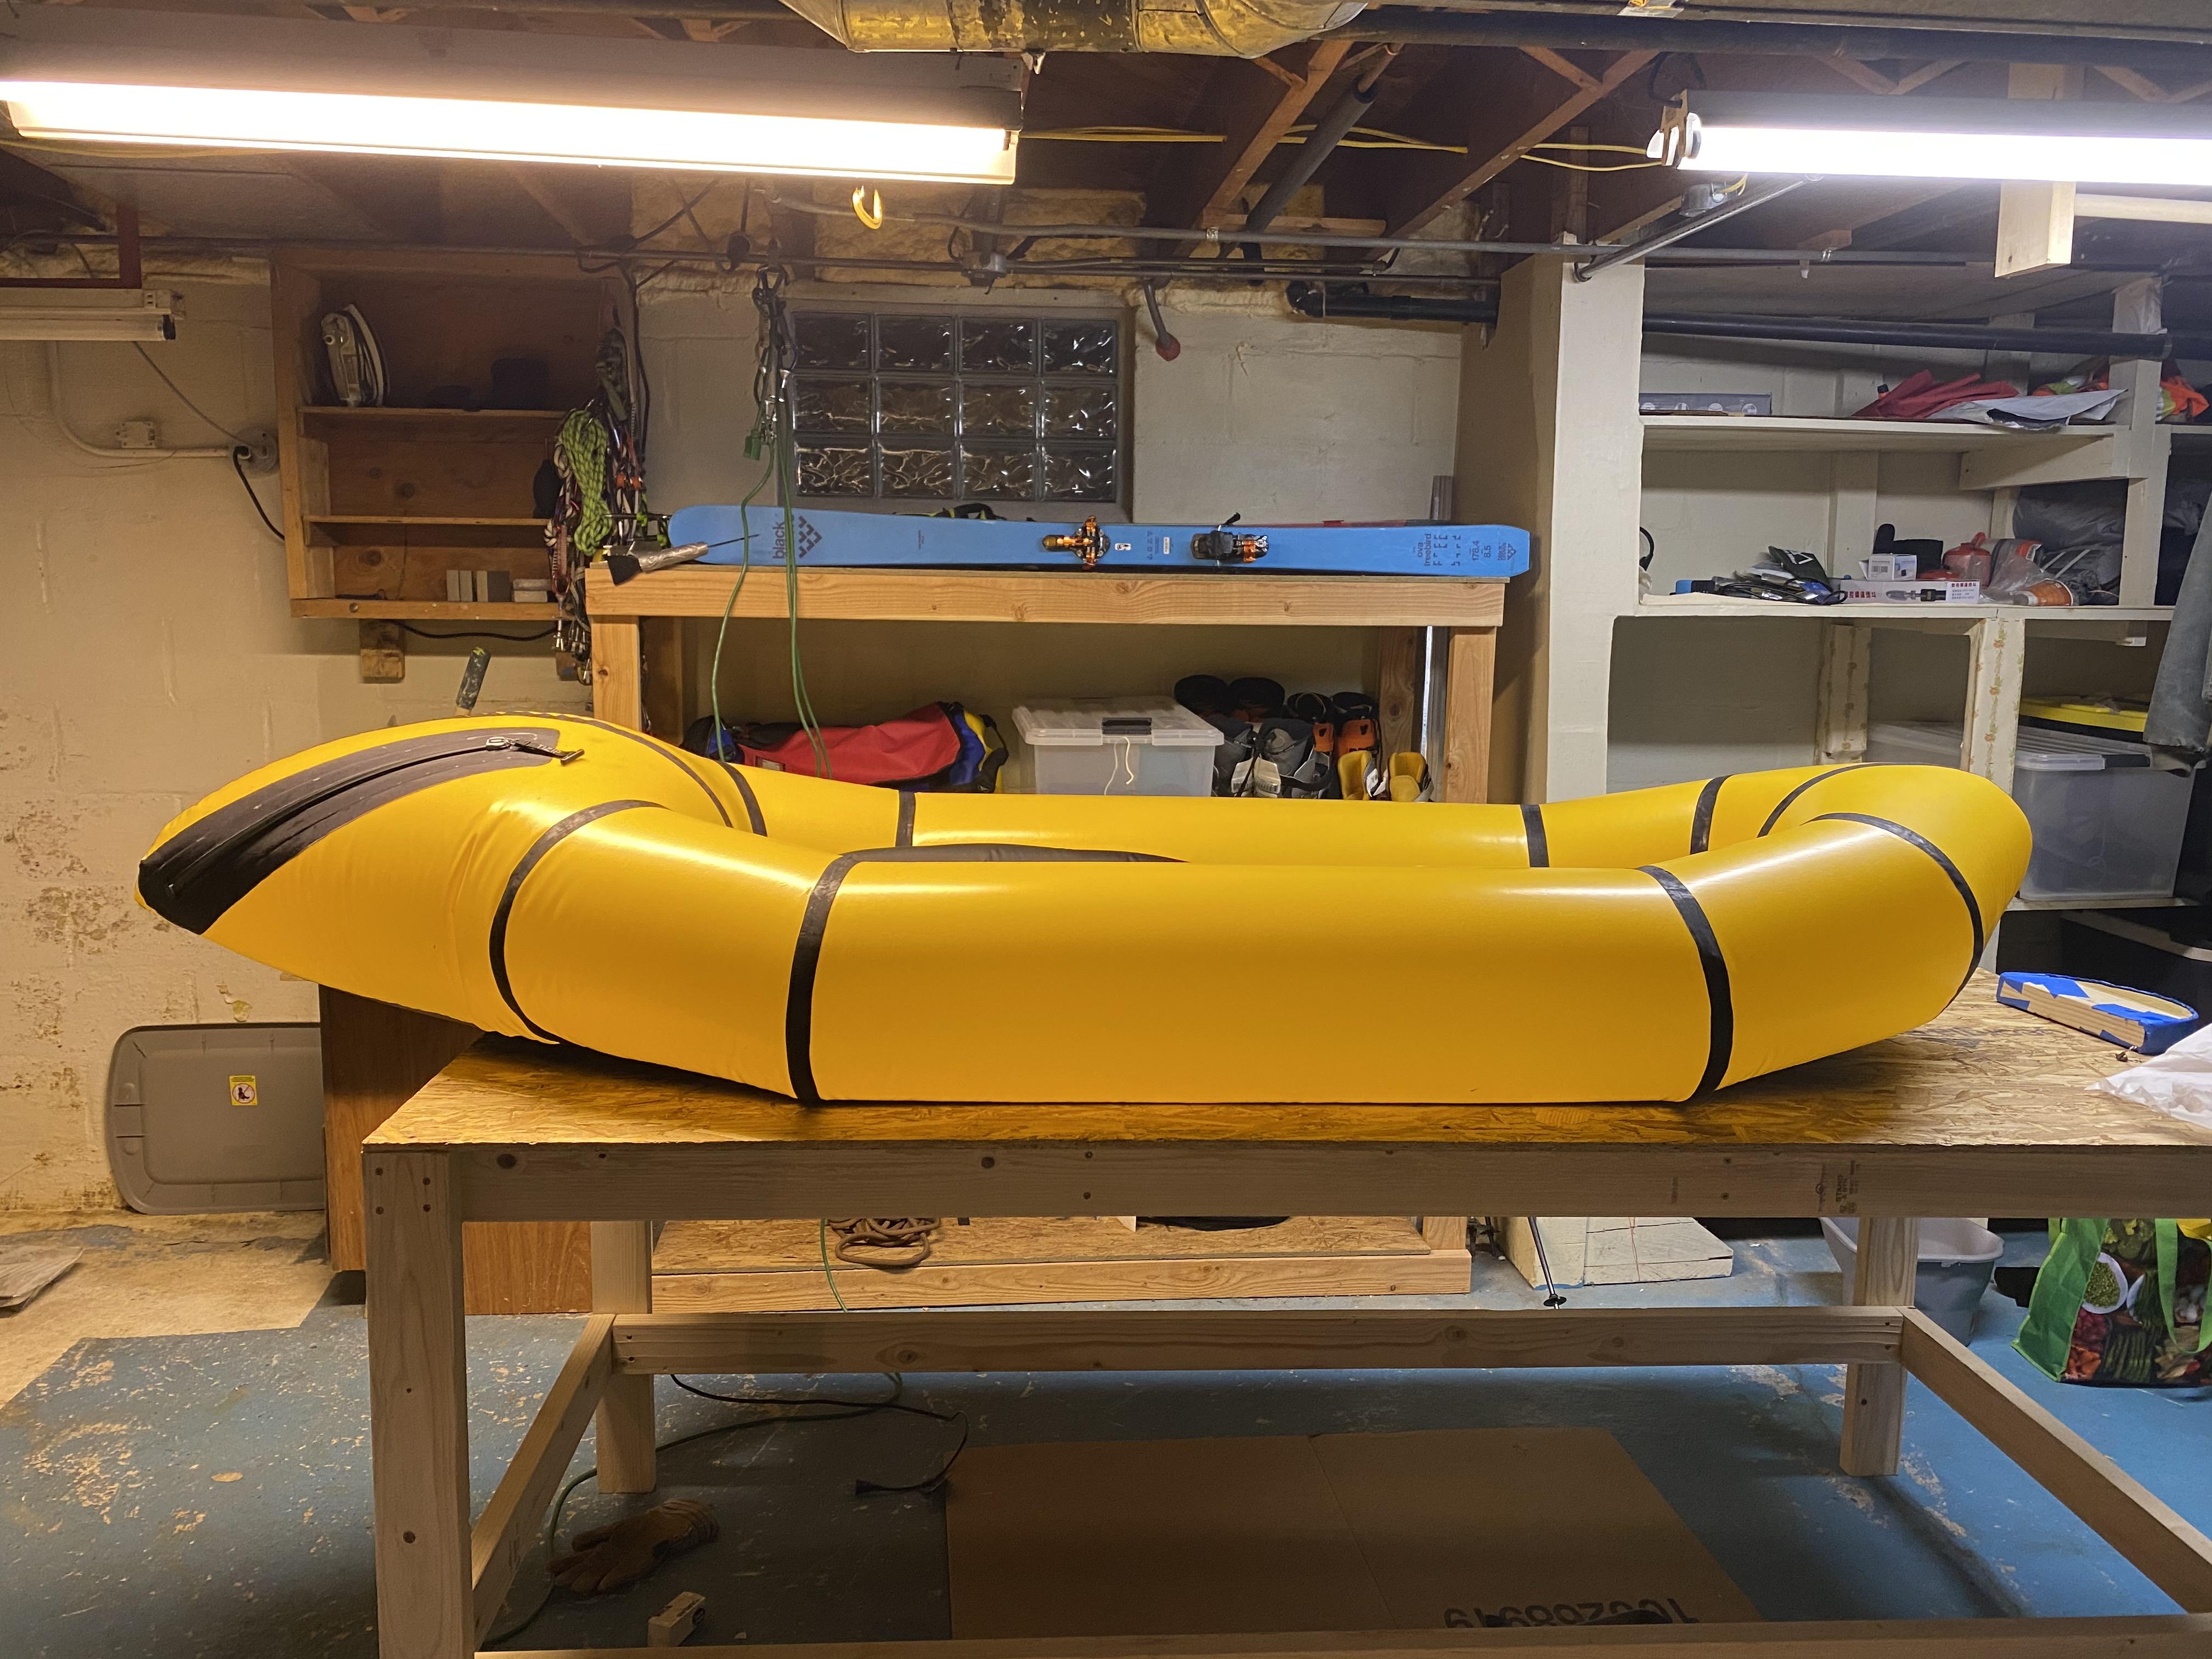
Well, off to find leaks! I’m at roughly 2-3 breaths every couple hours, but would like to make it a bit tighter!
The front end is a little botched (turns out I misread your instructions; I think you said 10-12 inches from the end of the boat/tip of the boat when ironing the center seams and I did 10 inches from the end of the seam. It was too late at that point for the front seam. Back seam is more or less without flaws.
-
December 9, 2020 at 11:48 am #13370jlrose09Participant
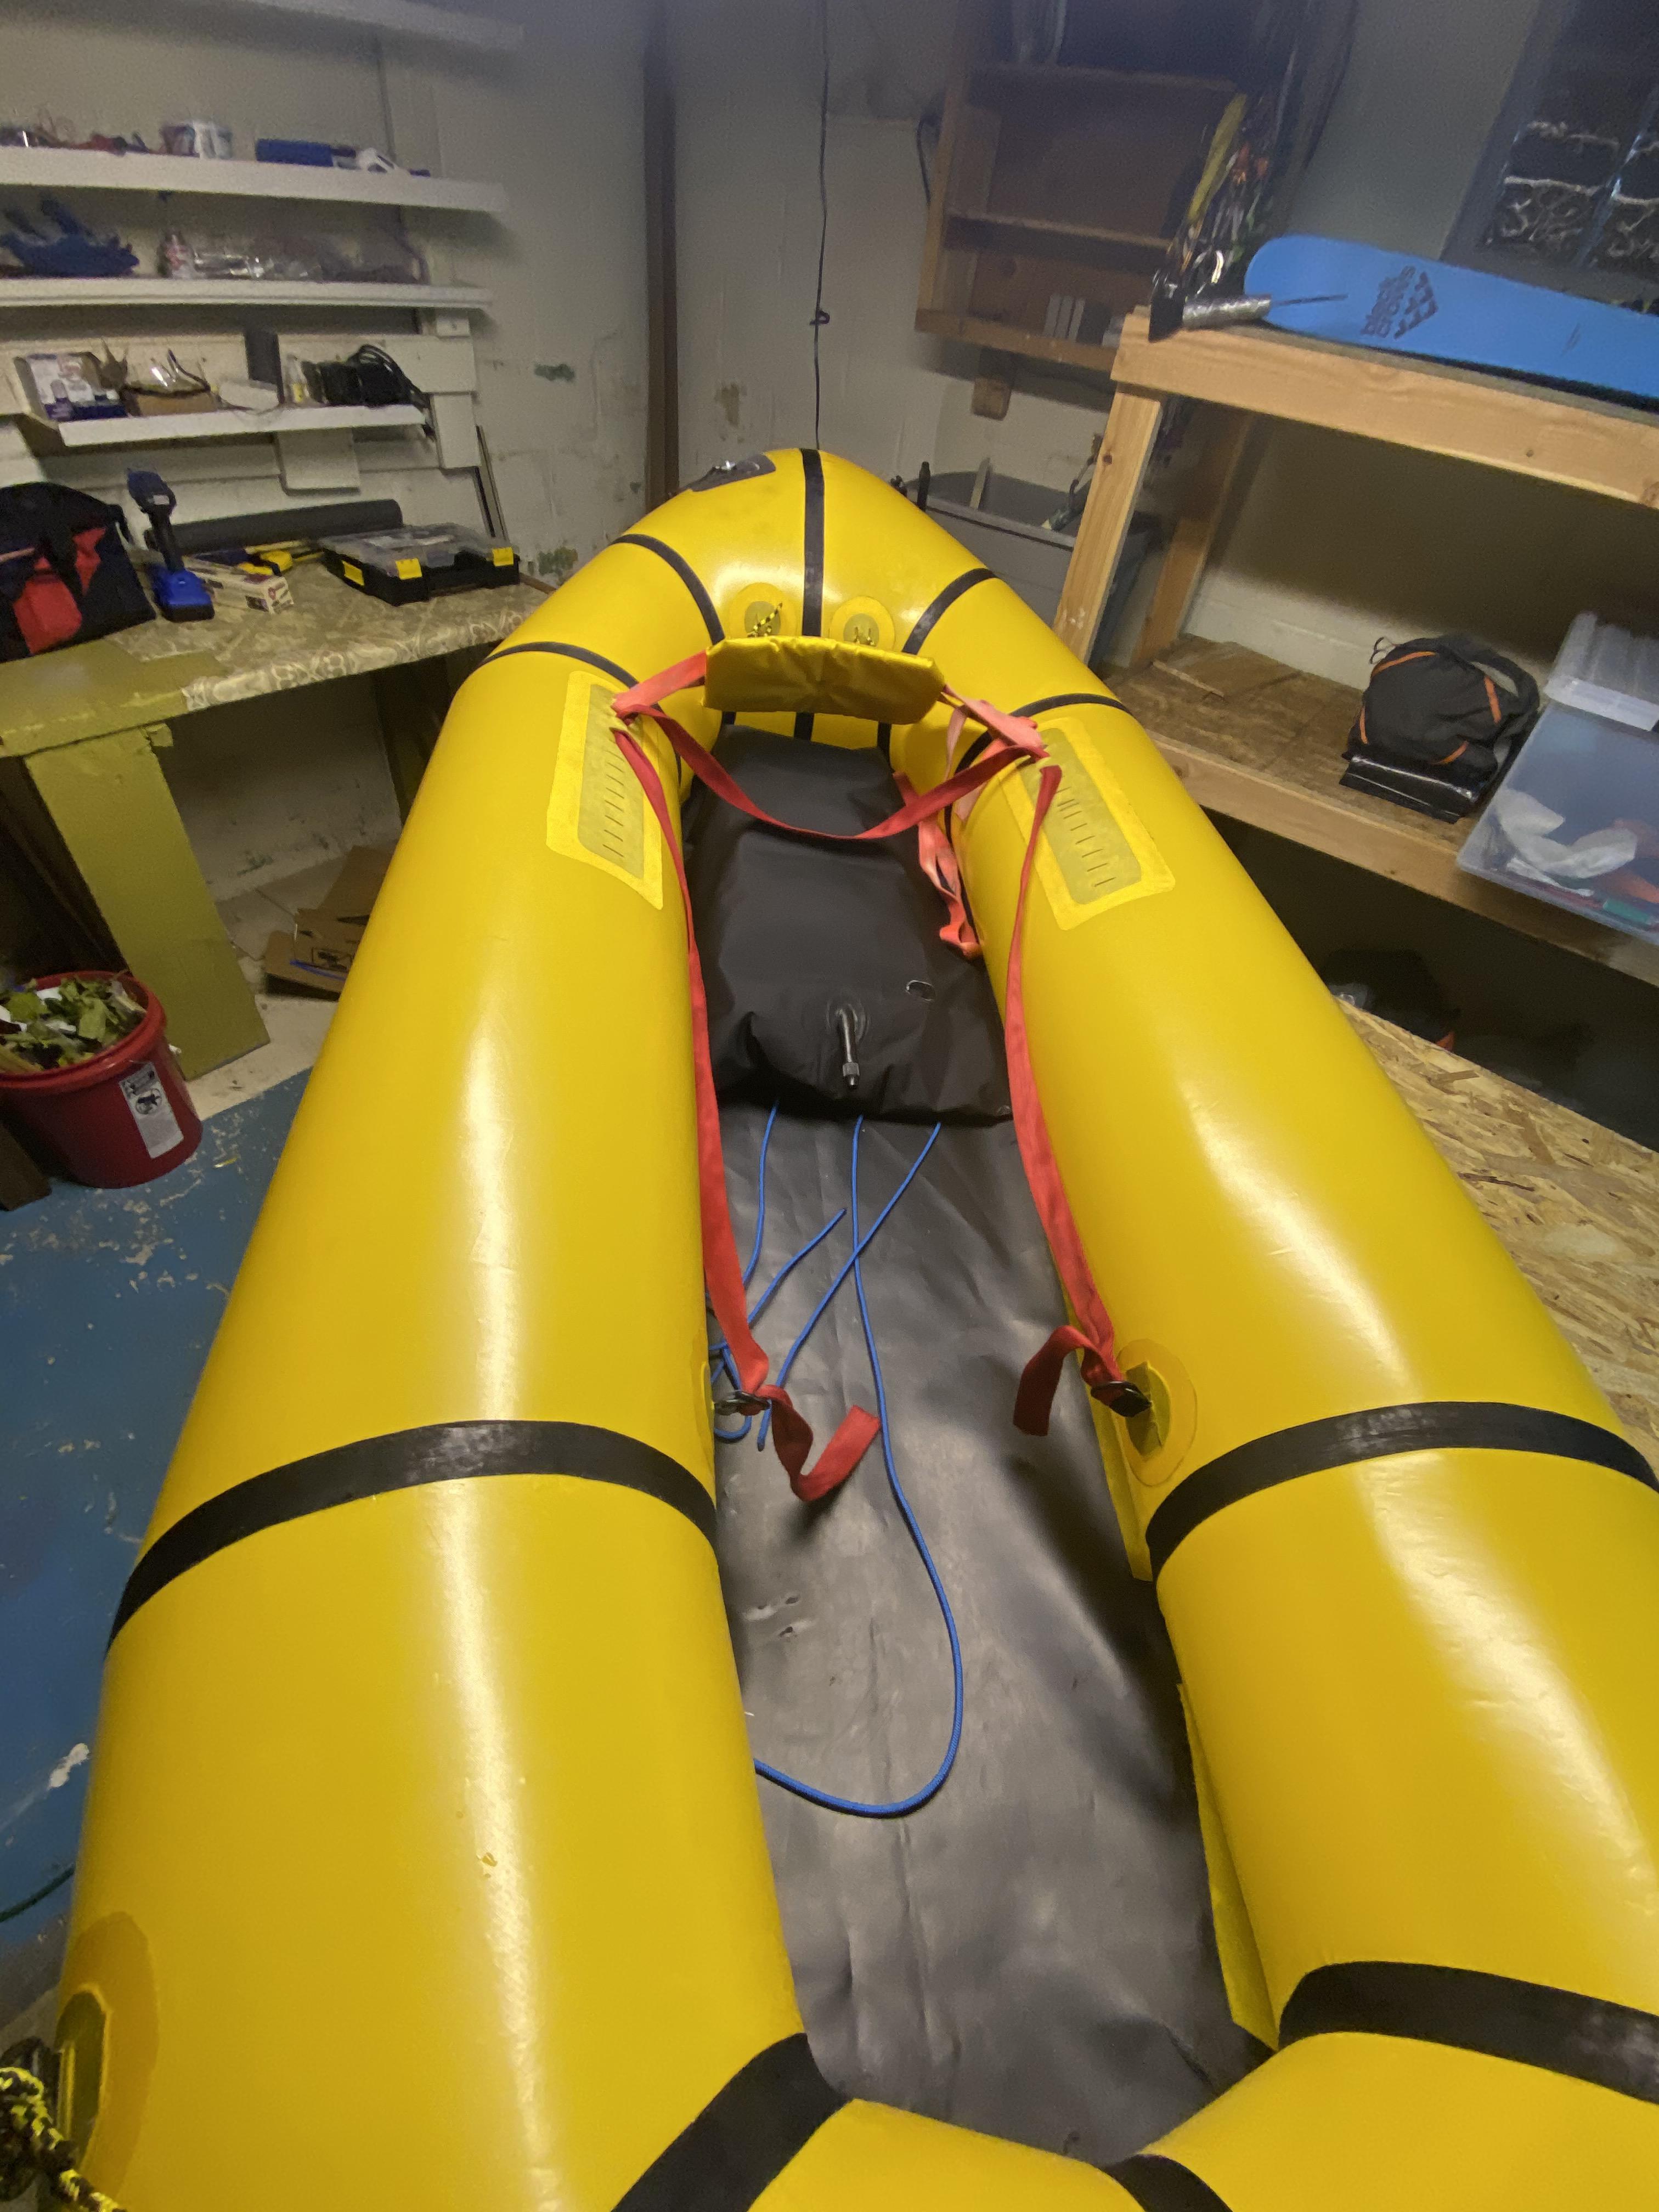
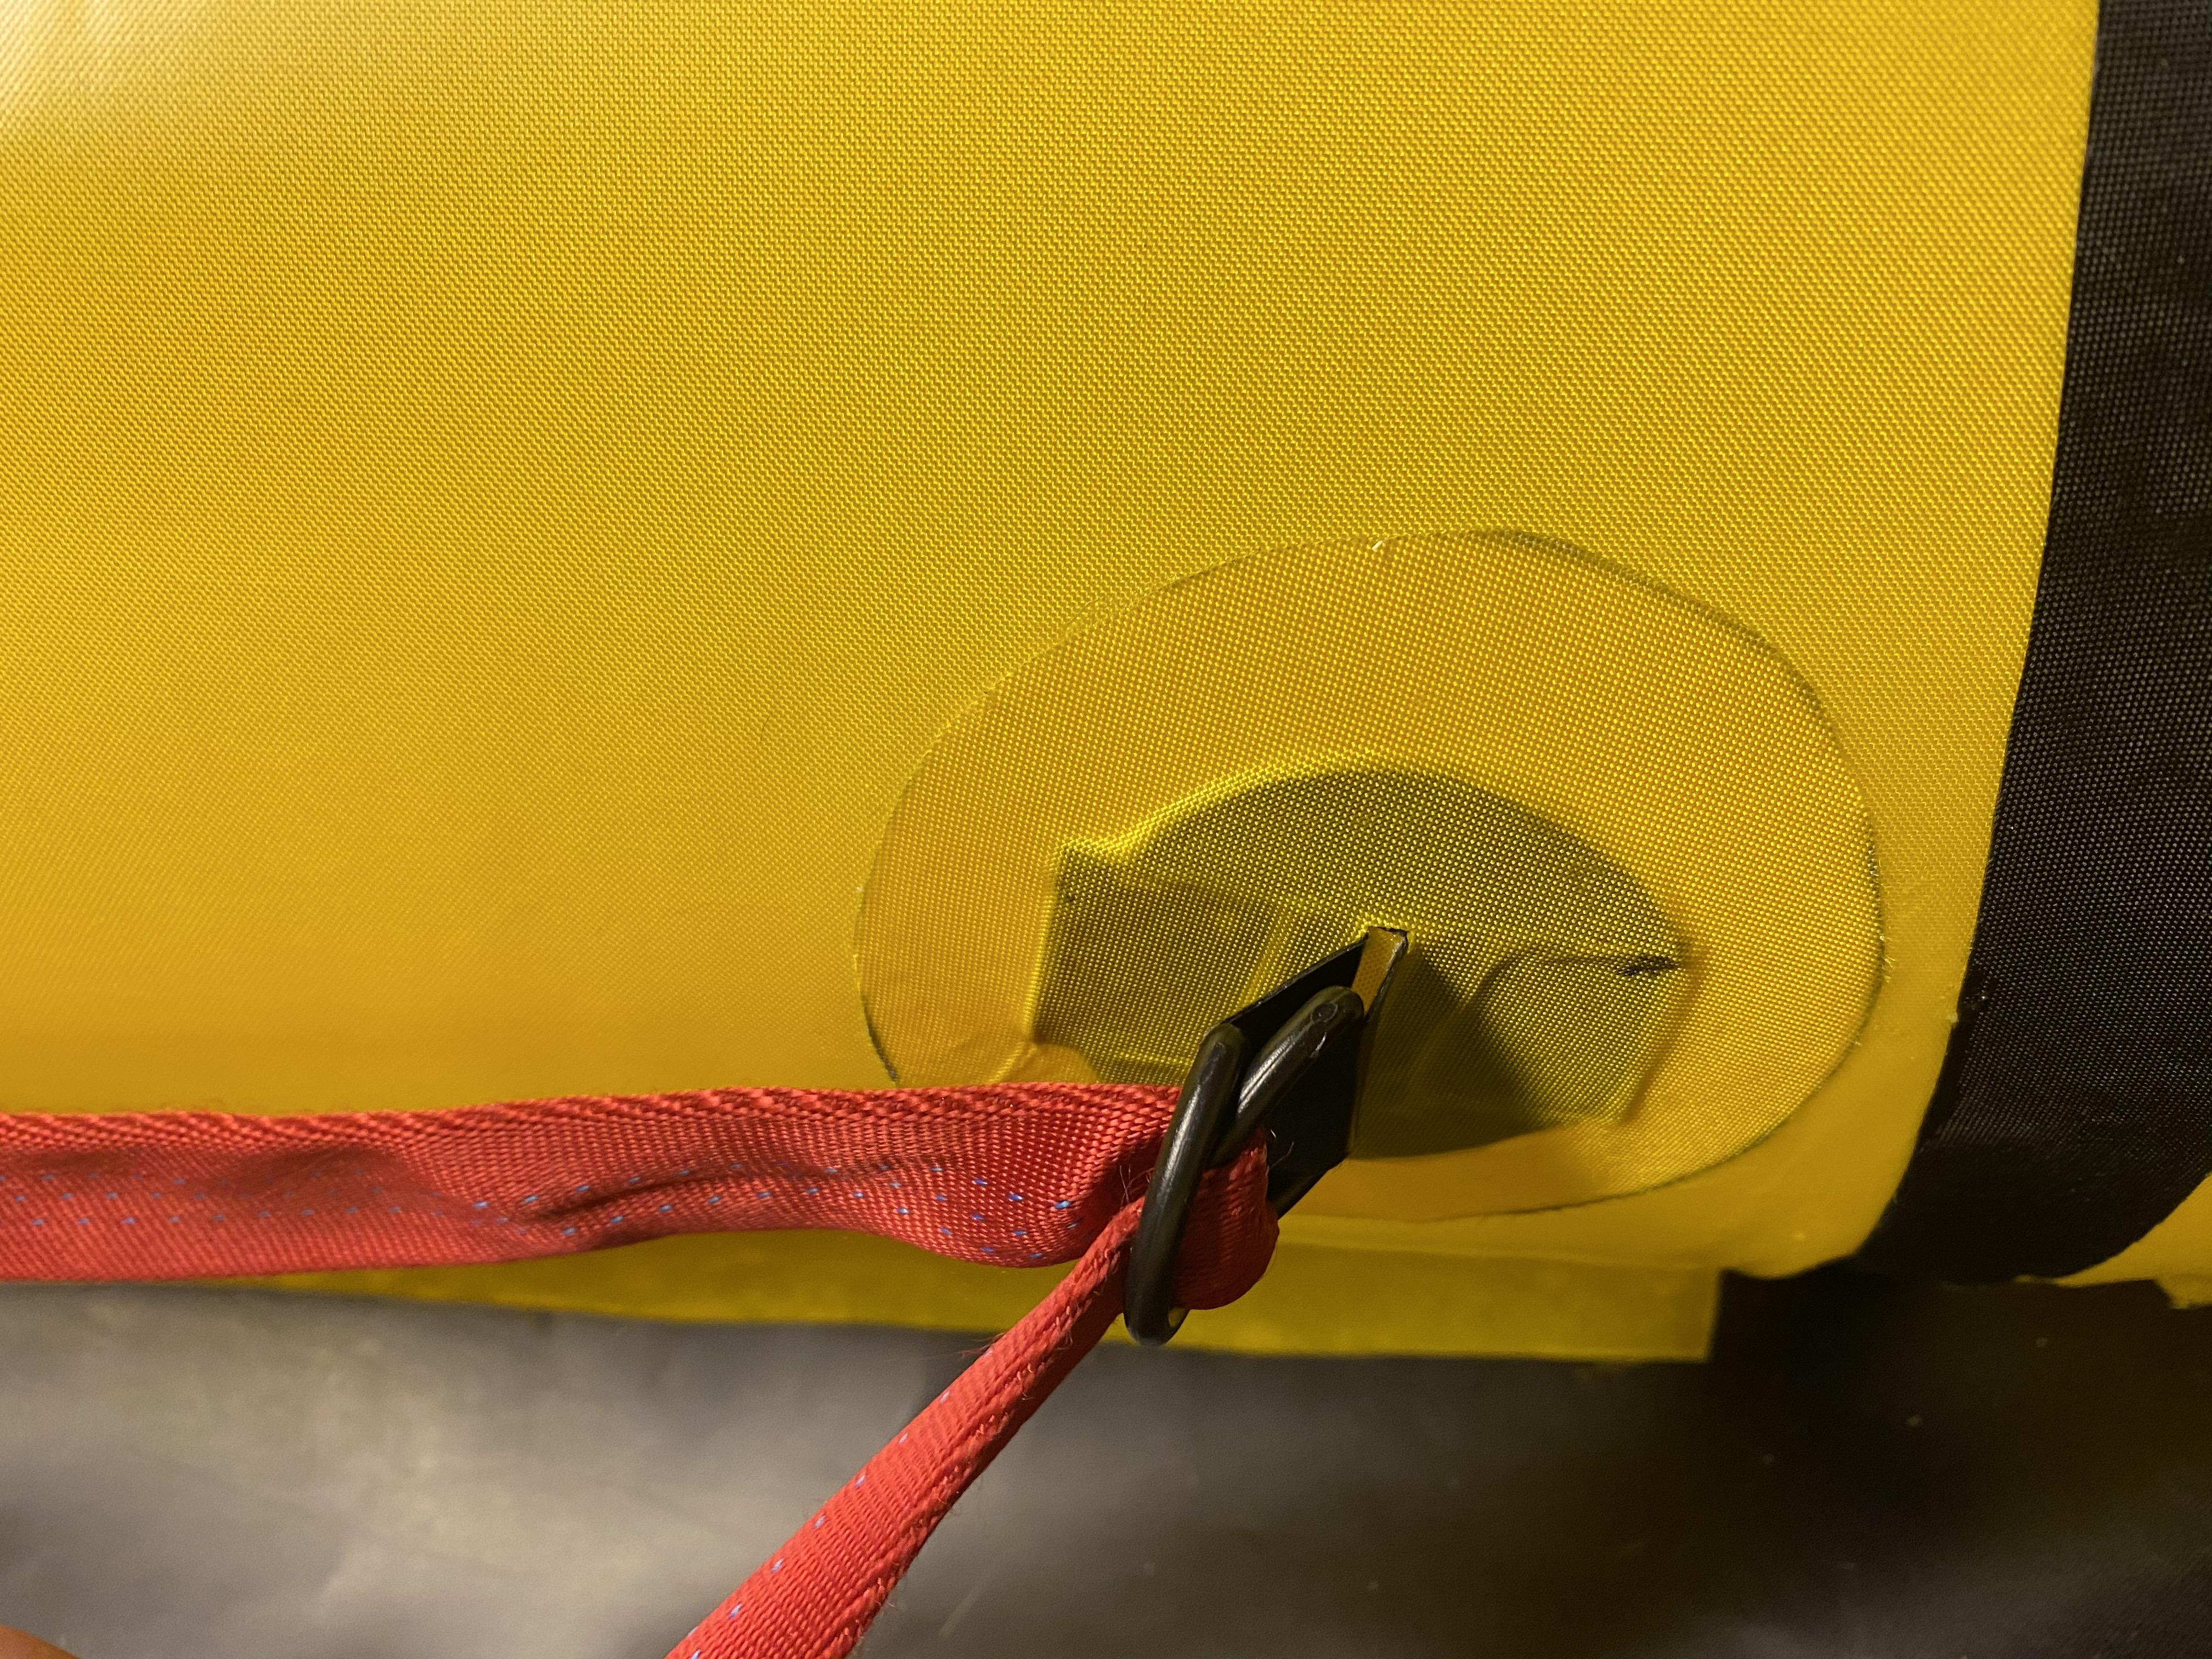
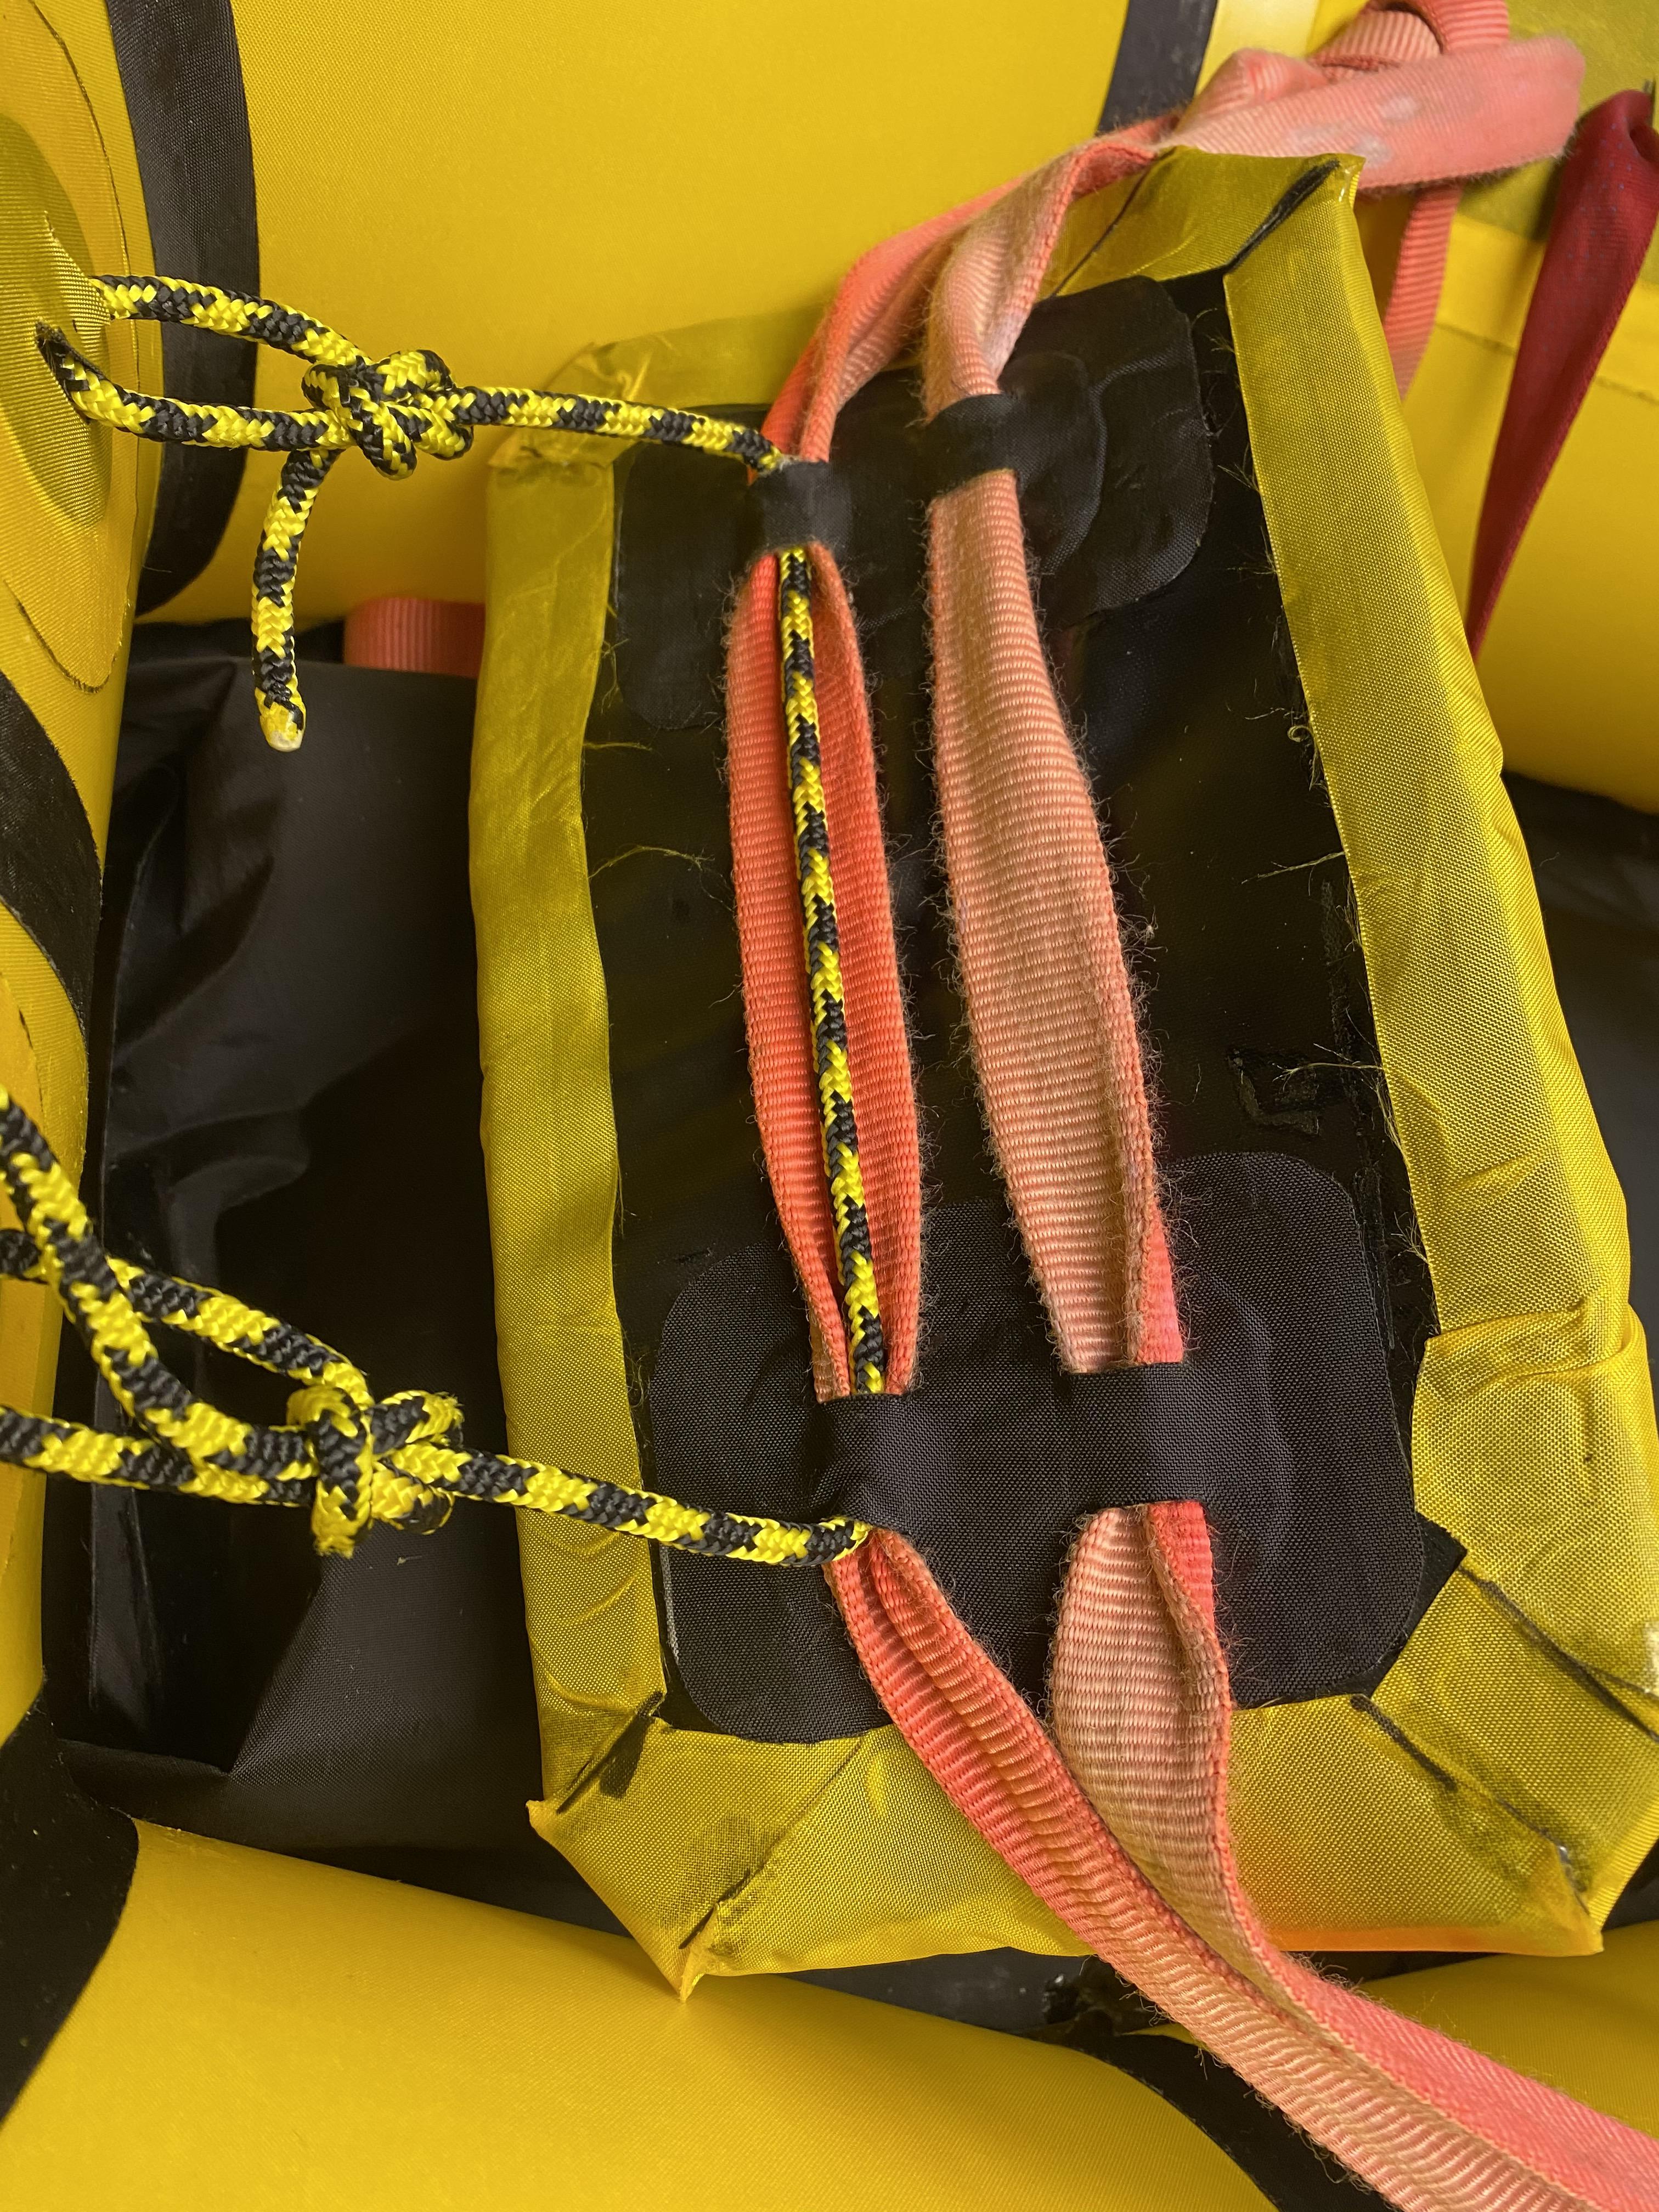
Figured I’d show it more or less rigged up now. I made a seat back out of some closed cell foam and a couple scraps of fabric. I used a piece of two sided so that I could weld a baffle in the middle, but someone with half a brain and a sewing kit could probably do a better job of it. I figured I’d share though because I thought that if executed better, the rear attachment points on the seat actually work pretty well. If I had made them a little wider it would be a bit more stable but as it is it works.
Also, for anyone thinking of doing the attachment points like I did for the top of the thigh strap and seat, I’d probably recommend a d’ring as it is easier to attach cord and what not to it; but that being said the way I did it here seems pretty strong so far. I sandwiched a piece of floor fabric between two tube fabric pieces and then welded in on with little slots. Larger slots probably would have been better too, but at the end of the day, it’s a home made raft and my first go. I hadn’t seen anyone do this either but with two d-rings in one patch you can make little cinch points for webbing. I’m using these for the end of my thigh staps, and I’ll probably put a quick release up by me in the cockpit.
I’d also suggest using a pencil on some of your designs fellow pack raft builders. I have lots of sharpie marks… I’d also recommend the 8 oz tube of aquaseal/seamgrip; you’ll end up using it. I’m pretty sure my raft is a quarter pounde heavier in glue. I’m not sure which one is better having used both; the seam grip is easier to apply, but the aquaseal seems more robust? Hard to say. Most of my air leaks were from where I had attached the zipper (three bubblers on the ends, I didn’t do the glue on the inside seam). So I resealed and glued those, and then ended up adding aquaseal to as many of the tube junctions as I could and it seems to be more or less air tight now, maybe a breath or two a day. The other place I think I had leaks was on some of the tube floor junctions on the outside of the boat, but some quick work with aquaseal on those edges on the inside and it seems fine. I’m not sure how much tighter I could possibly hope for? Matt how often do you top off your boat if it’s just sitting around?
Also, just a side question, how does everyone not have glue-brain after working on these things?? I feel like there were a few times when I had my head in the tube gluing things and it was only a step away from a paper bag…
And maiden “voyage” in shallow pond in a cold lake
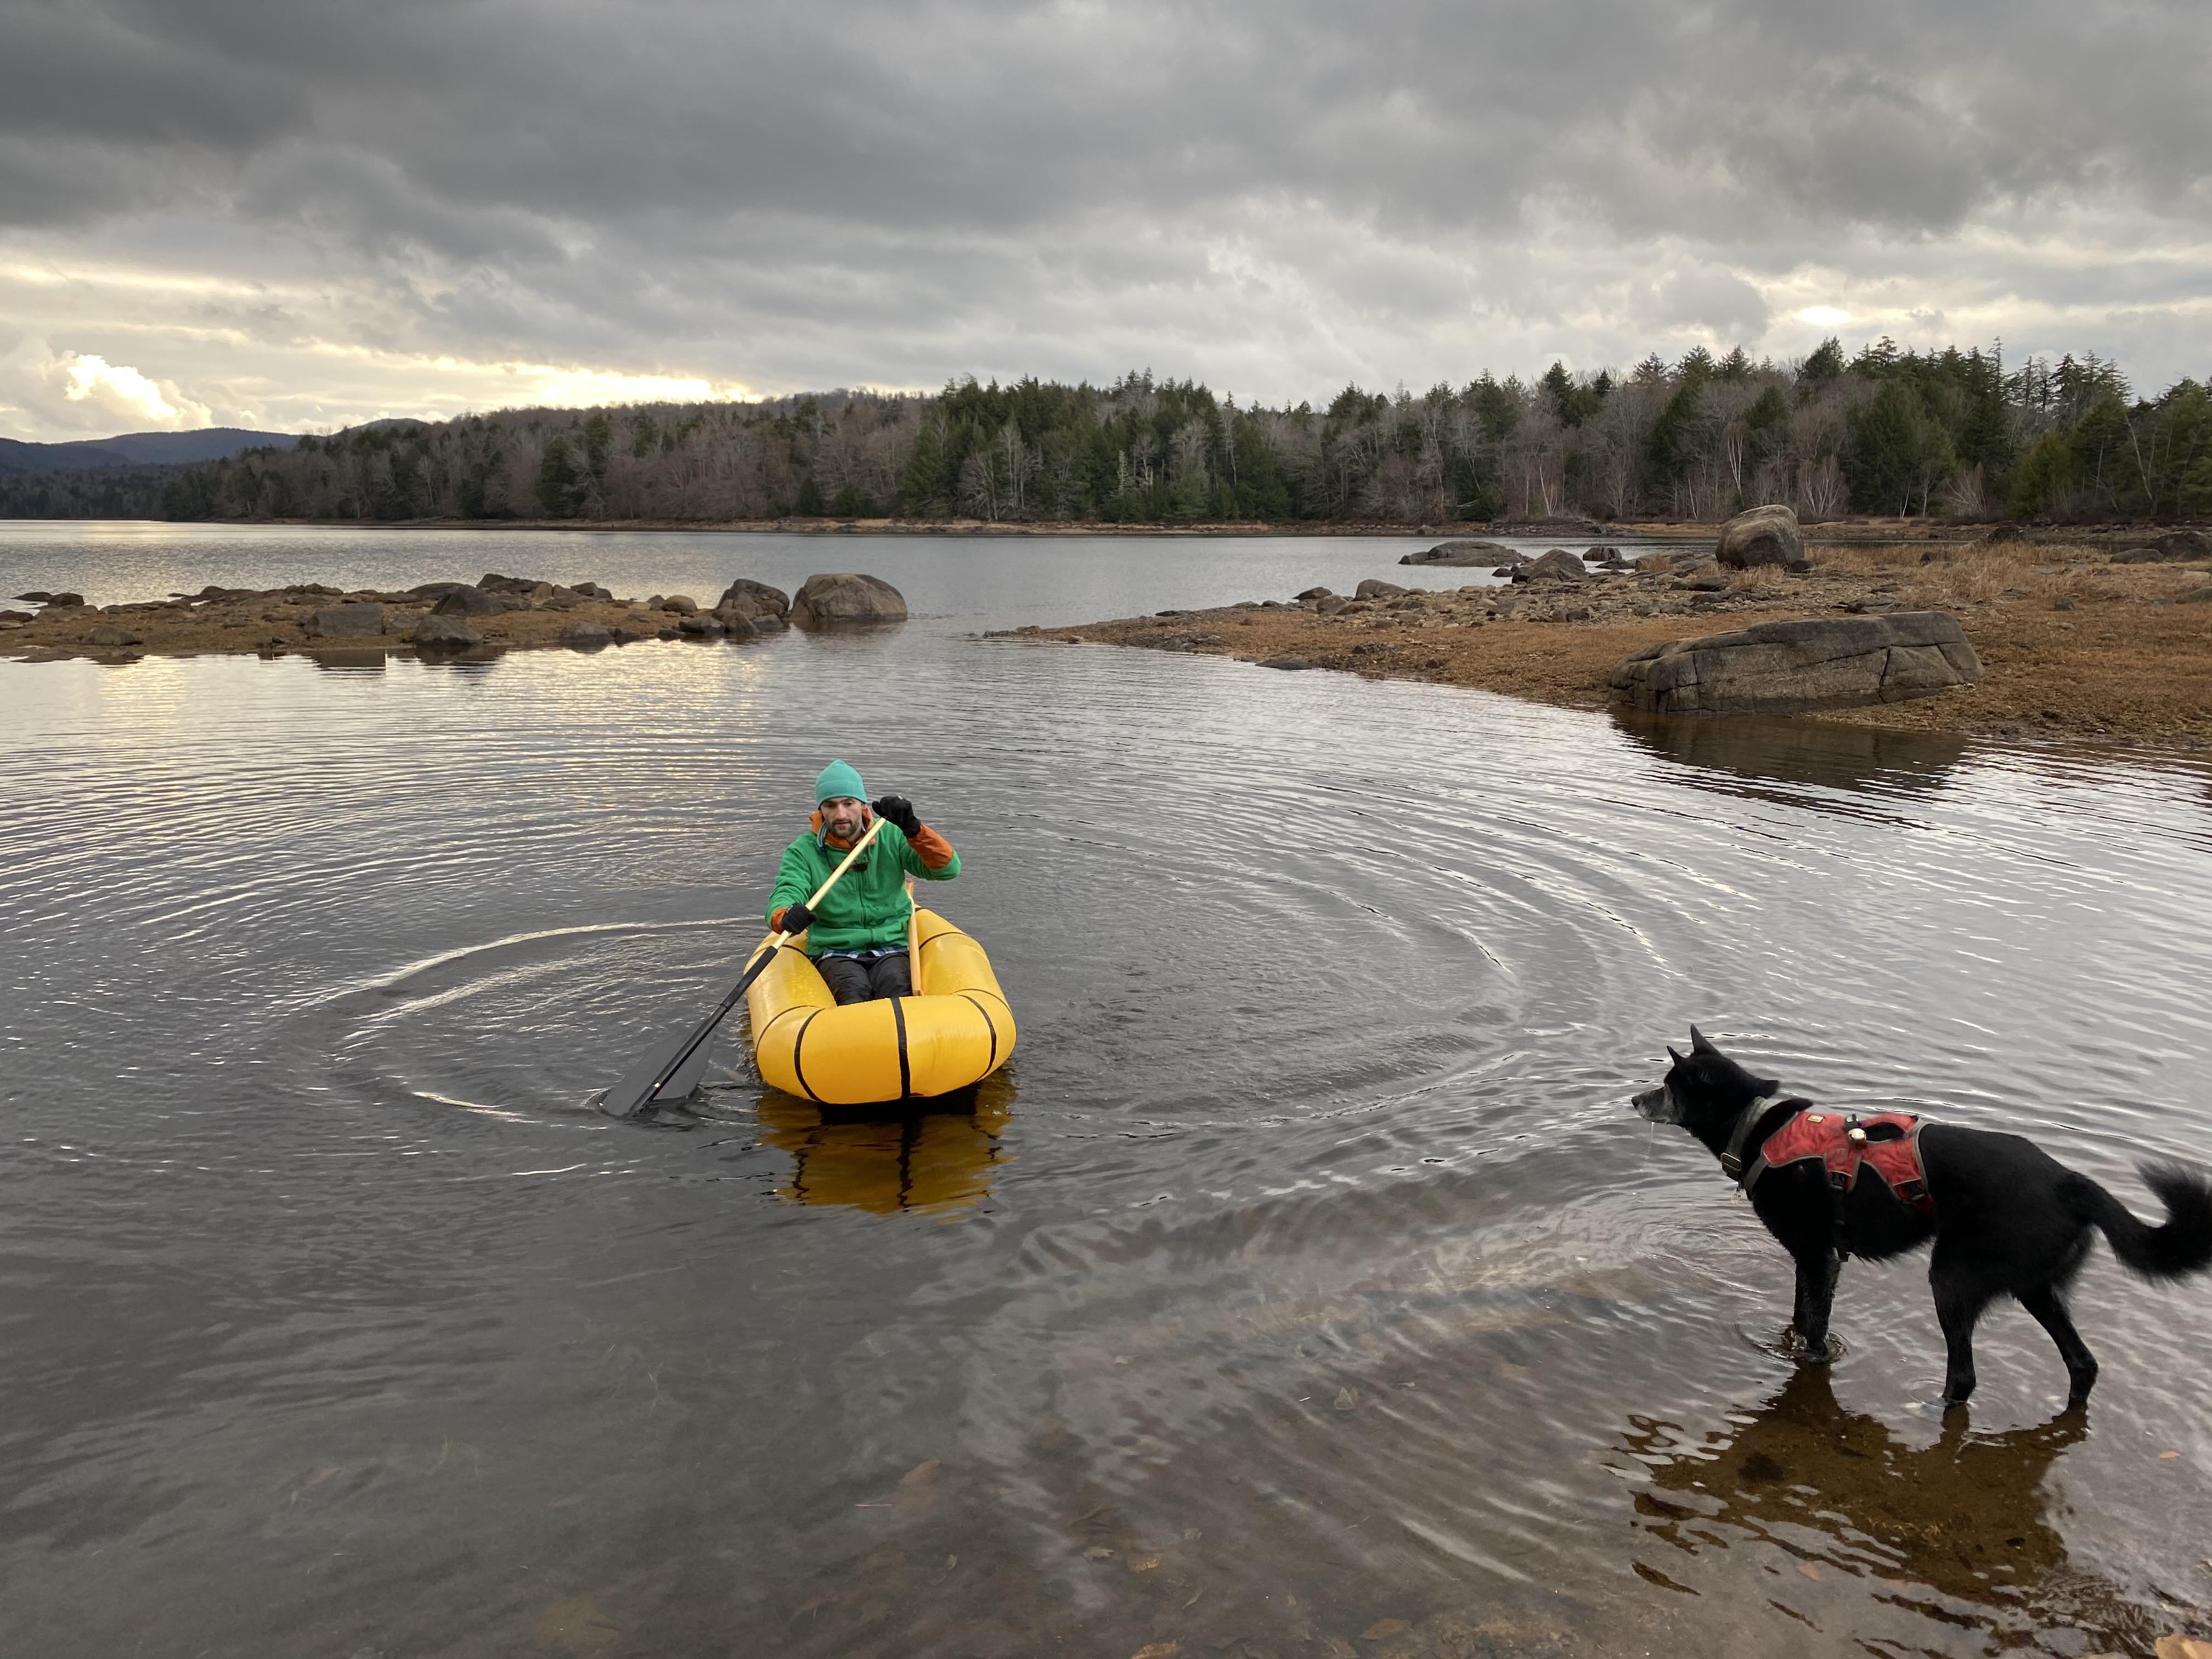
-
This reply was modified 5 years, 6 months ago by jlrose09.
-
December 9, 2020 at 3:59 pm #13374Matt (Admin)Keymaster
Thanks for the tips, and excellent idea to use the double D-rings!
I’ve gotten to the point where my new packrafts will hold air indefinitely, but I’ve built way more of them than you and my first couple of attempts leaked way worse than yours, so it sounds like you’ve done a great job. You could try to track down where the air is coming from using a 50/50 mix of soap and water painted on with a brush, but it may not be worth your time for such a slow leak. When you’re actually using it, the temperature will affect the air pressure much more quickly than a leak that slow.
Regarding the glue-brain thing – I definitely recommend applying Aquaseal/Seam Grip outside if the weather cooperates, and at least in a well ventilated room. I do it in my garage with the window open and then get the heck out of there. I also try not to do a whole bunch of seam sealing all at once – maybe one or two seams and then leave it overnight.
Cheers!
-
This reply was modified 5 years, 6 months ago by
-
November 26, 2020 at 2:11 pm #13337Matt (Admin)Keymaster
Beauty!
-
-
October 26, 2020 at 8:05 am #13179SamsquanchParticipant
Skeena maiden voyage yesterday on Bronte Creek, ON. The boat performed very well. This was my first diy packraft and I thought I’d post some thoughts whilst it’s still fresh.
First off, I’d like to say thanks to Matt for making all of this possible. What a blast. The boats are well engineered, the instructions are clear and there’s a great community for help and advice.
I enjoyed the build. Something therapeutic about crafting generally, but easier to engage when there’s a practical outcome.
I made mistakes. Quite a lot judging by the leaks I had to deal with! I thought the seams looked solid enough, but I’d lose pressure within 30 mins. Locate the leak, Seam Grip, dry, re-test. Repeat. Repeat. Repeat. Ended up with a lot of Seam Grip on the outside of the boat, which was something I’d hoped to avoid. Still, I got there in the end even if it looks a bit ugly to me.
The hardest part of the build was the final seam. Without a T-Zip, the space to work with just gets smaller and smaller. I had a few leaks on this seam, which was down to me struggling to iron on a flat surface. I tried a few jig designs, but it was still tricky.
The boat performed flawlessly on the water yesterday. Nicely balanced, a little lighter than my Alpacka (Llama) and slightly narrower which I like. No leaks at all. Had a few salmon try to jump inside.
Comparing the construction with the Alpacka it was interesting to note that they sew their panels together (inside out), then tape over the seam. I imagine that sewing would be a challenge for many builders, but I suspect this provides the primary strength for the boat rather than the TPU itself. It’s also a less permanent way to assemble the boat prior to taping, i.e. you could make an adjustment if there’s a mistake. The other advantage would be that there is no reliance on the panels aligning perfectly, i.e. no gaps between panels if they don’t. I’m curious whether it would be practical to try sewing on a diy kit and whether it’s considered worthwhile.
Next up for me is a UL. I’d told myself I’d get a T-Zip on my next one primarily to make construction easier. But now I’m about to pull the trigger the whole point of the UL is weight, so I’m questioning this. Definitely something missing in my life without bits of fabric and glue all over the place!

-
This reply was modified 5 years, 7 months ago by Samsquanch.
-
October 26, 2020 at 11:18 am #13181Matt (Admin)Keymaster
Great job, and thanks for posting!
To answer your question about the potential benefit of sewing the seams, I have done lots of destructive testing on the tube-to-tube seams used in the DIY Packrafts and the fabric around the weld always fails before the weld does – in other words the ironed seams are stronger than the fabric tubes – so while sewing the seams before welding might make the seams even stronger, it wouldn’t add any strength to the finished boat.
Regarding the leaks, I’m curious about whether or not you coated the inside of all of the seams with Seam Grip – if not, I definitely need to make this clearer in the instructions. Cheers!
-
February 6, 2021 at 2:34 pm #13659SamsquanchParticipant
Sorry for the delay in replying. To answer your question, yes I did seal the inside of the seams with the Seam Grip. Now that I’ve just finished another boat (UL), I believe I made two mistakes on the Skeena: not consistent with my linger time when welding, not using a good enough bowl/jig to shape the seams at either end. Lessons learnt. Not had a single leak on the UL and I did not seal the seams with Seam Grip.
-
-
This reply was modified 5 years, 7 months ago by
-
September 5, 2020 at 12:03 am #12767BillParticipant
I built a red Skeena using the “Leather Iron”, and it was a ton of fun to make. The instructions were great and it went together very well. I took it pretty slow and just did a bit each evening for a couple weeks and weekends. I really want to thank both Matt and the forum members (especially Bruce) for all the great descriptions and information. I installed the zipper, which was really useful for finishing it off and adding glue to seal up potential leaks at the seams.
After I finished the Skeena, a friend mentioned that he had a V2 kit that he never built and wanted to give to me, so I also built a yellow V2. Building the V2 kit showed me how much the techniques have advanced between the time of the V2 and the Skeena (a 4th generation boat). The Skeena was much easier to build and I feel like it was easier to build well than the V2. For the V2, I opted for a single-layer floor and used the extra material to make a seat in the Skeena style. I like how that thinner floor lets the boat roll up easier and it feels a good bit lighter than the Skeena. If I was going to do a rock-scraping creek trip, I’d bring the Skeena for sure, but for flatwater the V2 with single floor seems totally good. Both boats took about two weeks to build (a month total time). I didn’t keep track of hours, but I think Matt’s estimate is pretty accurate.
My daughter and I have made a number of day trips in the boats, which are really fun to paddle and so easy to bring anywhere. The Skeena is longer and feels like it tracks better and is faster. We haven’t been in whitewater yet, but the bow volume of the Skeena seems larger and like it would keep you from nosediving. I really like how the Skeena’s floor at the stern goes much further back than the V2’s floor did and think that would make it much tougher if you got into some shallow water.
People ask about the boats a lot and were very excited about them, so I decided to give them a “DIY” brand where some other boats have their logos.
I would definitely recommend building one to anybody who likes to make things. Building them without time constraint also makes it relaxing rather than stressful. I was skeptical about the zipper, but totally think it is worth it in hindsight. My next kit will be a two-person. Thanks for the great kits!
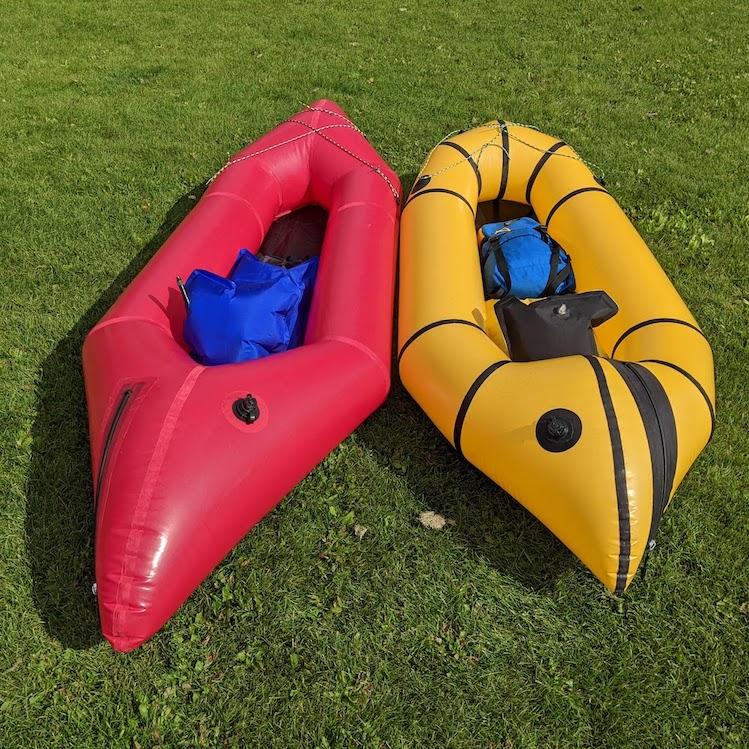
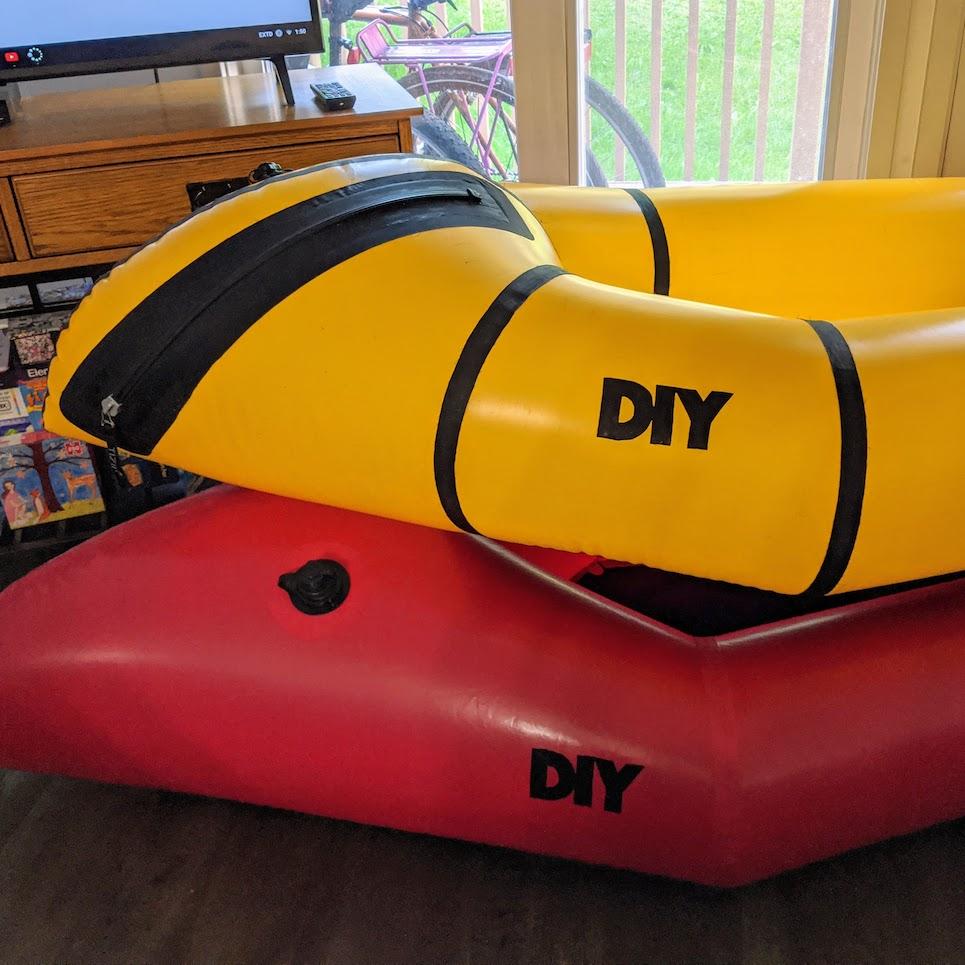
-
September 8, 2020 at 1:56 pm #12791Matt (Admin)Keymaster
Thanks for the pictures and the details about your experience putting the kits together – it looks like you did a great job!
I have certainly tried to improve the construction methods and instructions since version 2, so it’s good to know I’m on the right track. Cheers!
-
-
September 4, 2020 at 2:52 pm #12766LaylaLou11Participant
Took my Skeena out for her maiden voyage in Montana! Super stoked with my boat, it was super maneuverable and tracked better than I expected for such a small raft.
It took me more like 80hrs to build but I blame my poor grip strength for that. I’m still struggling with 3 leaks at the 1-2 and 3-4 tube to floor seams. It floated fine, I just had to blow a few breaths into it every hour or so which was only a little annoying.
My seat has given me the most trouble, I did it first and I think I overwelded it. I suspect I damaged the TPU near my seams. I ended up welding extra strips around the entire thing which seems to have made it airtight but it’s not about 3 inches narrower. And I missed the step of gluing the white piece onto the top up valves. They kept popping out and deflating my seat.
I’m really hoping fabric gets back in stock soon so I can add a spray deck/skirt before some trips I have planned in October. I was constantly sponging out water from running Class IIs!
Super fun project, I love my boat. Thank you so much for all the tutorials and the awesome design!
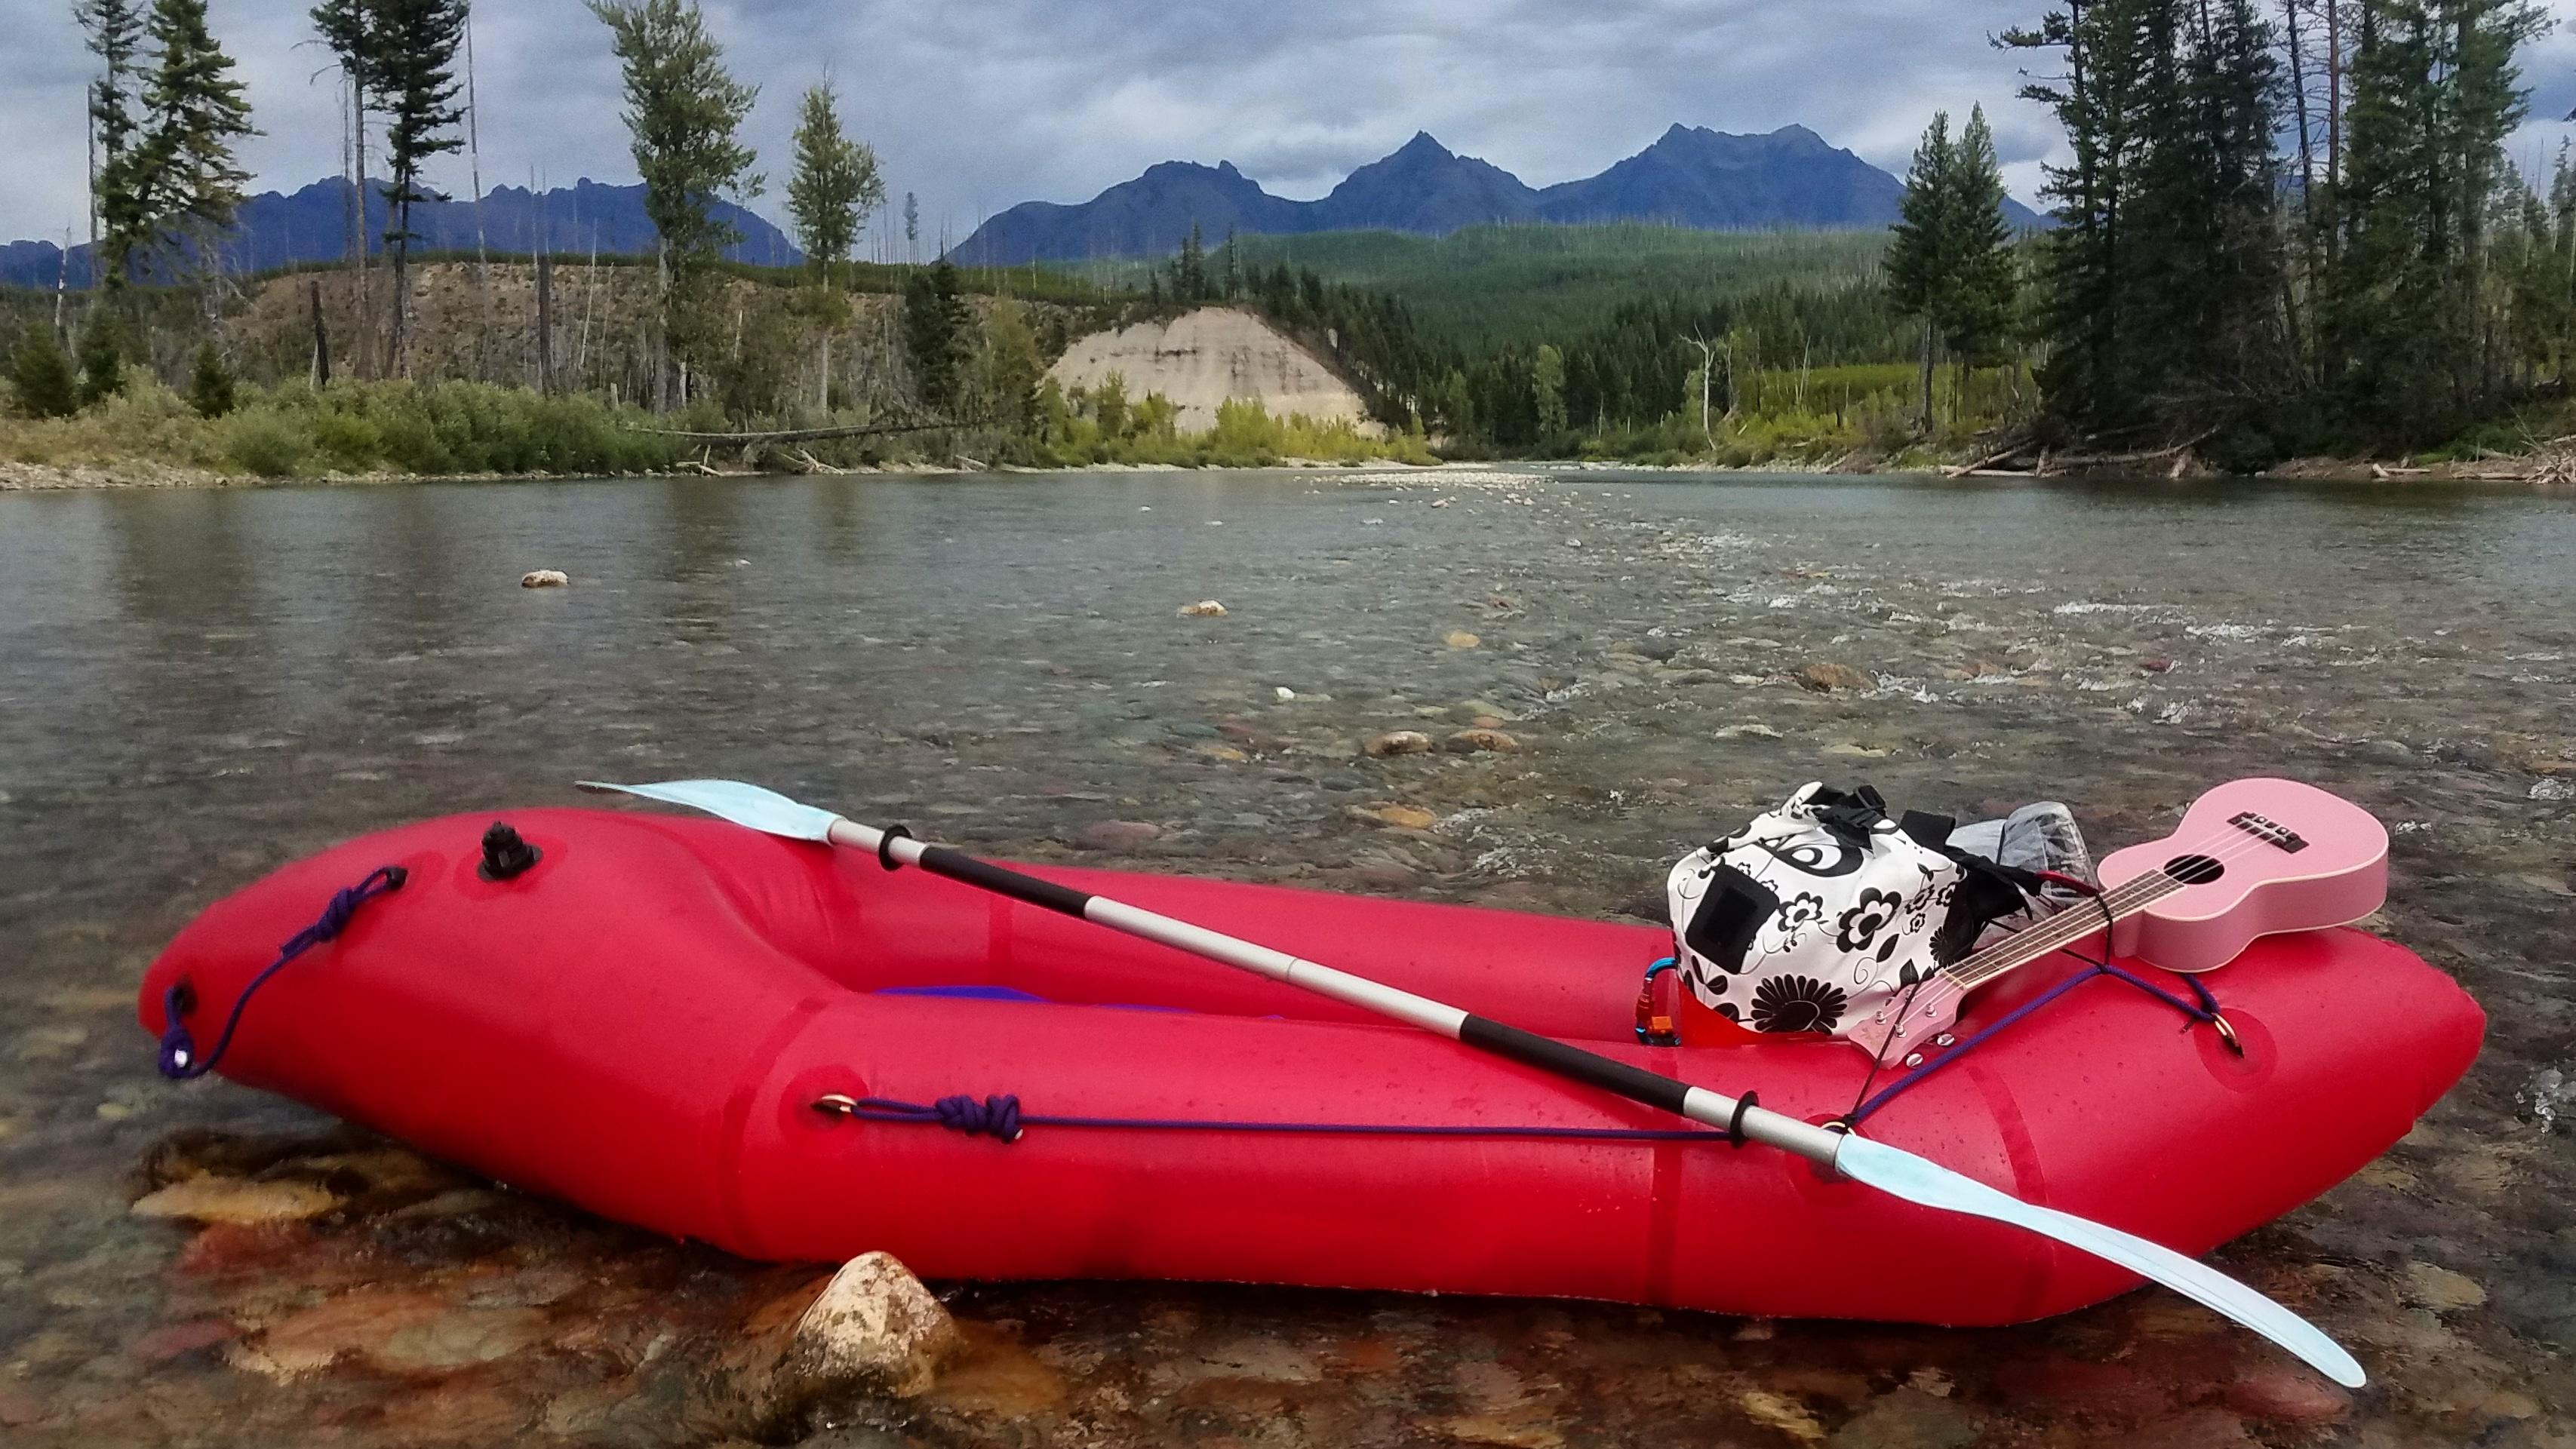
-
September 8, 2020 at 2:02 pm #12792Matt (Admin)Keymaster
Thanks for posting – the pink ukulele makes a great hood ornament!
Thanks also for the feedback about the seat. This is a common refrain, so I’m in the process of redesigning it to make it easier for people to assemble without leaks.
-
-
July 26, 2020 at 10:38 am #12744keopgaardParticipant
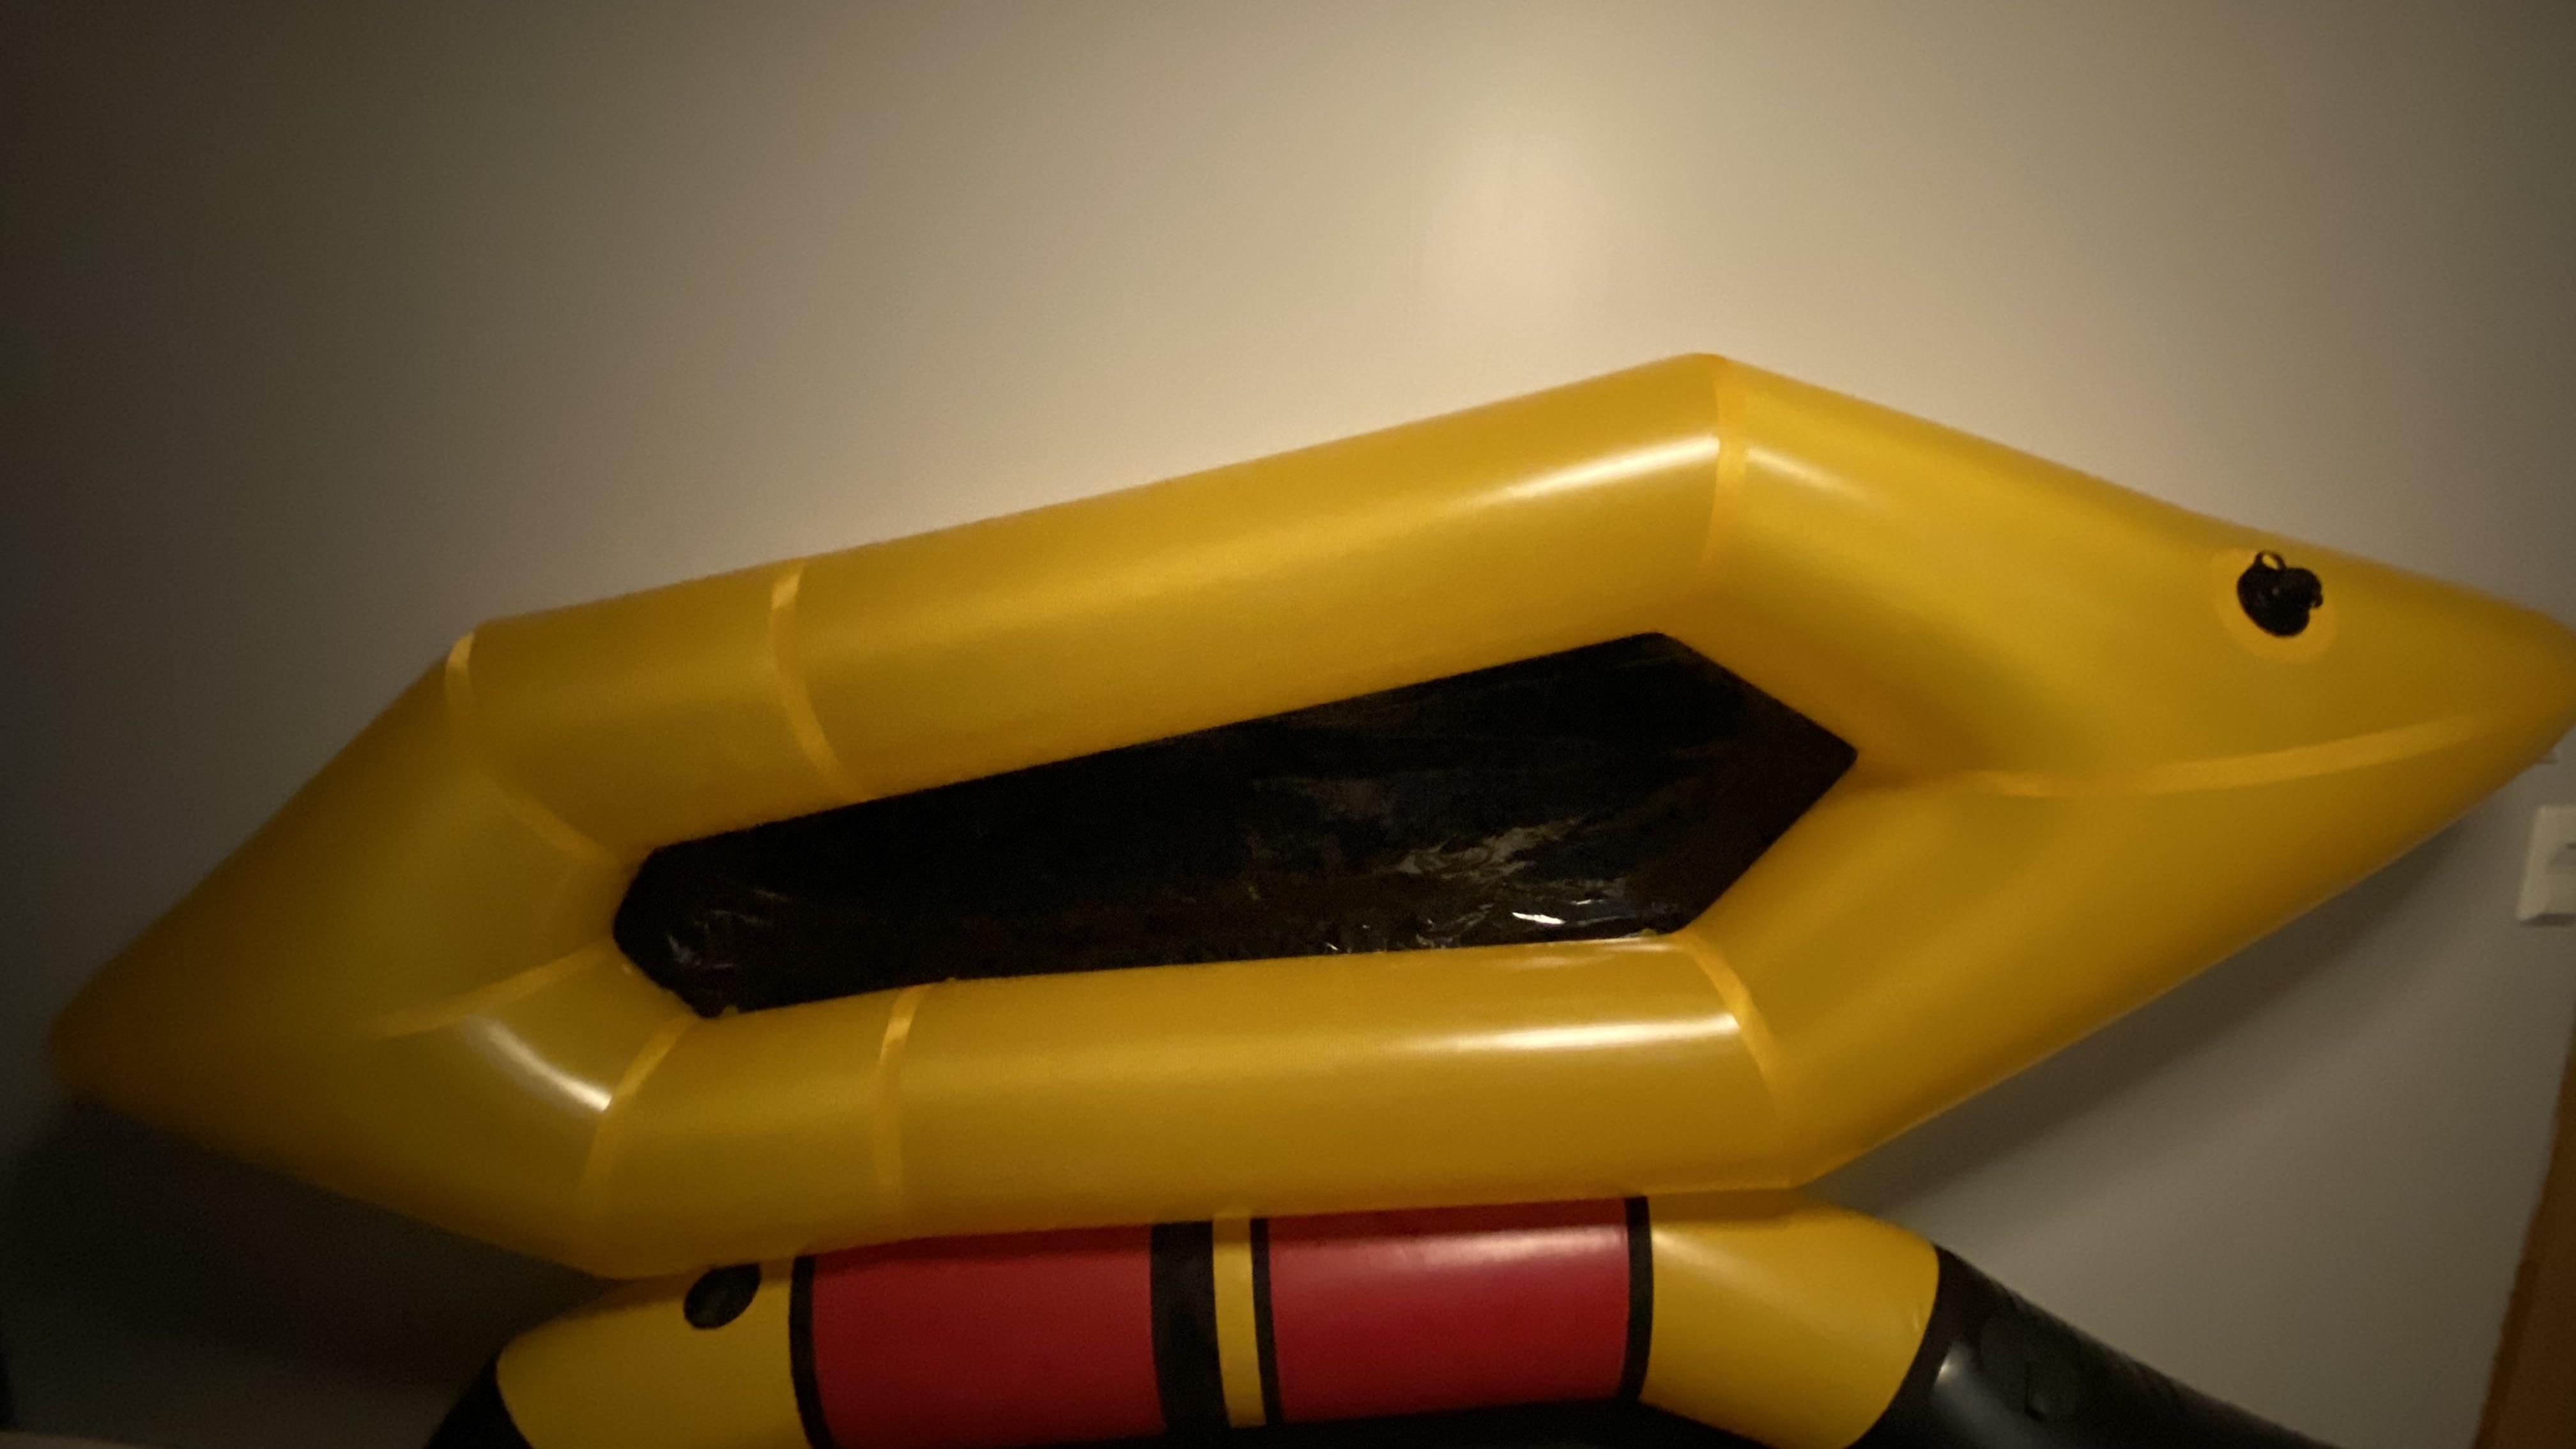 Ultralight, 783 gram weight. Buildingtime, Aprox 15 hours and 4 hours waiting for the glue to dry.
-
This reply was modified 5 years, 10 months ago by keopgaard. Reason: Missing text
-
July 27, 2020 at 9:38 pm #12755Matt (Admin)Keymaster
It looks great! And thanks for the note about the time!
-
This reply was modified 5 years, 10 months ago by
-
July 26, 2020 at 8:02 am #12738pporneluboaterParticipant
Trial float of my skeena with Colorado air.
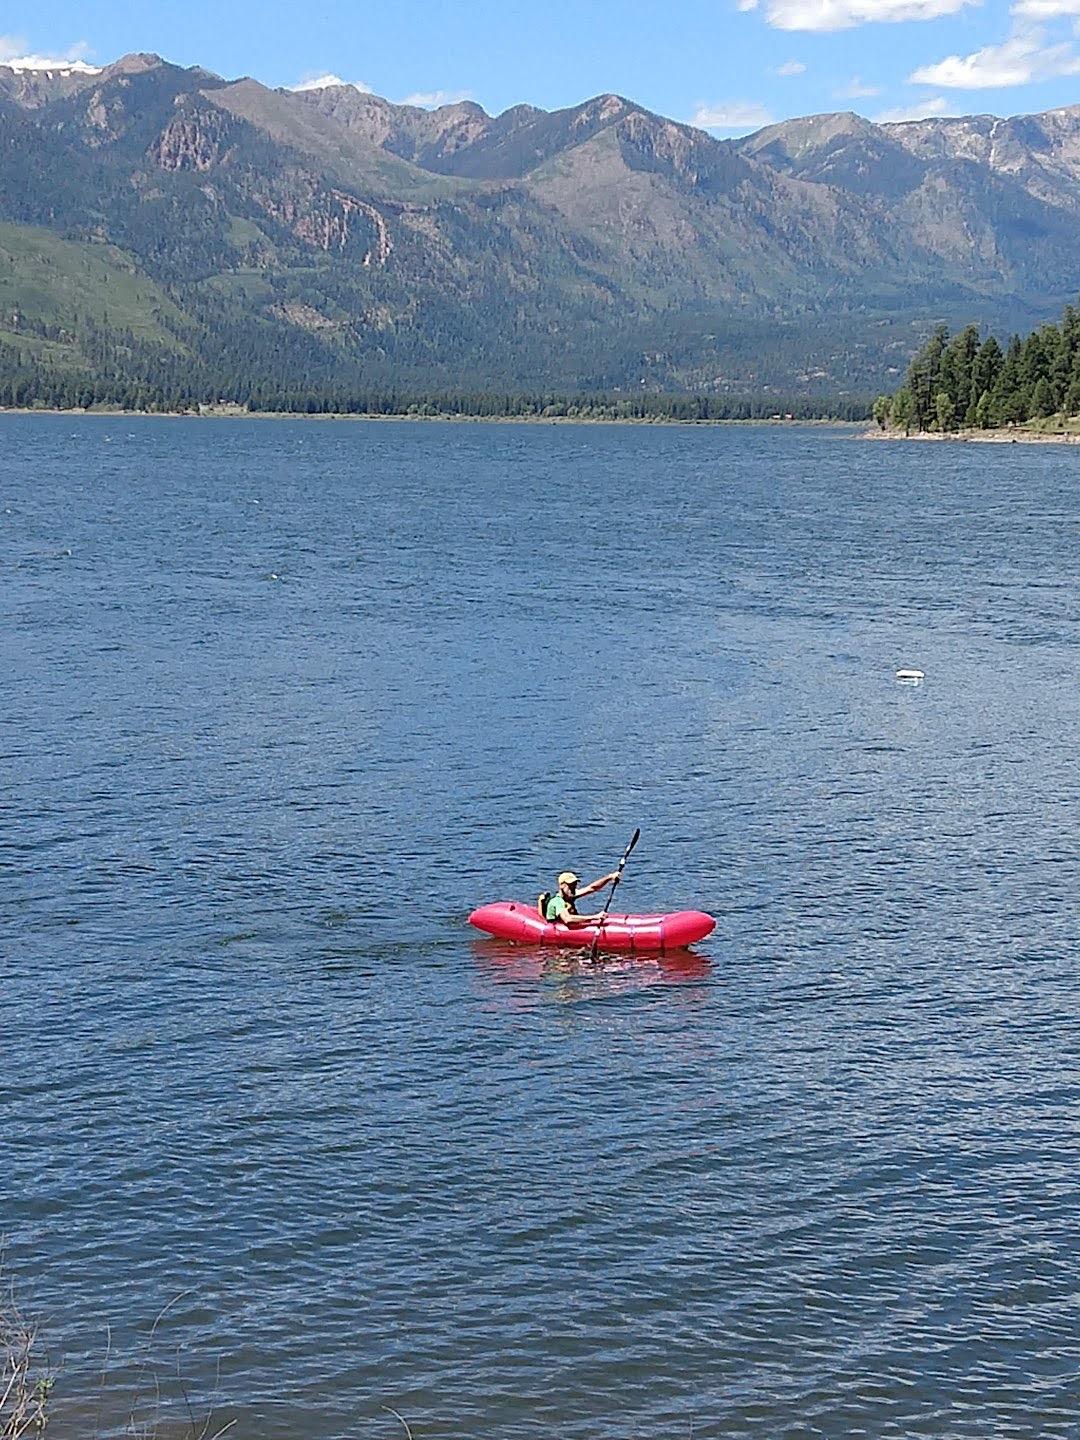
And a trial river run on the Animas tubing through Durango.
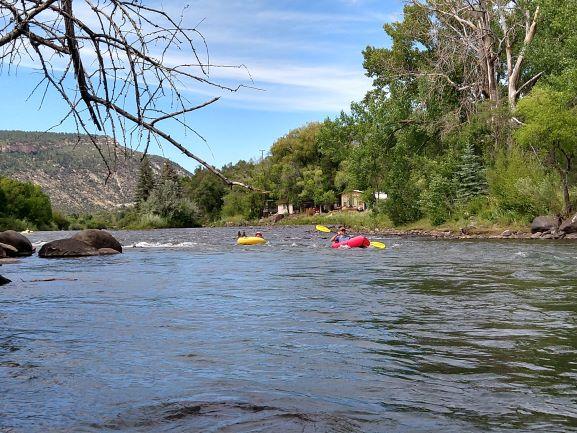
Not your typical “Bikeraft” setup, but love that I can take a boat along on a motorcycle!
This photo also shows one of the new “Covid-19” color schemes. I think the blue seam strips look pretty good. Need to work on installing attachment points for carrying a bicycle now.
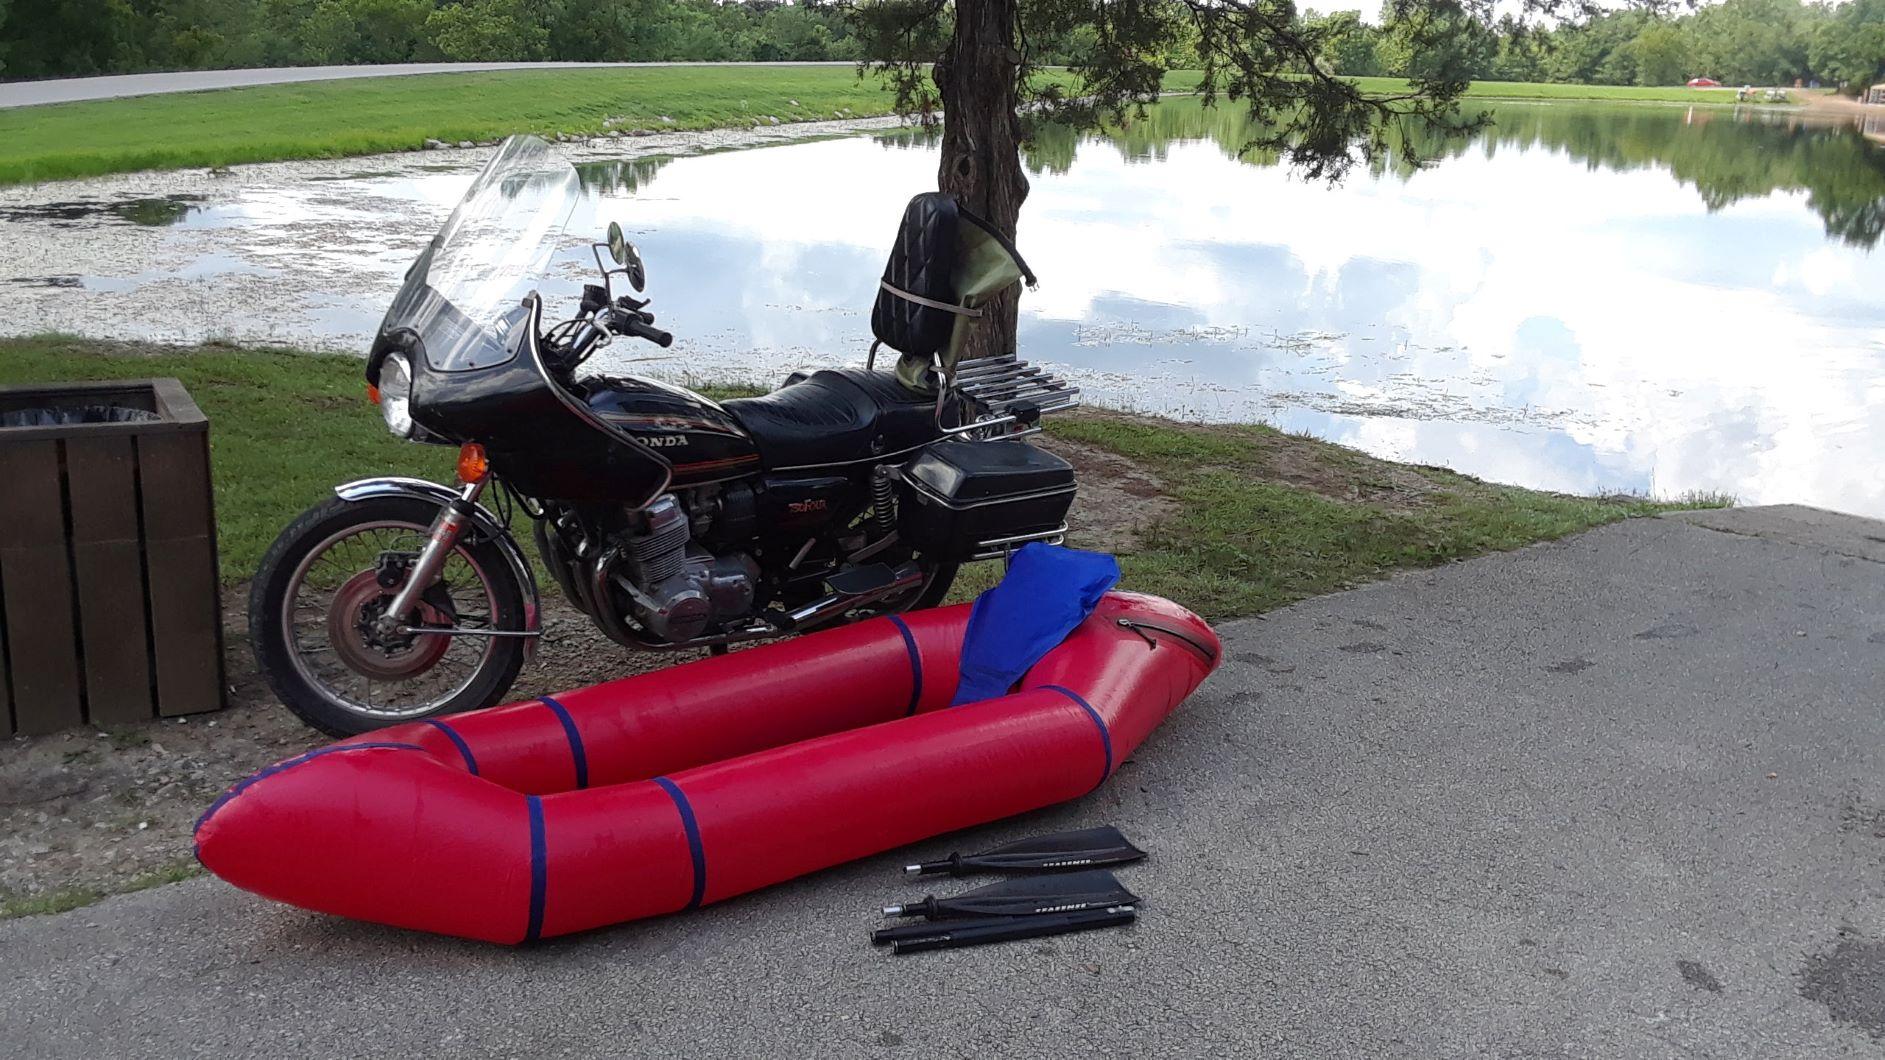
-
July 26, 2020 at 10:34 am #12743Matt (Admin)Keymaster
Beautiful!!
-
-
July 17, 2020 at 6:40 am #12656Christian001Participant
Couple of weeks ago I finished my two packrafts! Telkwa and 2-Person.
It was awesome to build these. I really enjoyed it! The Telkwa was the first and it took me about 3 weeks. I was not very fast, but was afraid of doing any mistakes. I did some, but nothing major. Had some very minor leaks at the zipper.
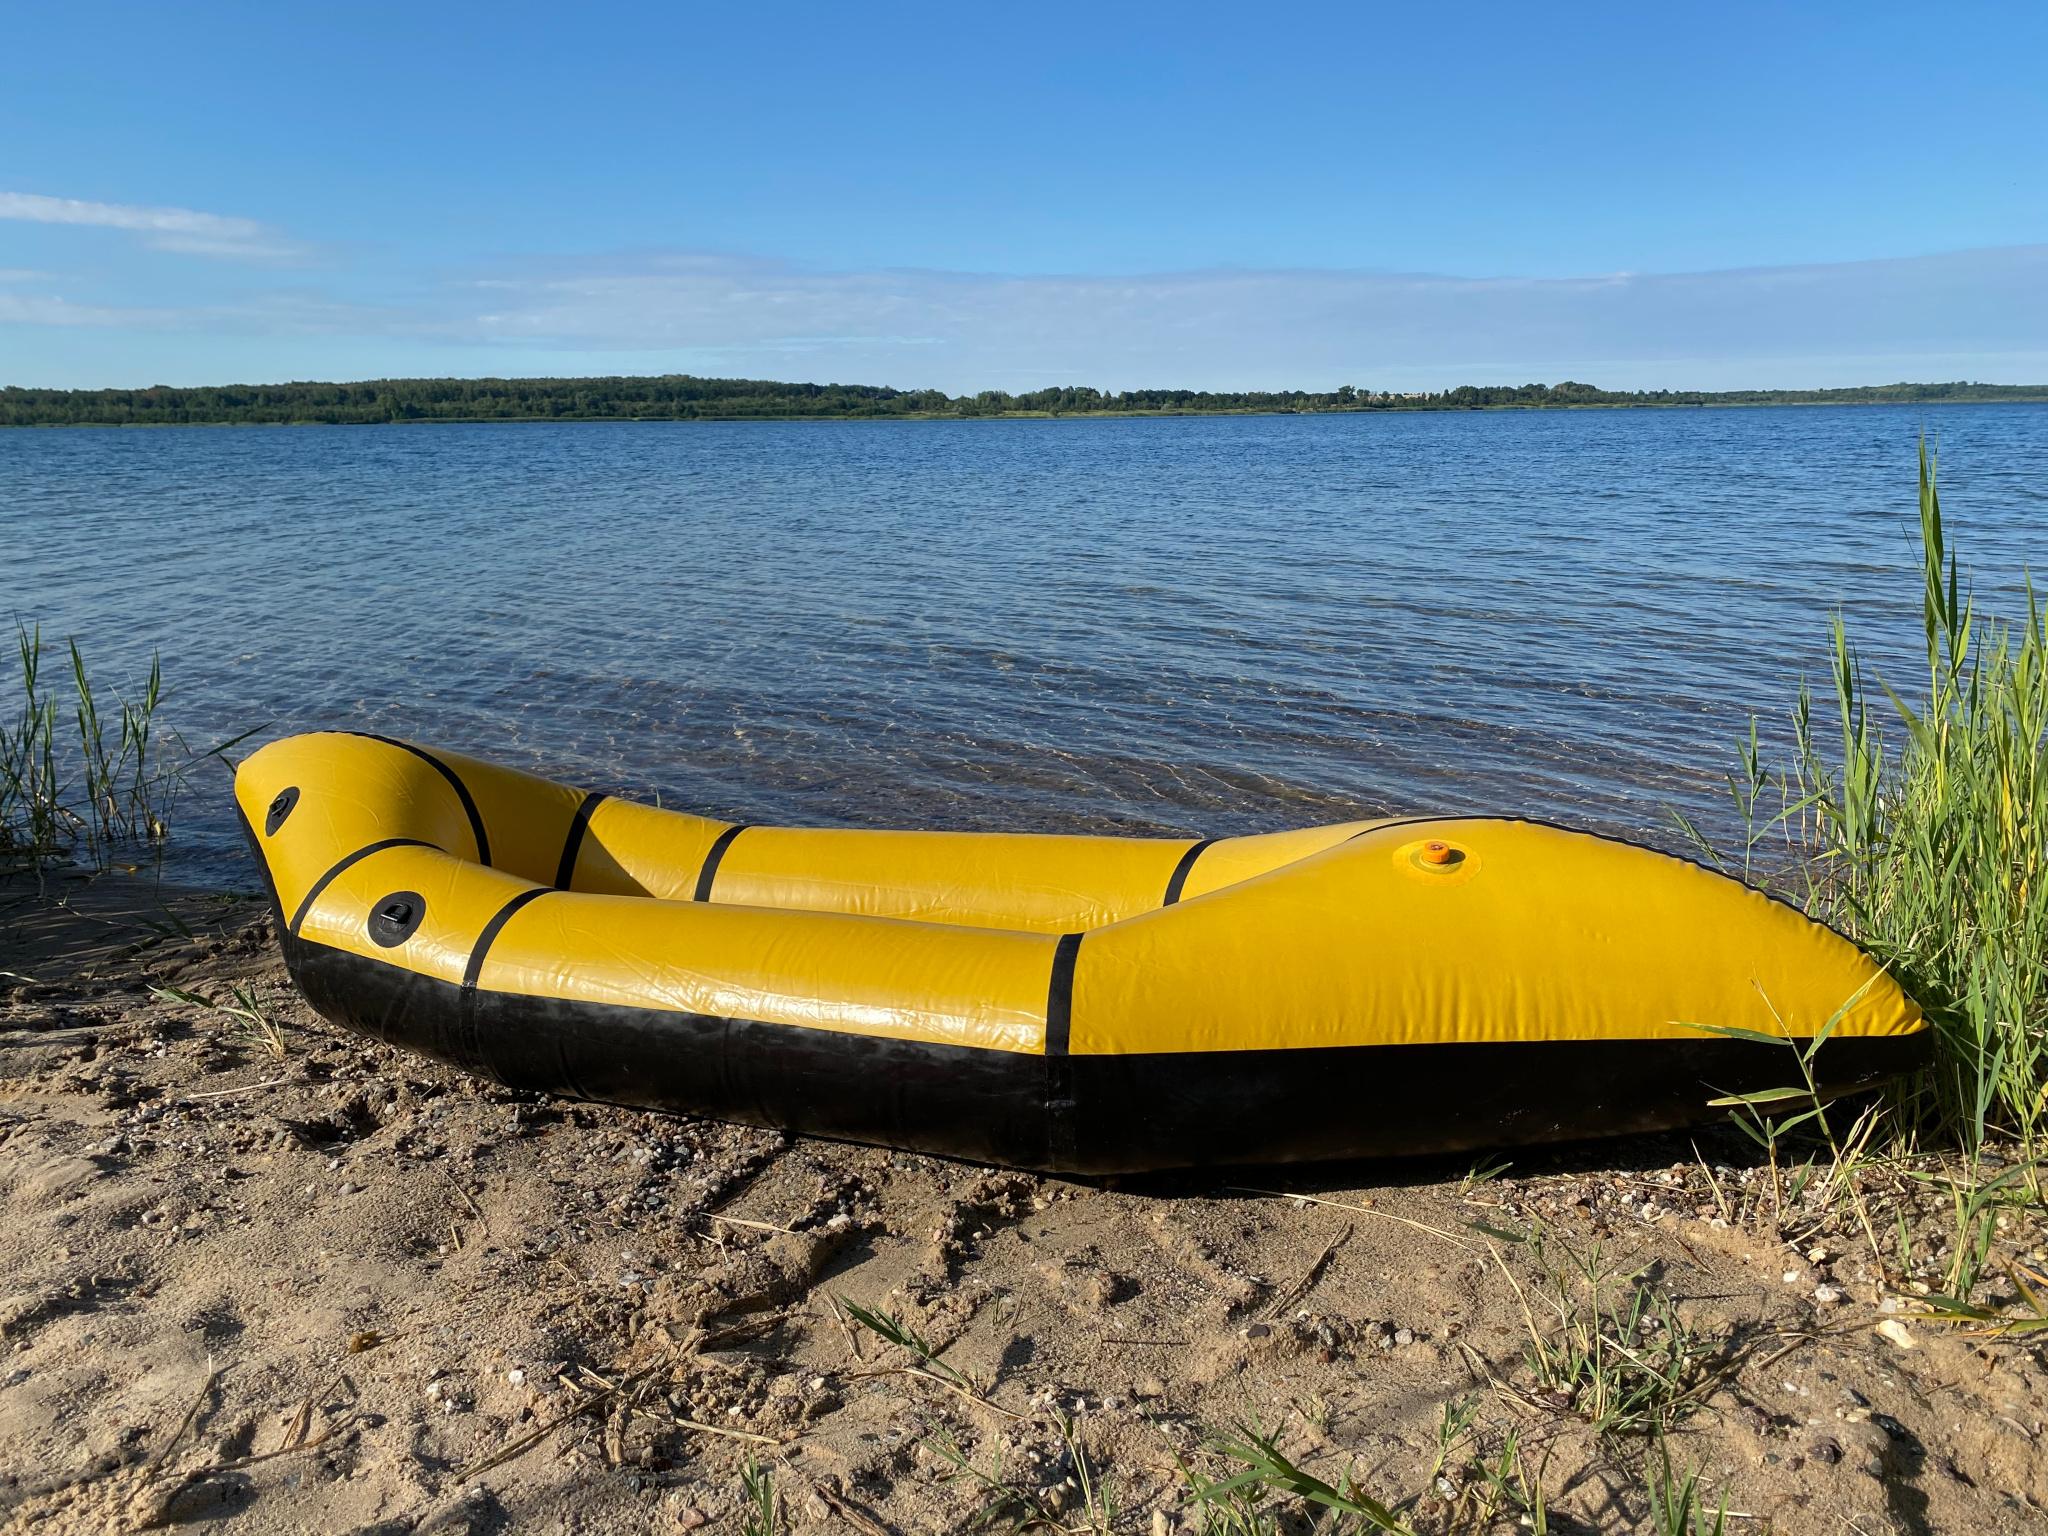
The second (2-Person) took me about 1,5 weeks. It did not have a wrap around floor, so for me it was much easier to build. And I learned quite a lot with the telkwa. The 2-Person had no leaks and was airtight right from the beginning.

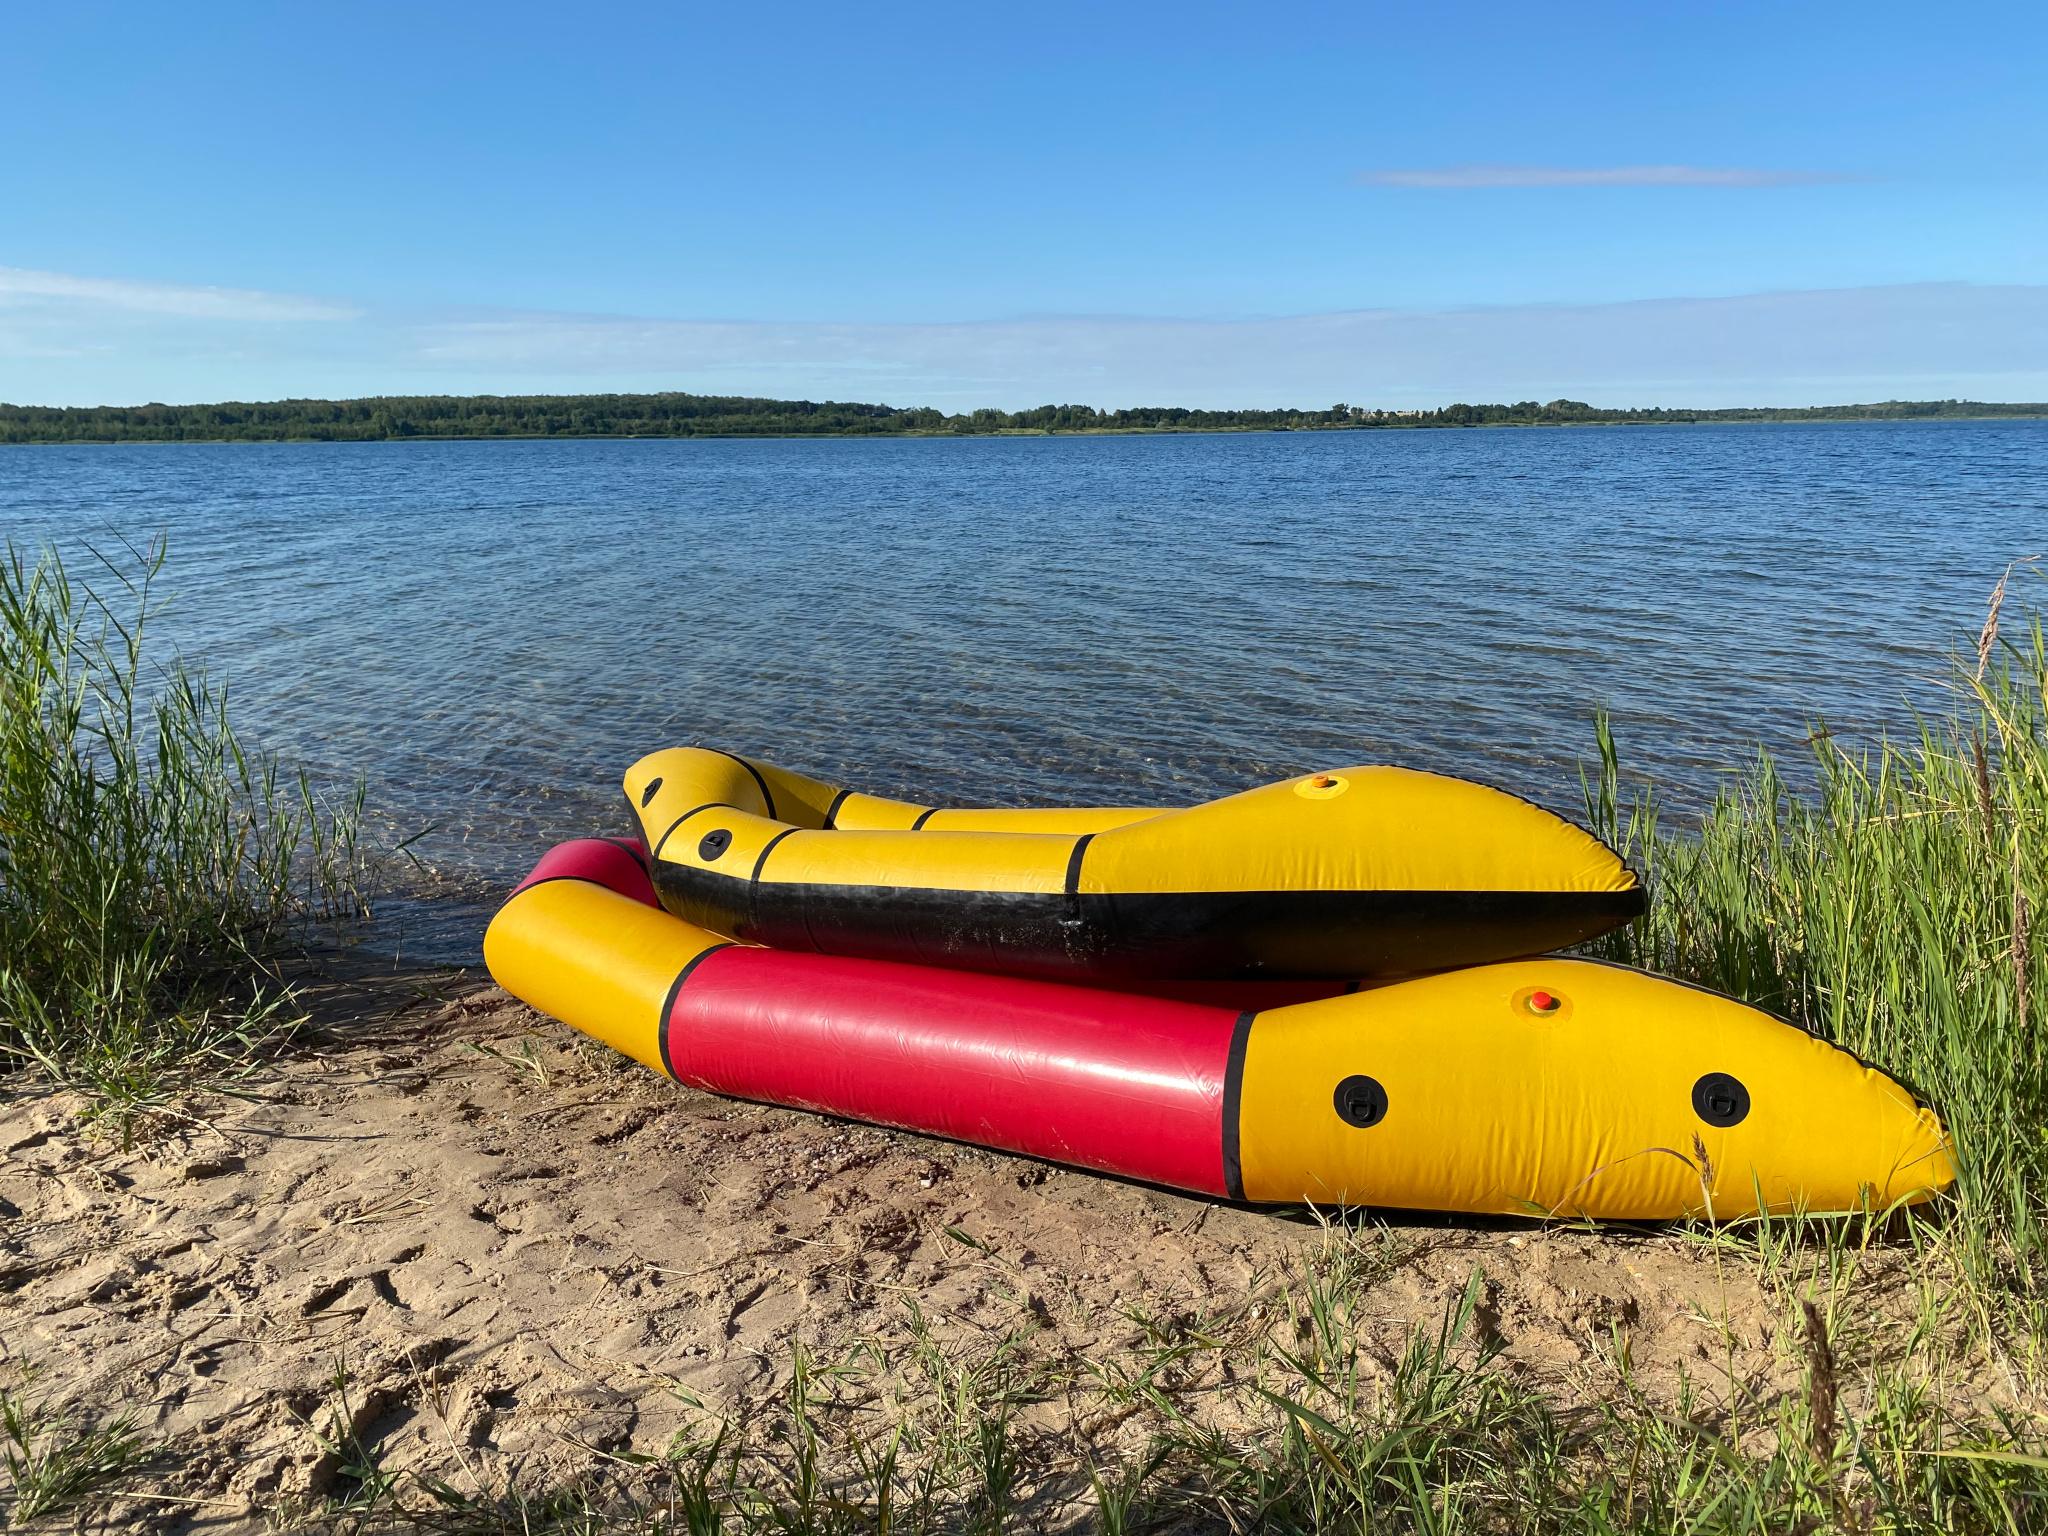
For both packrafts I used the Leather Iron and an hot air soldering station (858D). With the hot station I could weld the seamstrips very consistently. In my tests the welds are very strong and mostly without any airbubbles.
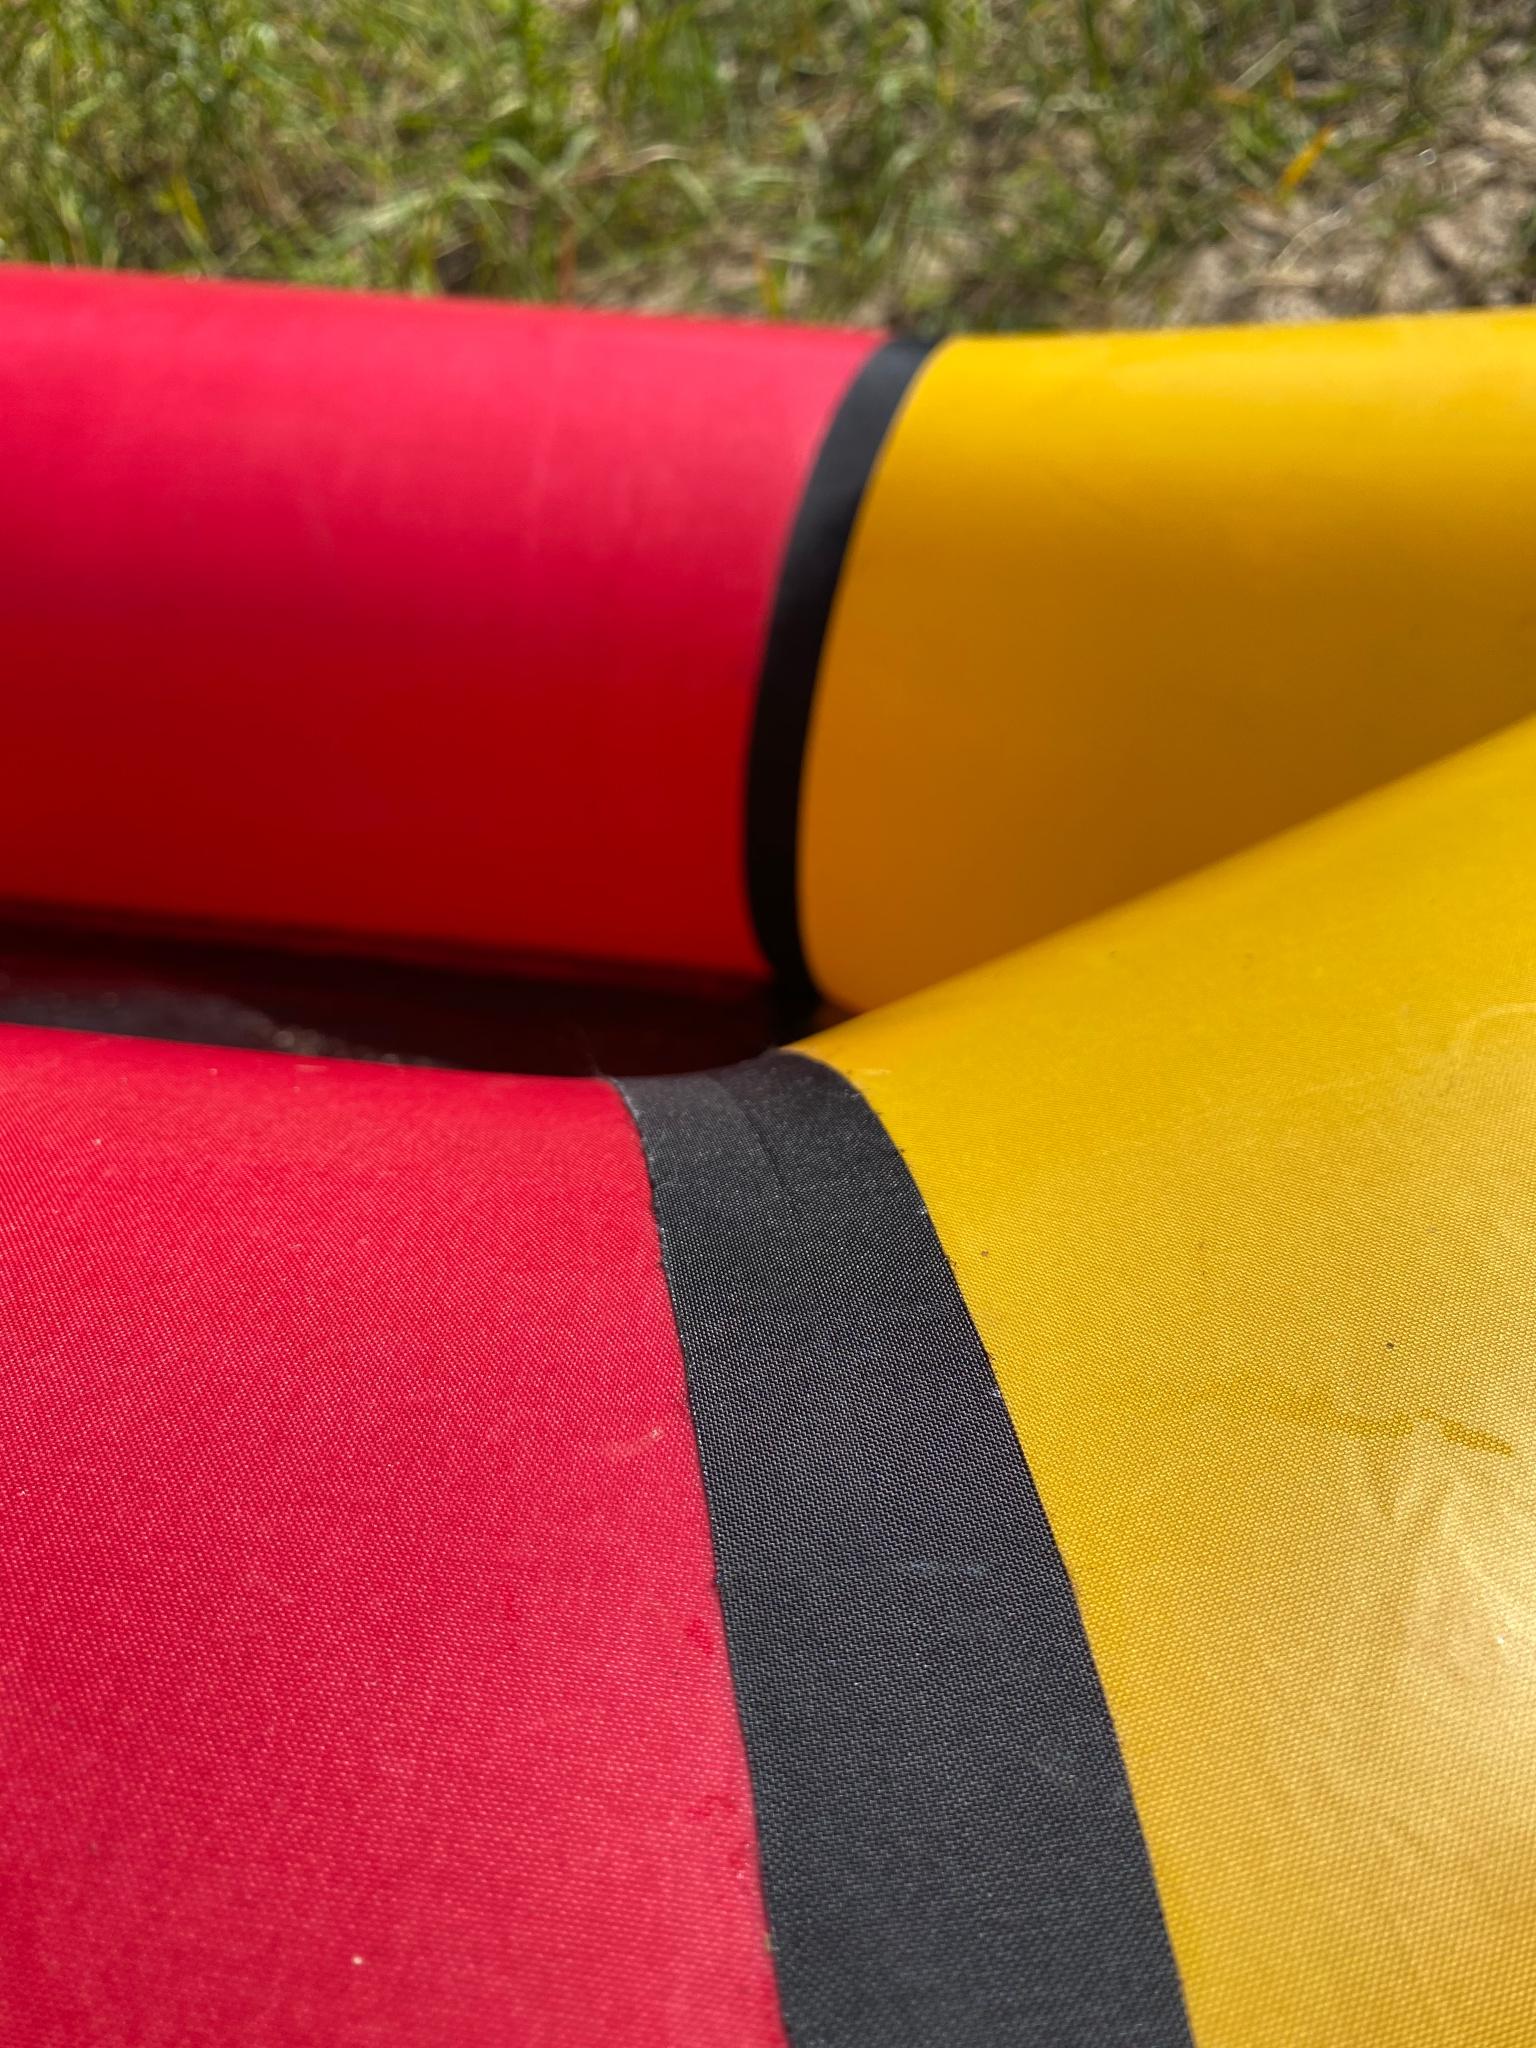
When Matt is back from his trip I will order the Ultralight and Skeena as well!
-
July 17, 2020 at 7:53 am #12657Matt (Admin)Keymaster
Thanks for showing us, Christian! Your packrafts look great and it is good to know about the hot air soldering station – your seams look excellent!
-
-
June 2, 2020 at 9:38 pm #12391LuckatronParticipant
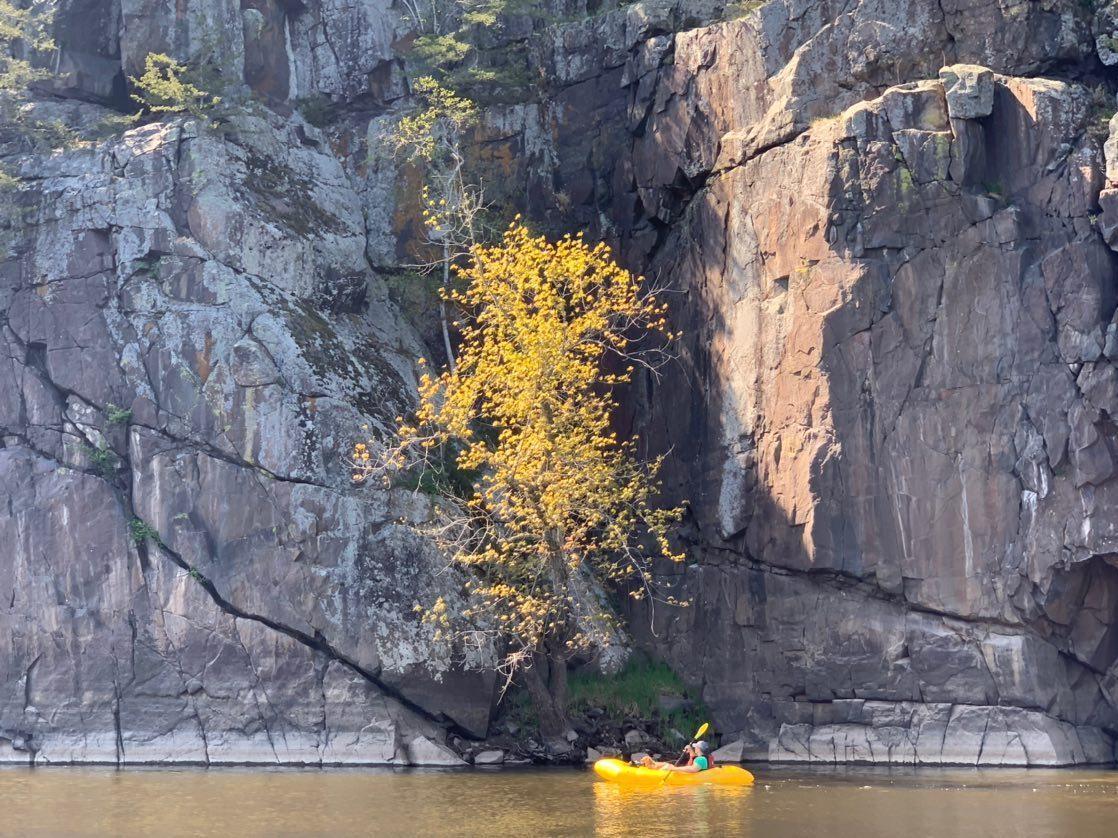 With a giant stinky goober of sealant globbed in the tip of the stern, I nervously tested my completed project. 60 seconds later, I was loving it. 60 miles later, I am loving it a little more. The testing continues. Always remember that when you are finished, you get to paddle it. That’s a nifty reward. I might build a few more! … or maybe I won’t. I can’t decide, and it doesn’t matter. I have plans for this one in the meantime.
-
June 4, 2020 at 8:09 am #12398Matt (Admin)Keymaster
Beautiful!
-
-
April 17, 2020 at 7:37 am #11269unnamedpeaksParticipant
Finished my UL Packraft
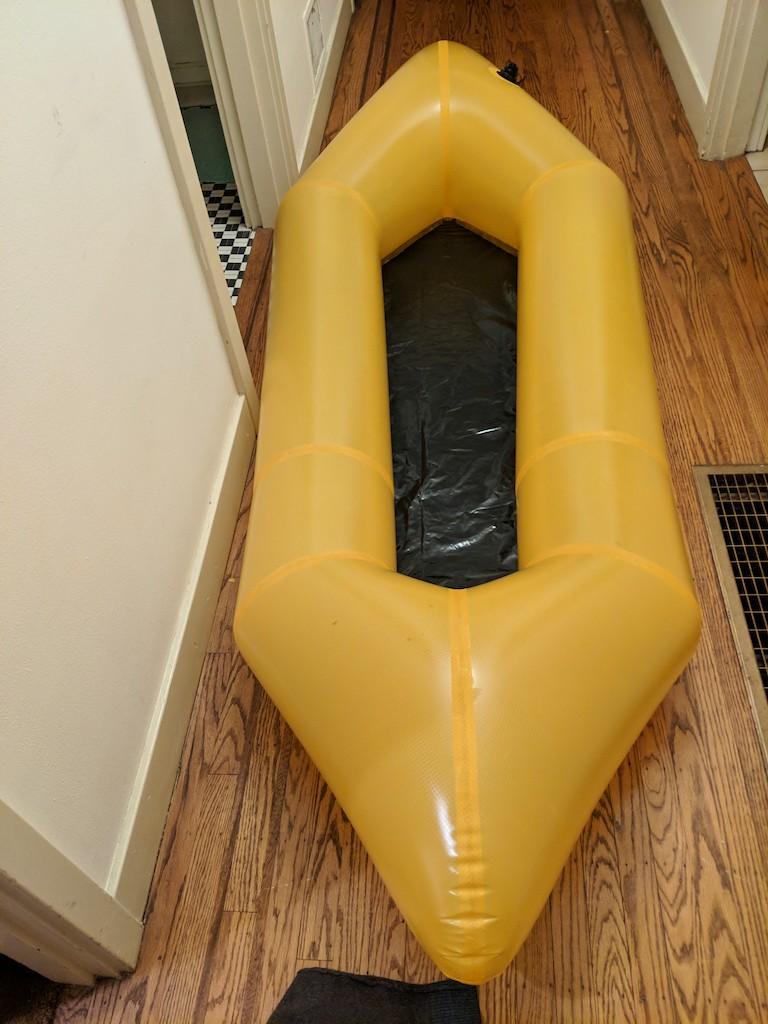
-
April 16, 2020 at 3:19 pm #12069krstahlParticipant
A friend and I floated a 6 mile section of the Yellowstone River near Billings, MT in early March. I just had to try my newest Telkwa!
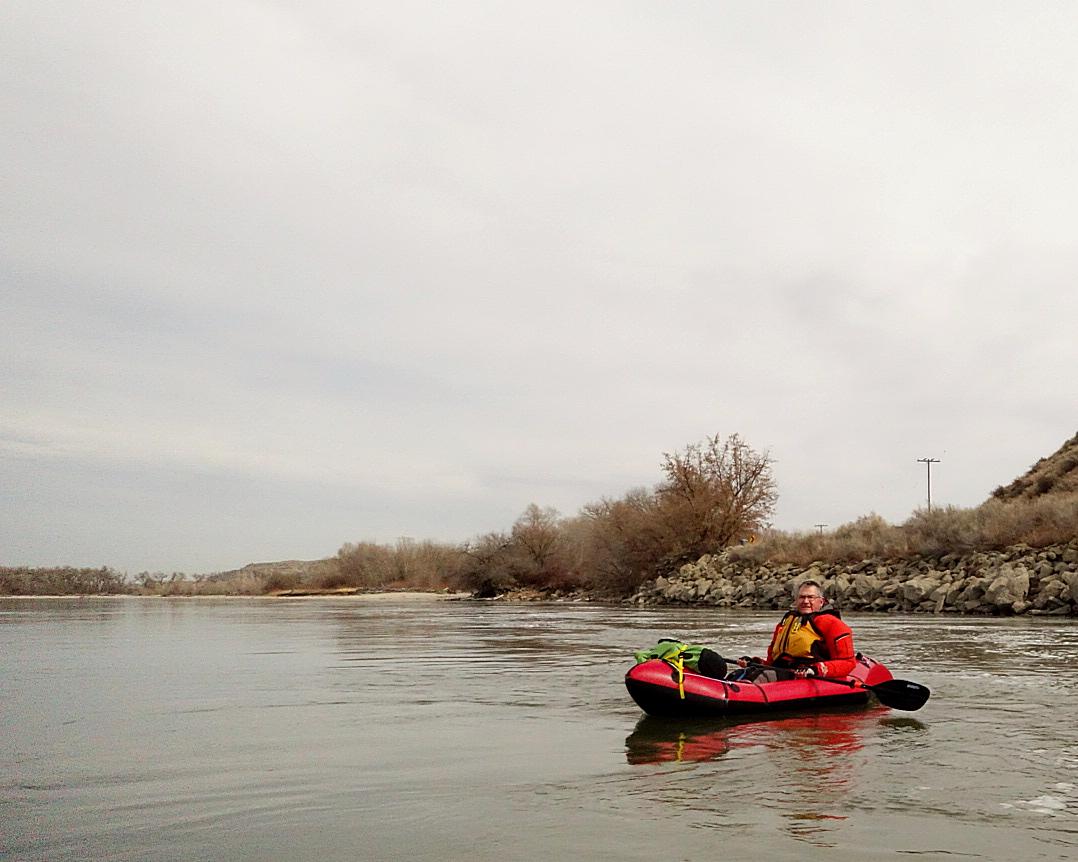
-
February 29, 2020 at 10:55 am #11717ArnoldParticipant
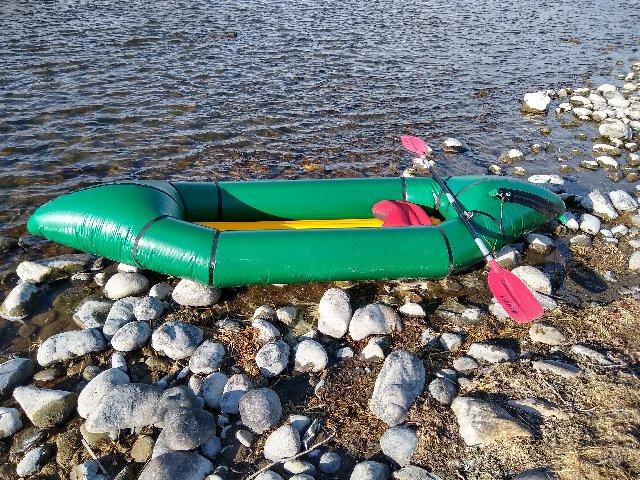
Maiden voyage of a recently completed stock-length Voyageur. This is my second packraft, first was a V2 which works very well and gets a lot of use. This one had way fewer leaks! Cold day and cold water made it tough to keep it full of air, but it worked great. As Derek has mentioned in earlier posts, the Big Agnes Air Core fits perfectly. I bought the 66″ long one and it seems made to fit the regular length Voyageur like a glove. Still need some lash tabs and will slowly add seamgrip along the seam tape to take care of final small leaks. Even if I leave it with the current small leaks, it stays full for several hours. Very happy with this raft, thanks Matt!
I can certainly see why the next version of the two person raft is different, smaller front end and one less seam at the rear makes sense. Will most likely build one of those next.
Again, thank you Matt for offering these up!
-
February 29, 2020 at 11:51 am #11718Matt (Admin)Keymaster
Great work, Arnold! Thanks for posting!
-
-
August 17, 2019 at 4:18 am #10691OlleParticipant
My first trip with my packraft was a wonderful one. I took it out to northern Norway. Being able to both hike around and paddle in the fjords made for an amazing time!
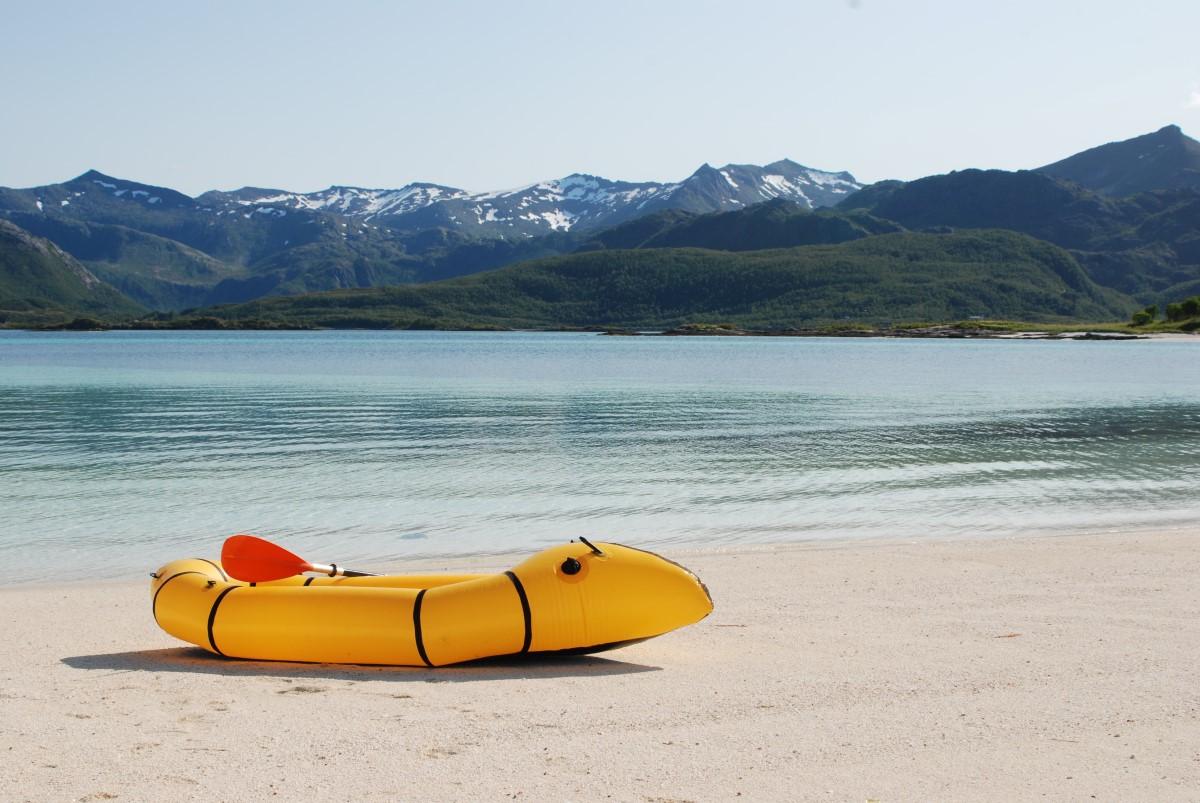
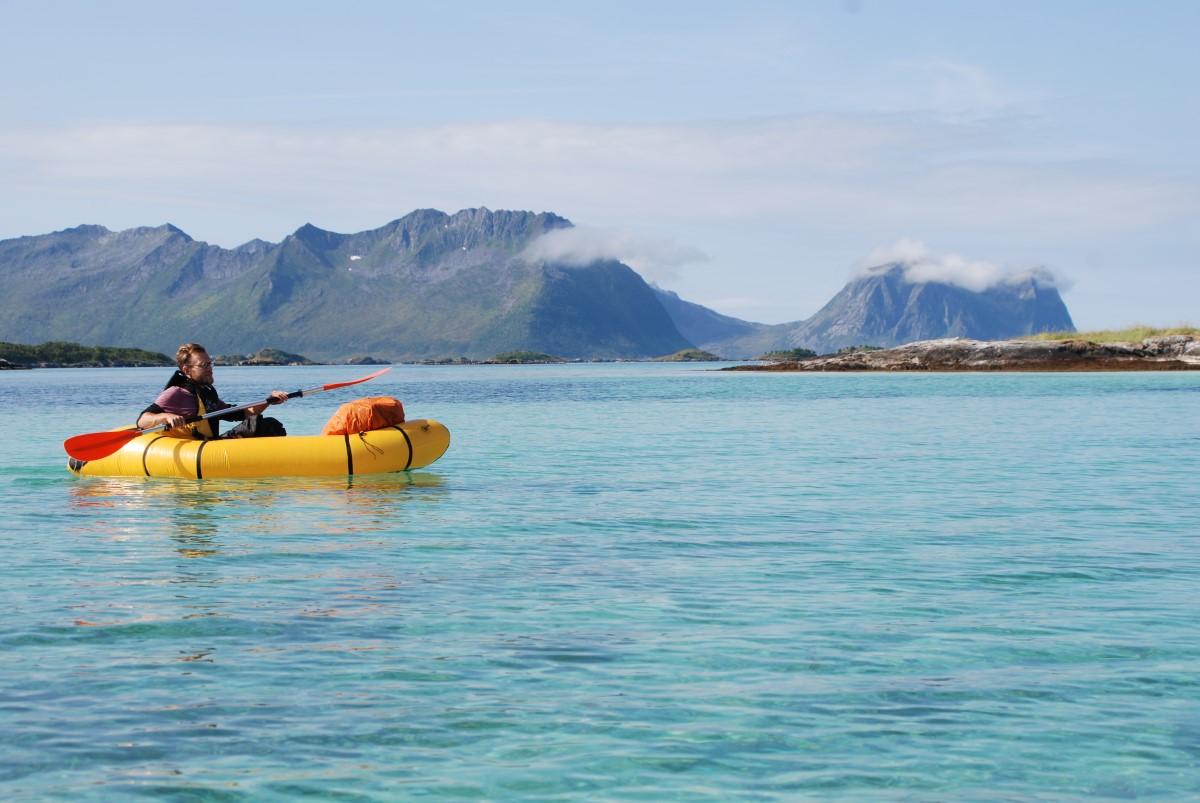
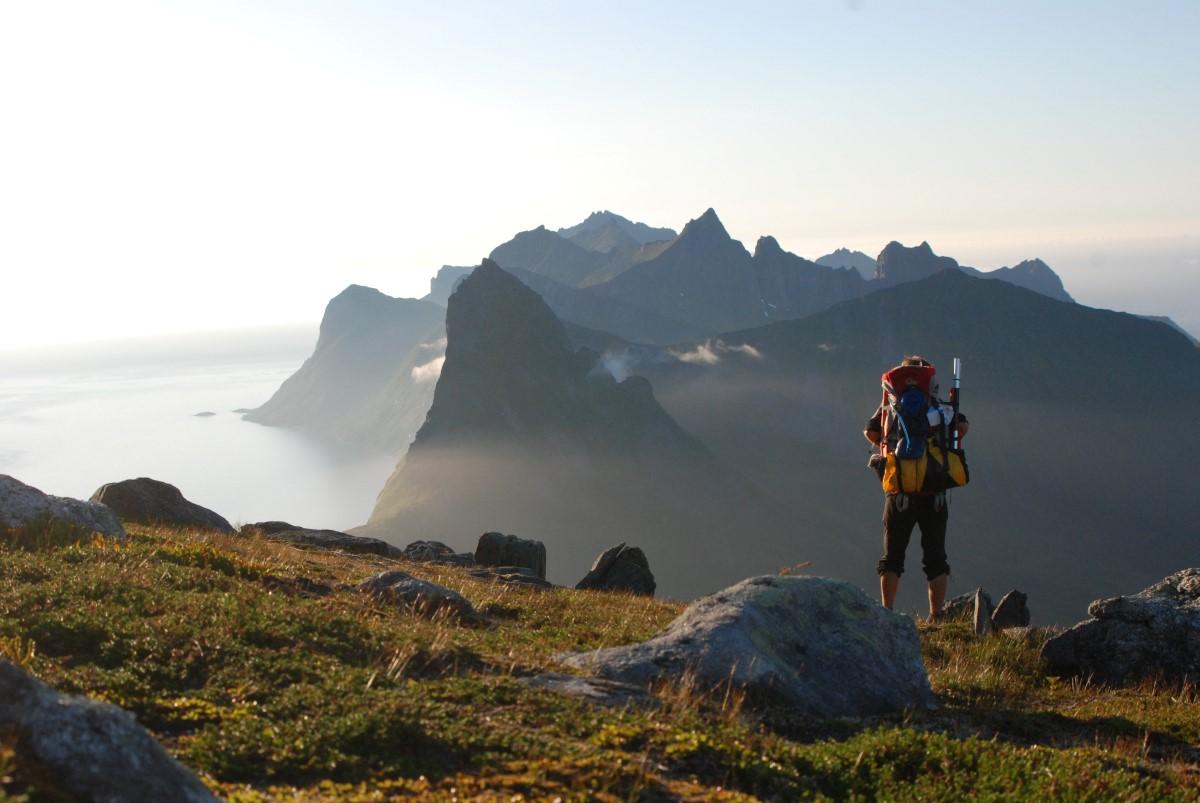
-
August 17, 2019 at 10:40 am #10692Matt (Admin)Keymaster
Wow, gorgeous scenery and great pictures!! Thanks for posting!
-
-
June 25, 2019 at 9:25 am #10135ColdBikeParticipant
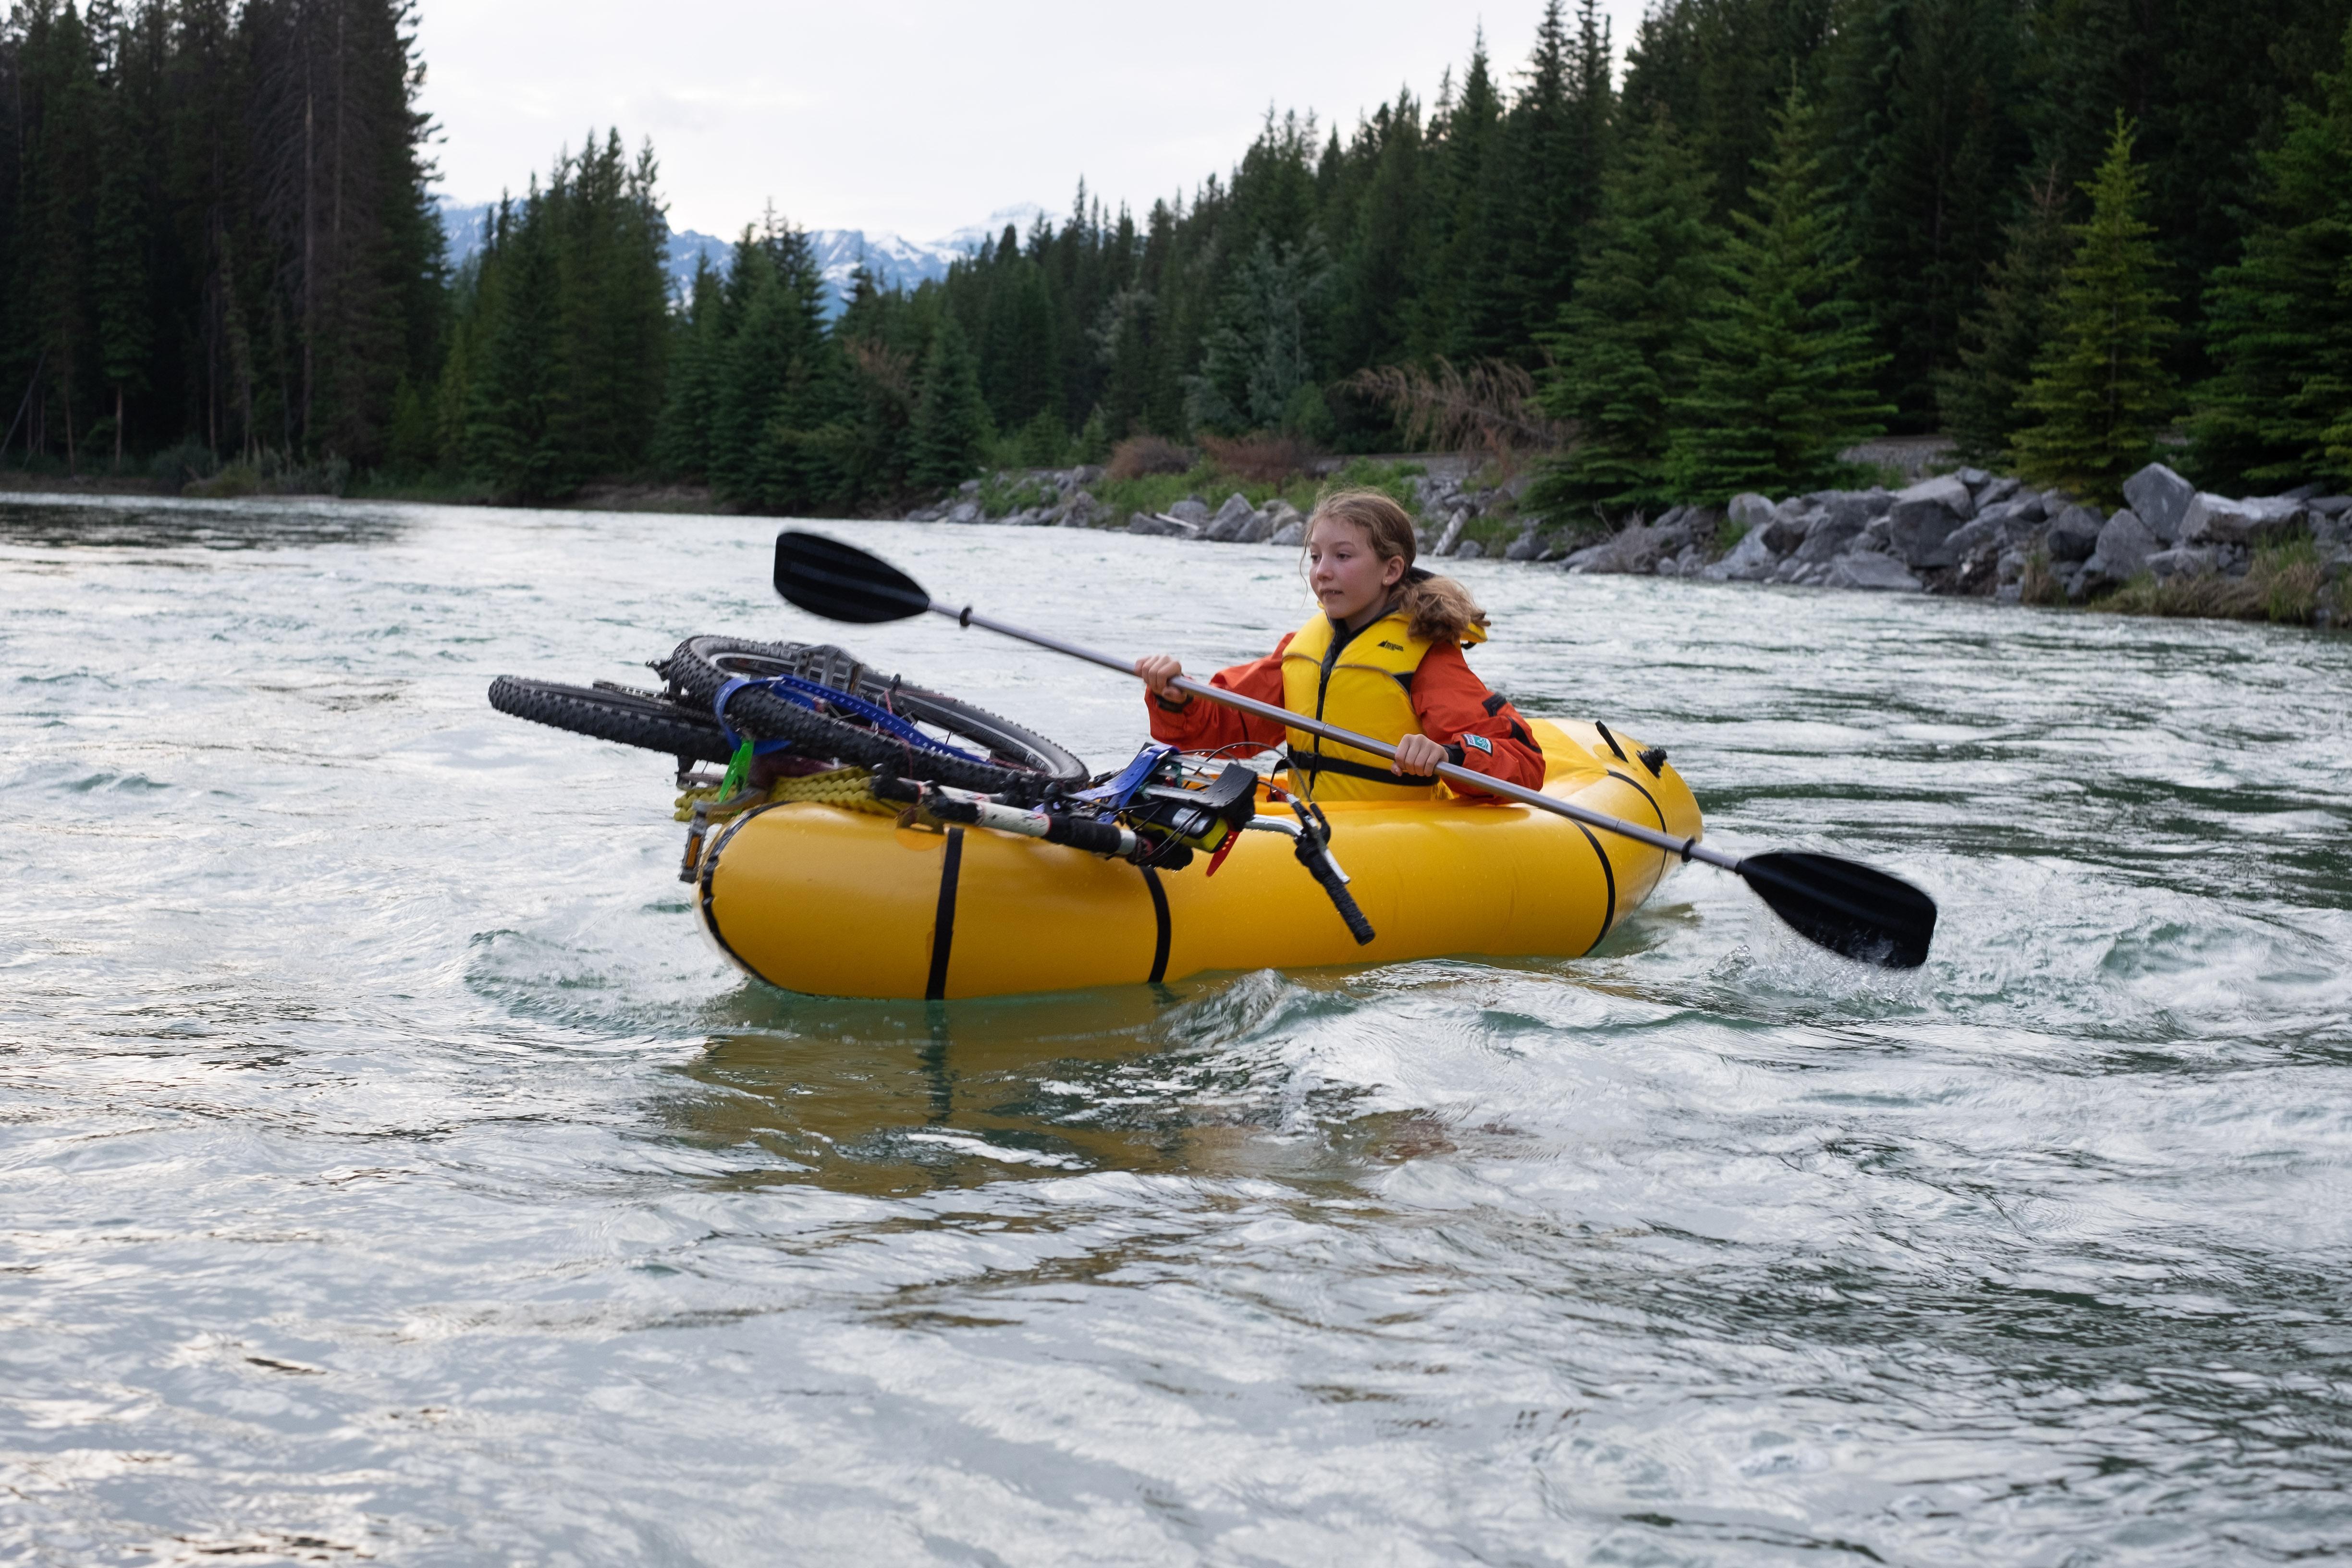 I also wrote up our first bikerafting trip here: https://www.coldbike.com/2019/06/25/solstice-weekend-bikerafting-overnight-on-the-bow-river/
-
June 25, 2019 at 10:42 am #10138Matt (Admin)Keymaster
Great trip report! Thanks for posting!
-
-
June 17, 2019 at 8:51 pm #10122DerekParticipant
Man, I LOVE my big boss oversized DIYpackraft. My son and I landed our first king salmon from the packraft today. I know you discontinued the Voyageur, but I’d love to have the option to buy plans for one in the future, when this one wears out. Such a great utility packraft.
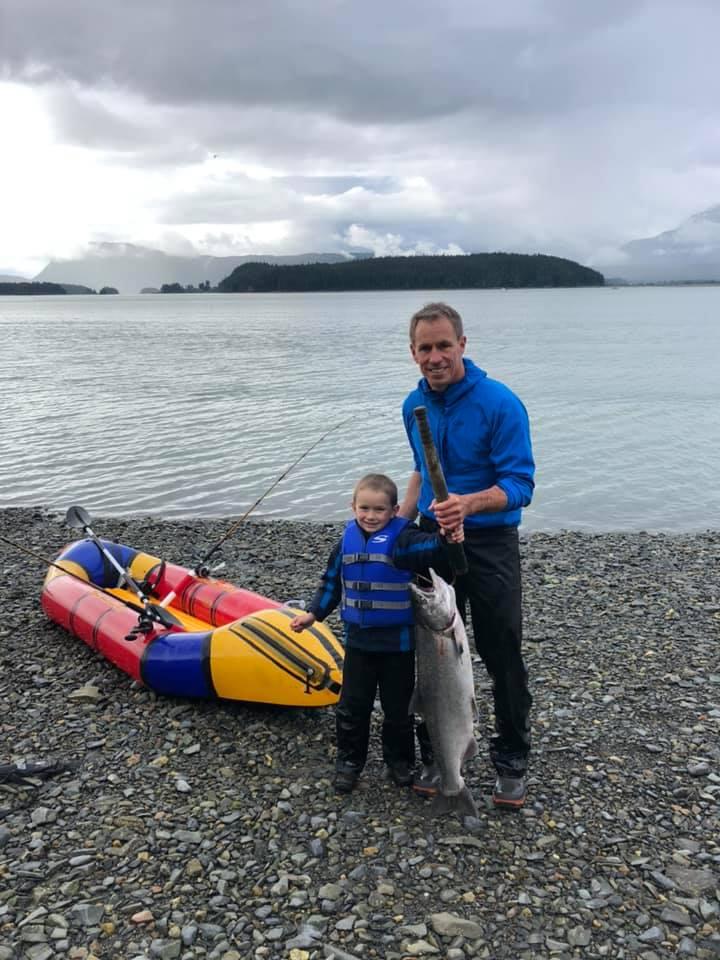
-
June 25, 2019 at 10:44 am #10139Matt (Admin)Keymaster
Beauty!
-
-
May 17, 2019 at 9:33 pm #9958DerekParticipant
First Dolly Varden of the year……..
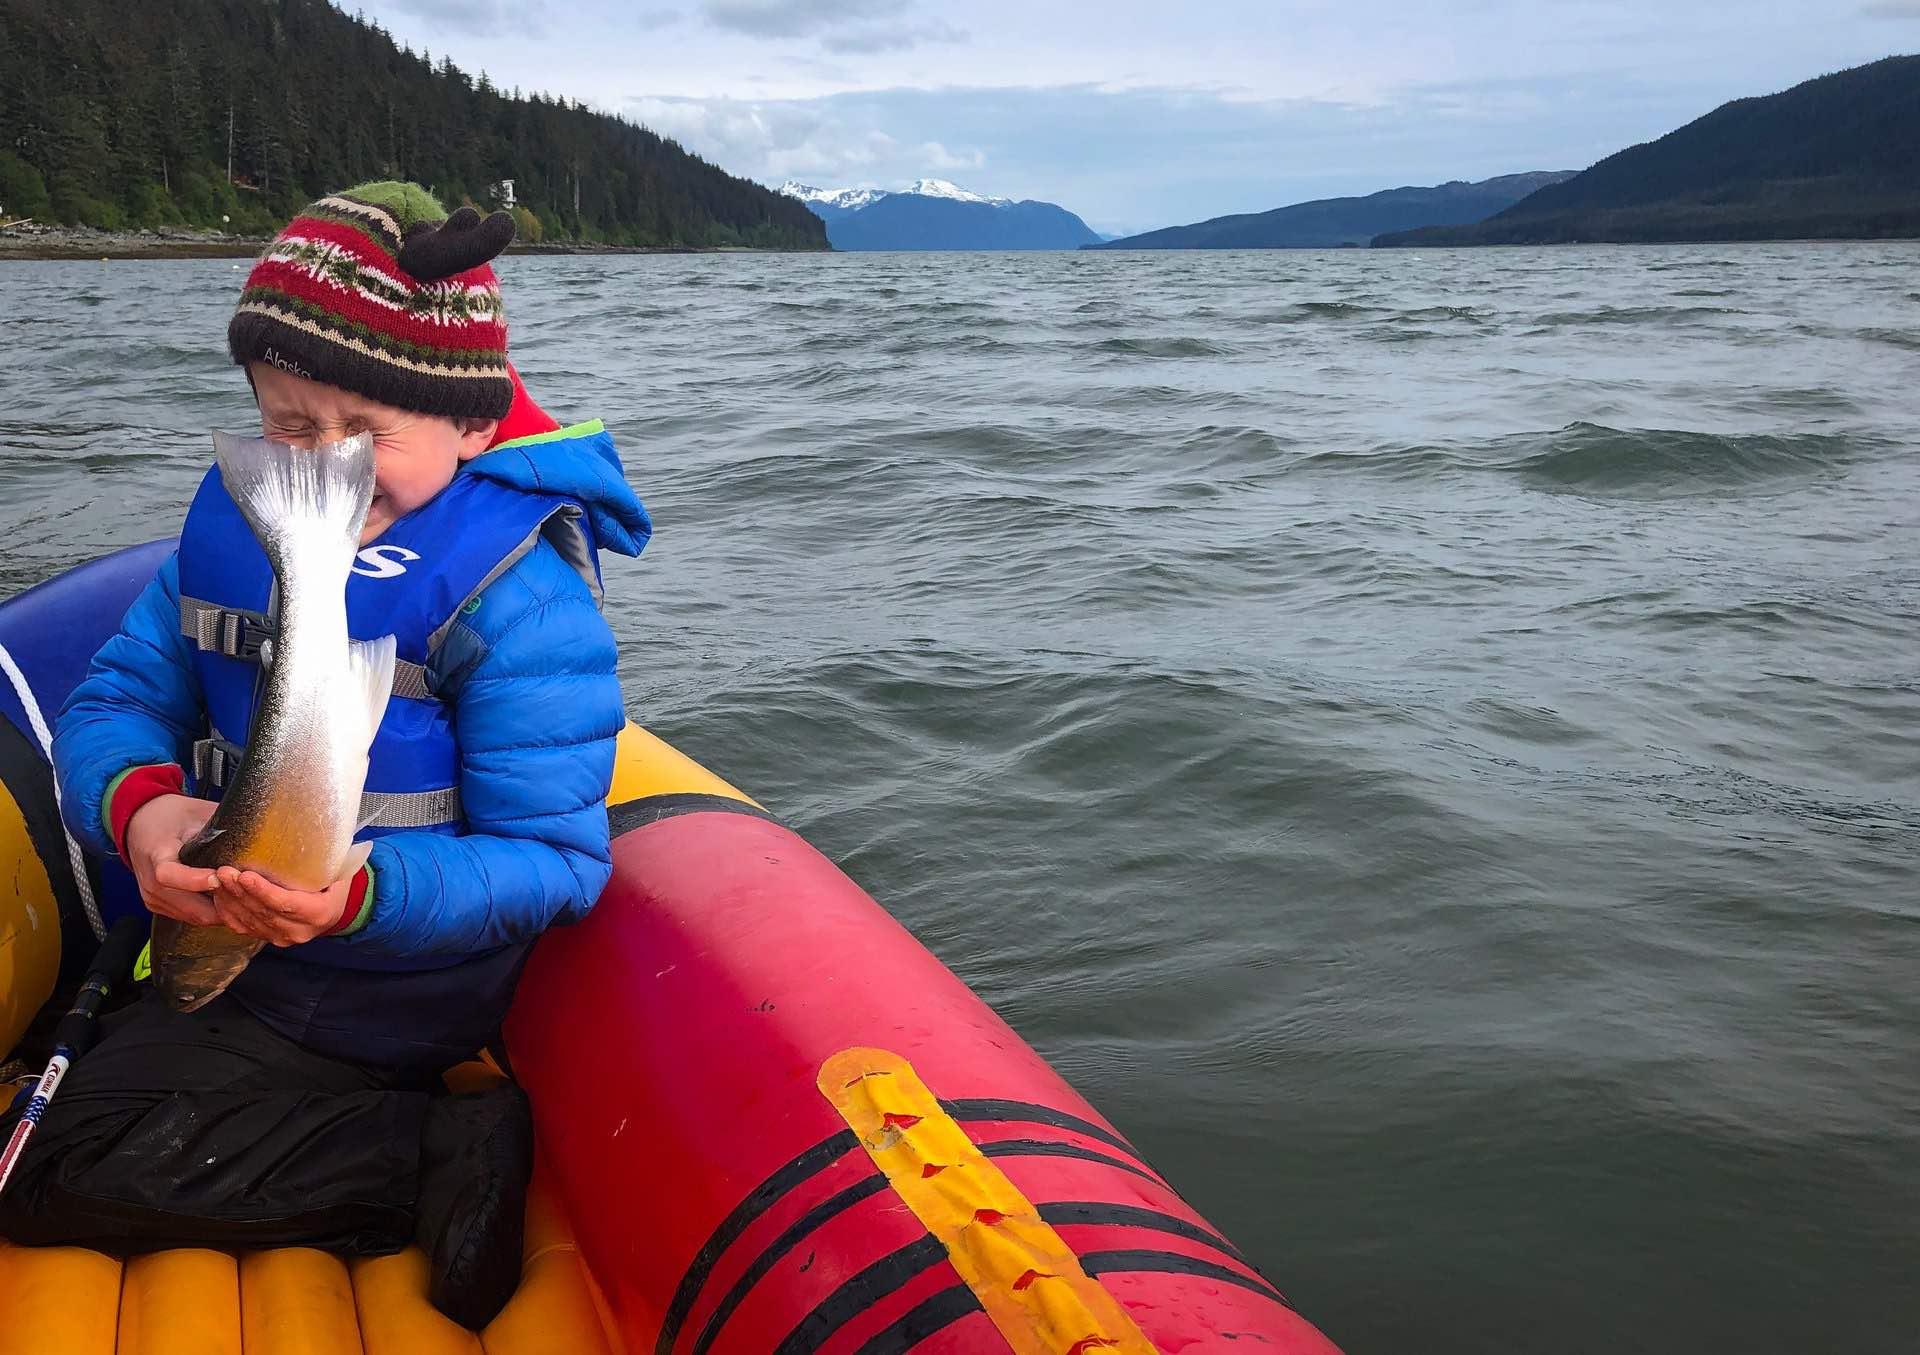
-
May 21, 2019 at 12:32 pm #9972Matt (Admin)Keymaster
Hahaha!
Good looking fish!
-
-
May 14, 2019 at 8:50 pm #9795DerekParticipant
Year two on my ghetto Voyageur build. Paddled 11 miles today on a bear hunt, didn’t find a bear. Pictured with a full pack, rifle, and two crab pots. This thing is ugly, but it serves a purpose.
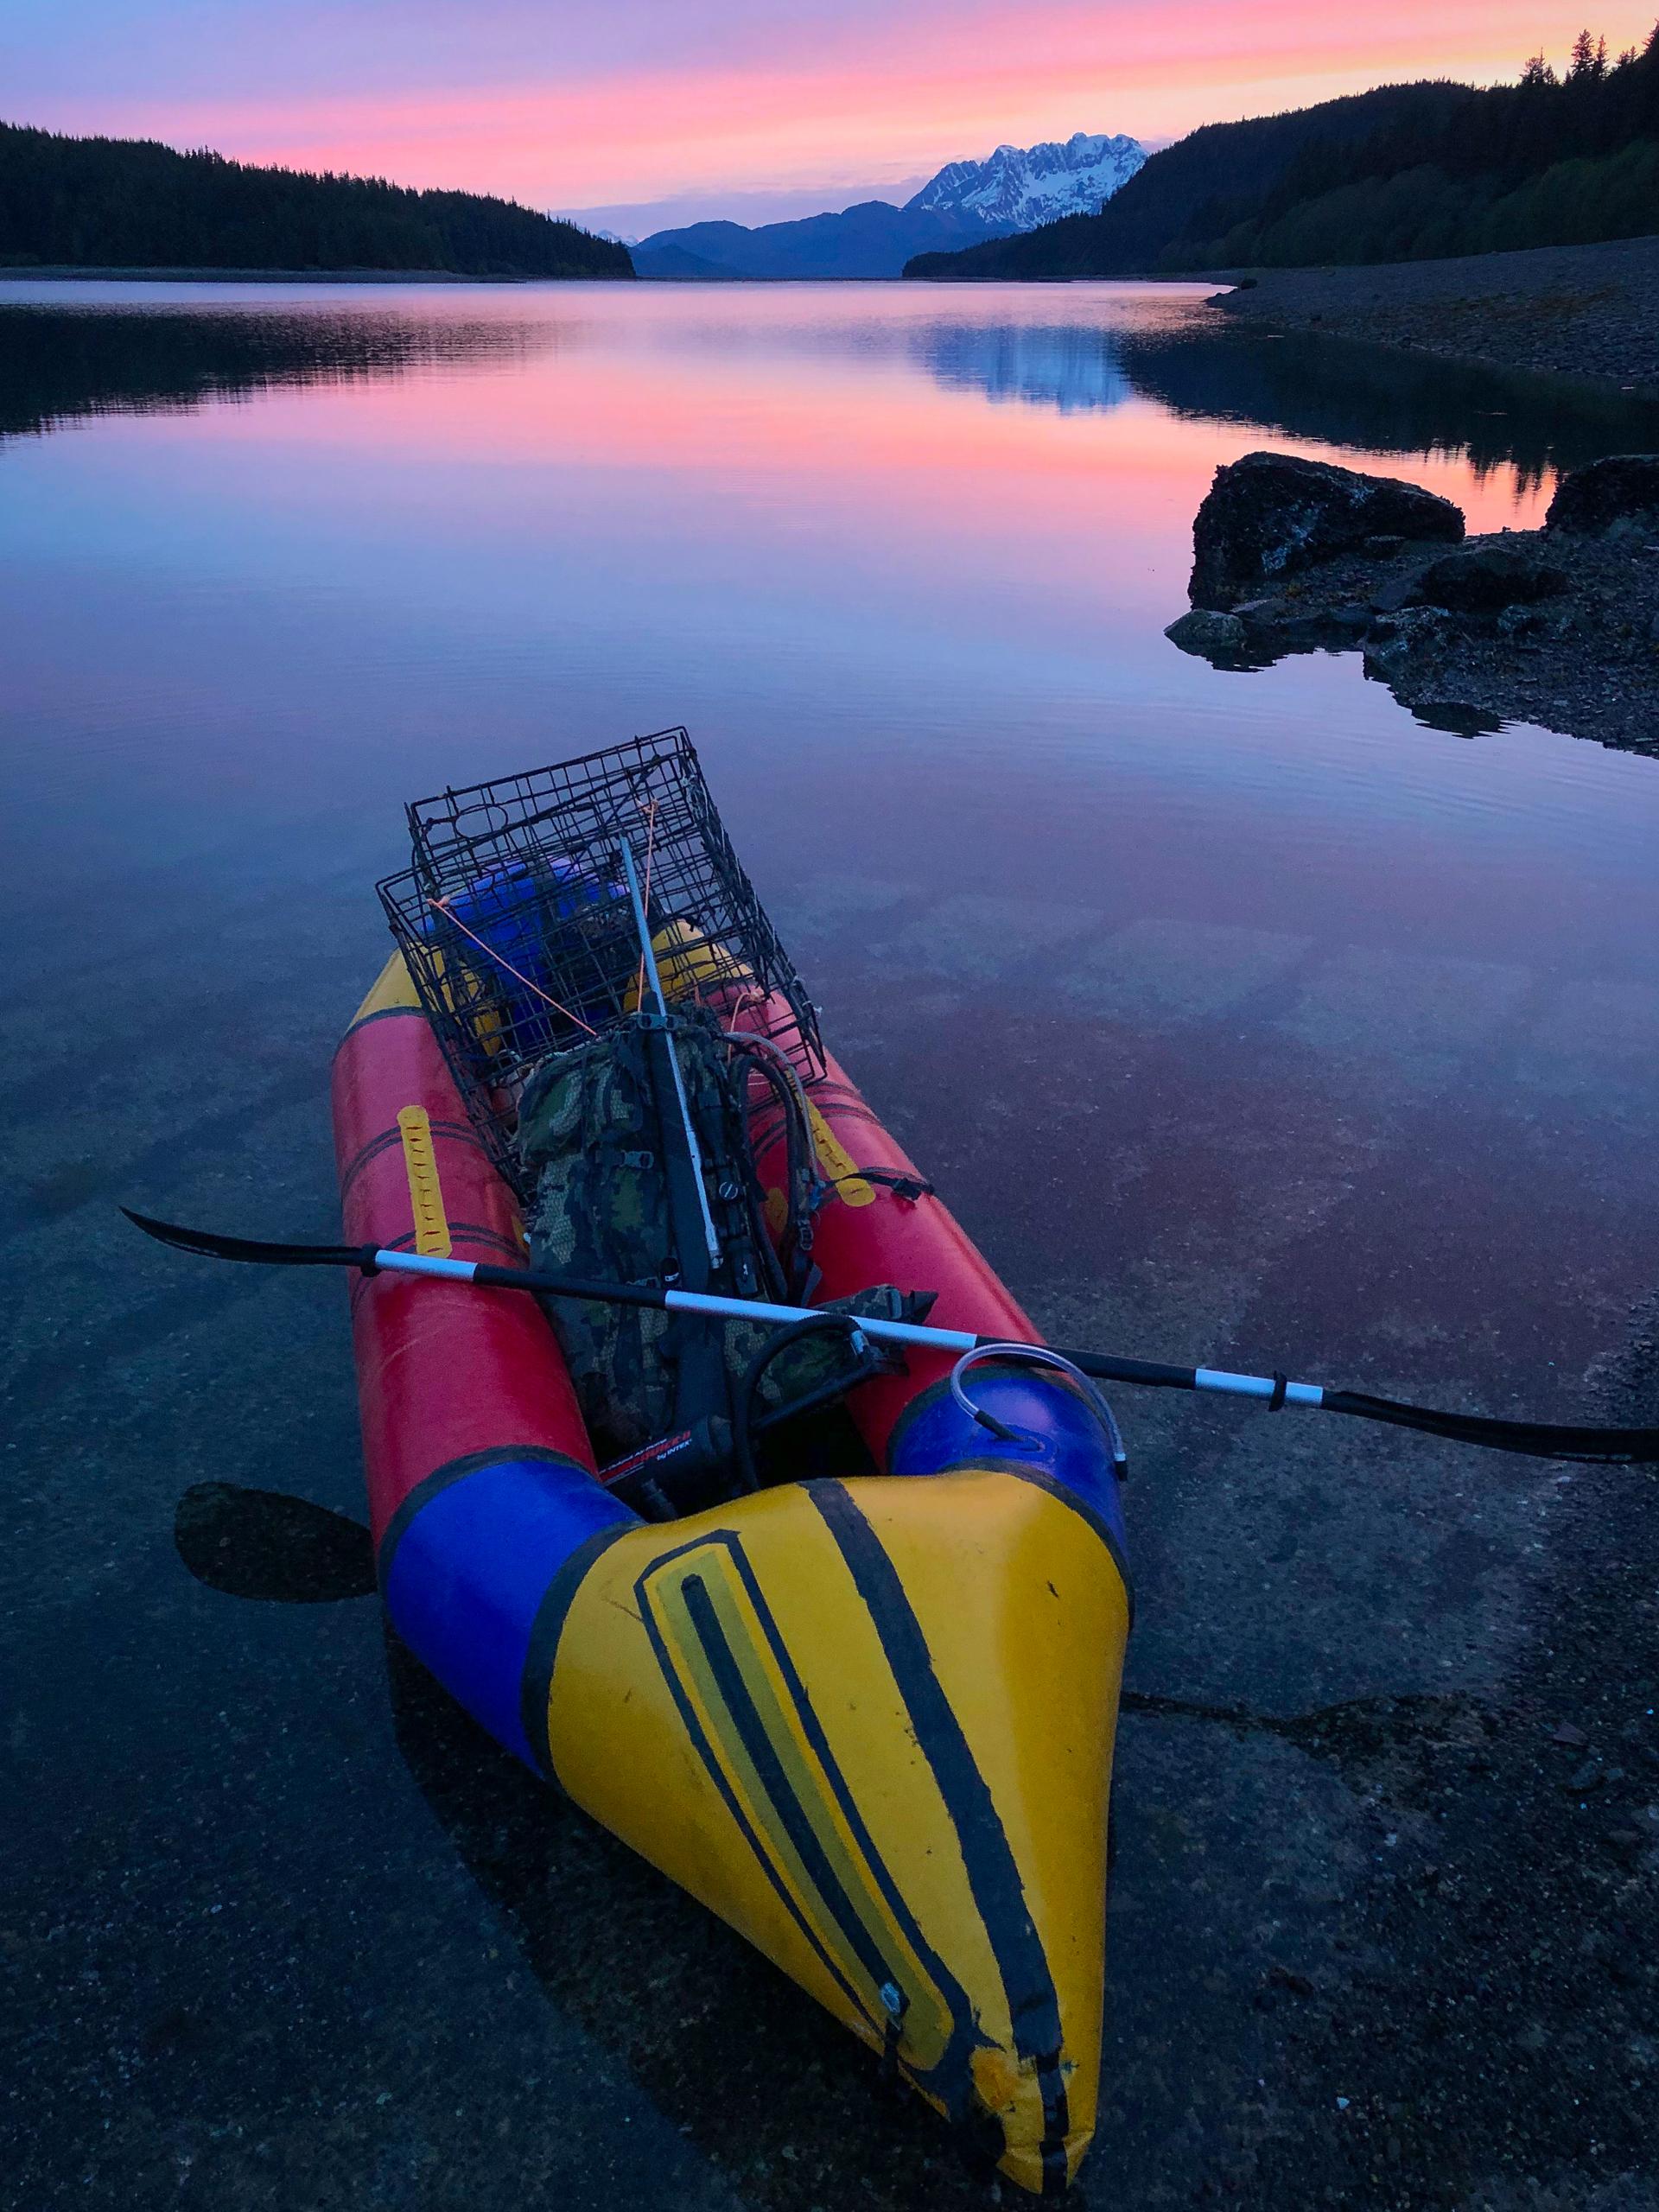
-
May 15, 2019 at 8:04 am #9796Matt (Admin)Keymaster
Gorgeous shot!
-
-
April 28, 2019 at 2:25 am #9489keopgaardParticipant
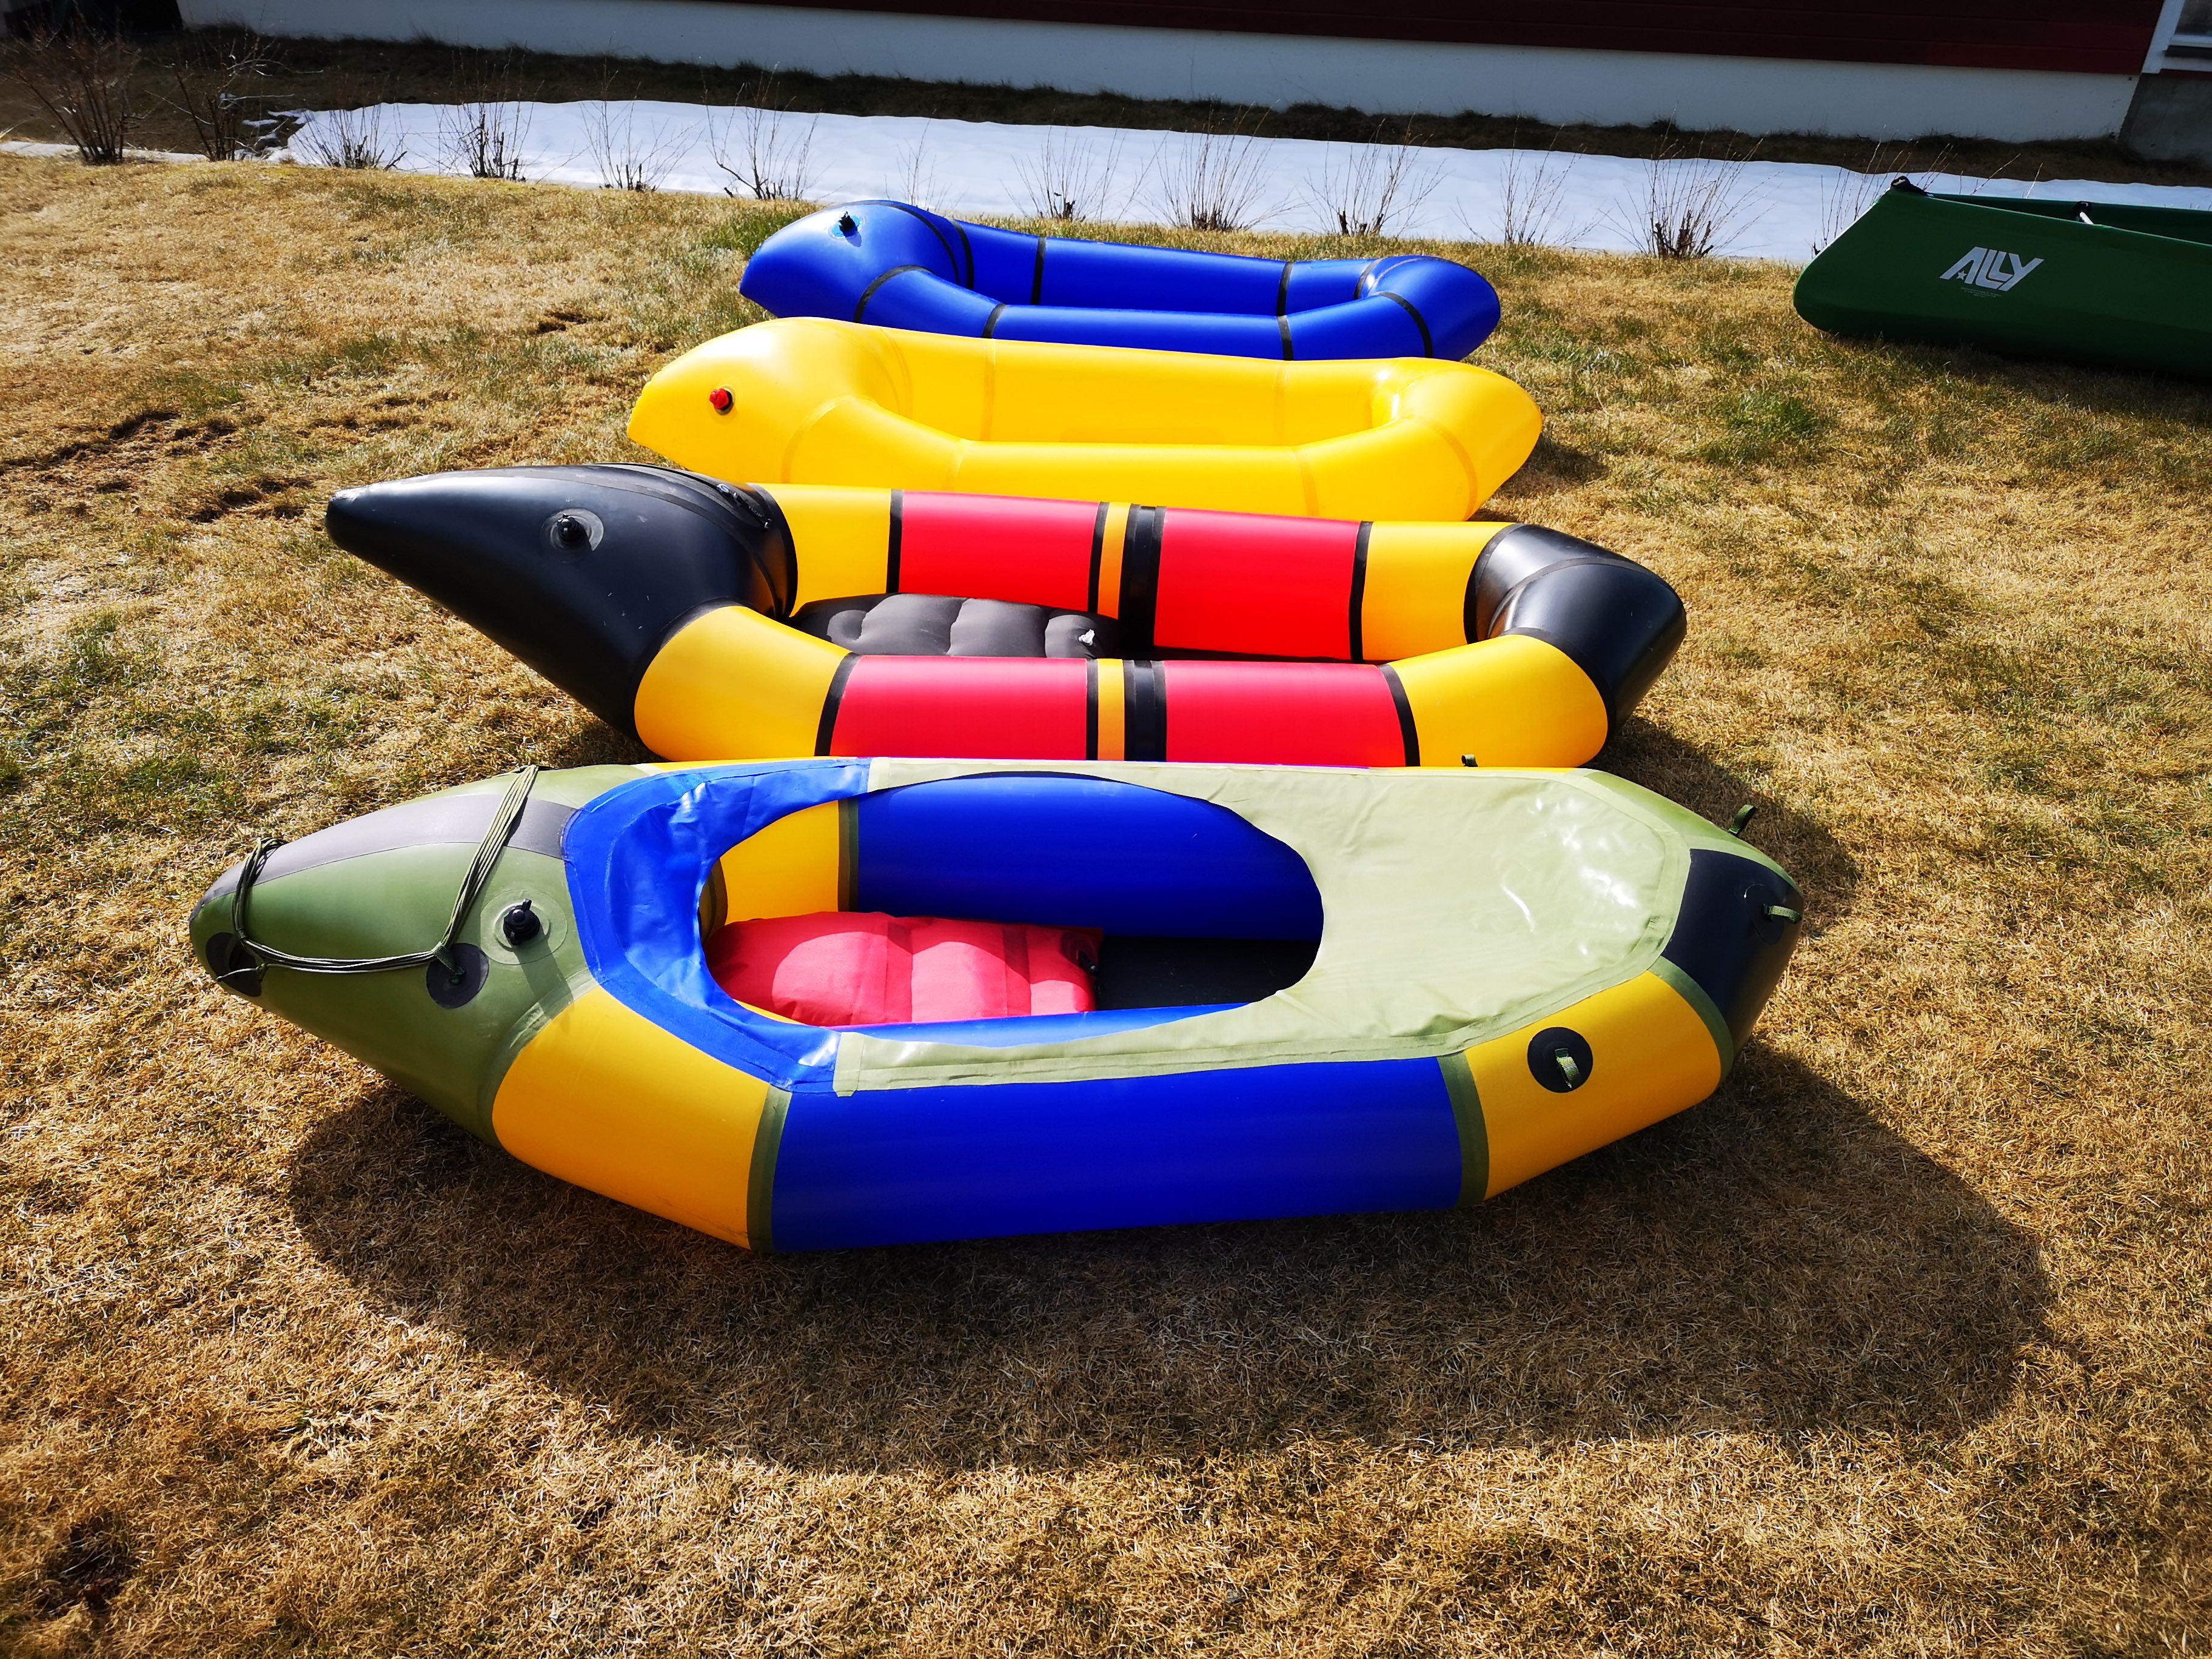
-
April 29, 2019 at 7:31 am #9498Matt (Admin)Keymaster
Beautiful!
-
-
January 26, 2019 at 7:31 pm #8694DerekParticipant
Crabbing near Juneau with a DIYpackraft, and hauling a deer off of Admiralty Island with a custom HUGE Voyageur DIYpackraft and my smaller one.
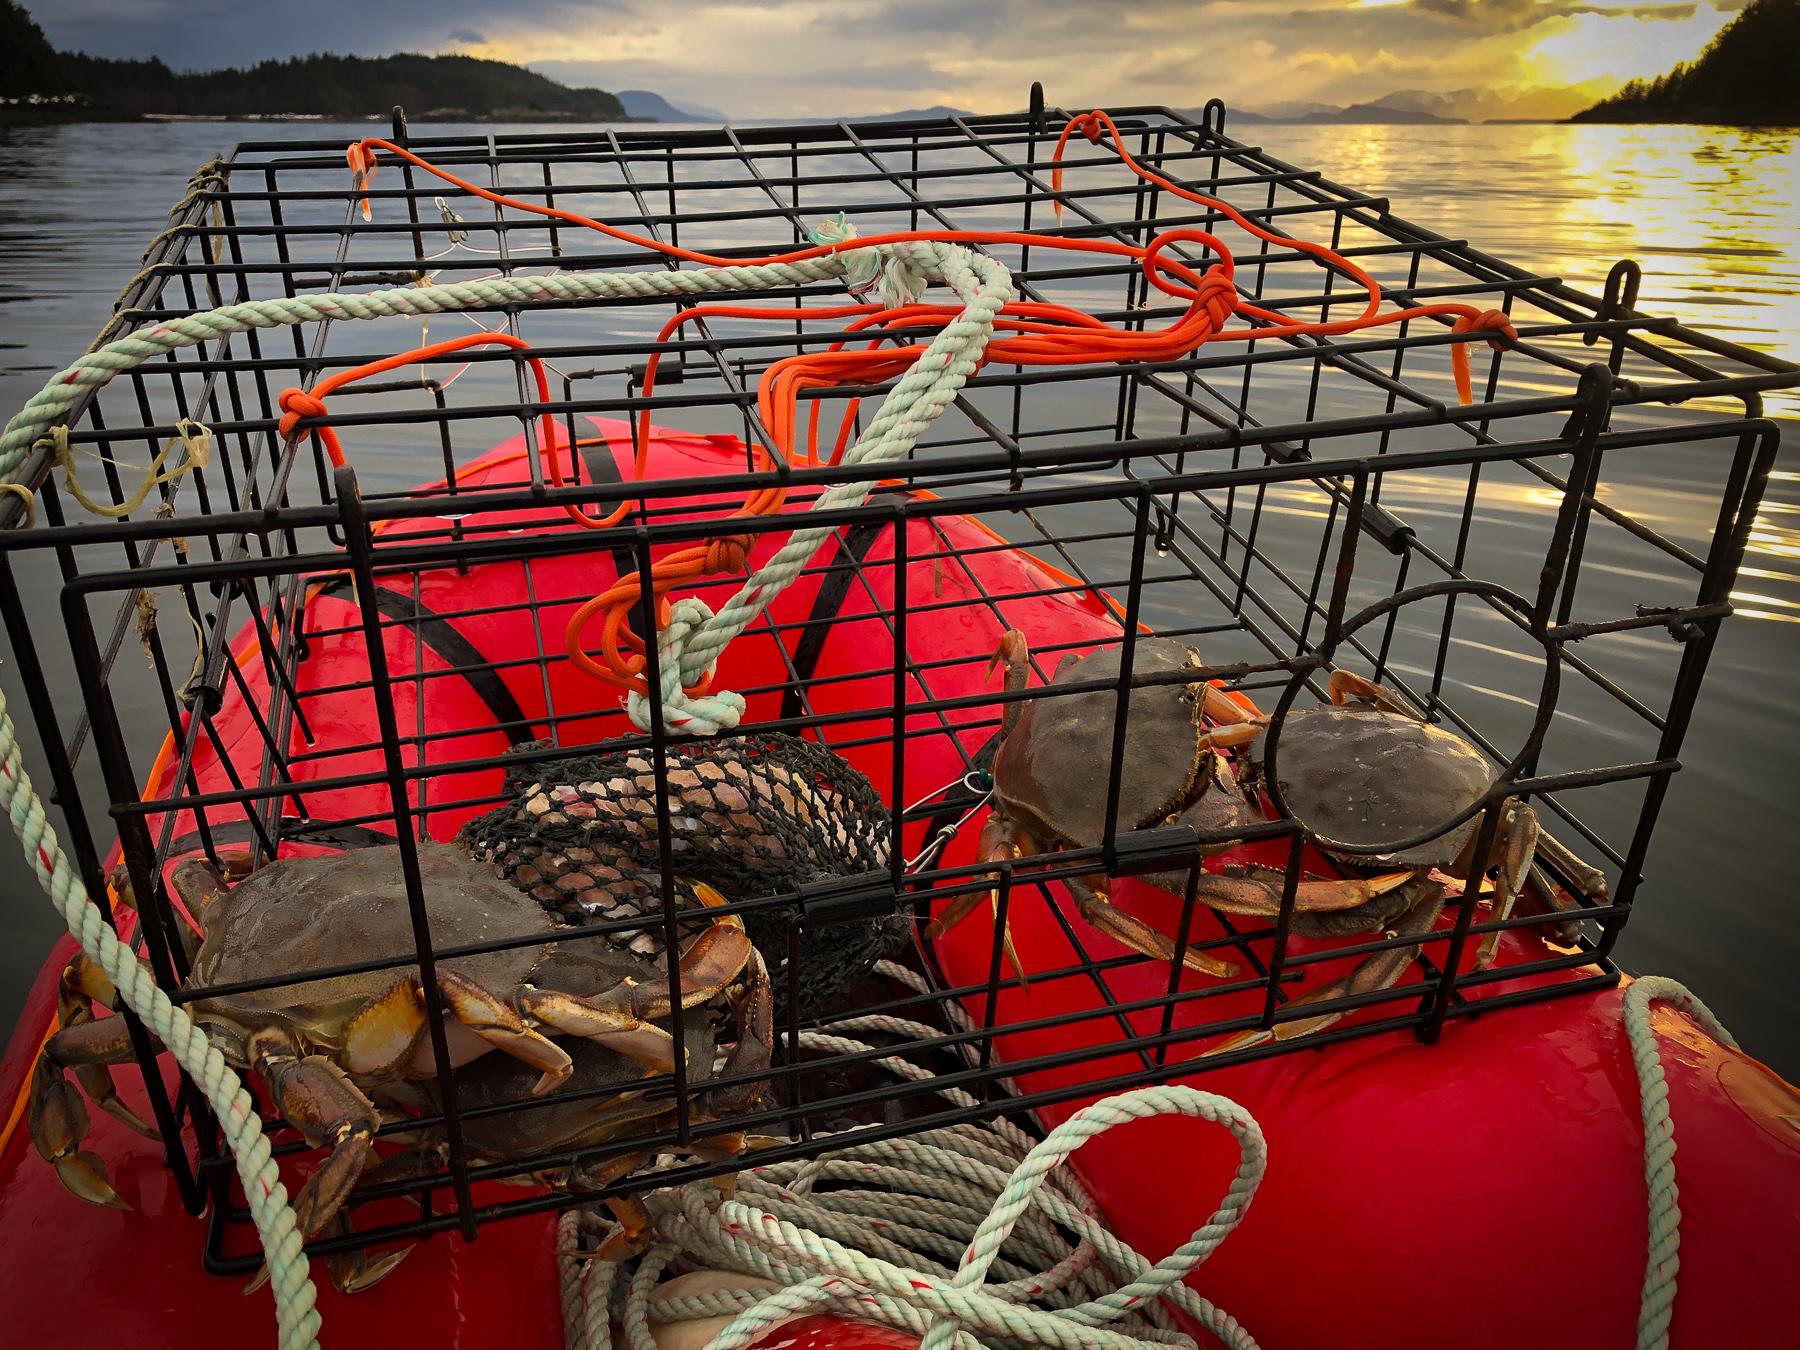
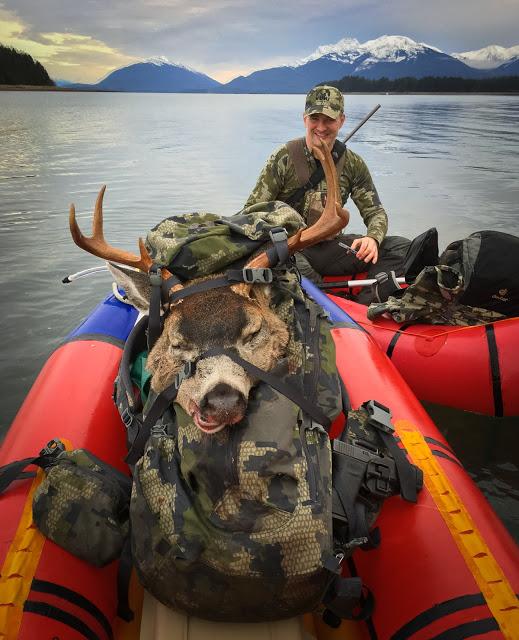
-
February 21, 2019 at 11:31 pm #8939petespistolParticipant
That is a sweet bounty! Beautiful buck. Would you be interested in giving tips to the Juneau Makerspace? We are planning a group build and think it would be great to tap the local builders to give tips as we get started building.
-
January 28, 2019 at 9:03 am #8703Matt (Admin)Keymaster
Congratulations! If you run out of room in your freezer, I might have room for a crab or two 😉
-
January 28, 2019 at 1:56 am #8701Kwok Wah LaiParticipant
Wow!👍👍👍
-
-
September 17, 2018 at 3:19 am #7033keopgaardParticipant
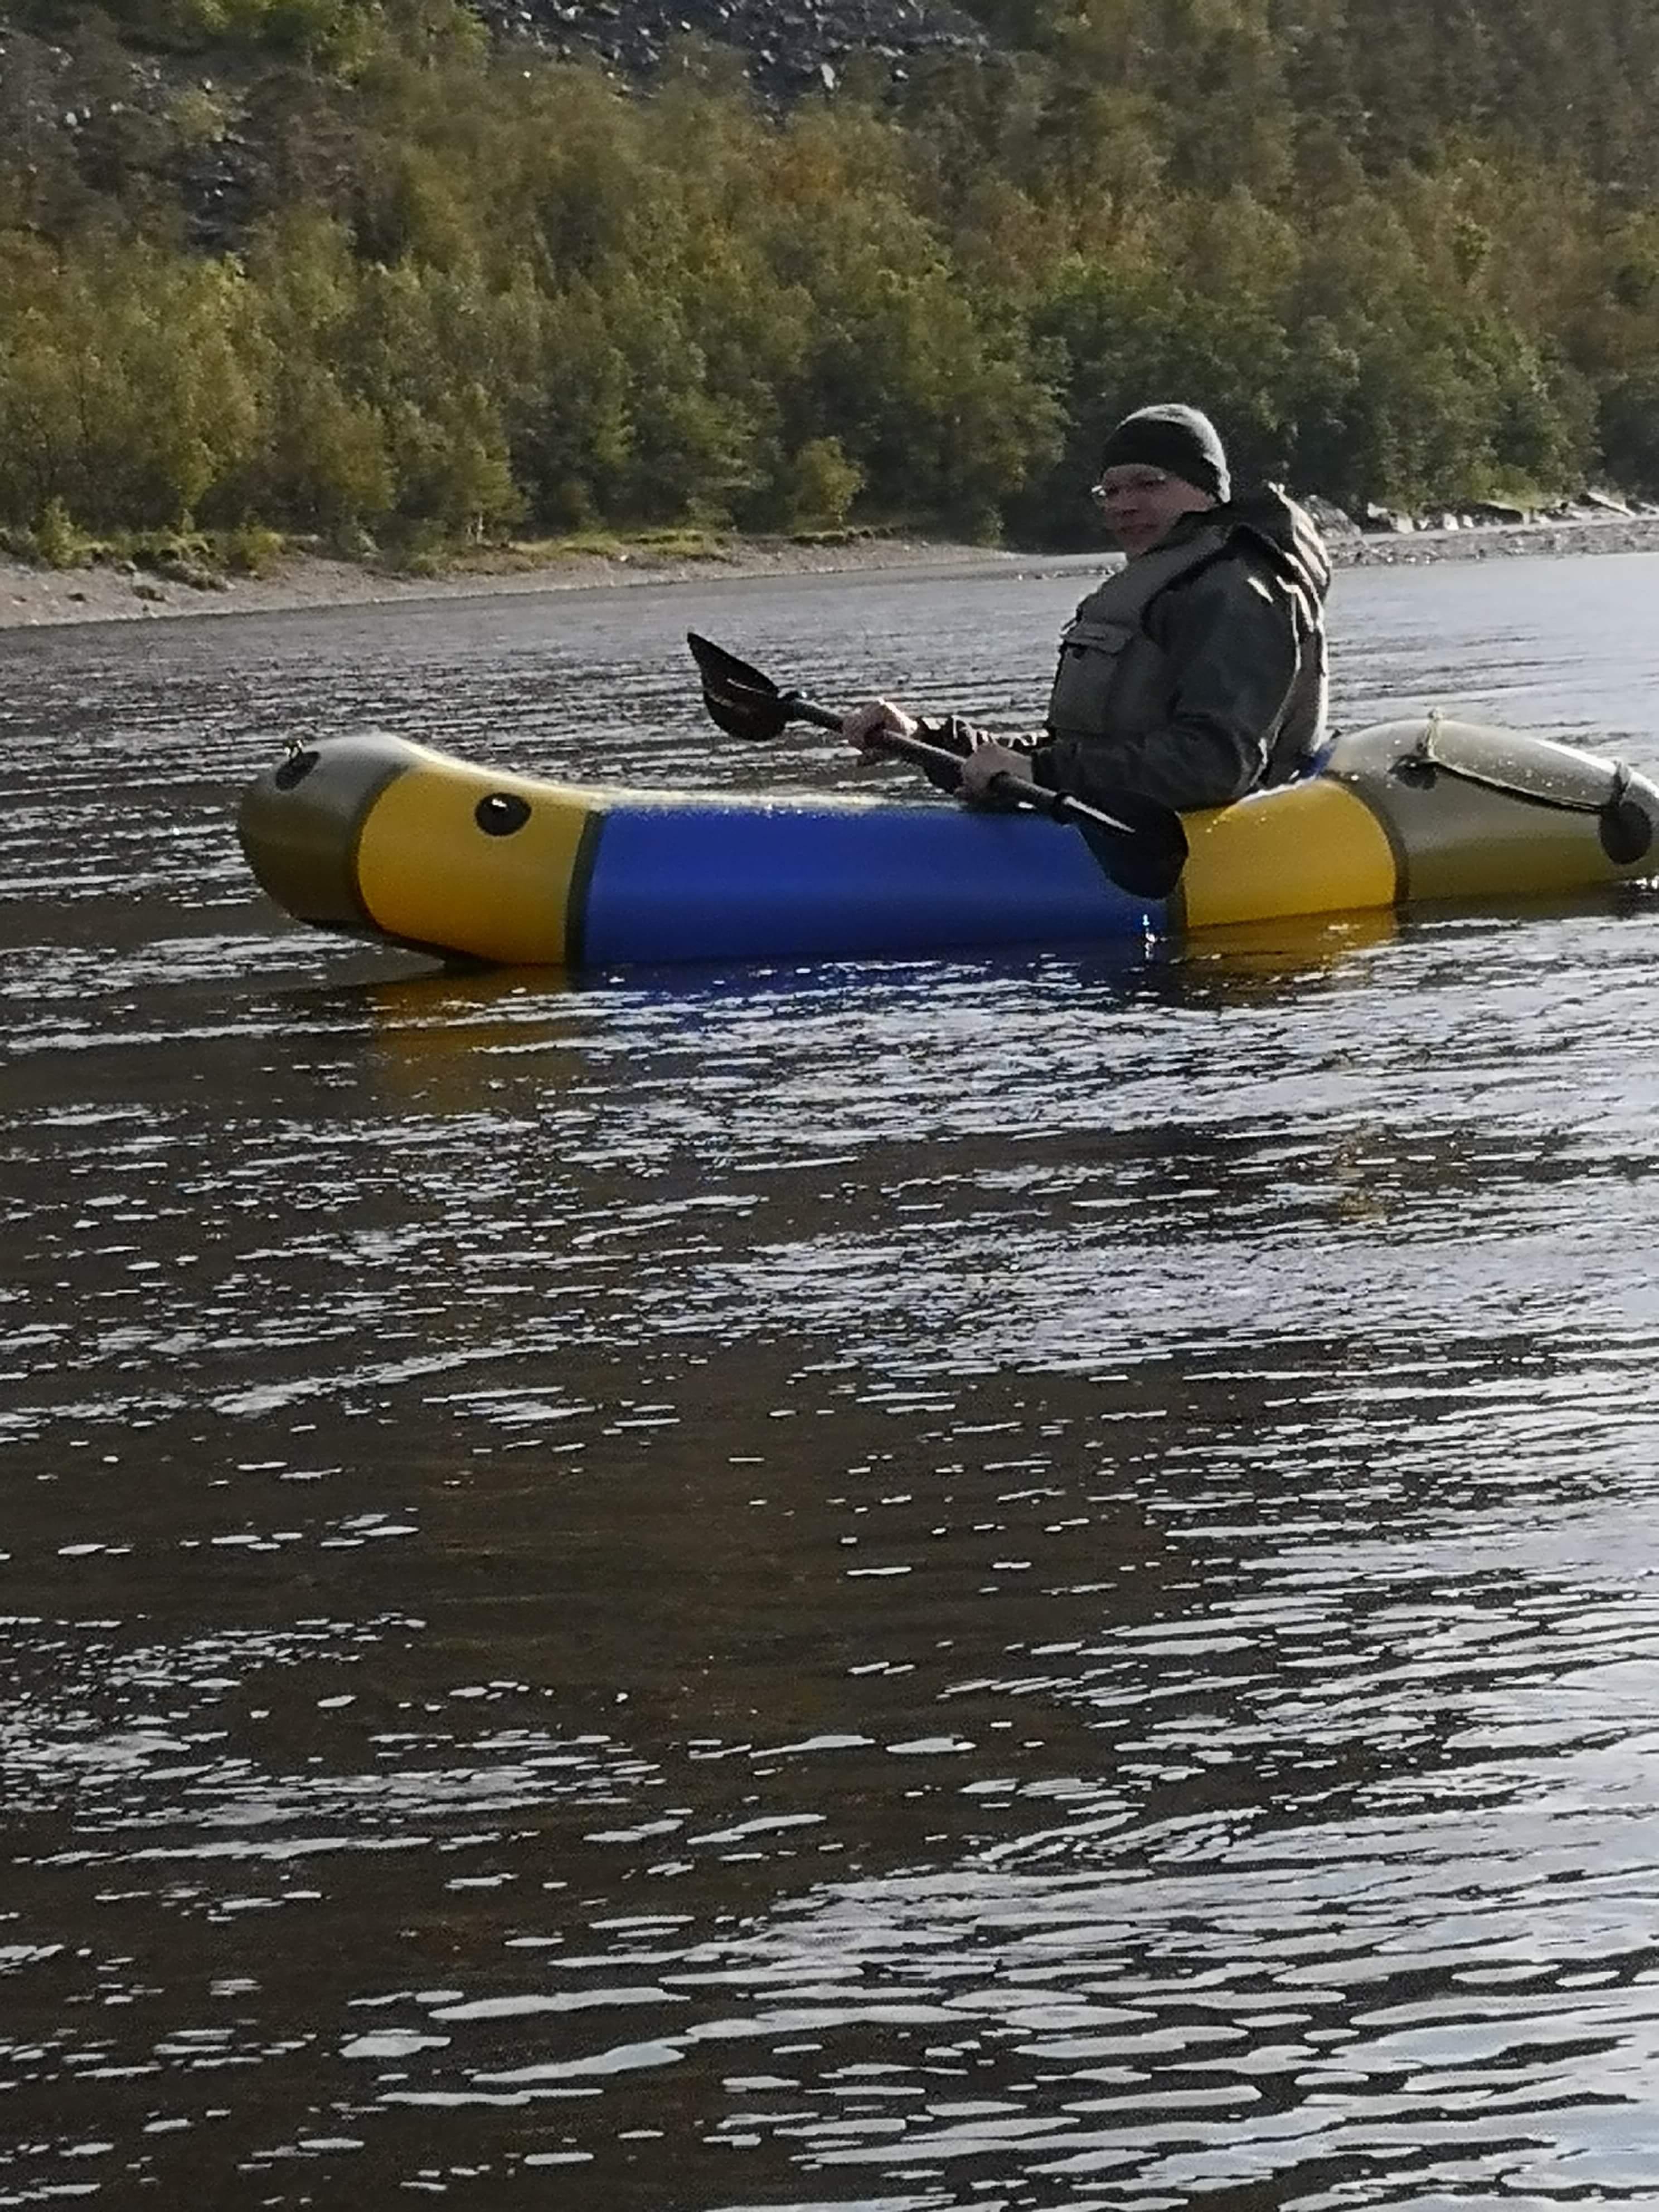
-
September 19, 2018 at 4:24 pm #7041Matt (Admin)Keymaster
Another great looking packraft – well done!
-
-
September 17, 2018 at 1:29 am #7031SvenskParticipant
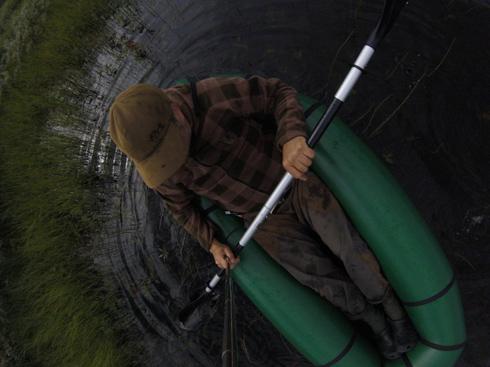
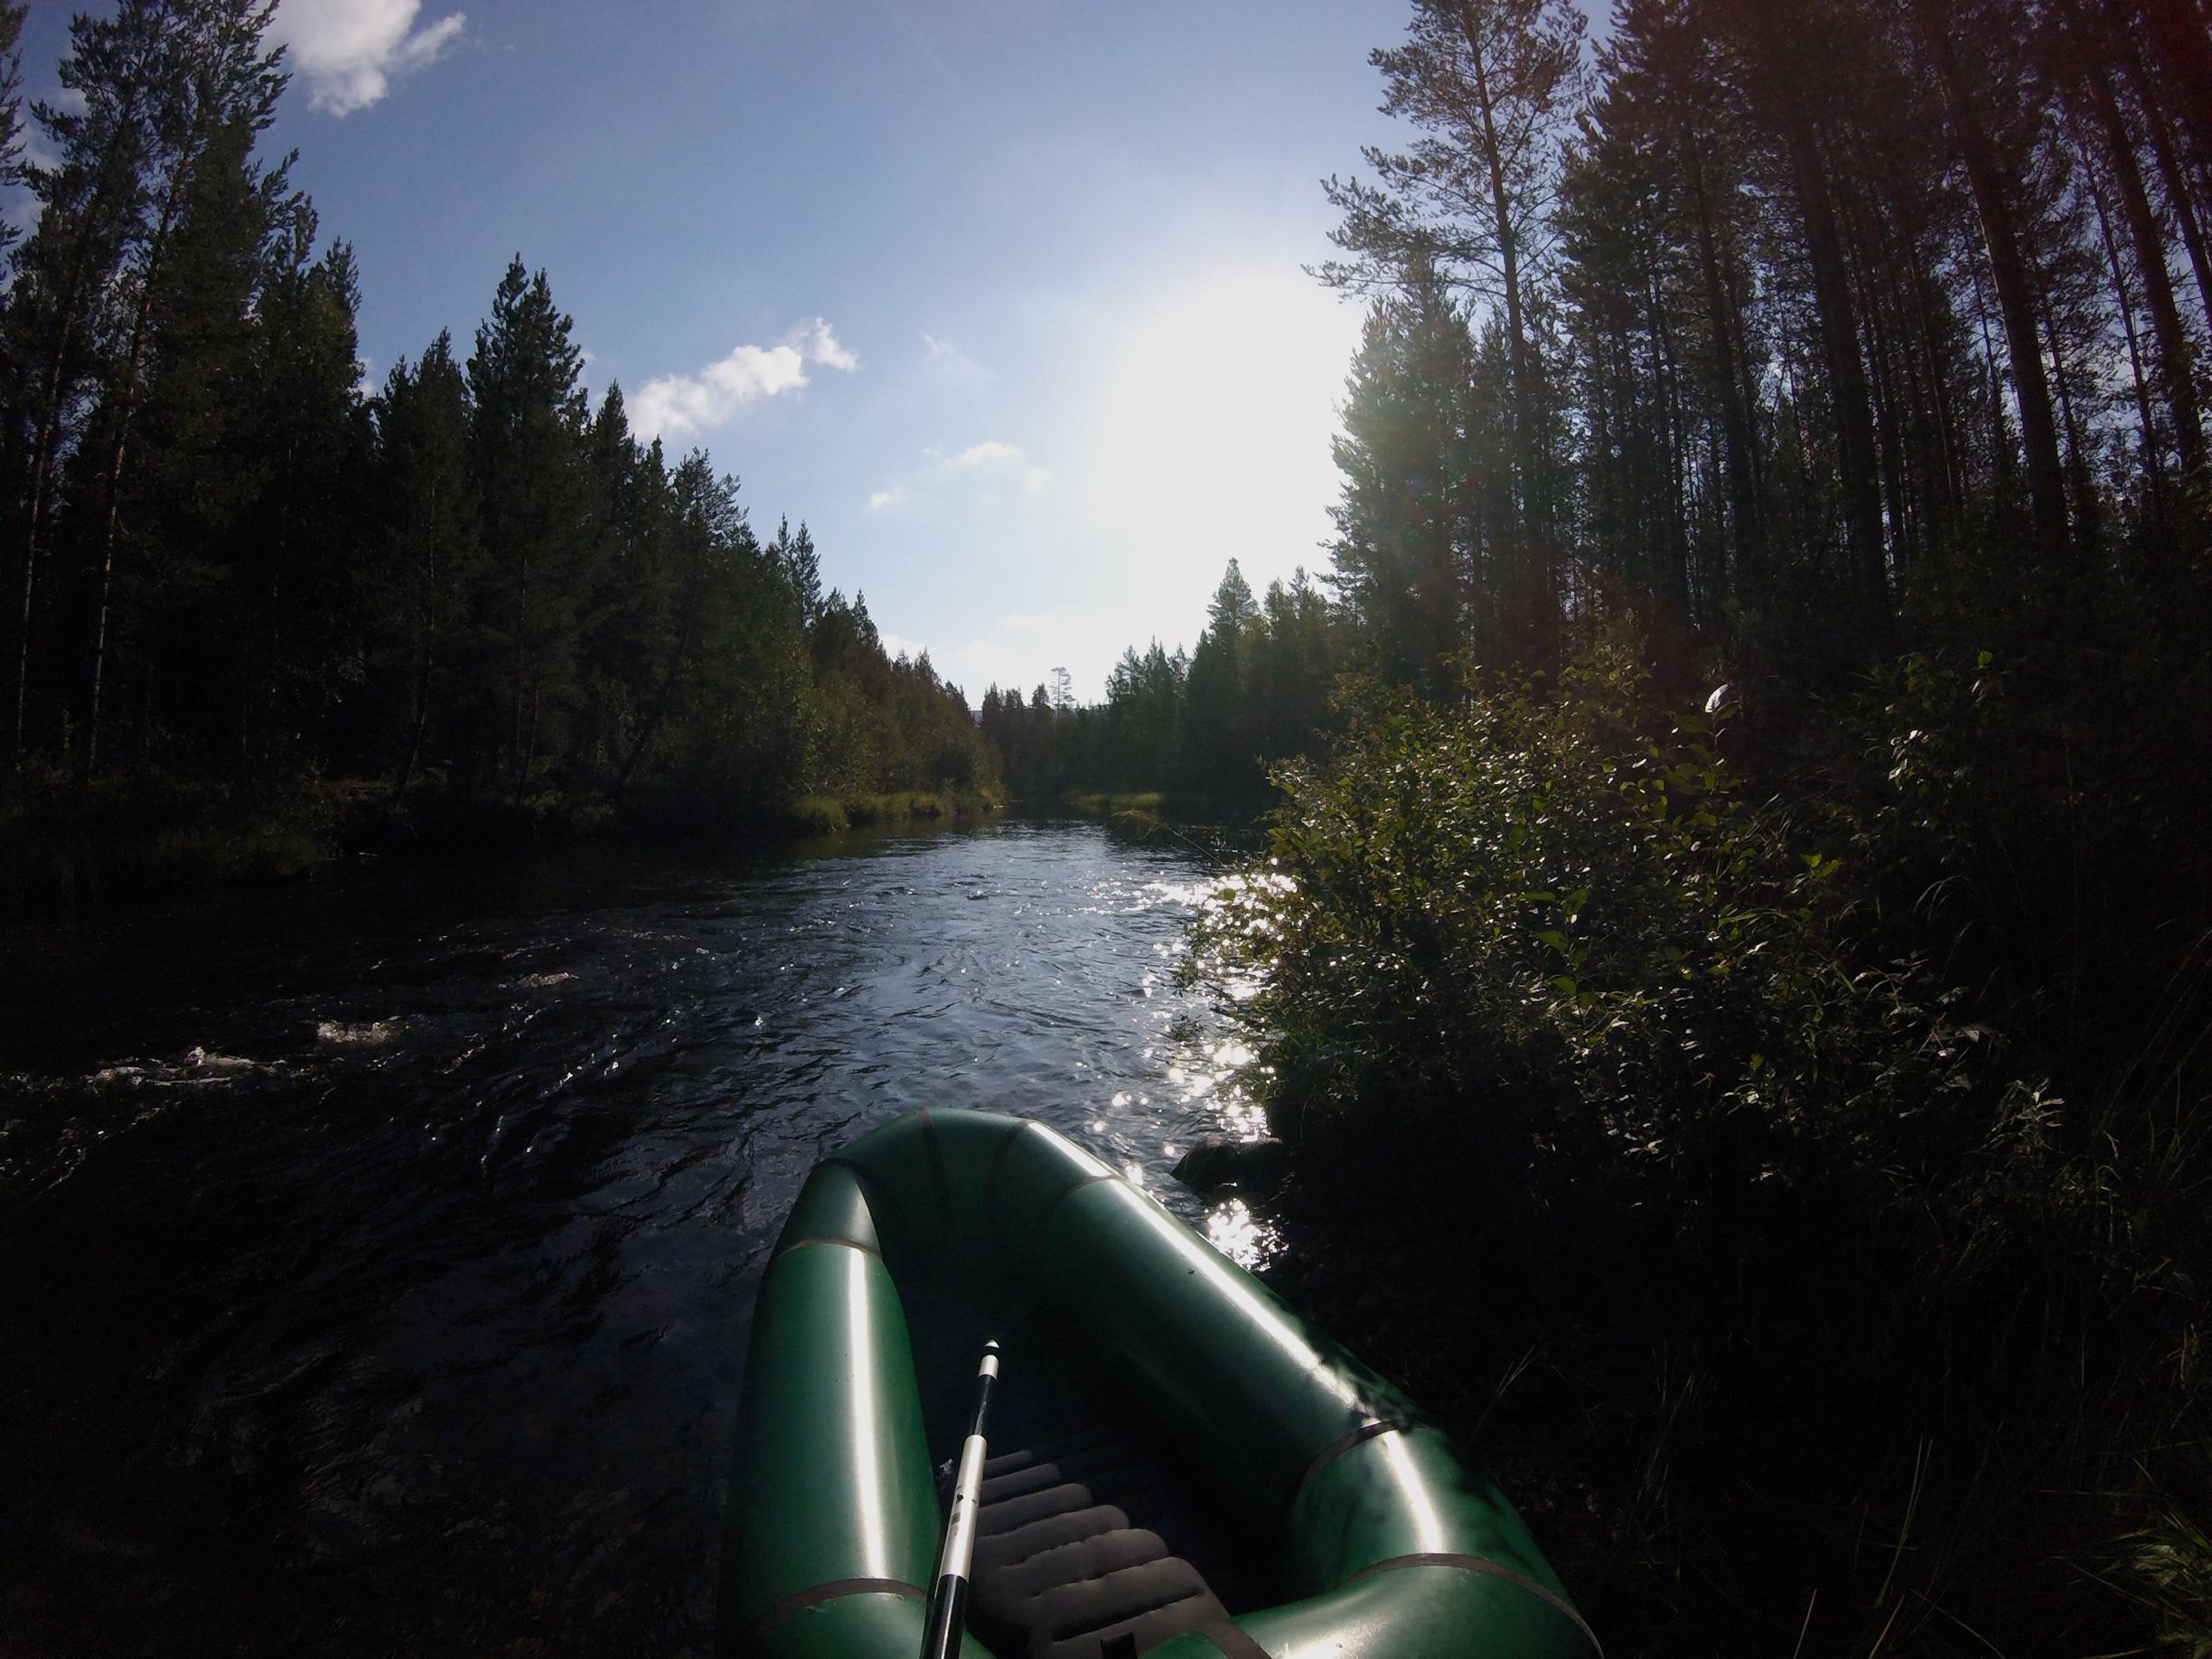
…my first trip with Packraft v2 to the north of sweden. It was awesome!!! Like it so much…
-
This reply was modified 7 years, 9 months ago by Svensk.
-
September 19, 2018 at 4:23 pm #7040Matt (Admin)Keymaster
Excellent!
-
This reply was modified 7 years, 9 months ago by
-
August 30, 2018 at 2:28 pm #6978alaskastinsonParticipant
Figuring out the attachment and balance for the fat bike. The raft fits easily in the seat bag. paddles on the handle bars. I still had to wear a back pack for the PFD. Next purchase will be an inflatable one.
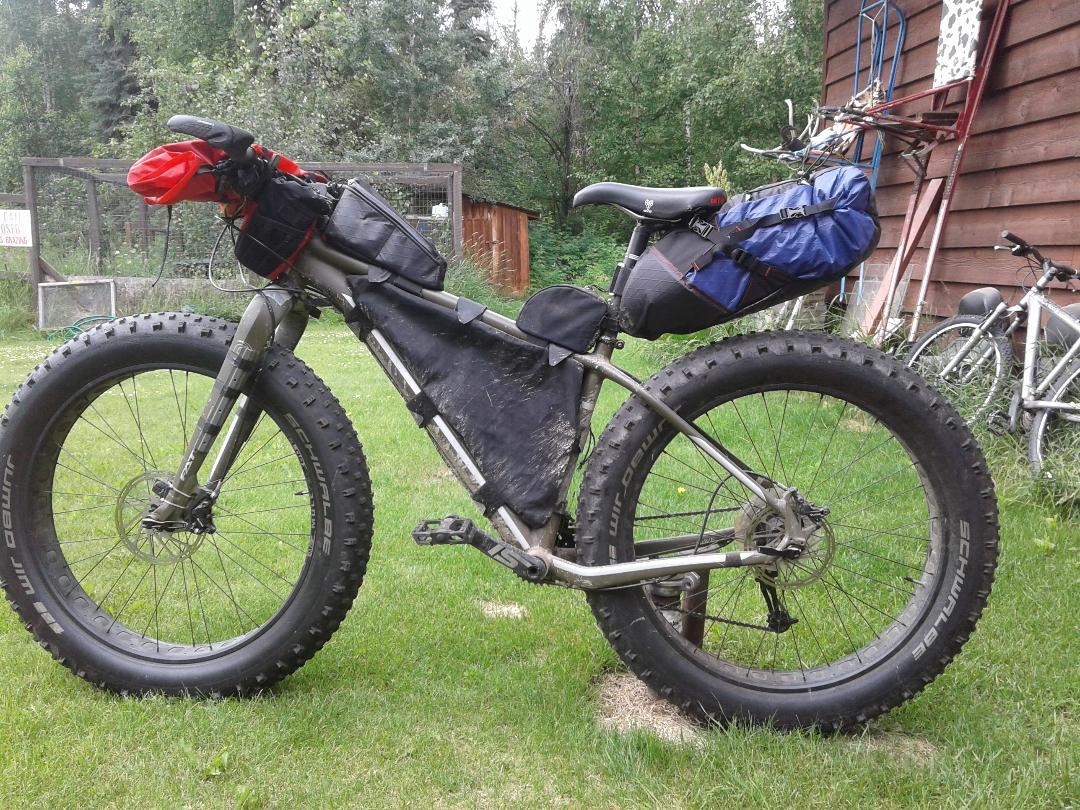
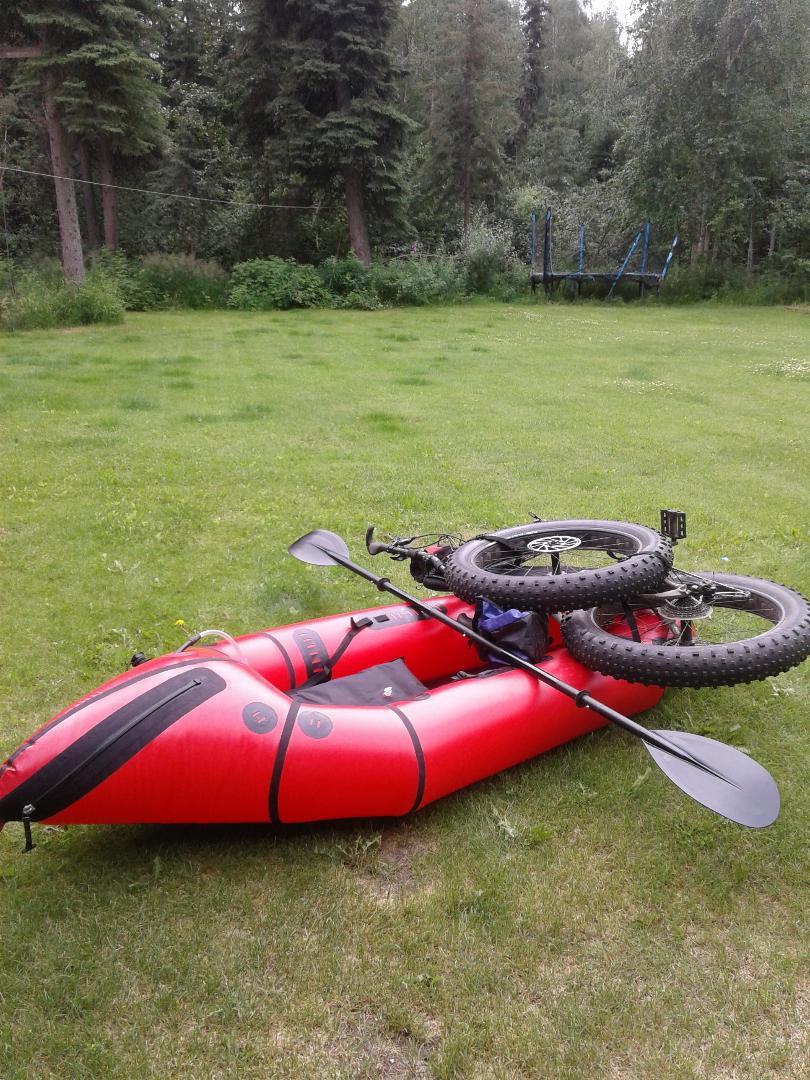
(Yep, the zipper is on up side down. It seemed OK when it was all apart. Next time…)
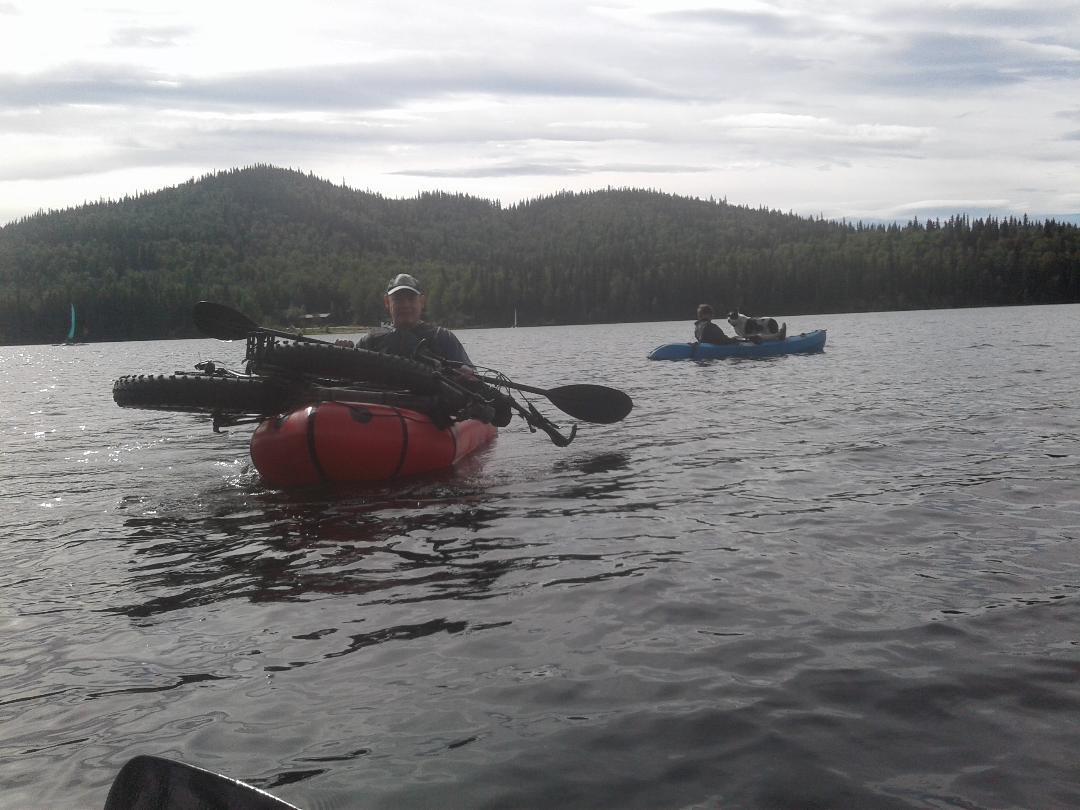
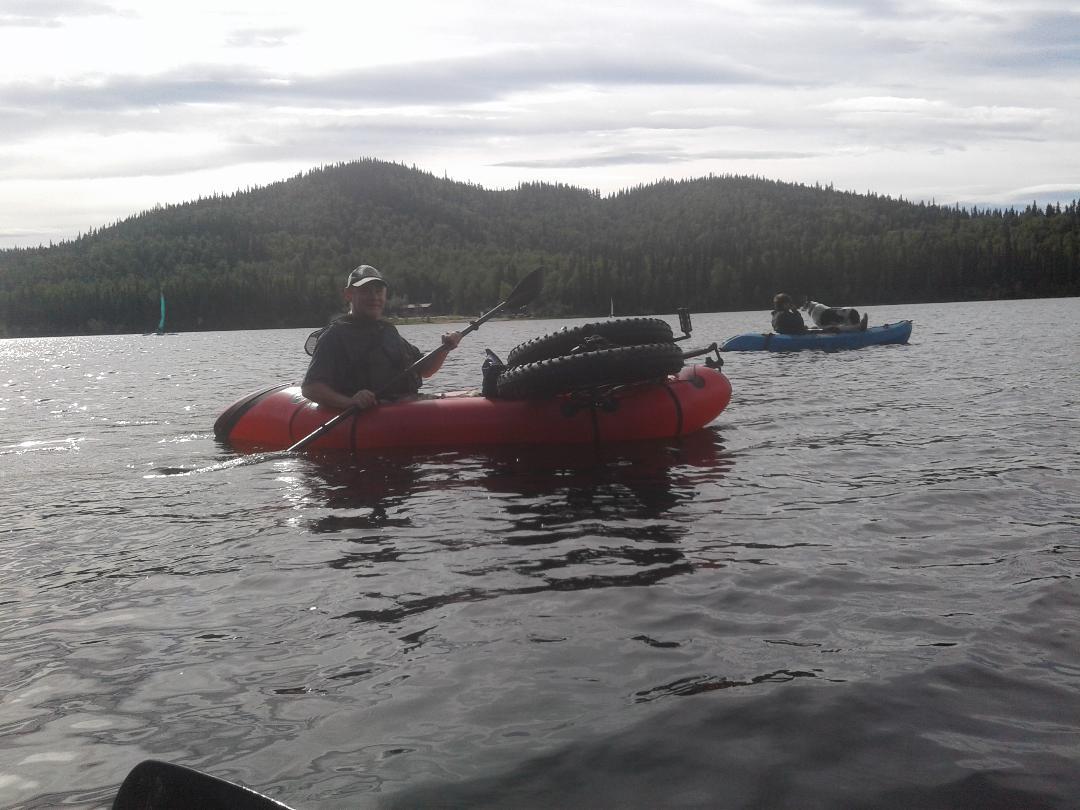
A couple laps of the lake, and it’s ready to float the river!
-
This reply was modified 7 years, 9 months ago by alaskastinson.
-
August 30, 2018 at 4:42 pm #6980Matt (Admin)Keymaster
Fantastic!!
-
This reply was modified 7 years, 9 months ago by
-
August 3, 2018 at 11:21 am #6863jeffleederParticipant
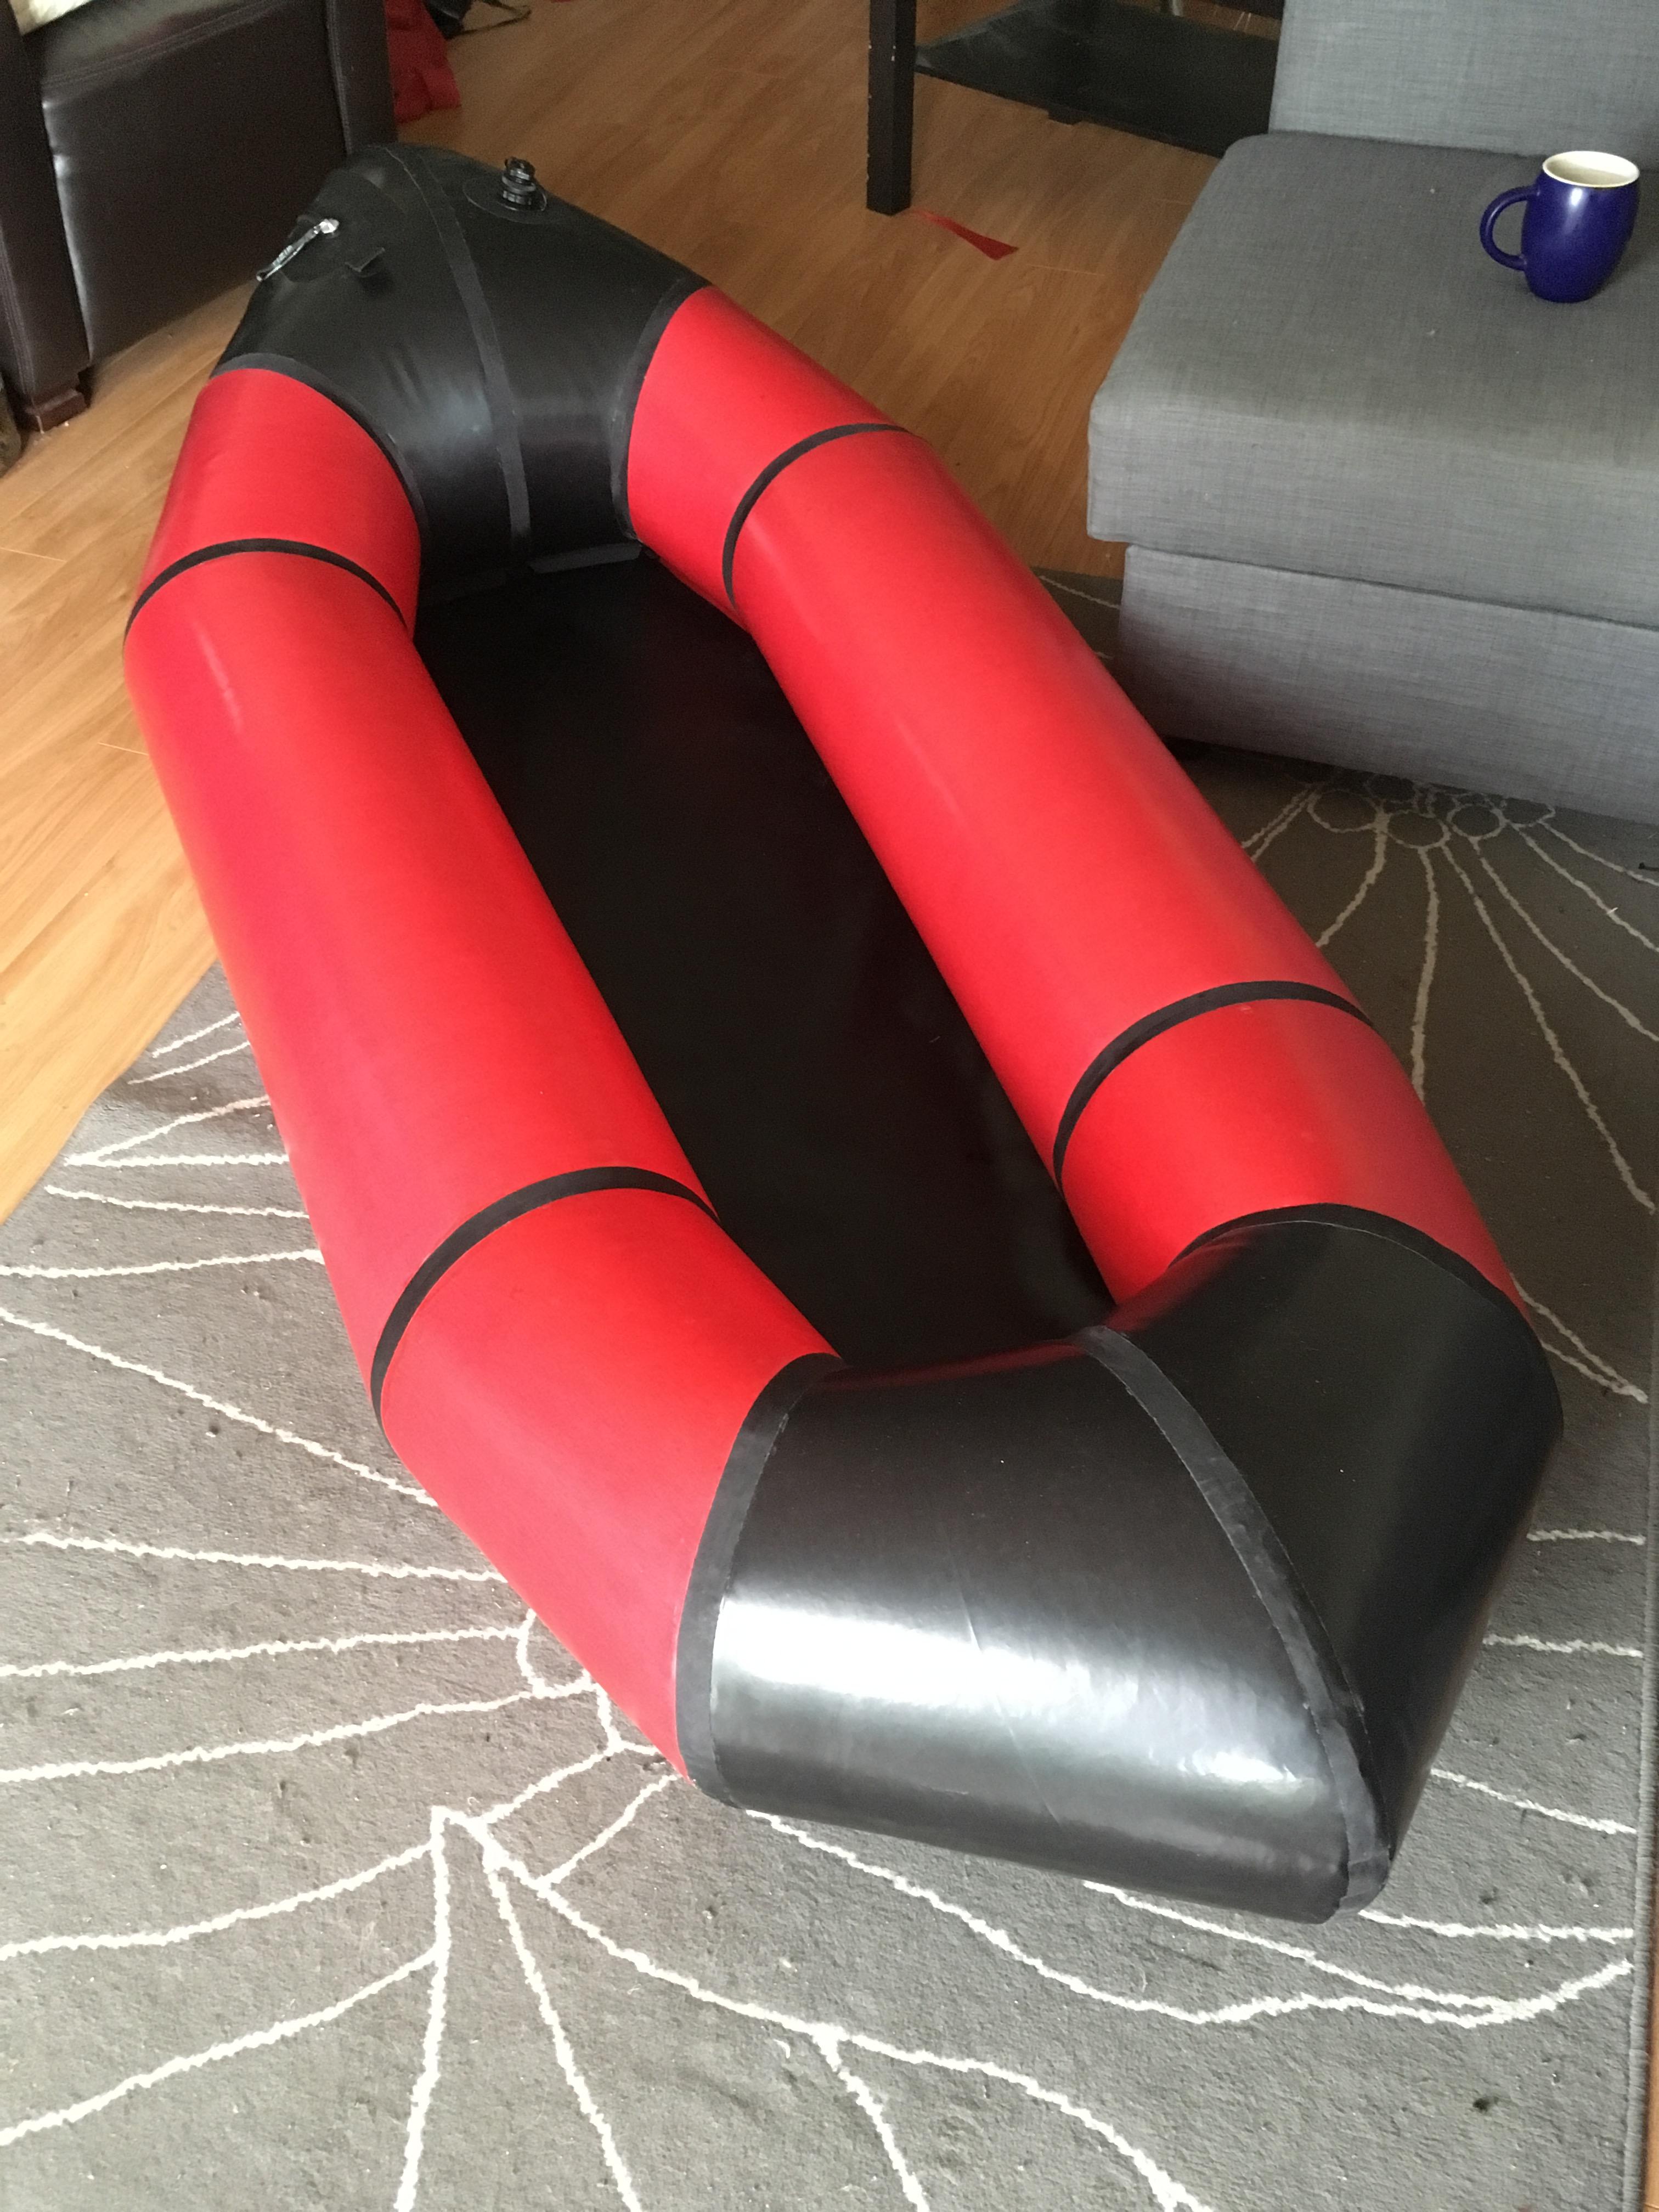
Its ALIVE!
-
August 3, 2018 at 5:09 pm #6864Matt (Admin)Keymaster
Looks great! Thanks for posting!
-
-
July 30, 2018 at 1:59 am #6838keopgaardParticipant
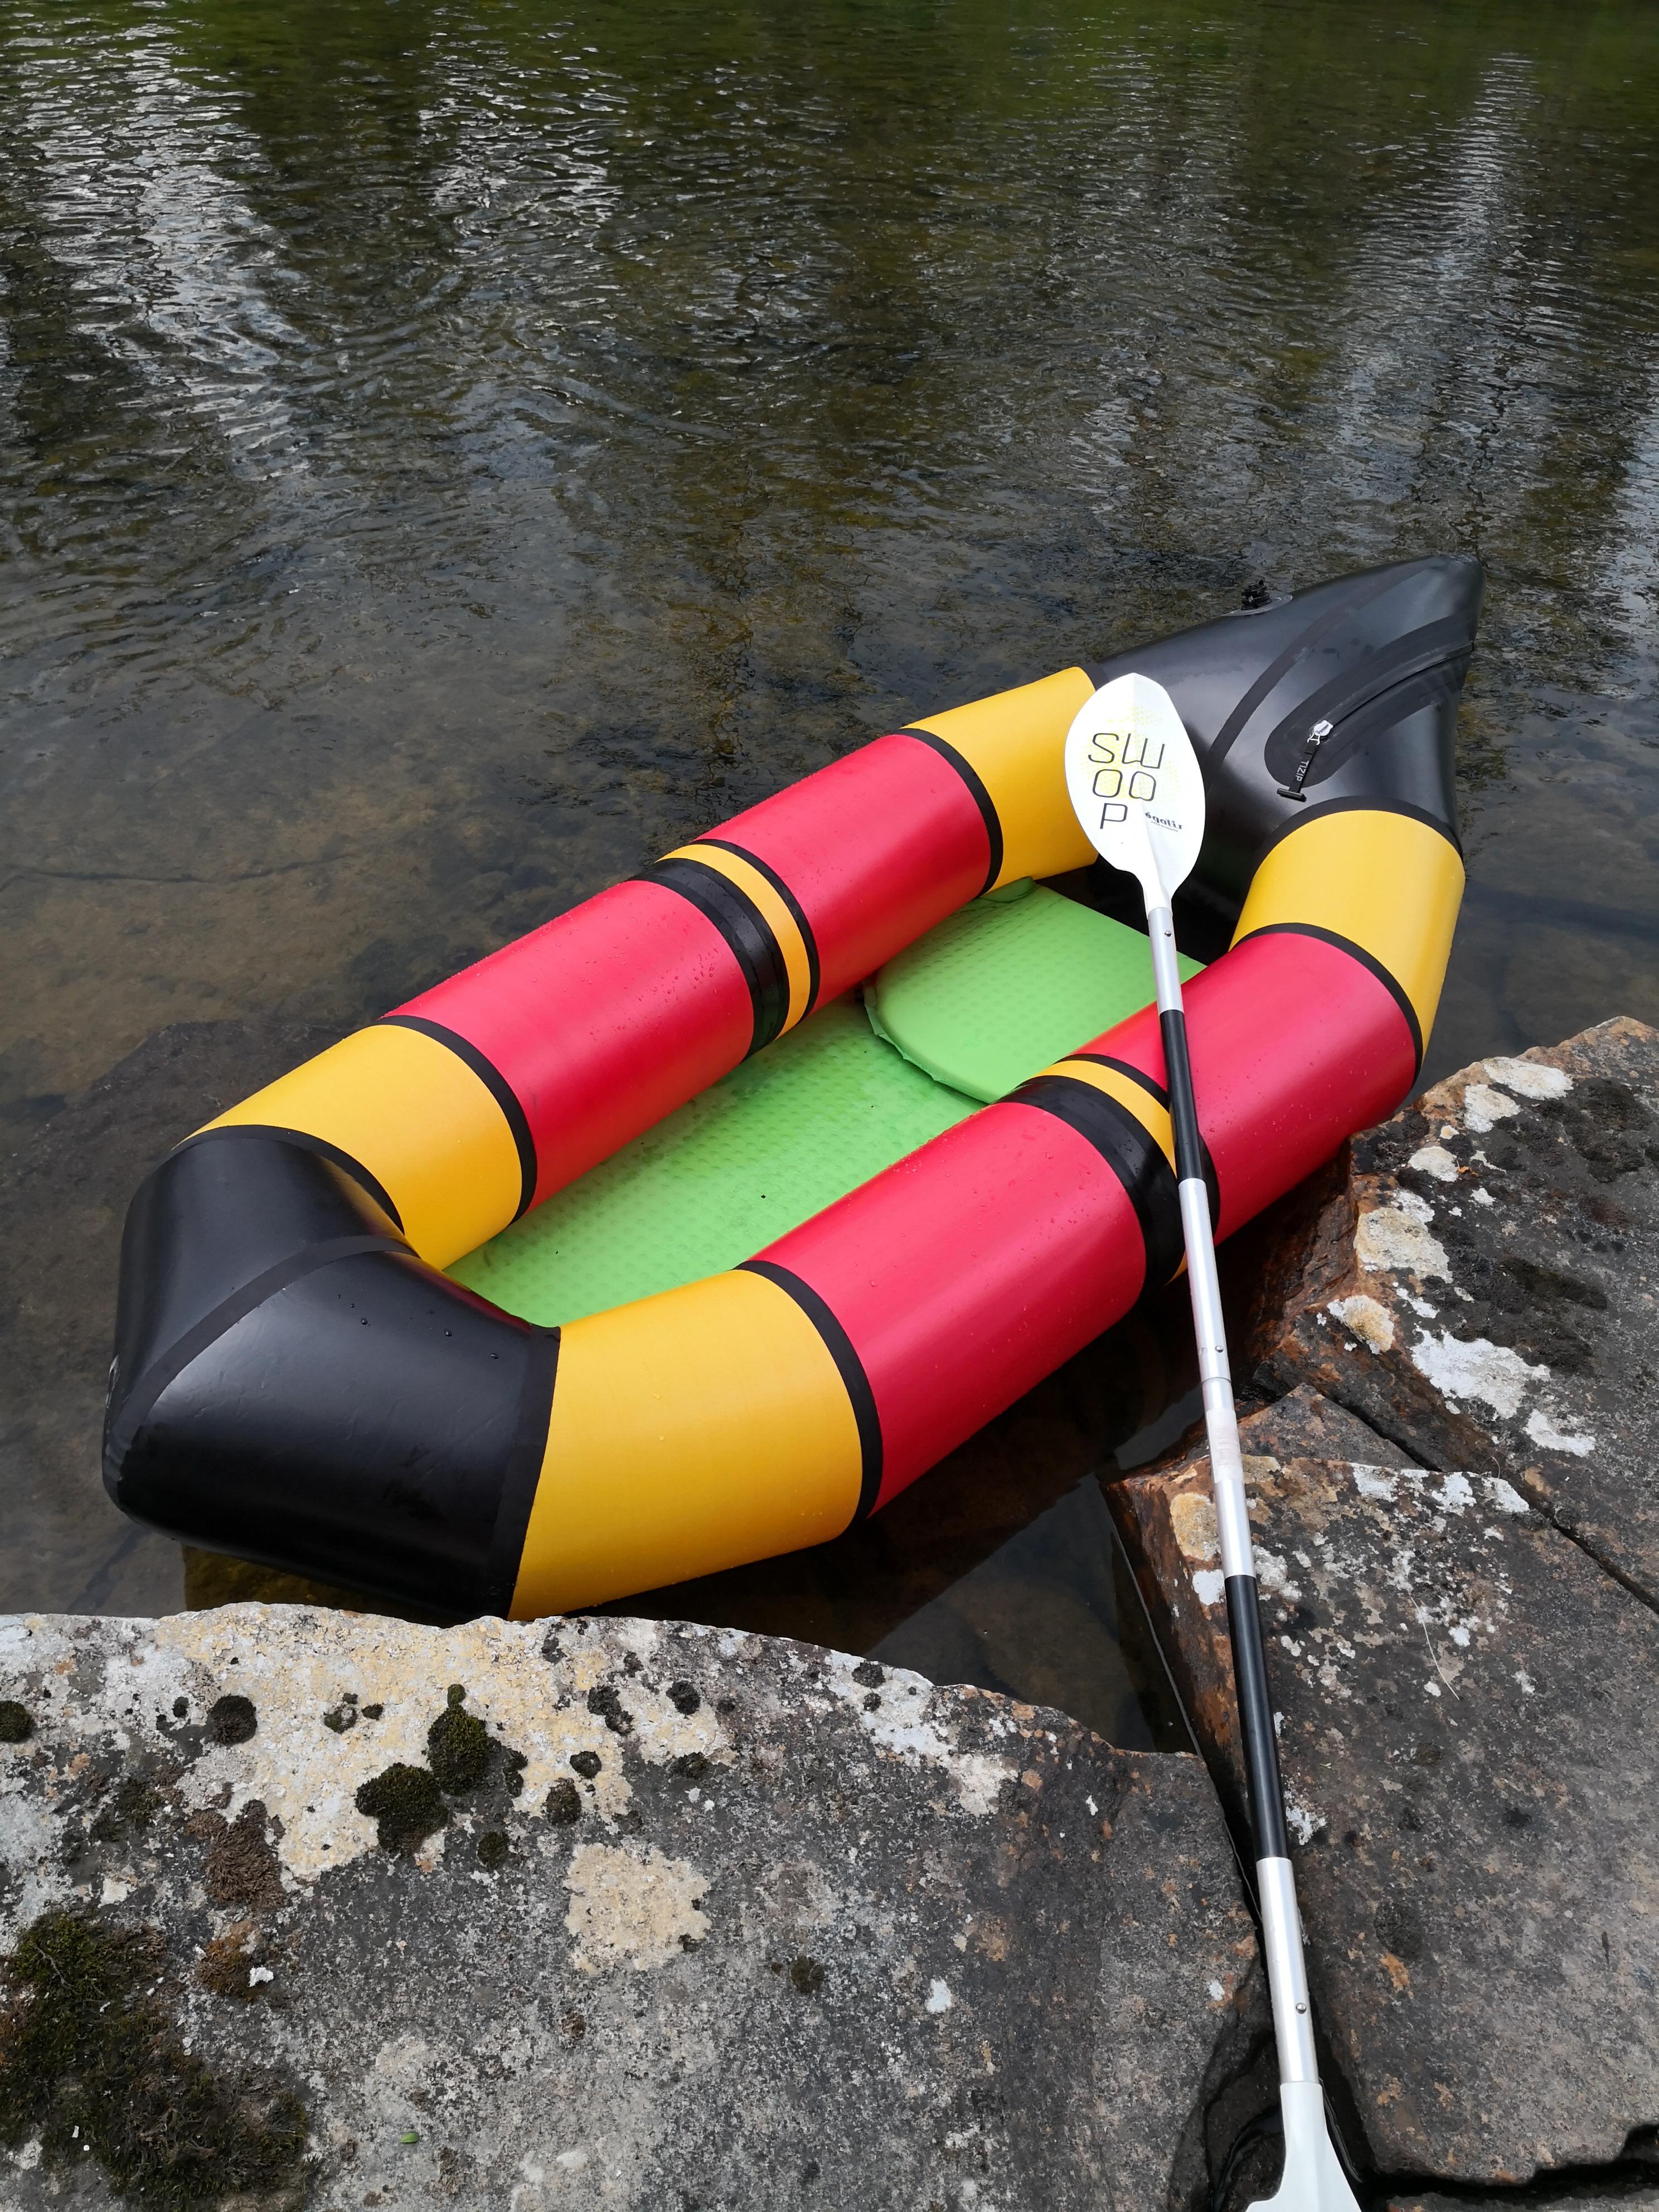
-
July 30, 2018 at 8:32 am #6839Matt (Admin)Keymaster
Very Cool!!
-
-
July 28, 2018 at 8:32 pm #6831keopgaardParticipant
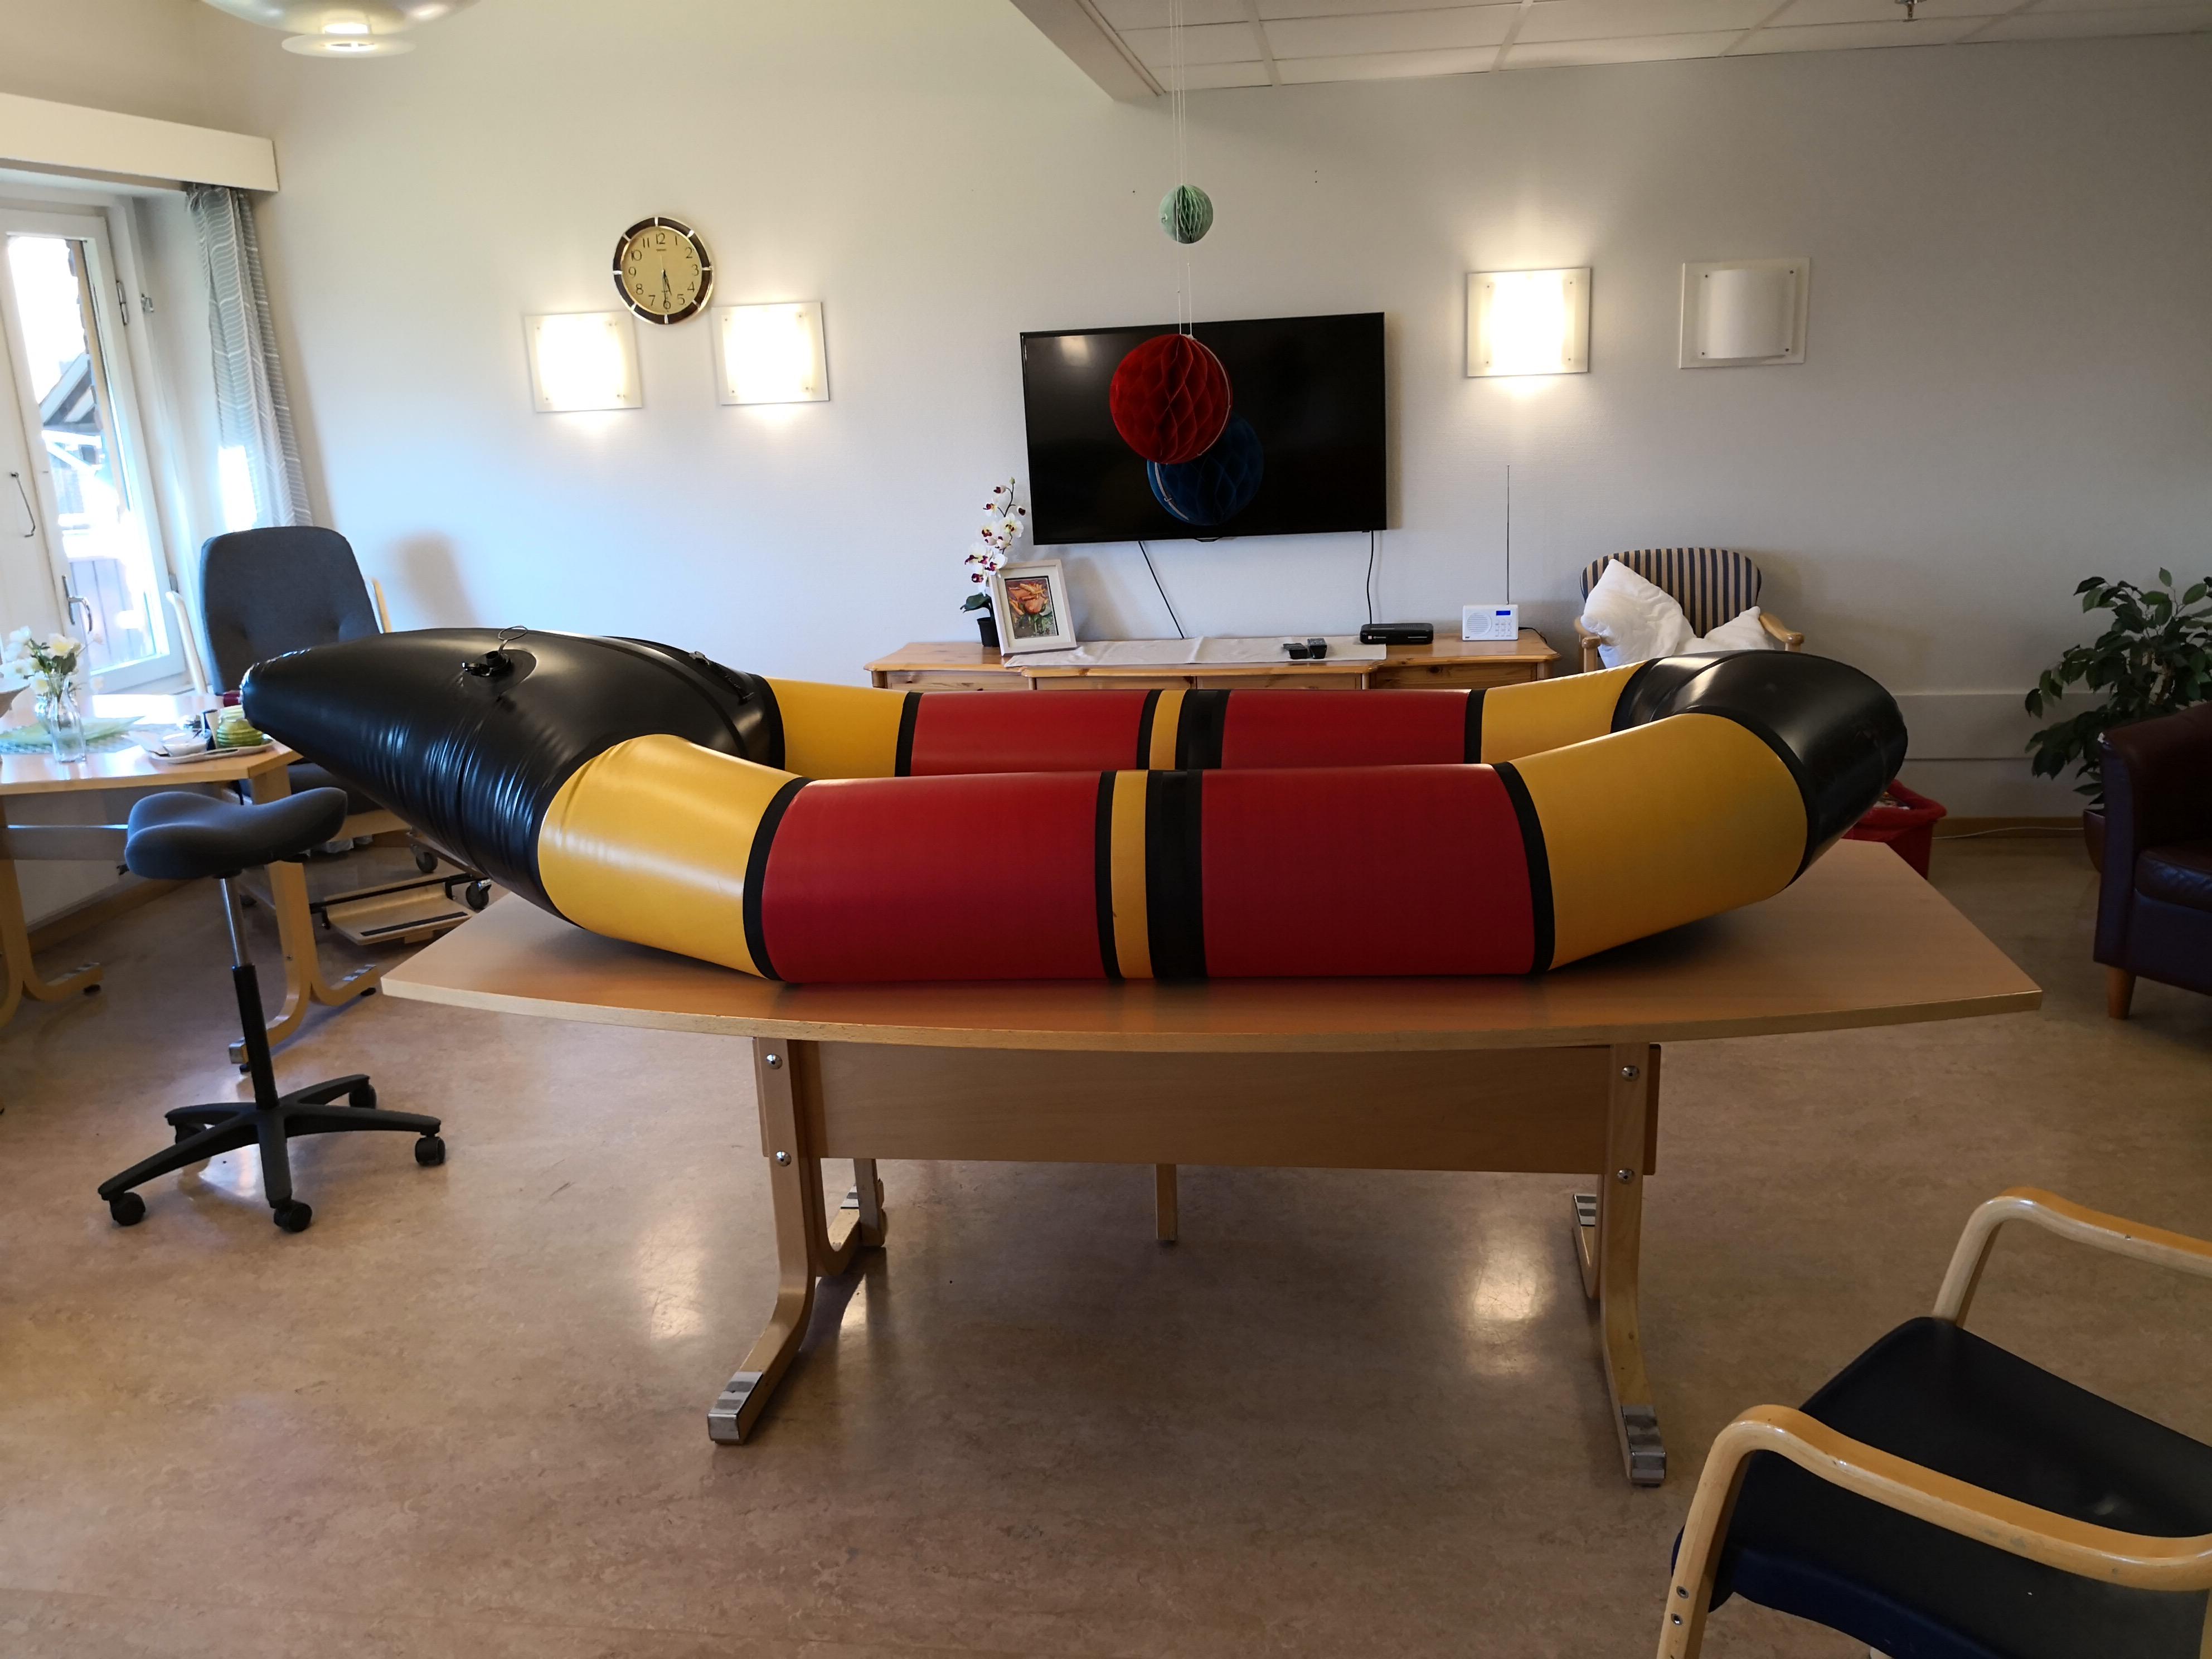 Number 4, my last size large V2 with modifying.
-
July 30, 2018 at 12:08 pm #6841Matt (Admin)Keymaster
Very cool! It looks like the modifying worked well 😀
-
-
July 24, 2018 at 8:56 pm #6803StevenParticipant
And this….
-
July 24, 2018 at 8:55 pm #6802StevenParticipant
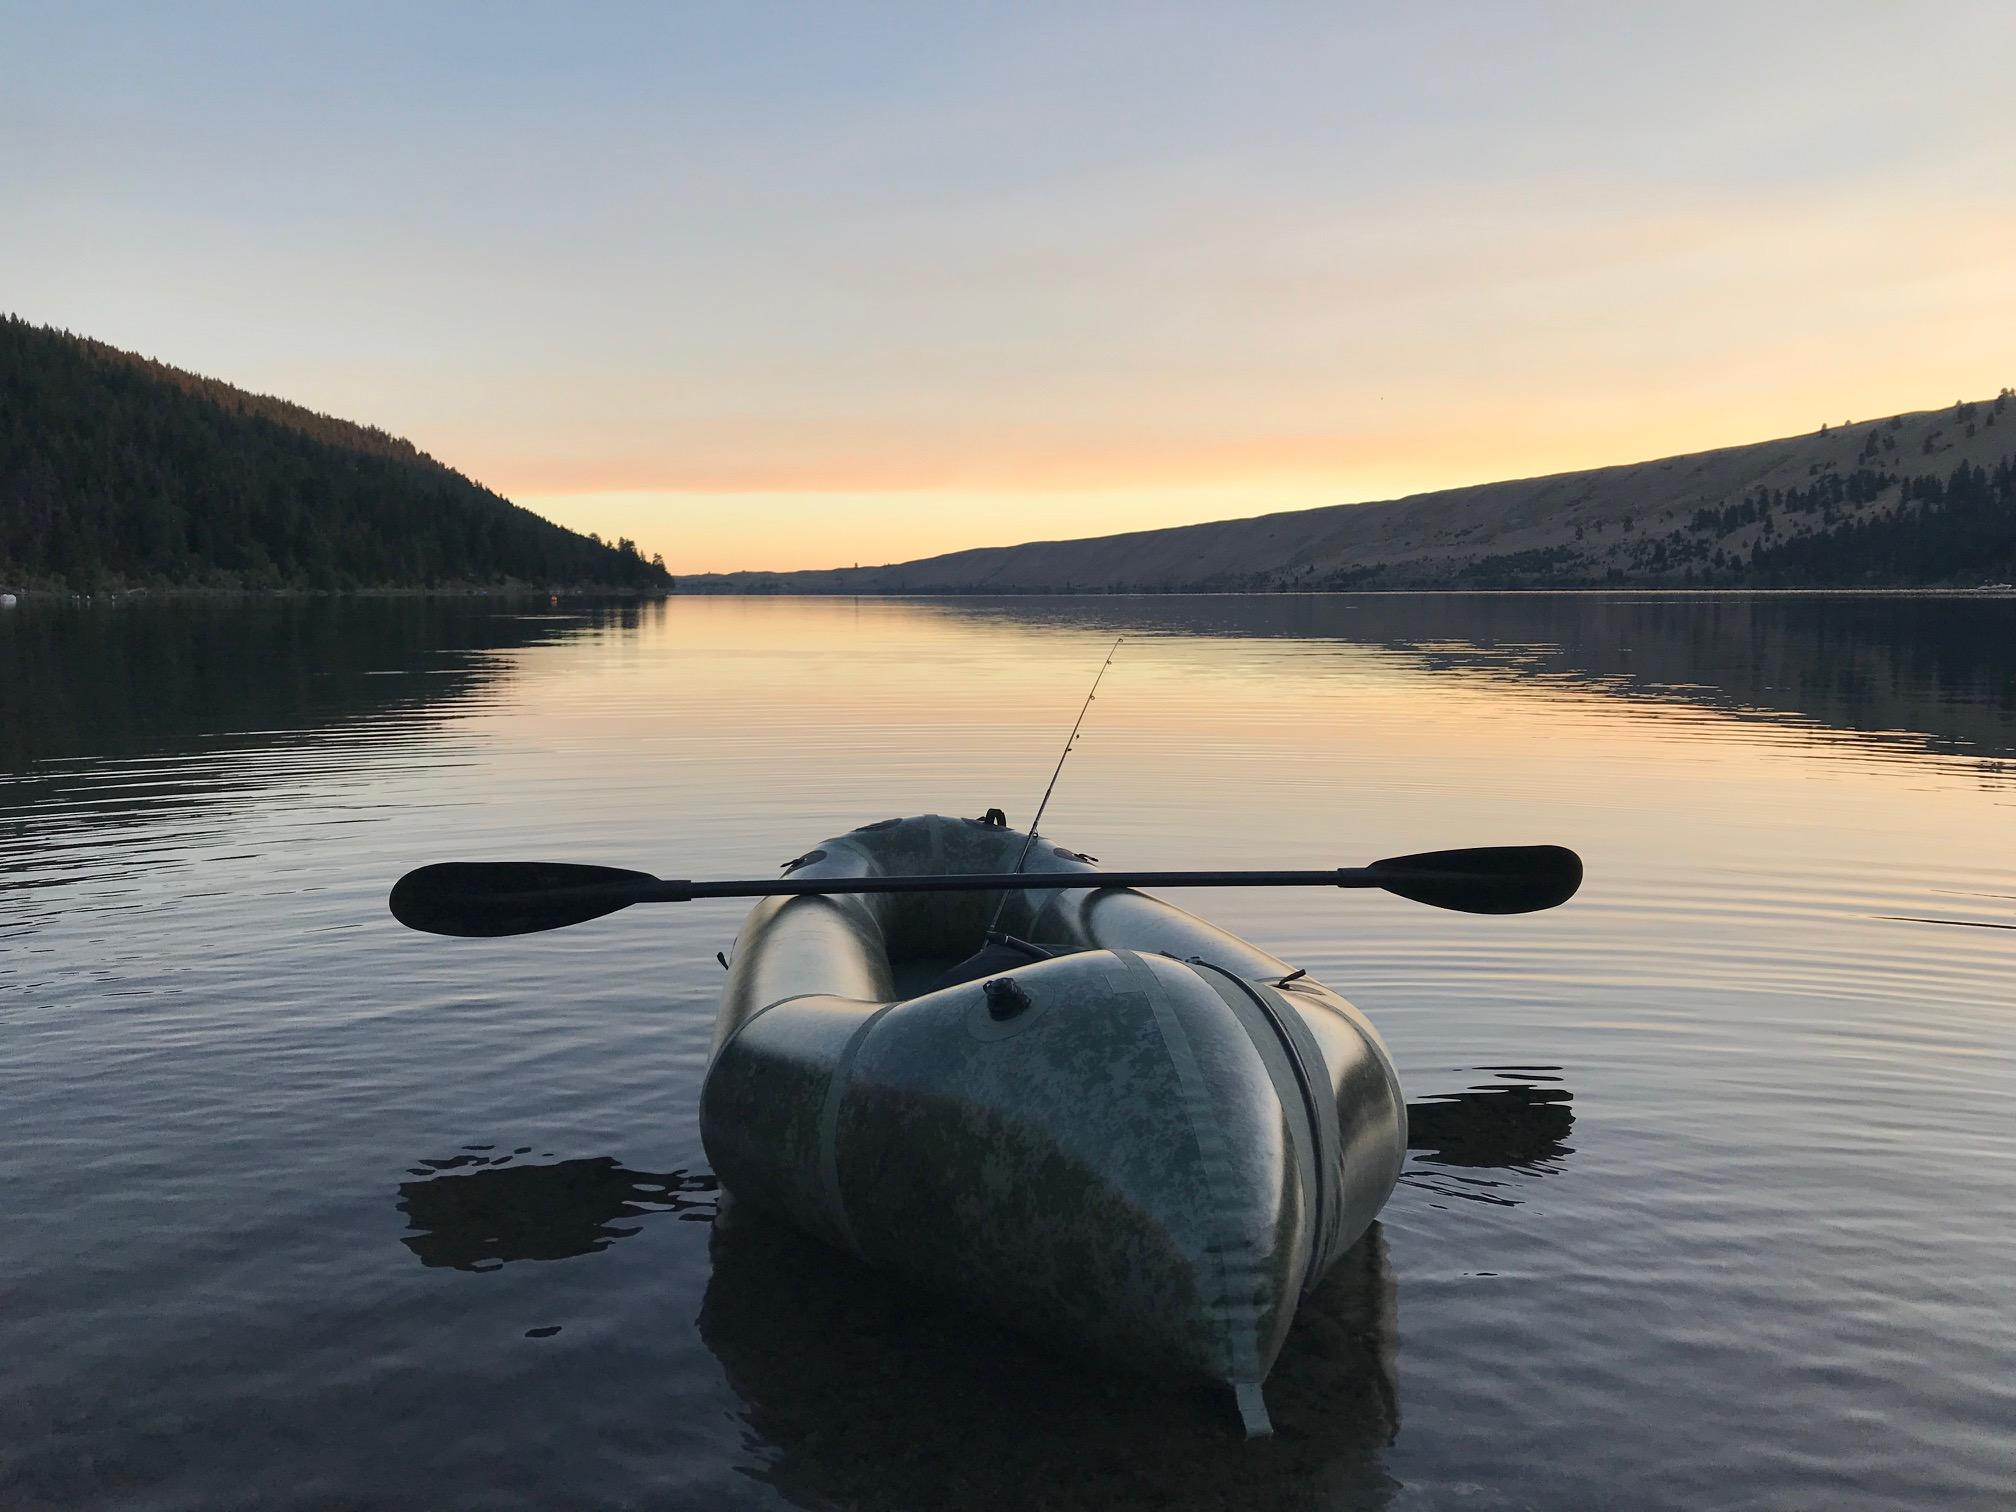
I don’t have social media…so I have to post this pic here and show ya’ll….this is why I built this raft!!!
-
July 26, 2018 at 2:26 am #6815Kwok Wah LaiParticipant
Really beautiful …👍
-
-
July 15, 2018 at 1:34 pm #6745keopgaardParticipant
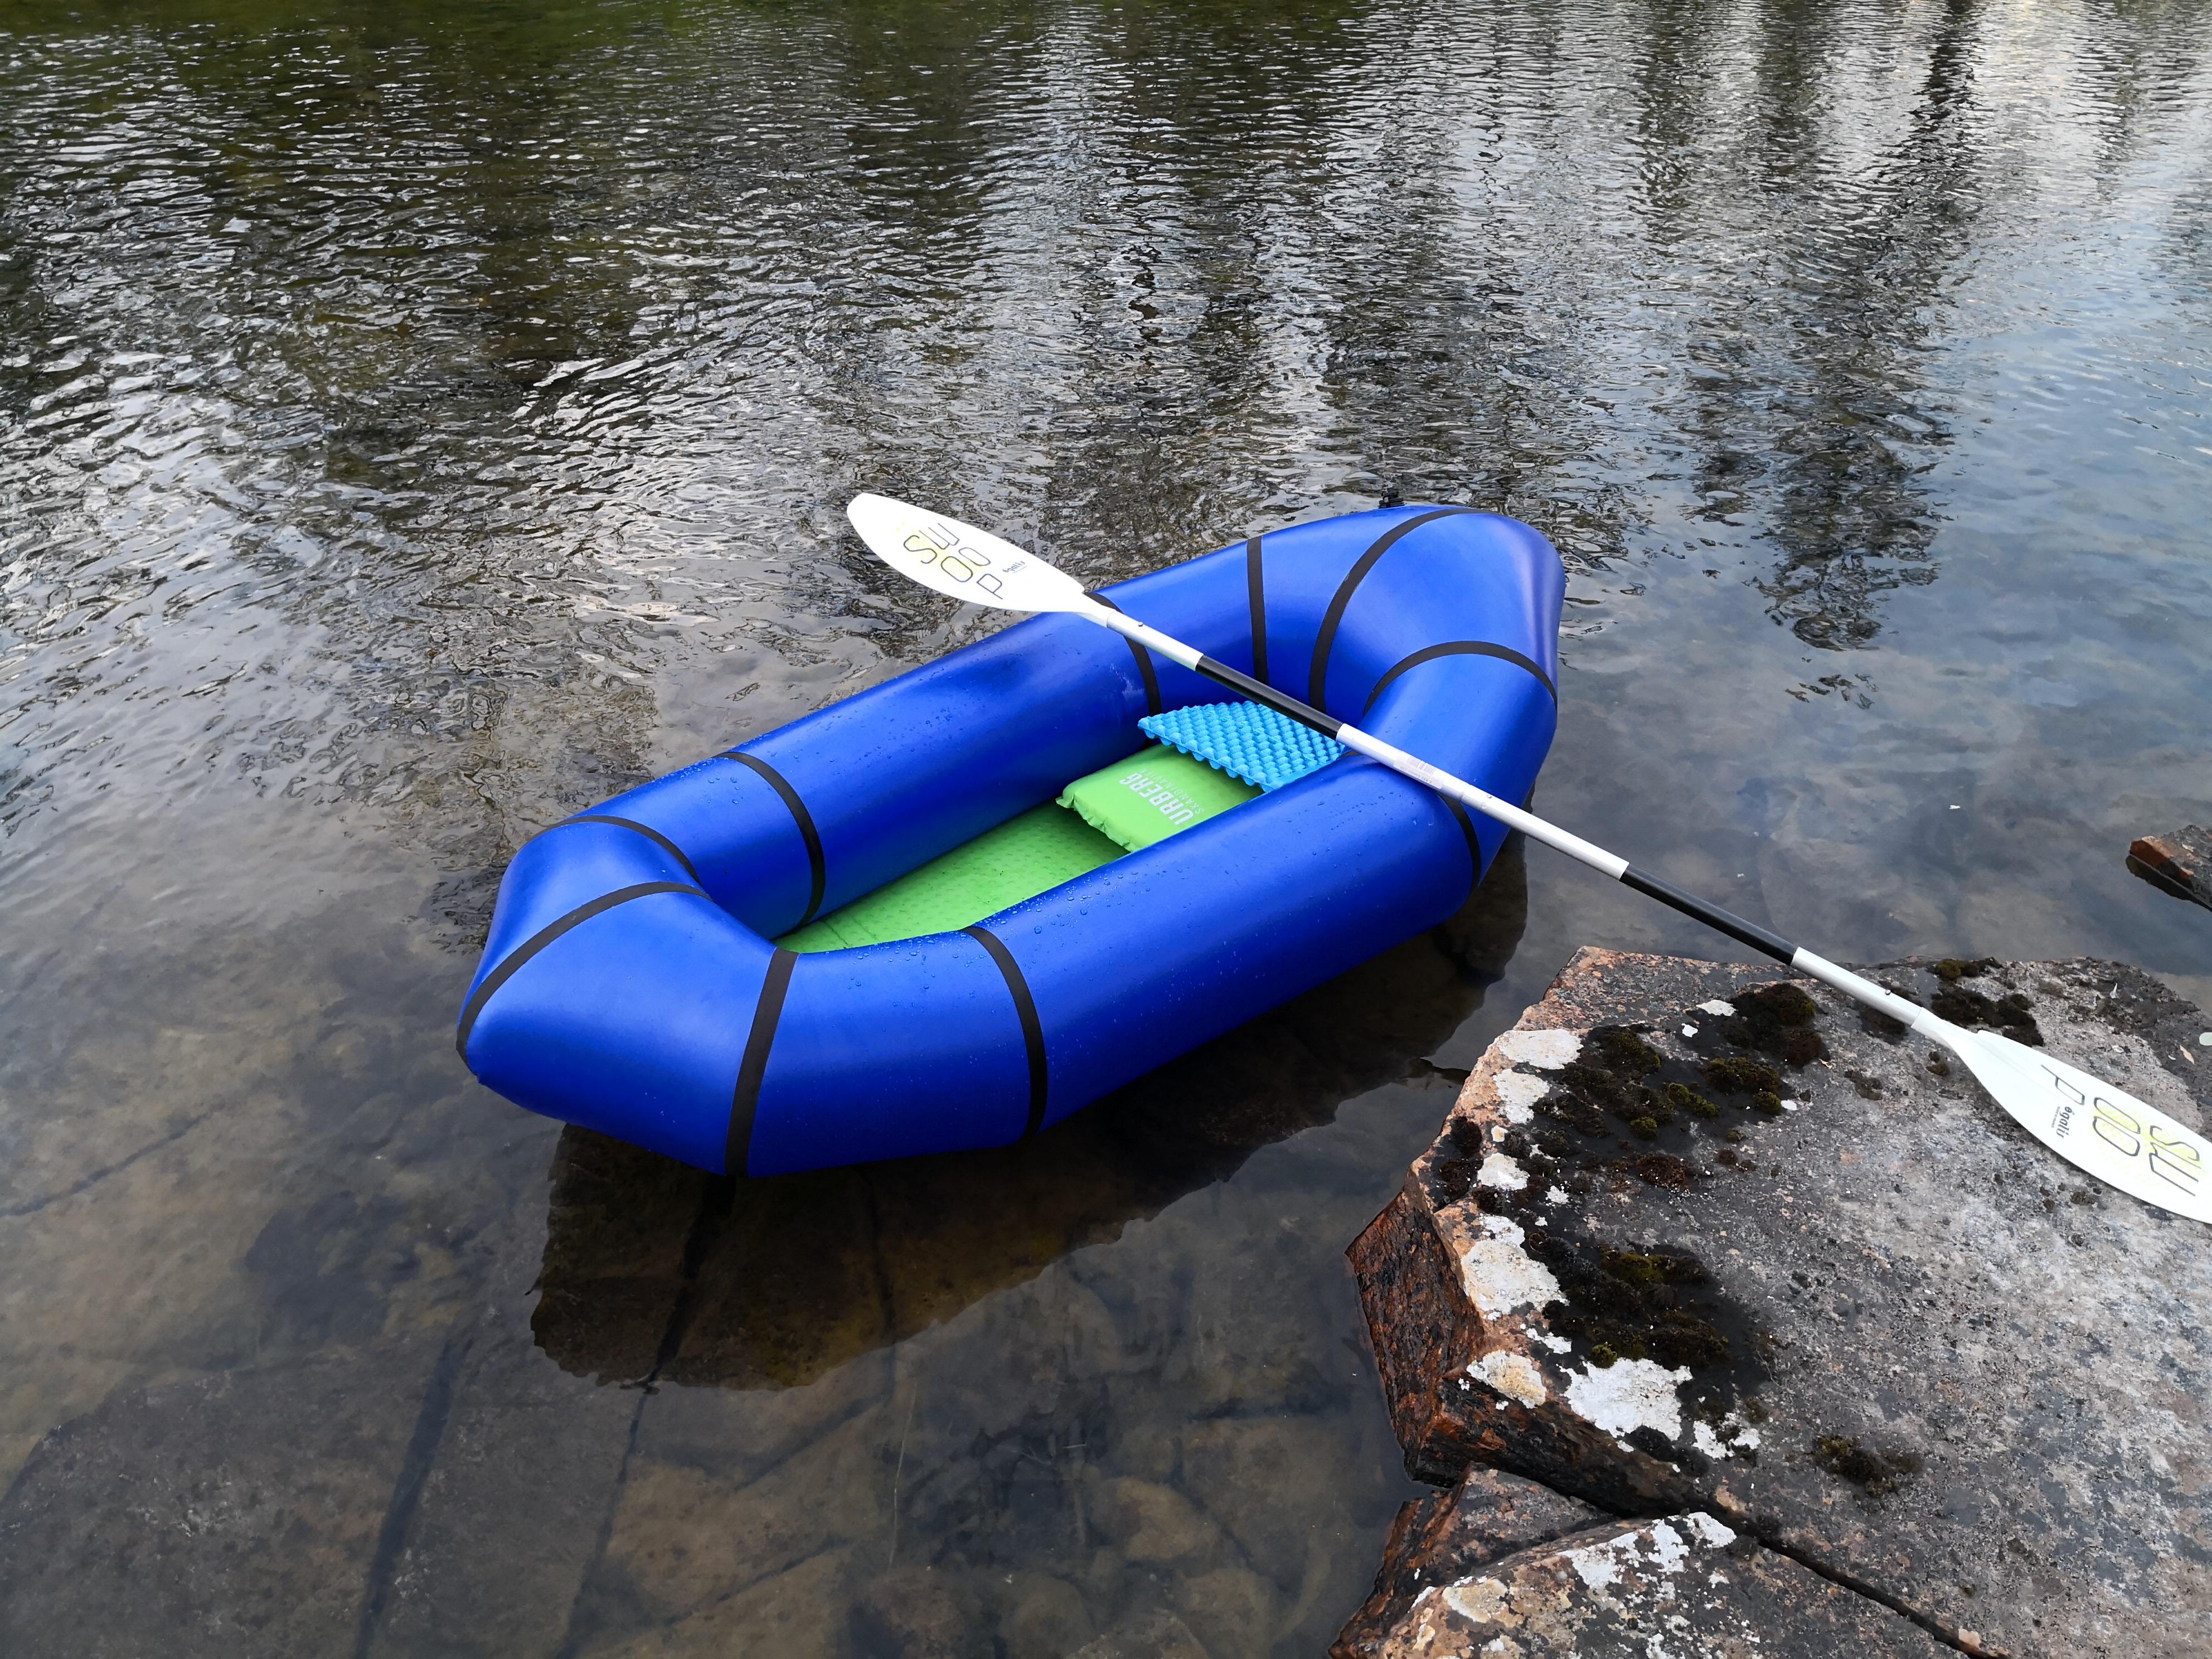
-
July 9, 2018 at 10:49 am #6715DerekParticipant
Second packraft just finished. The first one was an 80″ floor on the Voyageur. Learned a lot in that build and applied it to this build. This one was much easier and more fun to build. Good times ahead. Still needs a spray deck. And I’m using my ExPed large camping pillow for a seat because it’s only $30 and I don’t need to spend hours making it;)
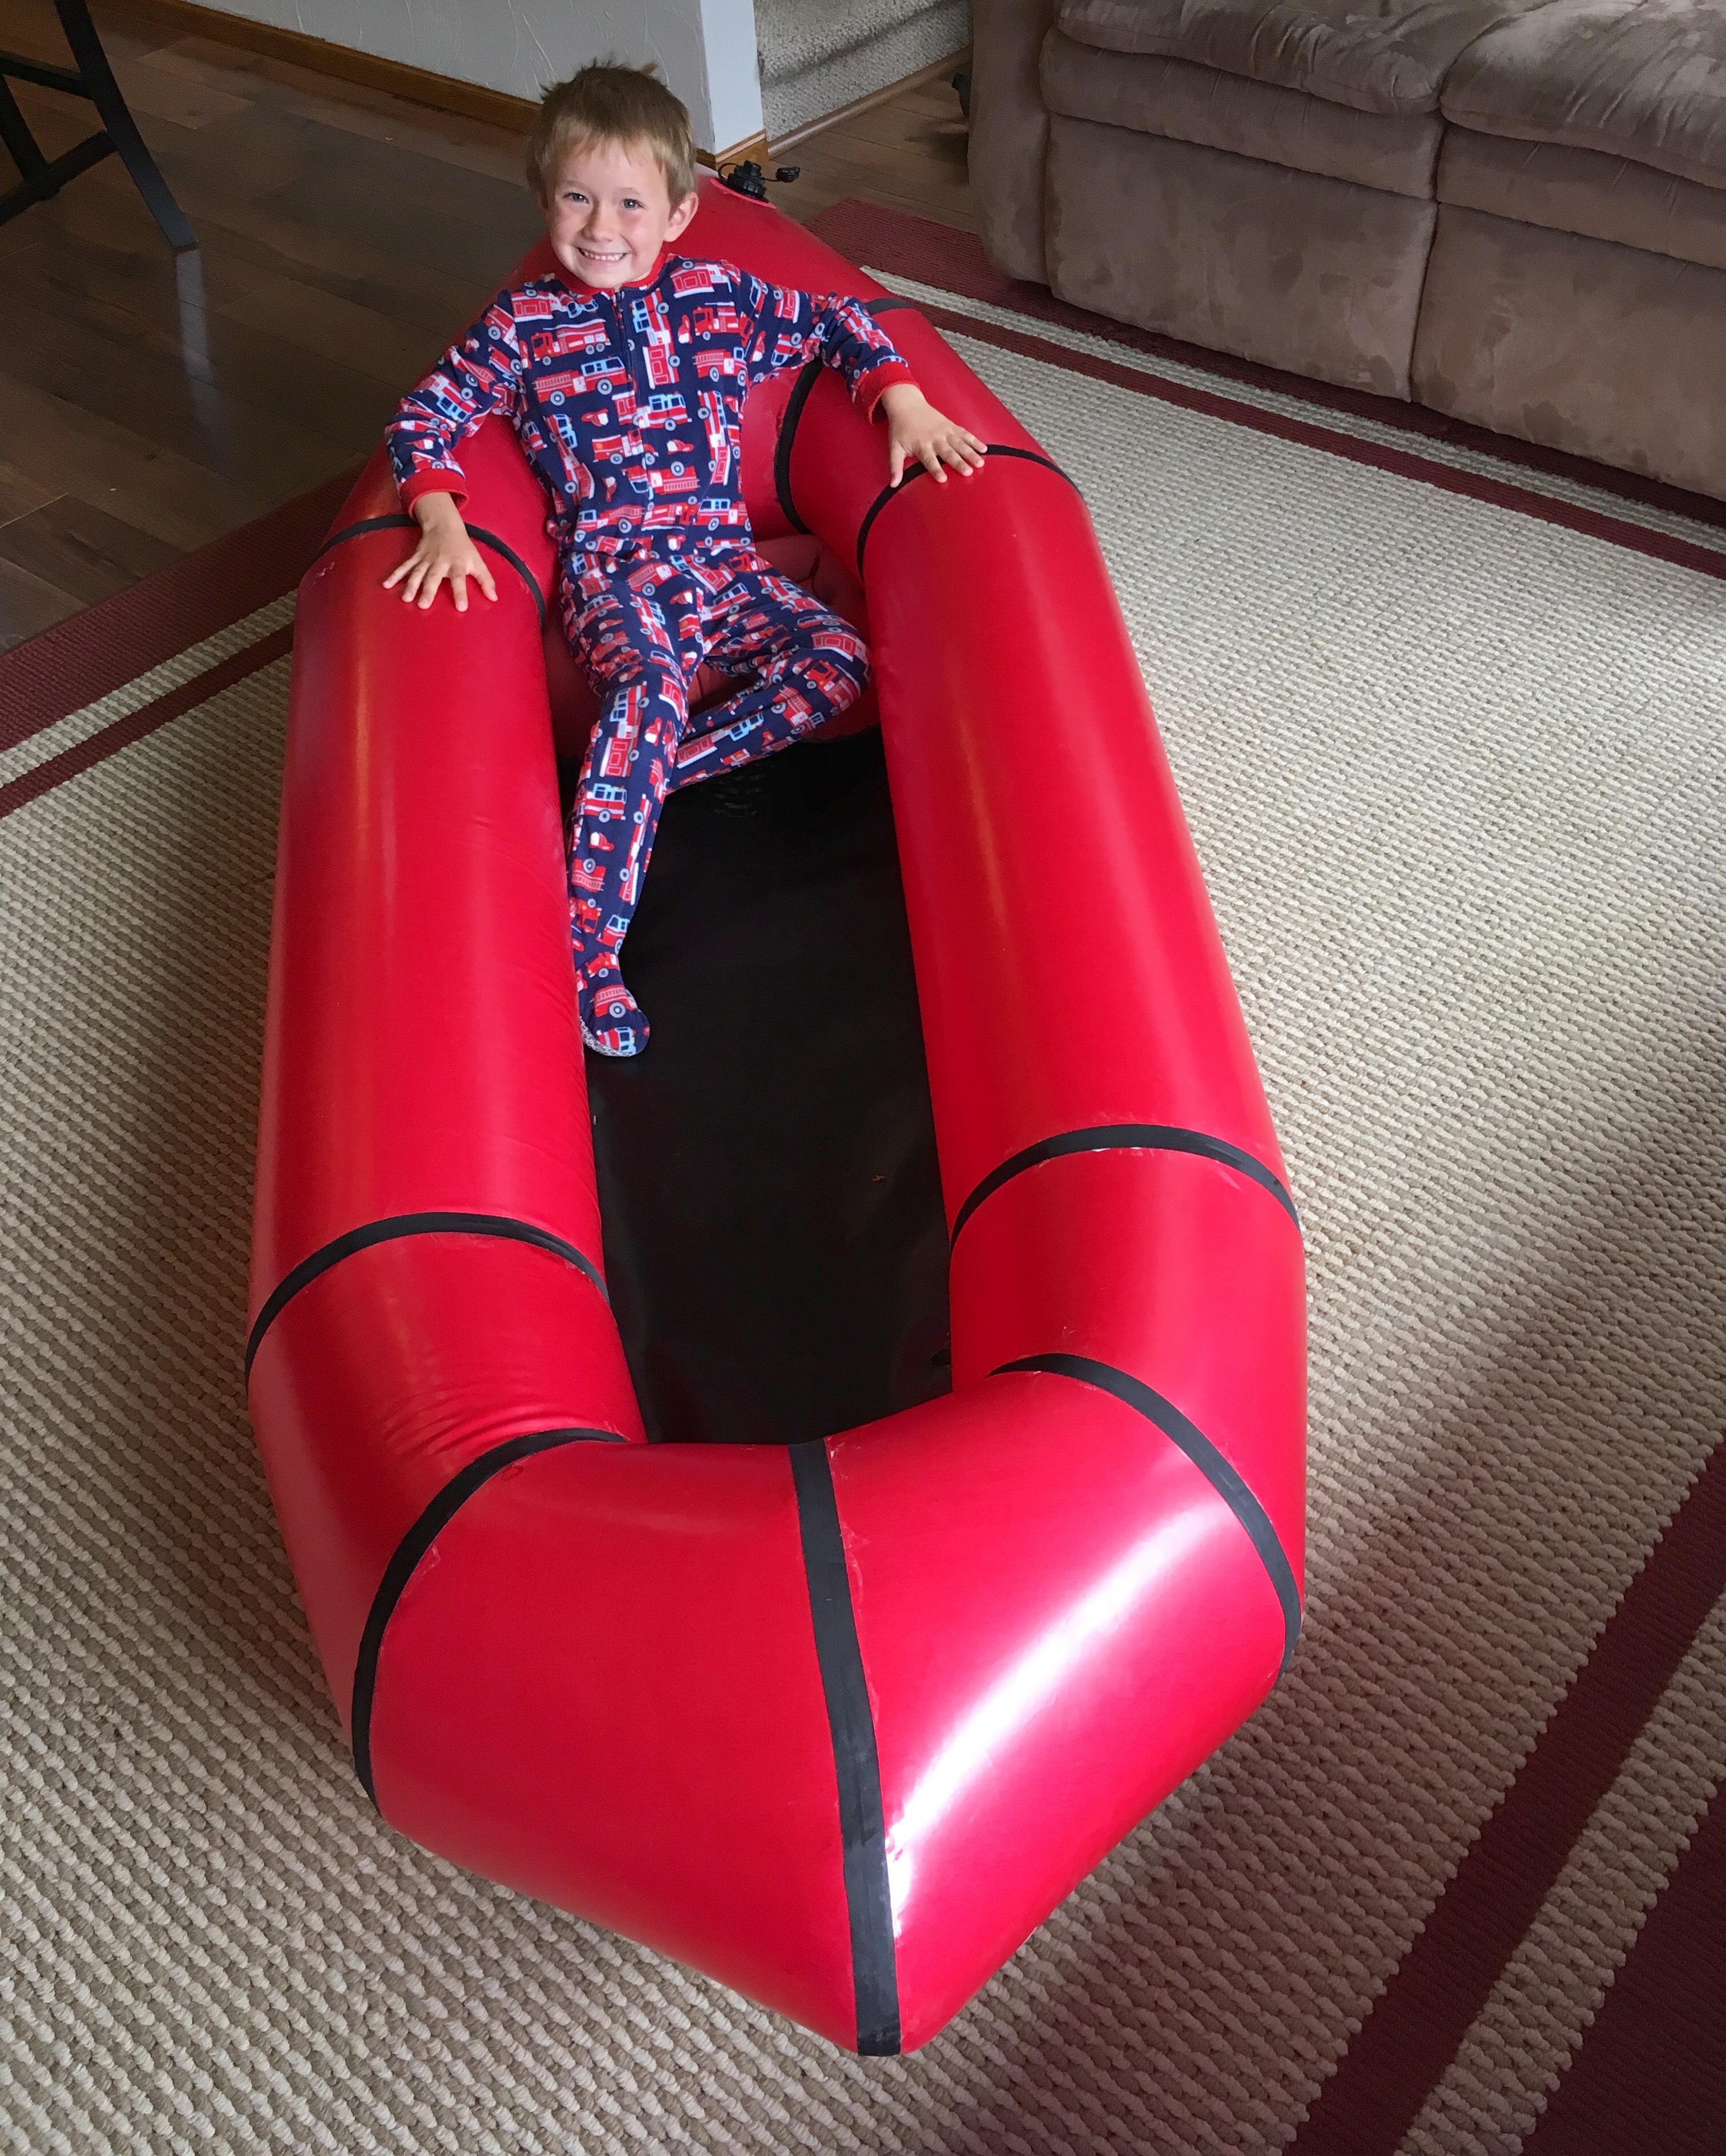
-
July 11, 2018 at 8:41 am #6722Matt (Admin)Keymaster
Looks great! Thanks for posting, Derek!
-
-
June 30, 2018 at 12:17 pm #6678kevin_frankParticipant
Finished my packraft last weekend, and took it out for the first time on the Hutt River (NZ) yesterday. It all went great! Still a couple small leaks to sort out and need to put some tie points on.
Question for you Matt – do you have any recommendations for UV protection? When I was in SAR we used 303 (eg. https://totaltrim.co.nz/products/303-aerospace-protectant) on a lot of our plastic-y stuff, including drysuits with similar zippers.
Also, if you ever run into a guy named Ron Morrison up in Smithers, say hi for me! Thanks again for putting together such a fantastic product and website.
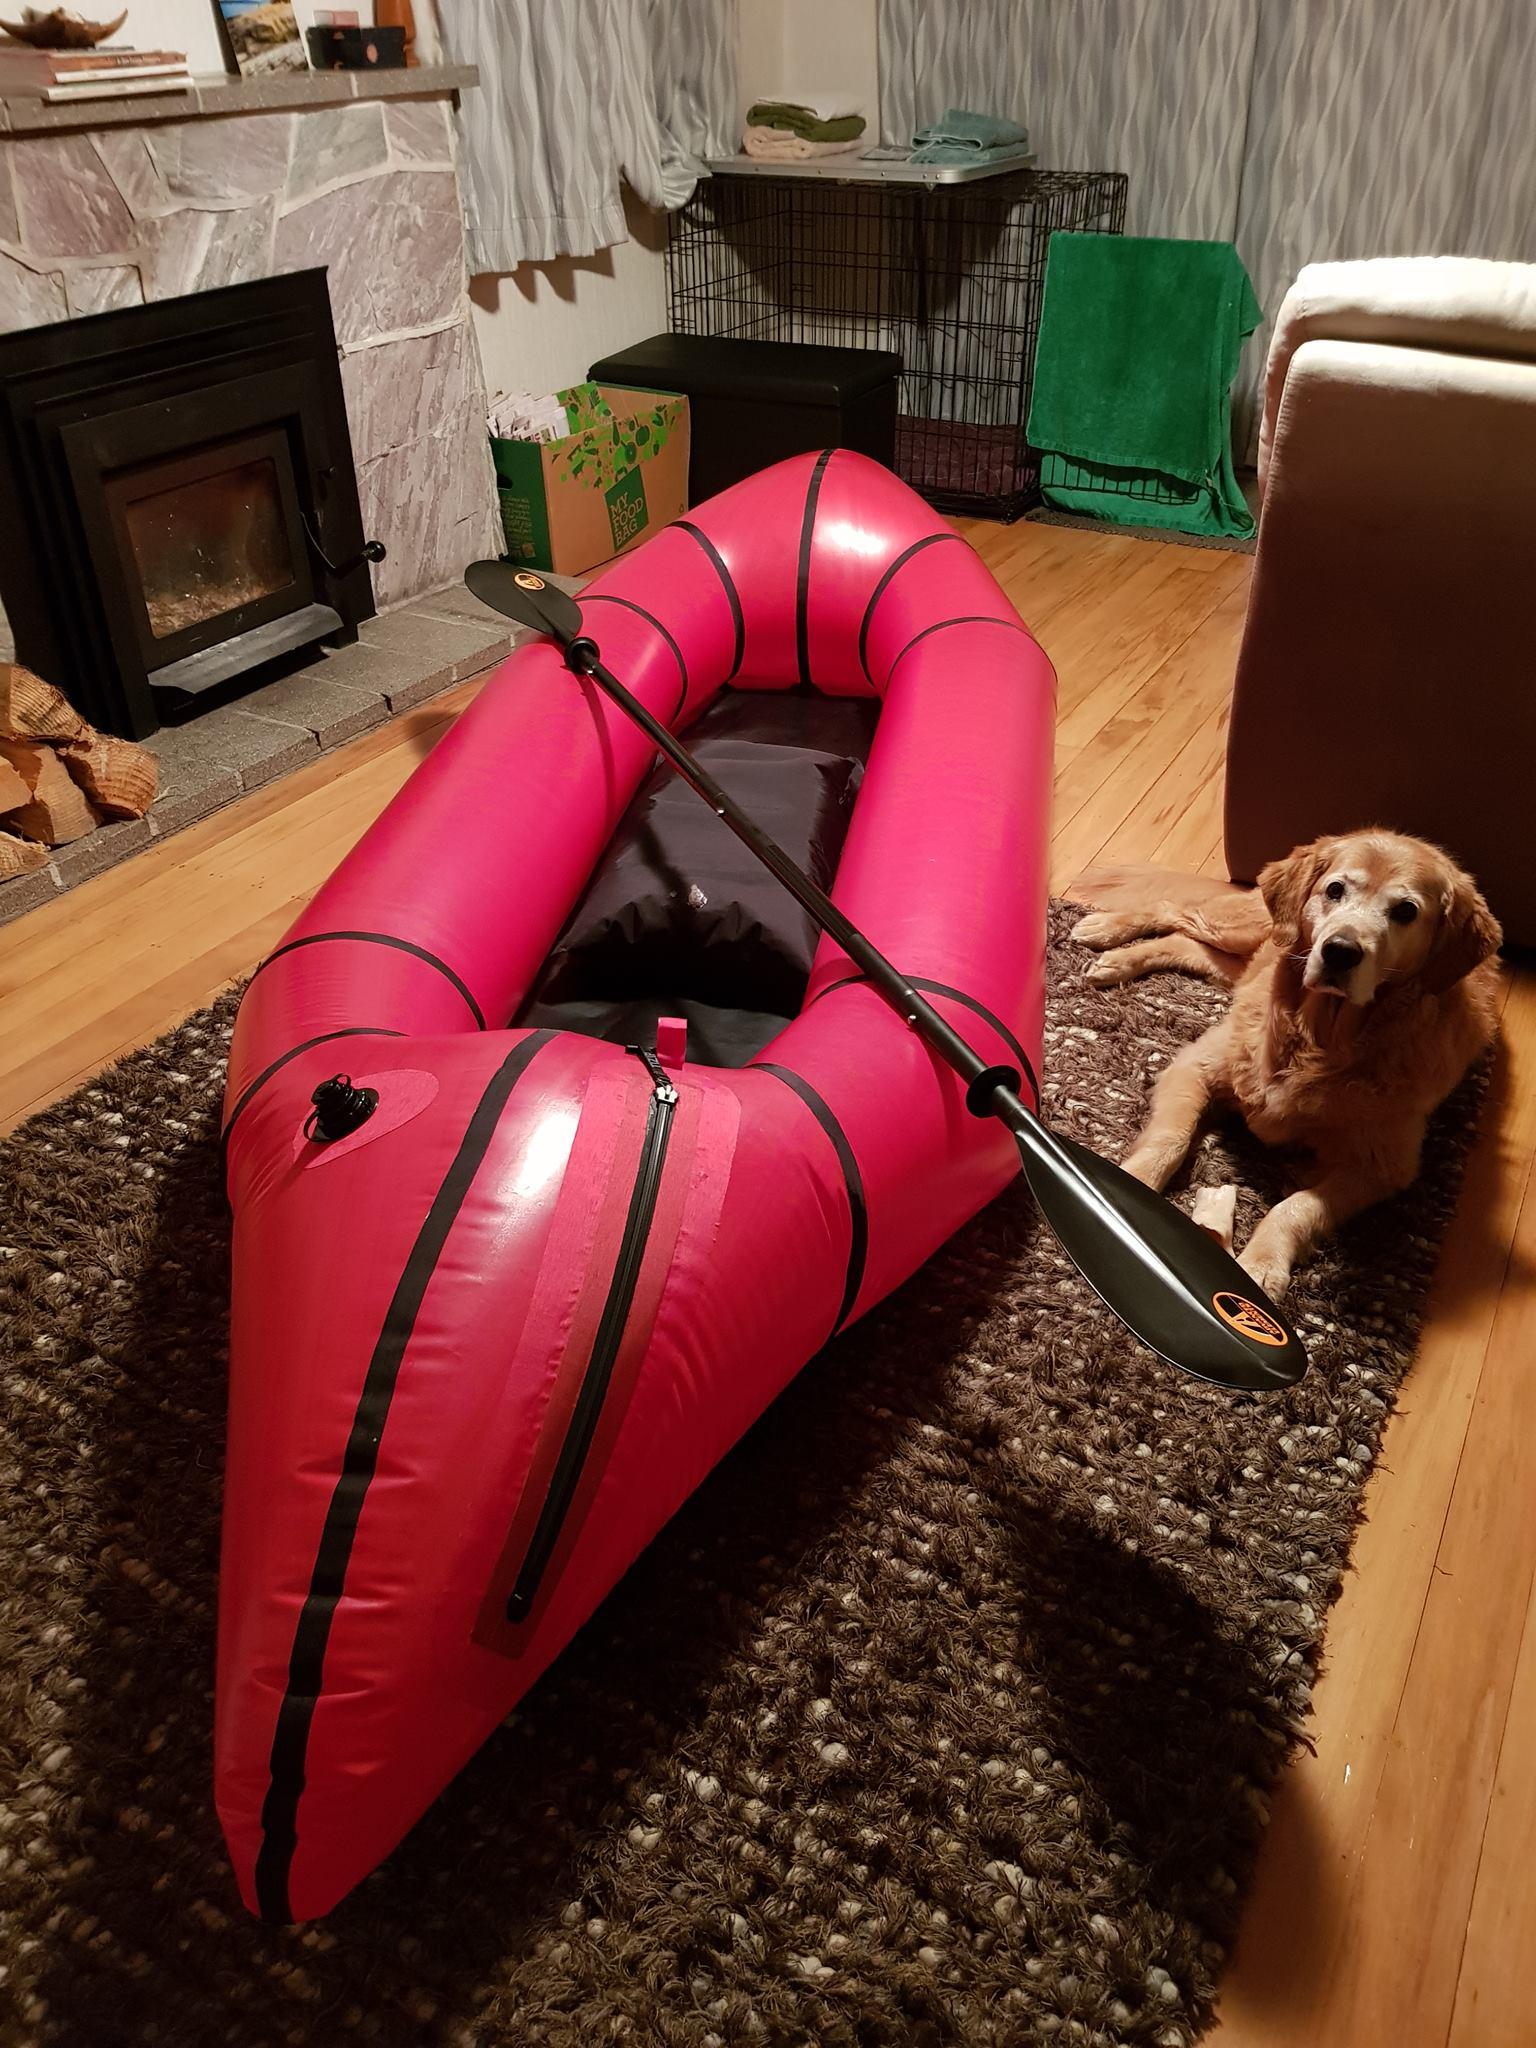
-
May 16, 2018 at 10:54 pm #6417StevenParticipant
Well, 1 yr later (I know I’m slow!) I had my v2 out on the water today for it’s maiden voyage….wow and whew. All the hard work paid off when I got on the water and realized this thing is legit. My friend has an Alpacka I had been drooling over for a few years and he was pretty impressed with the look and how it paddled through the water.
It was definitely a learning process for me, and I was only able to devote little chunks of time occasionally which made it about a 10 month project. I had a bunch of leaks to remediate after completion but that seems to be more due to my heat sealing technique. By the end my technique was creating nice tight seams, but the first half of the build I think I wasn’t getting a truly melted TPU layer between the fabric pieces. Re-heat sealing and seam grip did the trick in the end. I installed a TiZip. I have not installed the top up valve that I ordered, just not sure if I really want it on there…I still want to install a couple more tiedowns and then I will call it a wrap. The tiedowns I have just been ordering from Alpacka. I know, not DIY, but they are good quality. My desire is to use it for fishing high mountain lakes and also to do the occasion bike/pack/raft trip; can’t wait to get a bike on it and see how it floats. I’ll post pics when that happens. Thanks Matt and all the other users of this forum for the tips and instruction to help me do this!
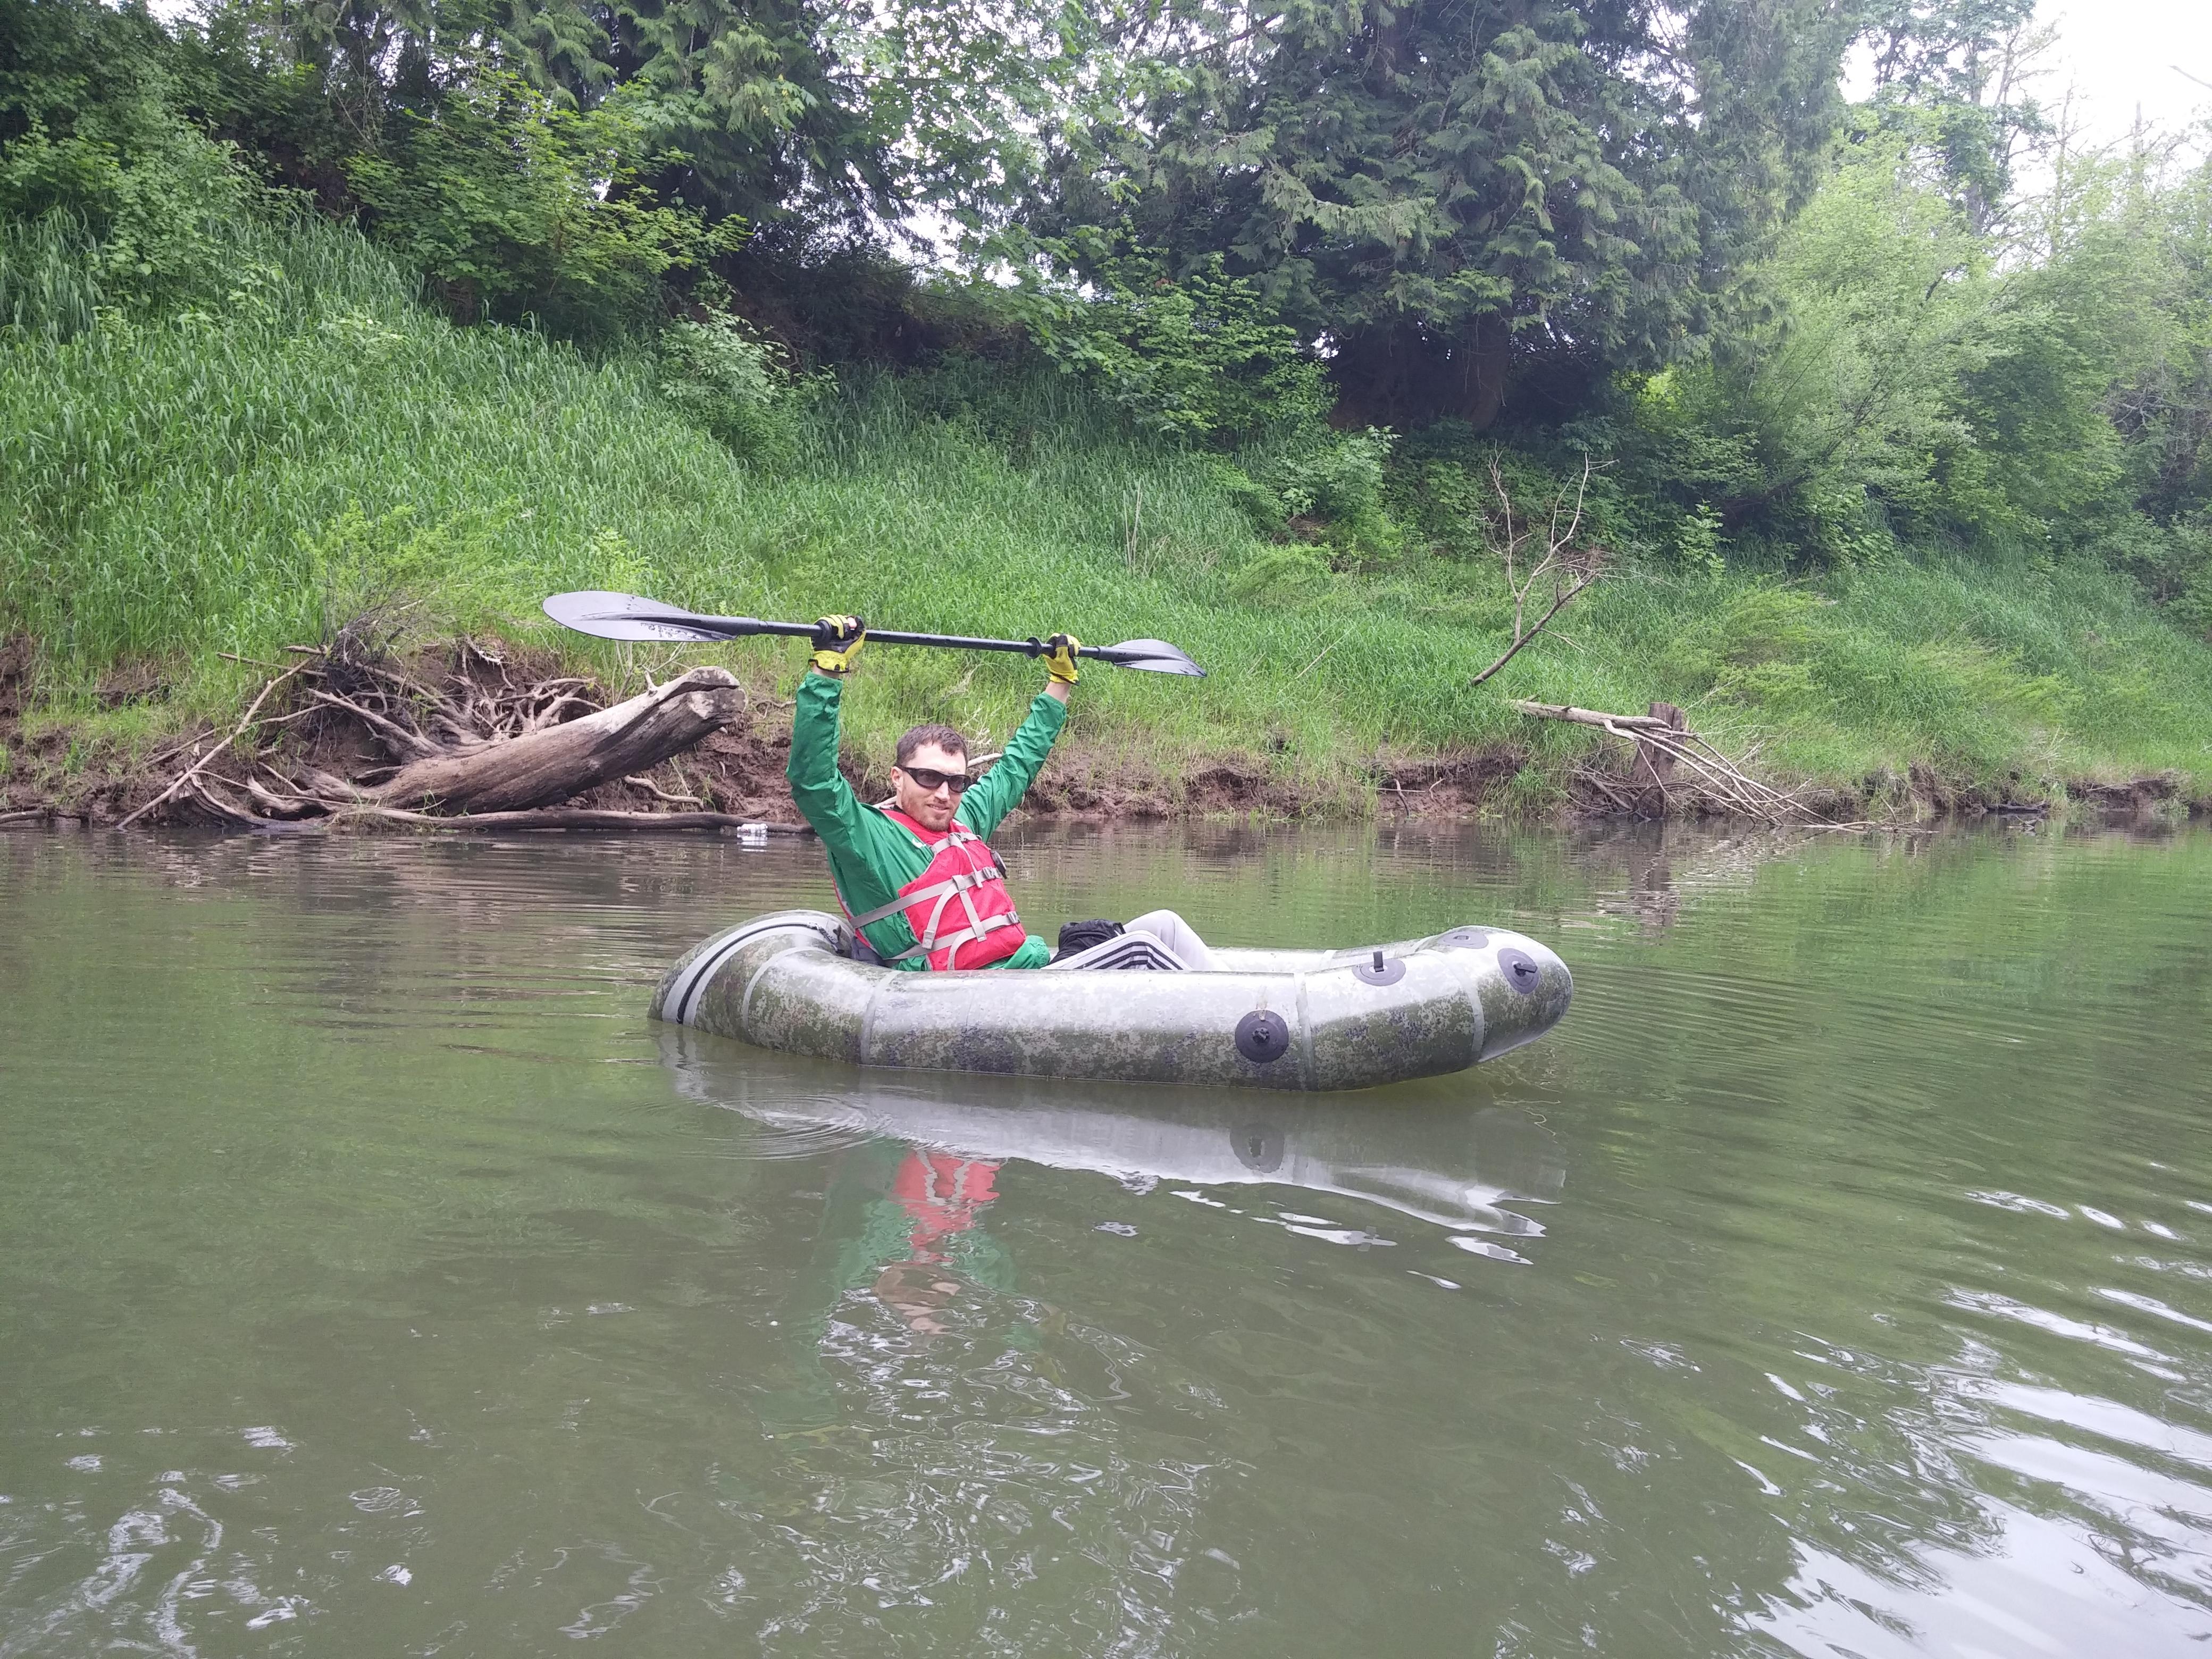
-
May 17, 2018 at 8:27 am #6422Matt (Admin)Keymaster
Looks great, Steven!
I have so many half-finished projects, I know what that’s like, so good for you for plugging away at it and getting it done. Thanks for posting!
-
May 17, 2018 at 2:37 am #6419Kwok Wah LaiParticipant
Wow… Great !!!!! Both you and your boat are awesome 👏🏼
-
This reply was modified 8 years, 1 month ago by Kwok Wah Lai.
-
This reply was modified 8 years, 1 month ago by
-
-
May 13, 2018 at 5:18 pm #6393StevoggoParticipant
Hi all,
Finished my V2 from plans and finally got around to testing it in the river. The raft is great and exceeded my expectations for handling etc. The material I sourced looks very much like an imitator of Mat’s so I plan on getting some “DIY packraft” decals done.
My biggest problem was the end join on the seams, the last one, nearest the inside of the boat, they all leaked. I must have done something wrong there but can’t see what. Anyway it was all fixed with Aquaseal.
I plan on making a cpl more to take the kids out in the summer.
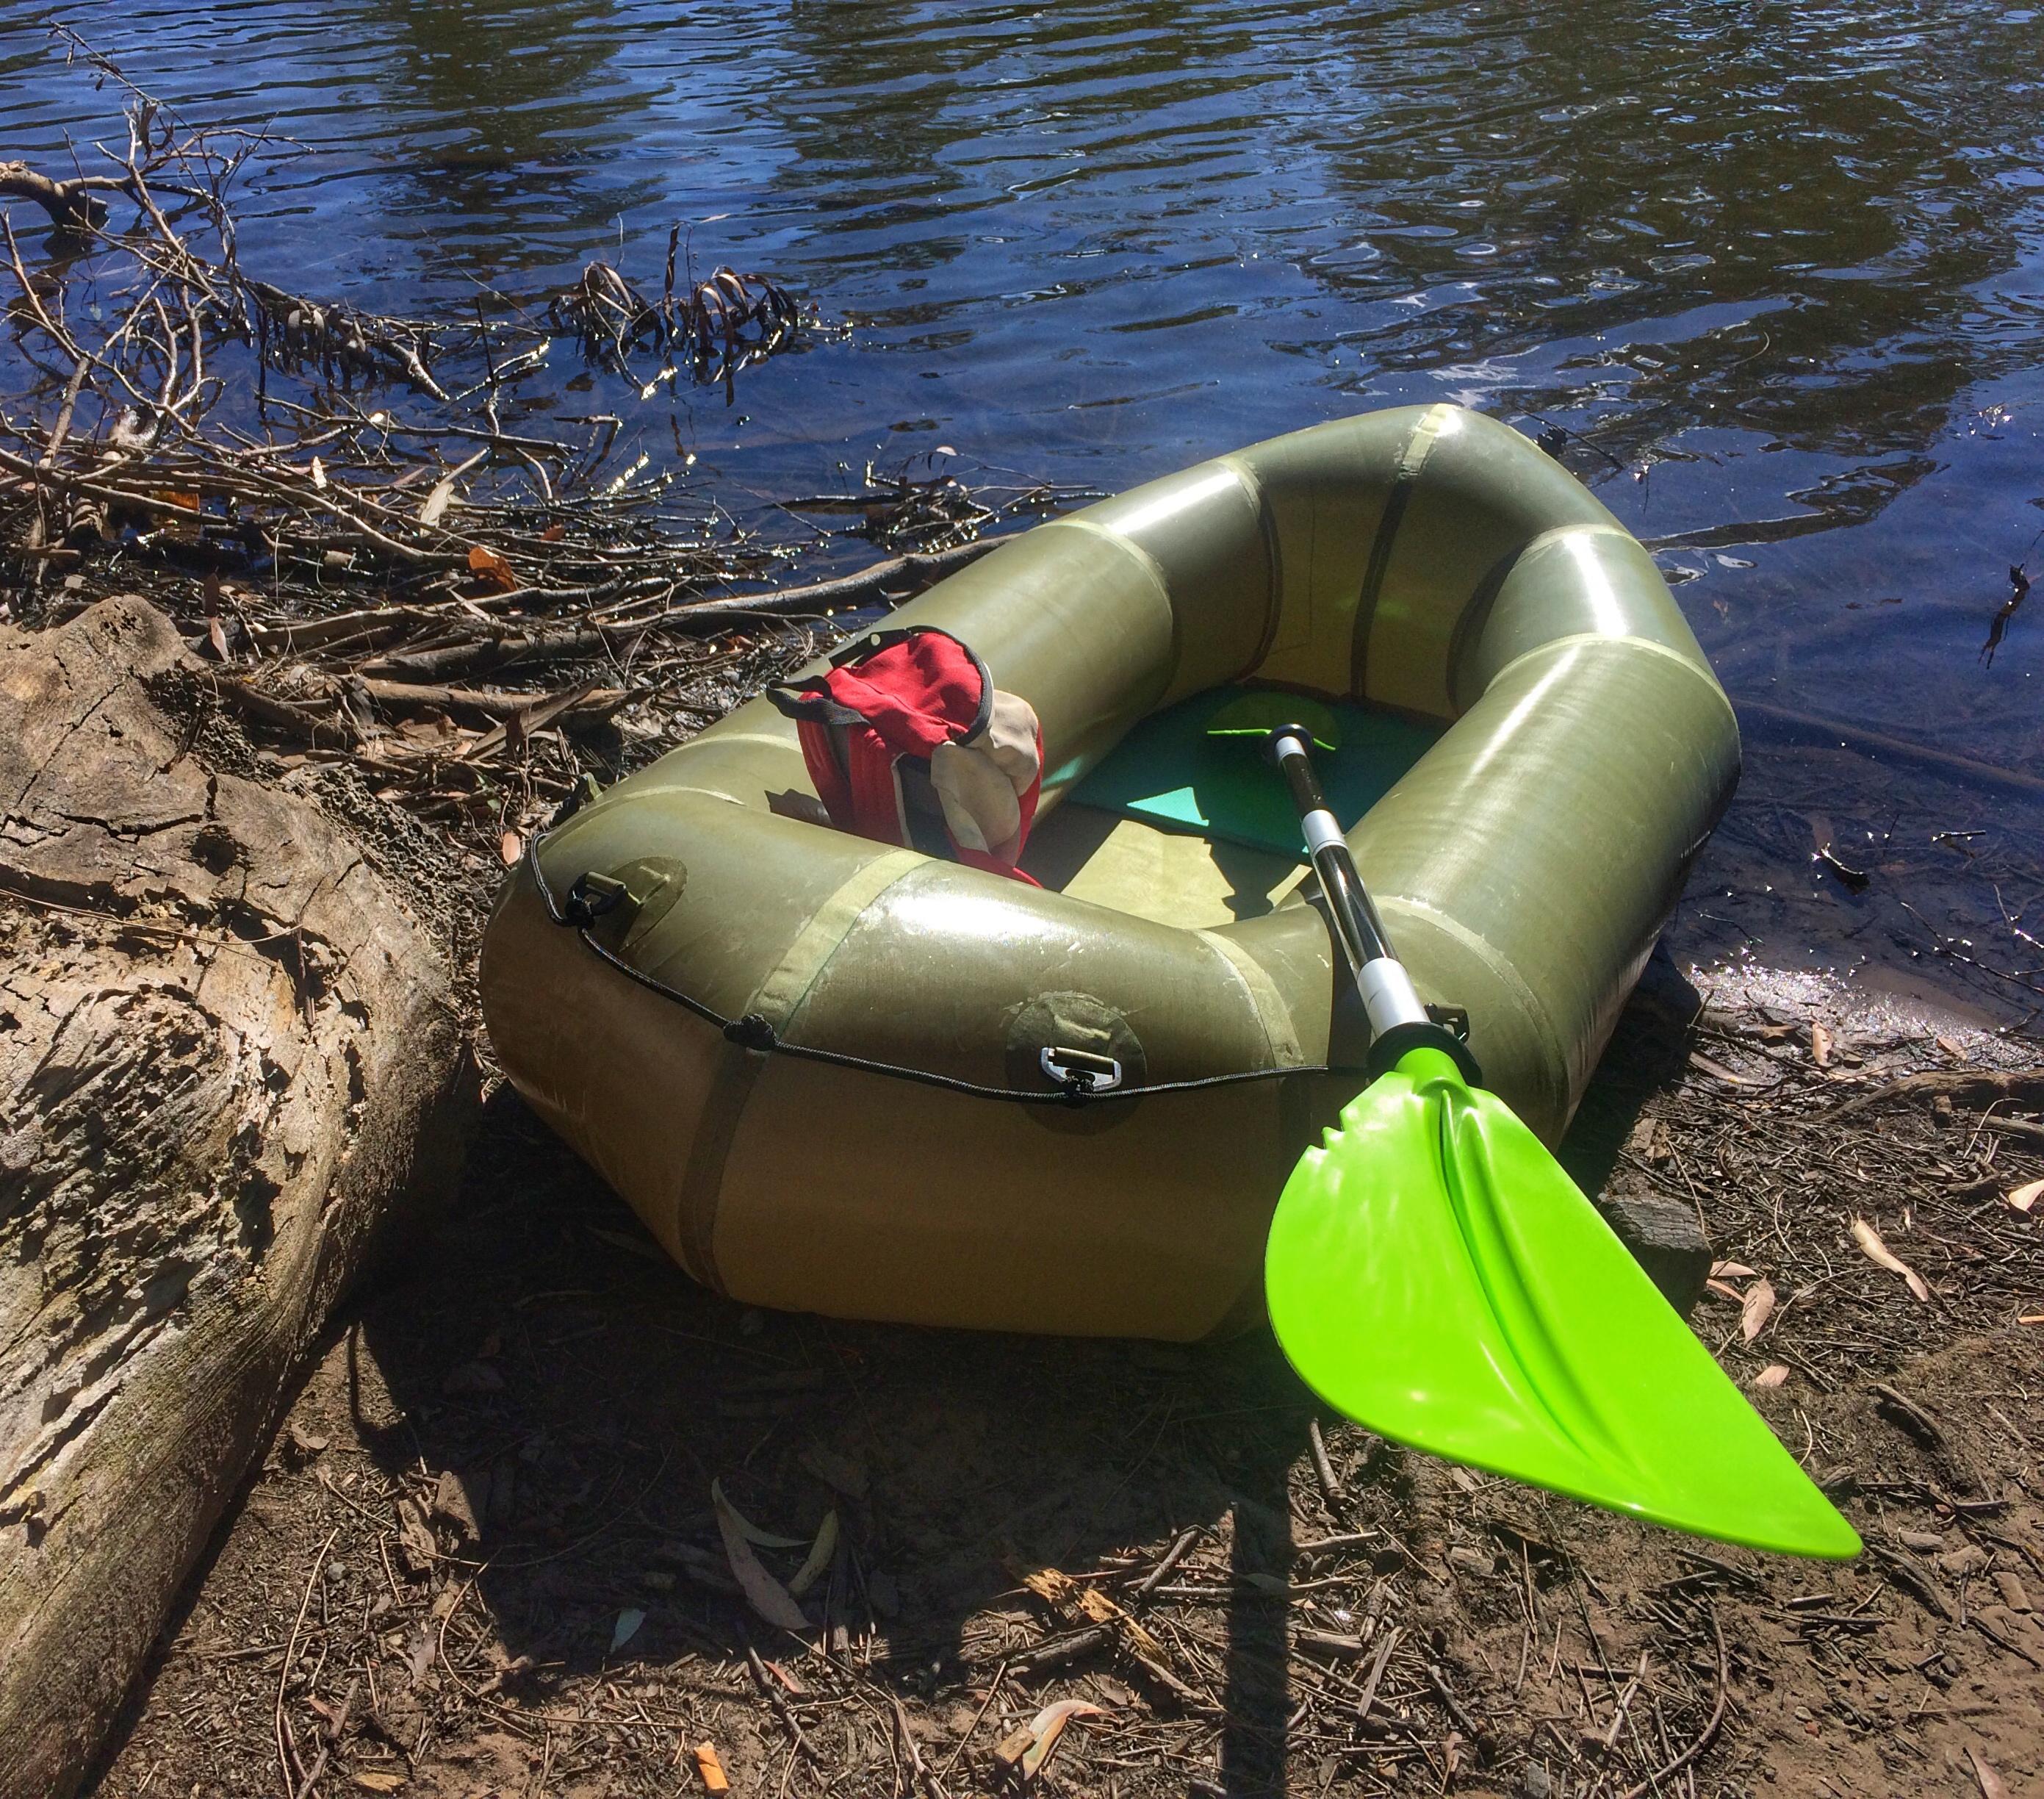
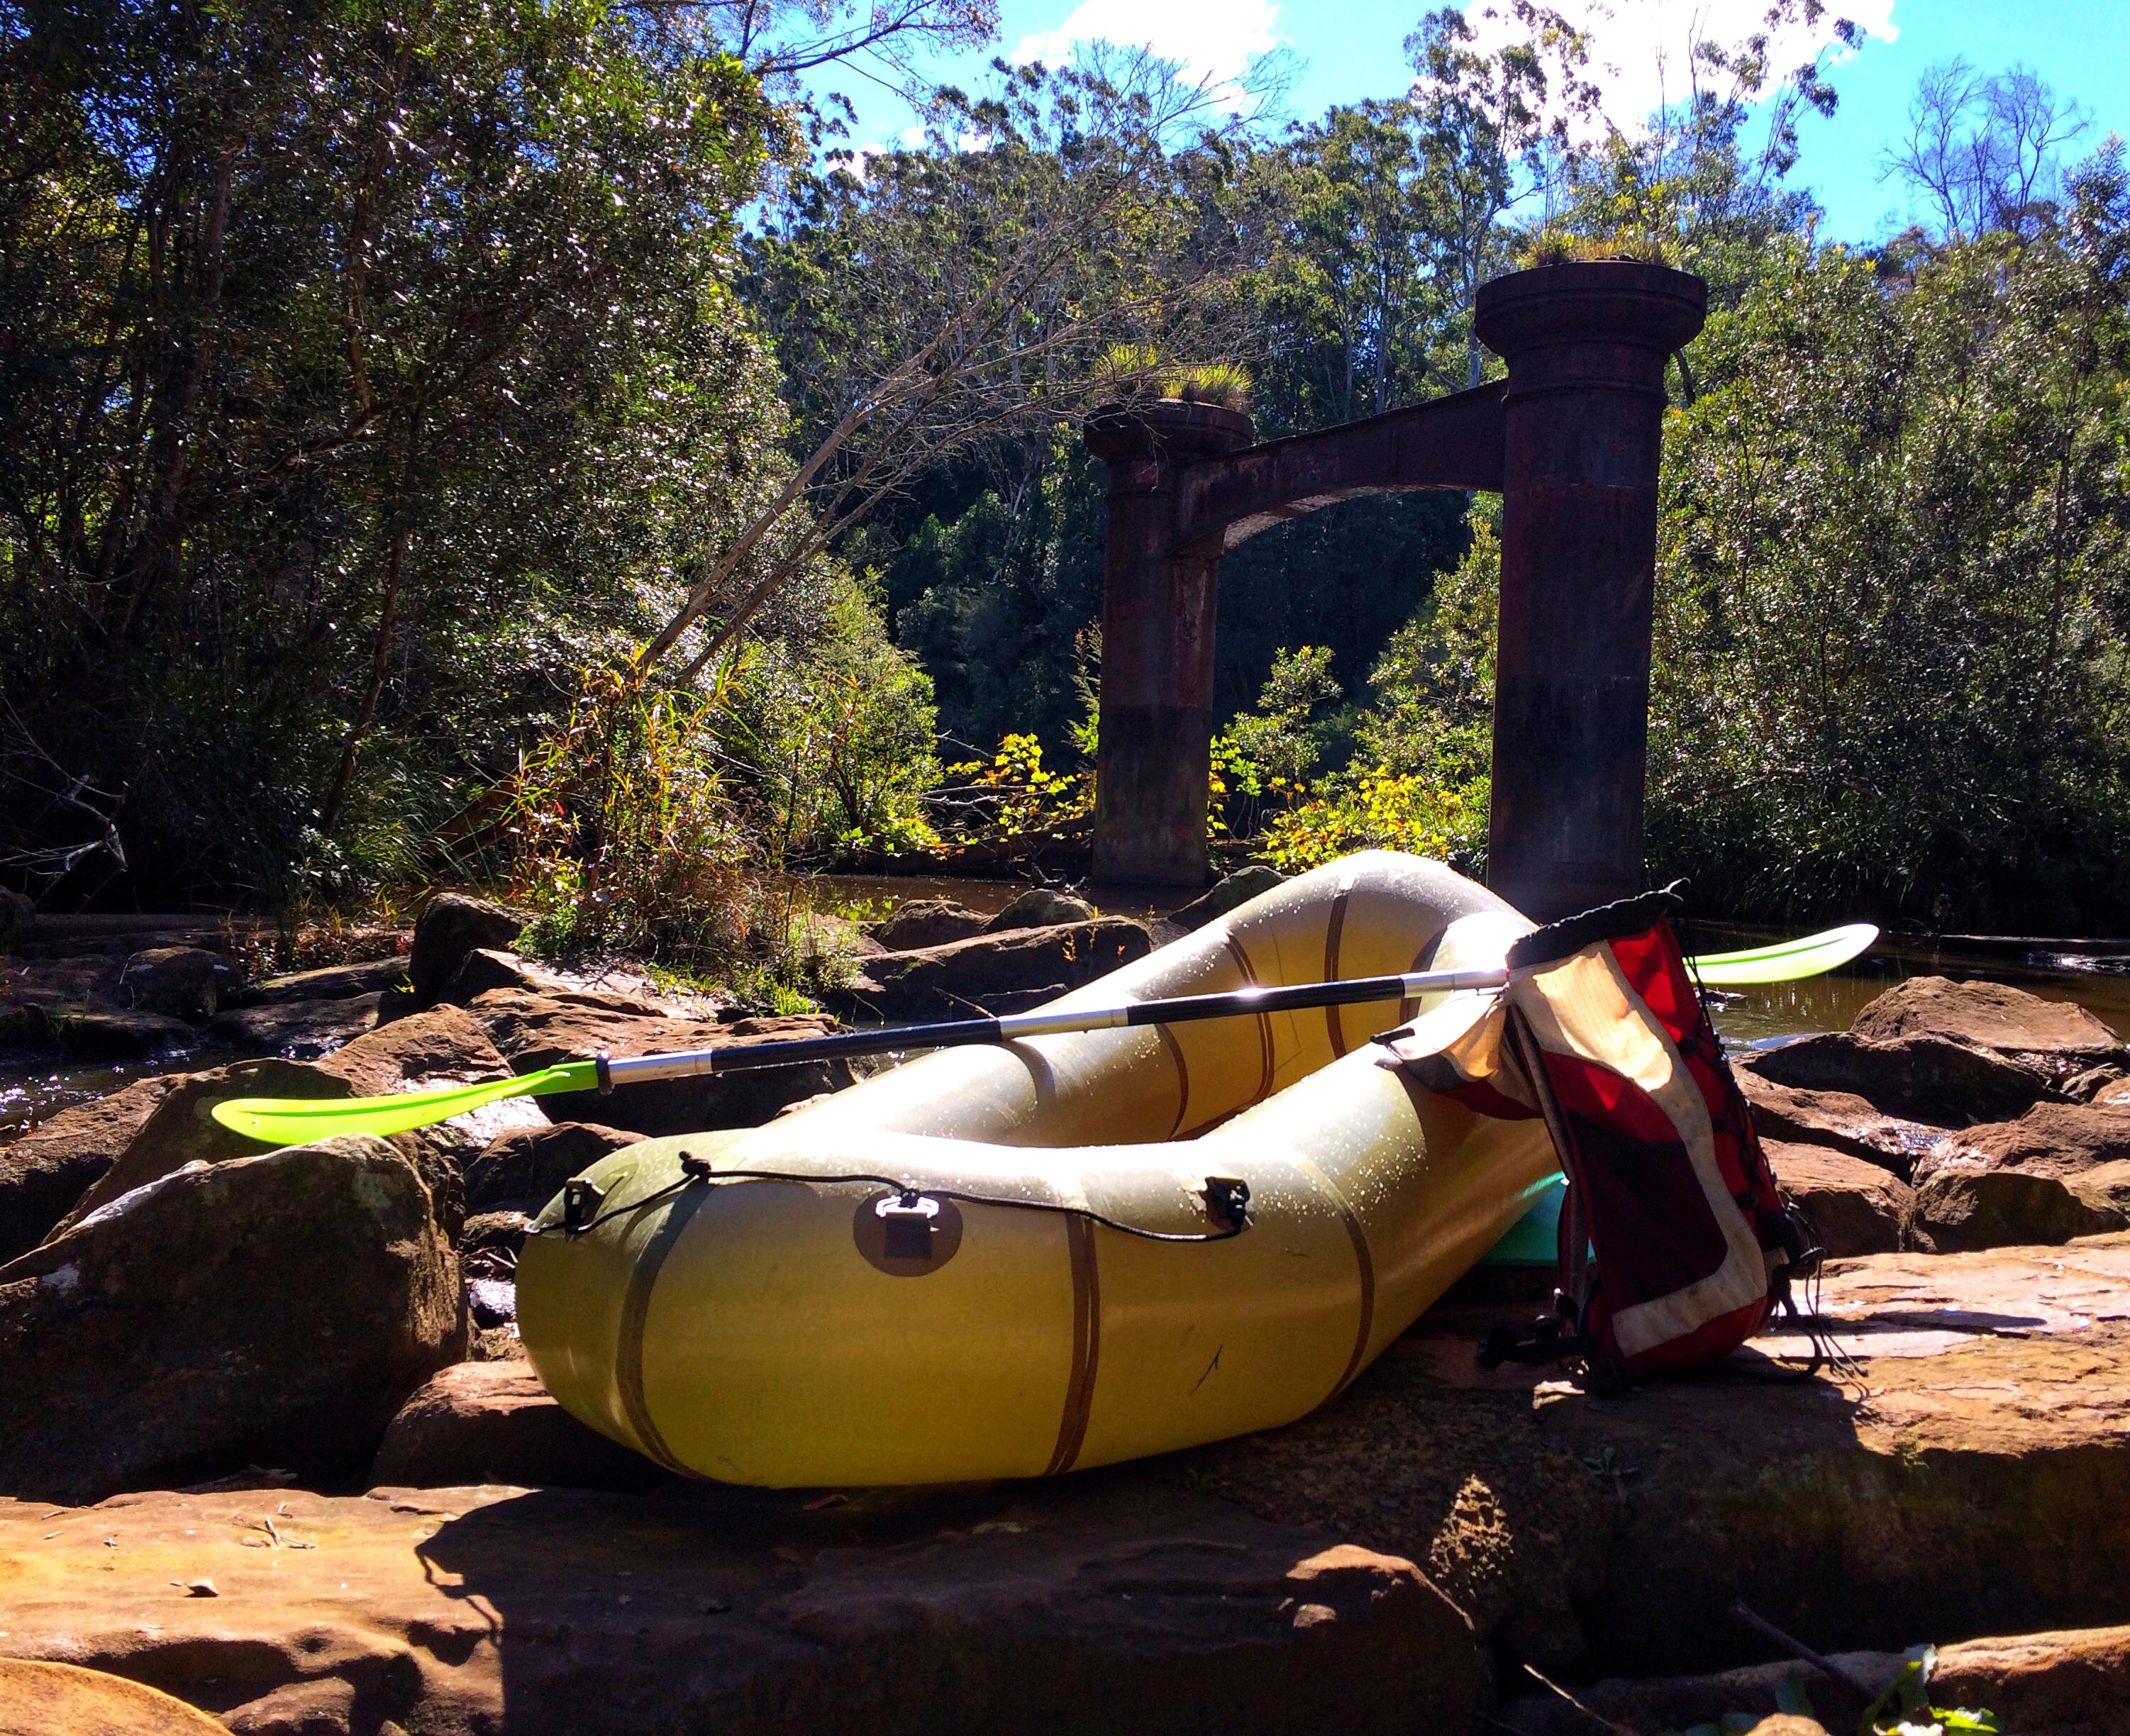

-
May 14, 2018 at 12:43 pm #6398Matt (Admin)Keymaster
Cool! Thanks for posting!
-
-
May 1, 2018 at 4:55 pm #6198
-
March 21, 2018 at 2:53 pm #5823MattSParticipant
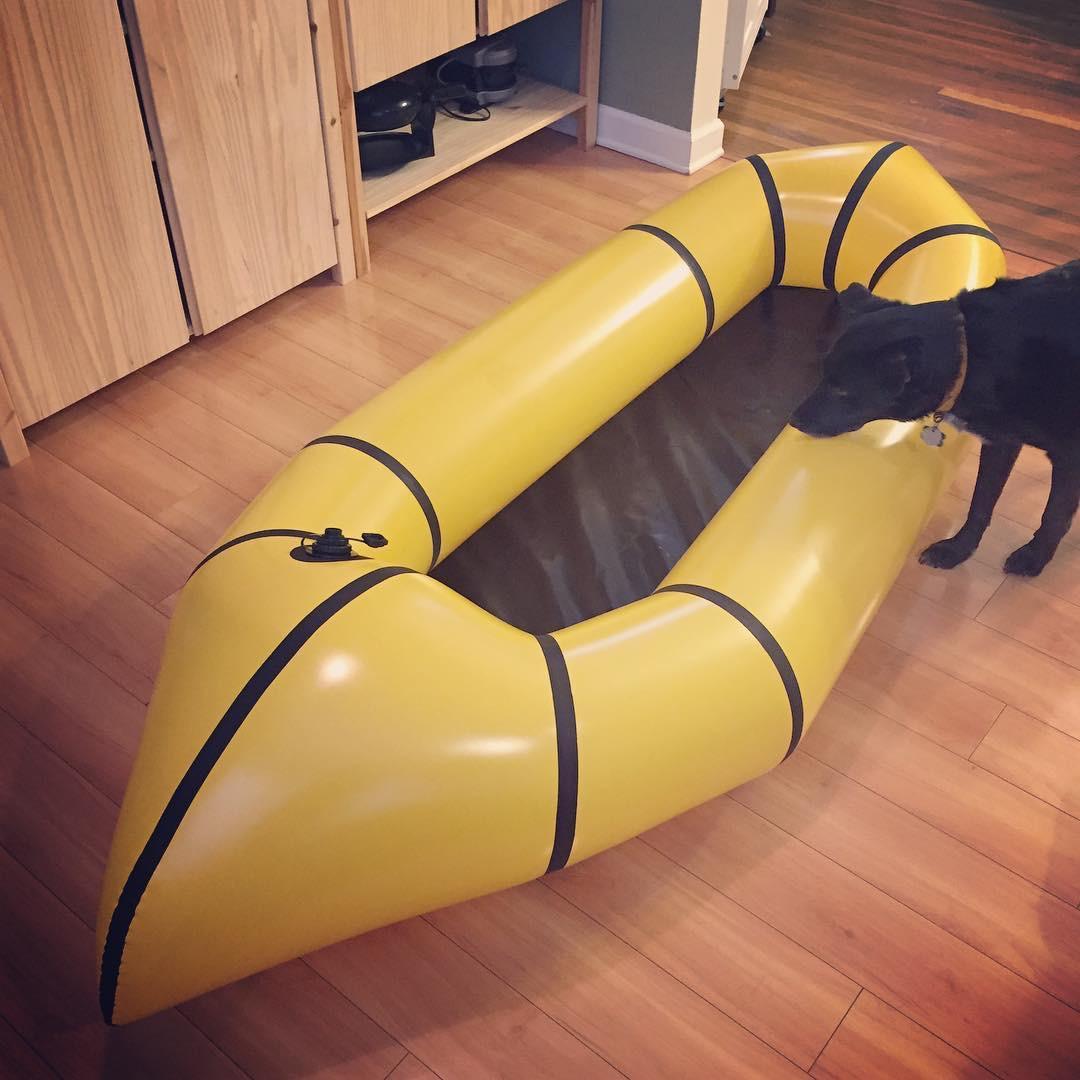
Just finished my first build, waiting on the glue to dry on the last leaky seam and then it’s headed to the river to test out!
-
April 25, 2018 at 3:01 am #6152ConradParticipant
Thi sis my V 3 build.
 finally found all the leaks and realised my mistakes in building so after Ive tested this in water and had apply I intend to add inflated floor with sort of keel and a spray skirt of some kind. THEN I get to do it all again on a v3 in blue for my partner…
-
April 25, 2018 at 8:36 am #6154Matt (Admin)Keymaster
Excellent! I love the look of the yellow tubes and black trim.
-
-
March 21, 2018 at 7:00 pm #5835Matt (Admin)Keymaster
Beauty!
-
-
January 22, 2018 at 1:13 pm #5267EliotParticipant
Just wanted to share some photos of my V3 kit.
I outfitted it as a light weight whitewater boat with three point thigh straps, a backband and a whitewater deck with a cockpit coaming.
Several of us ran laps on a local class II in it for it’s maiden voyage.
Coming from a rafting and whitewater kayaking background, the packraft performed really well and exceeded my expectations of handling and speed.
Everyone who tried it is sold on buying a kit from Matt.
Now I really want to build another V3 whitewater boat as a self bailer.
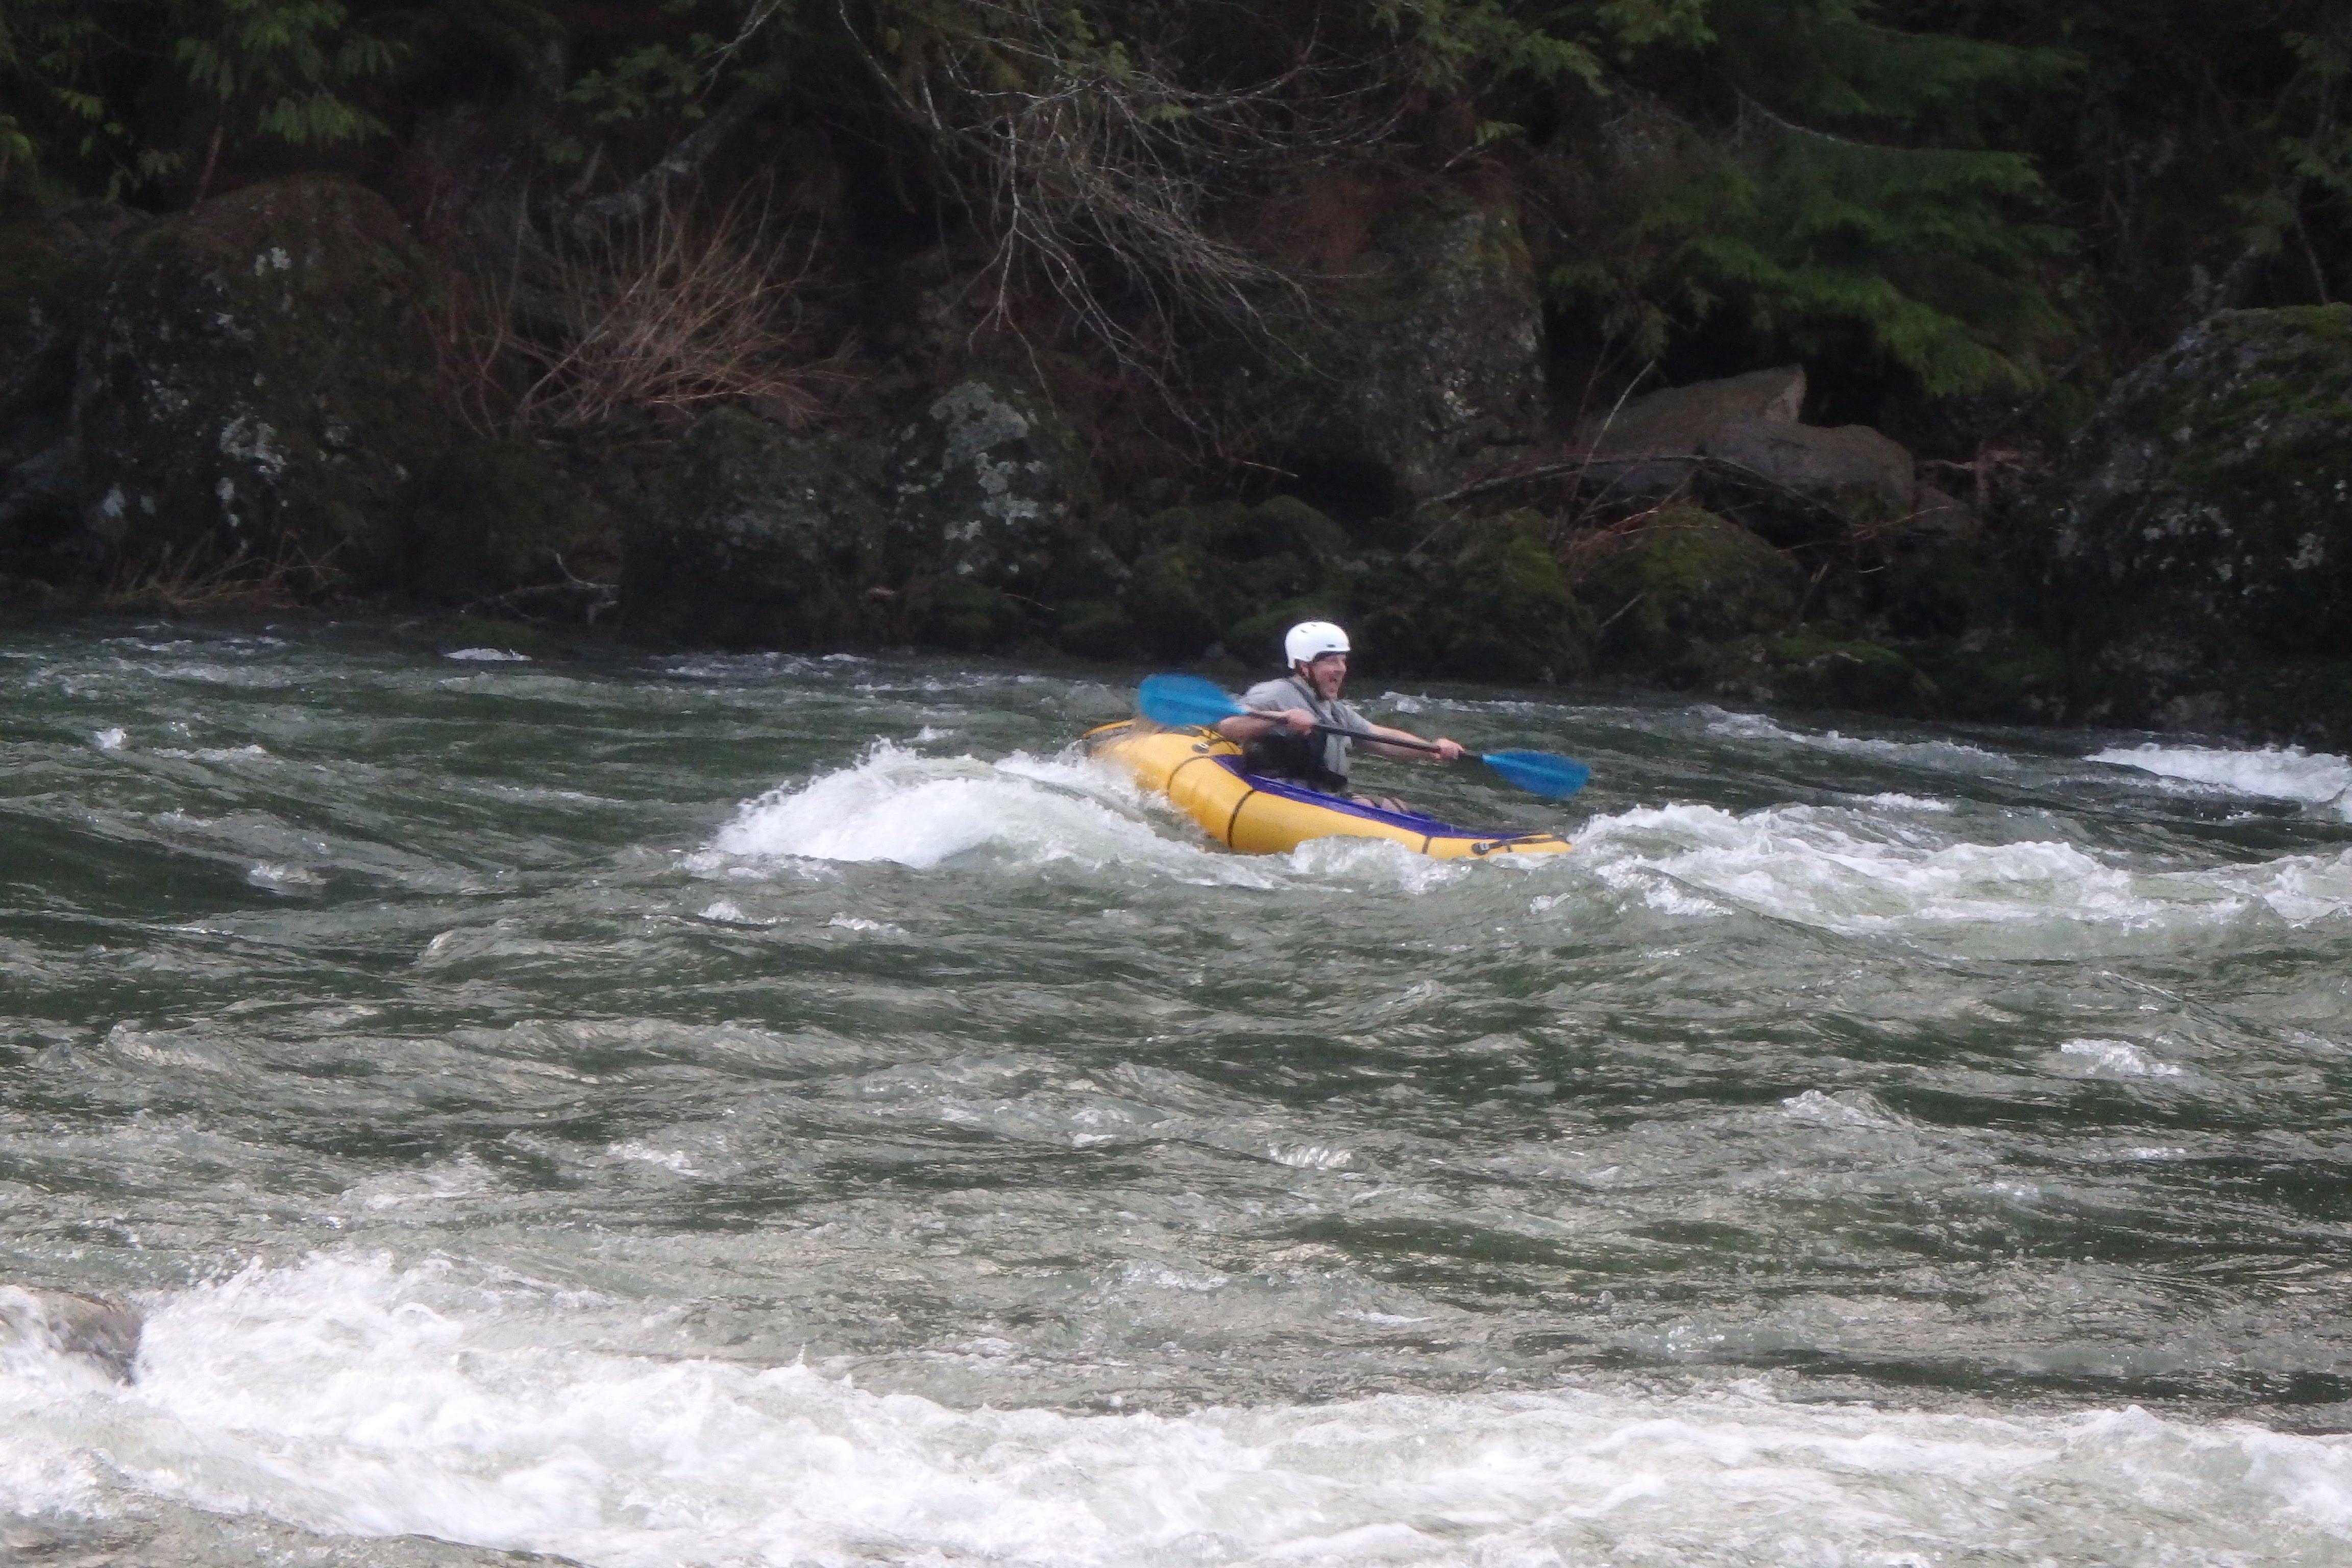
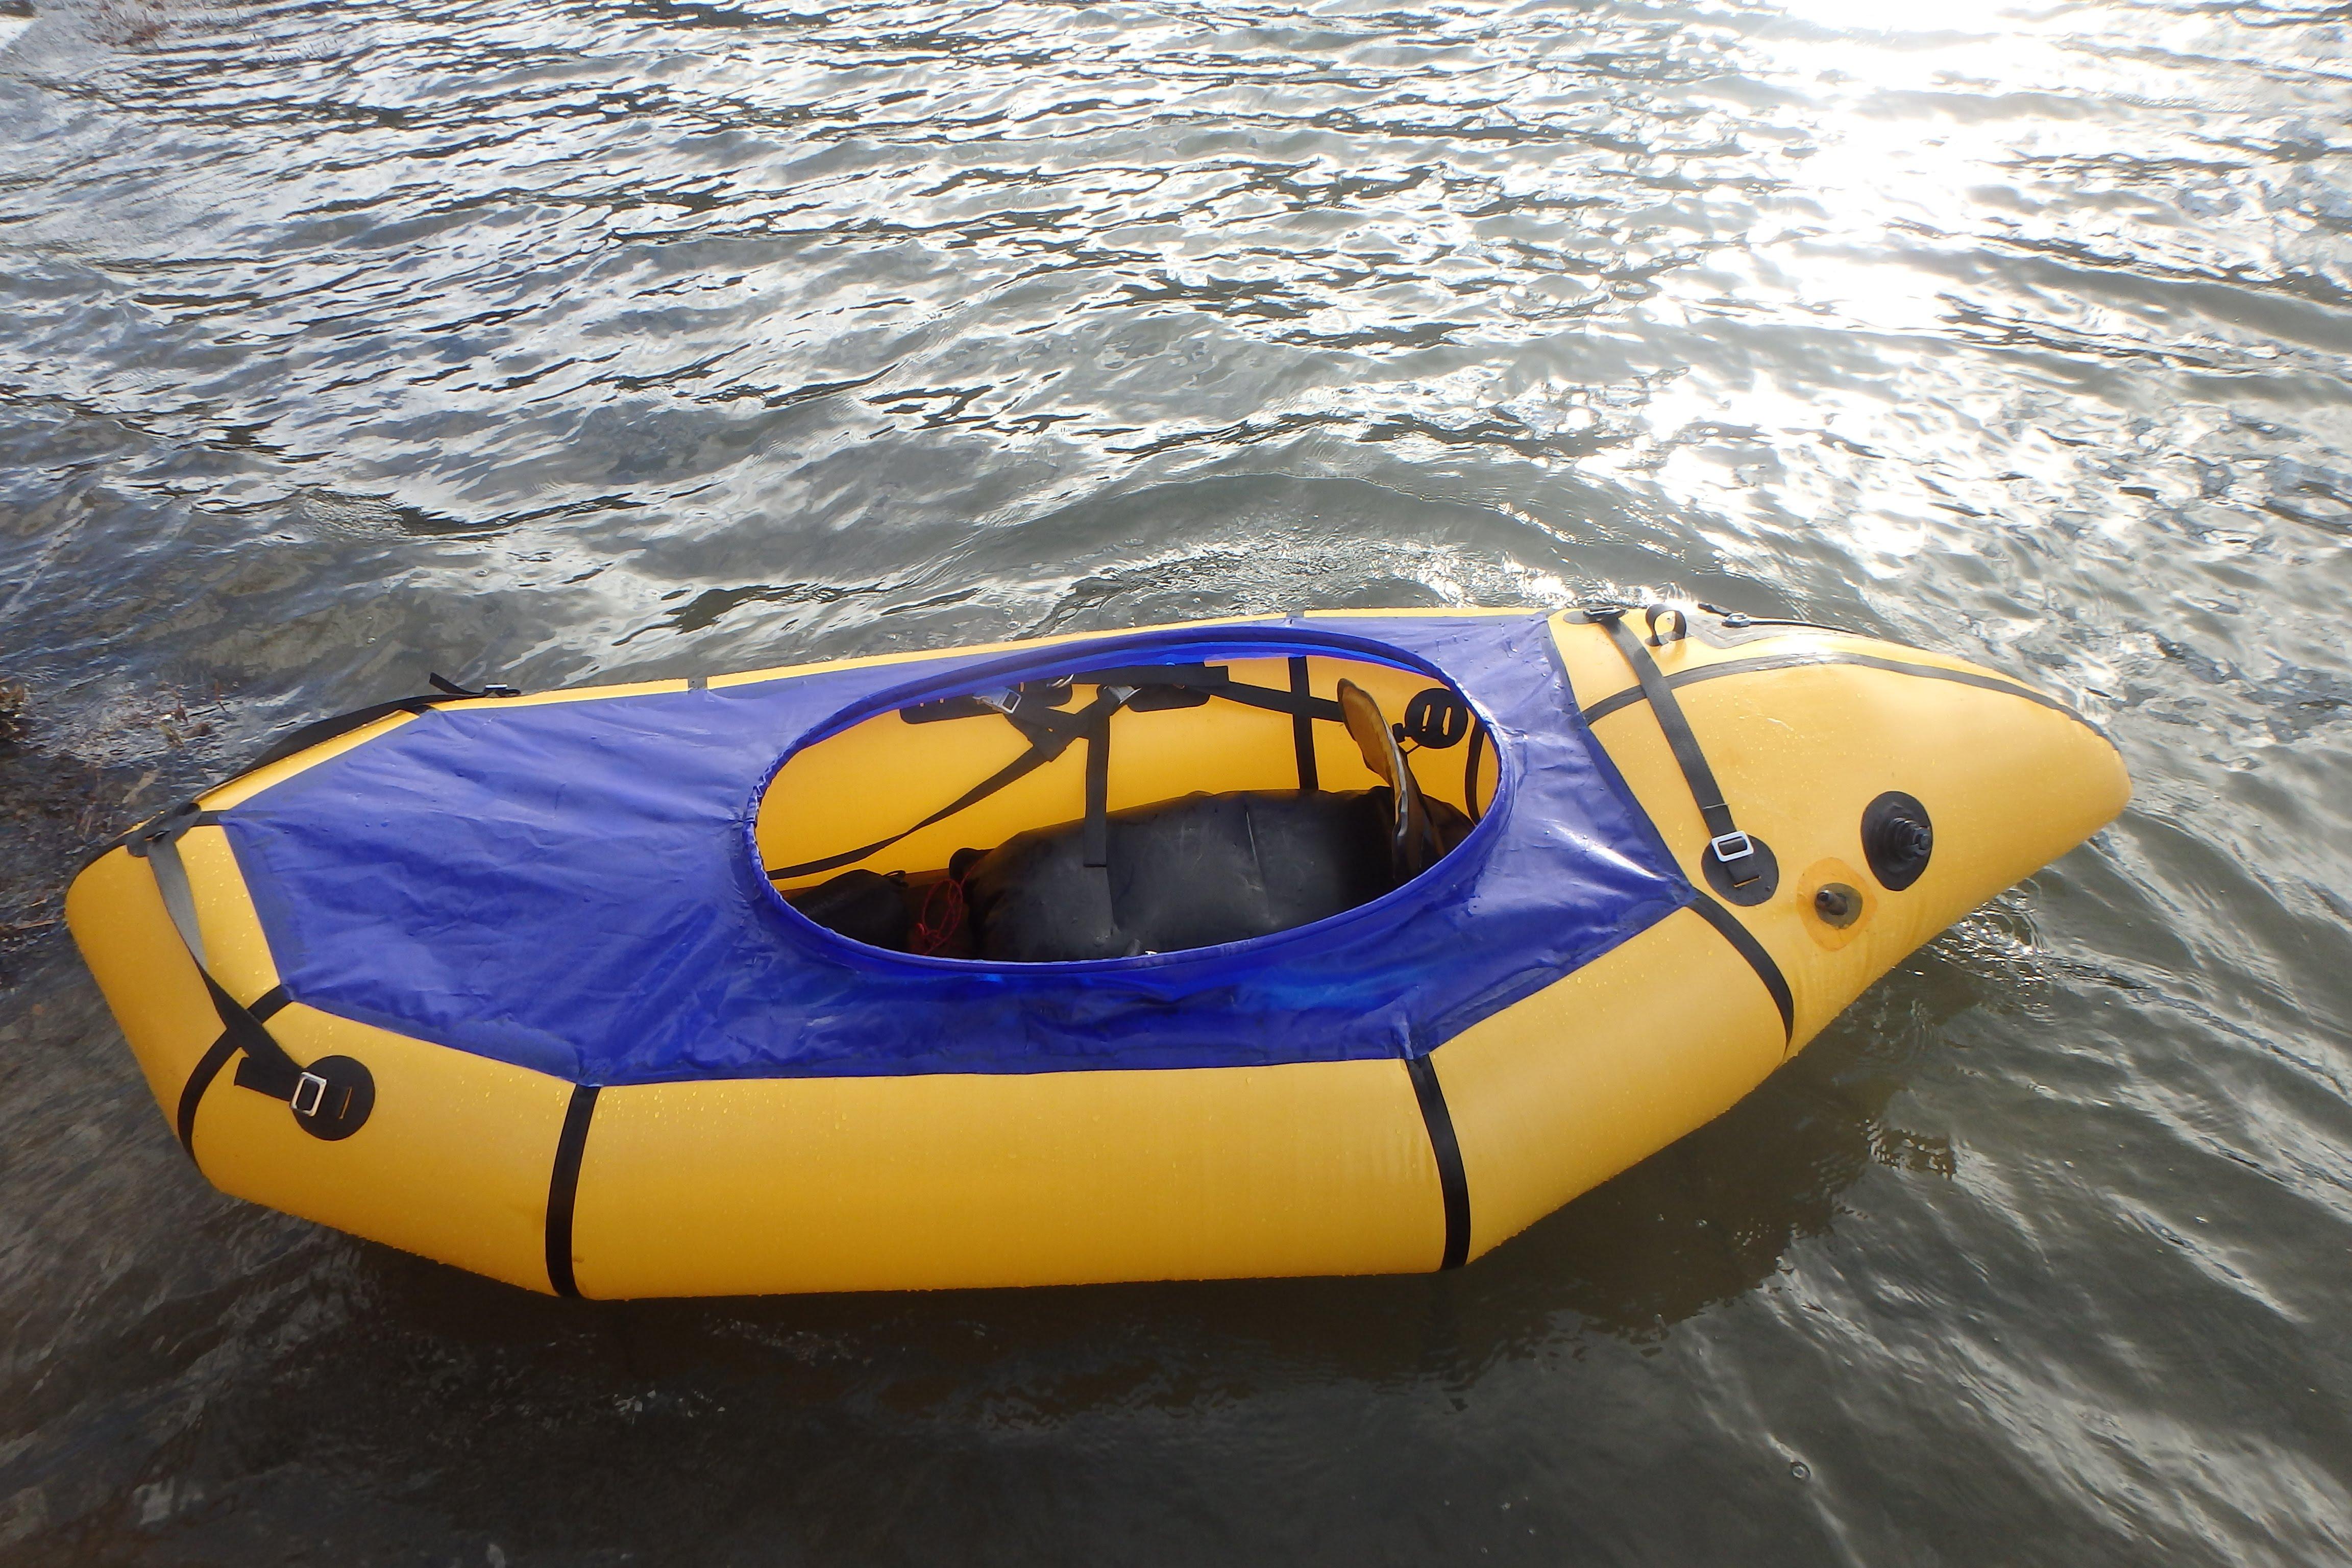
-
January 24, 2018 at 2:32 am #5281ClemensParticipant
It does look awesome – good job!
I’d also be really interested in the materials you used for the “rods” (I hope that’s the correct term) of the sprayskirt.
-
January 24, 2018 at 10:41 am #5282EliotParticipant
Hi Clemens,
The rod that forms the coaming is currently a single piece of 3/8″ OD, 1/4″ ID Polyethylene (PEX) tubing. This is available at most hardware stores in North America for installation in household plumbing as an alternative to copper or CPVC.
There is a short section of 1/4″ aluminum tube inserted as a joining piece.
I believe this is what Alpacka and others are doing on the current crop of whitewater oriented packrafts.
Following Matt’s construction guide for a spray deck, I have a small slit in the inside rear of the cockpit that I feed the coaming into and snap the joint together through.
I will be making some improvements to this area as it’s the one thing I’m not 100% happy with. It is currently very difficult to install an off the shelf whitewater kayak bungee sprayskirt. However, once it’s on, it’s fairly secure.
I think a slightly longer coaming piece than I currently have will create a deeper and more secure lip for the skirt to fit over and make it easier to snap into place.
Hope this helps.
-
March 12, 2018 at 2:07 pm #5716ClemensParticipant
Hey Eliot,
thanks a ton for the insights and thanks to Matt for putting up the documentation.
—-
I finished my first V3 on the weekend – all the outfitting is yet to come. I was so eager to try it out that I even forgot to pull off all of the masking tape.
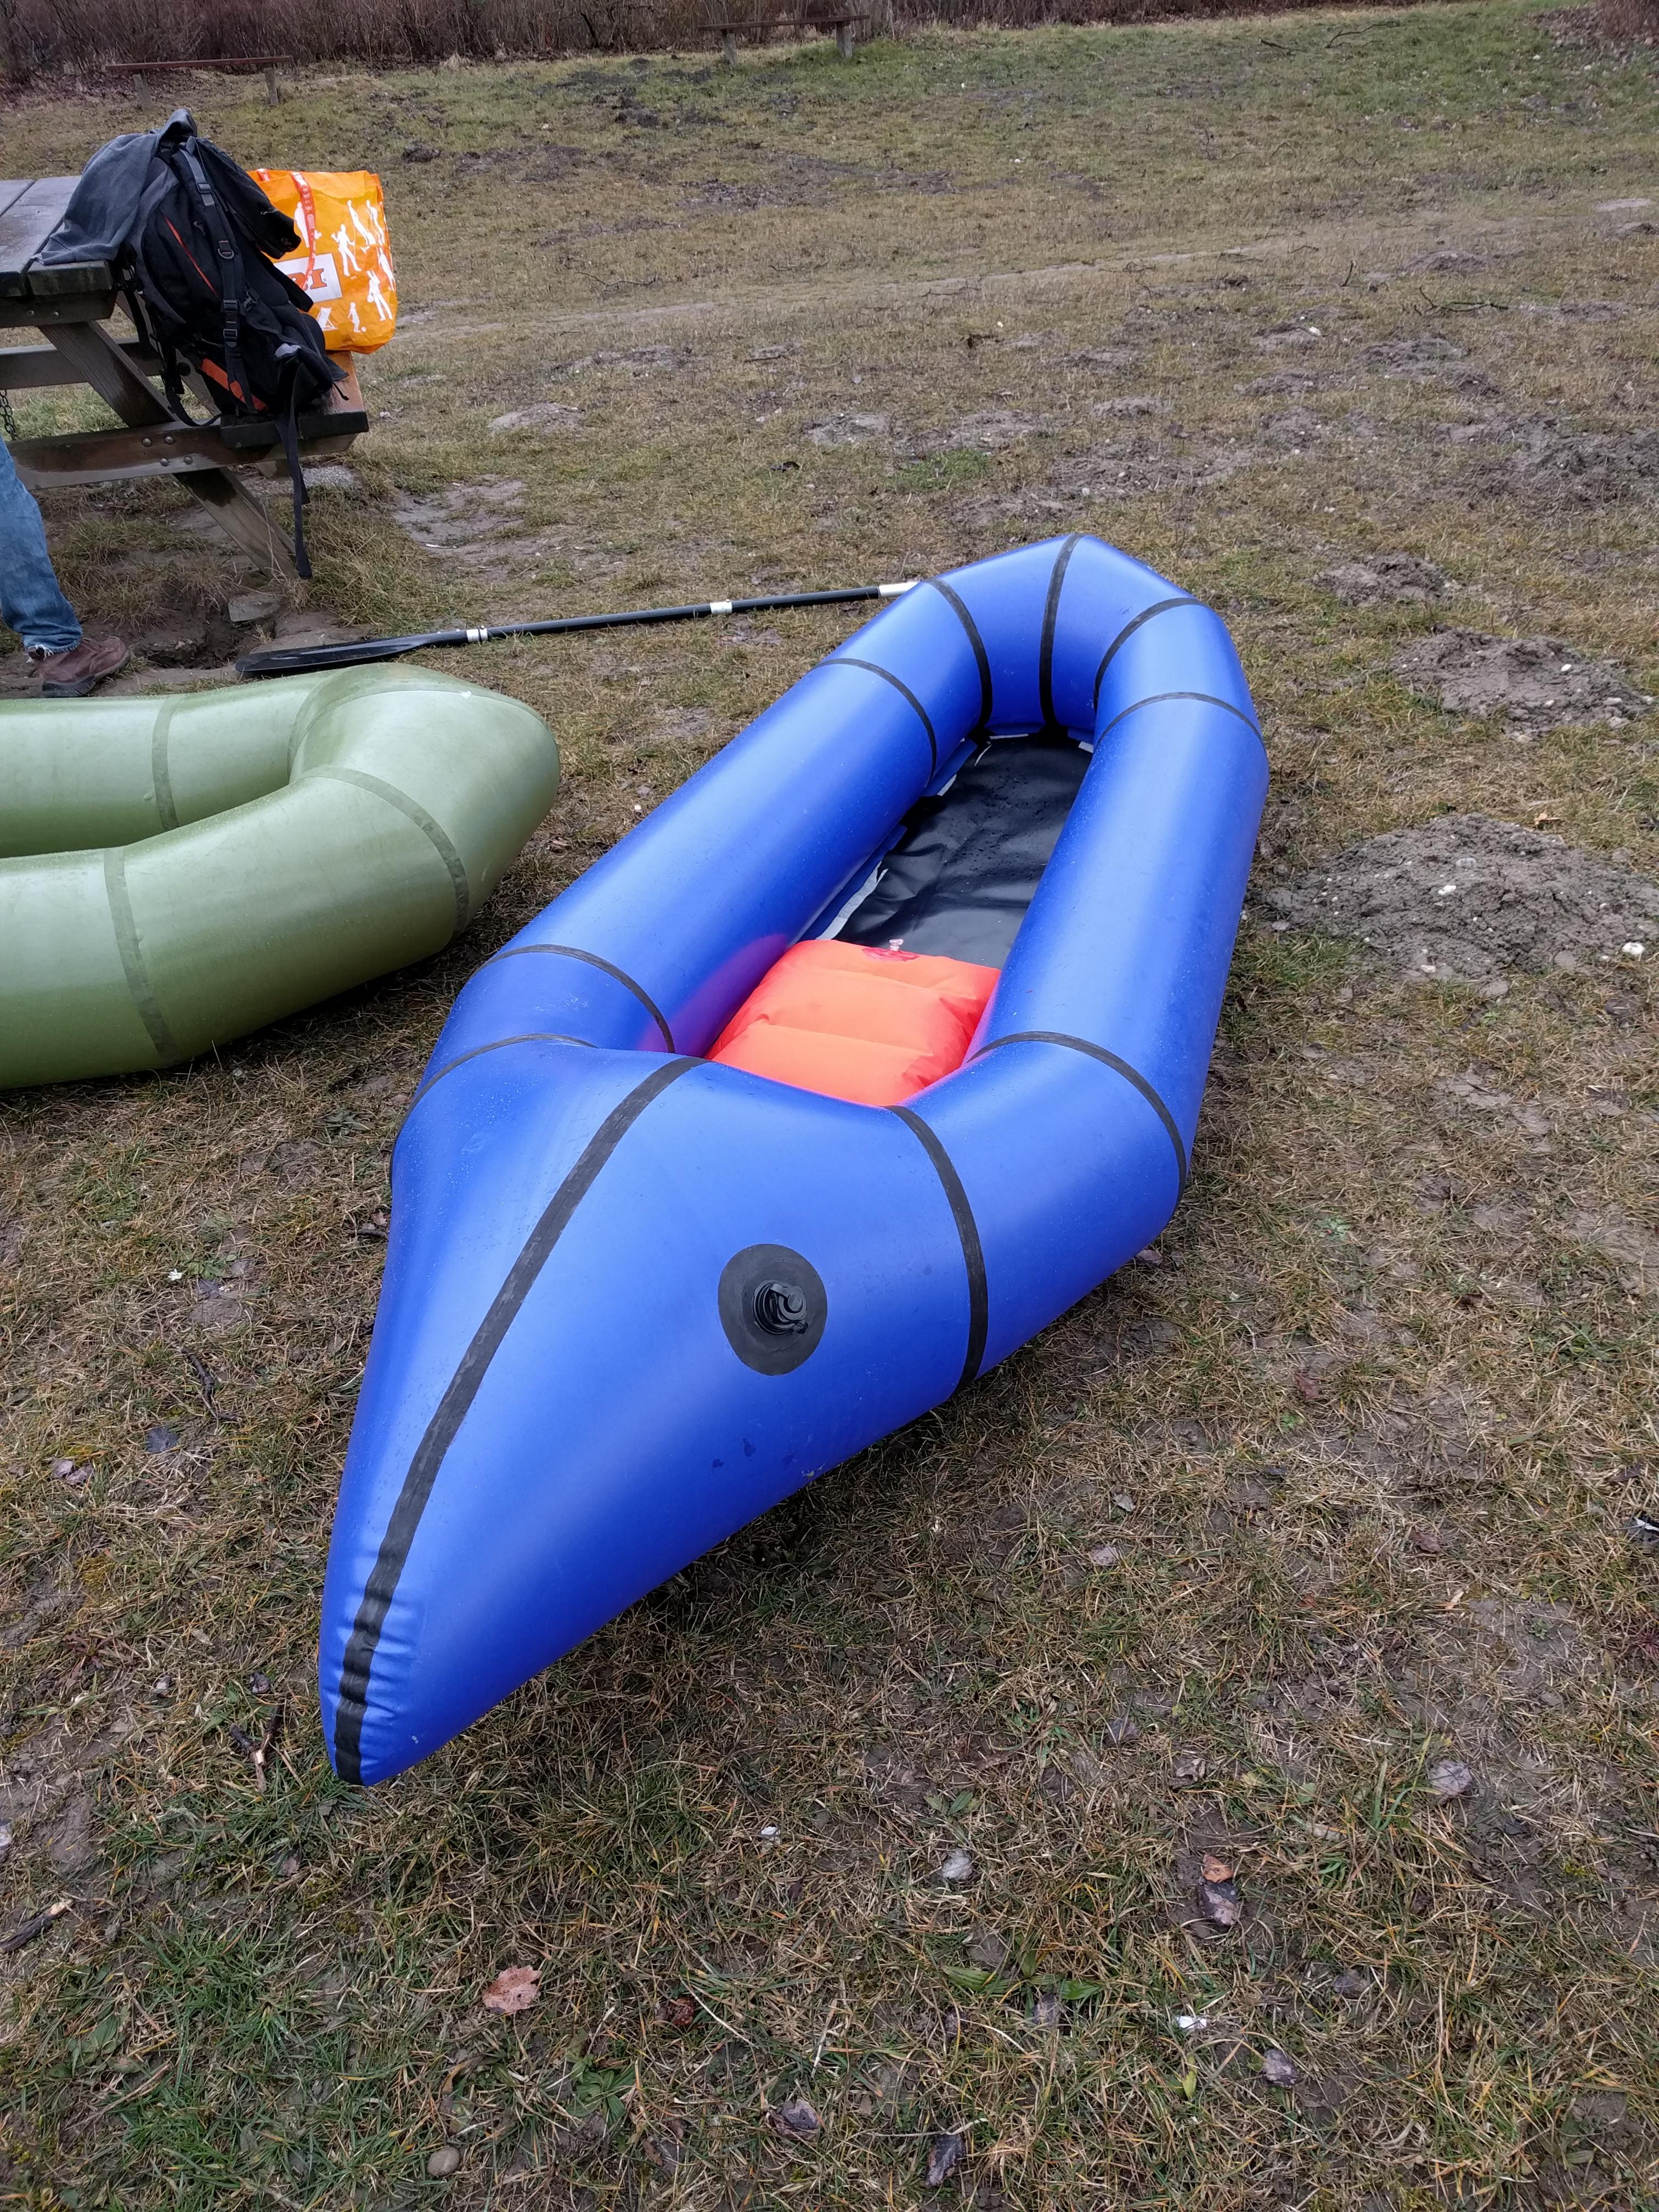
Cheesy picture paddeling it on the Danube:
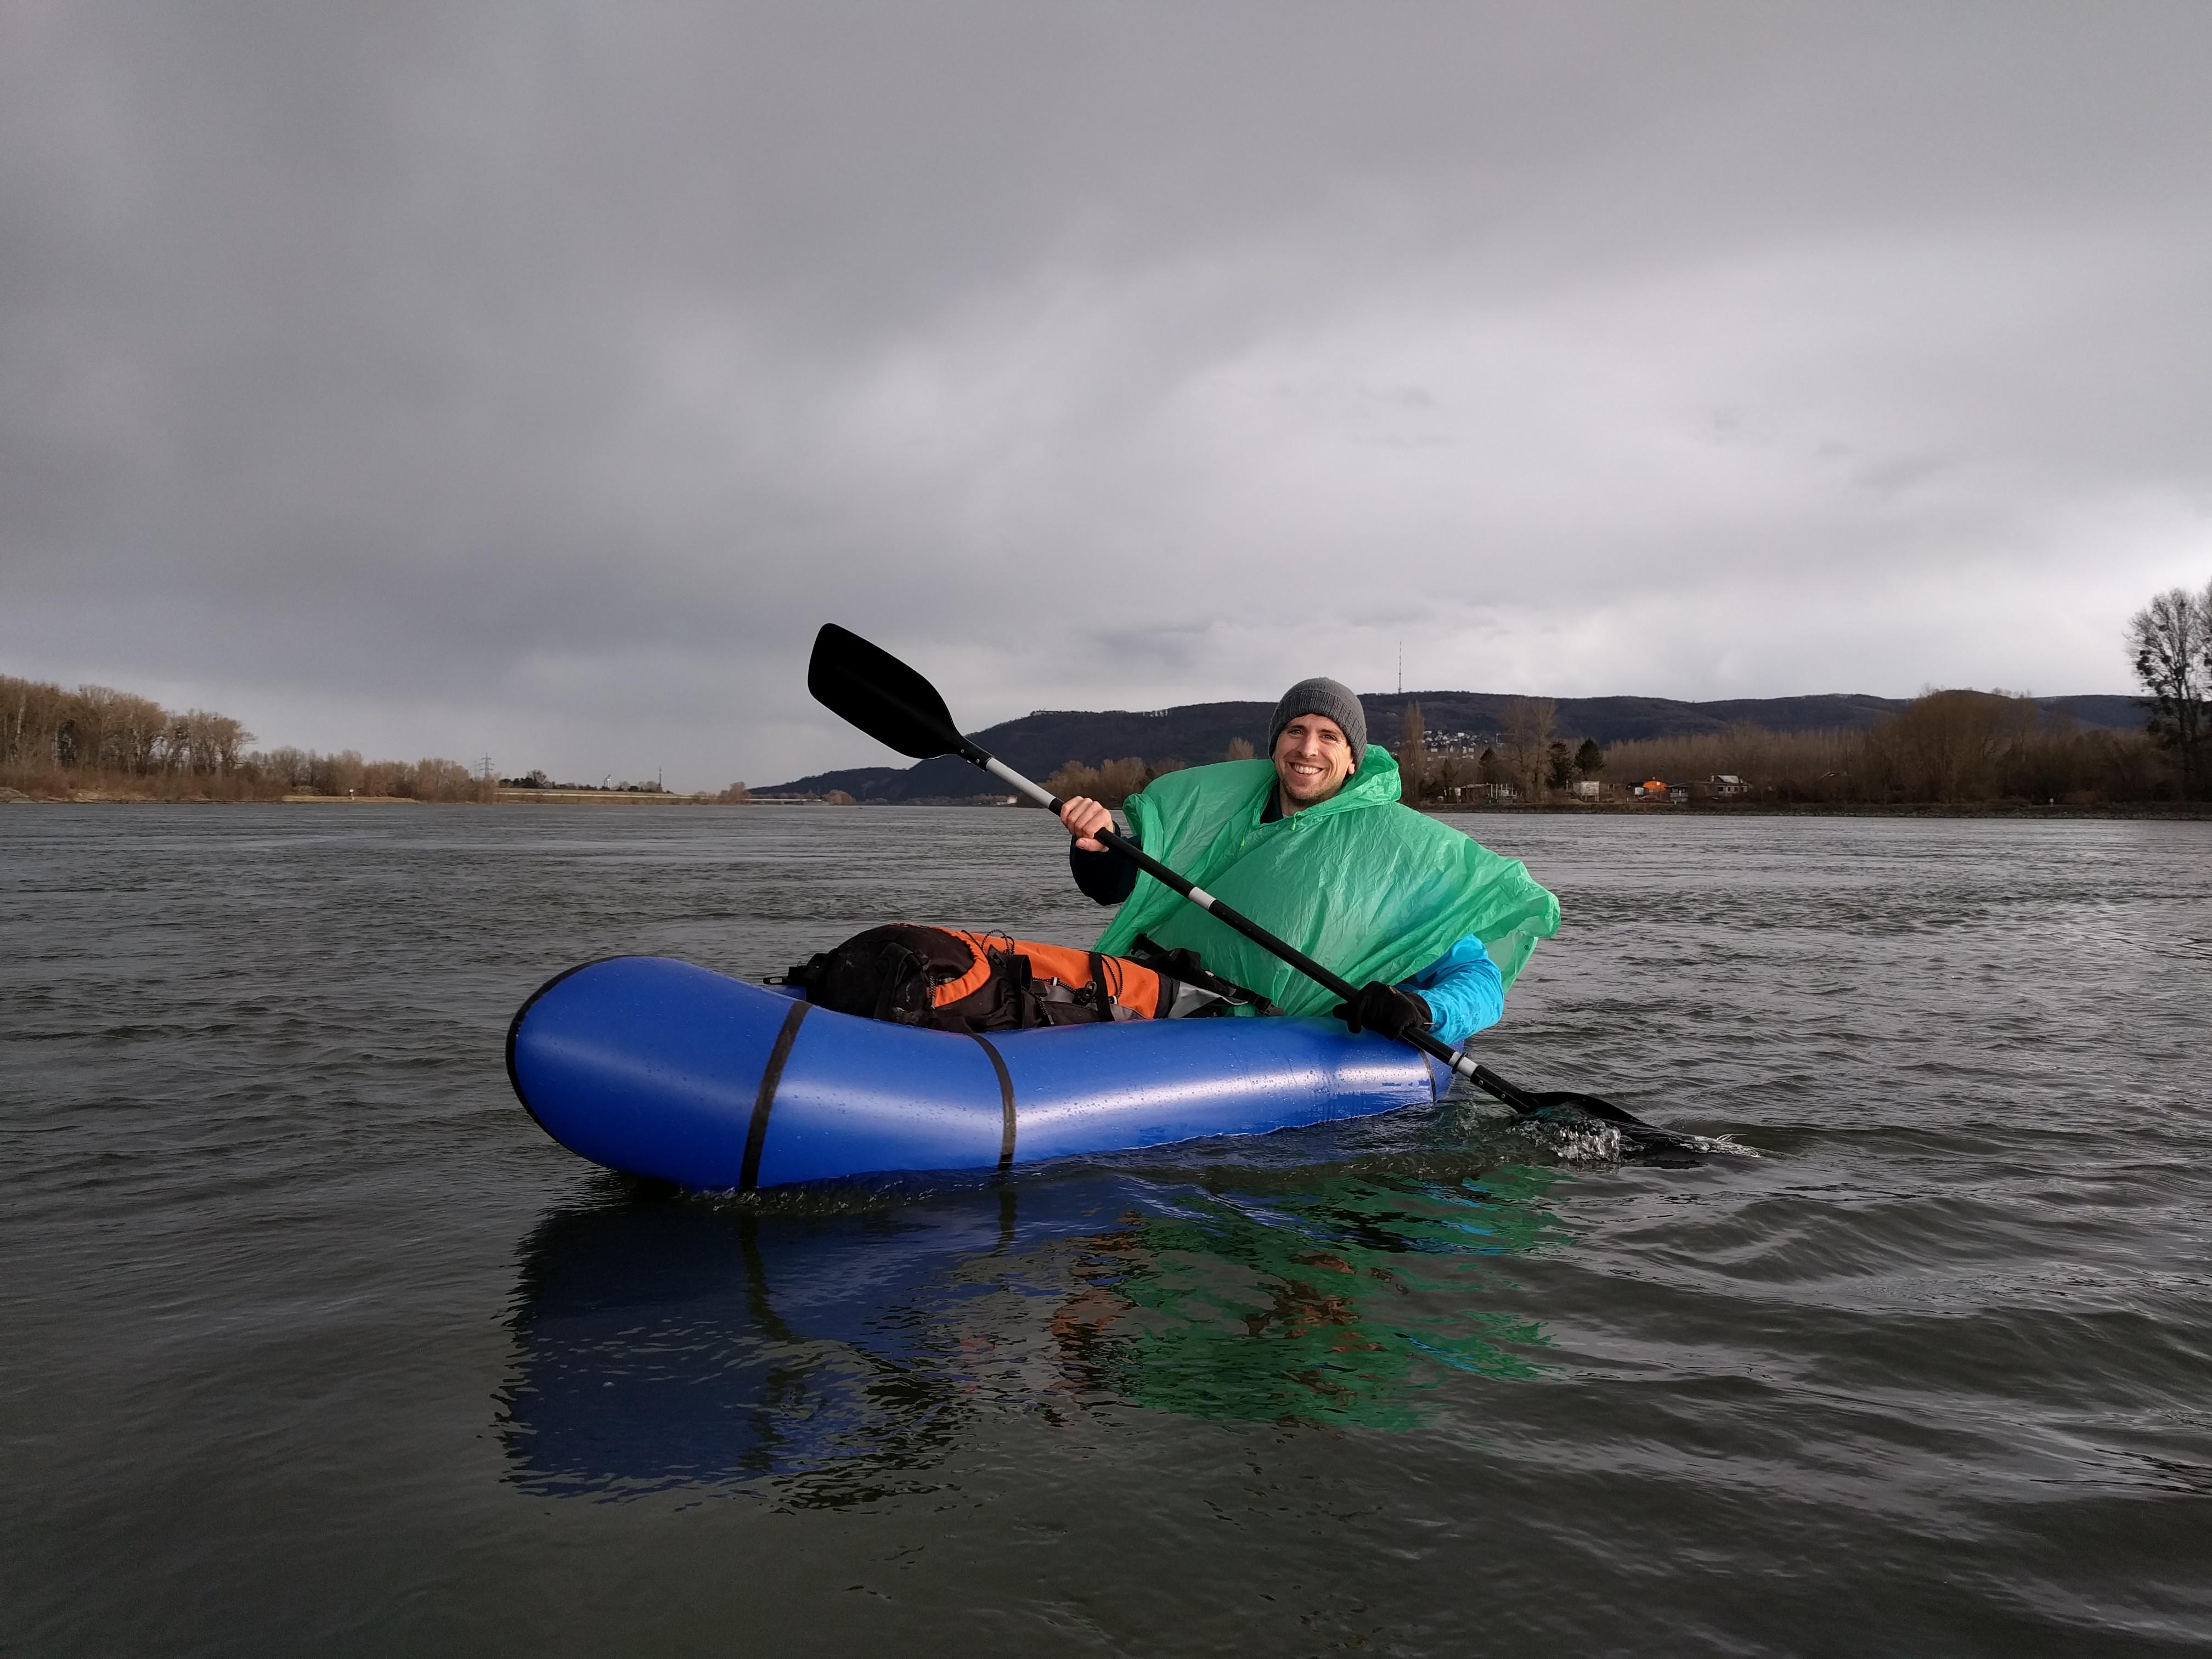
-
March 12, 2018 at 2:58 pm #5718Matt (Admin)Keymaster
Nice! I’m glad to see you looking so happy!!
-
-
-
-
January 23, 2018 at 9:21 am #5272Matt (Admin)Keymaster
This is awesome!
If you have more pictures and details about your outfitting, I’d love to do a blog post about it because lots of people will be interested in the thigh straps and back band.
Great work, and thanks for posting!
-
-
November 22, 2017 at 12:41 am #5016Patrick DewaneParticipant
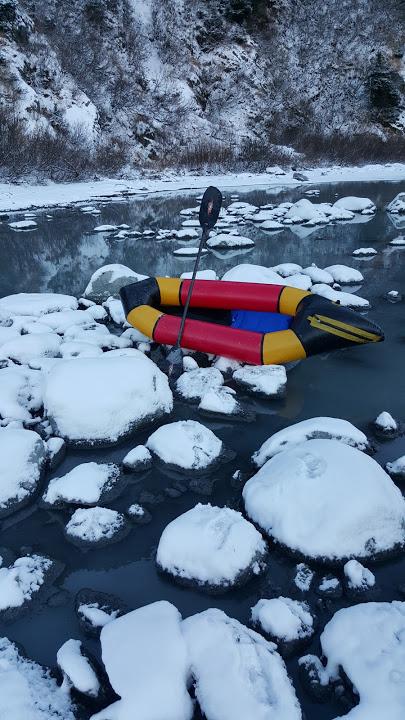
I finished my V3 raft about a week ago, and have been chasing down leaks! The build went pretty well, I’m now much more curious about commercial welding techniques. I did have some issues with the fabric contracting upon sealing, really only noticiable over the length of the two long red center tube sections. Once welded, the ends came up about 2cm short.. I suspect my iron was too hot? nothing some trapezoidal seam strips cant solve!
Heres some pictures of it (140cm) next to an older alpaca yak, and some weird little ice features.
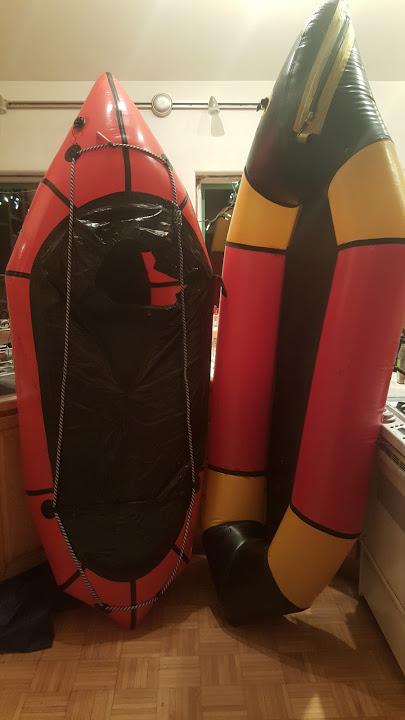
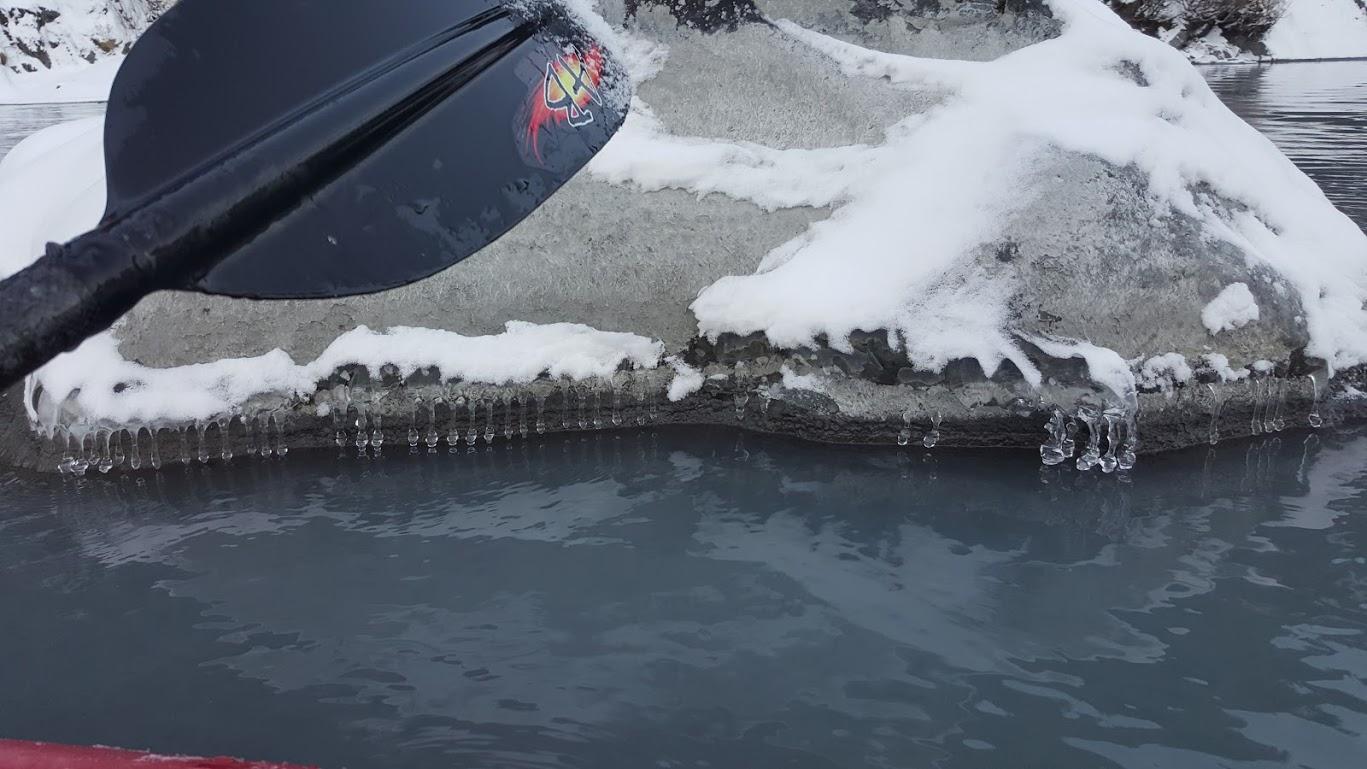
If the water temperature is higher than the air temperature, does the boat pressure increase upon getting on the water?
-
This reply was modified 8 years, 7 months ago by Patrick Dewane.
-
This reply was modified 8 years, 7 months ago by Patrick Dewane.
-
November 29, 2017 at 4:11 pm #5058Matt (Admin)Keymaster
Great shots, Patrick! The packraft looks good!
It’s certainly possible for the boat pressure to increase if the water is warmer than the air temperature, so give it a squeeze every so often when you’re paddling to make sure it’s not feeling over-stressed.
Thanks for mentioning the shrinkage issue – I’ll look into that. Cheers!
-
This reply was modified 8 years, 7 months ago by
-
October 26, 2017 at 9:52 pm #4809BruceParticipant
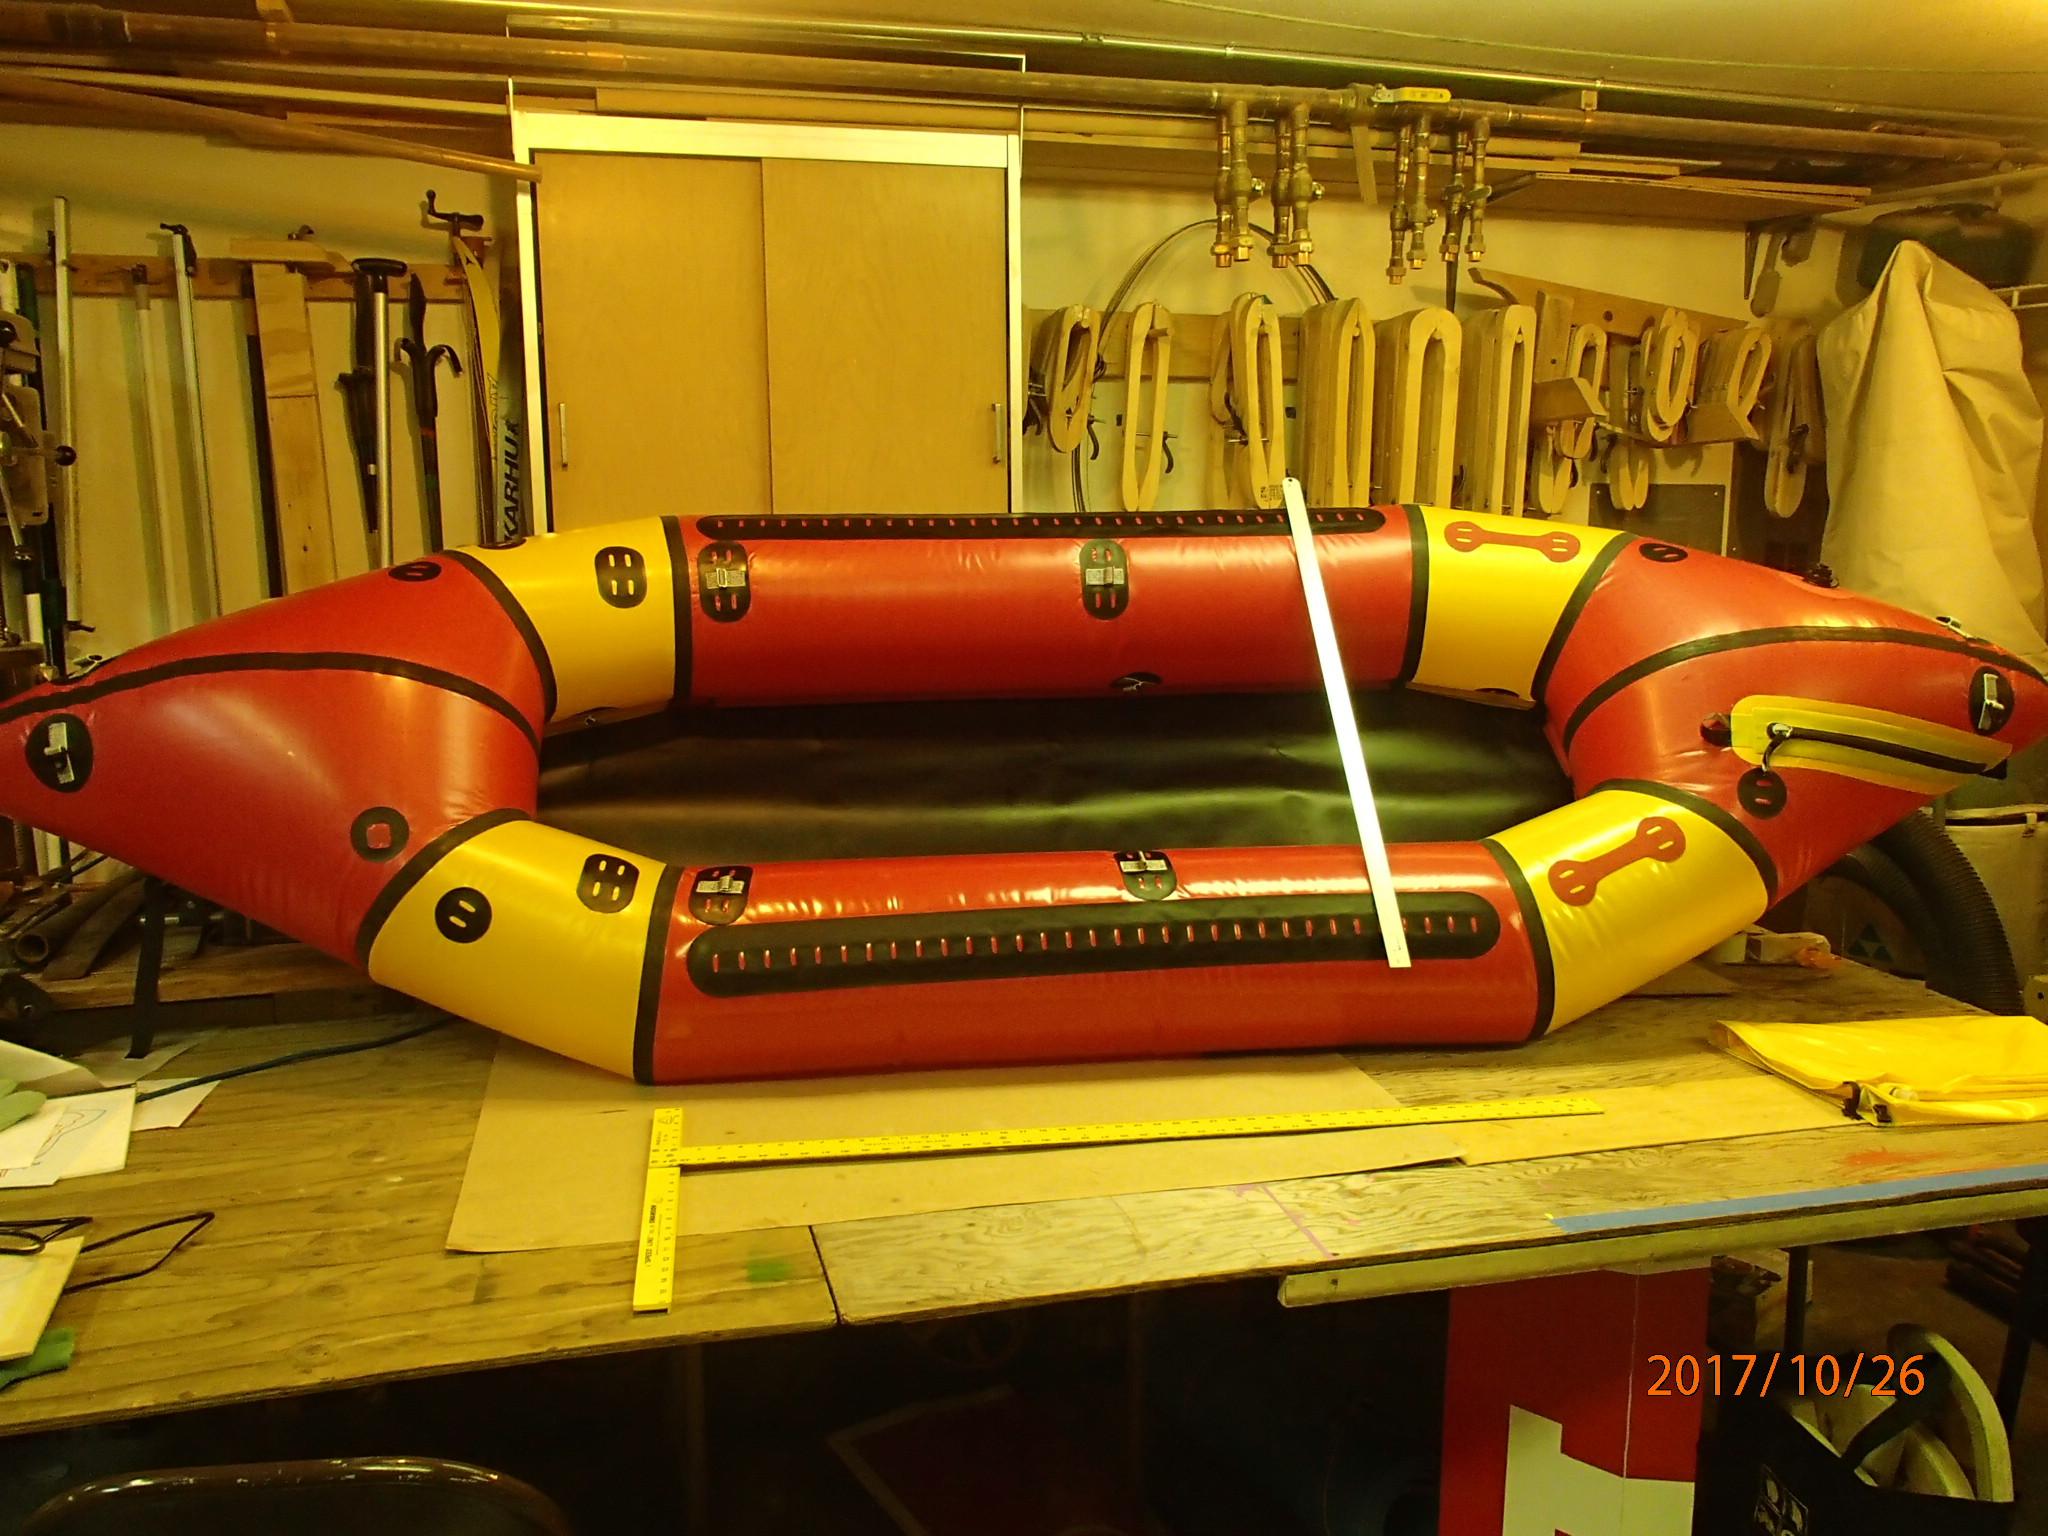 First inflation of my V3 Tandem packraft! It is 11 feet or 3.5 meters long, interior is 182 cm long. I will have to search for a safe lead in winter’s ice to give it a try!
-
January 30, 2018 at 6:30 pm #5319BruceParticipant
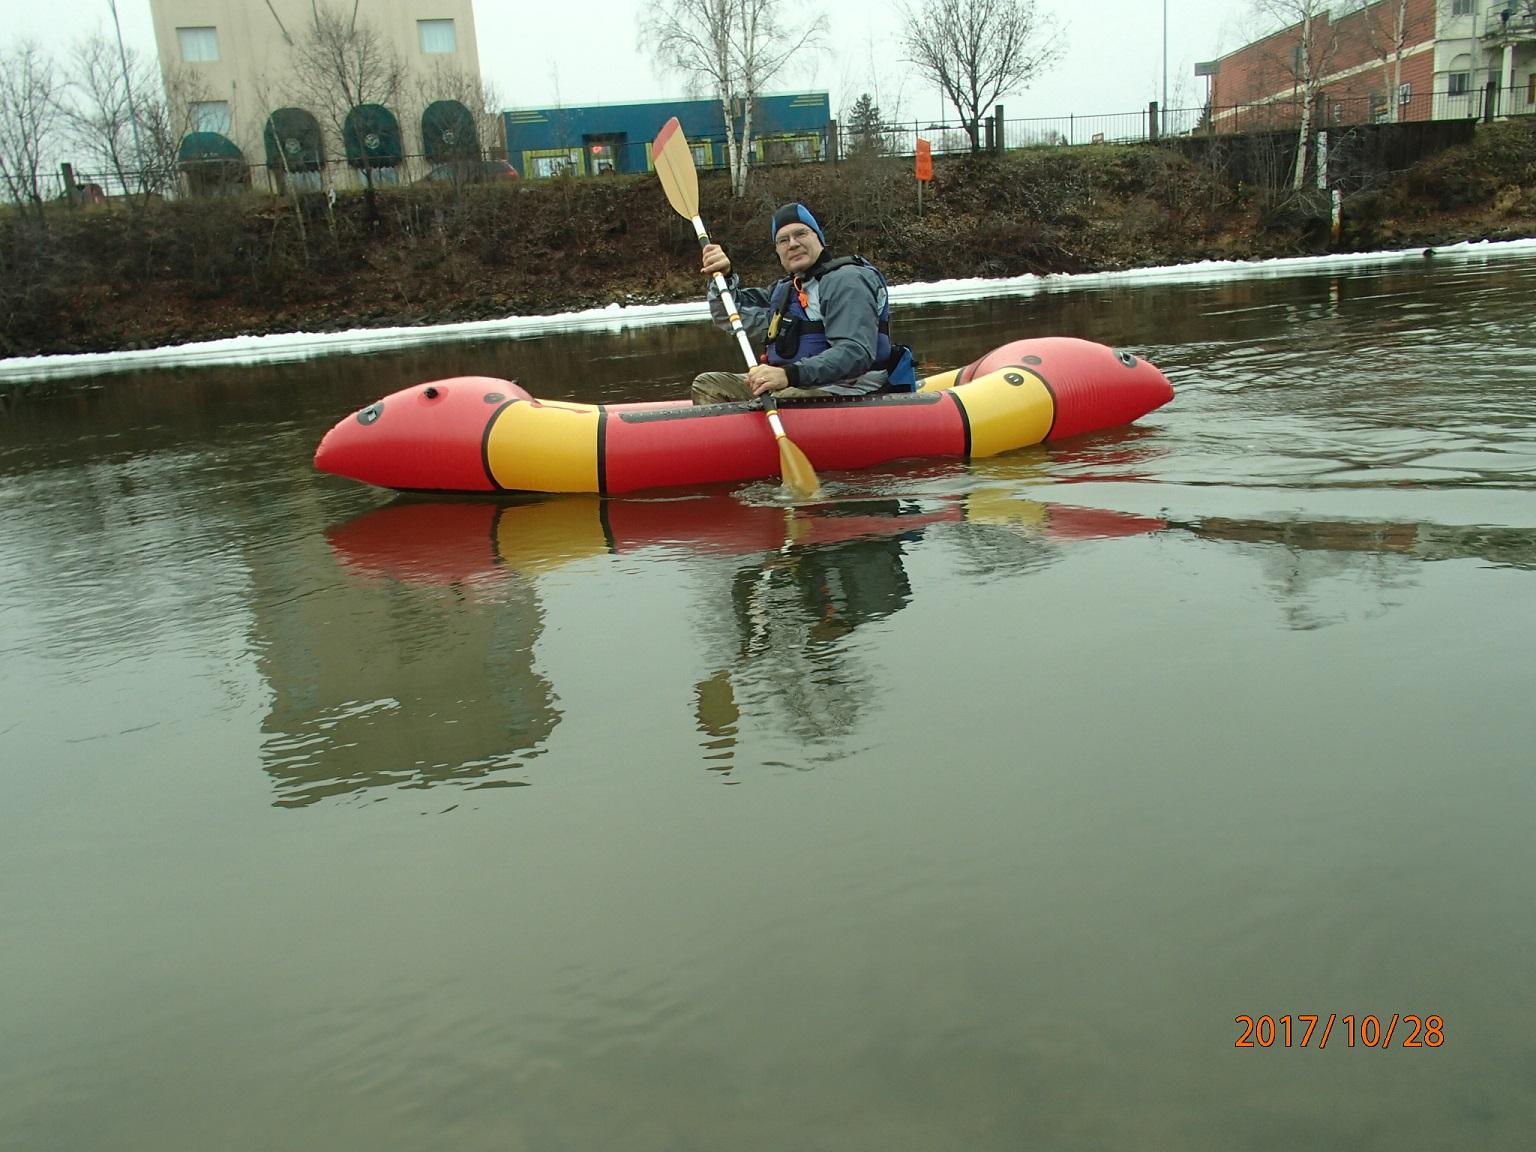 My first tandem, V3, on the Chena River, Fairbanks, Alaska. It was hard to keep the air pressure up ’cause I didn’t have a top-up valve installed. And the water was a lot colder than the air! As such, you can see some wrinkles when I move forward in the raft. Obviously, if one makes an even longer tandem, which is easy to do with the parallel tubes, then it can be harder to keep the side tubes stiffly inflated!
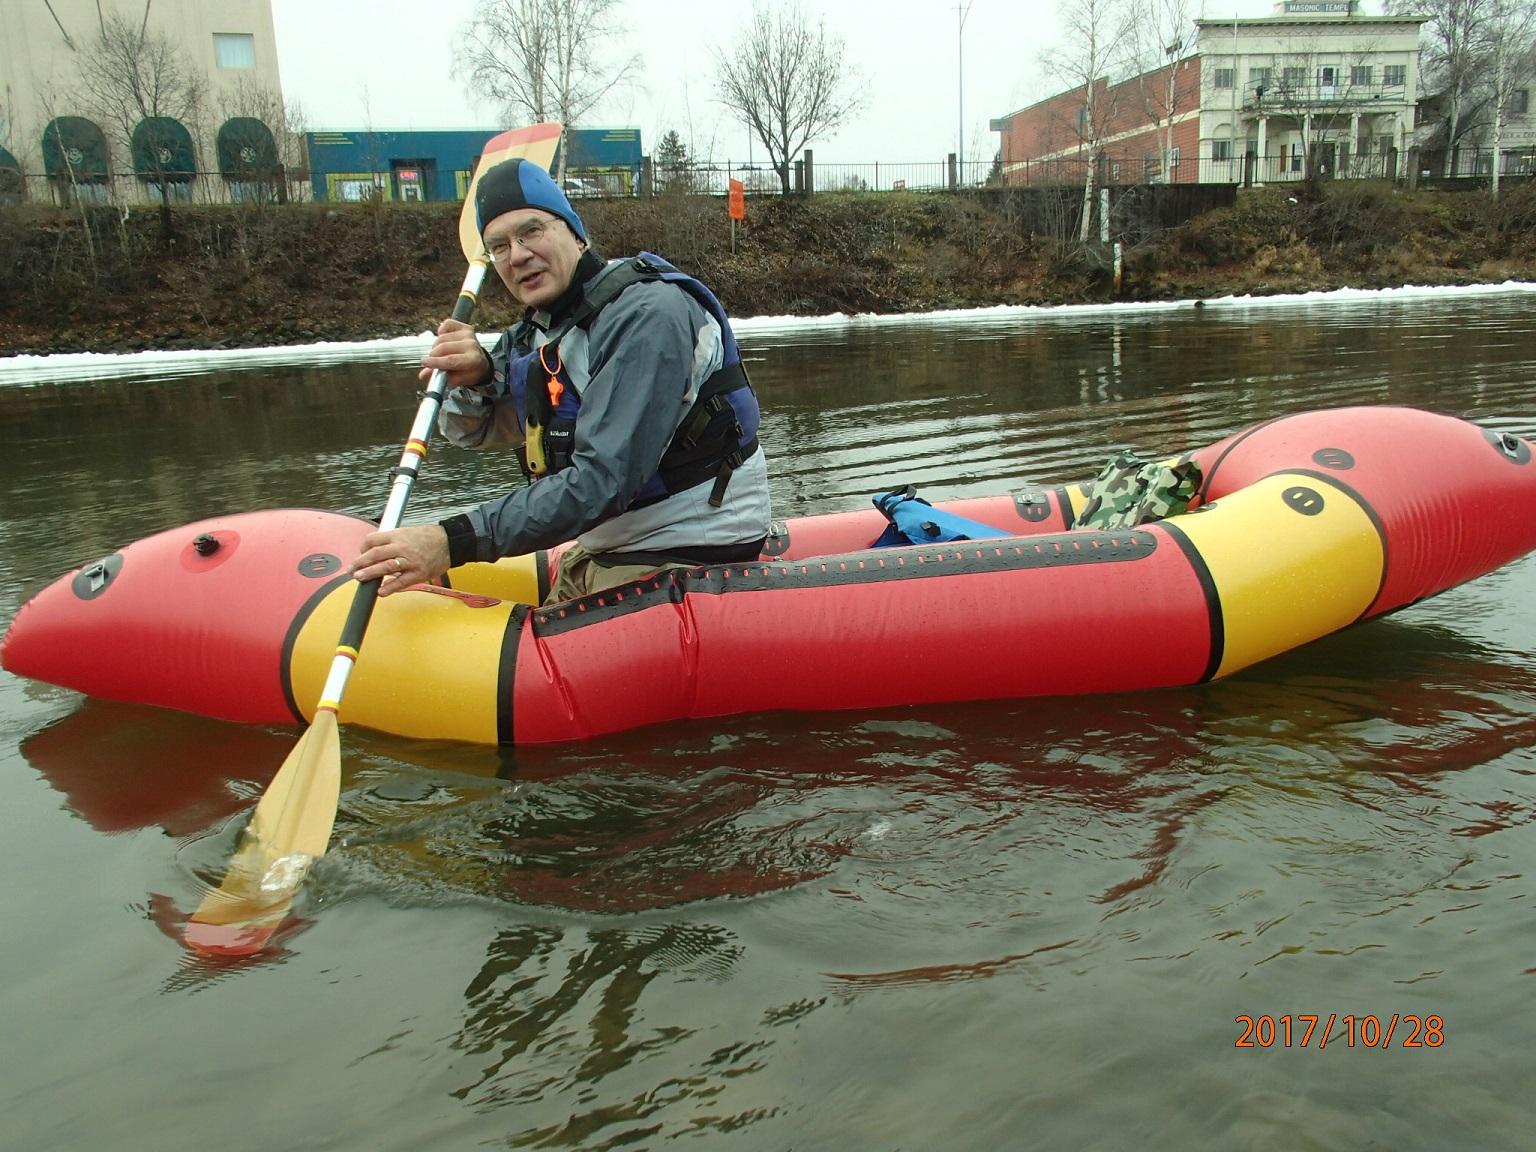
-
May 9, 2018 at 5:05 pm #6326DerekParticipant
Bruce,
I built one like yours, but 14″ longer. I just bought a Big Agnes sleeping pad that fits in as an inflatable floor. It’s uncanny how well it fits. Perfect width, stiffens the boat up very well, and it’s a heck of a lot easier than building an inflatable floor.
-
-
October 27, 2017 at 12:53 pm #4816Matt (Admin)Keymaster
It looks fantastic! Thanks for posting, Bruce!
-
October 27, 2017 at 5:49 am #4810Kwok Wah LaiParticipant
A beautiful piece of art, really! 👍🏿👍🏿👍🏿👍🏿👍🏿
-
-
September 28, 2017 at 4:33 pm #4661JeremyParticipant
I managed to take the V2 packraft on a recent trip to Eugene, OR. Packrafted the McKenzie River including a nice Class III ! Last picture you can see the obvious result of whitewater in an open bucket boat (completely swamped full of water). If I was doing a lot of whitewater I’d definitely want a spray deck! I need to make a seat, the camp pad I used kept flying up in my face! What a blast, thanks Matt for a great packraft!
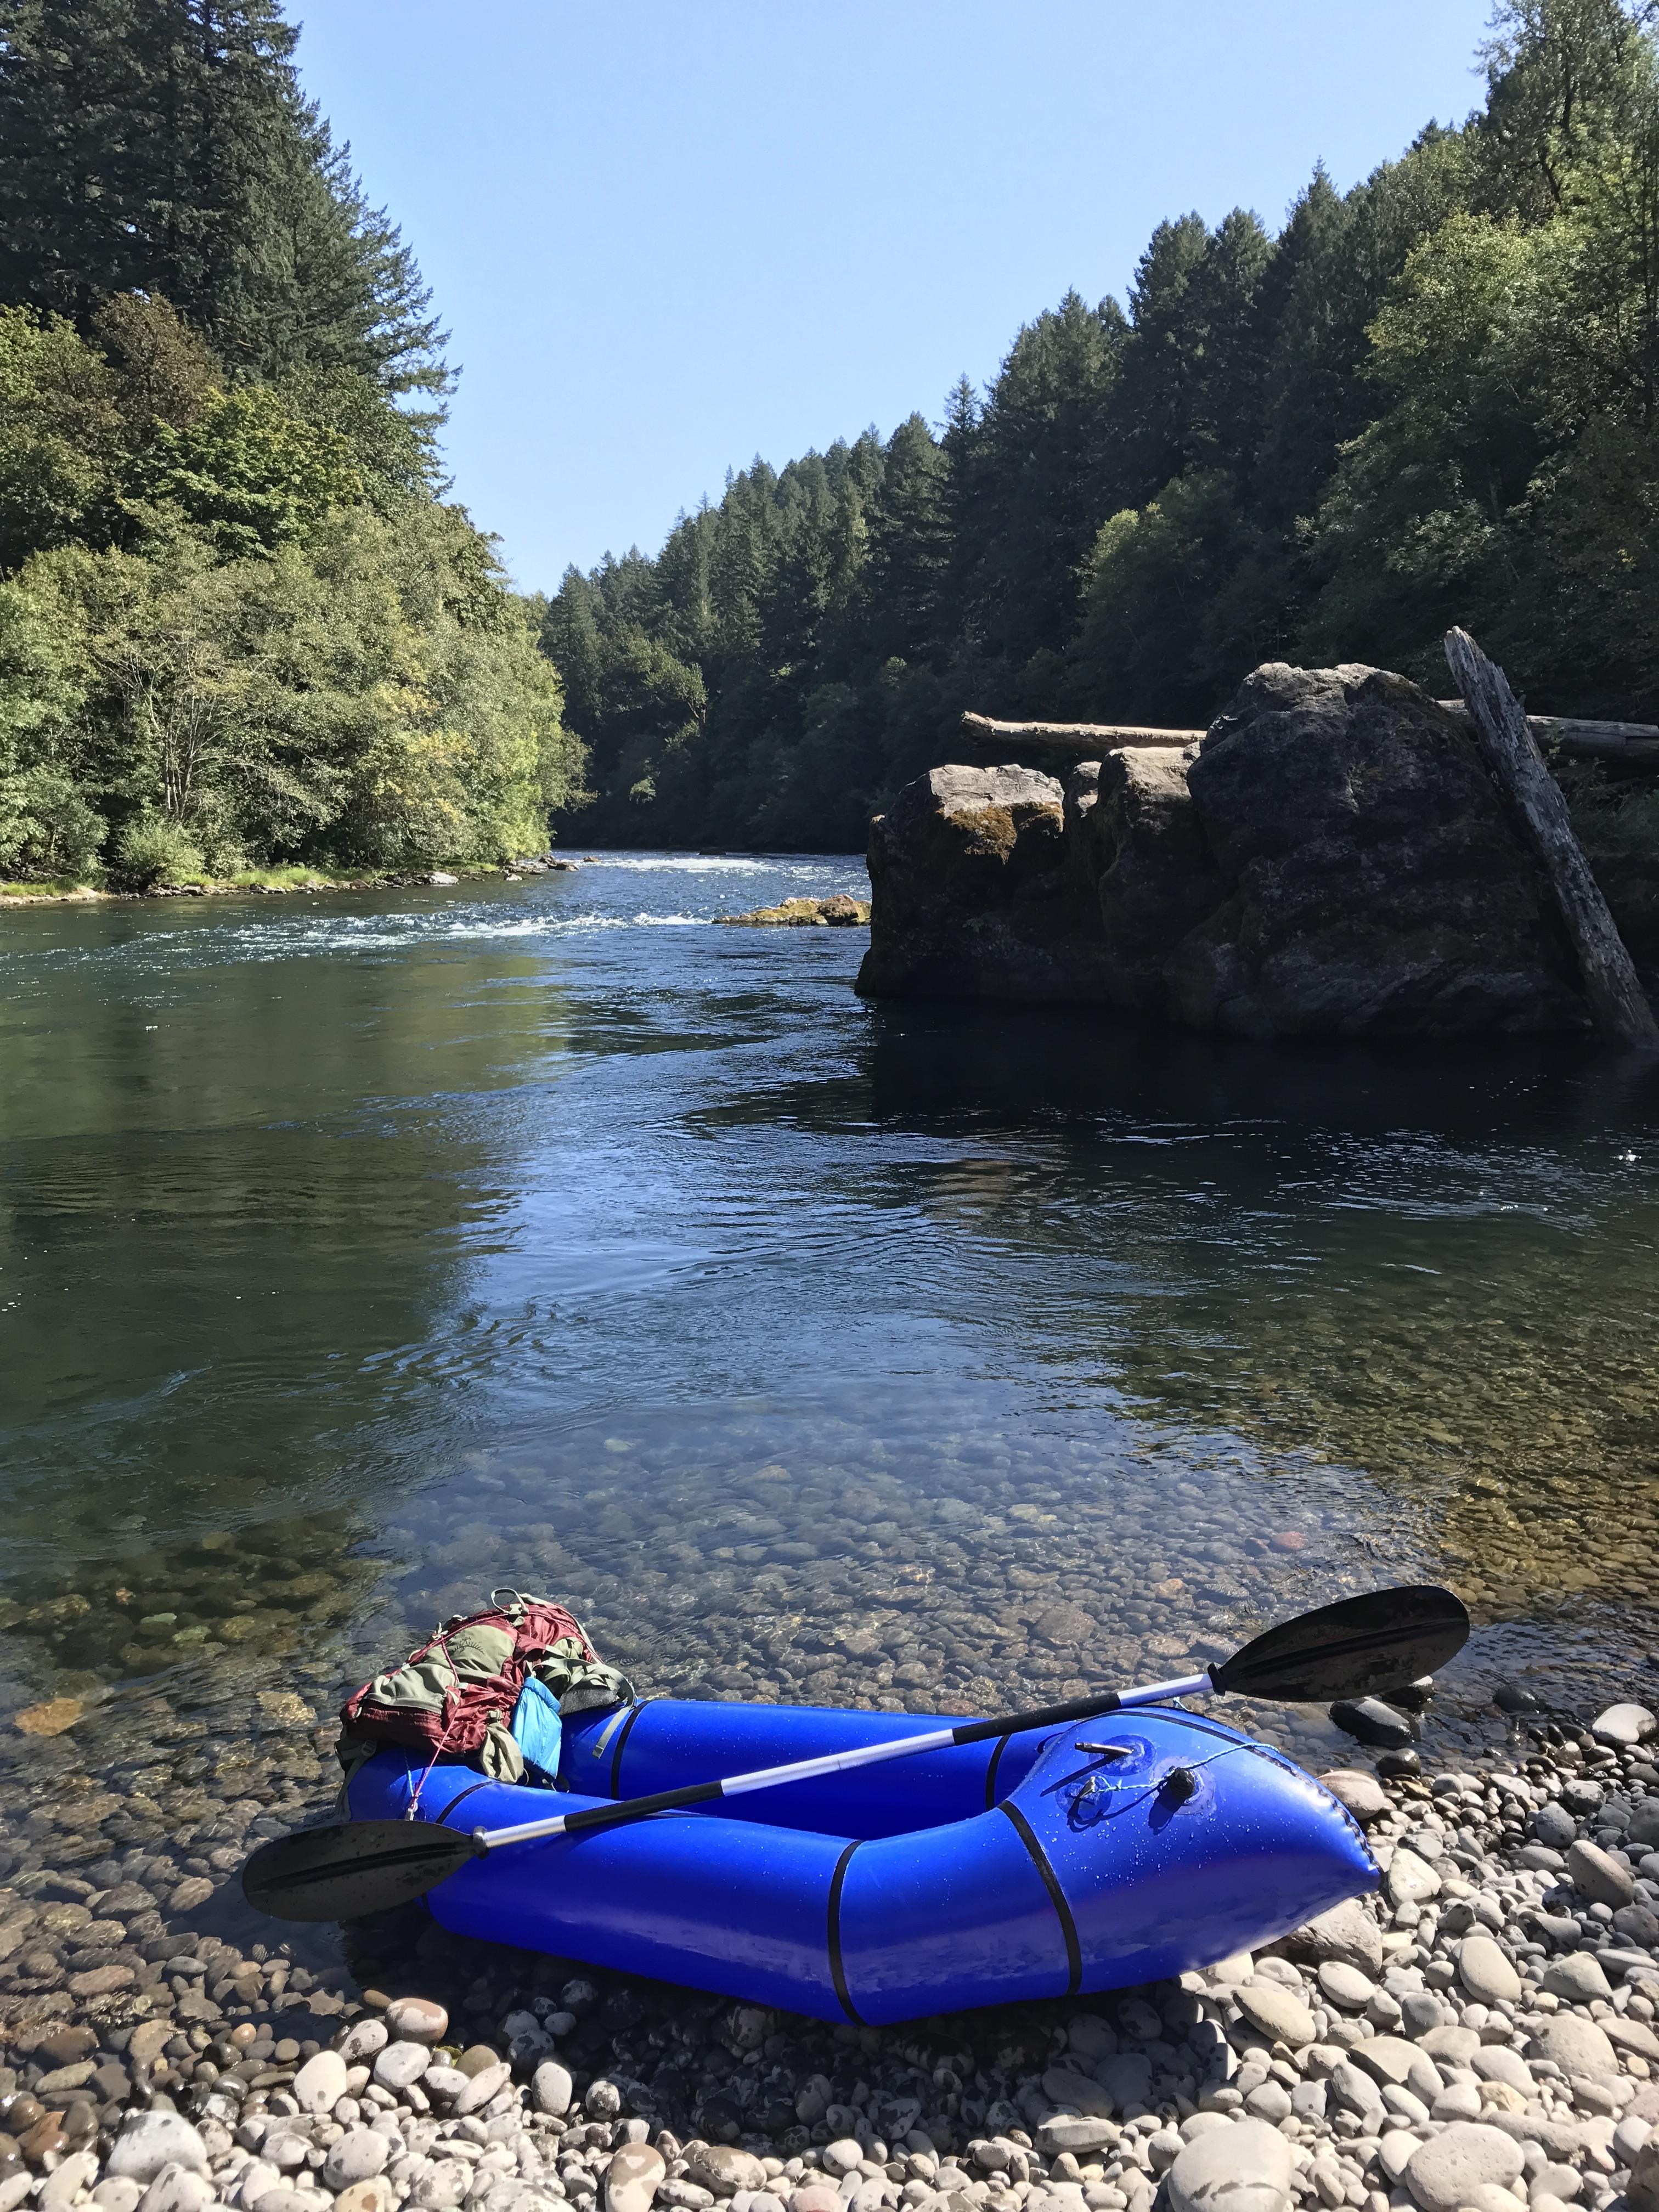
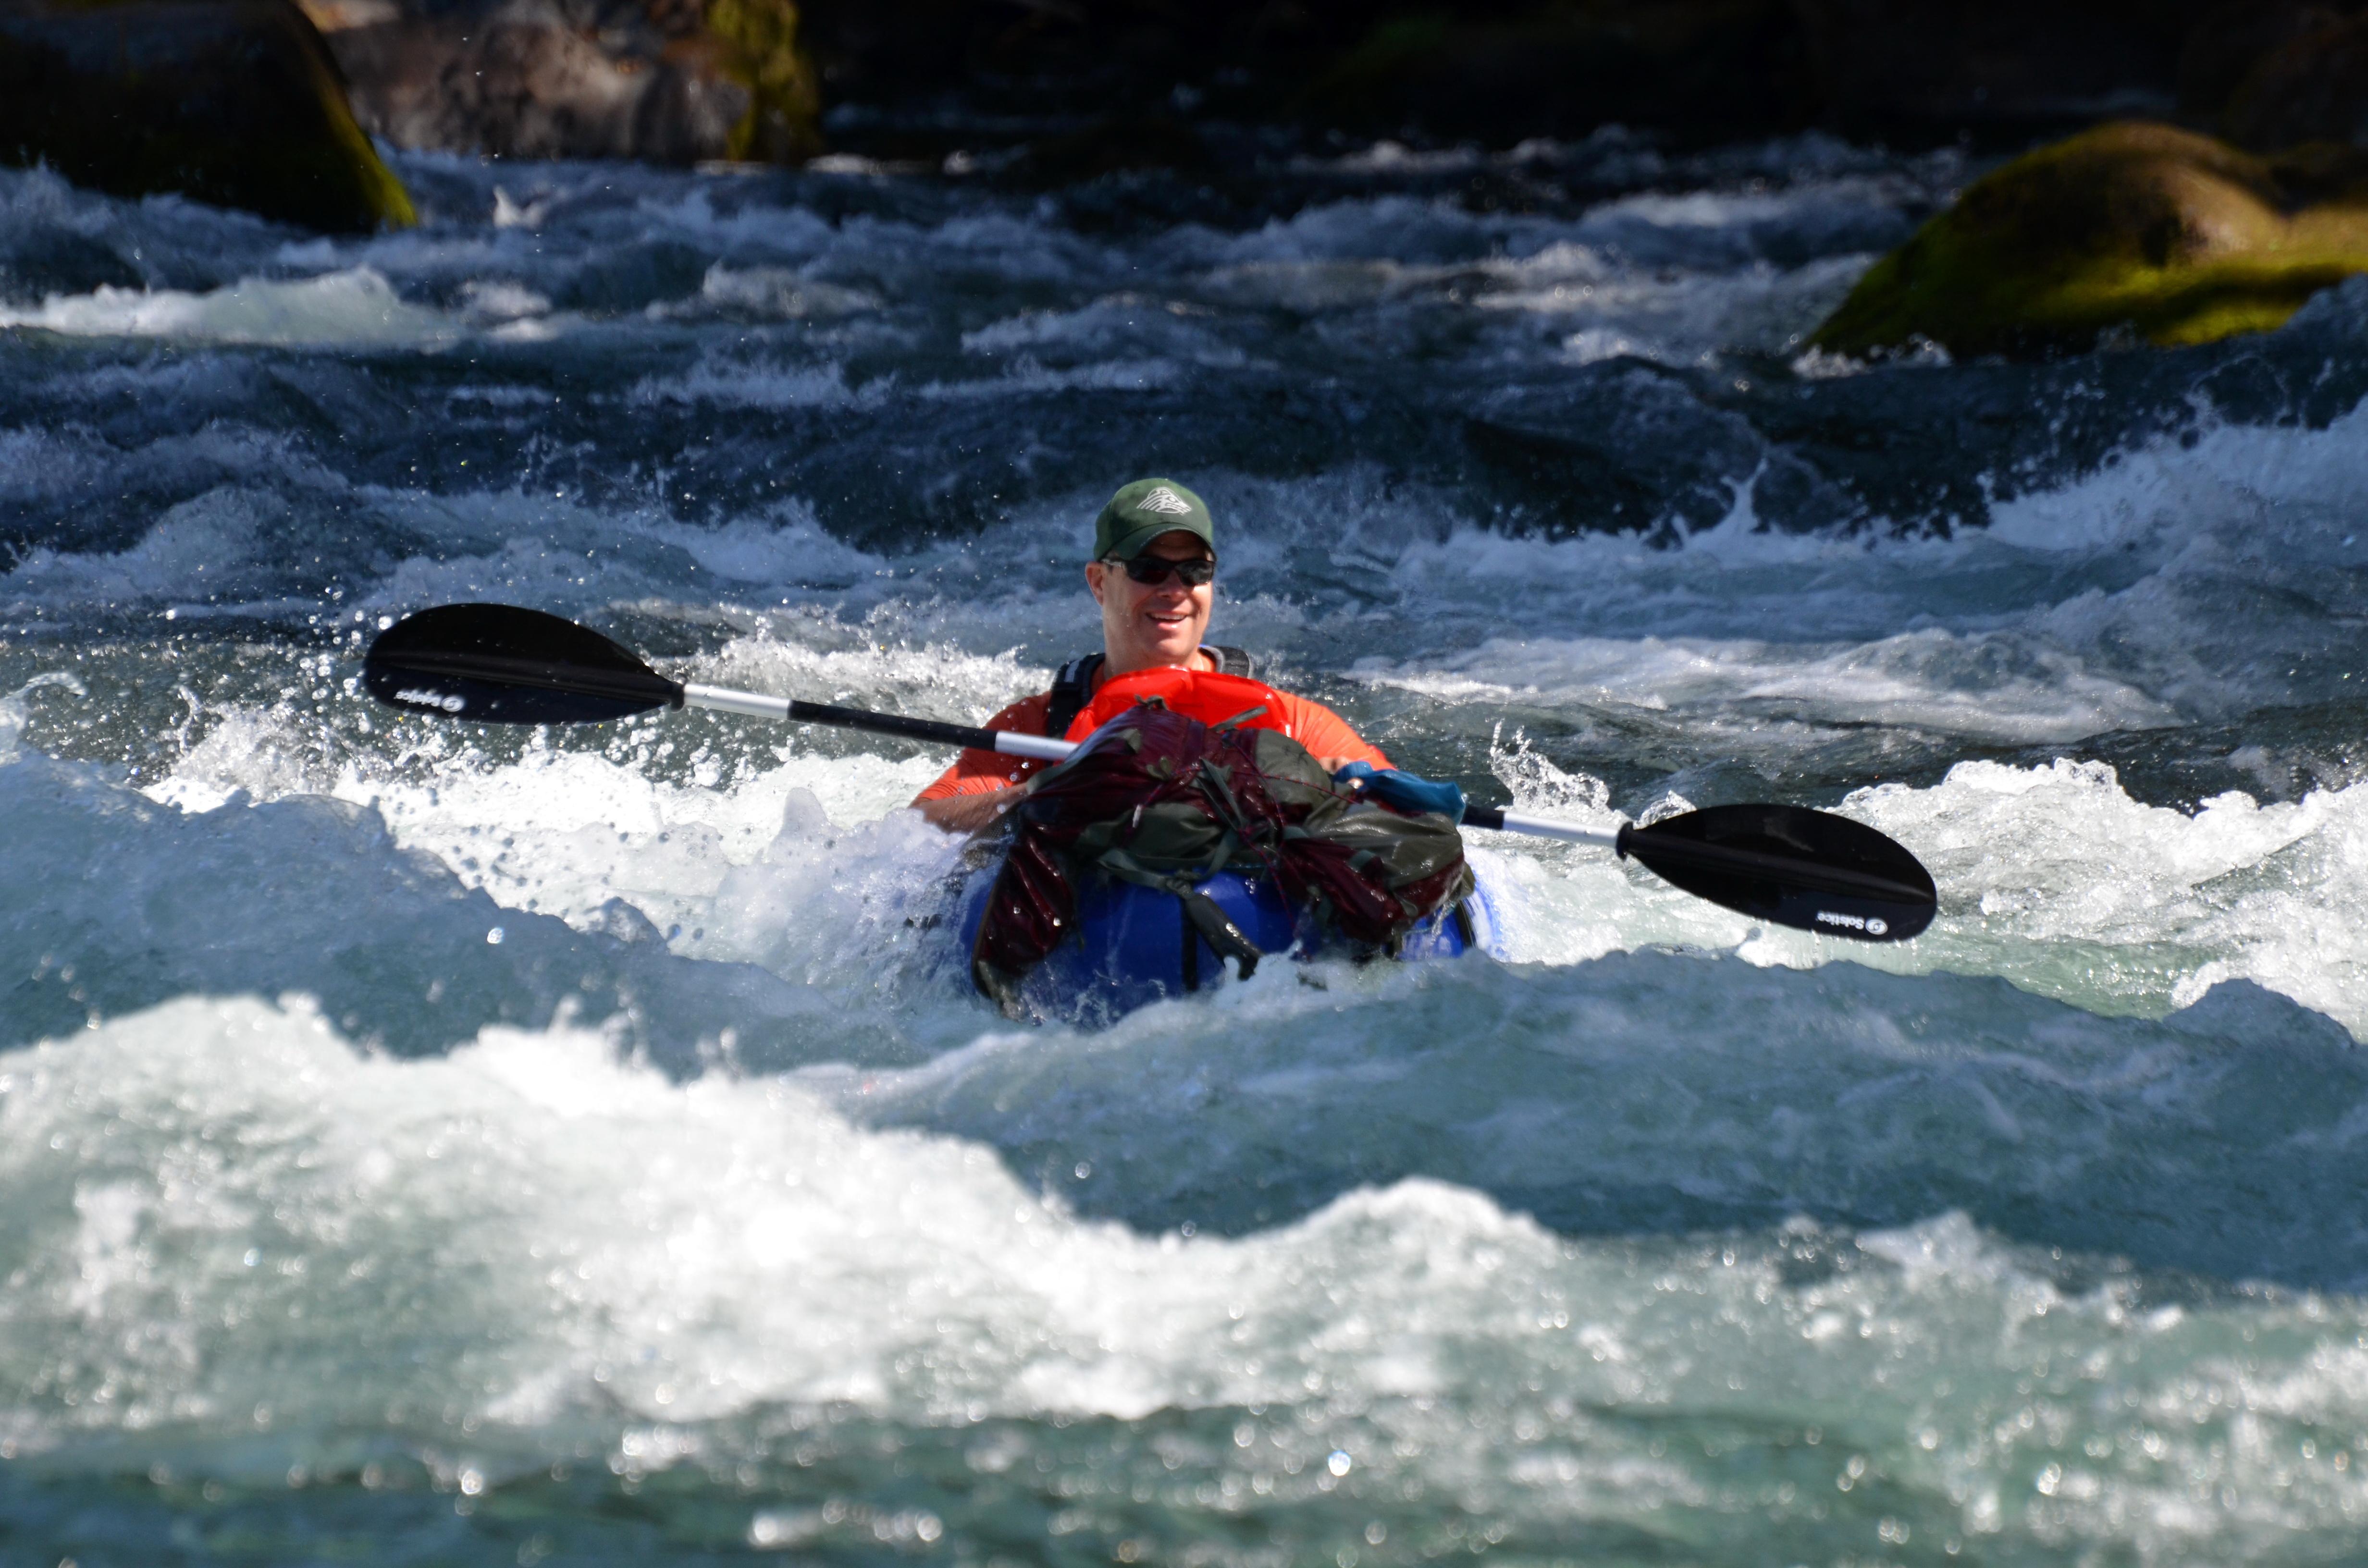
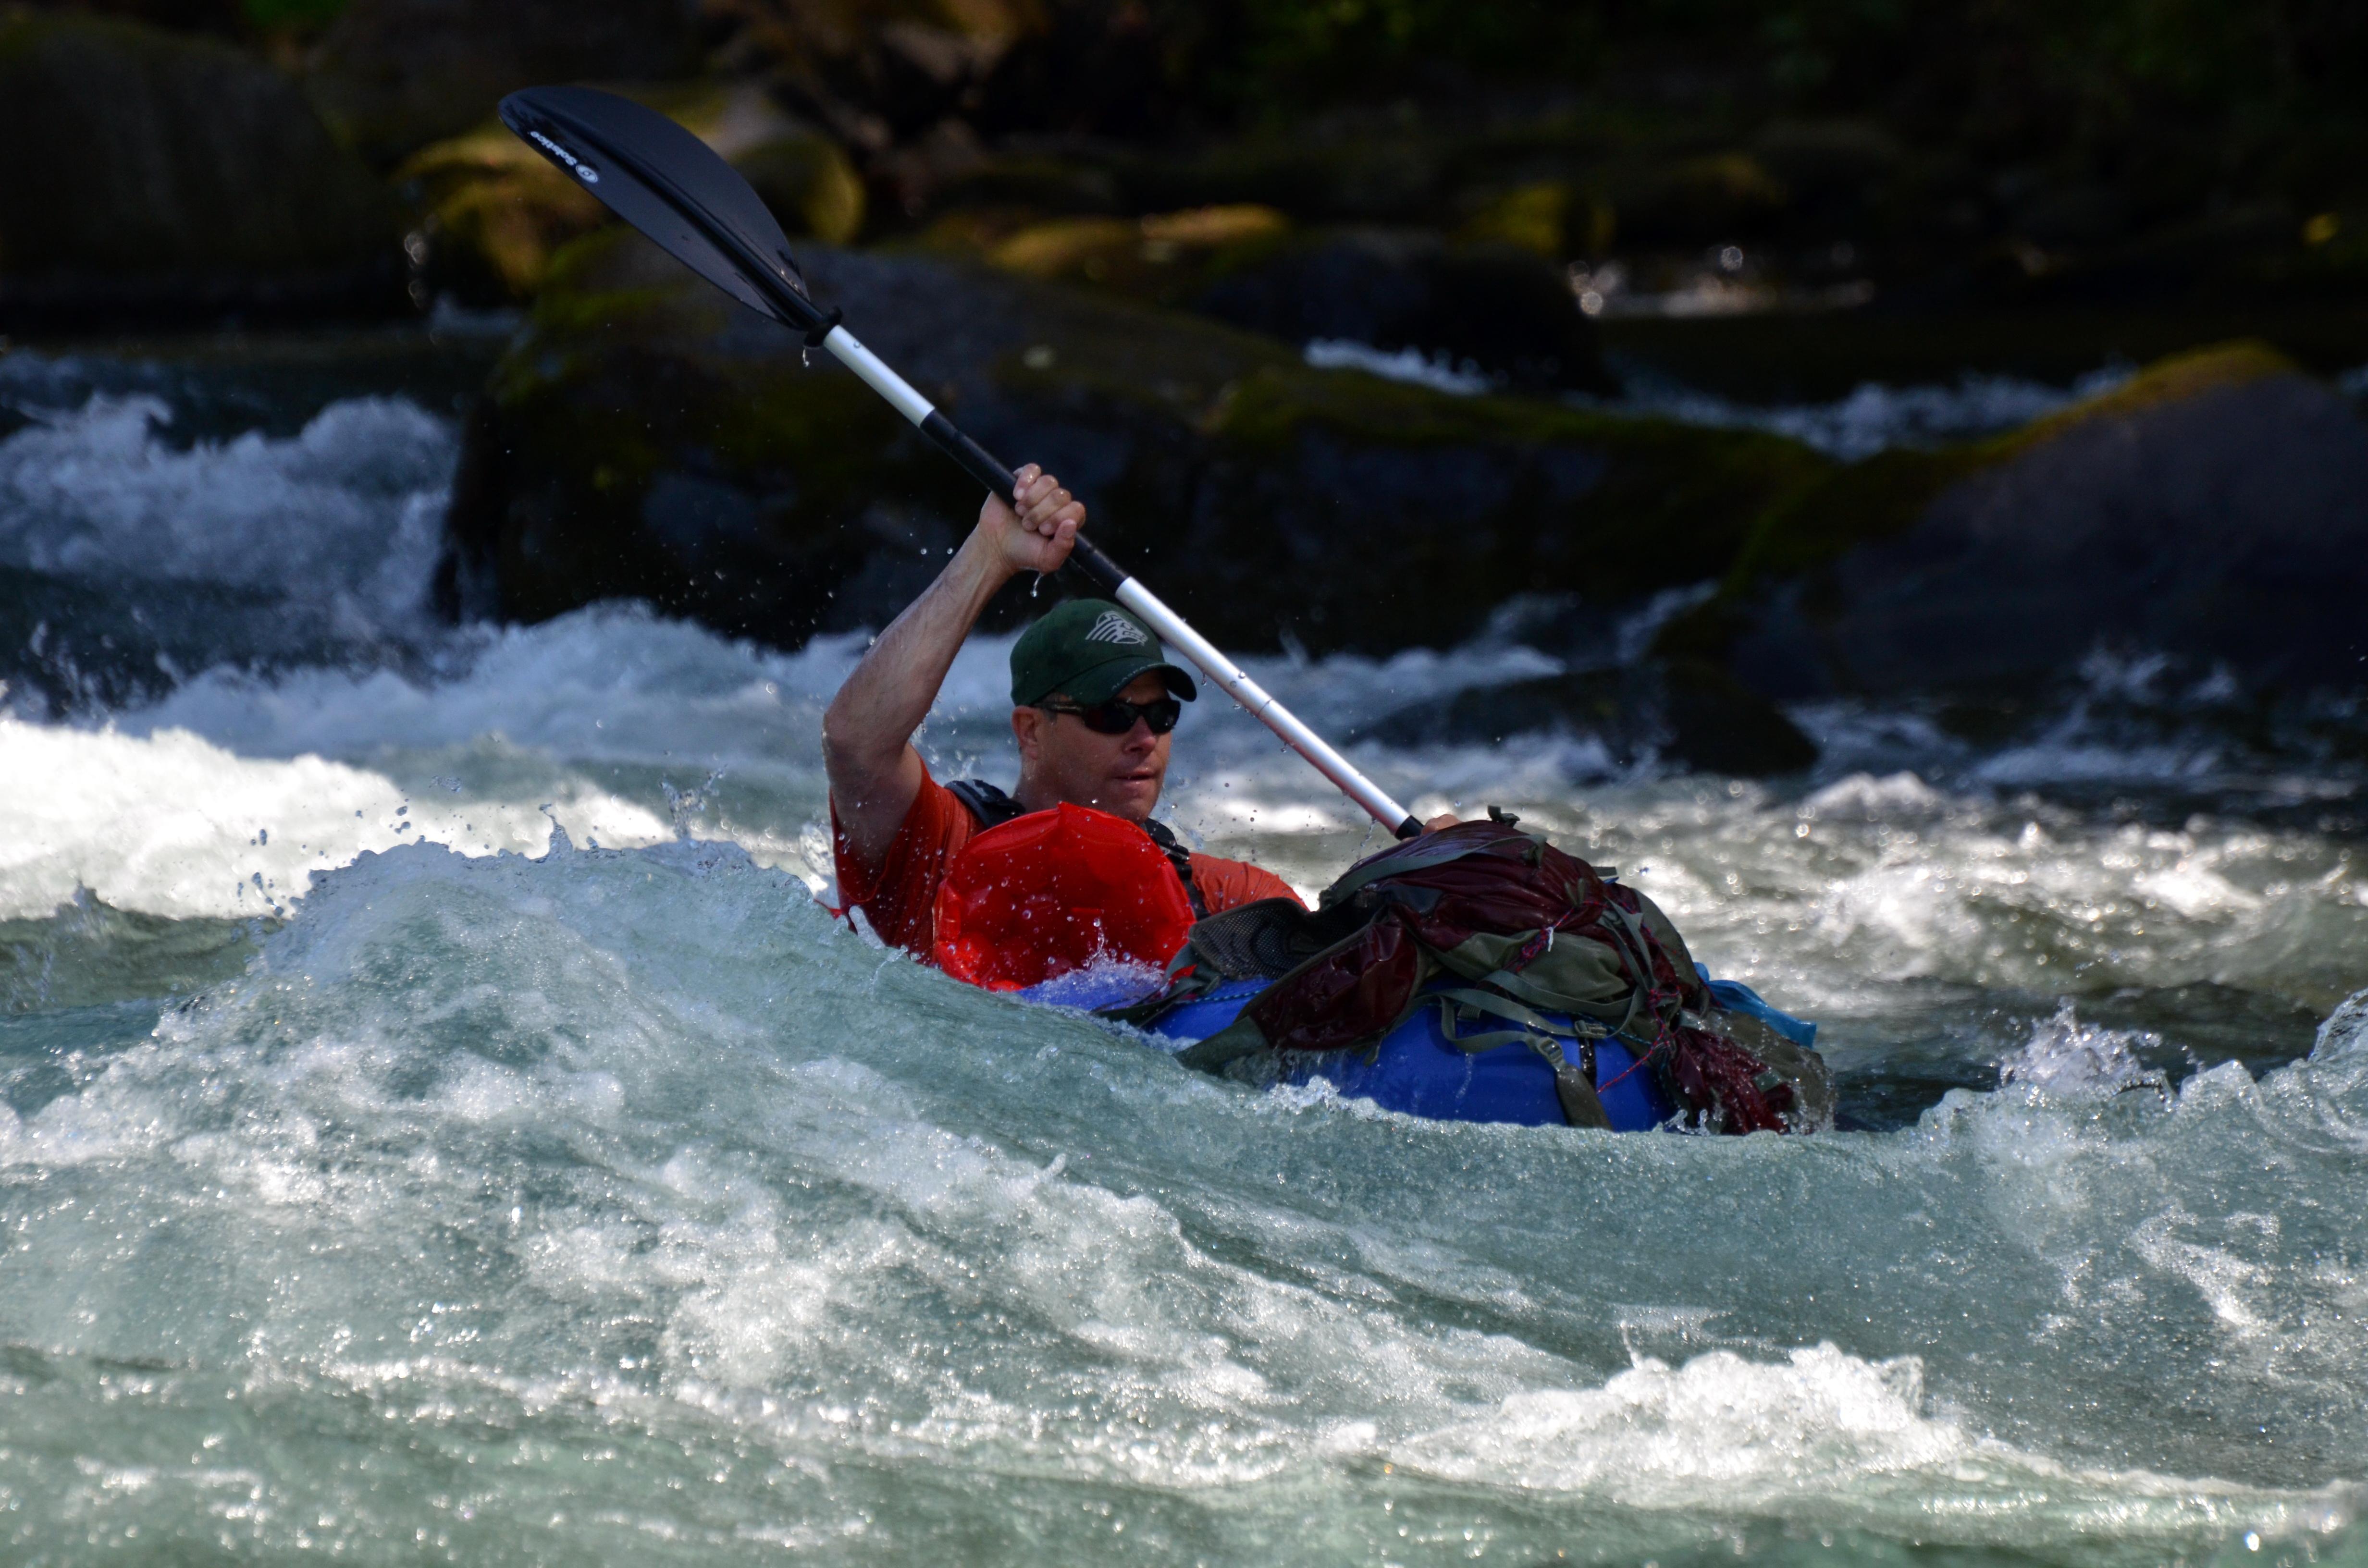
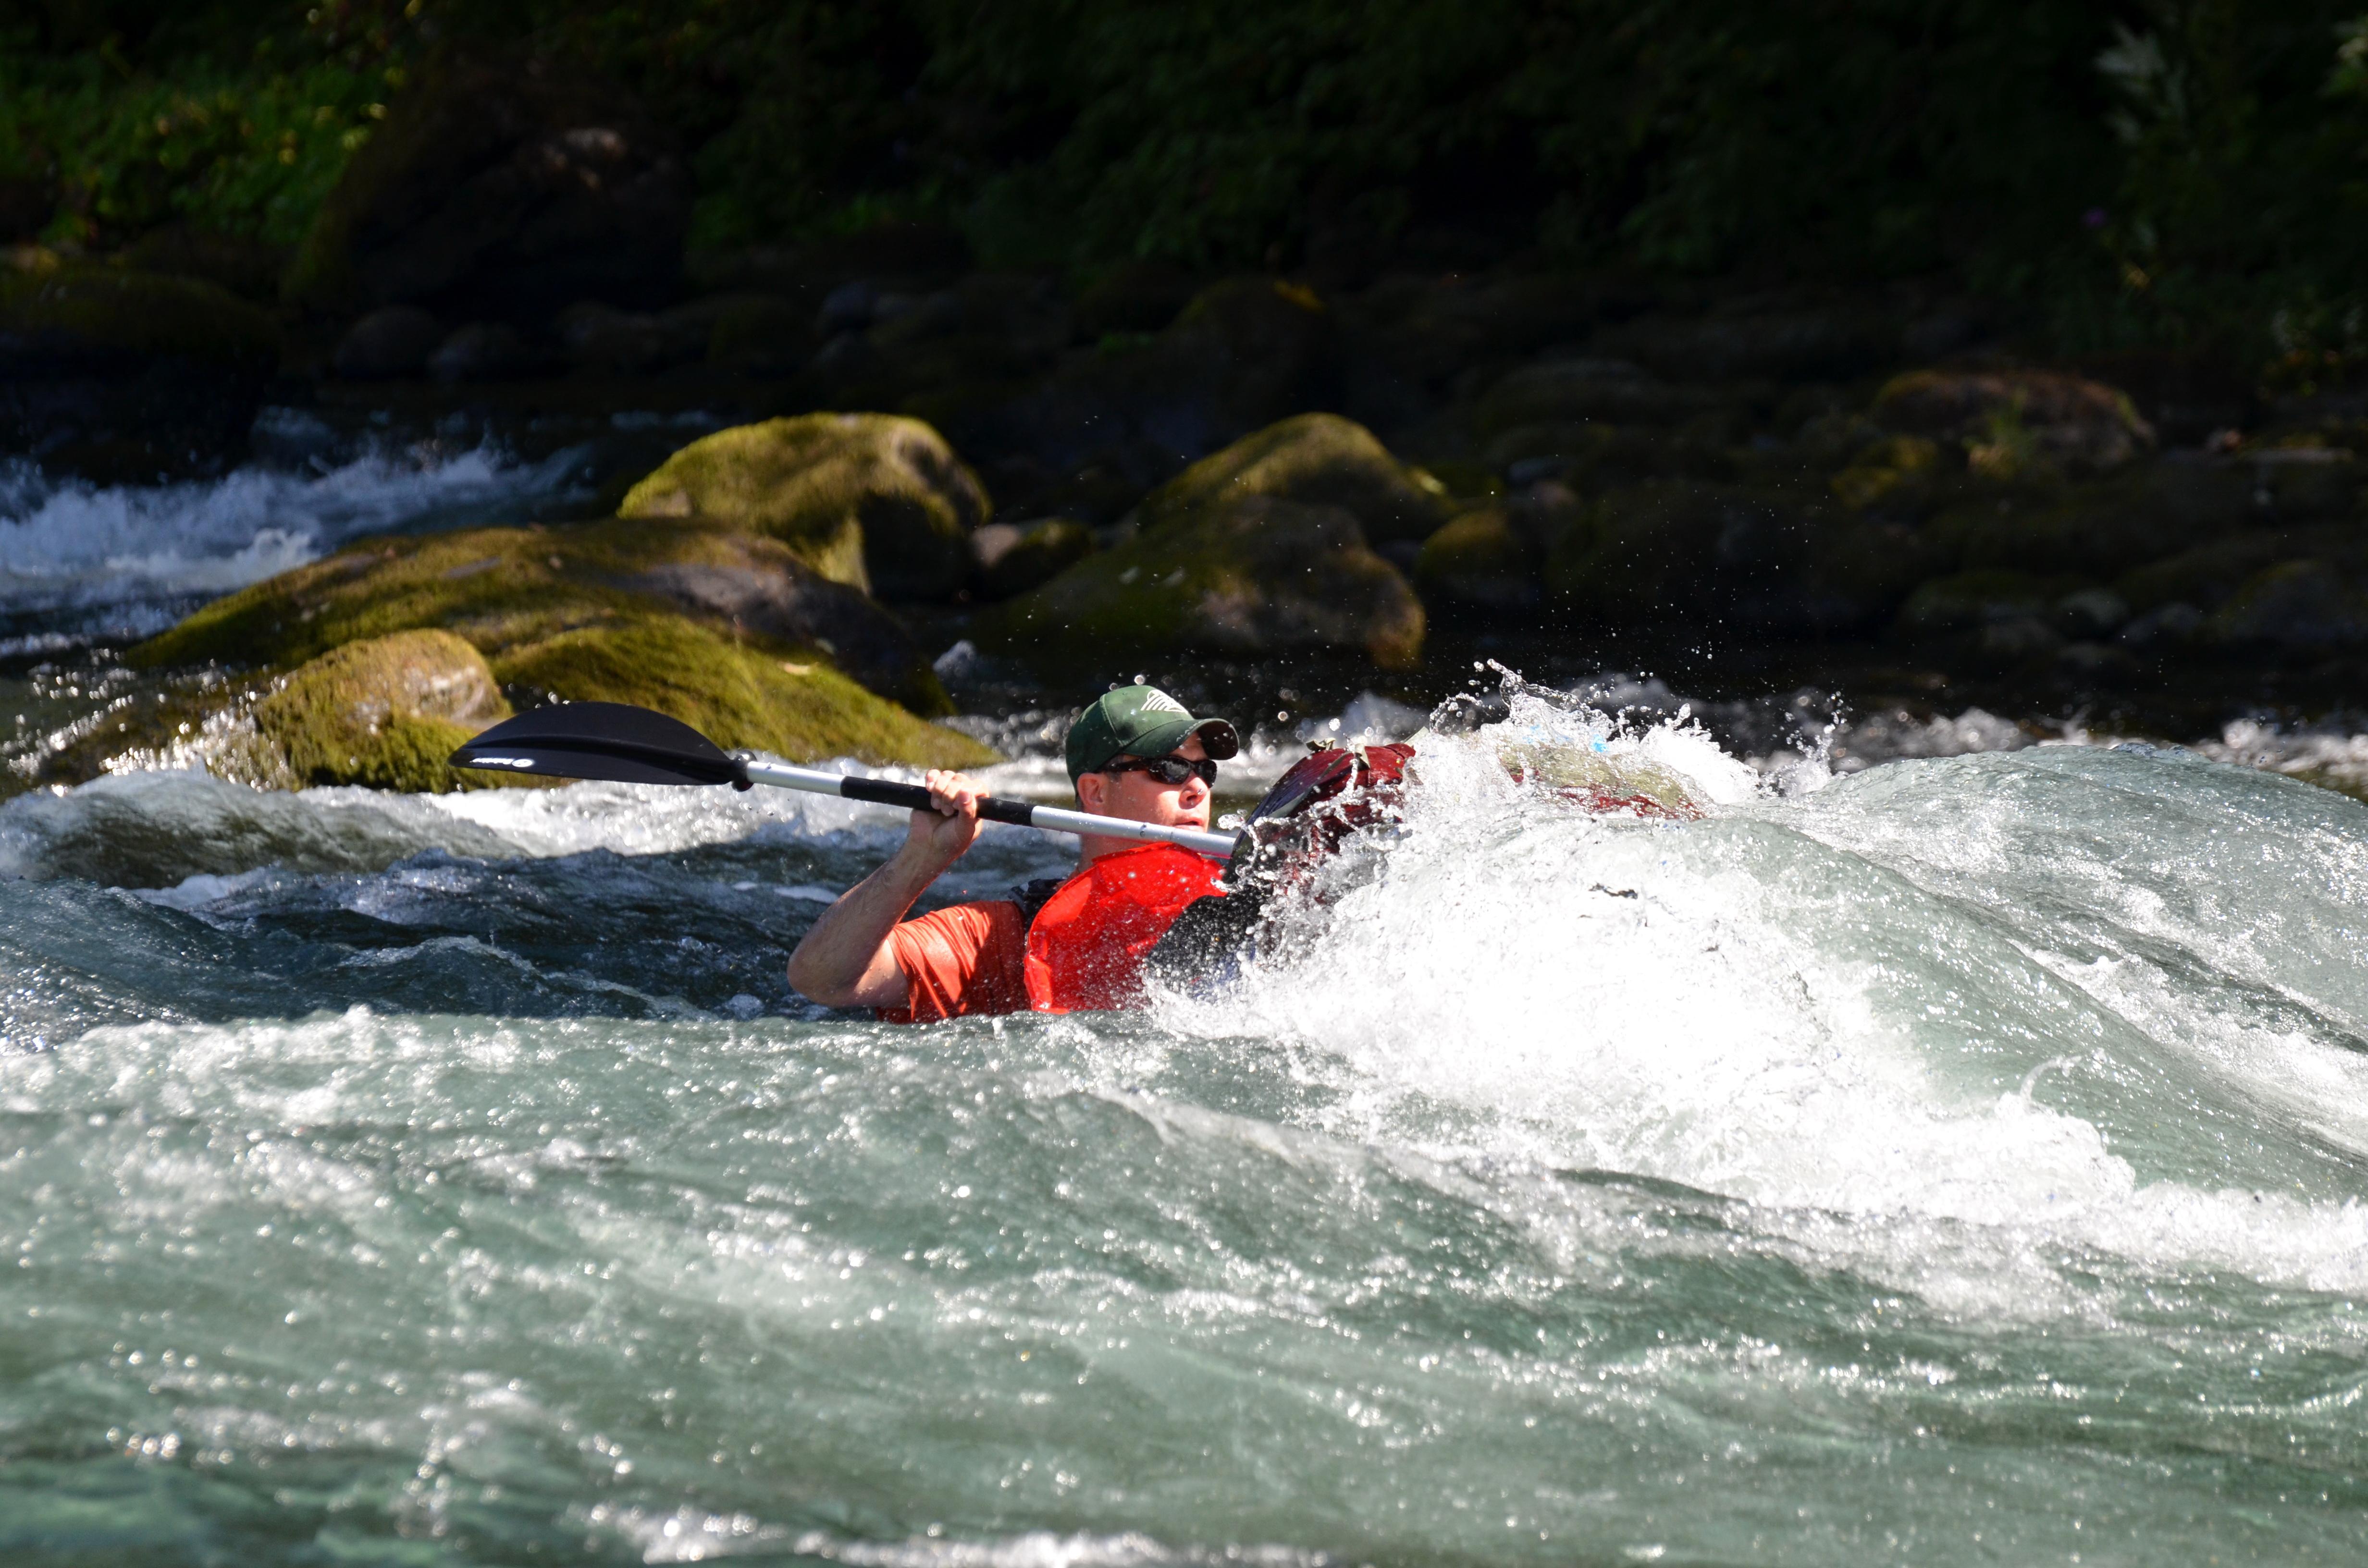
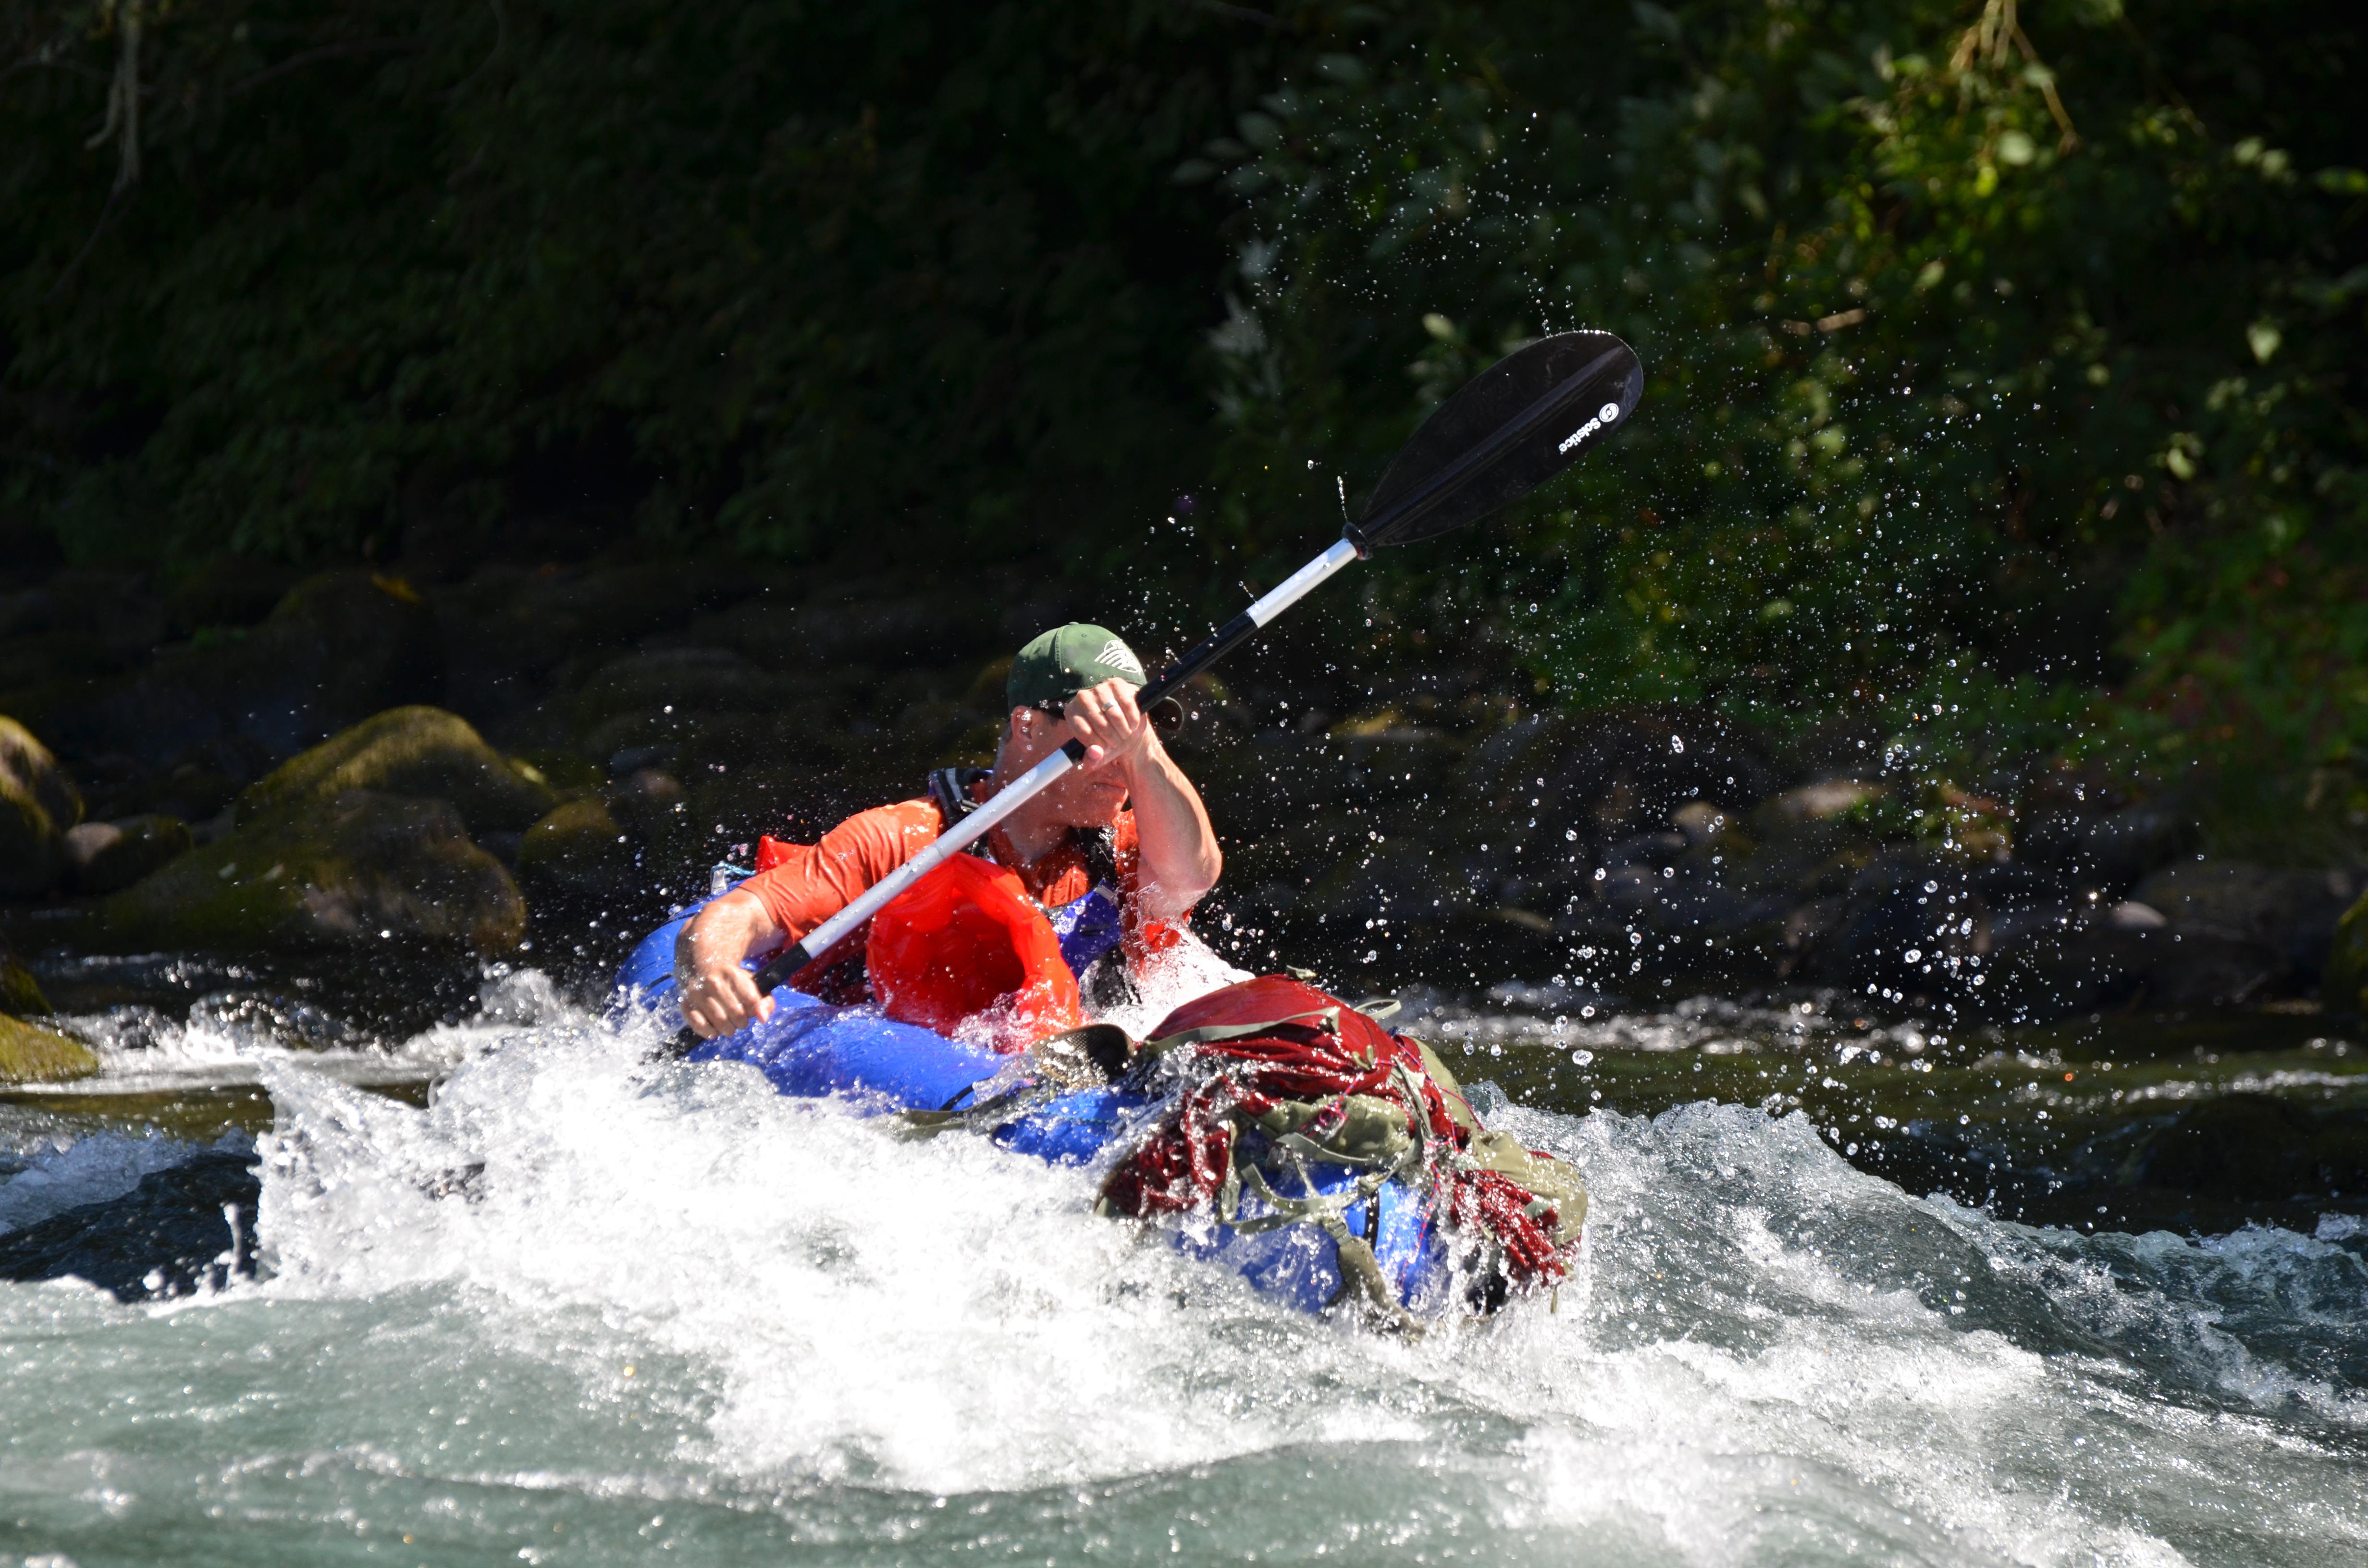
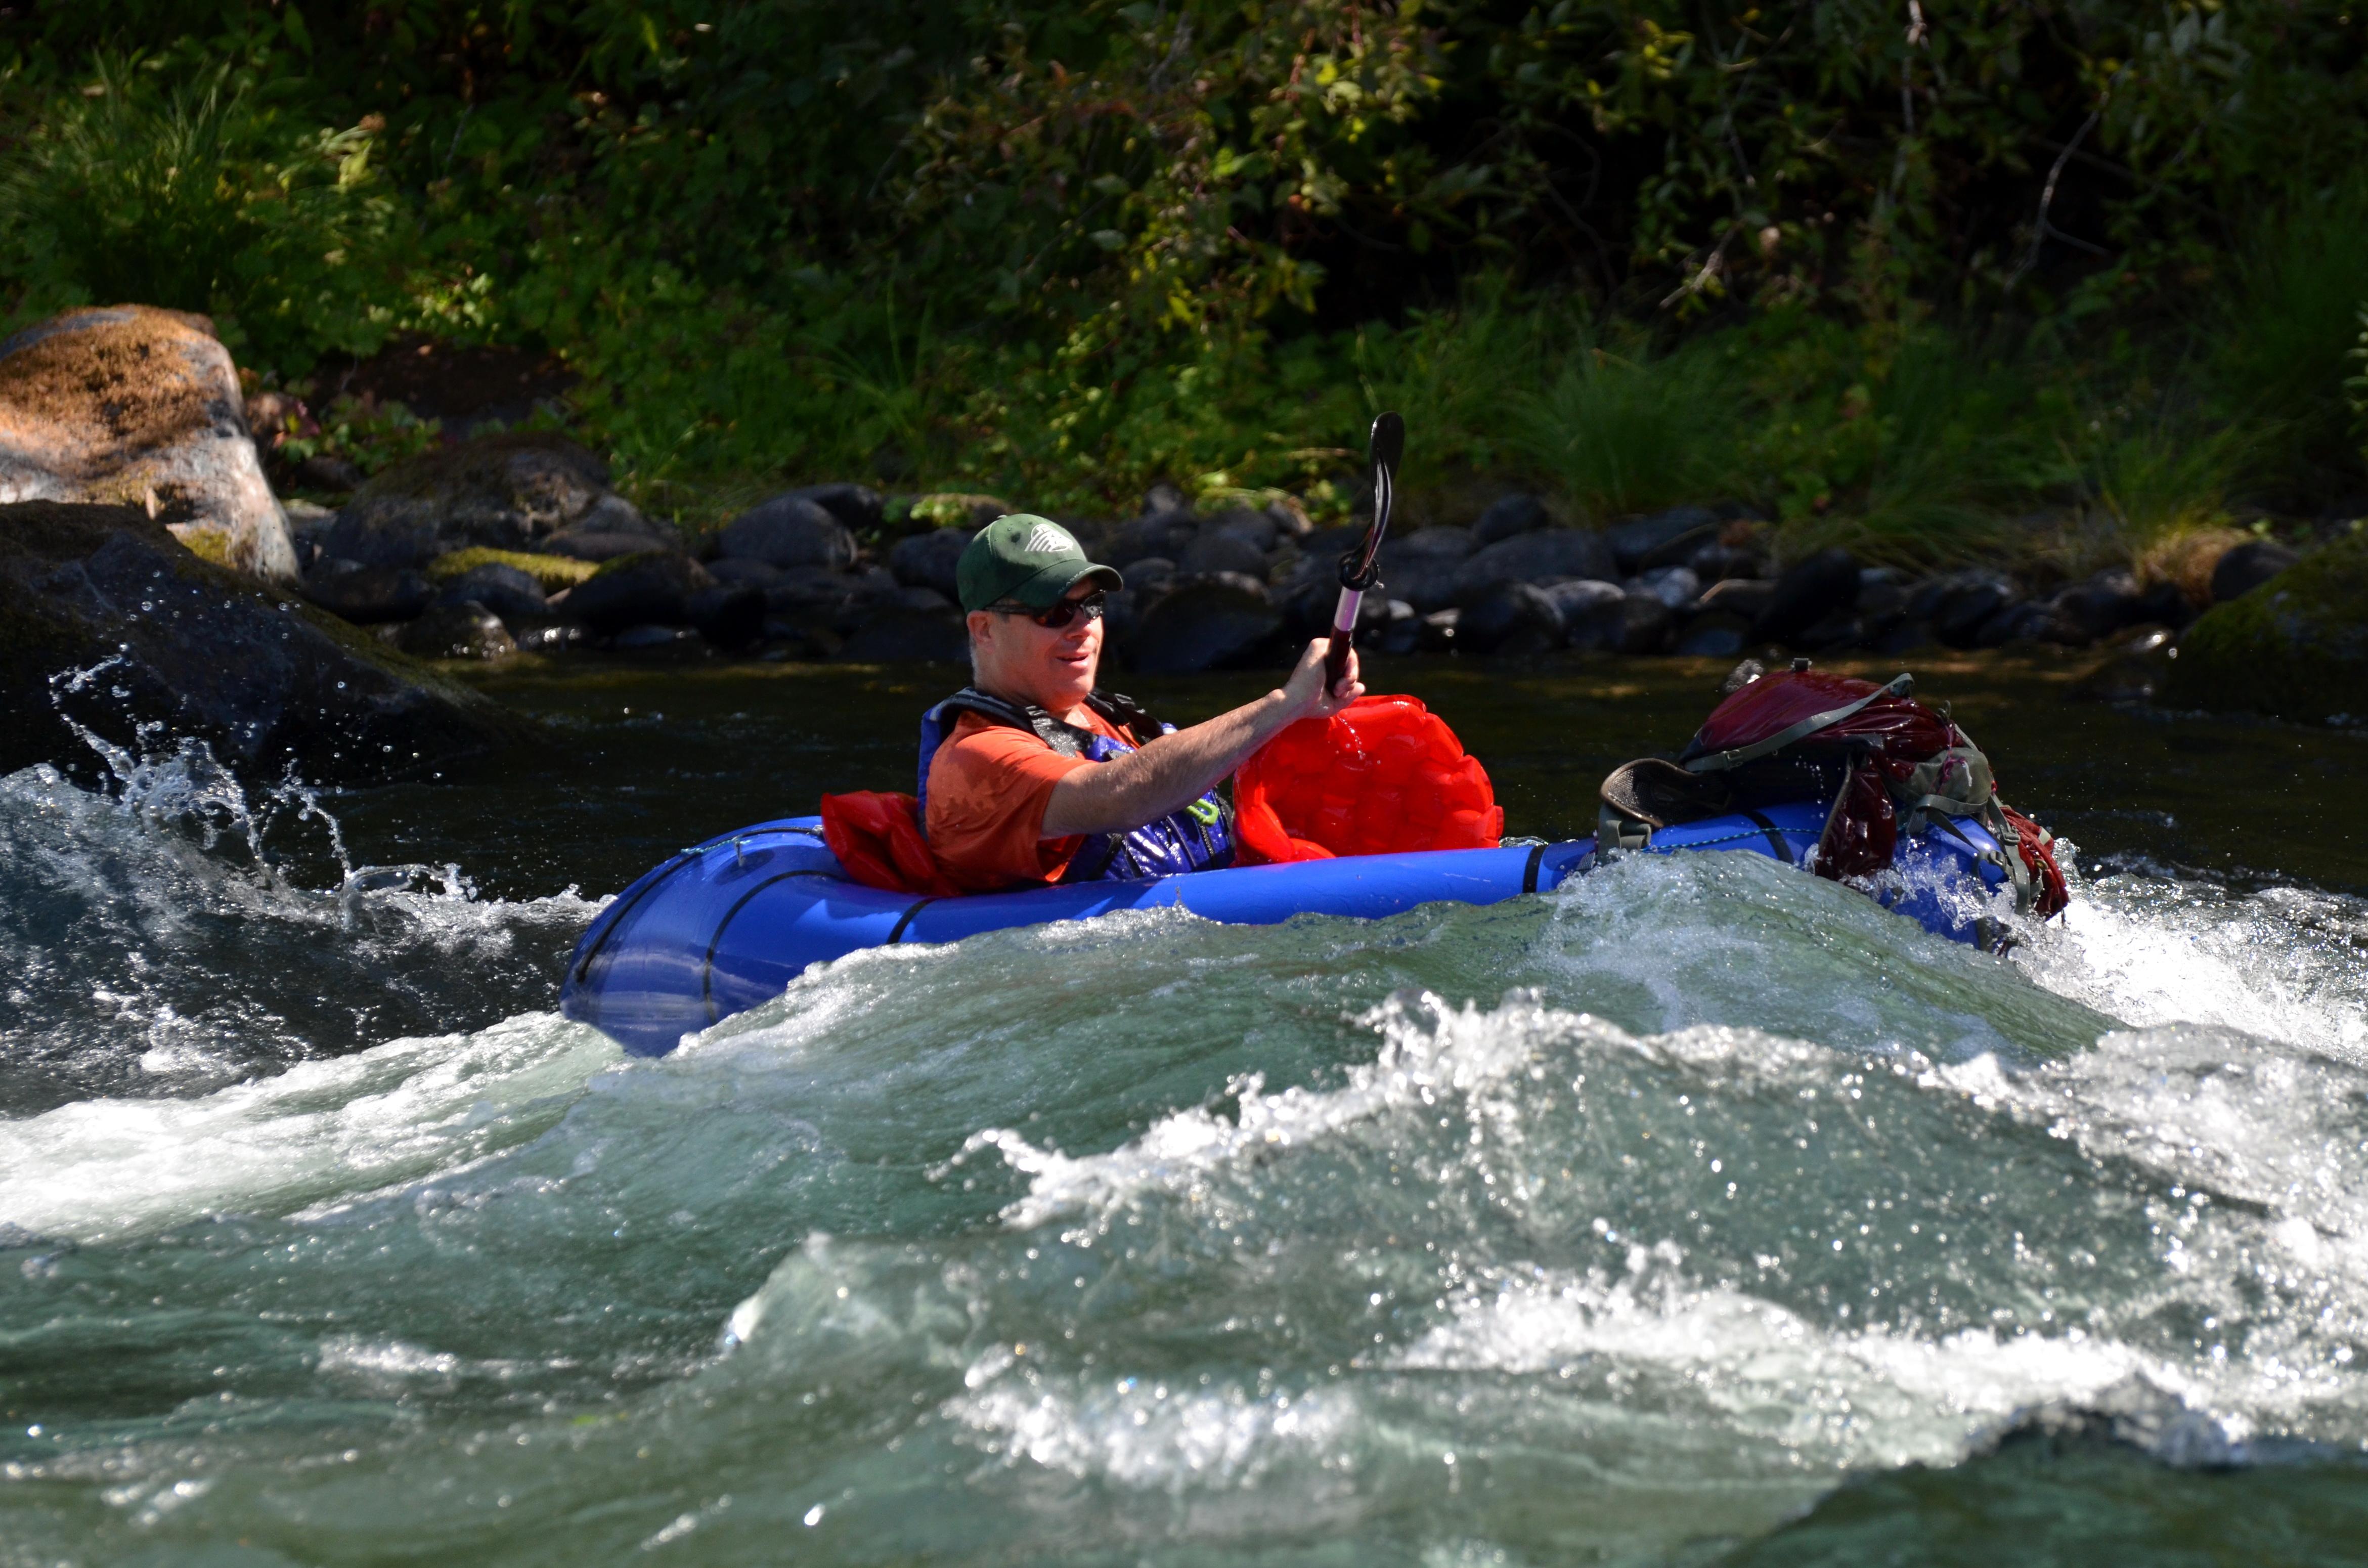
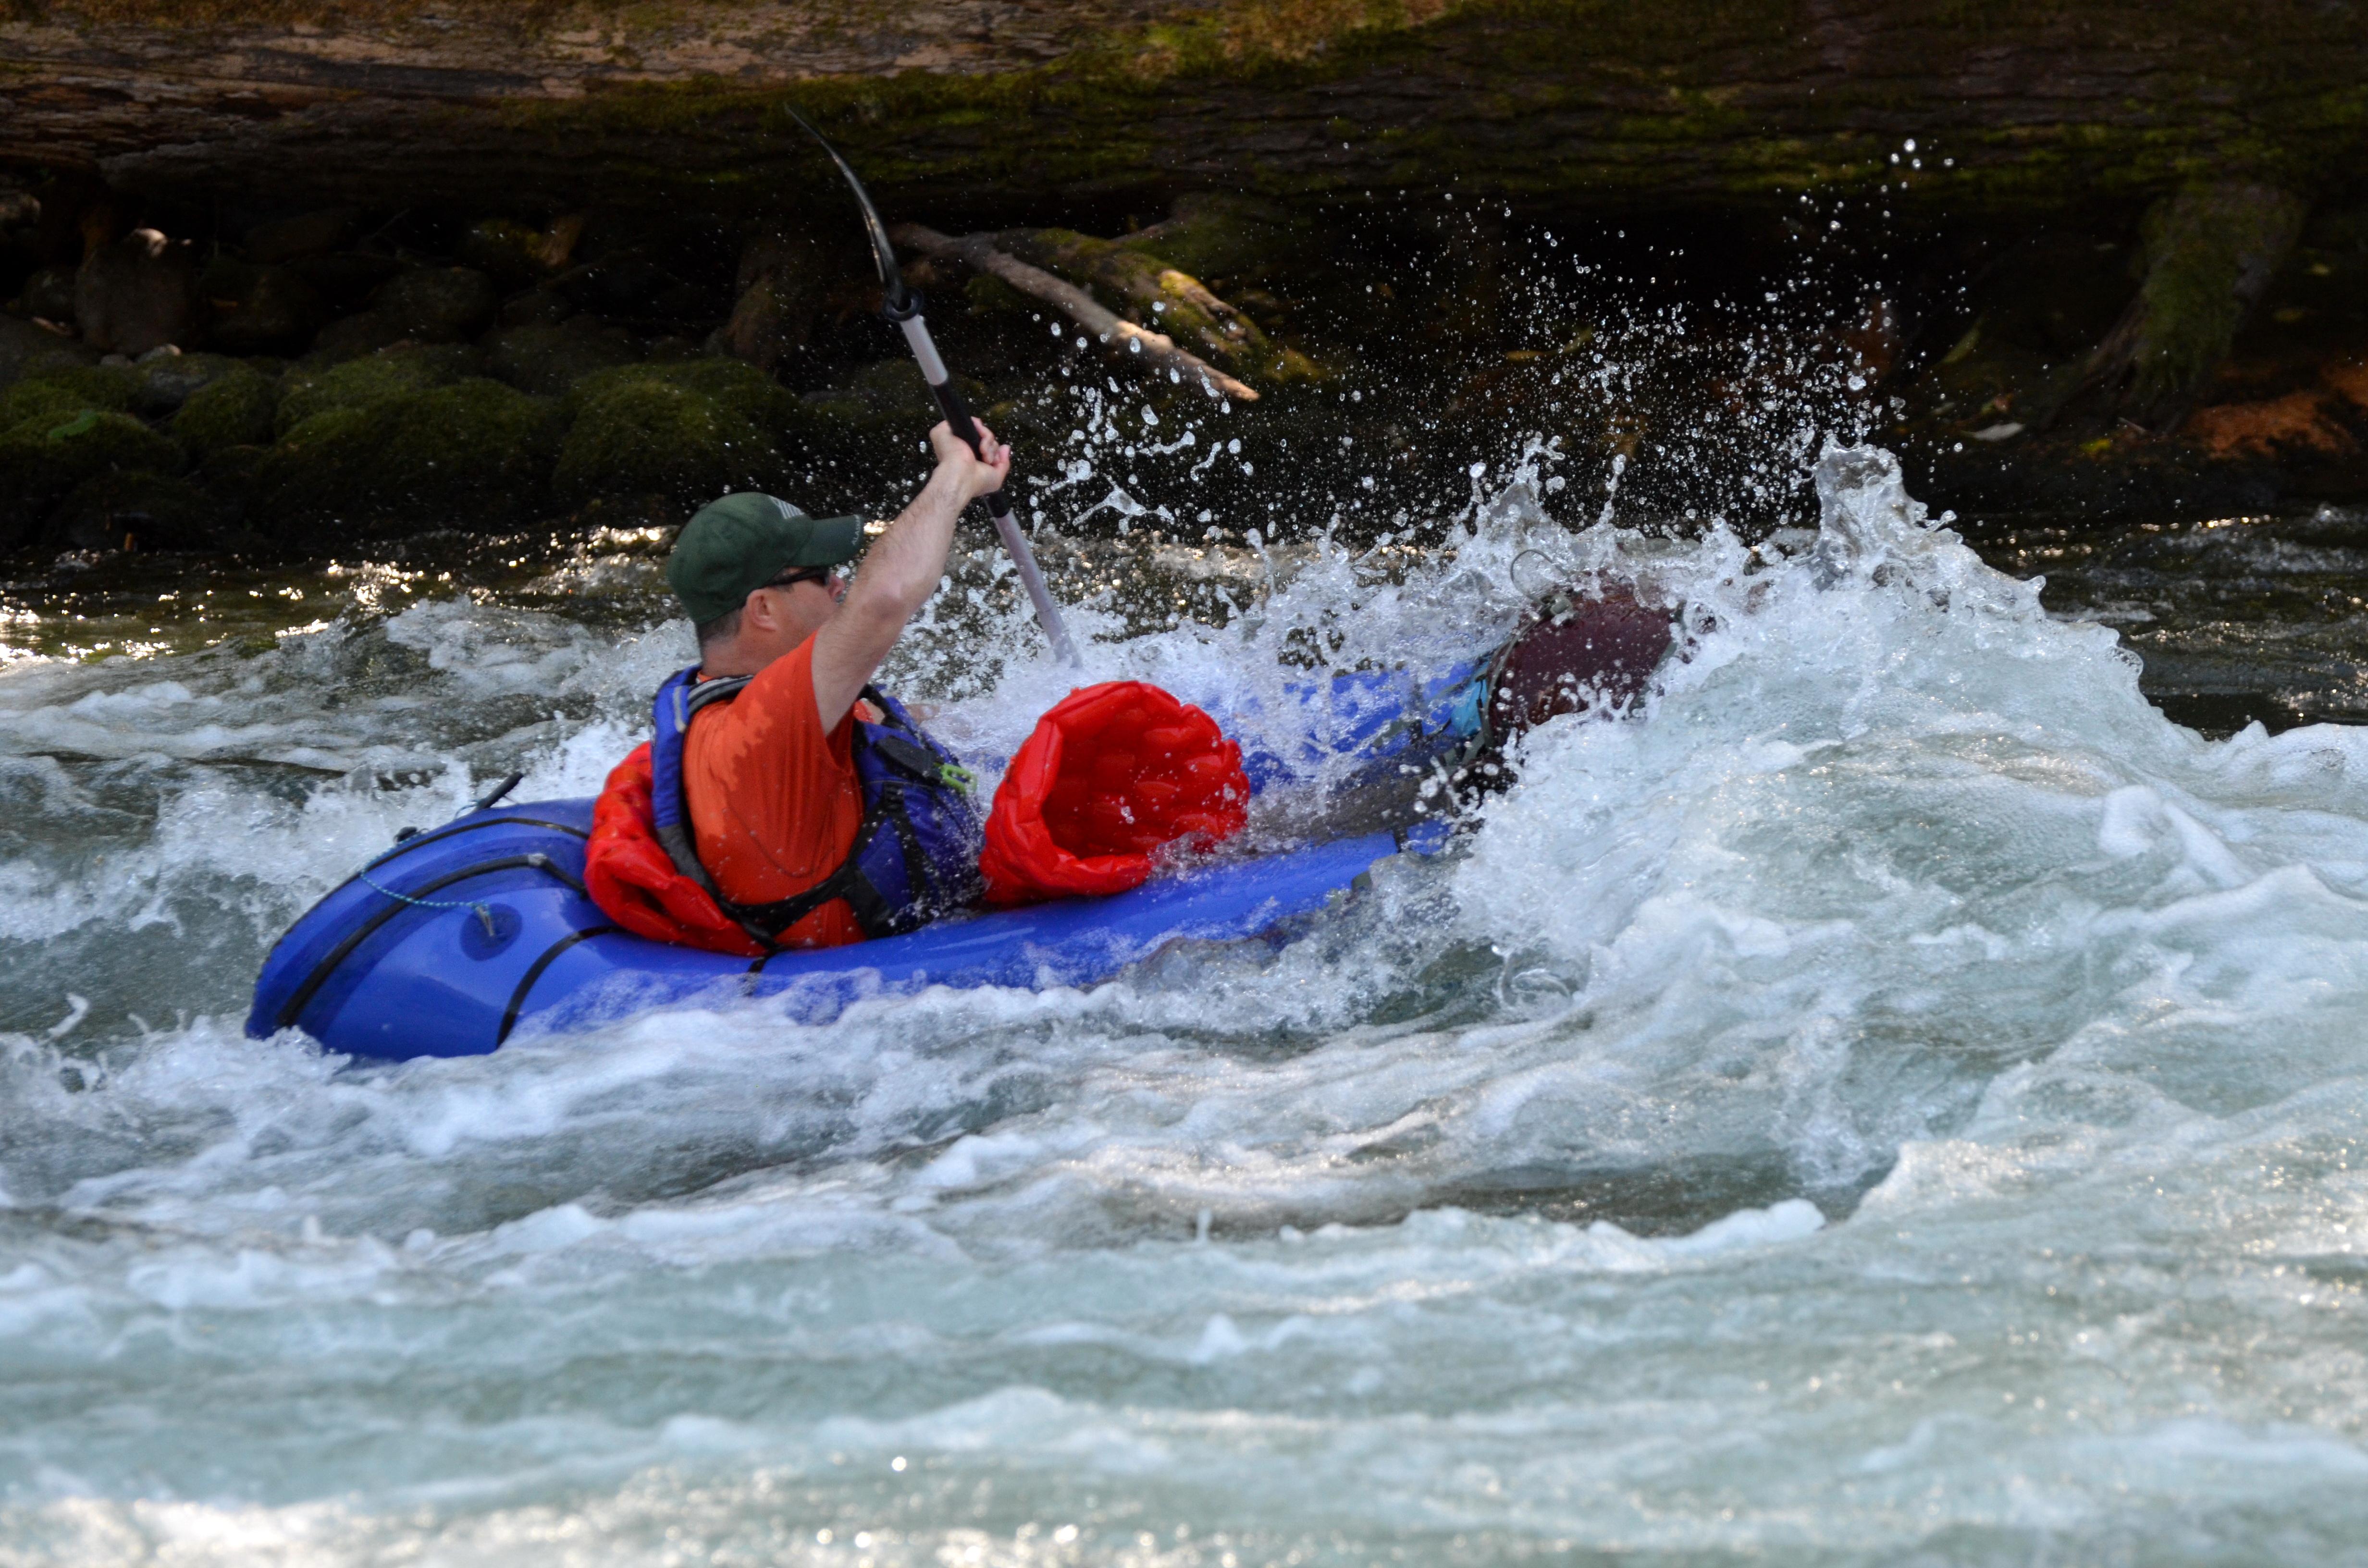
-
October 2, 2017 at 12:12 pm #4681Matt (Admin)Keymaster
Awesome!! Thanks for posting, Jeremy!
-
-
September 9, 2017 at 2:48 pm #4266keopgaardParticipant
Got my packraft finished today 🙂 Testing for airleaks..
-
October 9, 2017 at 8:14 am #4724keopgaardParticipant
Packraft number two. Size large, bought plans from Matt. Fabric from extremtextil in Germany. Did not have any problems about bonding, but more heat is the answer. The fabric is not so good as Matt’s fabric.
-
September 10, 2017 at 2:06 pm #4305Matt (Admin)Keymaster
That’s a big rubber duck 😀 Looks great!
-
October 19, 2017 at 2:43 am #4761keopgaardParticipant
-
October 19, 2017 at 10:17 am #4763Matt (Admin)Keymaster
Beauty!!
-
-
-
-
September 2, 2017 at 2:30 pm #4175ZackParticipant
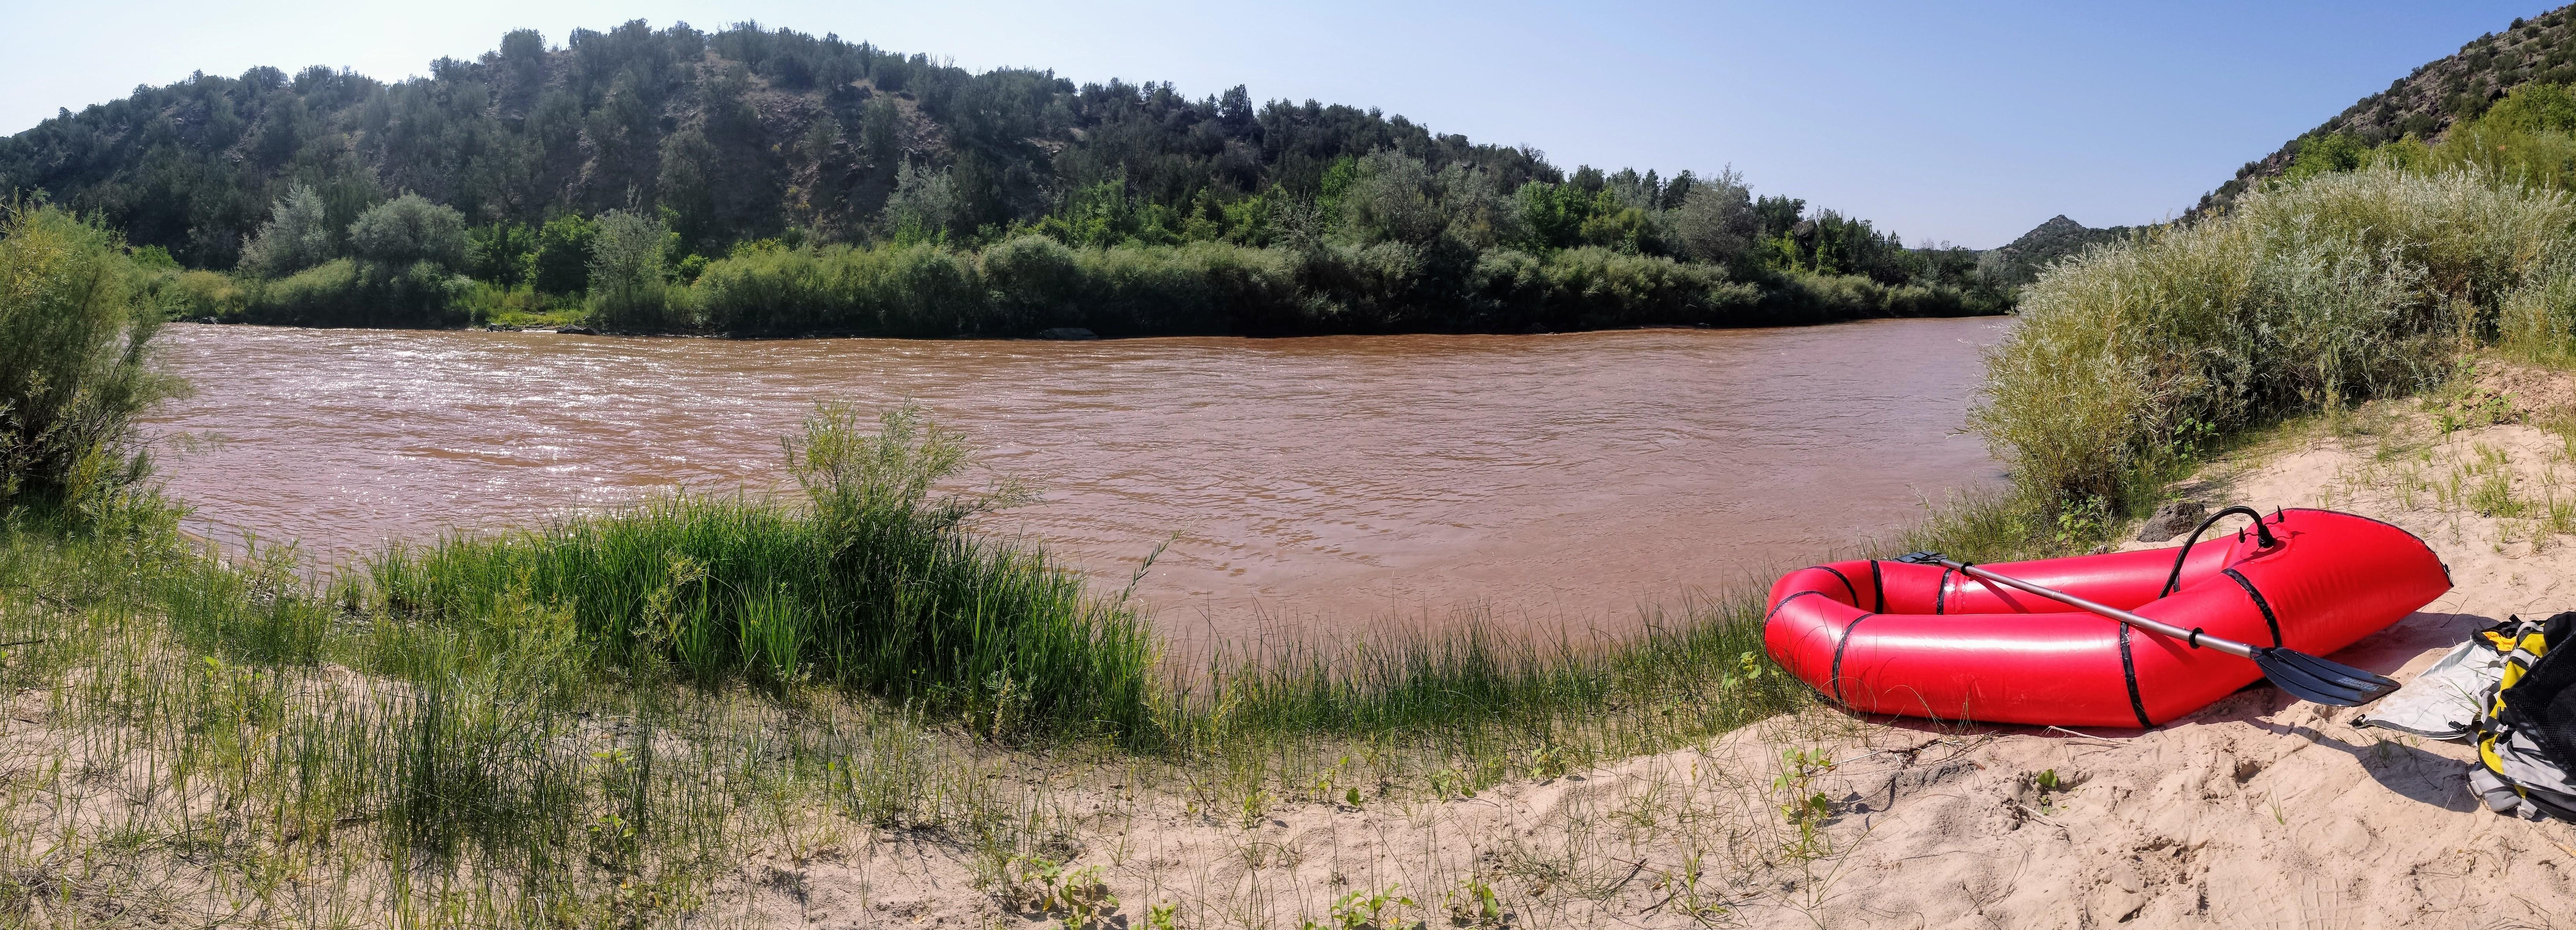
Protip: You can buy 1oz of Aquaseal for $8, or 8oz for $22. You may as well buy the 8oz, cause you just might need it.
-
September 10, 2017 at 2:07 pm #4306Matt (Admin)Keymaster
Great shot! I love seeing DIY Packrafts in what to me are exotic locations!
-
-
August 14, 2017 at 4:50 pm #3991Matt (Admin)Keymaster
I just got this cool shot from Jeremy and Melissa in Alaska showing their first two DIY Packrafts on their maiden voyage!
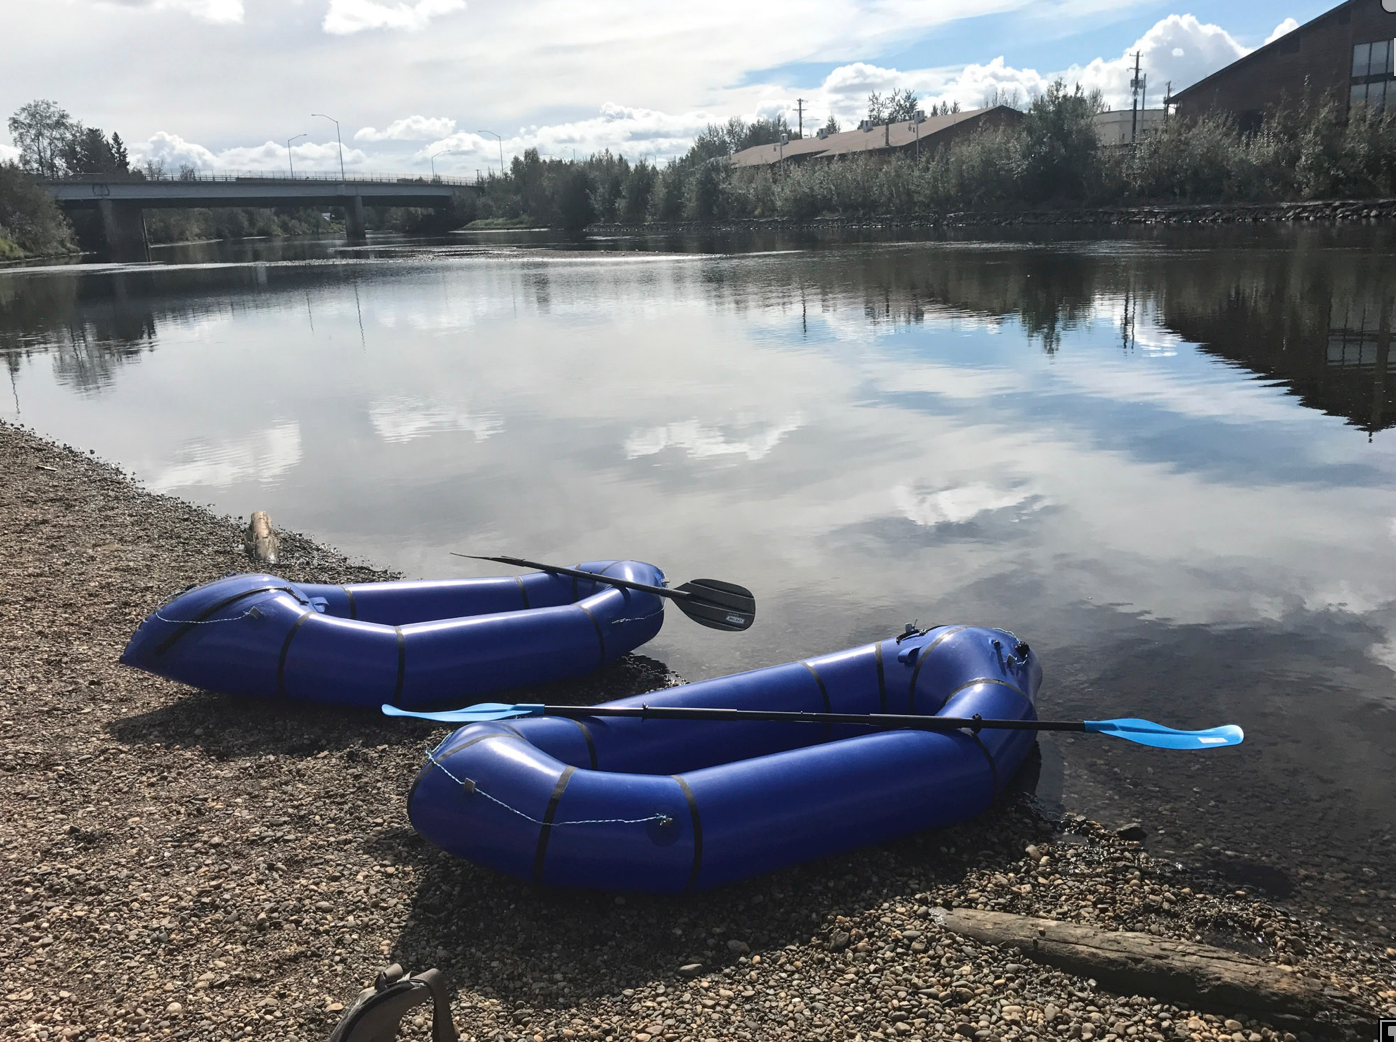
-
August 3, 2017 at 7:47 am #3796DaveParticipant
Very happy to show off the newly completed packraft, as you can see using the new green fabric! I tested it out yesterday and it worked very well. It’s impressive how lightweight yet rugged these craft are.
I still plan to install a top-up valve, and multiple tie downs for a packtach system.
My only issue now is in trying to fix a slow leak. This didn’t really impact my initial water tests, but I hope to get it solved soon.
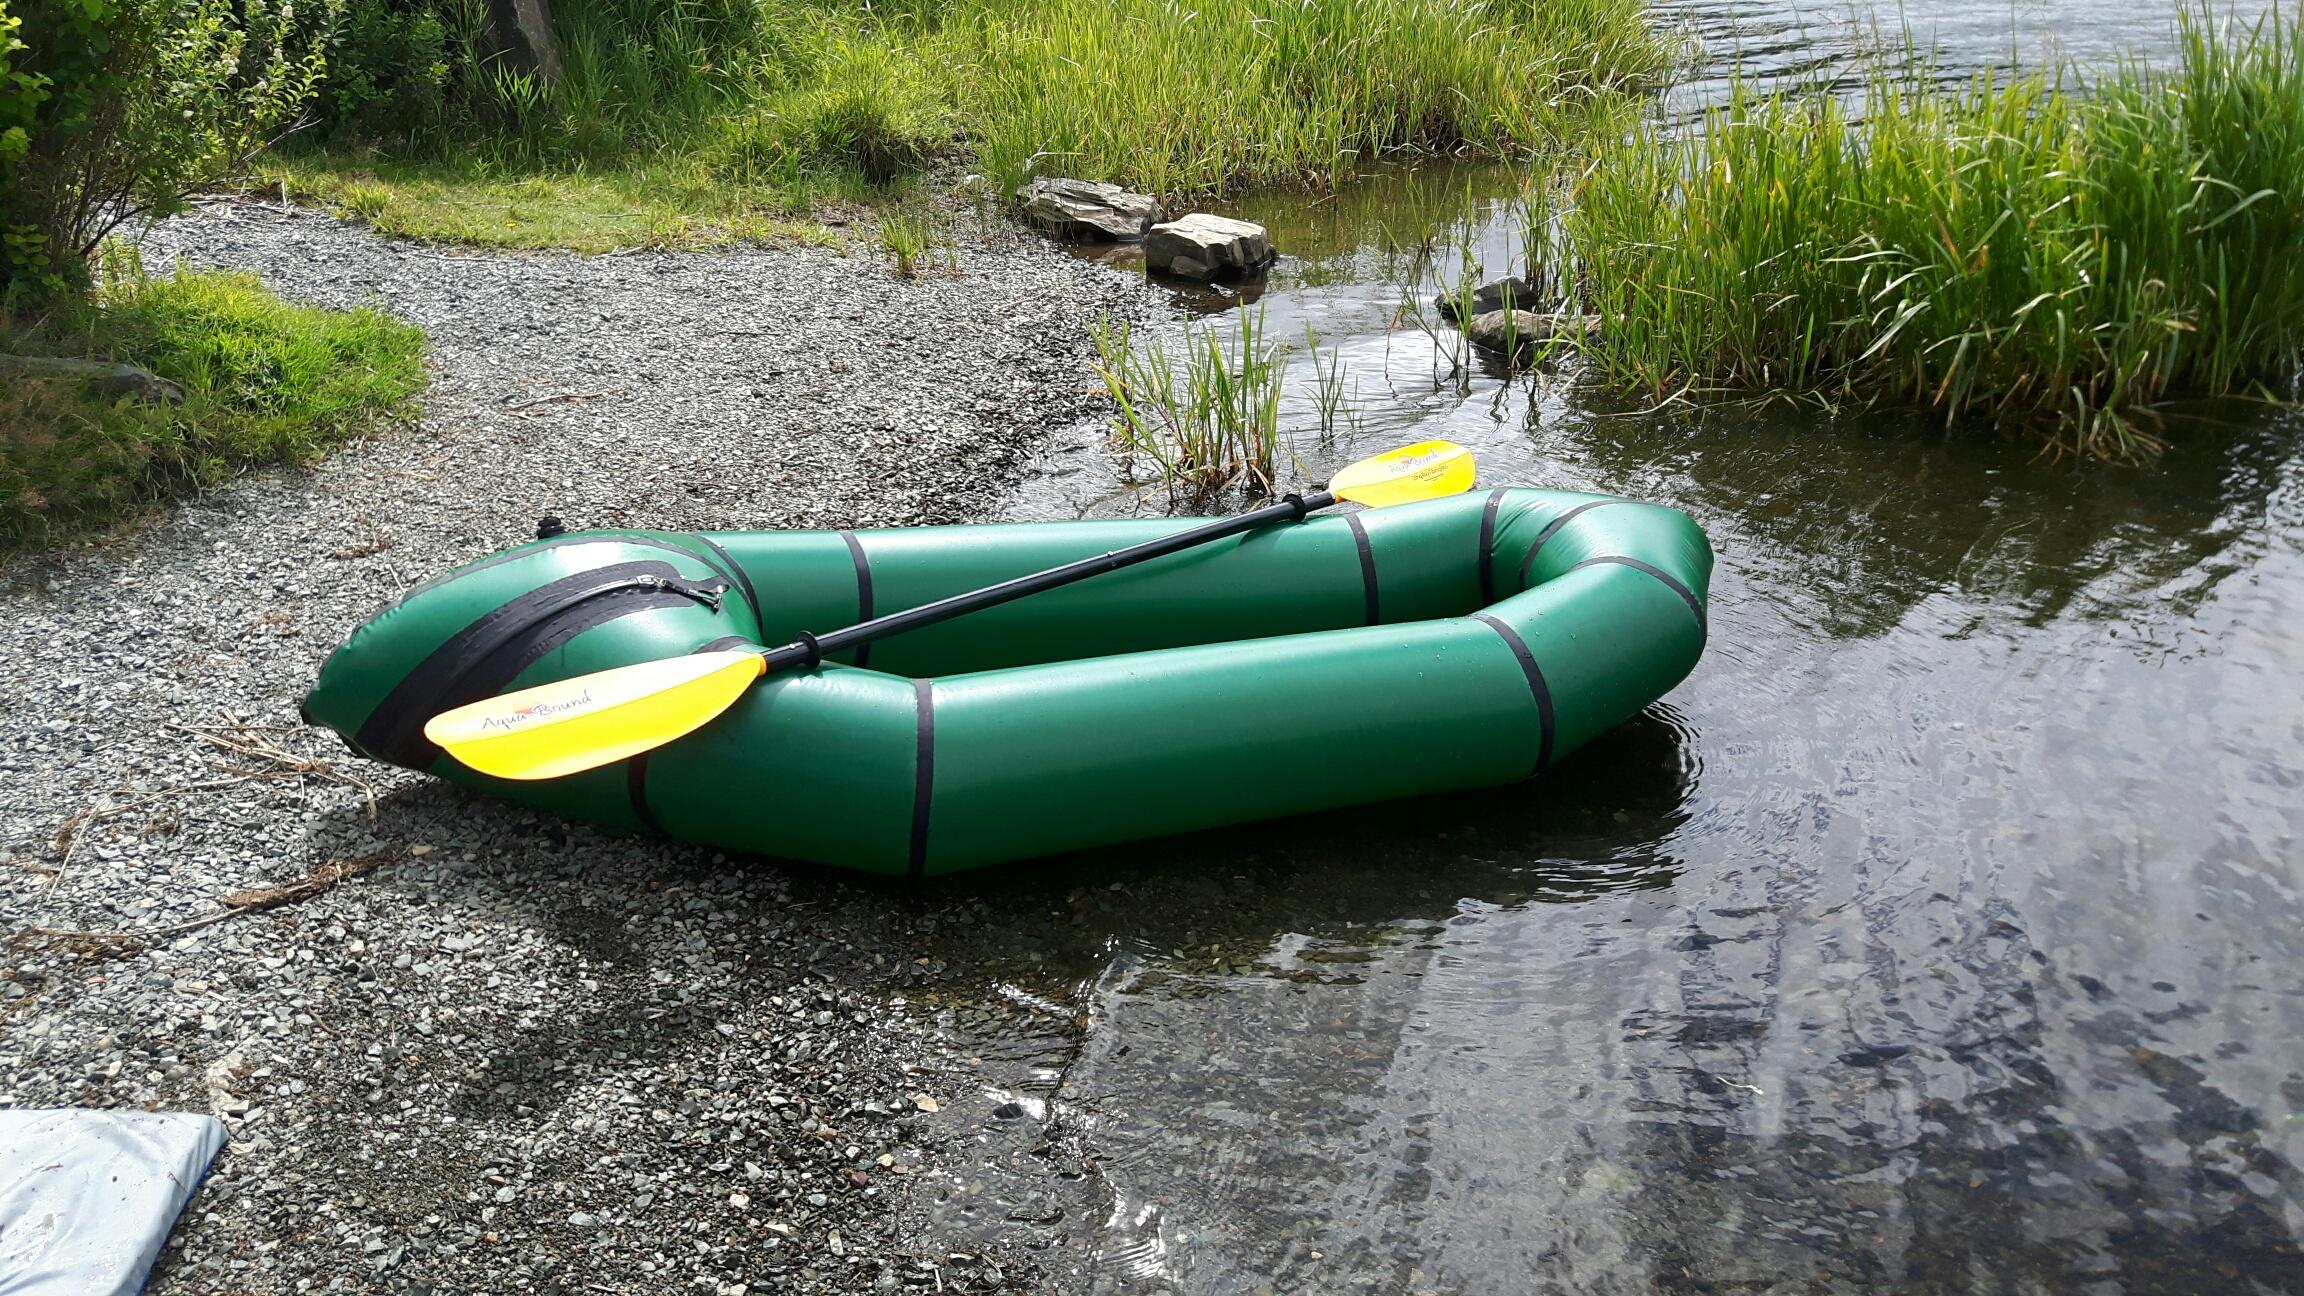
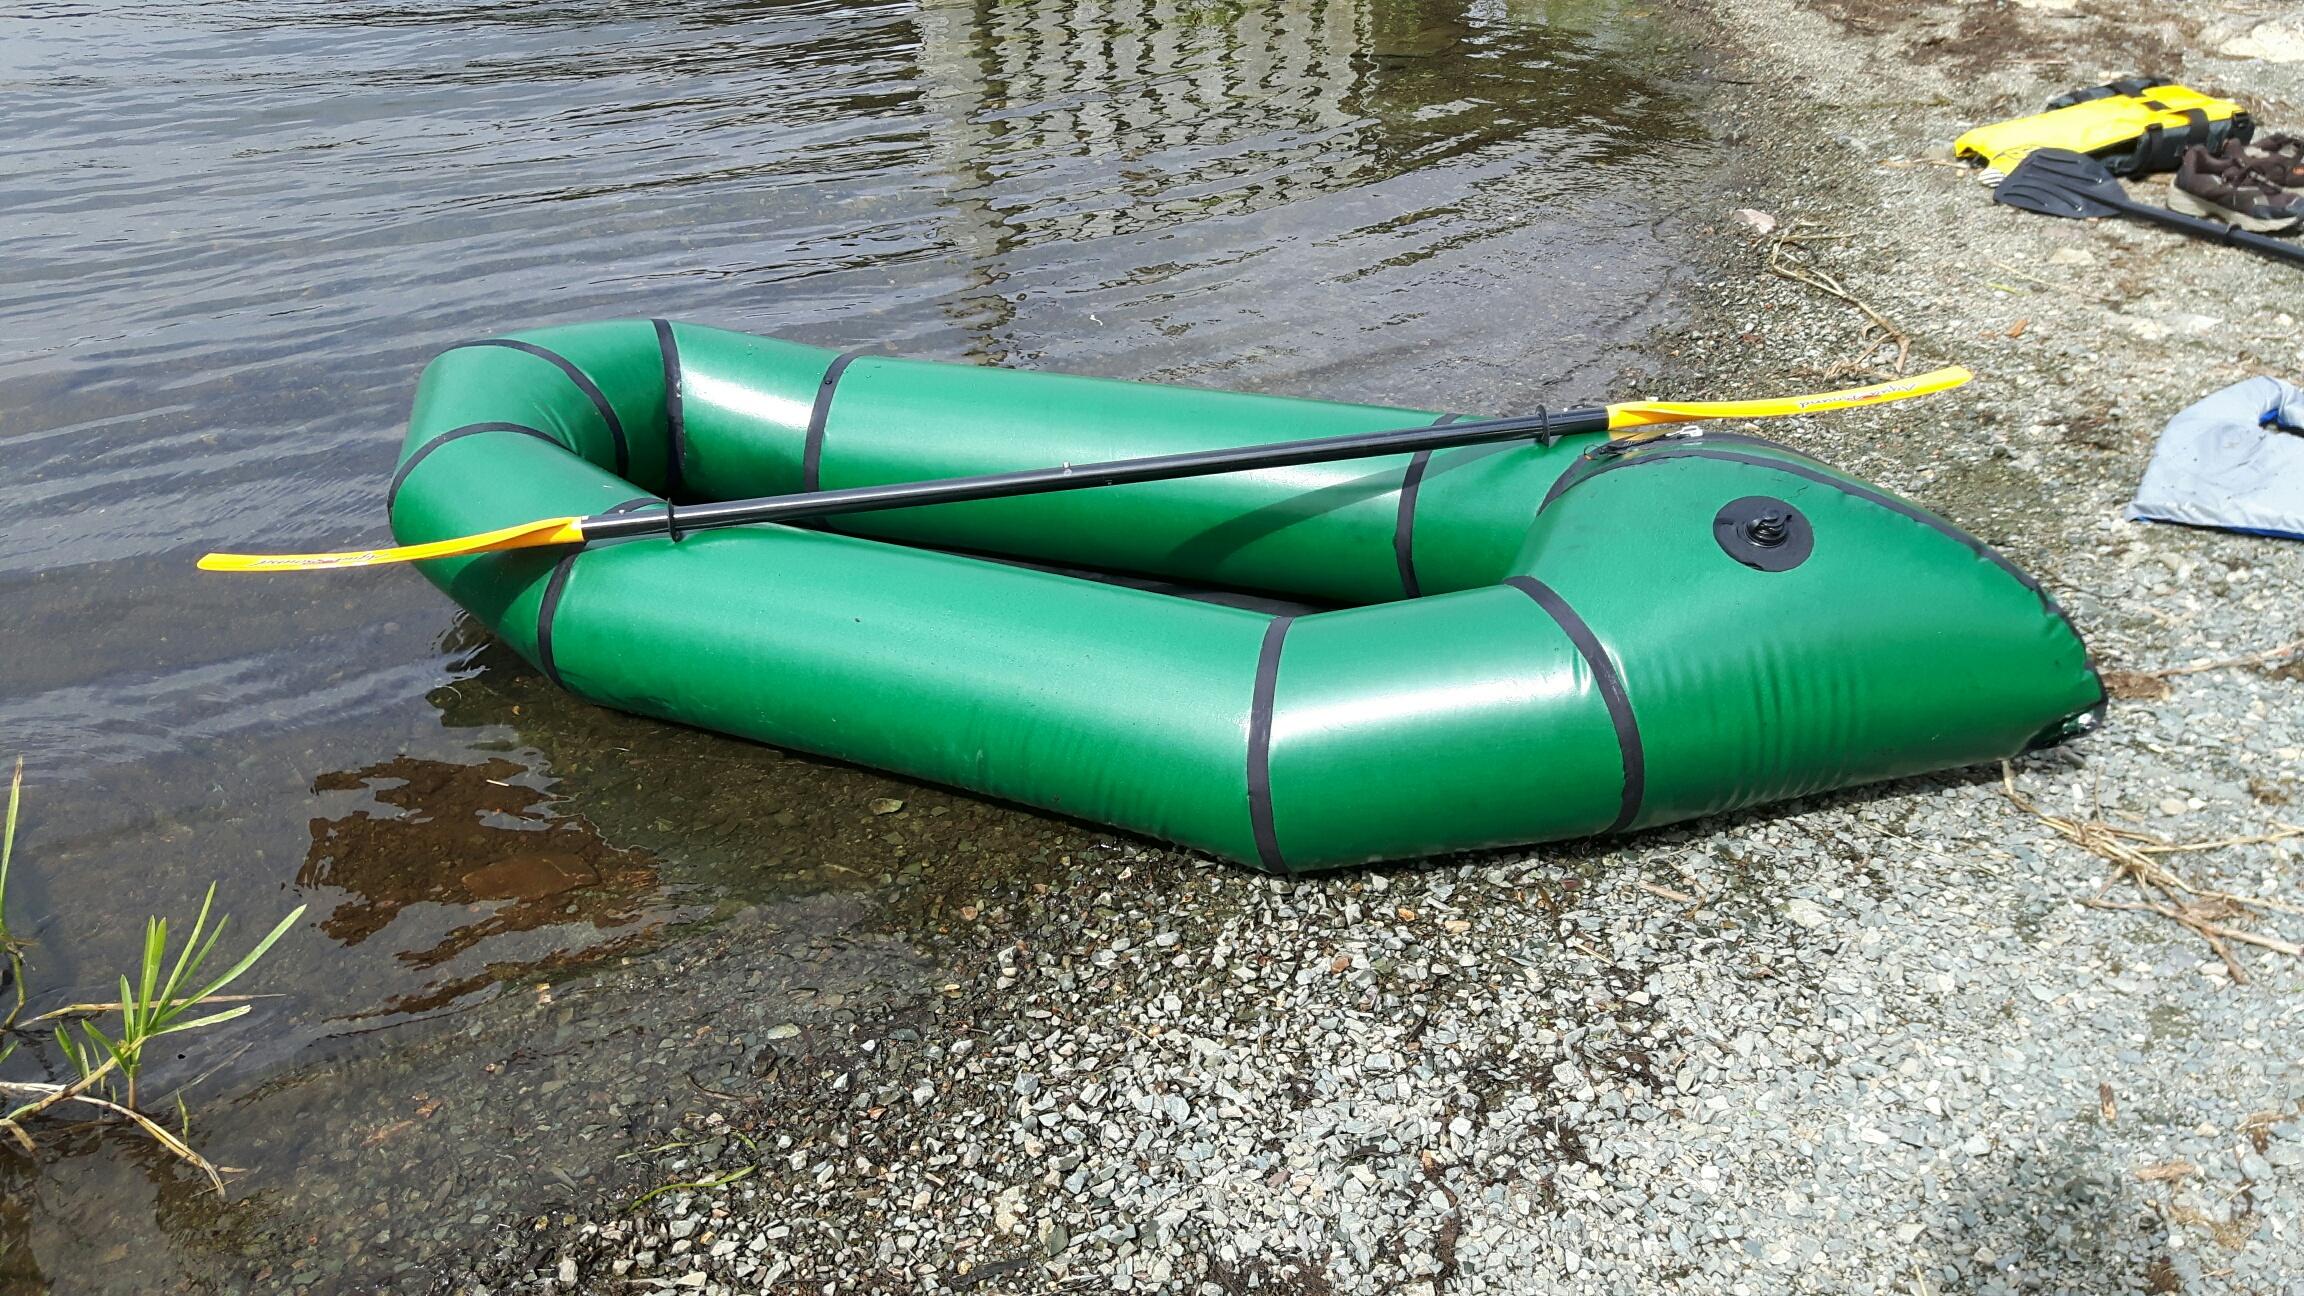
After all this, I feel like making another one to go with it. Perhaps in red!
Happy packrafting
Dave
-
August 3, 2017 at 7:51 am #3797Matt (Admin)Keymaster
Awesome! Thanks for posting, Dave! It looks great 😀
-
-
May 31, 2017 at 1:16 am #3300DougalParticipant
Very excited to put together my first packraft. I’m using a thermorest neo air xlite doubled over as a seat, floor and backrest. It’s very comfy, in fact far comfortable than the seat in my Alpacka. It also as some stiffness which improves handling. The sleeping pad wedges in pretty well, but I guess it could potentially come out in major rapids.
I’ve used it in grade 2 water and it handles it well. Thanks Matt:)
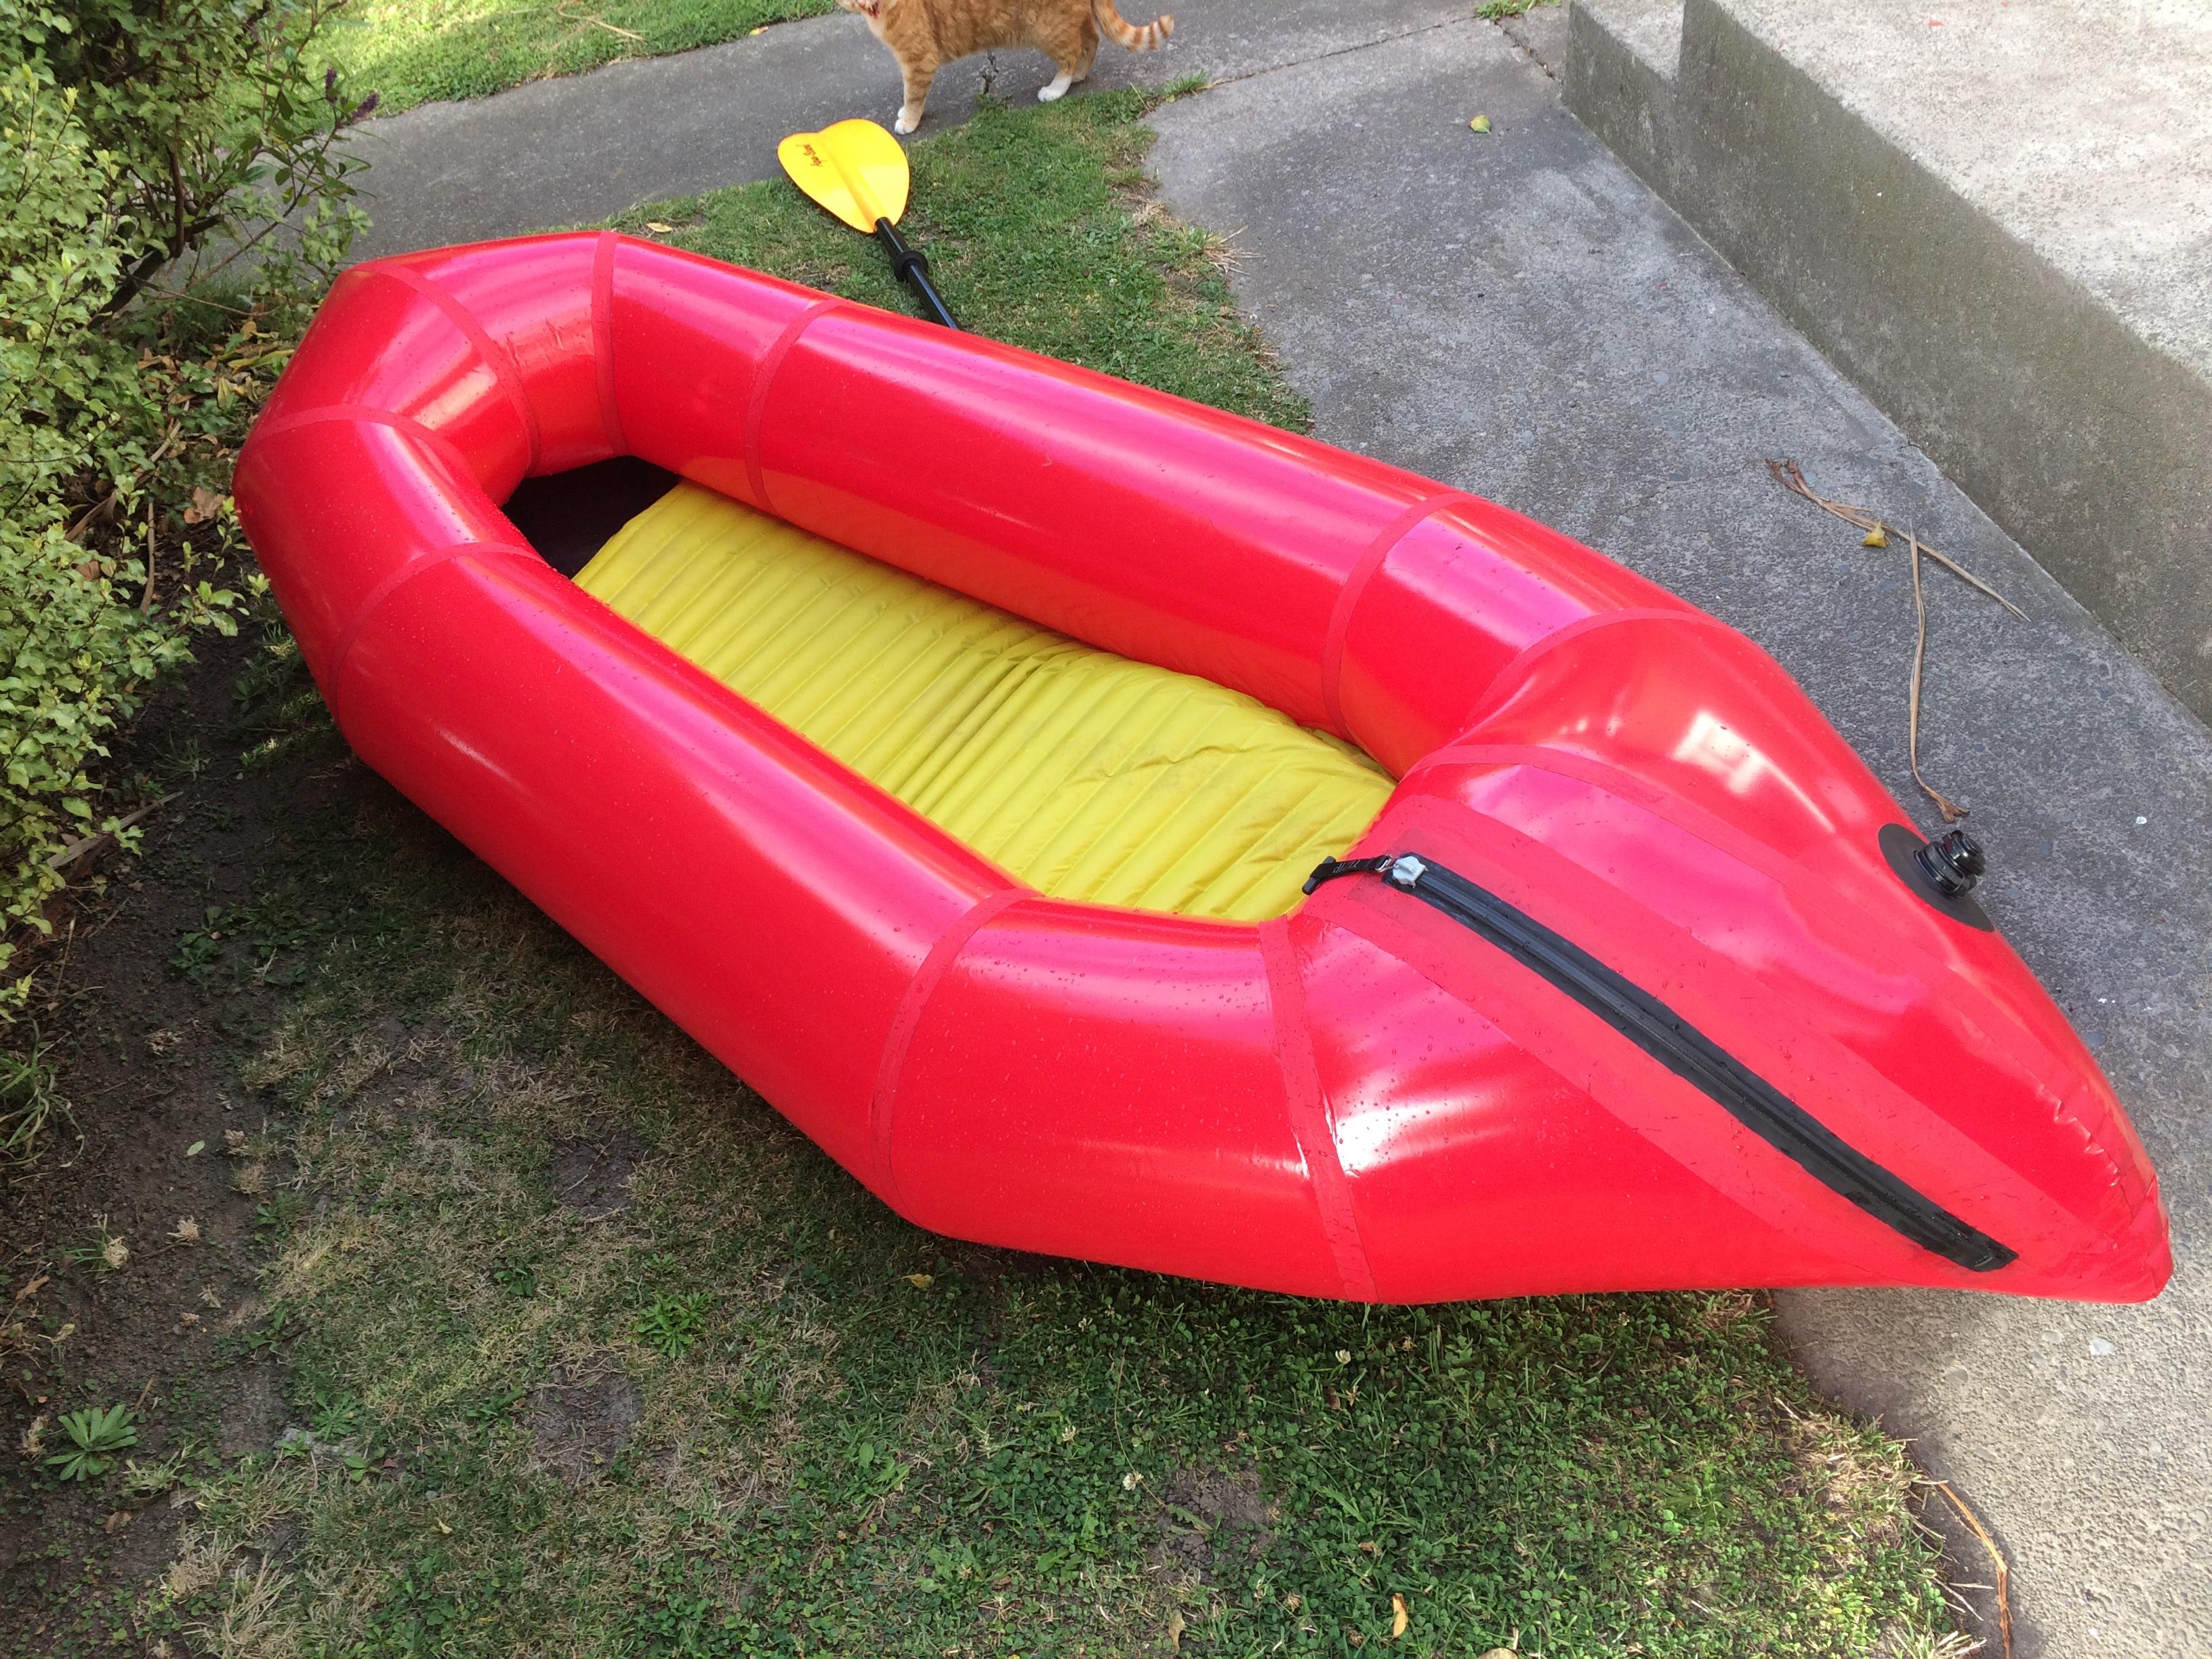

-
May 31, 2017 at 11:15 am #3317Matt (Admin)Keymaster
Beauty!! Thanks for posting, and thanks for the tip about the Neo Air Xlite!
-
-
May 23, 2017 at 7:23 pm #3249Kwok Wah LaiParticipant
Hi dear packraft DIYers,
I would like to share some pictures of my DIYed and some points on trouble shooting of air leakage.
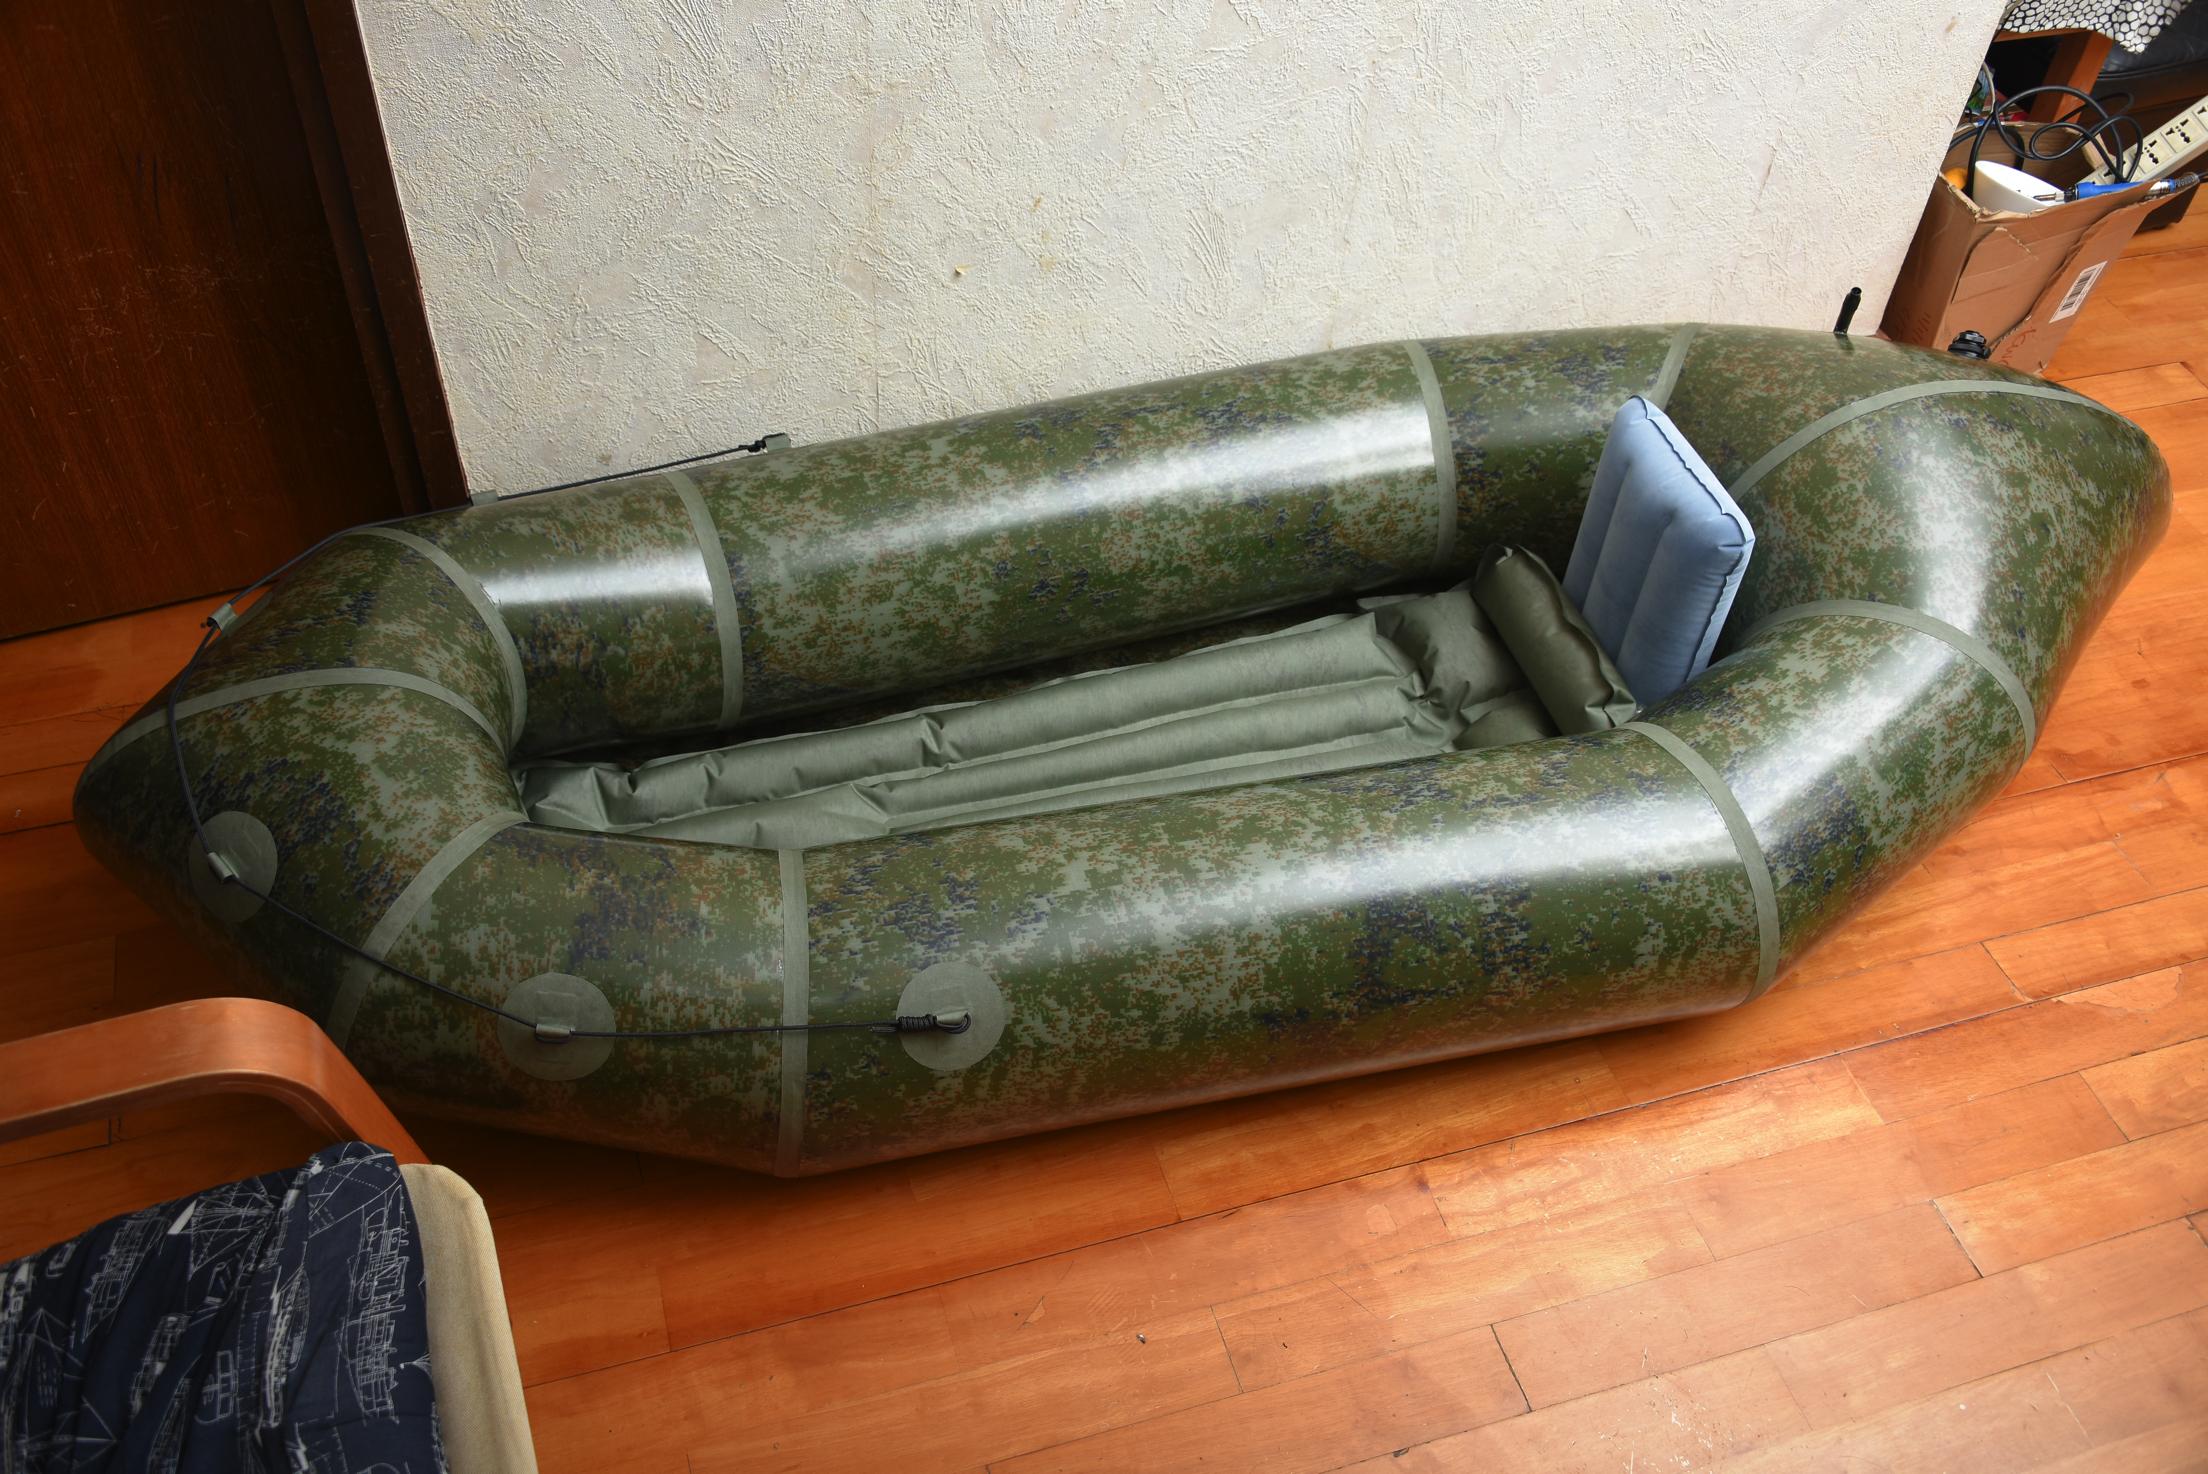
I must thank Matt first for his great web site and products. He had made my dream came true without costing arms and legs.
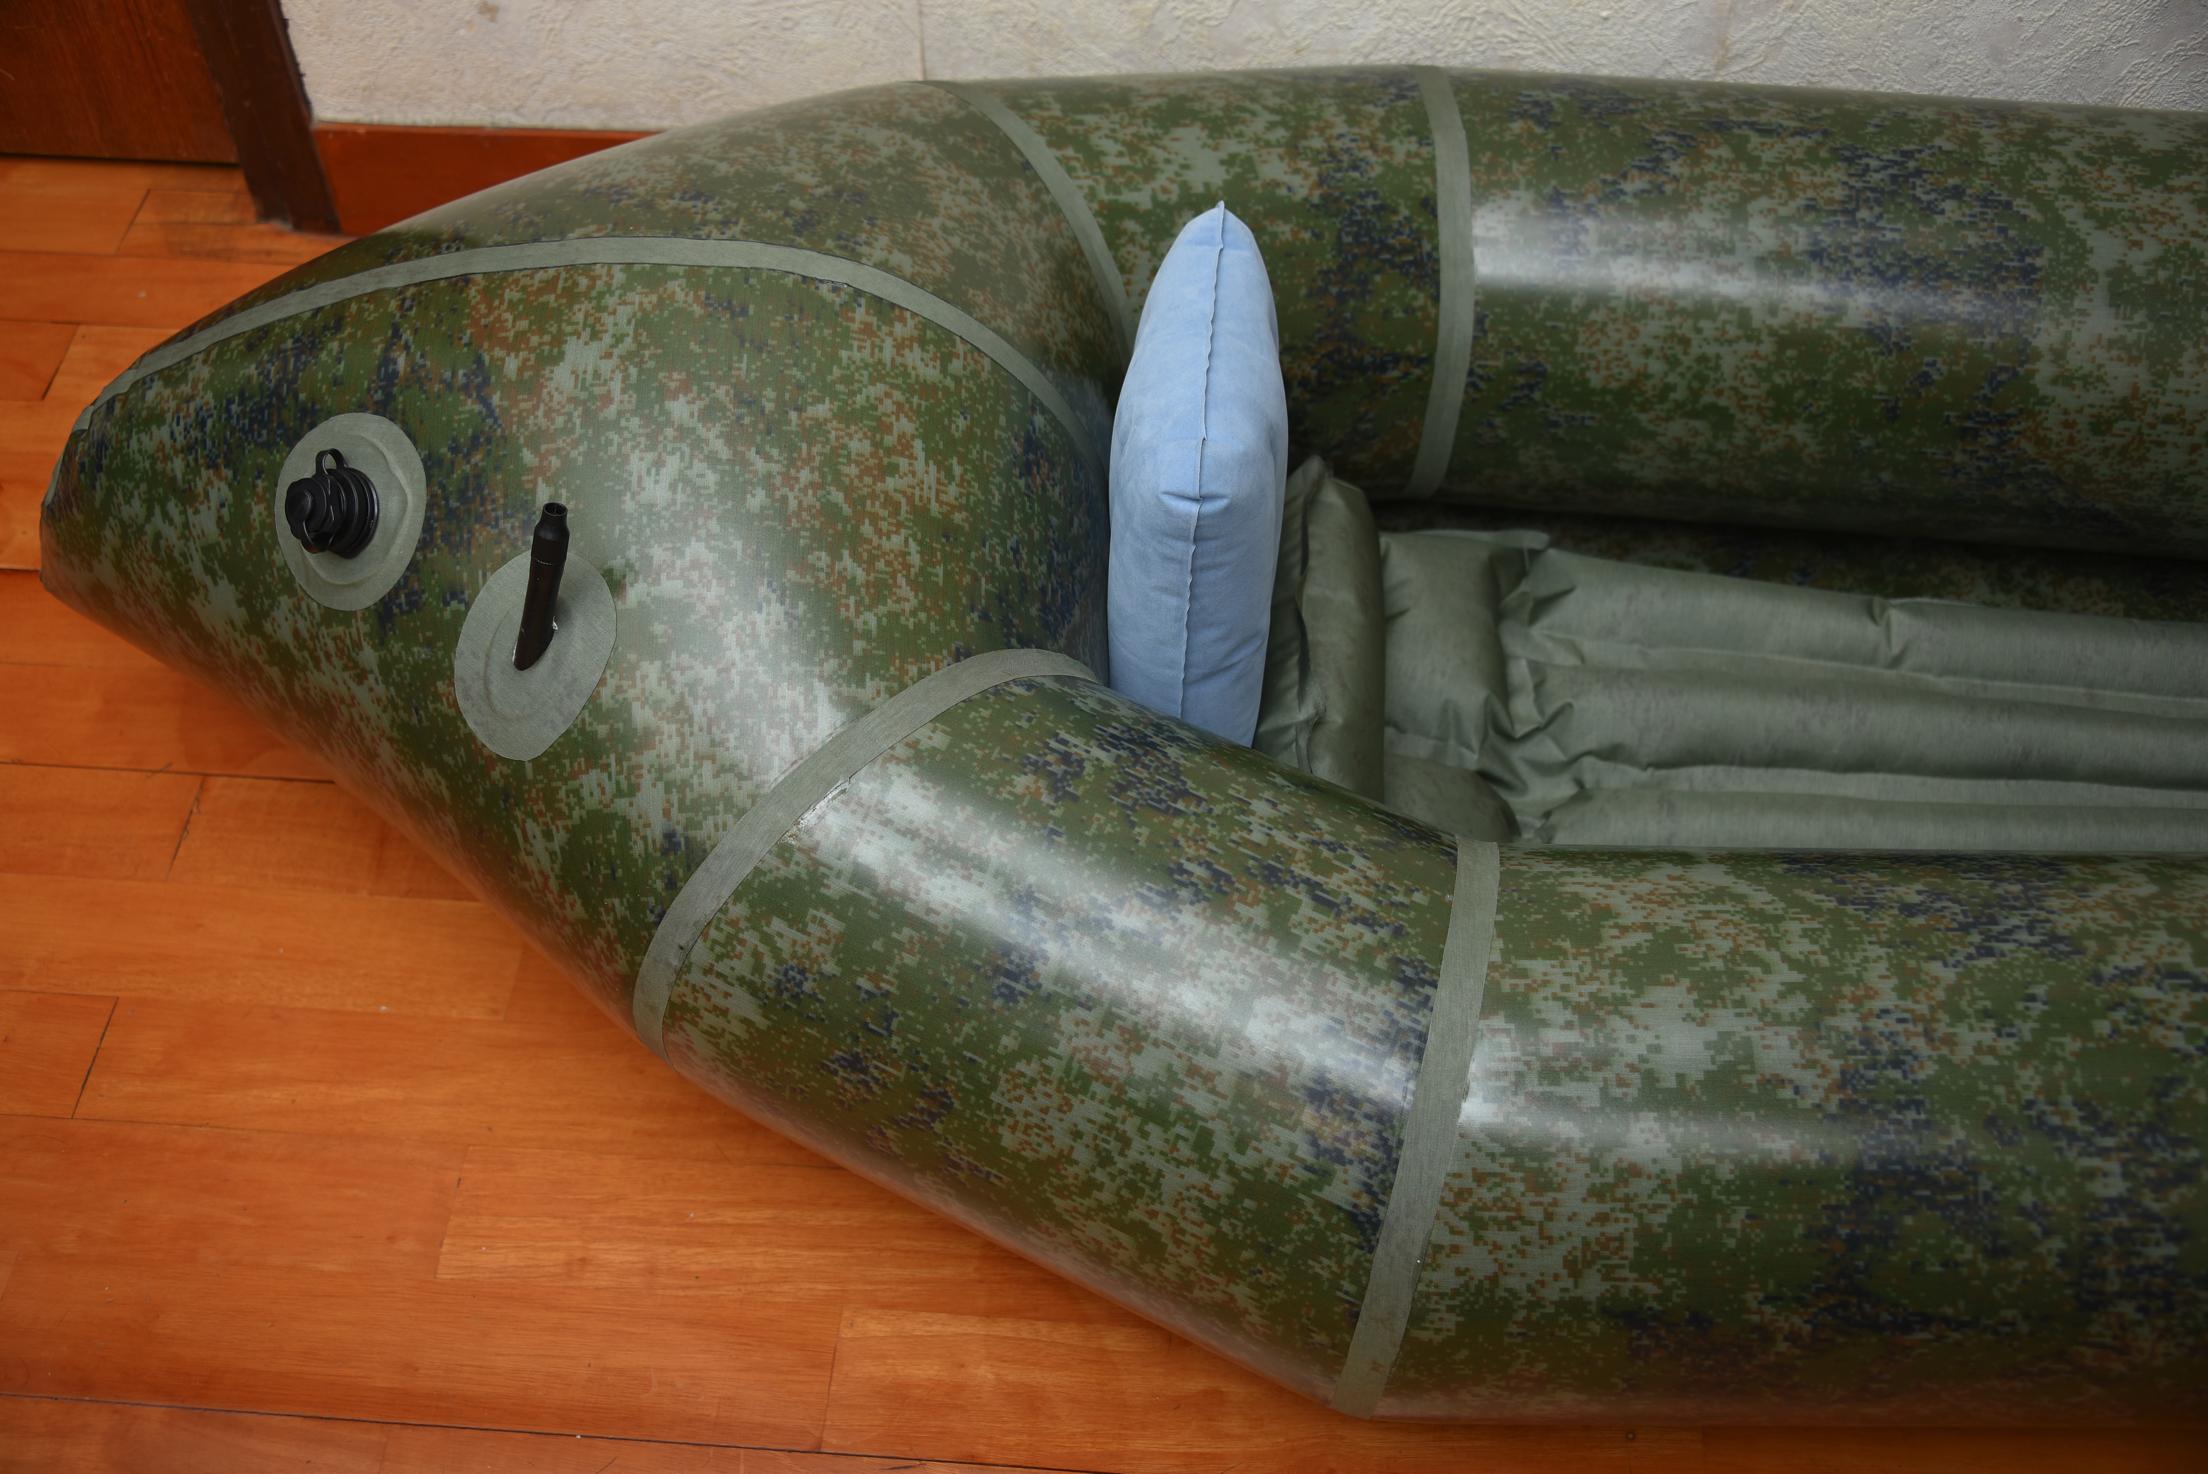
It is for my sea side recreation, watching birds flying and fishes jumping. But most of all, I am enjoying the tranquility of the sea when it is calm.
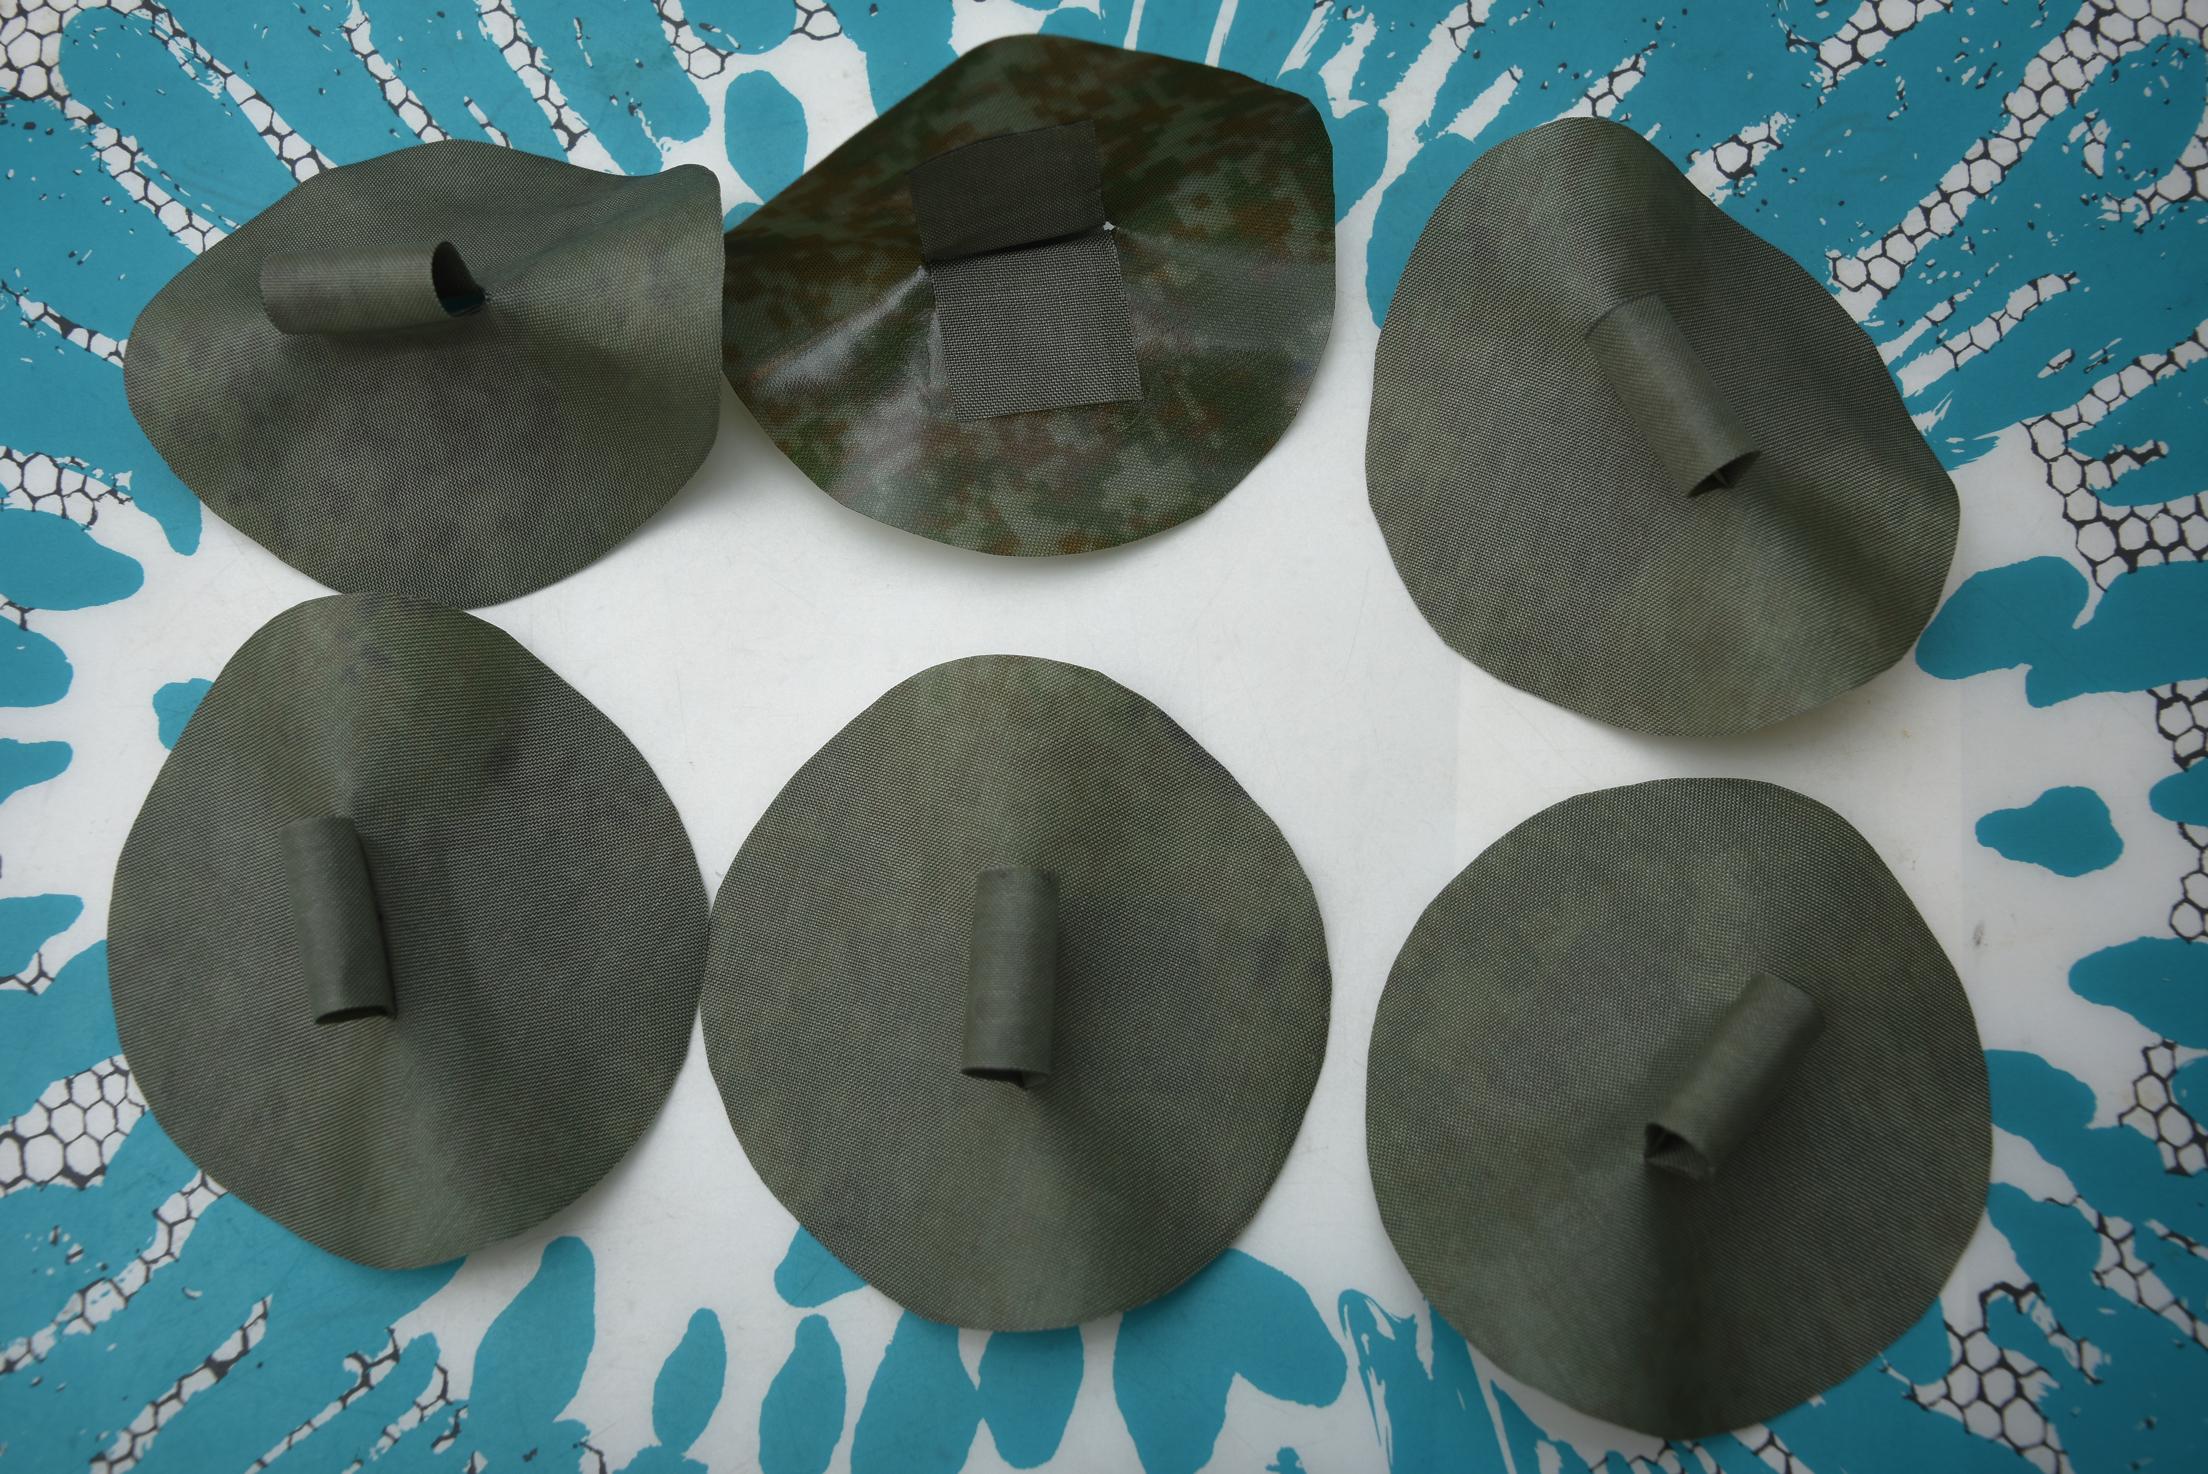
The PVC inflatable canoe, alone, I have been using is weighted almost 20kg, it was a kind of torture in handling it.
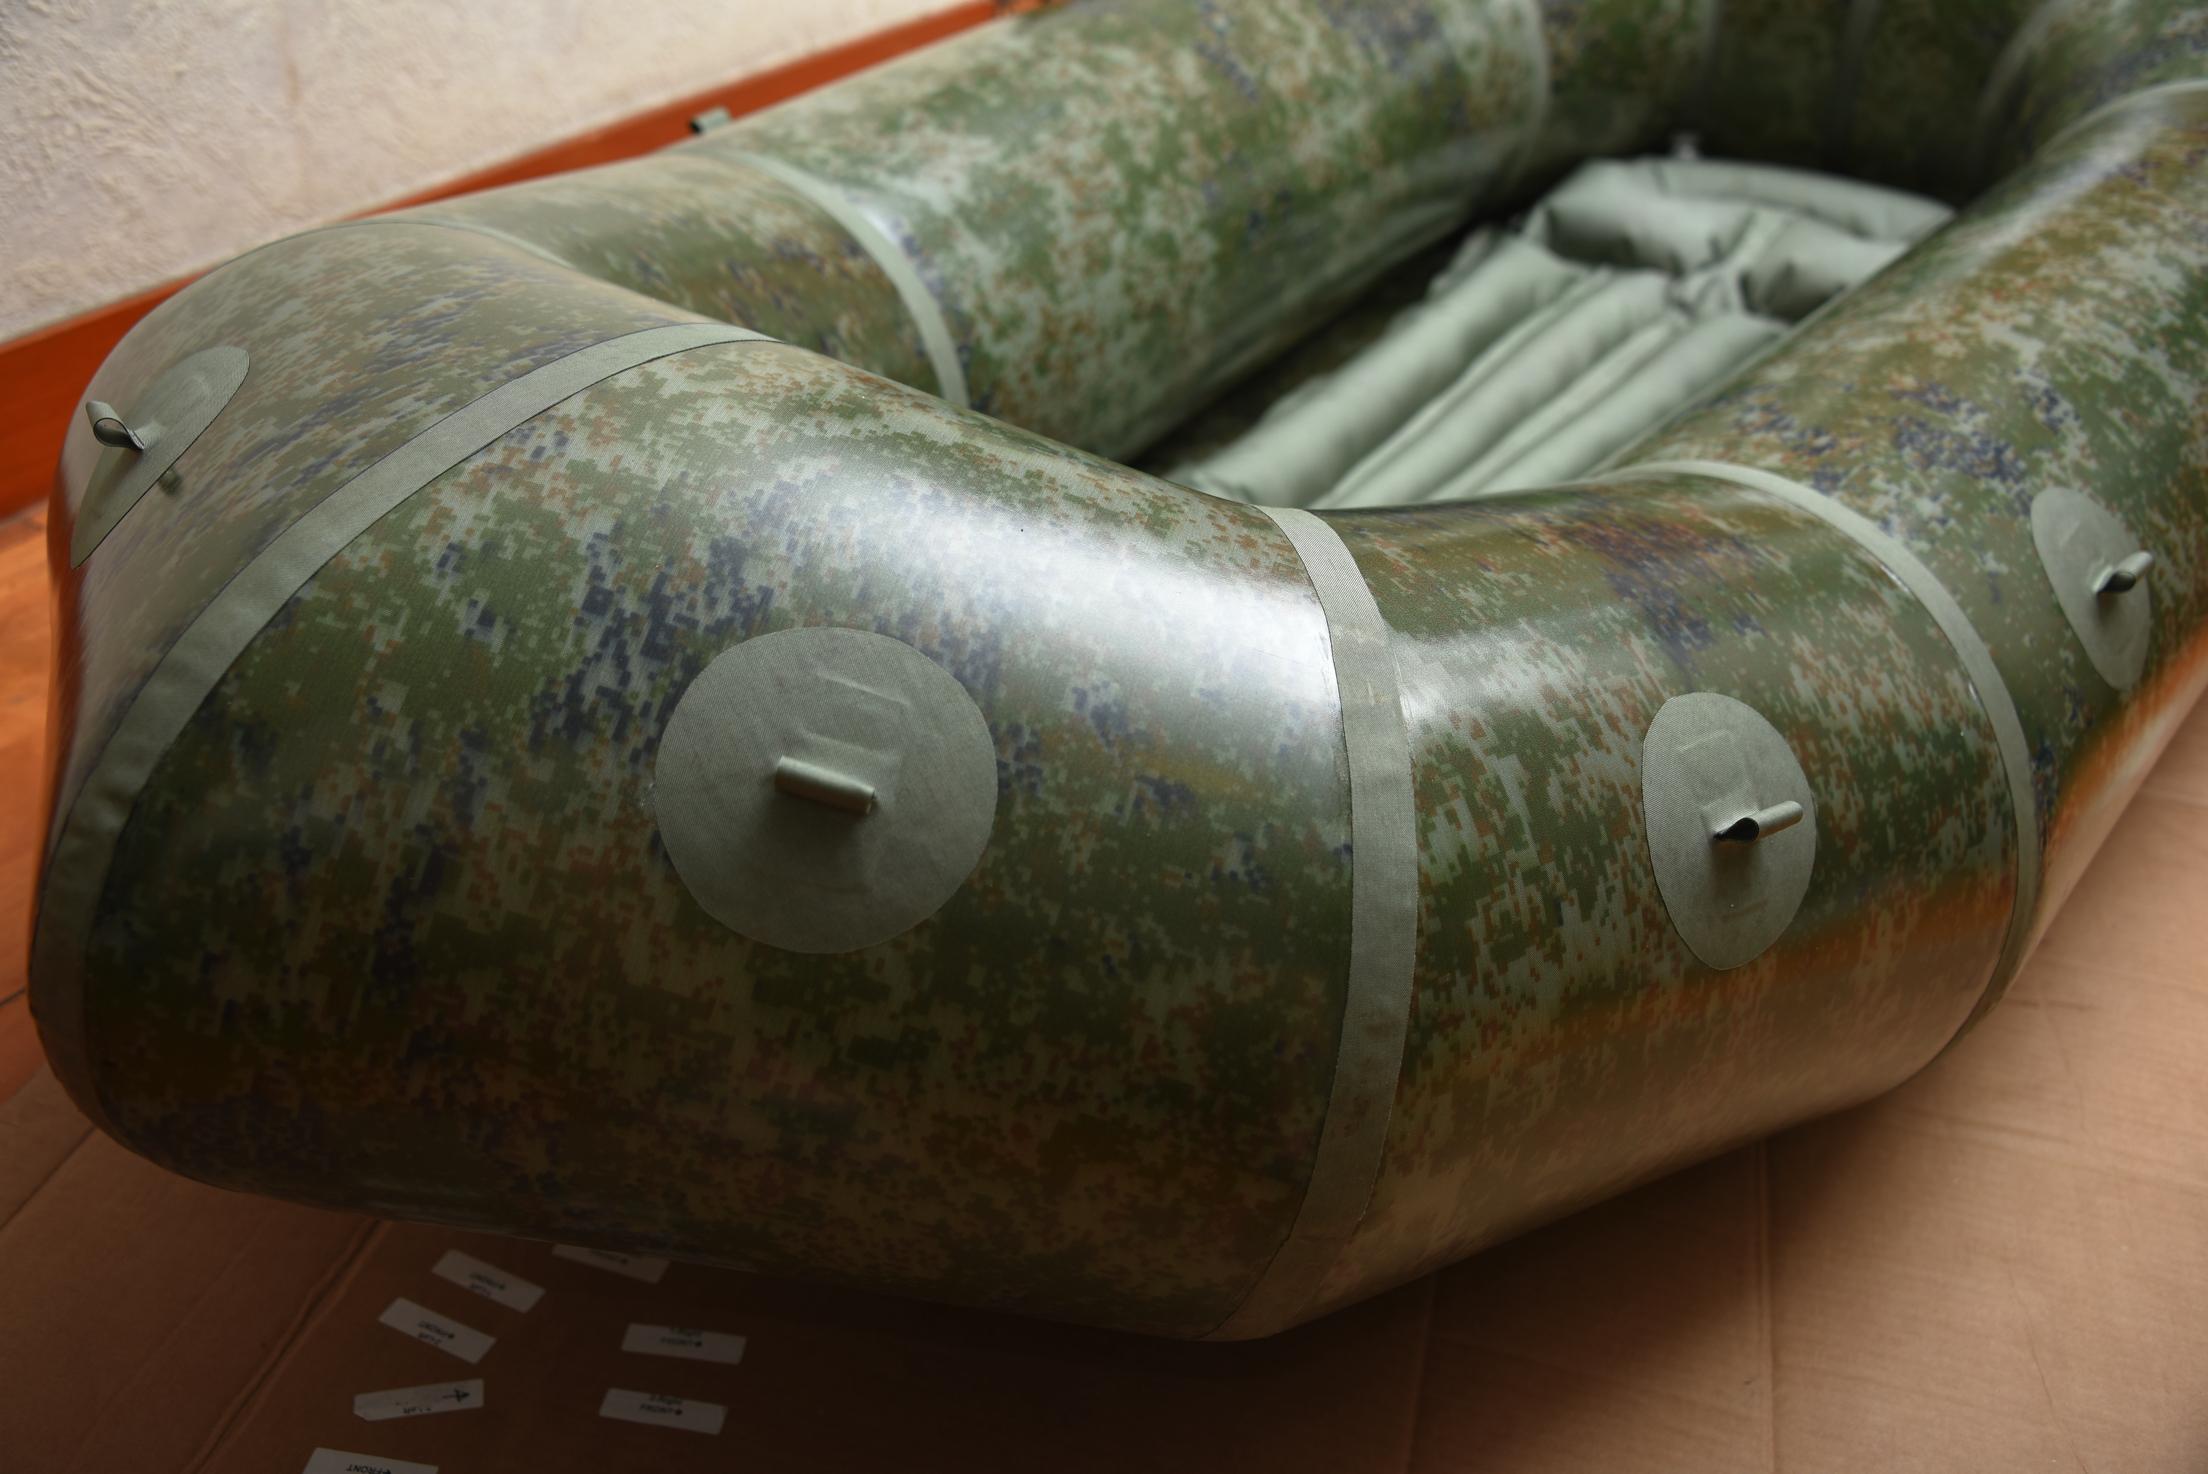
So, I was always thinking about of replacing it with a lightweight inflatable canoe or raft.
Commercially available products today are Yotta expensively unaffordable to me. Their prices are unreasonably marked high, I said to myself.
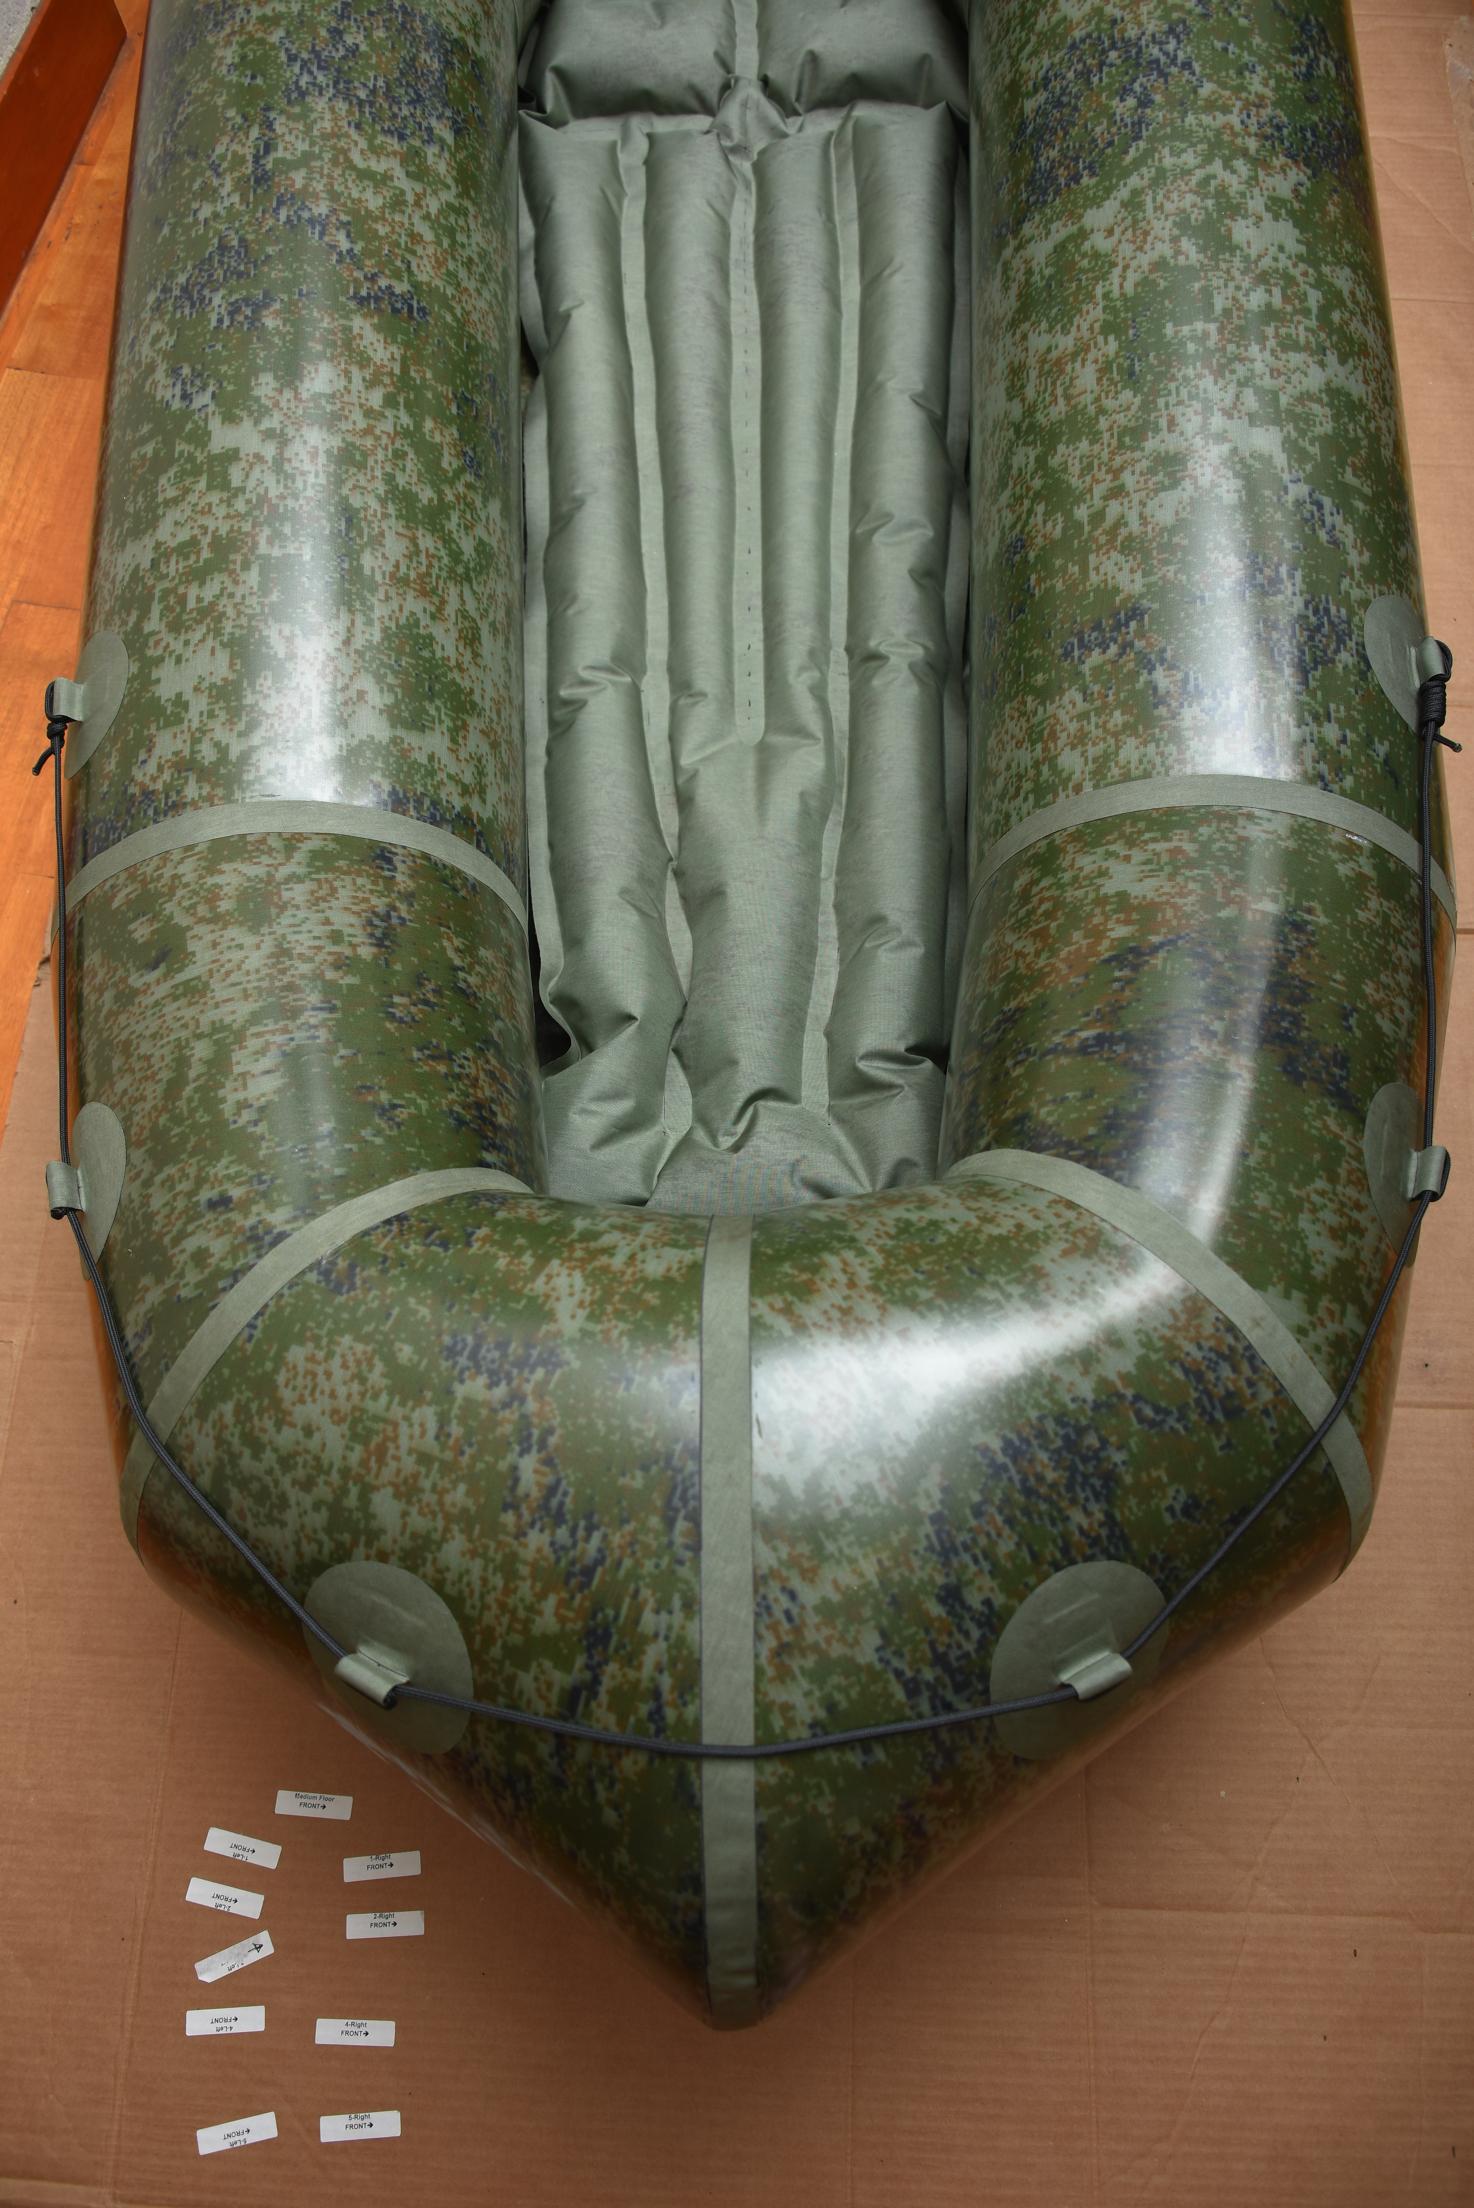
So, I told to myself to forget about it as simply as I can’t afford it.
Until I found “DIY packraft”, then I entered a different world.
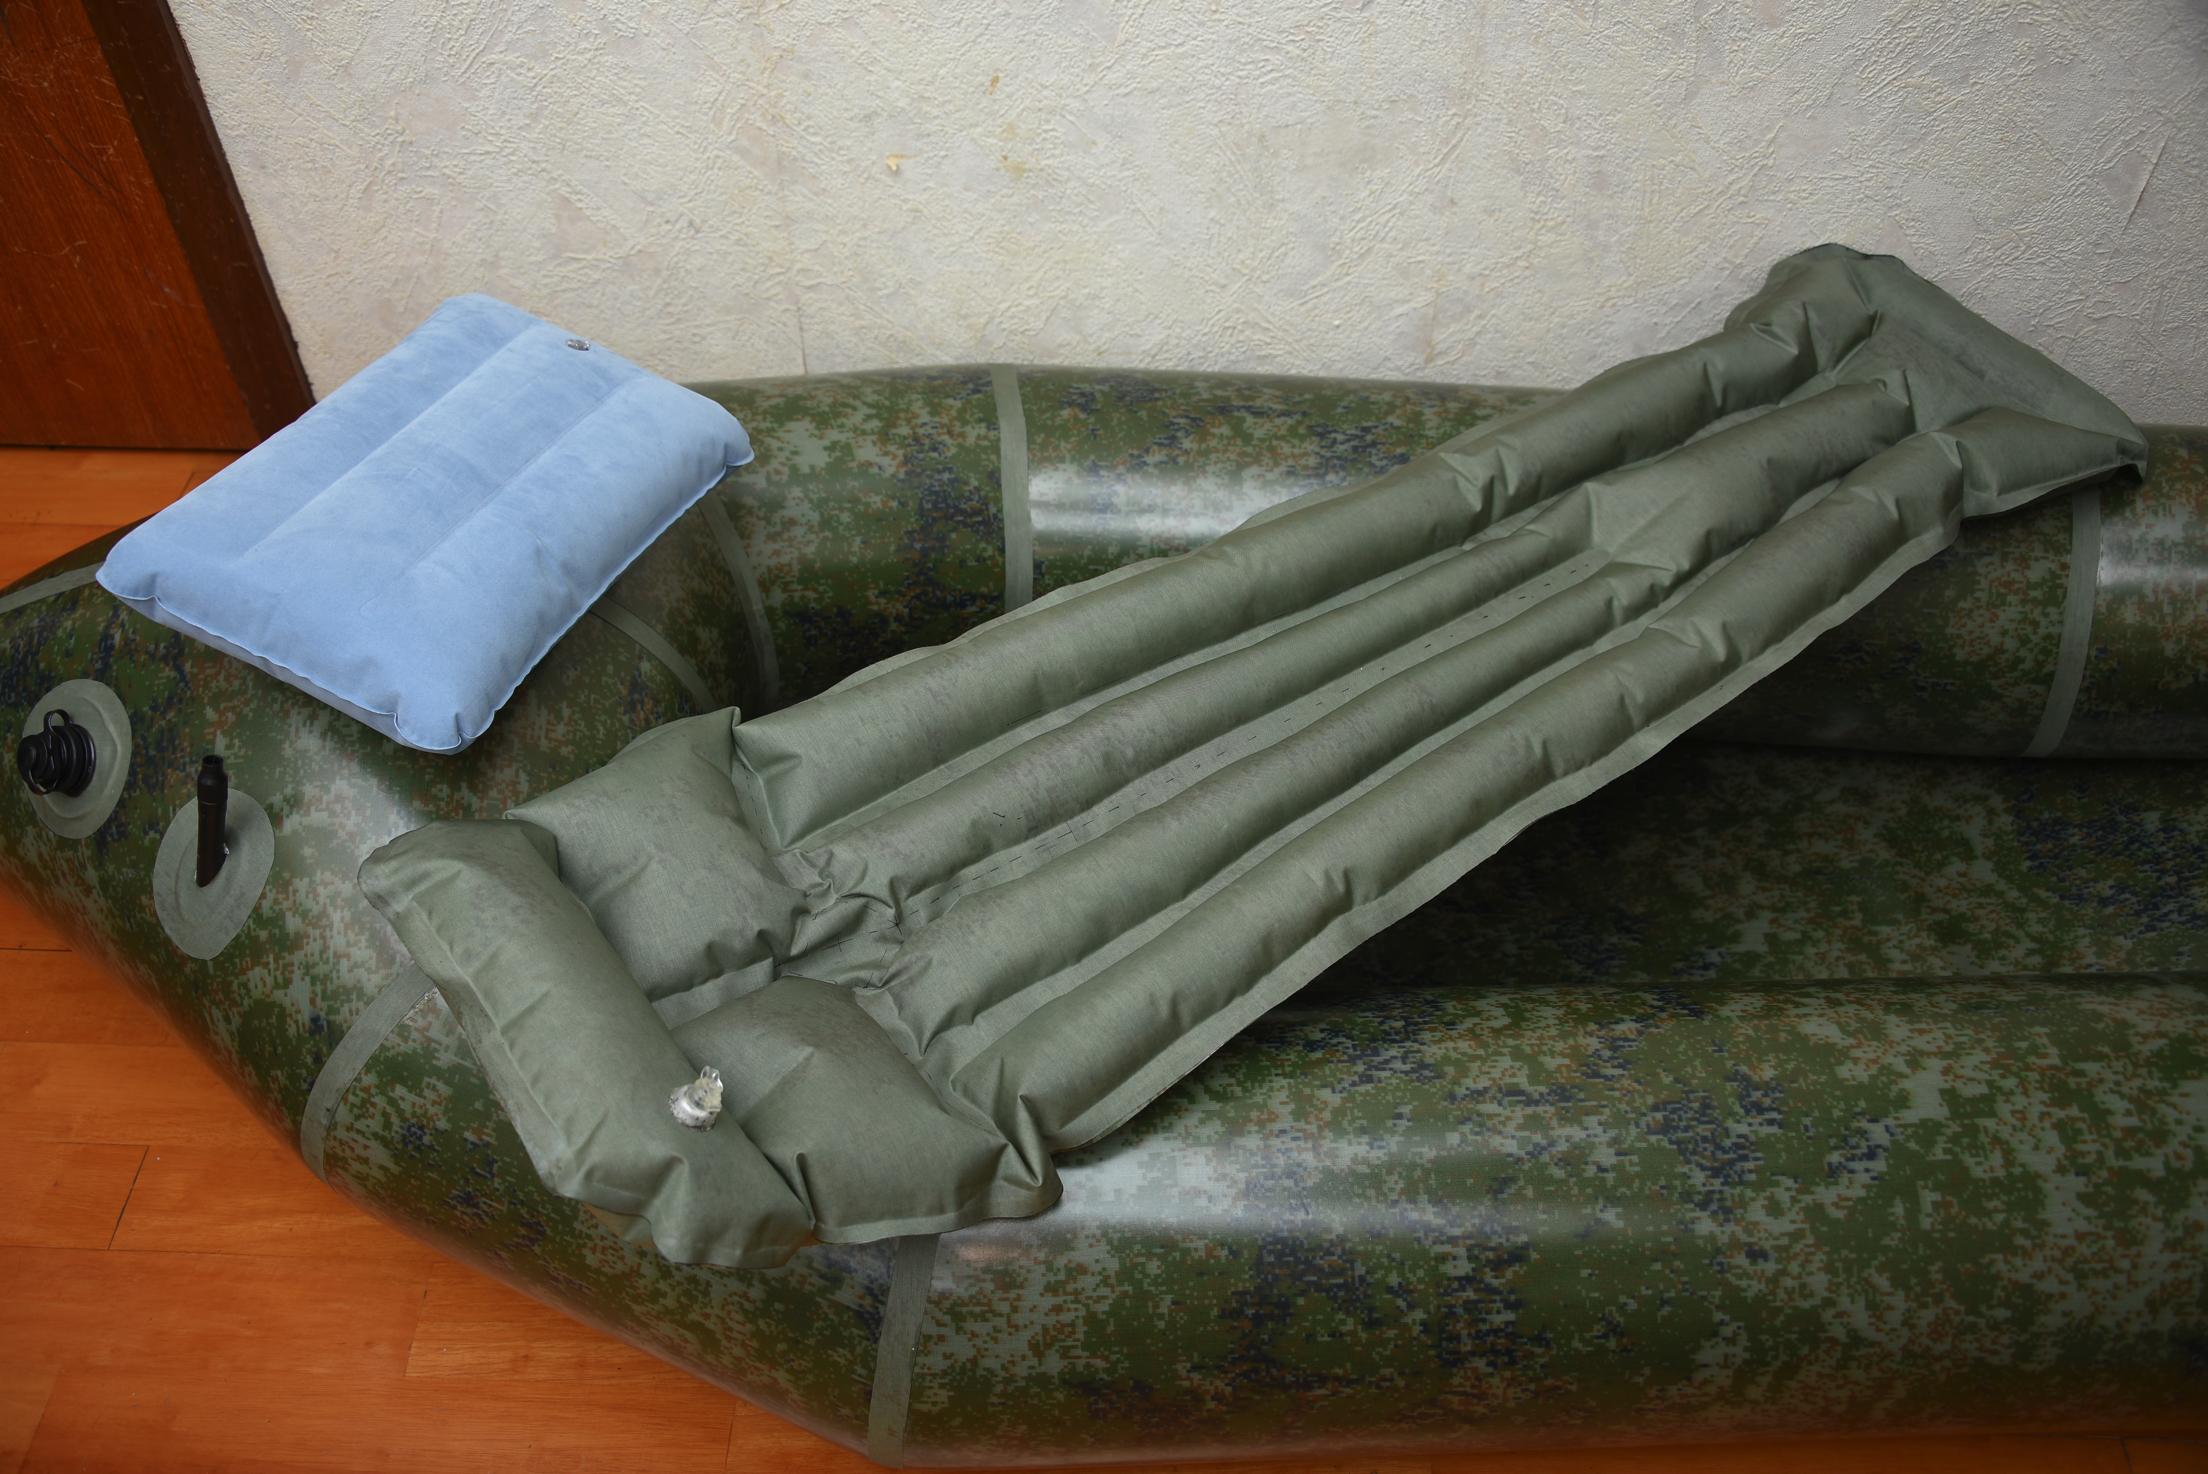
I don’t mind any colour of fabric, so go for a readily available medium sized digi-camo DIY kit. Actually, this dig-camo is beautiful.
My raft is weighted about 1.4Kg.
After doing the last seam sealing of the stern strip, I tested the air leakage.
Using the method described by Matt, I had found leaks on the apex of stem seal strip and at the junction between tube L1, 2 and the floor piece. The bubbles they formed were easily visible big. They had been fixed by using Aquaseal.
Then leaving the raft inflated for overnight, it was found deflating very slowly.
Inspected carefully and by applying soap water again onto all seam strips then wait very patiently while observing. Some numbers of very small or minute bubbles formed very slowly on a point of the R1-2 seam strip.
It was a dry join and problem was fixed by re-solder and then applied a little bit Aquaseal.
The raft was left inflated for overnight again. Next morning, it was found good, no noticeable deflation.
Also made an inflatable 2nd floor (321g) mattress.
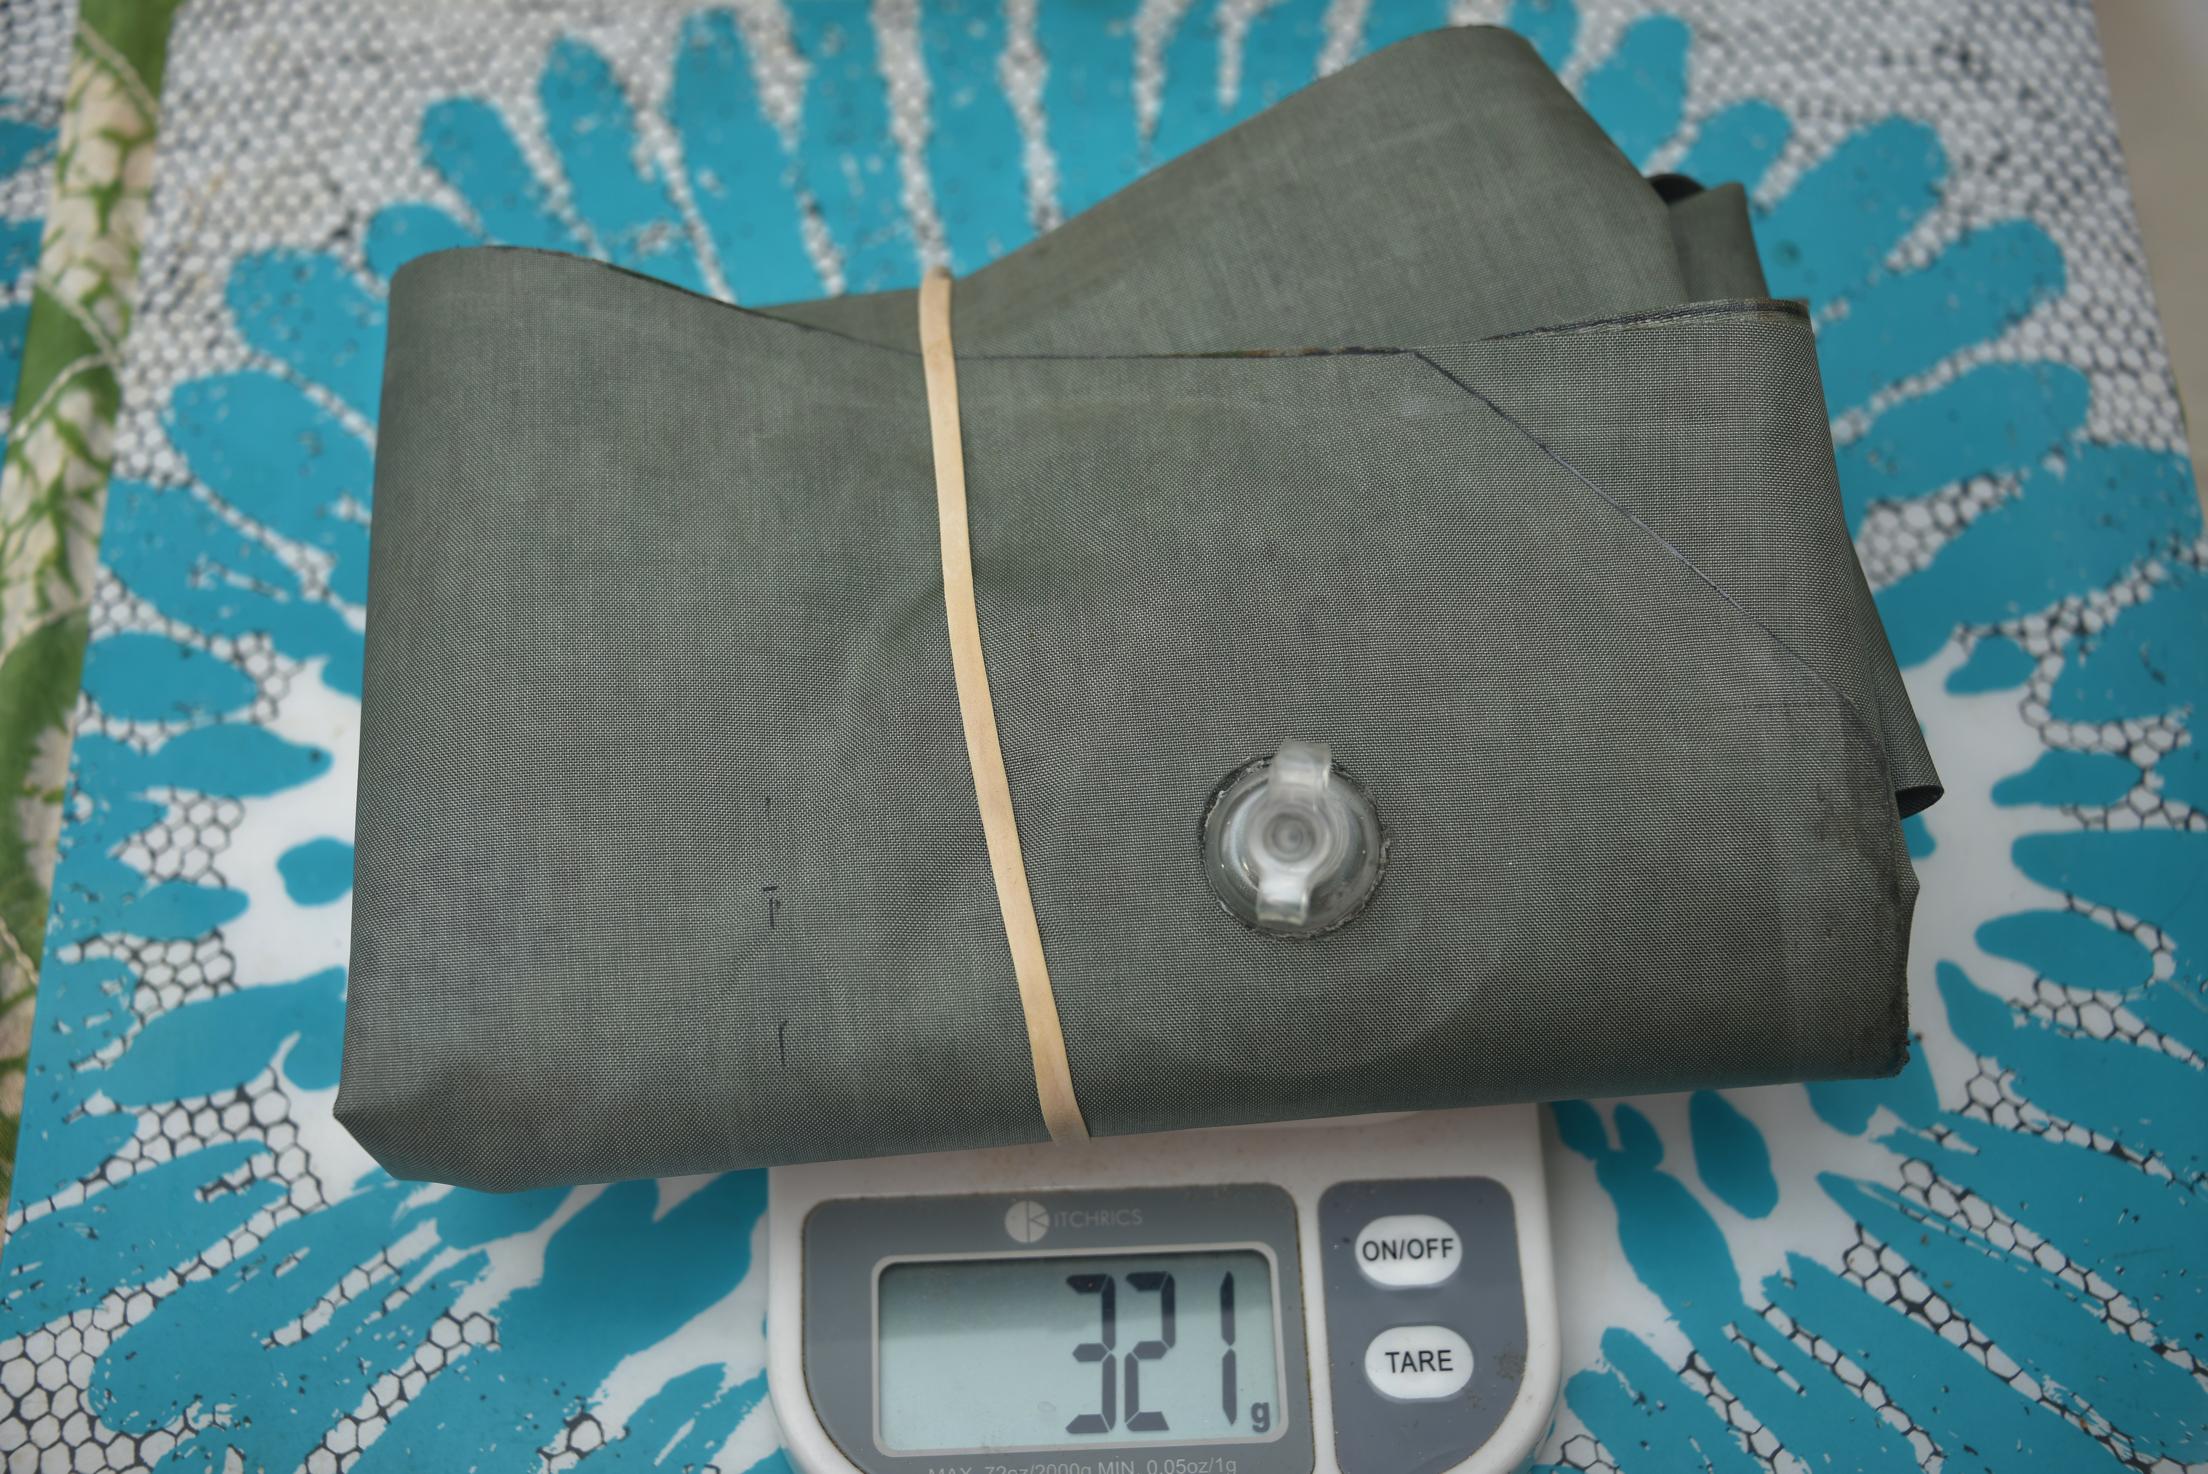
Difficult to make it good, the air pressure is very high when I sit on it and the heat sealing inside will break into segments.
Pockets of air (tube dia.) should be made small that air displacement will be small when weight is stepping on it.
The 67g blue colour back rest in the pic is just a cheap air pillow for camping, paddle is 980g, PFD is 625g, tuck Tape is 200g and repair kit is 33g (from local camping store).
My berghaus backpack is about 1kg.
All stuffs could be loaded into the backpack.
Raft items with backpack all together is weighted less than 5kg.
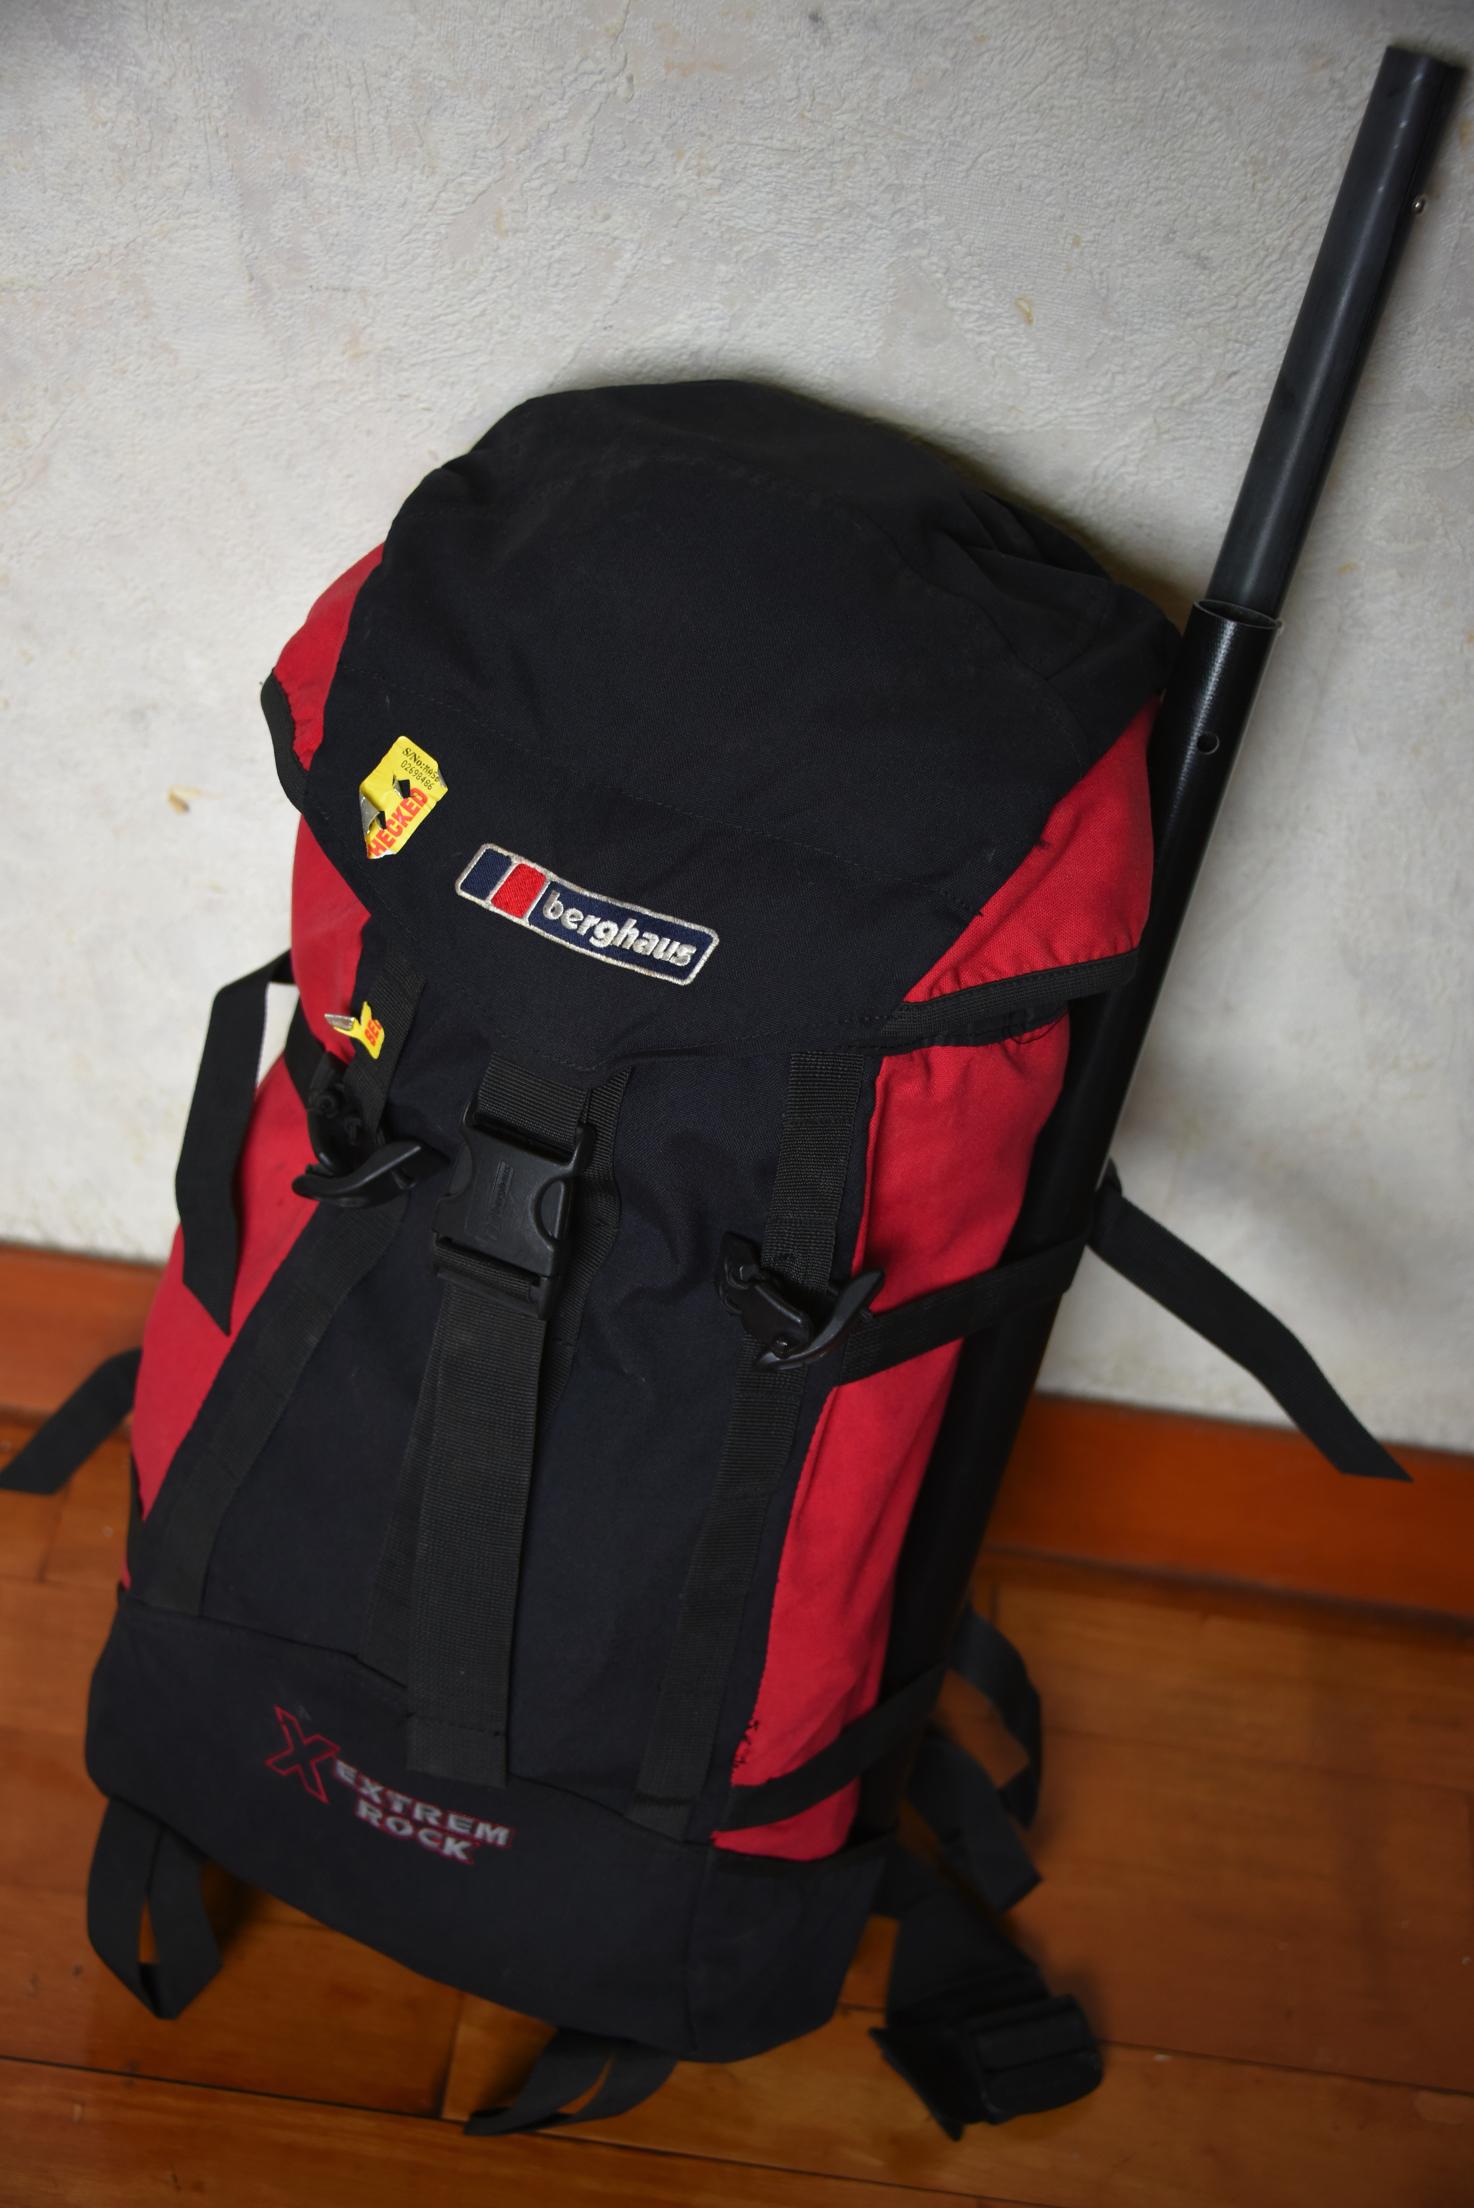
Add a bottle of water and something to eat, I am ready to go seaside kayaking now.
Thanks very much once agin to Matt, “DIY packraft” and inspirations from all DIYers.
Wish everybody all the best!
Cheers.
-
May 24, 2017 at 10:29 am #3252Matt (Admin)Keymaster
Thanks for posting your pictures and comments – your packraft looks great! Excellent work 😀
-
May 27, 2017 at 3:26 am #3262Kwok Wah LaiParticipant
Thanks so much Matt,
My raft had first virgin cruise today and I would like to share some more pics and points about it.
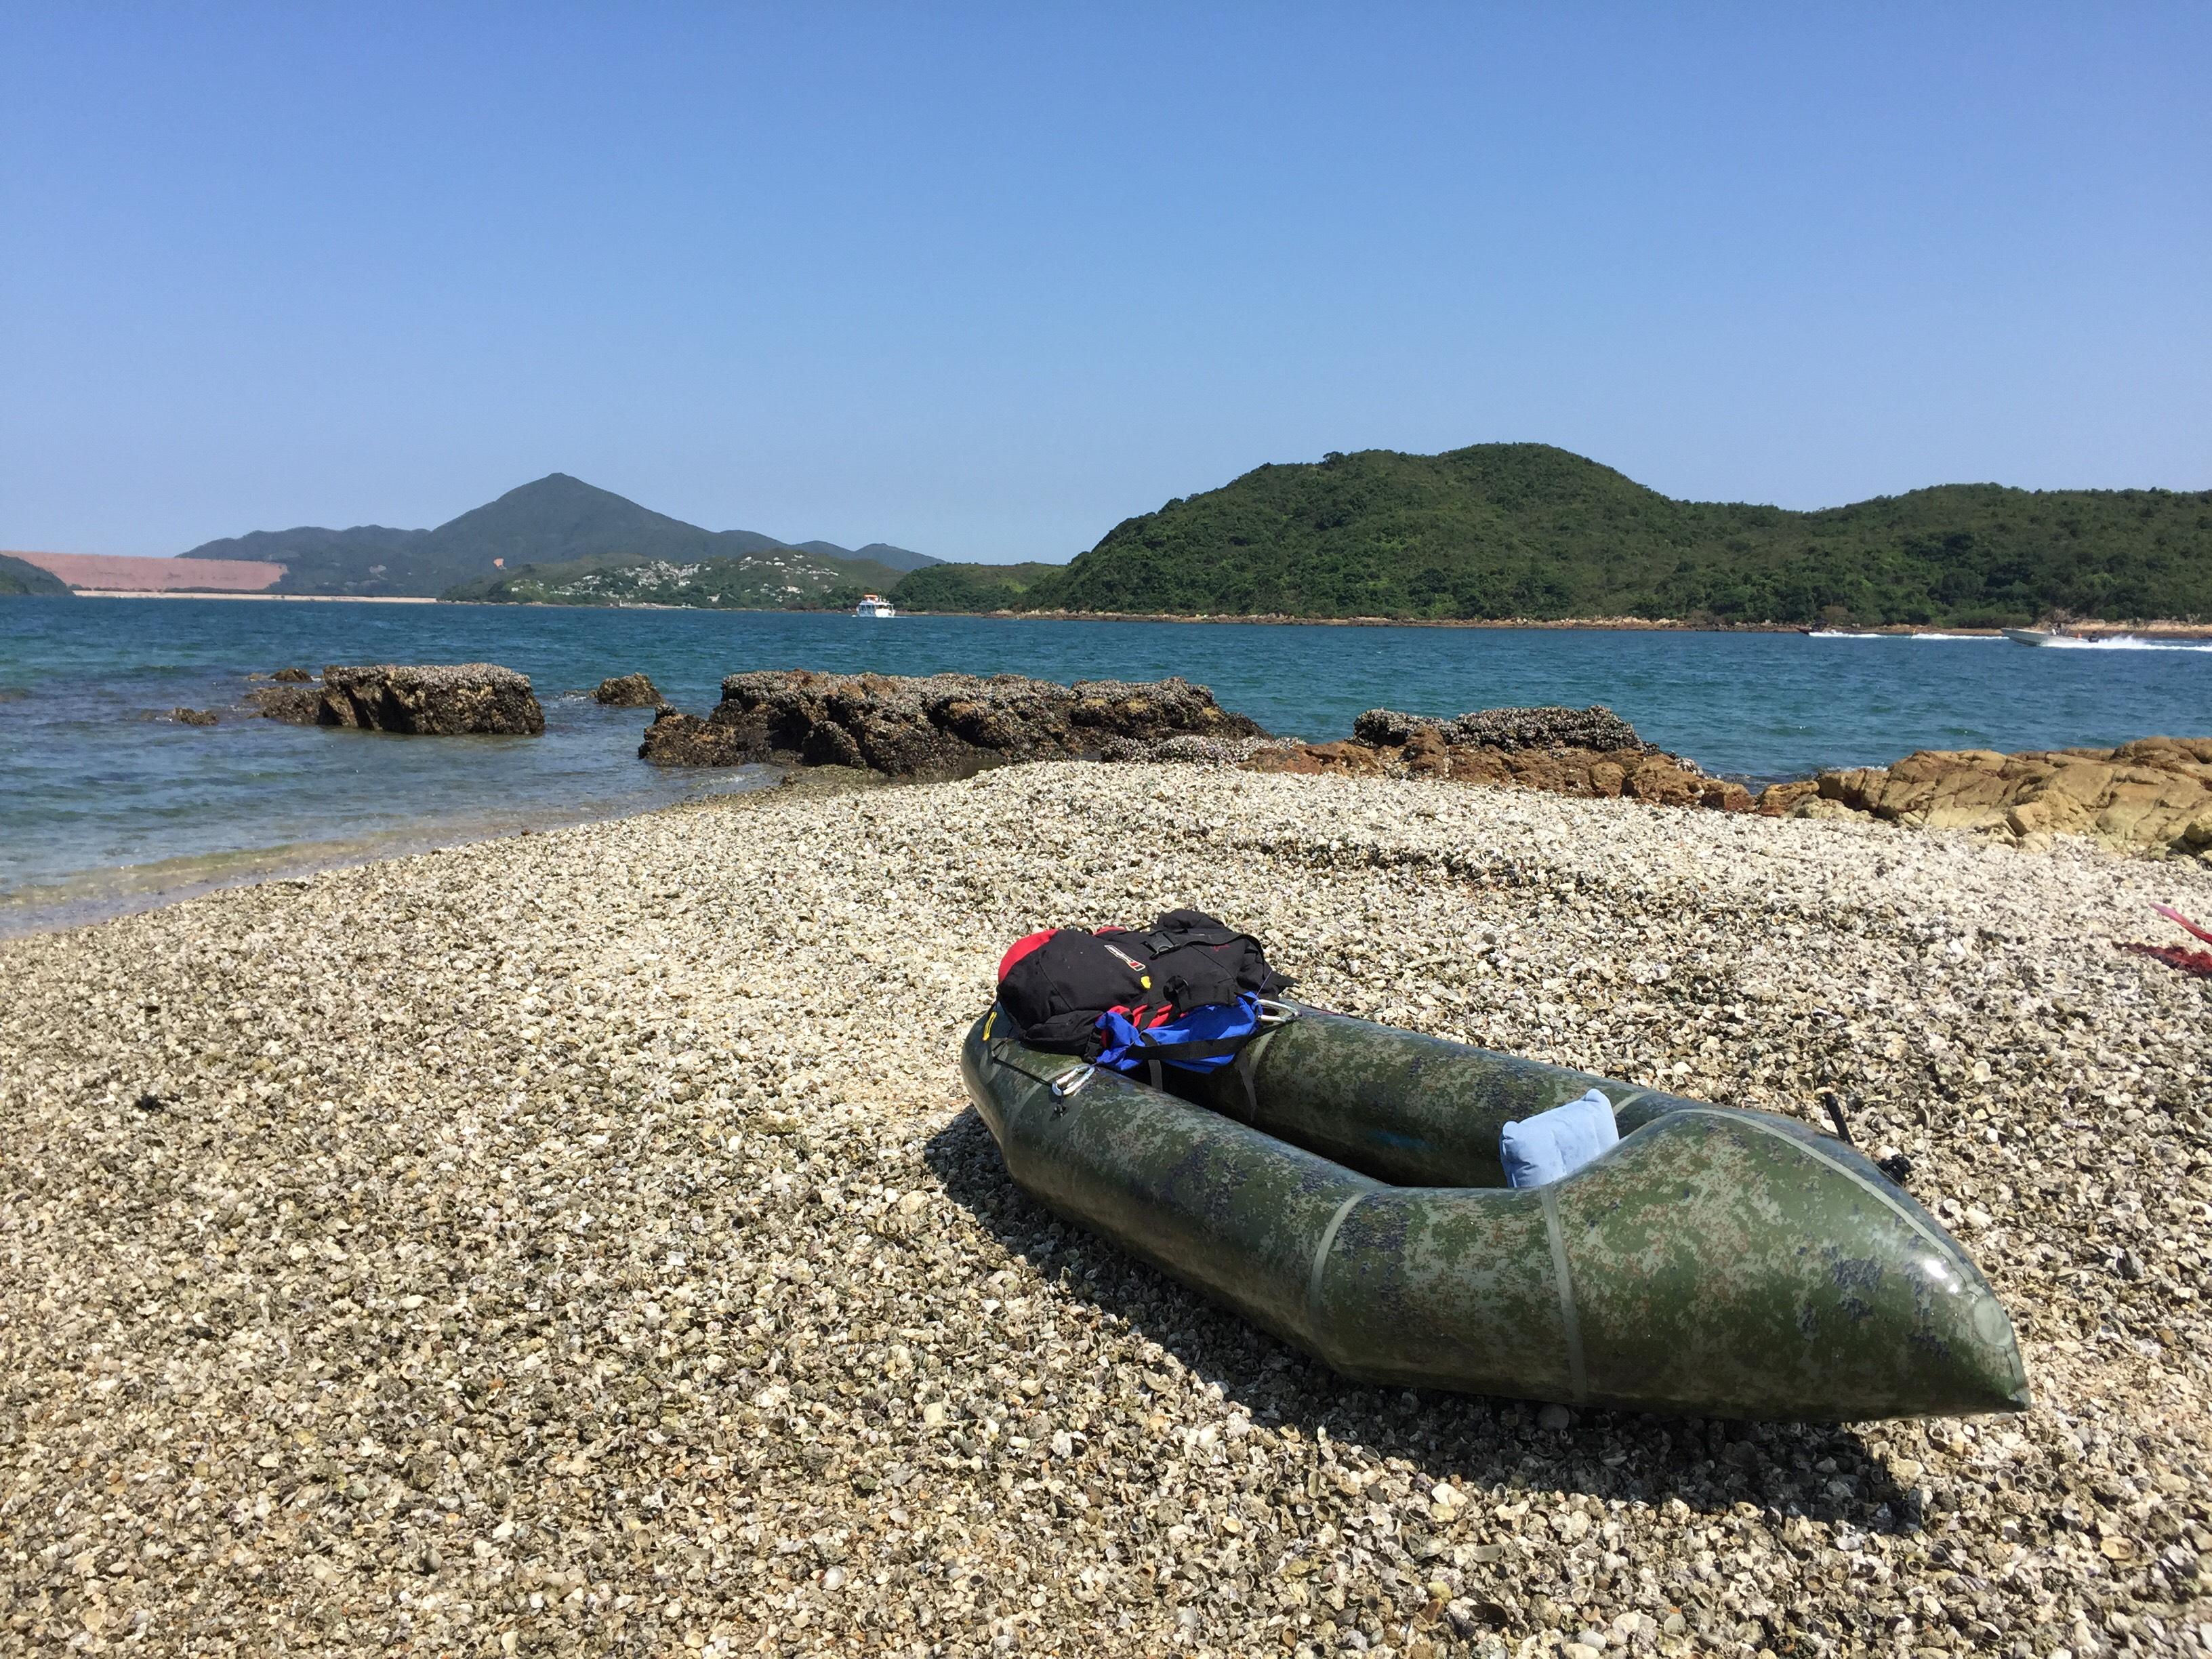
It was super fun to paddle with my DIY raft on the sea, your design is so good that even this is my first packrafting with kayak paddle (I was self-trained with Canadian style canoeing with an oar) it can be handled very well on the sea waves. Speed is way faster than my inflatable PVC canoe.
Today’s weather is fine, wind is peacefully in scale 3 to 4, normal waves size is small compare to the size of the raft. There were occasional invasion of big waves, caused by speed boats, with peaks higher than the packraft, however my raft could surf over the waves easily with very good stability. Sea water was spreading everywhere when the raft hitting the waves but it is OK water inside the raft was not much (less than a can of beer) to cause uncomfortable.
However, I was so disappointed with my DIY 2nd floor mattress, It was deflating in the middle of nowhere between launching site and a small shell island I was going.
I must redesign it and make it more reliable, but how, the air pressure inside is so high.
By the way, the fabric is tough that shells did no make harm to the raft bottom when I was crash landed it on the shells and rocks.
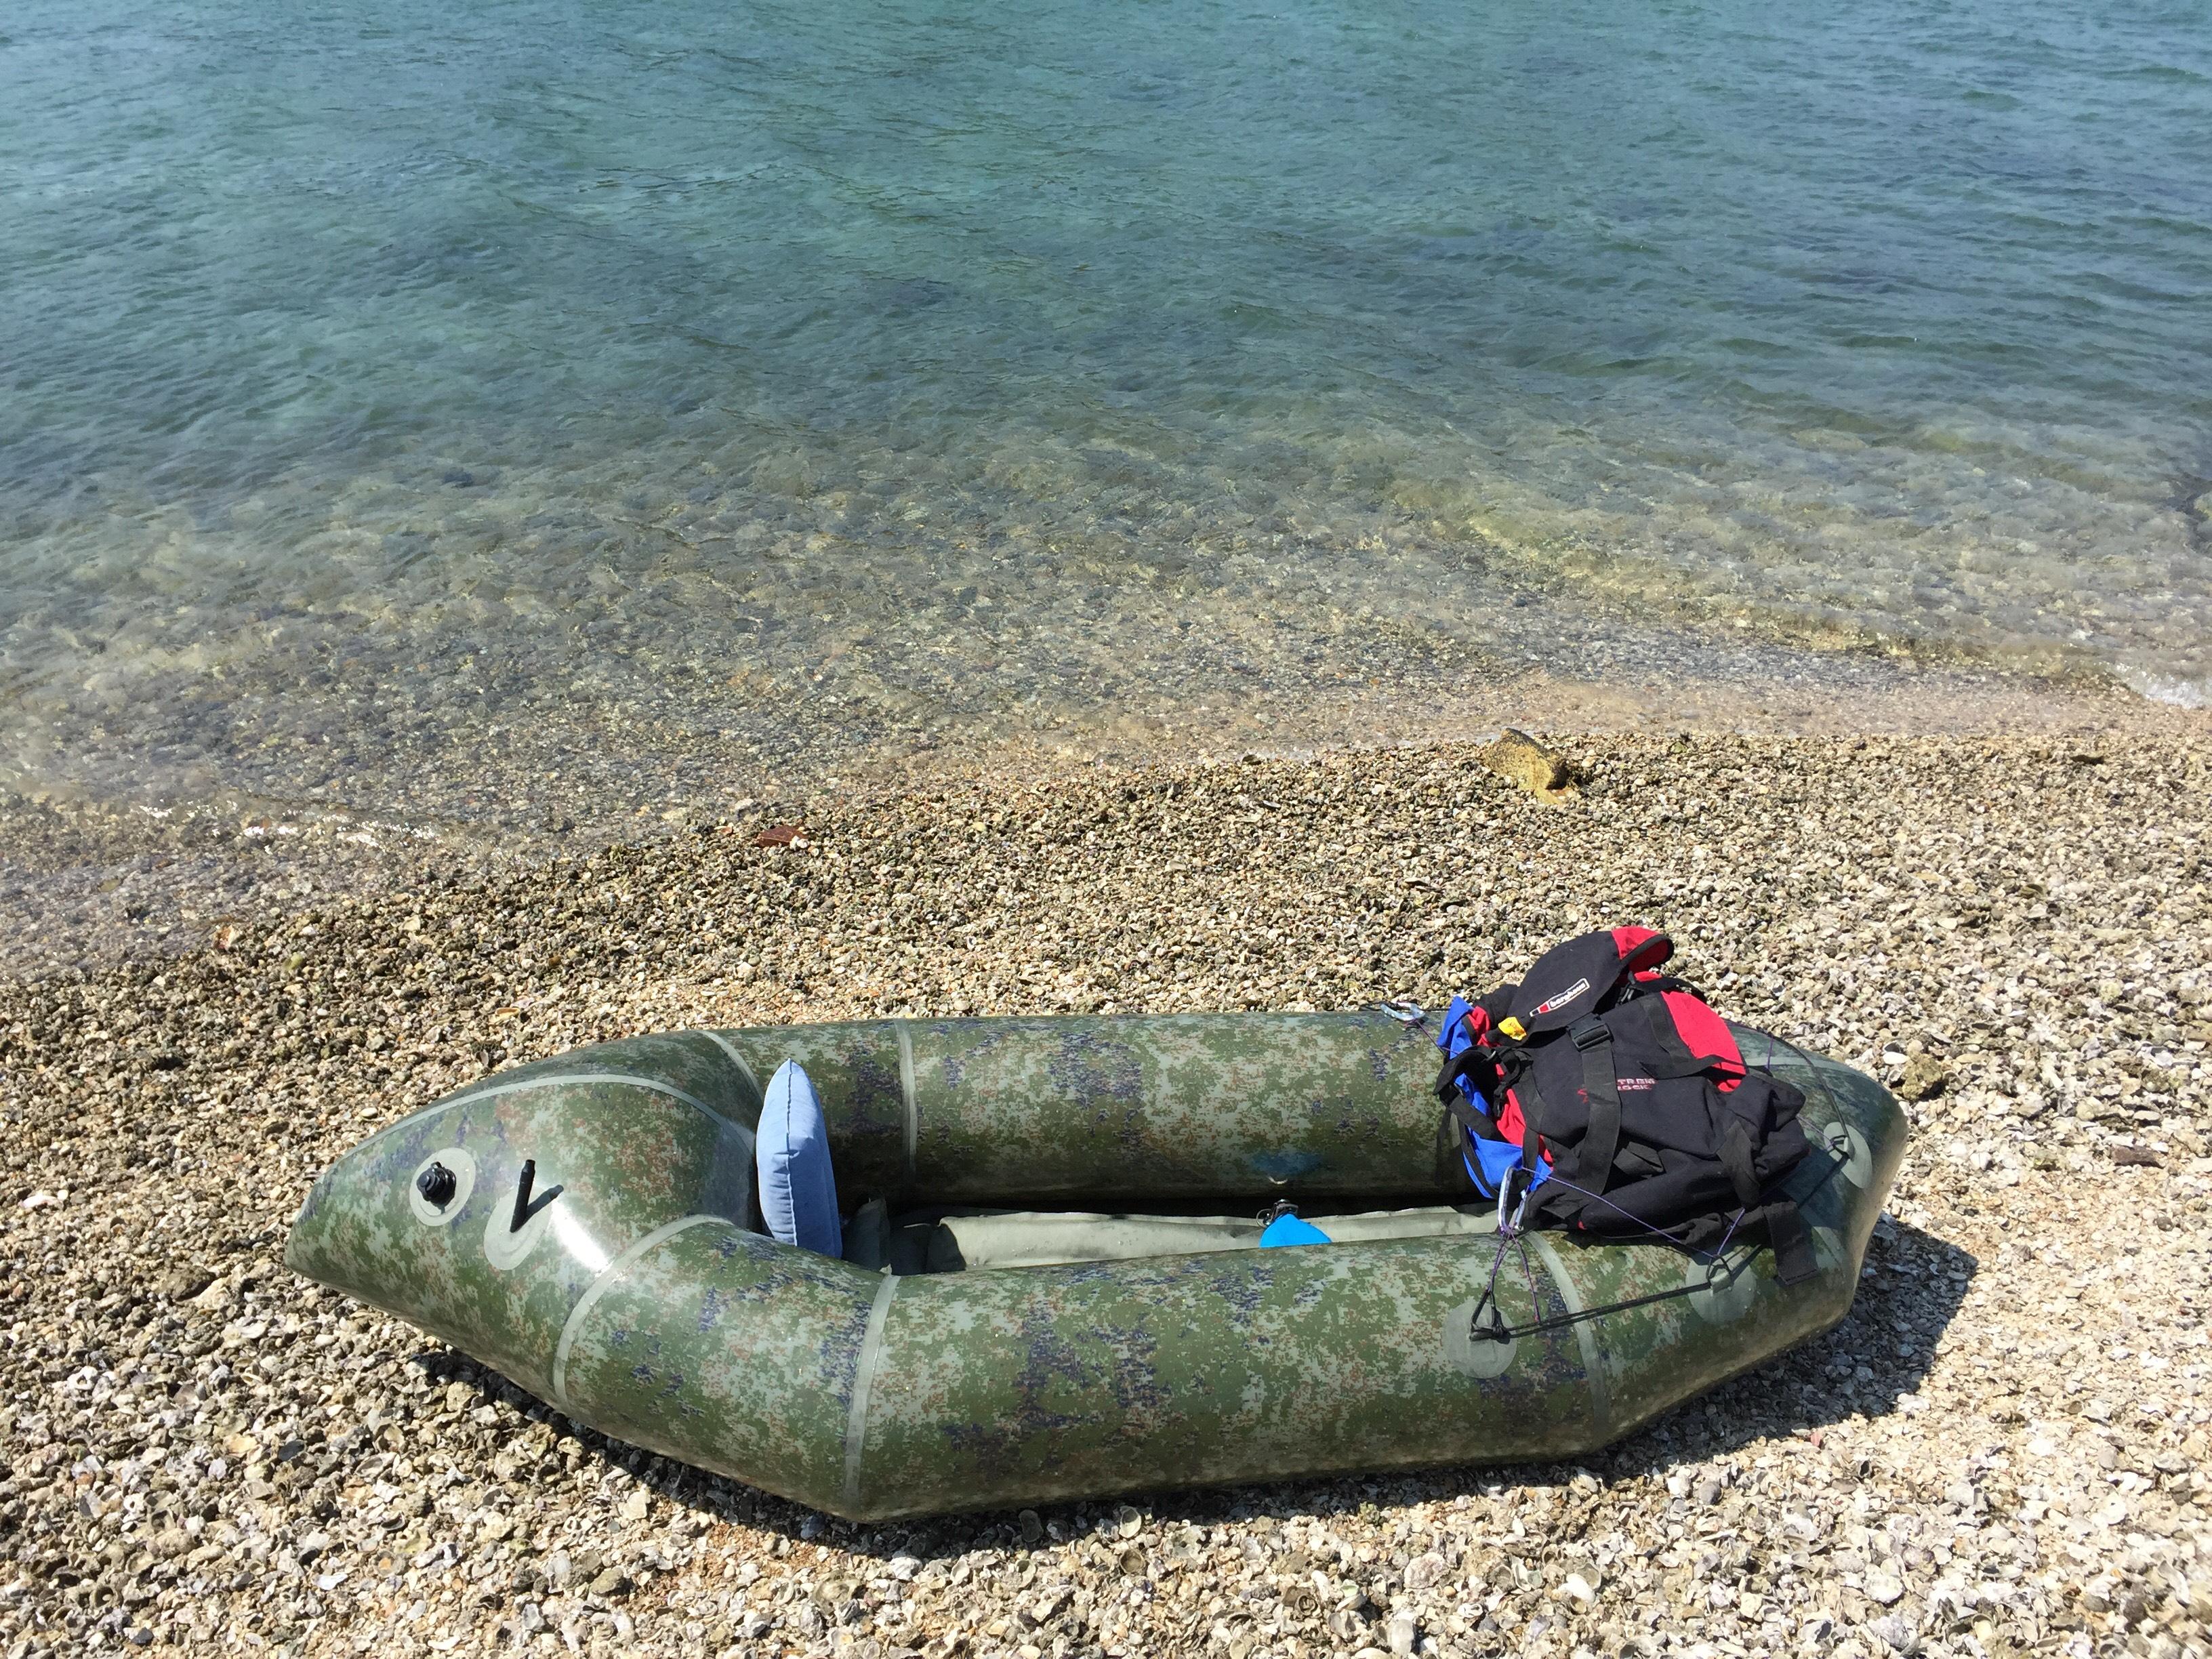
One more point is my paddling posture, I found that I needed a higher sitting position in order not to hitting the tubes with my elbows. I feel much better paddling after placing my inflatable back rest under my bum. I think that I need to make a good seat as well.
So, a reliable 2nd floor mattress and a good seat are my next DIY projects.
I think the green colour fabric is good, hope they would get through soon and I could use it.
Have a nice day and happy paddling!
-
May 31, 2017 at 11:19 am #3318Matt (Admin)Keymaster
Thanks for the excellent pictures and the review! This is useful information for everybody. I’m glad you had a successful journey 😀
-
-
-
-
May 10, 2017 at 10:17 am #3187Matt (Admin)Keymaster
Check out this cool time-lapse video Quincy made of himself constructing his DIY Packraft from plans and uncut fabric! Thanks, Quincy!
-
May 7, 2017 at 7:59 am #3147Matt (Admin)Keymaster
Here’s Jeb T’s all-camo DIY Packraft – thanks for sending pictures, Jeb!
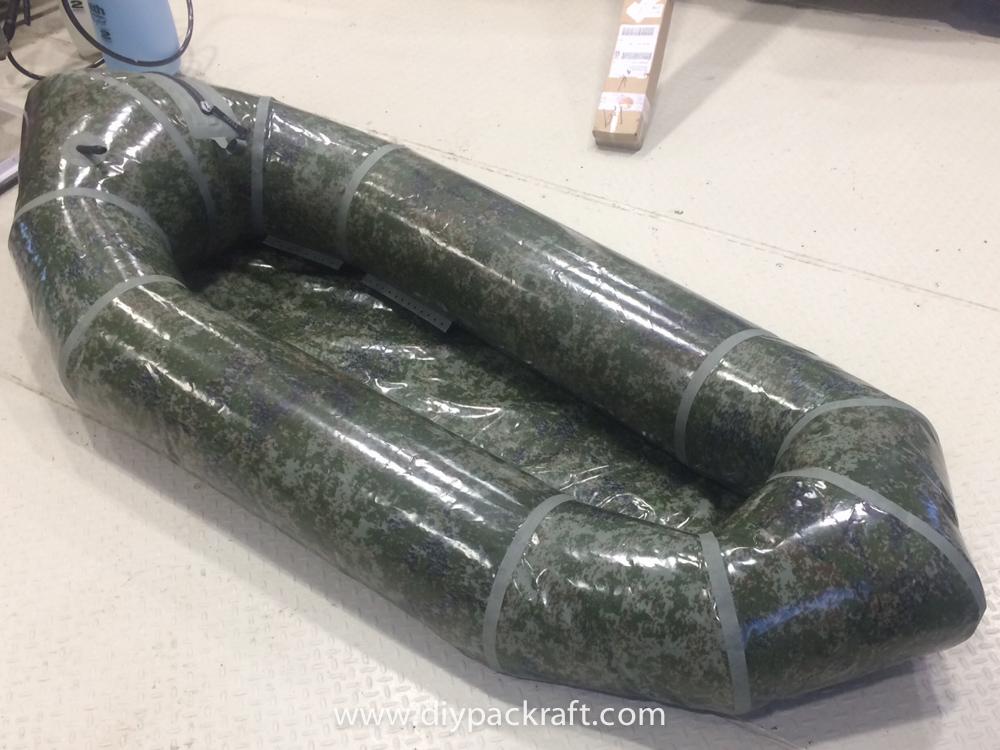
-
April 20, 2017 at 4:14 am #2985EdwardParticipant
Took my DIY packraft out for its first outing on Lake Taupo (New Zealand) last week.
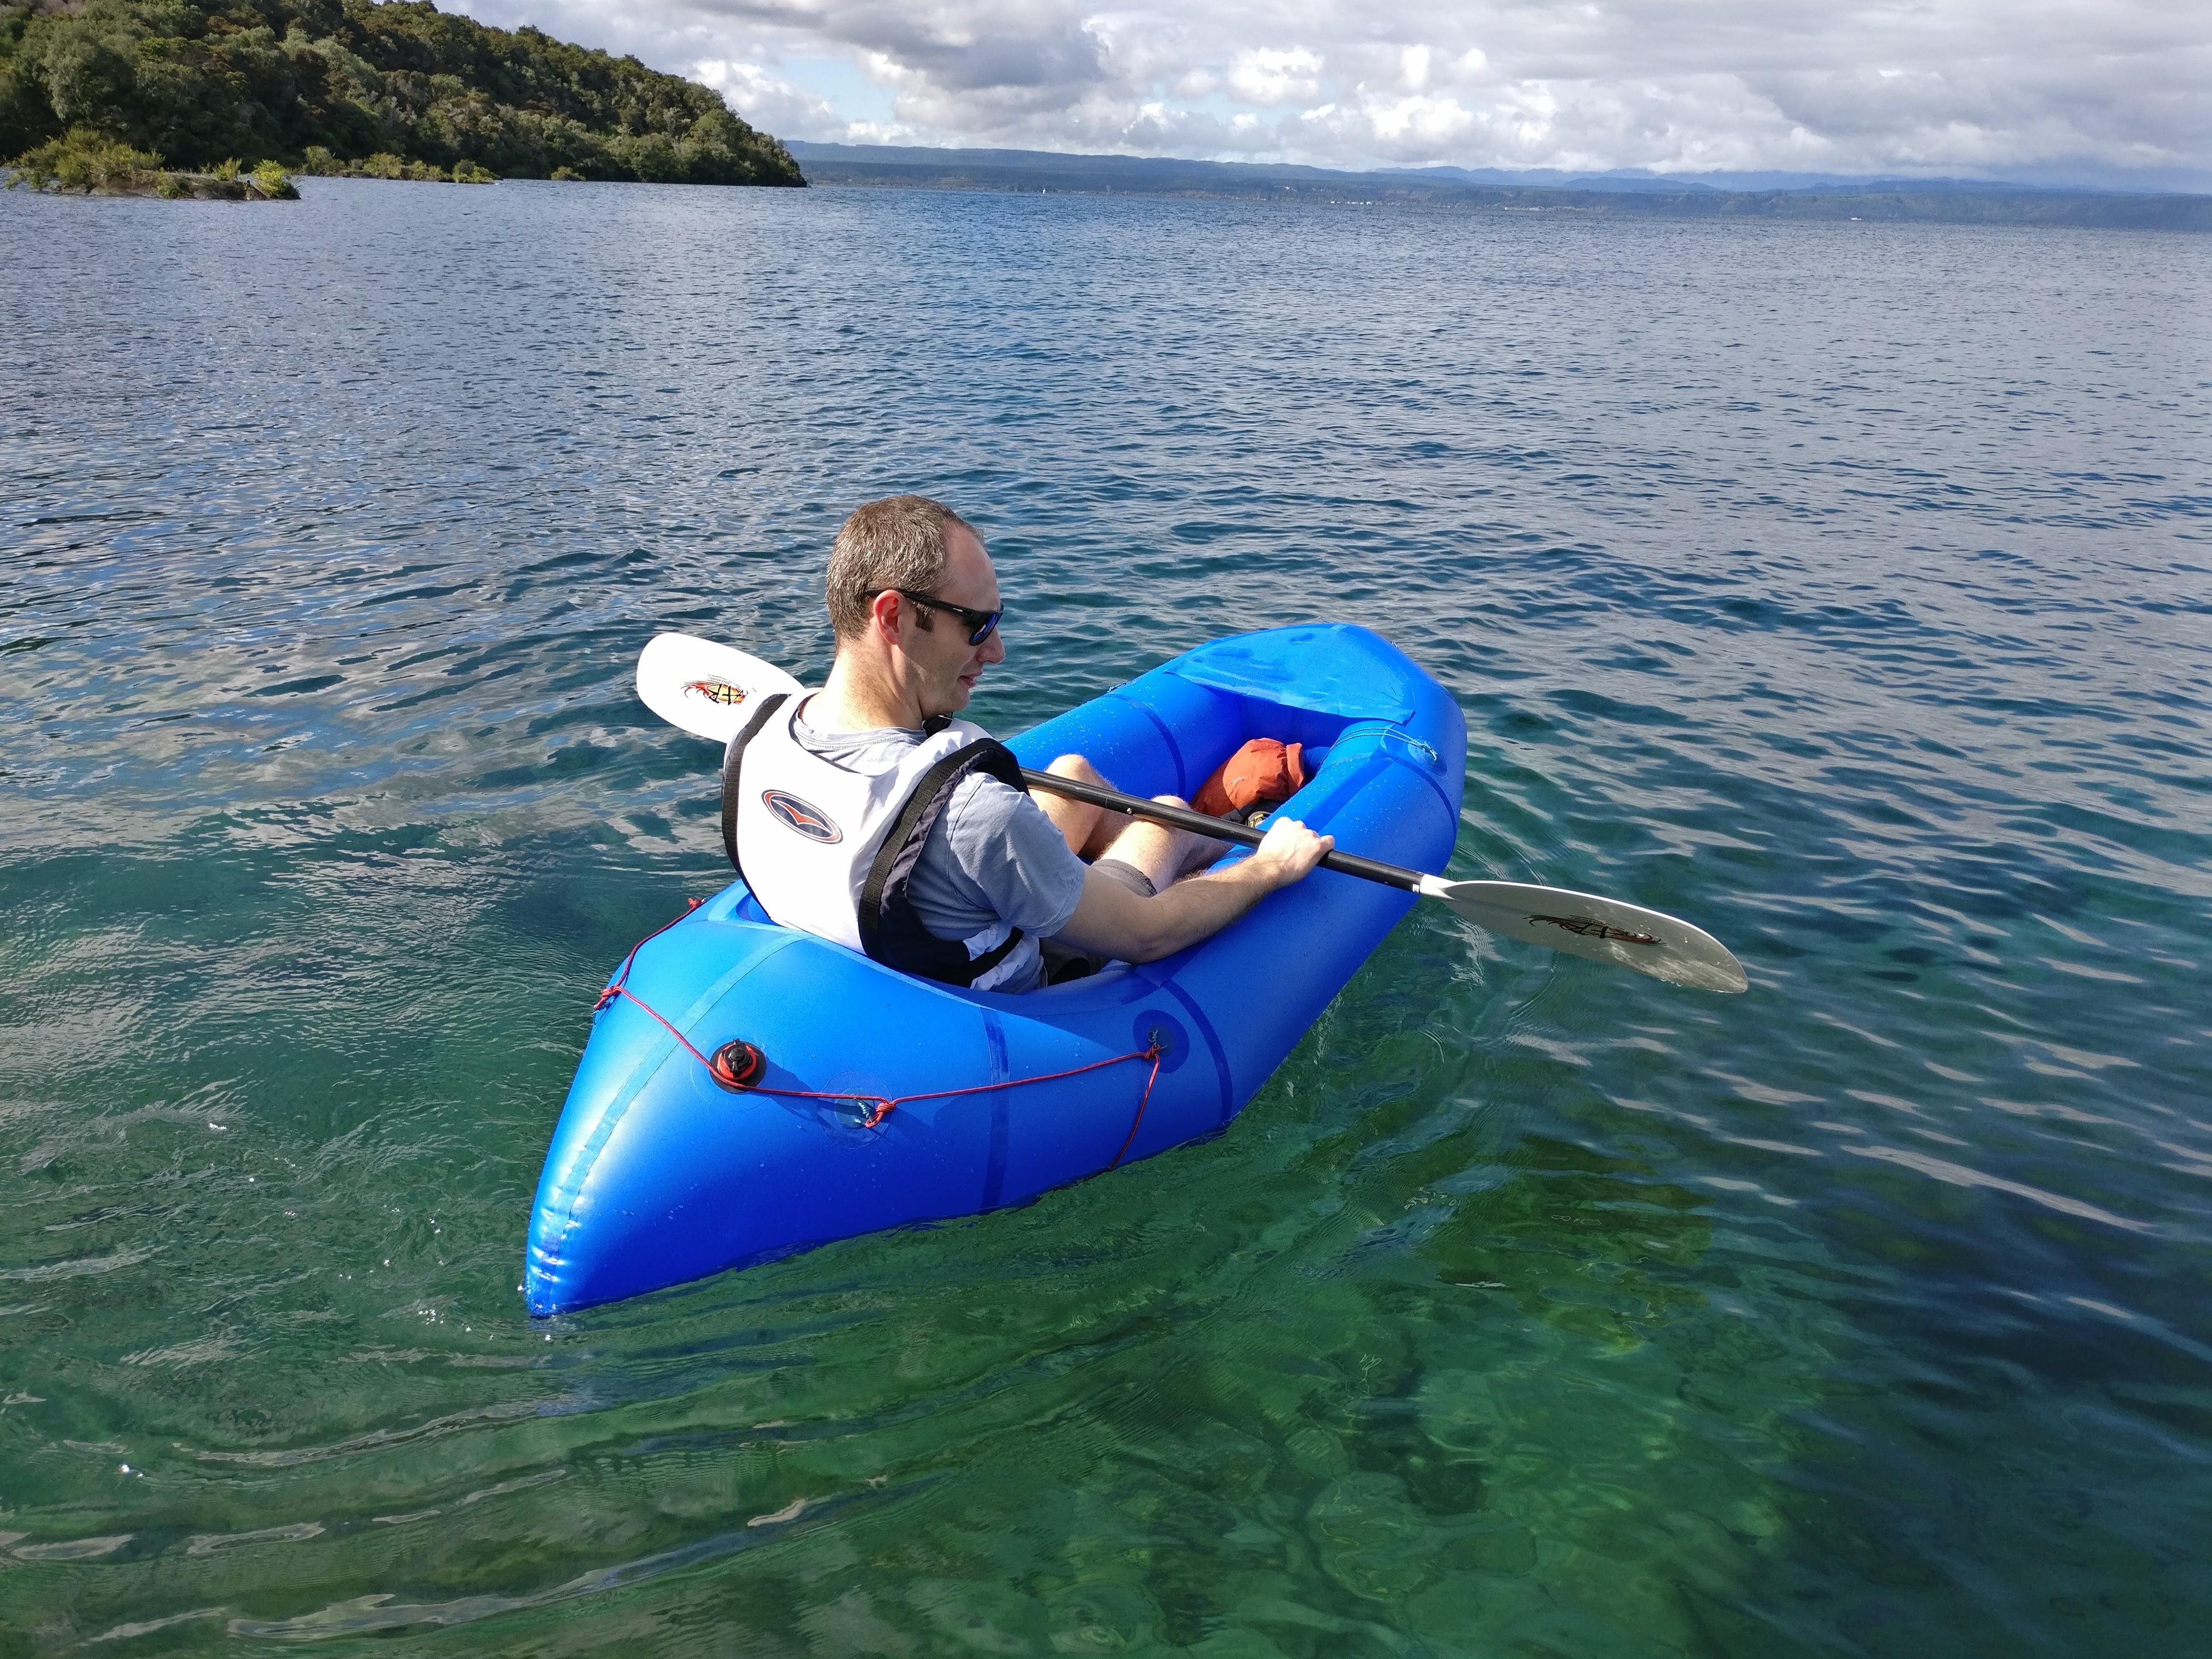
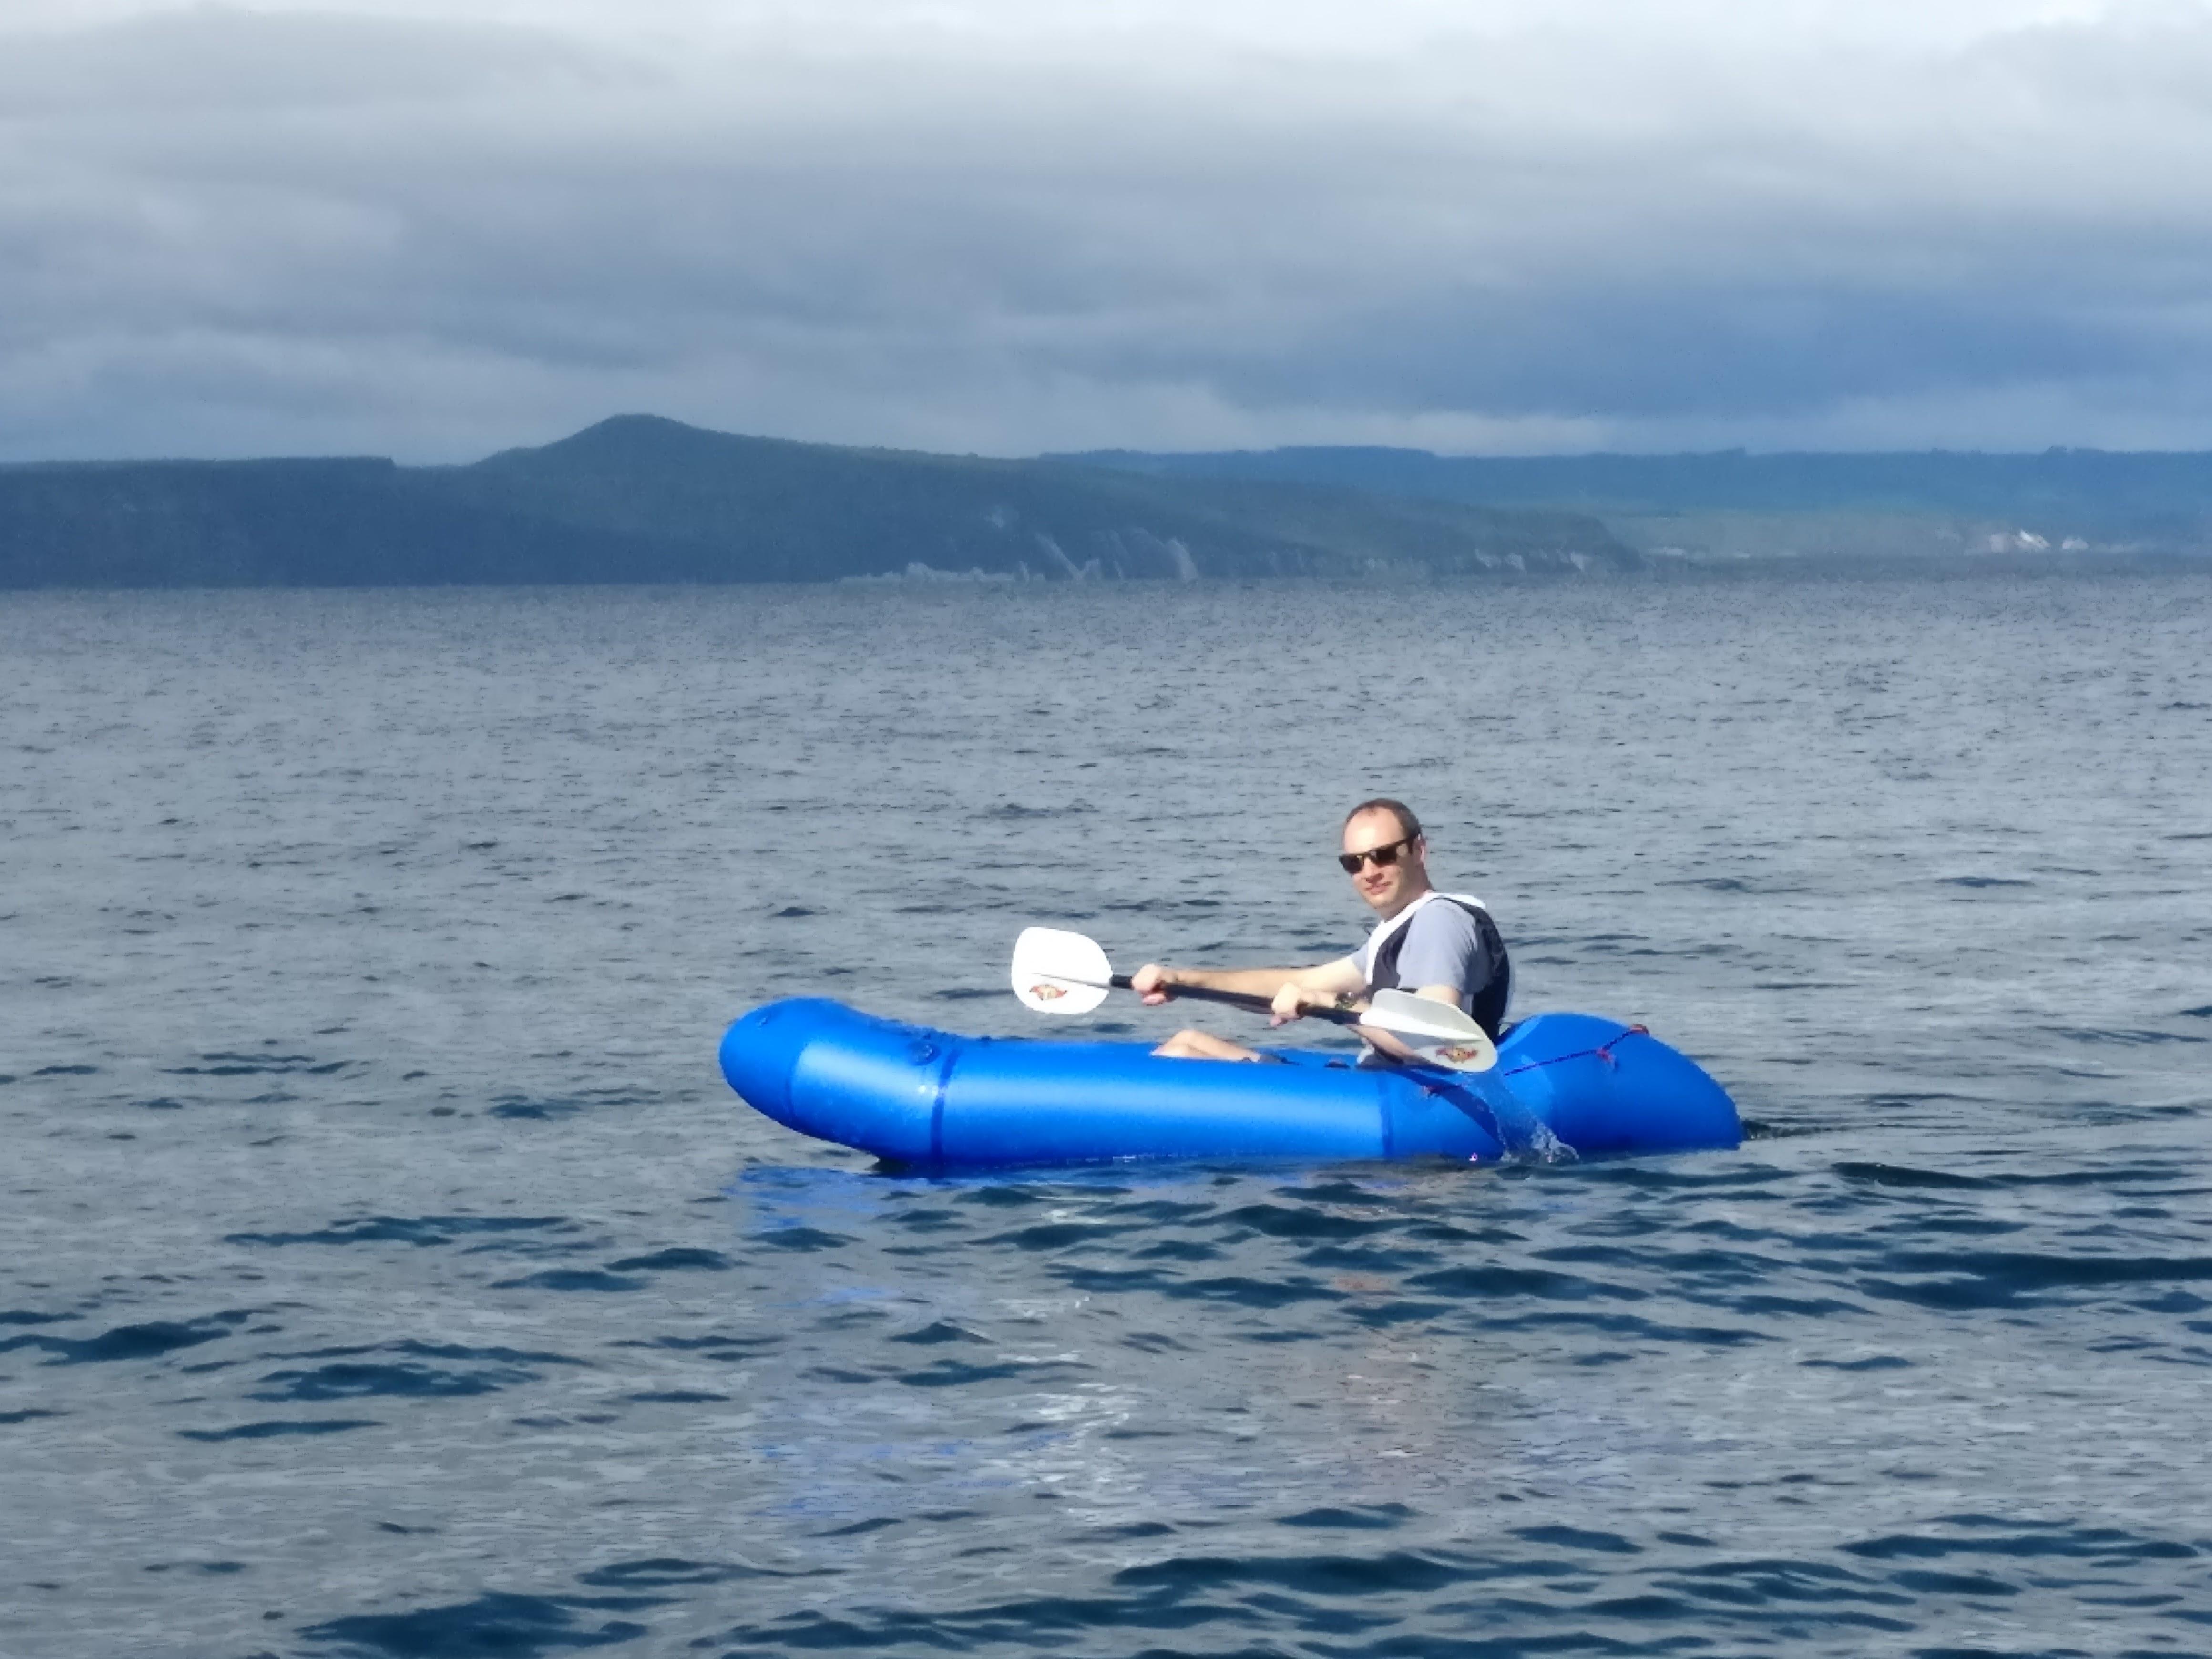
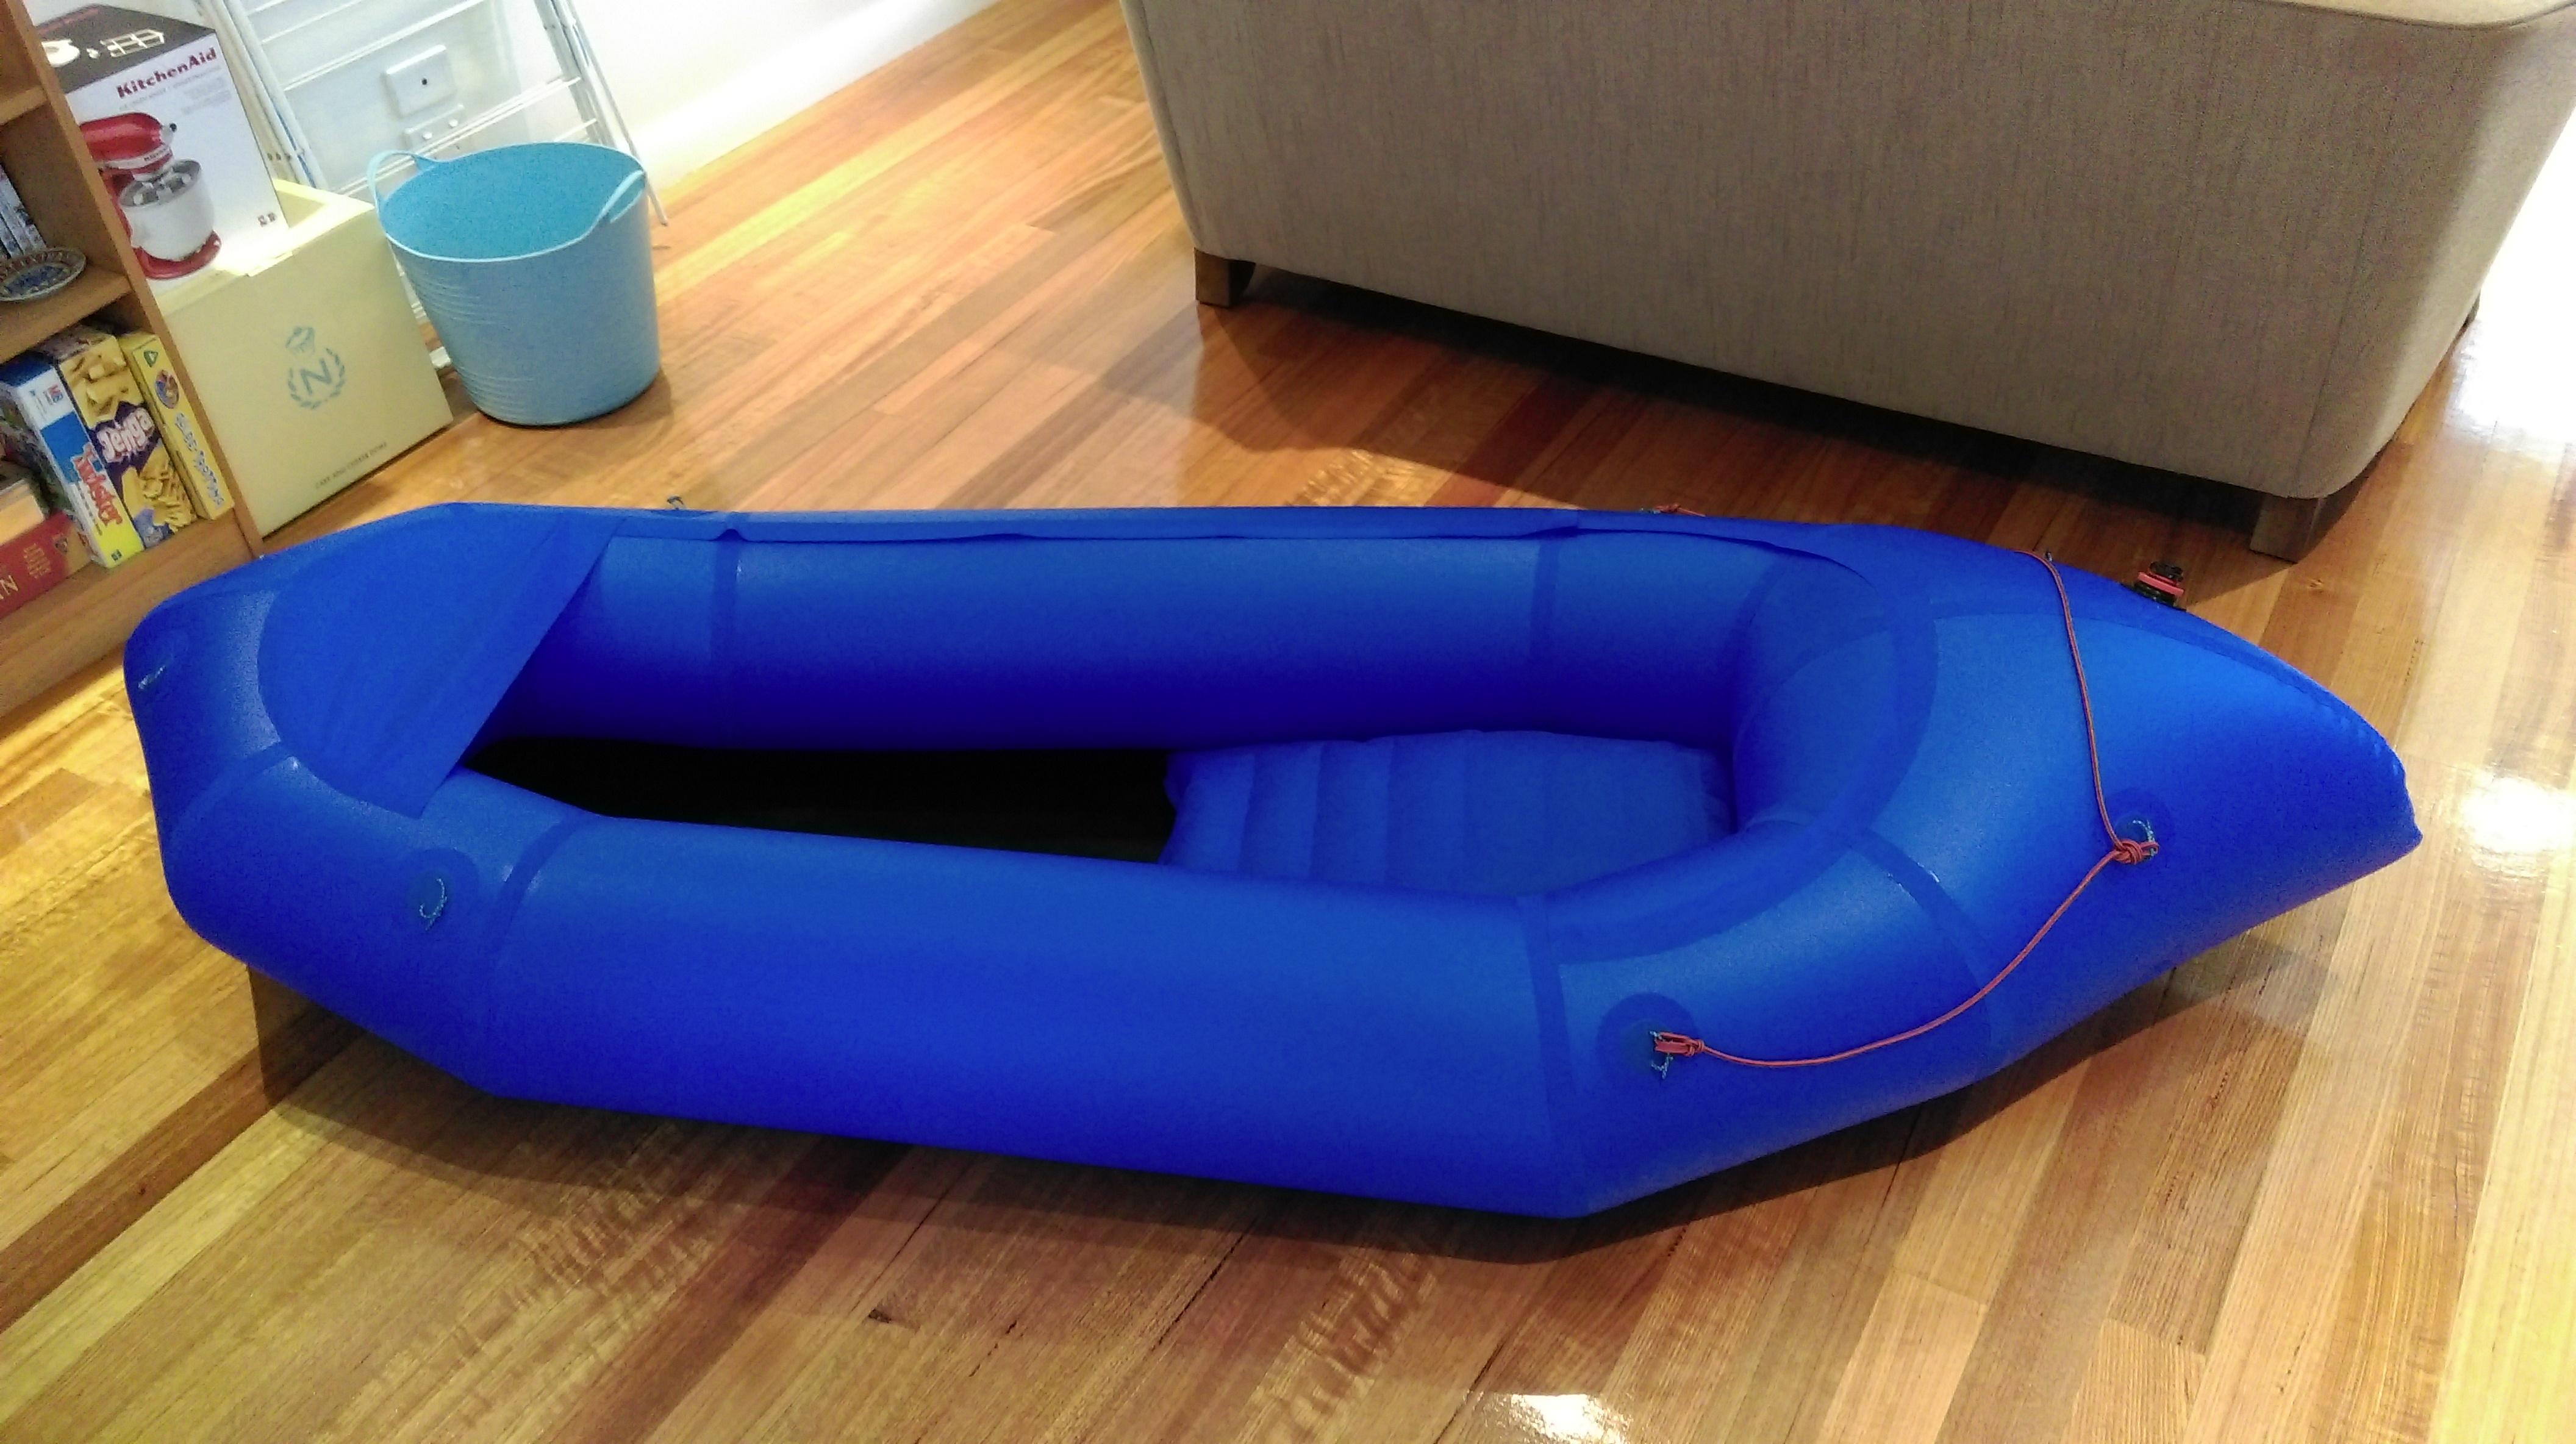
I used 210 denier fabric from extemtextil for the tubes and the black 650g/sqm fabric for the floor (TPU coated both sides…seems to work OK, just put baking paper underneath the area you are heat sealing). I agree with all other comments I’ve seen on the forum that the 210 denier extremtextil fabric is difficult to work with (it takes forever to heat seal!!!). I’d just get Matt’s fabric in future, though postage costs from North America to Australia is what put me off doing this originally.
I’ve got a Clover Mini Iron 2, just wrapped some foil around the handle to get it a bit hotter to heat seal more easily (still slow with the extremtextil fabric, but a bit better).
I ended up using Ozone Boston Valves from BrisKites (kite surf bladder repair valves). They’re good though not cheap, but I struggled to find an alternative source of the valves within Australia.
I’ve started putting together the beginnings of a “Cruiser” style spray deck, but have yet to finish.
Thanks to Matt for putting such a great site together.
-
May 15, 2017 at 8:27 pm #3204anacapriParticipant
Hi Edward- How many meters of fabric did you buy?
-
April 20, 2017 at 11:12 am #2986Matt (Admin)Keymaster
Hi Edward – great job on the packraft, and thanks for posting the photos! Lake Taupo looks just as crystal clear as I remember it – what a great place to paddle!
Please keep us posted on your cruiser deck, as it looks like you’re on the right track 🙂
-
May 25, 2017 at 2:05 am #3258anacapriParticipant
Hi Matt! I’ll ask you, since Edward doesn’t respond, want to do the same with a reinforced bottom as Edward your Plans large enough to be 210 denier – 4 meters, and the black 650g/sqm – 1 metre.
-
May 25, 2017 at 2:05 pm #3260Matt (Admin)Keymaster
Please check the How Much Fabric Do I Need? page 🙂
-
-
-
-
April 7, 2017 at 9:35 pm #2886ThorleneParticipant
Another red-DIY packraft-on-the-living-room-floor photo. And the maiden voyage photo on Lake Silver, Central Plateau, Tasmania. I’m pretty sure there has never been a packraft on Lake Silver before (5 hours hike from car park). I’ve named it ‘Packrafty McPackrafty-Face’.
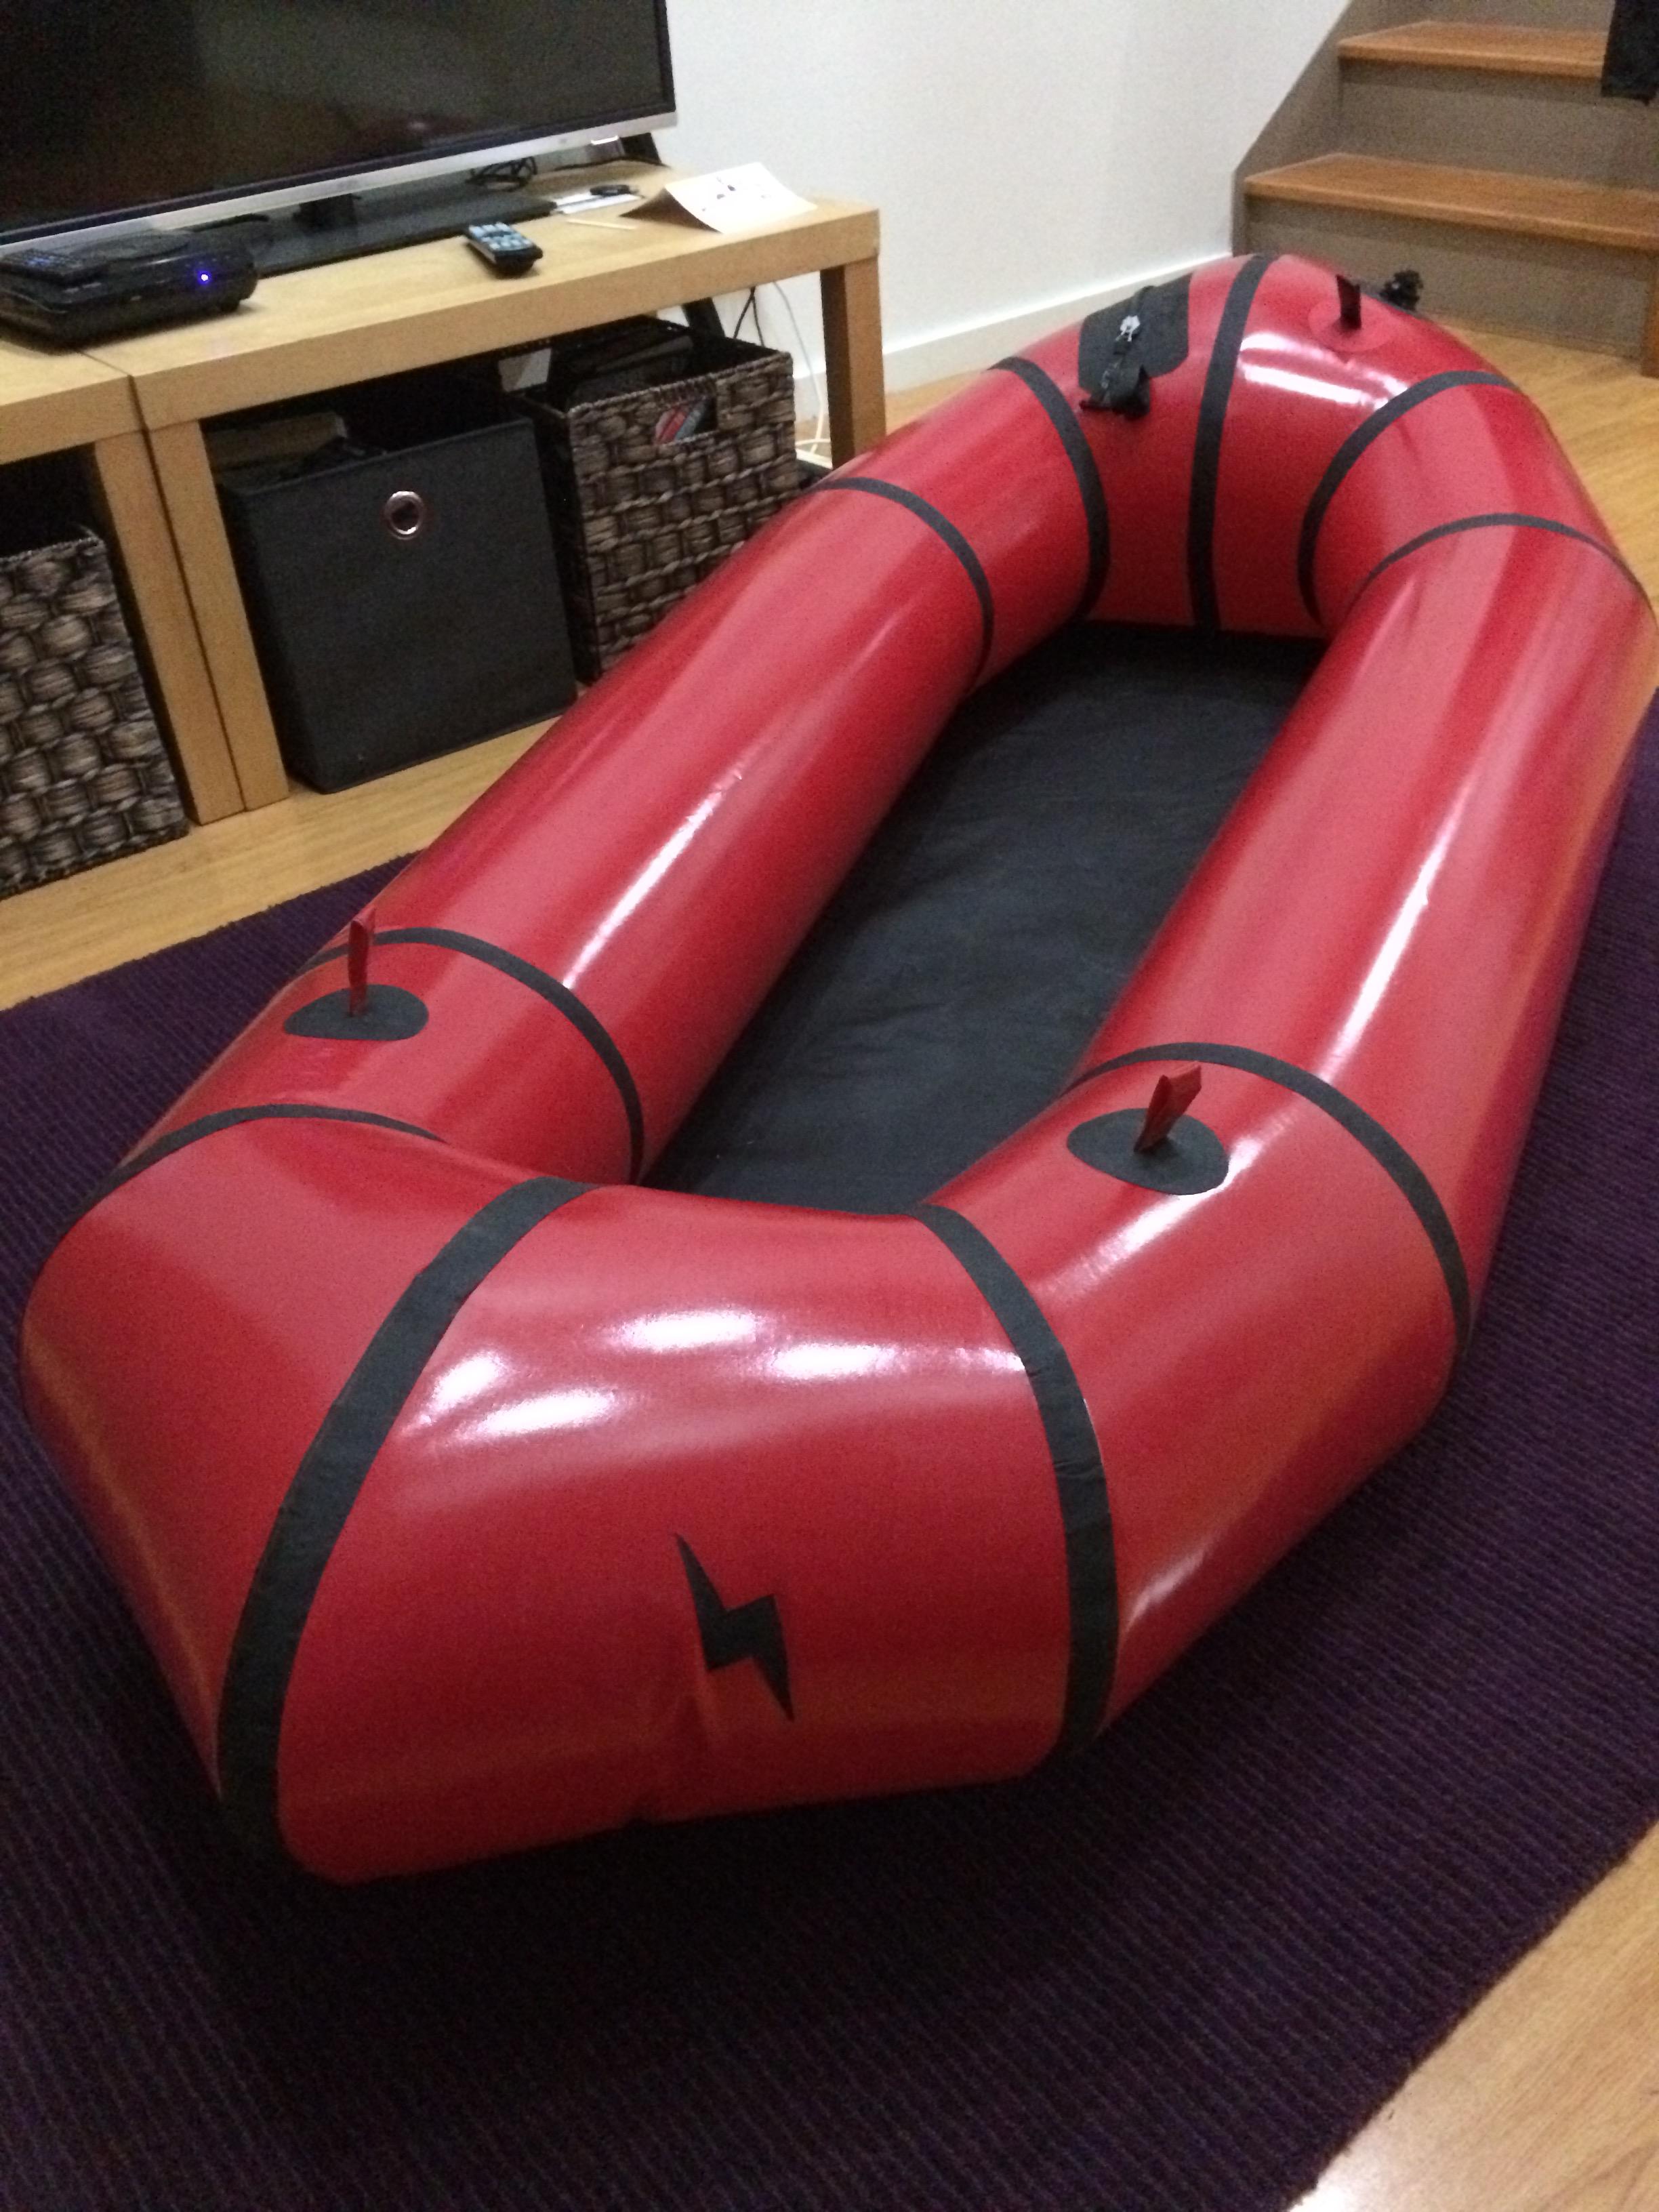
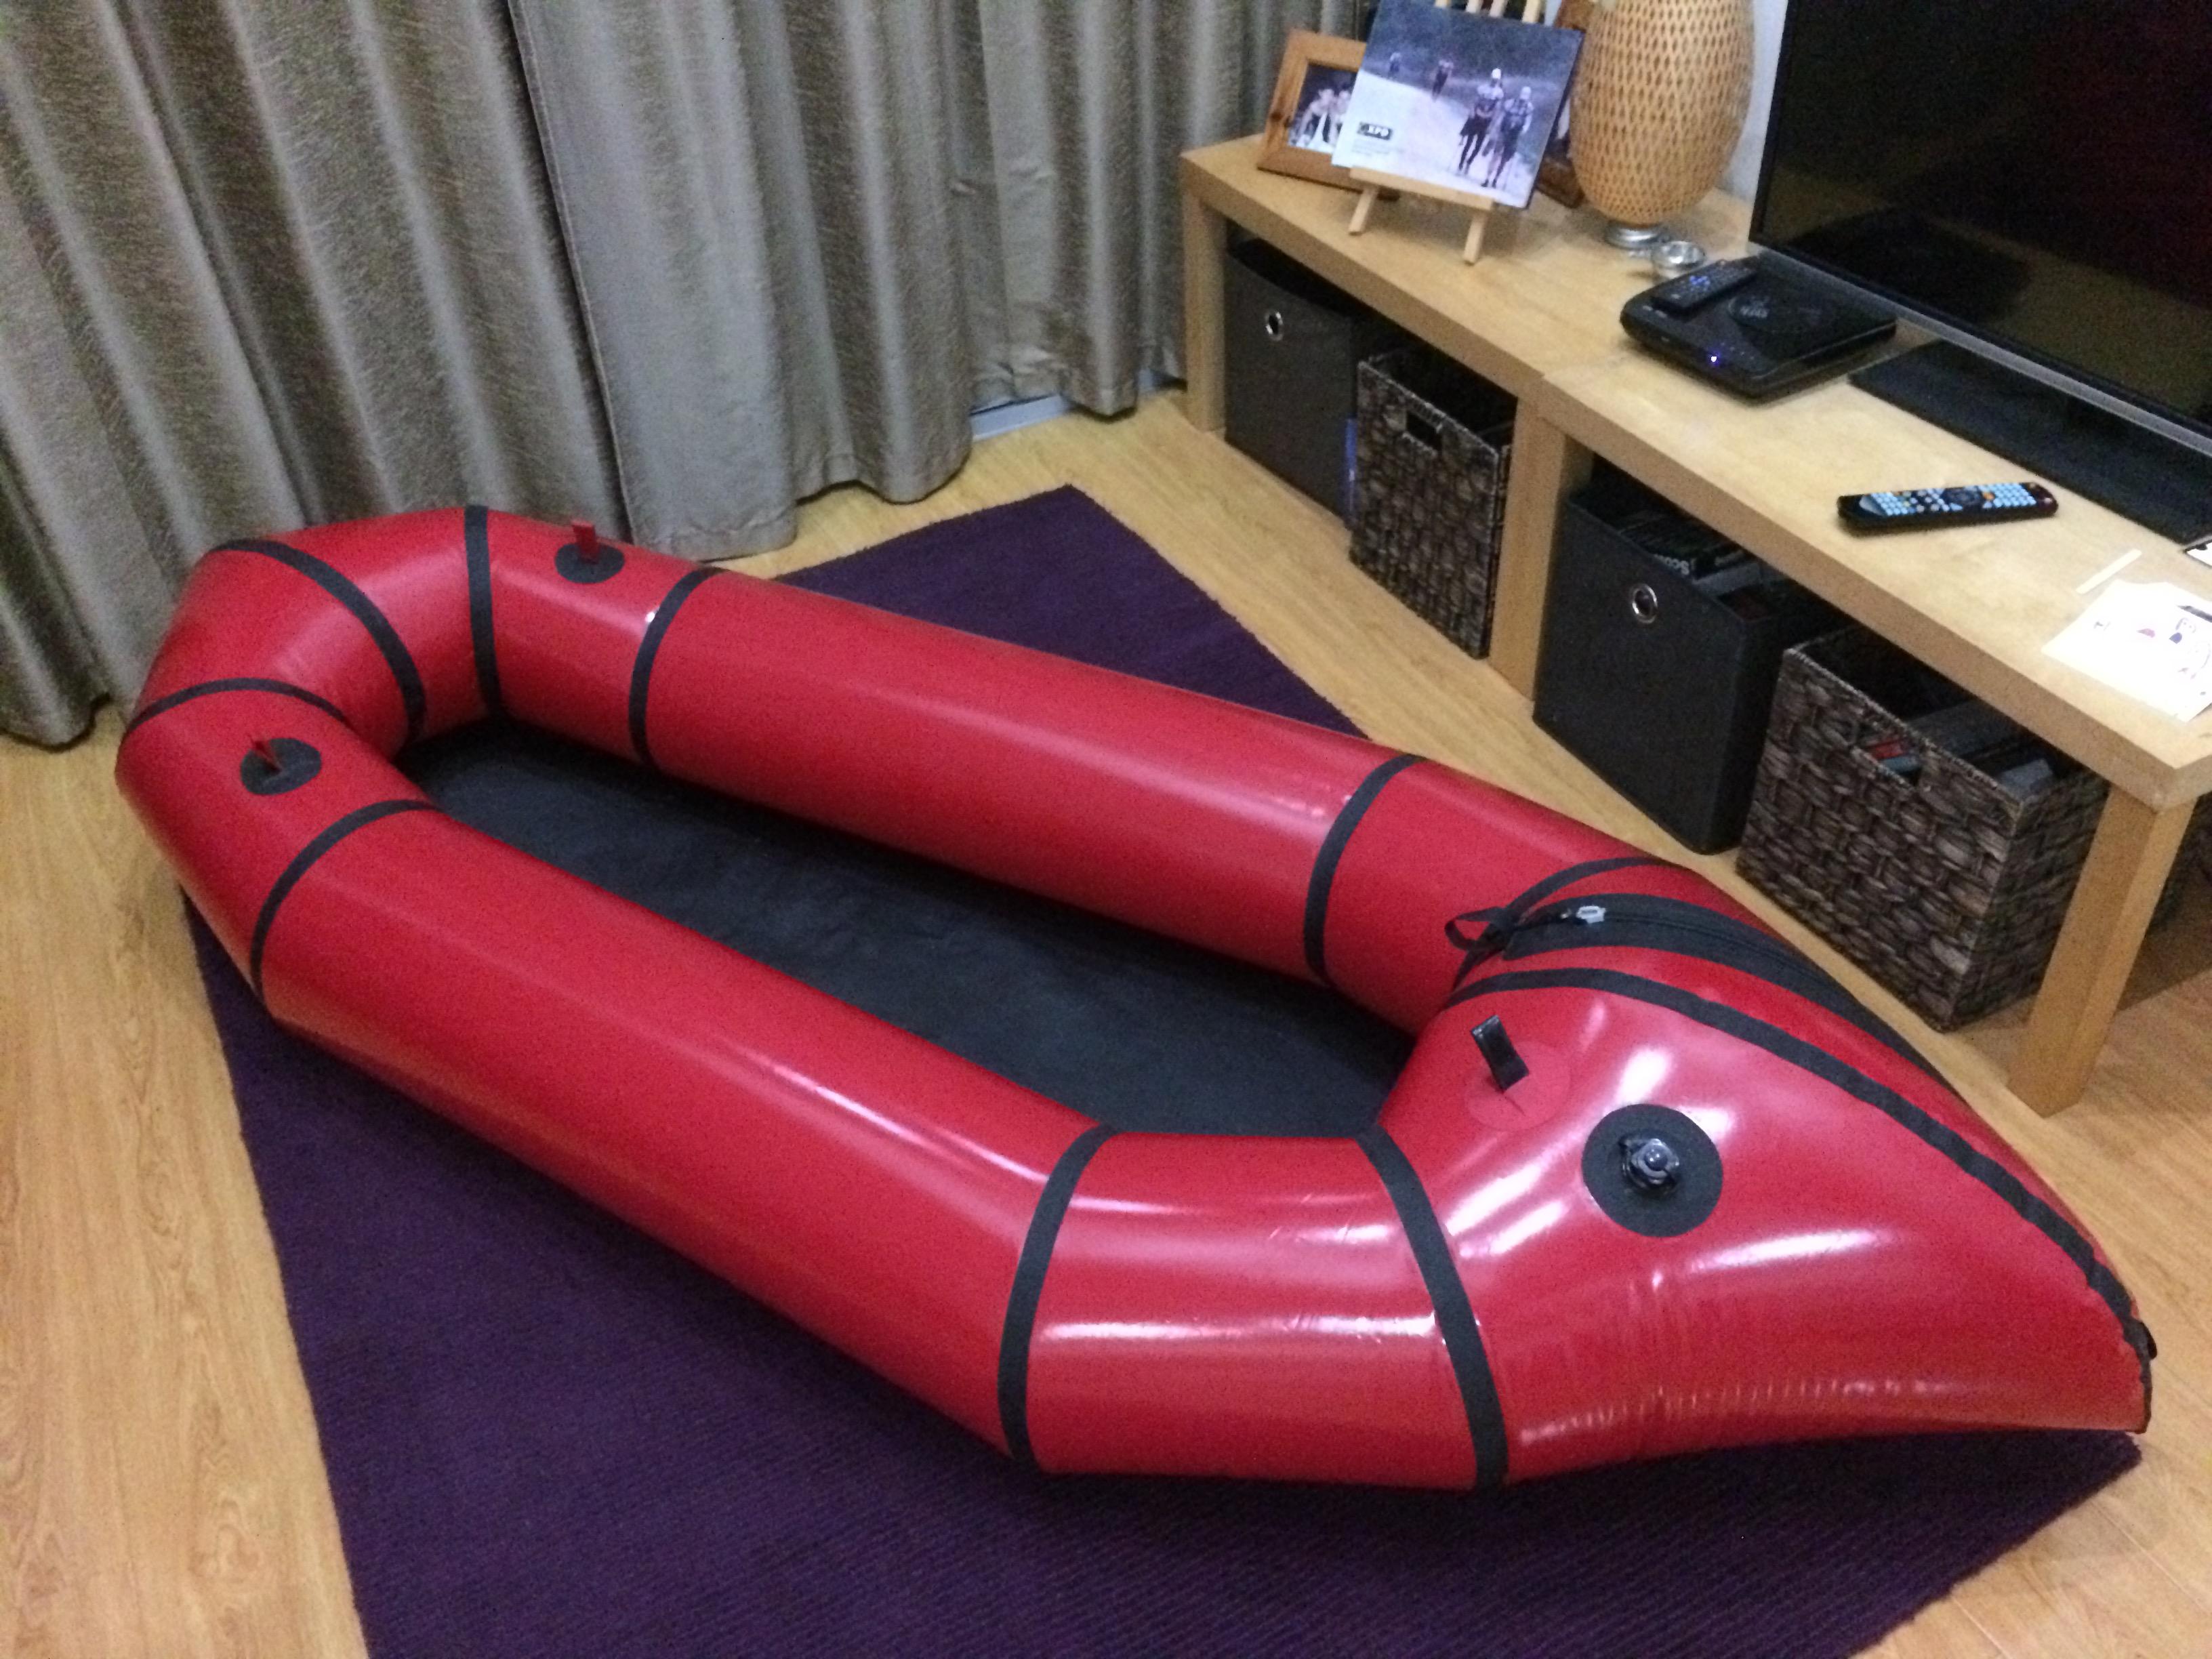
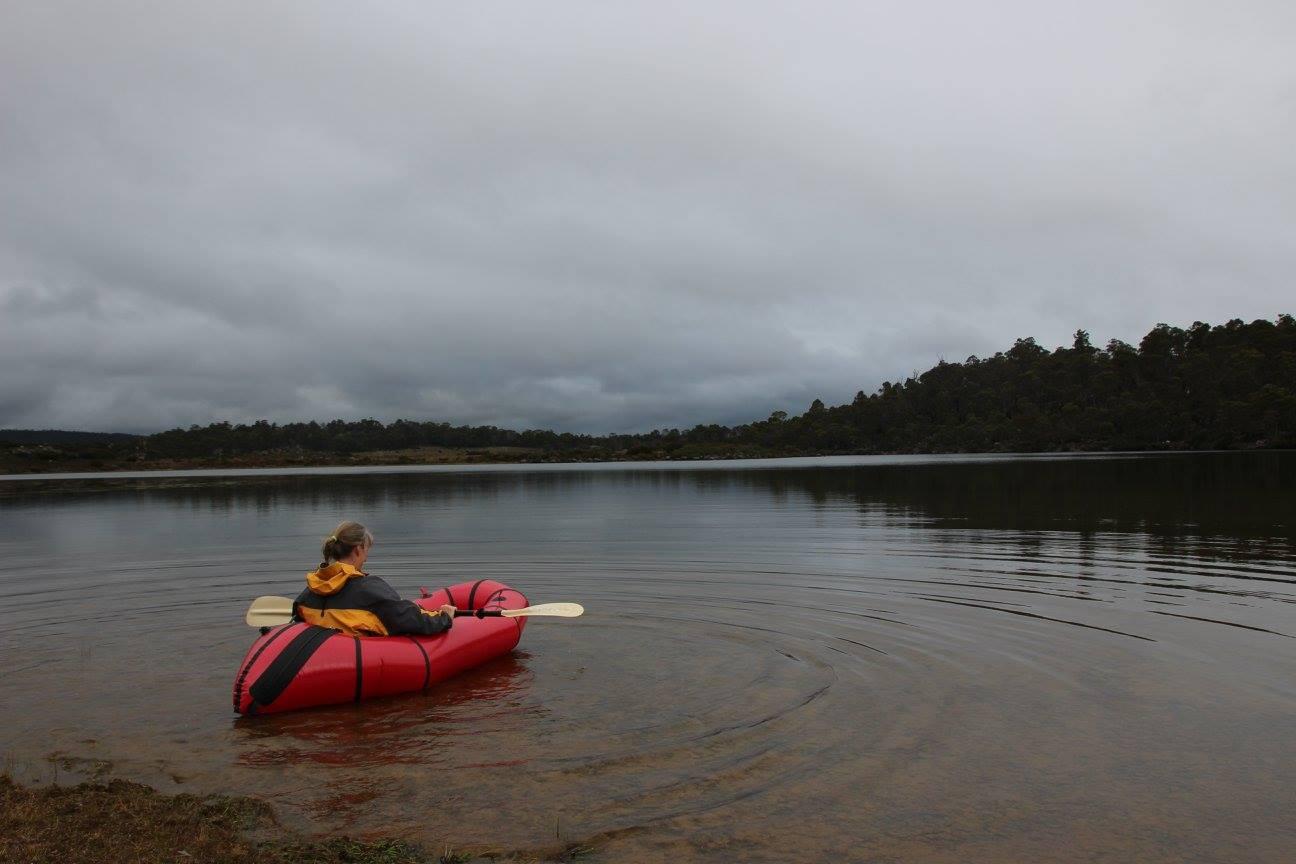
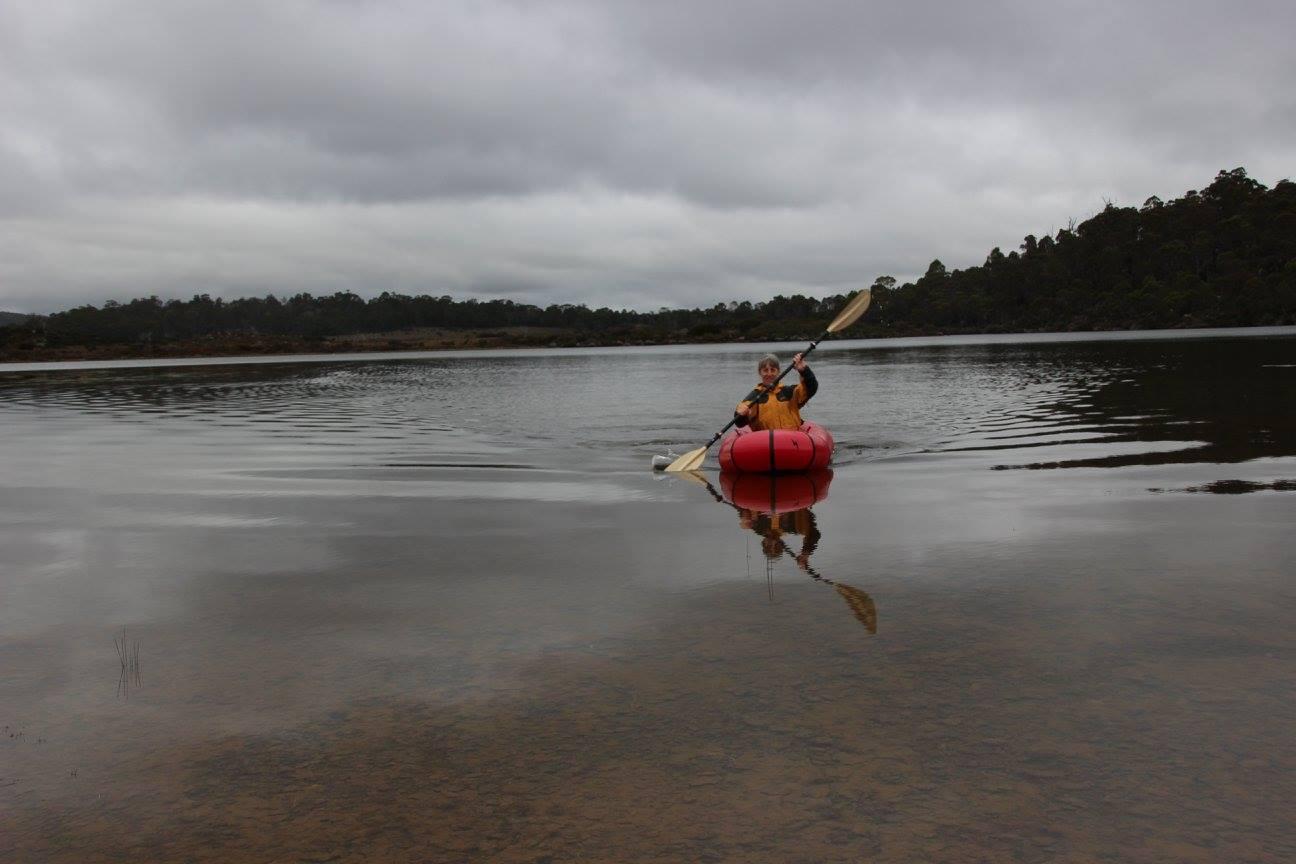
-
April 8, 2017 at 9:18 am #2889Matt (Admin)Keymaster
Excellent work! I like the lightning bolt detail, too.
It’s a great feeling to paddle someplace where you know a boat has probably never been before – like being the first person to summit a mountain 🙂
-
-
April 3, 2017 at 12:15 am #2868AndrewParticipant
My Packraft and testing it on the lake
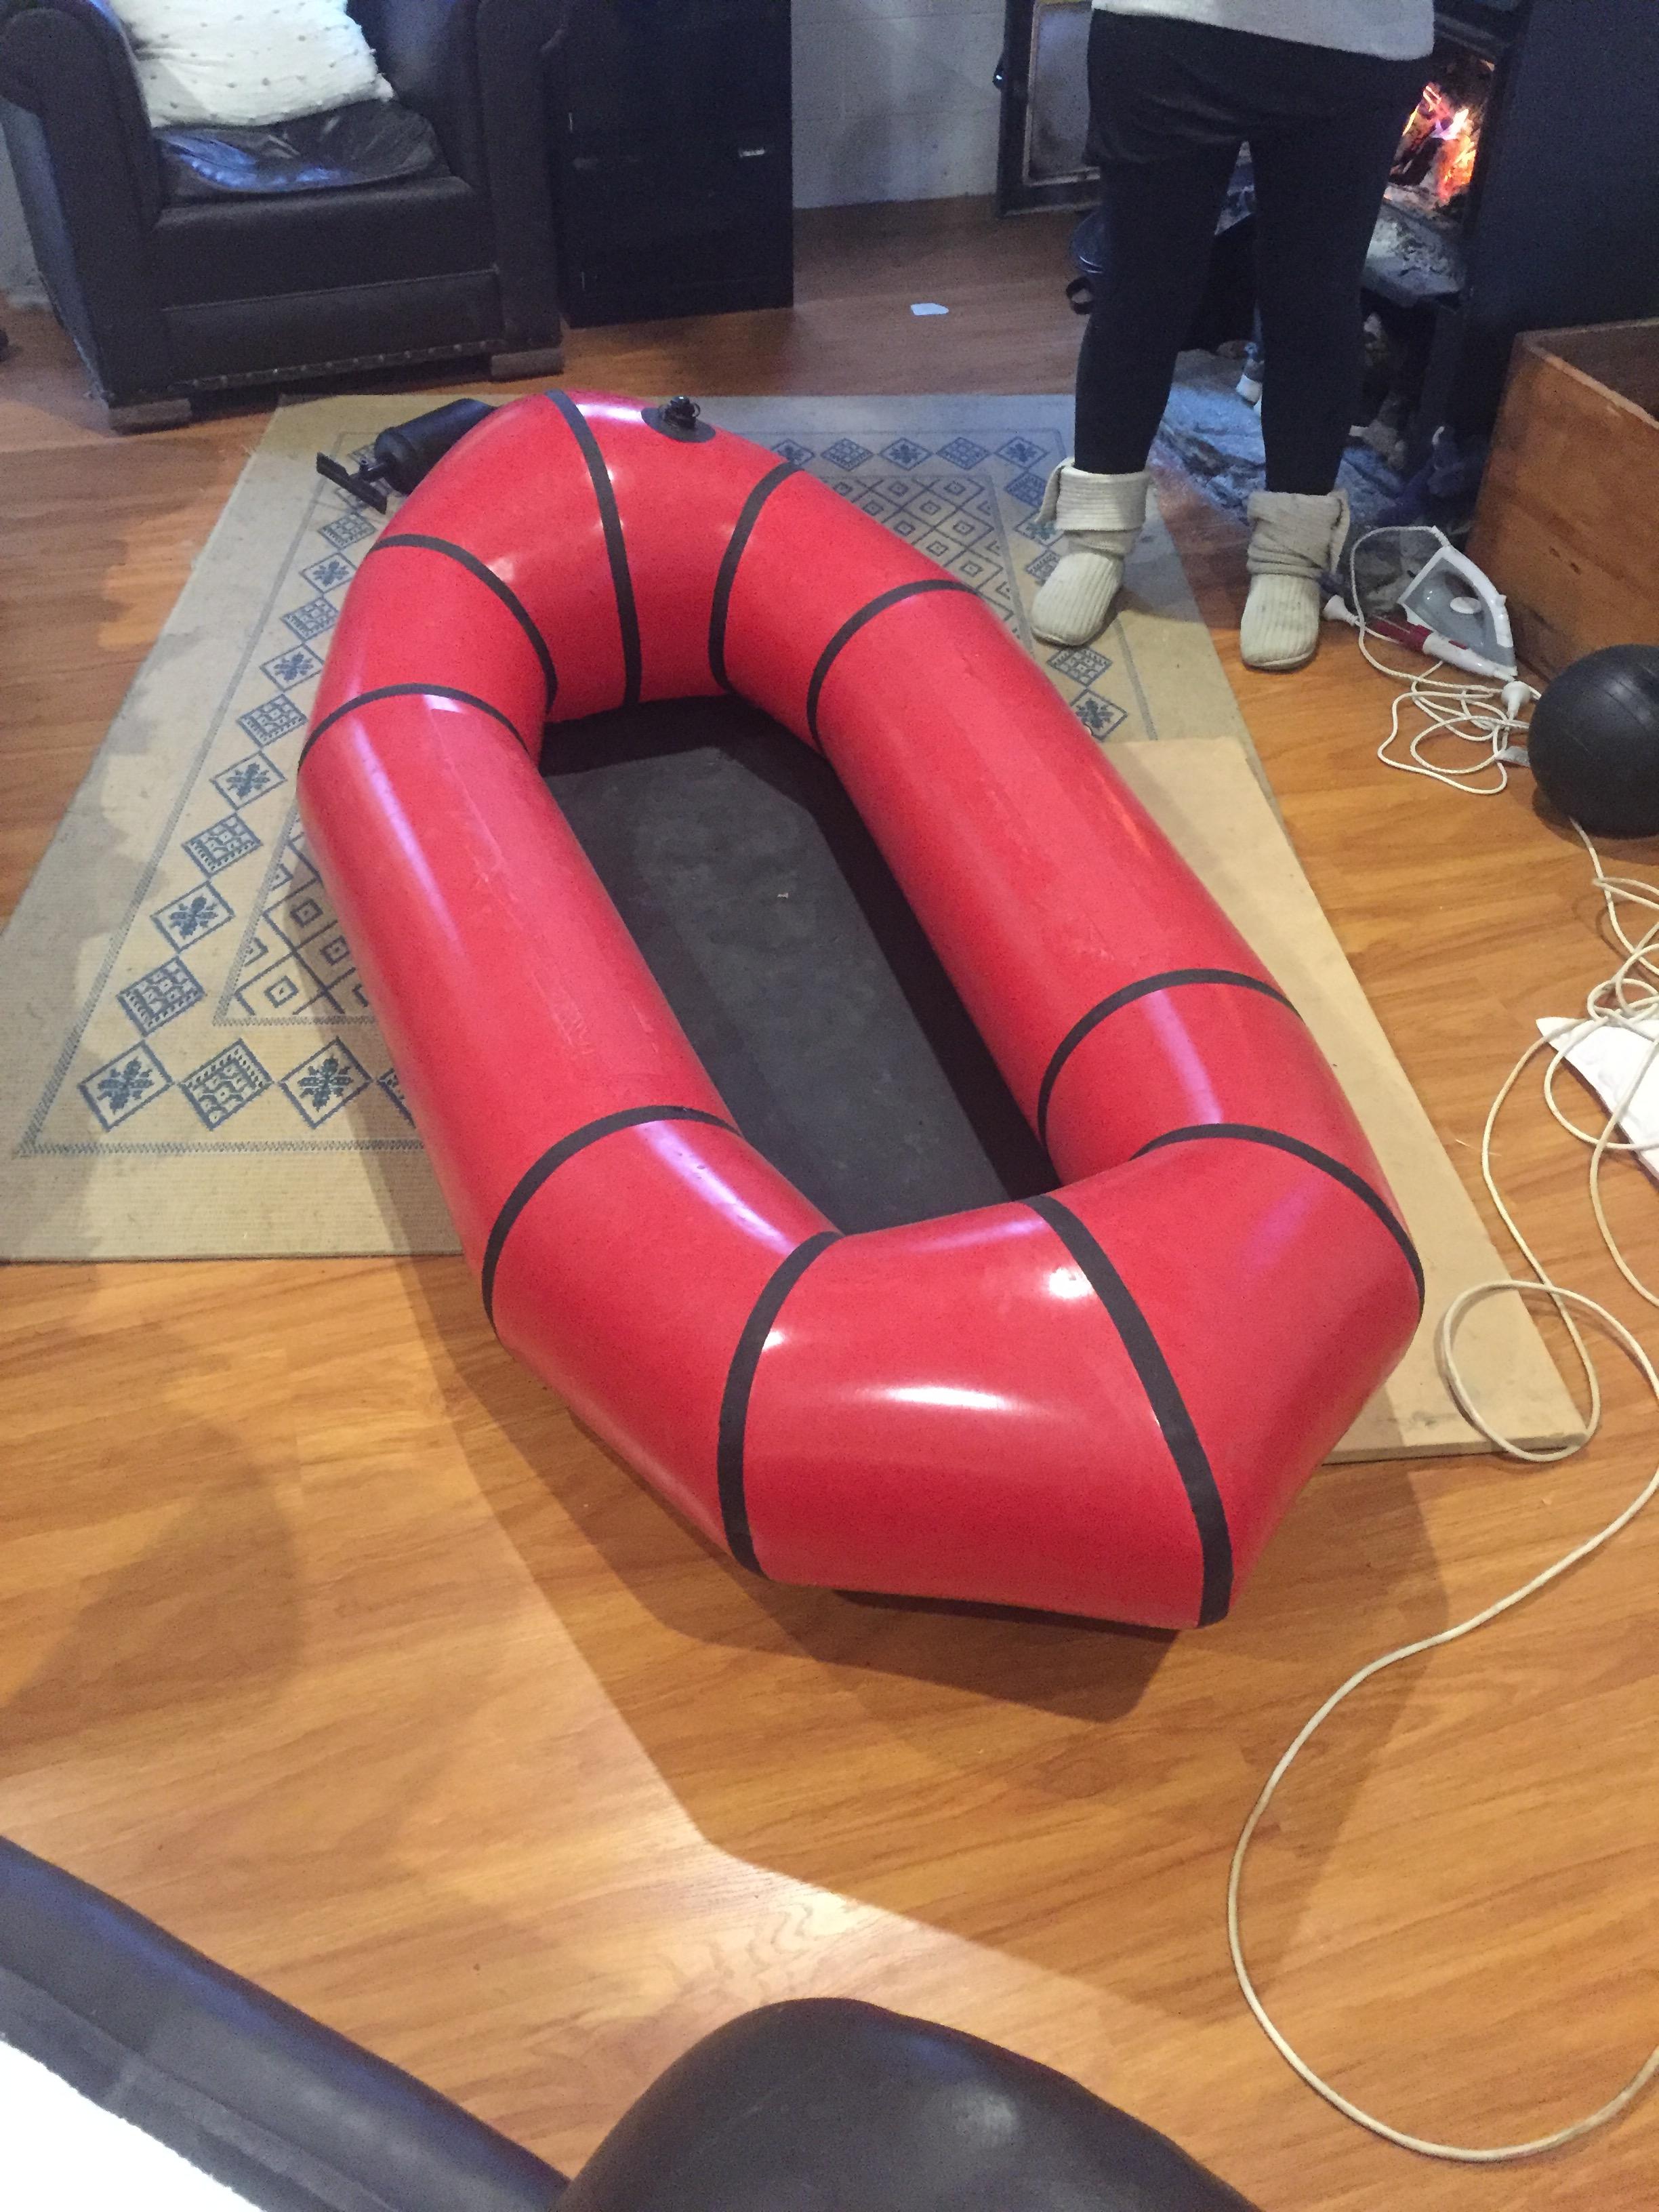
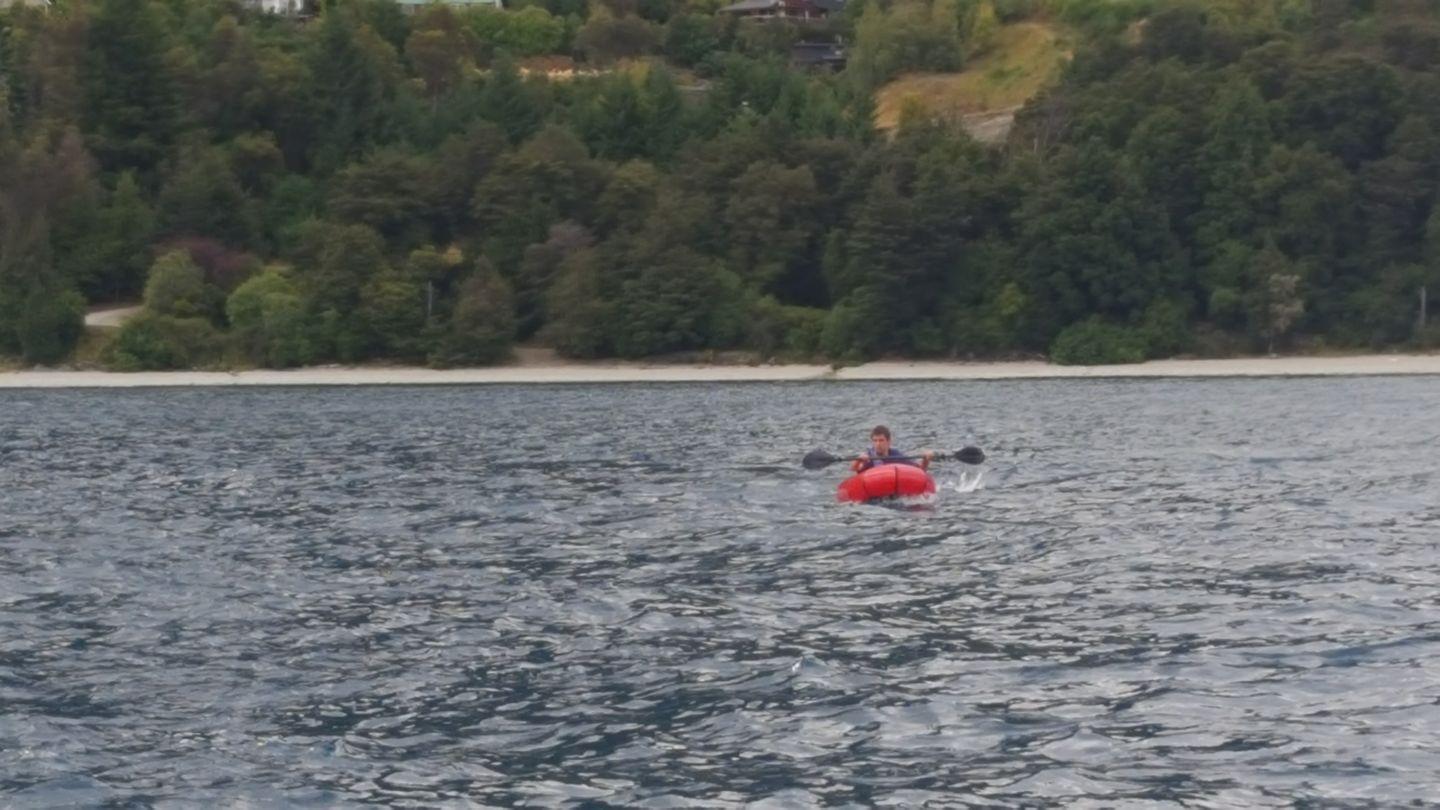
-
April 3, 2017 at 12:05 pm #2872Matt (Admin)Keymaster
Looks great! Thanks for posting!
-
-
March 9, 2017 at 10:02 am #2651Matt (Admin)Keymaster
Check out Andy’s red DIY Packraft!
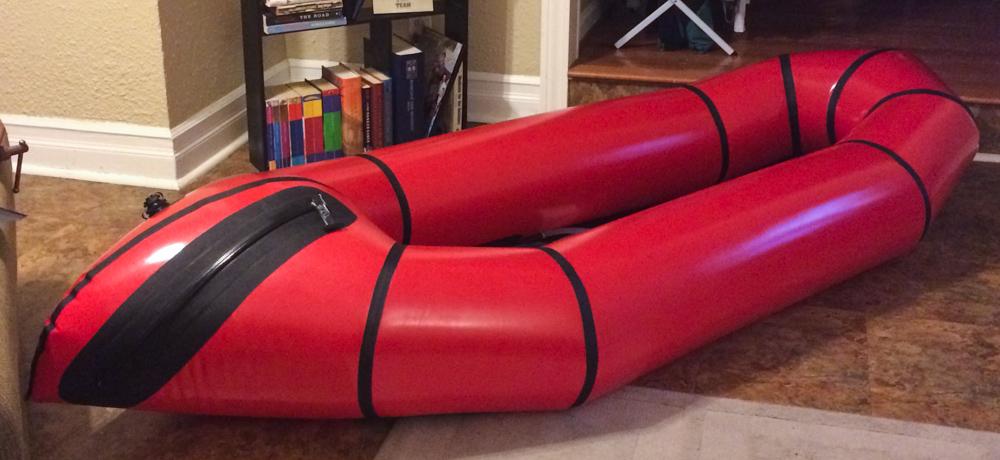
-
March 7, 2017 at 11:54 am #2641TylerParticipant
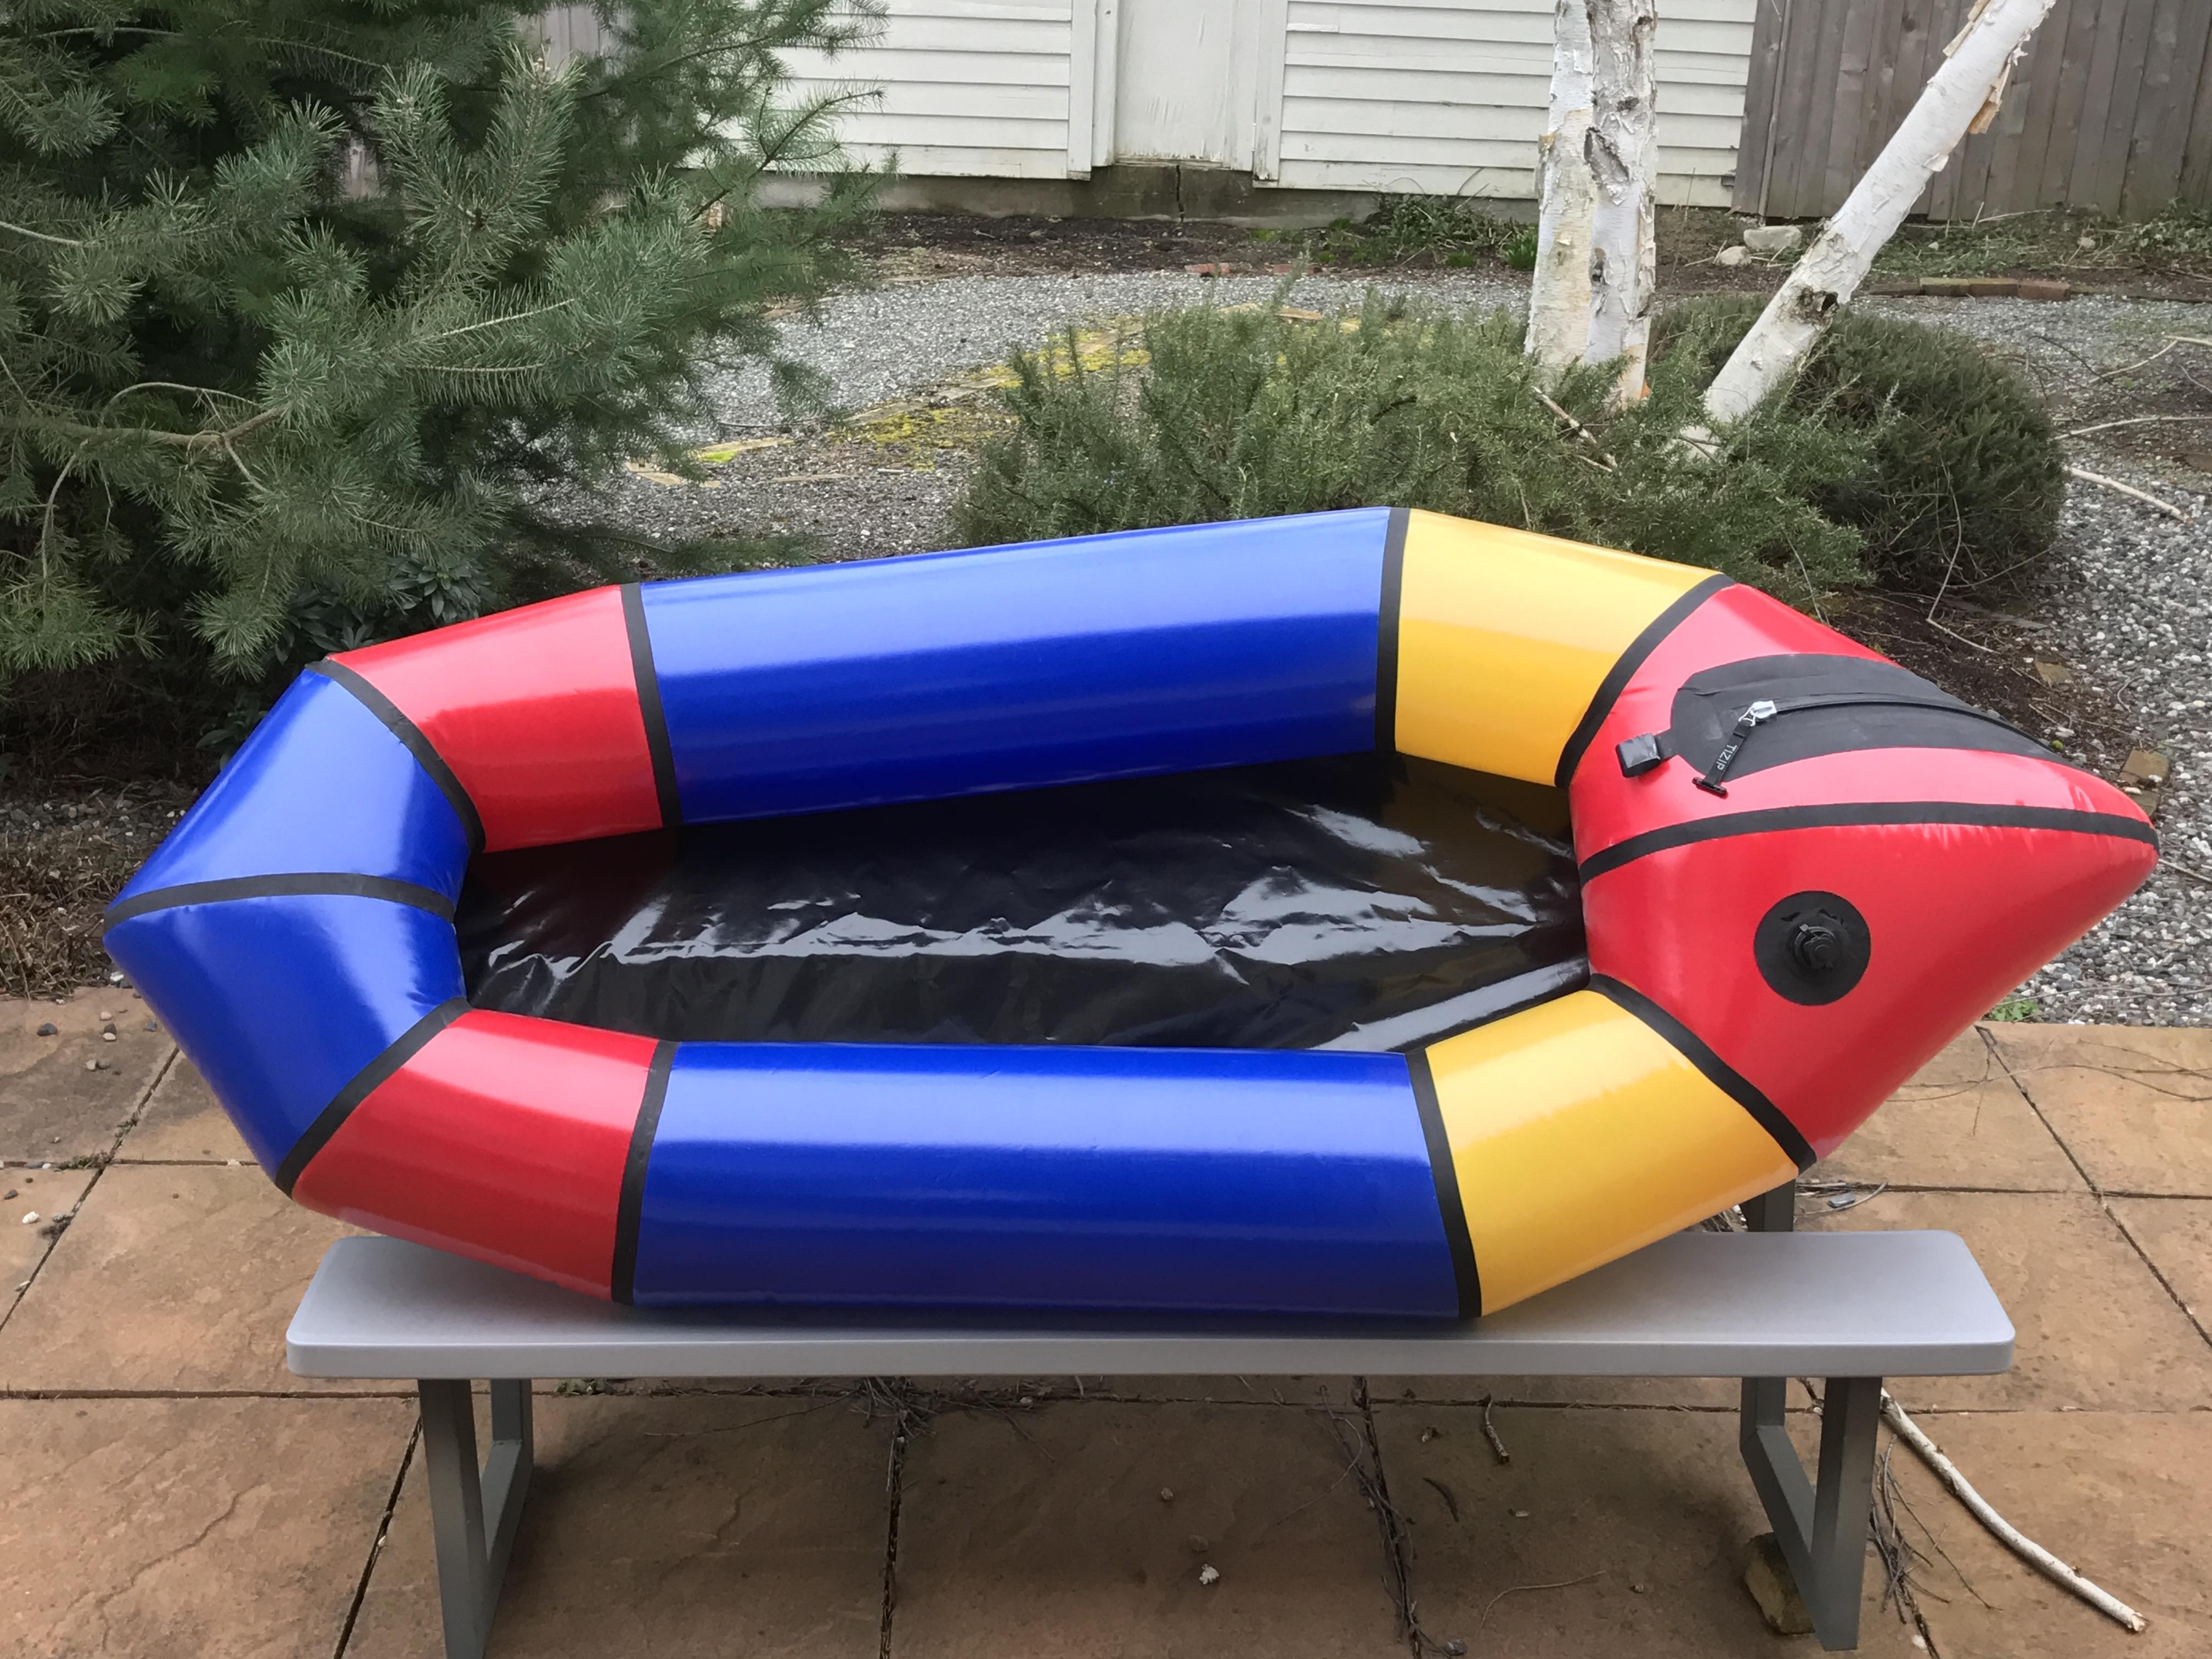
-
March 7, 2017 at 12:20 pm #2642Matt (Admin)Keymaster
Beautiful work, @tyler!
-
-
March 1, 2017 at 7:37 am #2603RomanGuest
-
February 25, 2017 at 11:51 am #2570Matt (Admin)Keymaster
Andreas made this yellow packraft from DIY Packraft plans and 210D fabric from ExtrimTextil in Germany. He said working with the fabric was “really hard but it’s possible. The next I will build with your 40den. It’s a great difference in quality.”
Great work, Andreas!
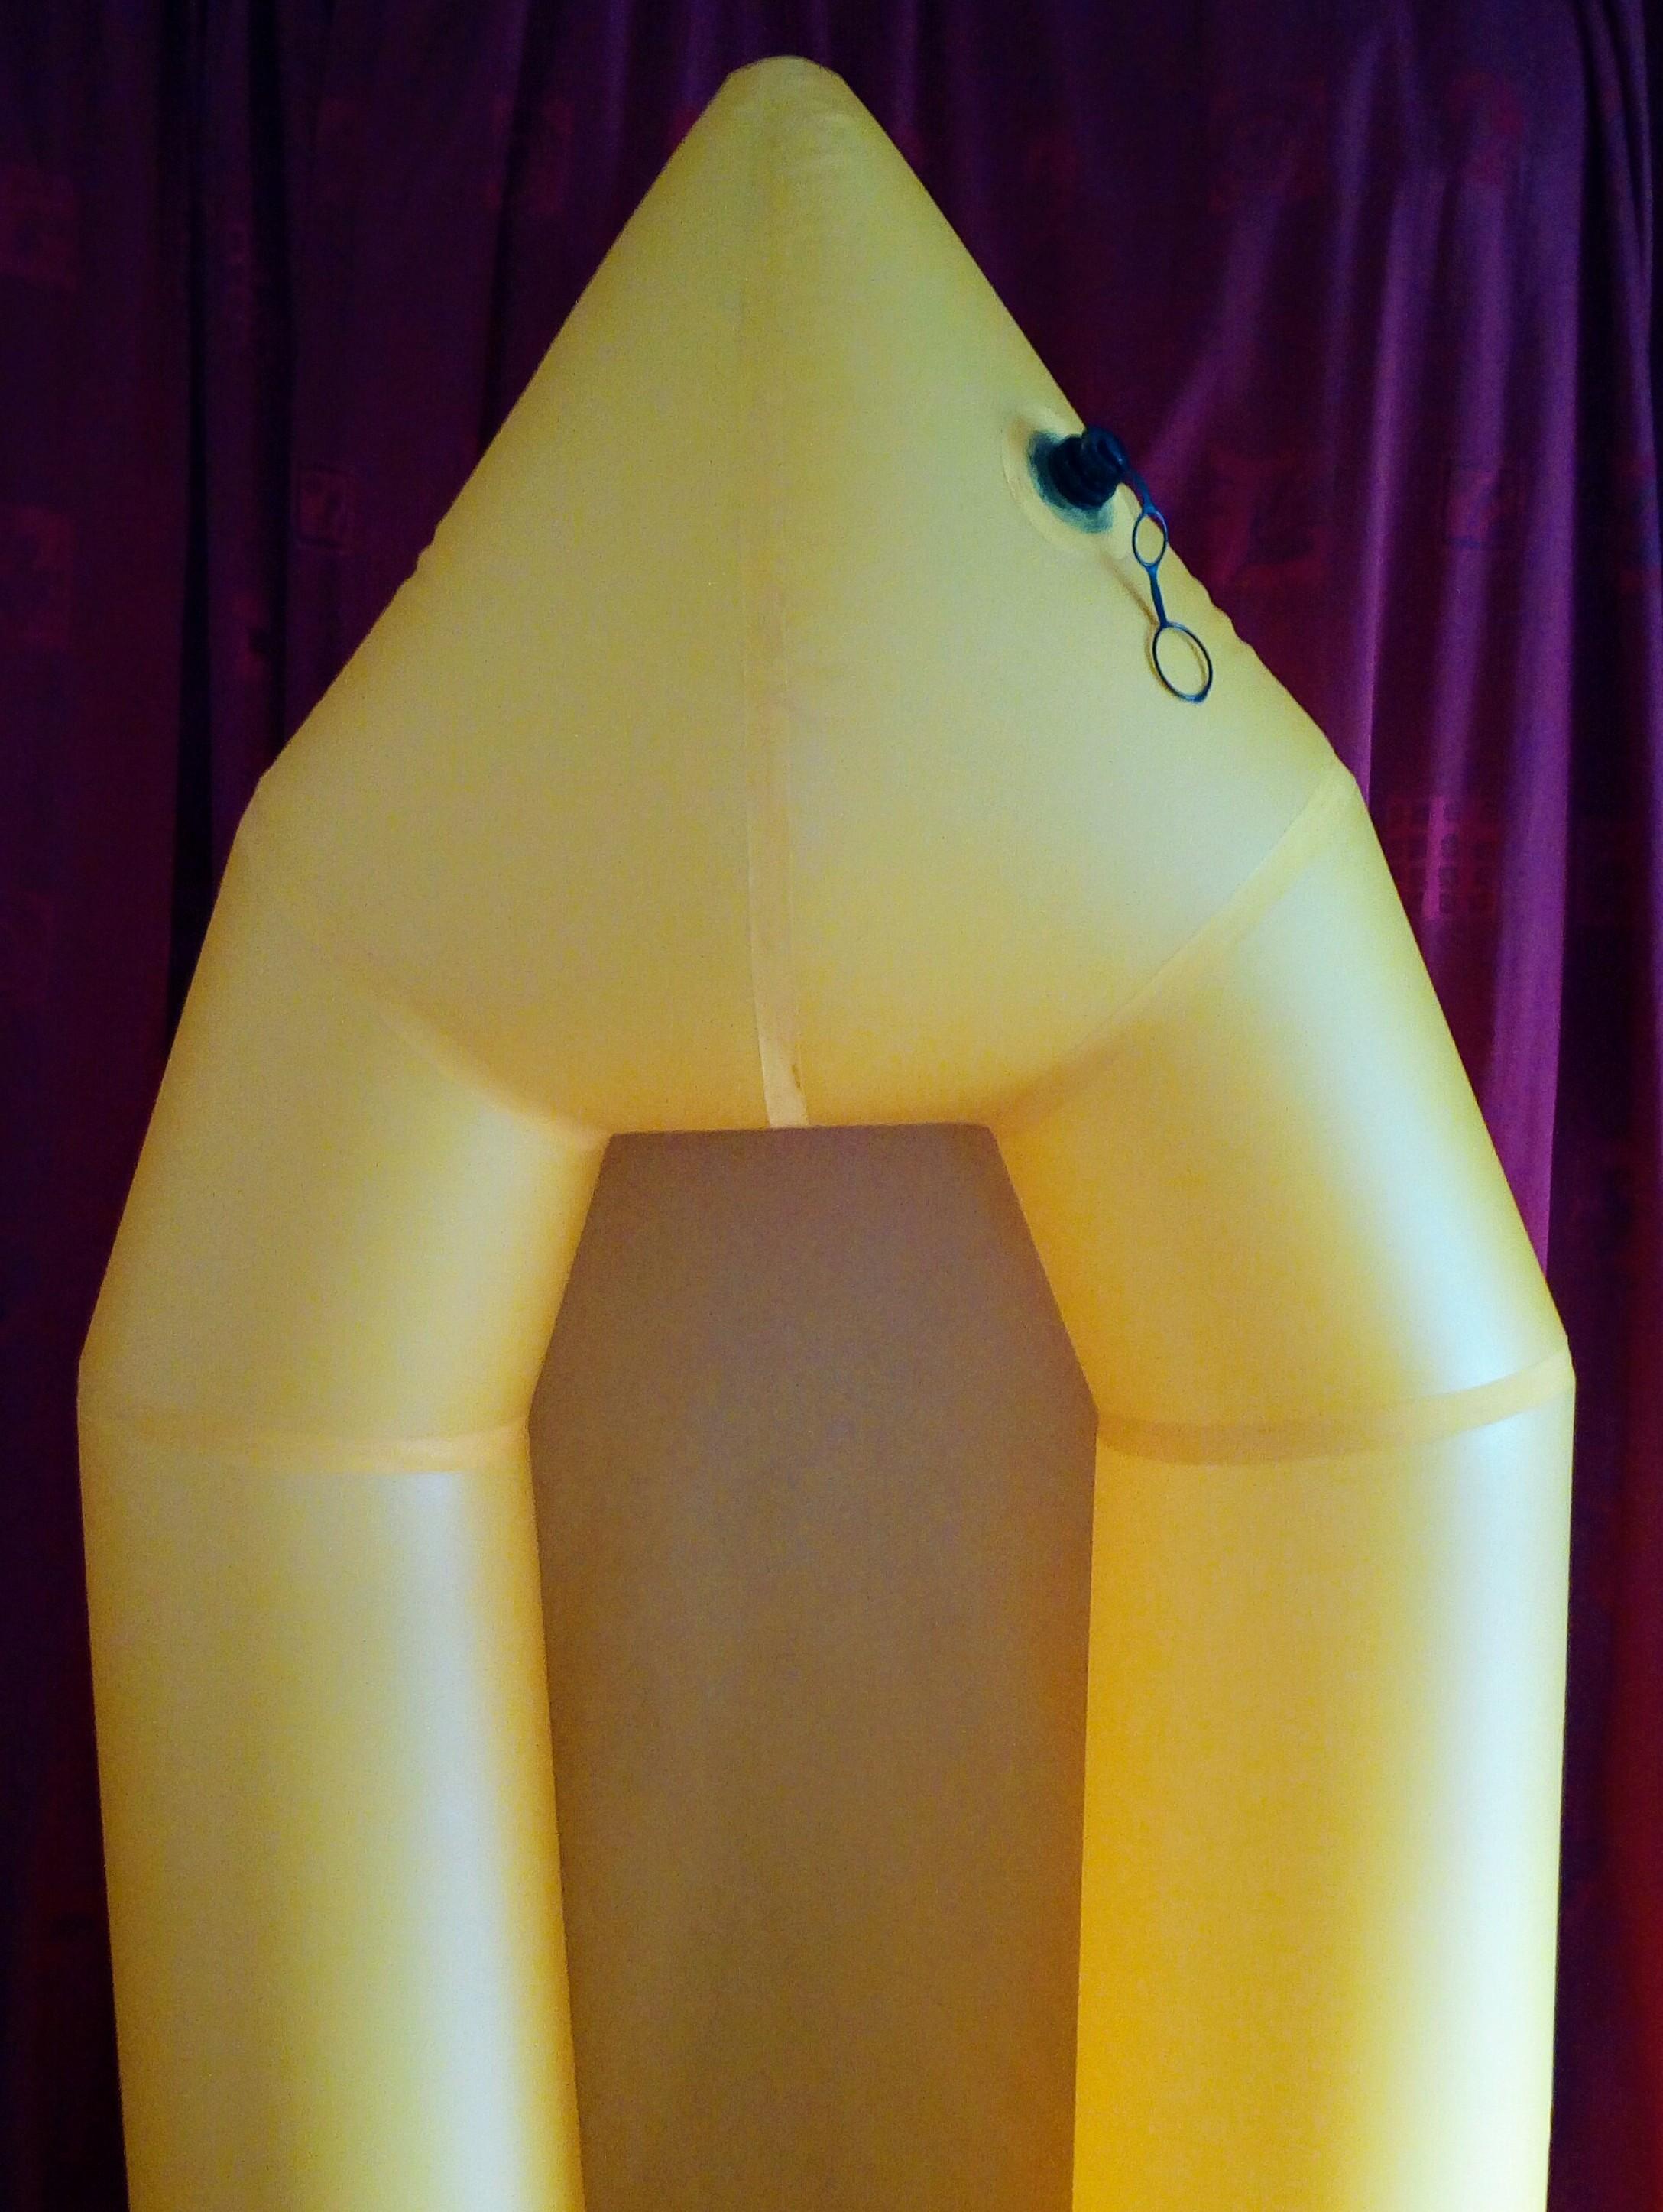
-
August 30, 2017 at 3:13 pm #4101Matt (Admin)Keymaster
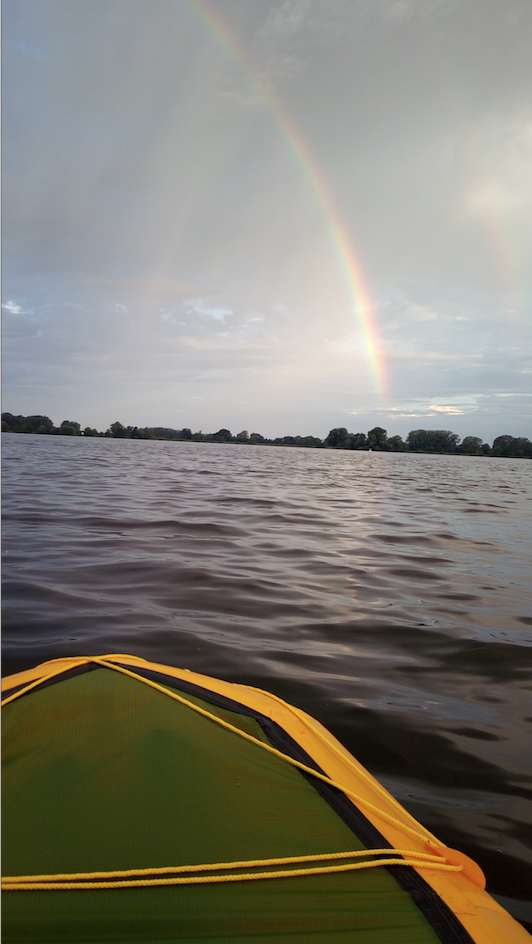
-
February 28, 2017 at 5:15 pm #2596hiroshiParticipant
Please tell.
Did you purchase this product?
How many meters did you purchase it?-
This reply was modified 9 years, 3 months ago by hiroshi.
-
March 2, 2017 at 4:37 am #2612Lyn St GeorgeParticipant
If you’re thinking of buying this fabric Hiroshi, then the general consensus here is to not buy it. Extremtextil have some very heavy tpu coated nylon which they describe as ‘high tenacity’, but all the others are not, and the fabric melts at almost the same temperature as you need for welding. Andreas says he will buy Matt’s fabric next time, not the one you are looking at.
I had to abandon a sleeping mat project, after buying enough fabric to make two mats and cutting it all up ready, because it just melted.
Everyone who has tried this ‘low tenacity’ fabric says to not do it again. For my first boat I bought a kit off Matt, and for the second boat I will buy green fabric off Matt – we know that this fabric is good.
Please do not buy any fabric that is not ‘nylon 66’.
-
March 3, 2017 at 12:46 pm #2621A.HergenhanGuest
to weld the extremtextil 210den i used a digital soldering station with 60 watt
and a aluminiumplate with teflonfoil sheated temperature 340 degree
again:its possible but you have to practice a lot to reach a good result
buy the nylon 66 its really better !
-
-
This reply was modified 9 years, 3 months ago by
-
-
February 15, 2017 at 3:47 pm #2505MikeGuest
I just inflated raft #2 today and it is pretty tight. I might have one very small seepage leak somewhere.
Mike

-
February 15, 2017 at 4:34 pm #2506Matt (Admin)Keymaster
Beautiful work, Mike!
-
-
February 11, 2017 at 9:02 am #2422OlympicMtnBoyParticipant
Let’s see if these pics work from my phone. Here is Evan working on Step 1 of his ultralight:
And me hard at work on my blue raft. These are gonna need names I guess!

-
This reply was modified 9 years, 4 months ago by OlympicMtnBoy.
-
This reply was modified 9 years, 4 months ago by OlympicMtnBoy.
-
This reply was modified 9 years, 4 months ago by OlympicMtnBoy.
-
February 28, 2017 at 10:28 am #2591OlympicMtnBoyParticipant
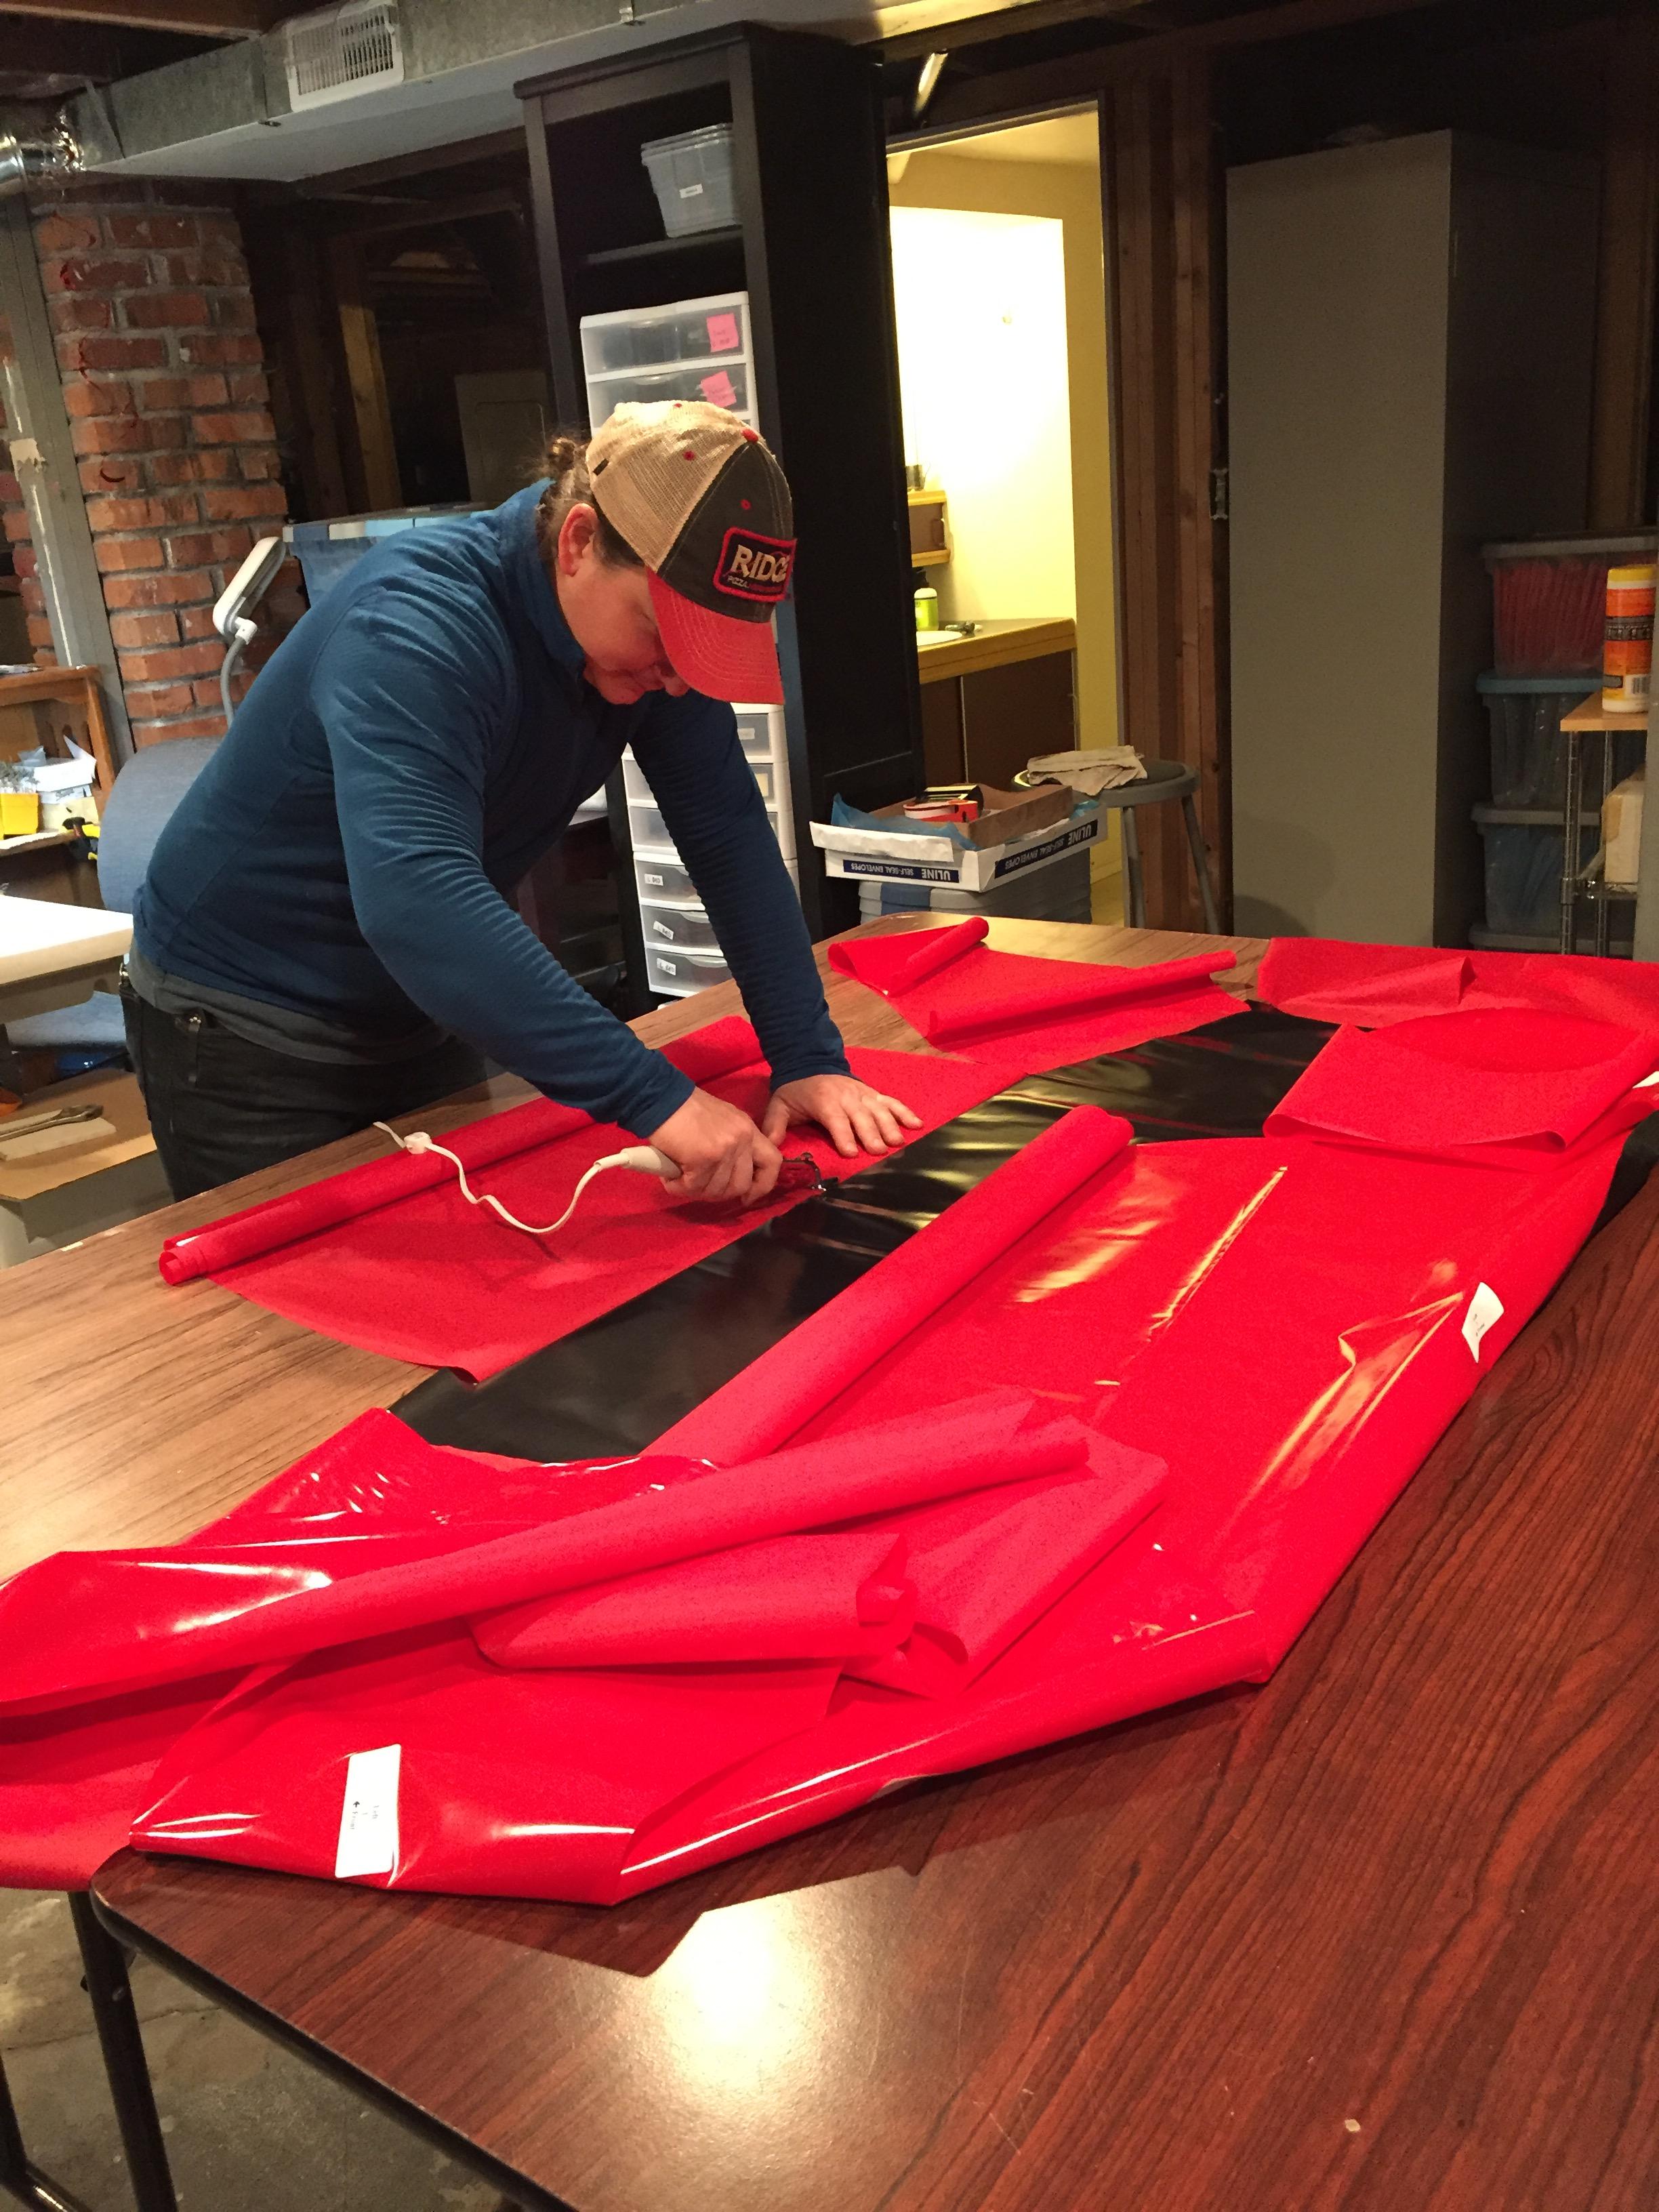
-
February 28, 2017 at 10:27 am #2590OlympicMtnBoyParticipant
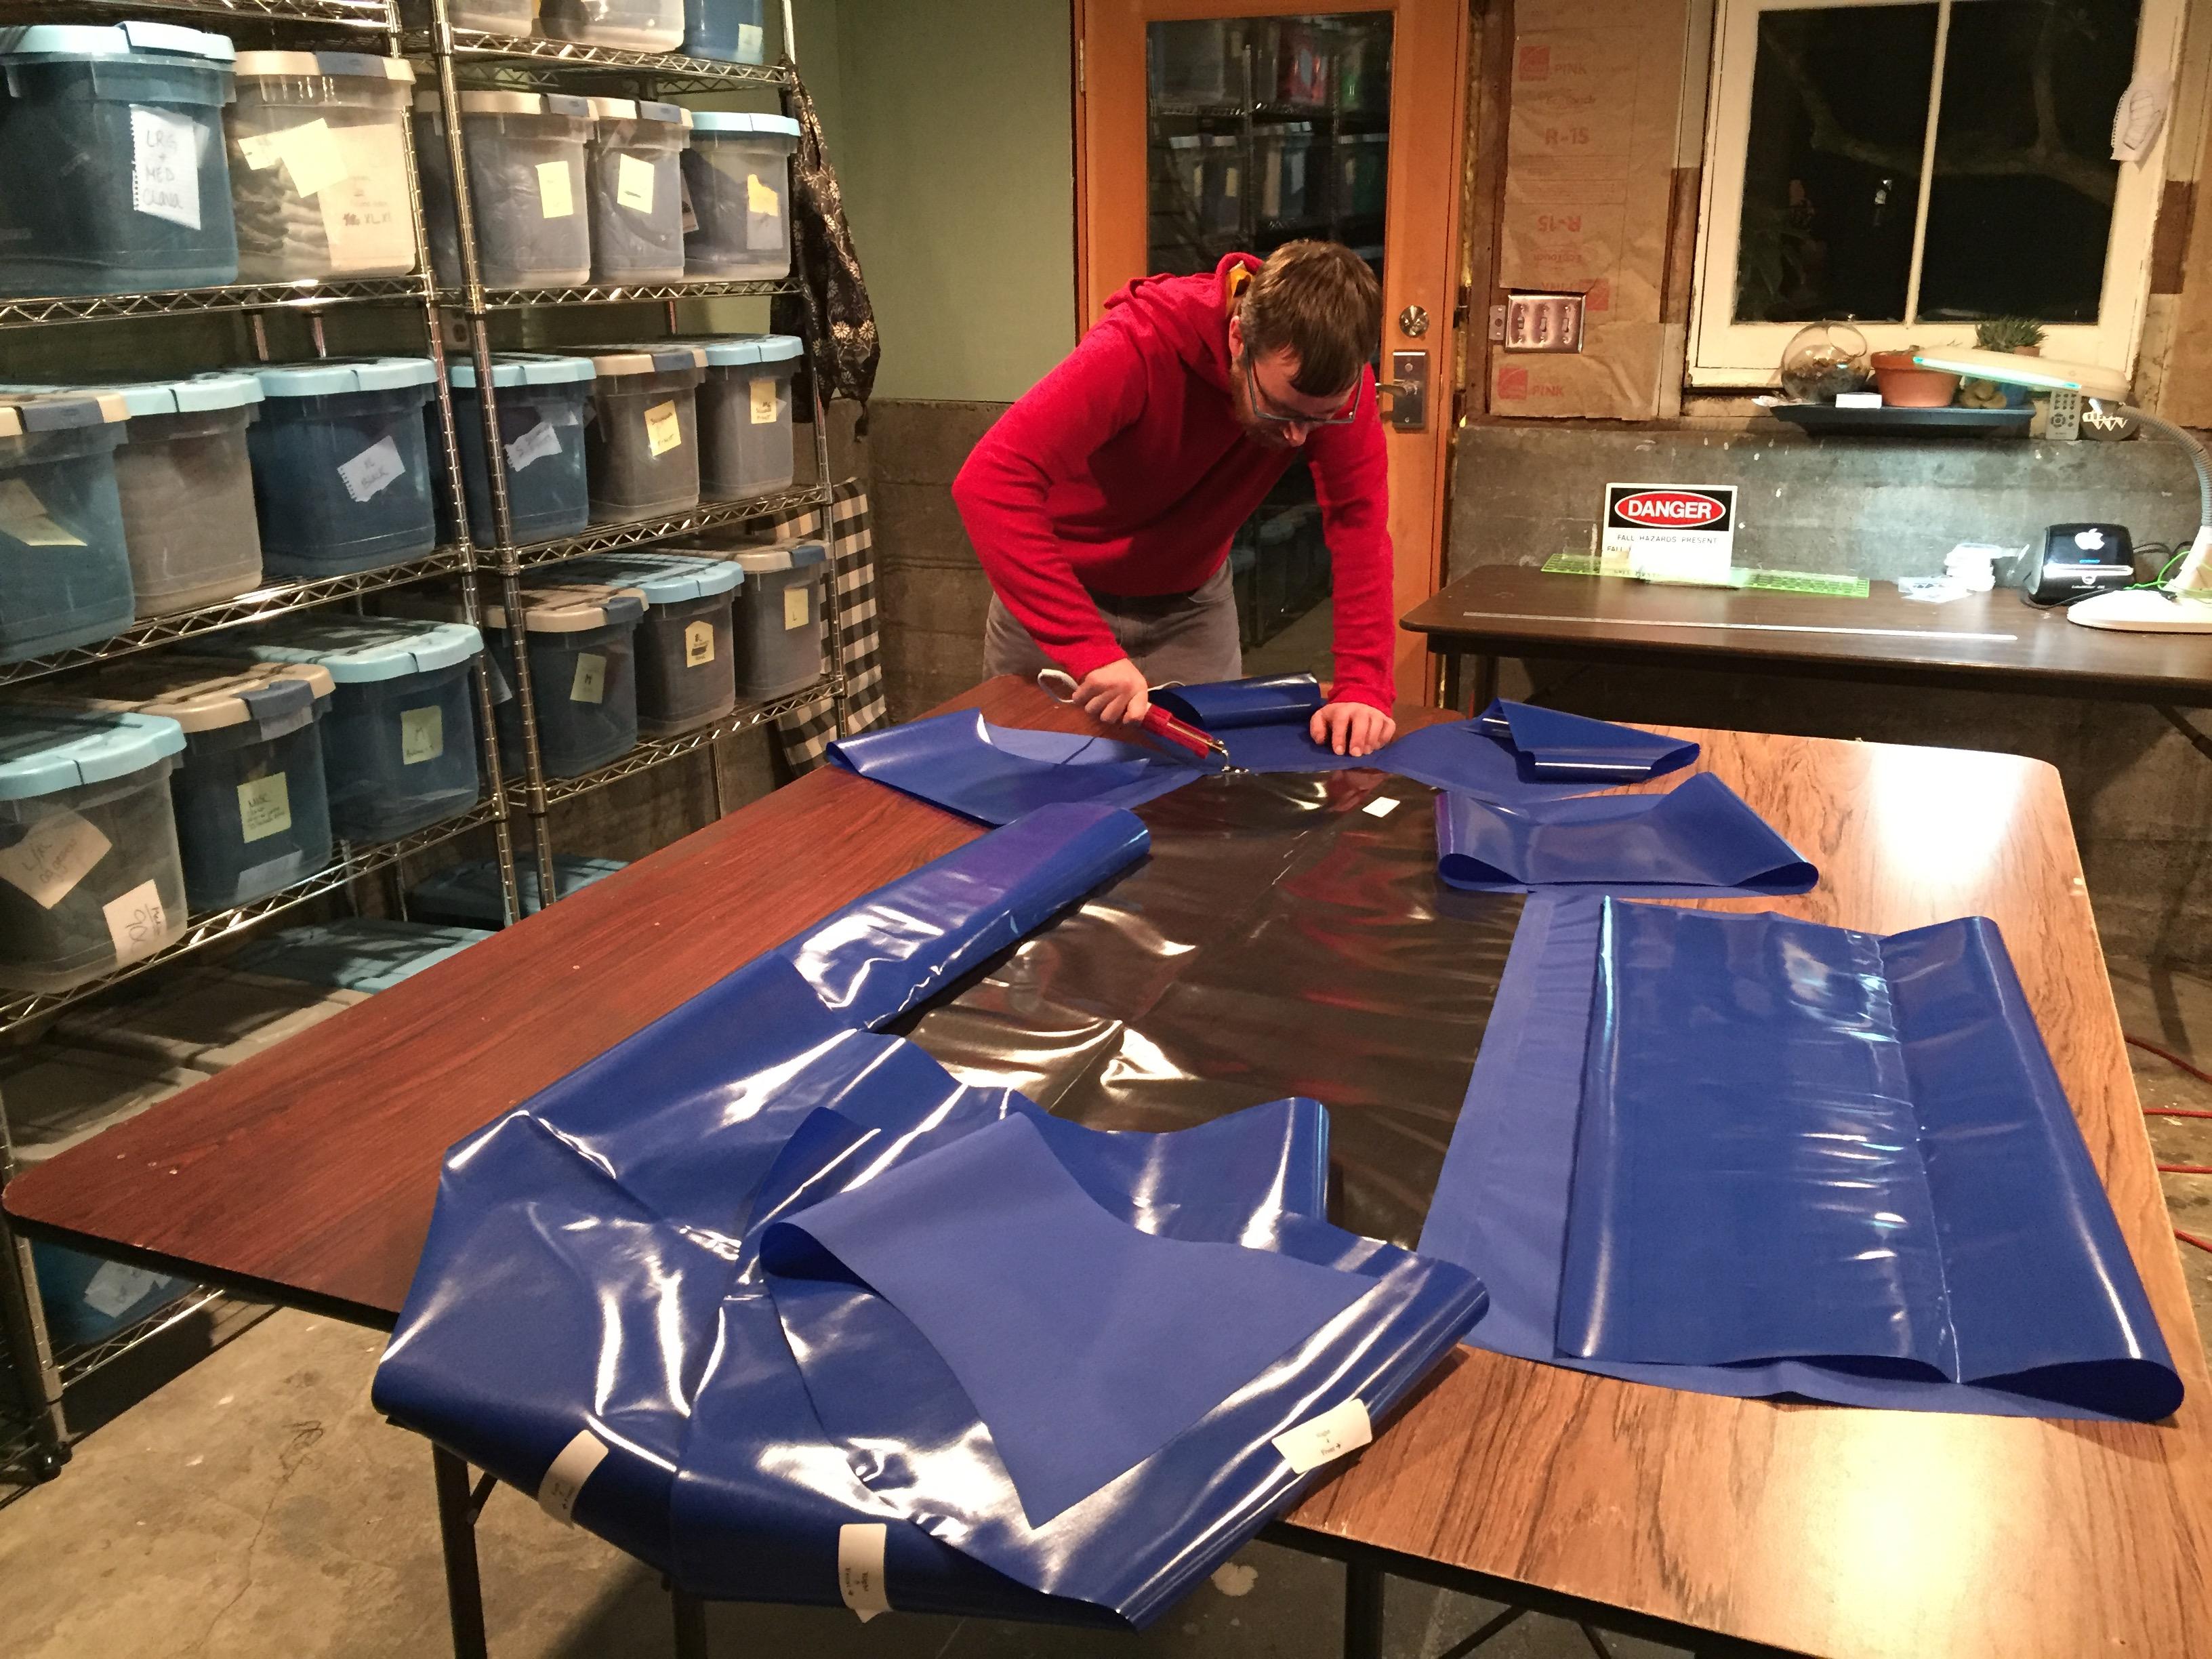
-
This reply was modified 9 years, 4 months ago by
-
January 1, 2017 at 5:16 pm #2095Matt (Admin)Keymaster
@Tomi made this very cool video of his DIY Packraft made from plans! Awesome!!
-
December 14, 2016 at 9:33 pm #1966Matt (Admin)Keymaster
Check out Marco’s boat in the water: Facebook album
-
-
AuthorReplies
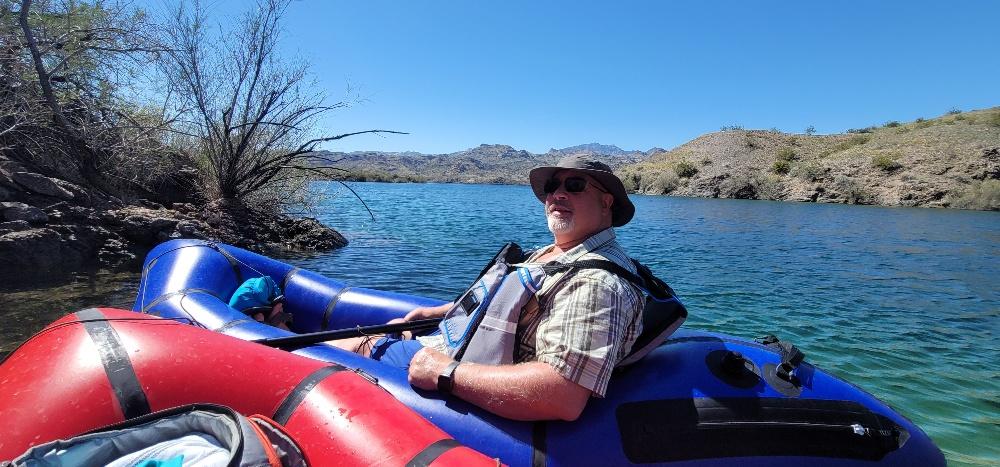
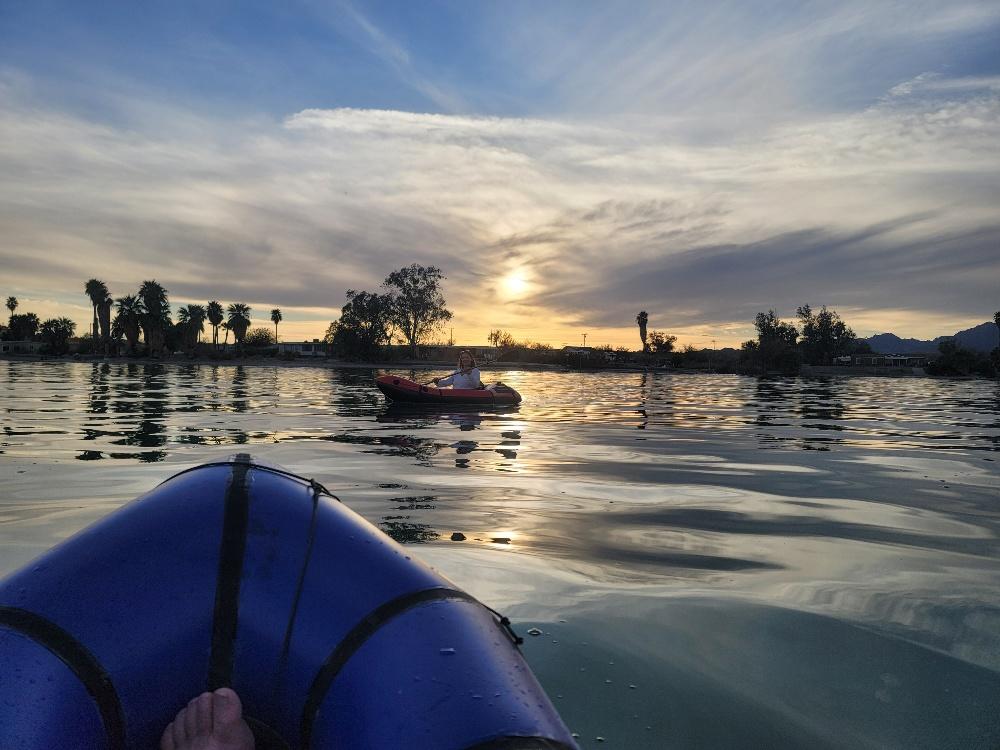
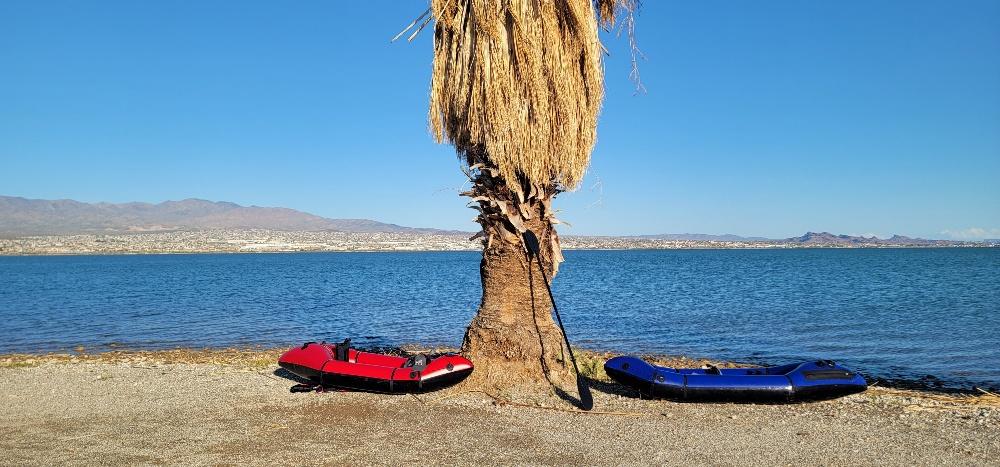

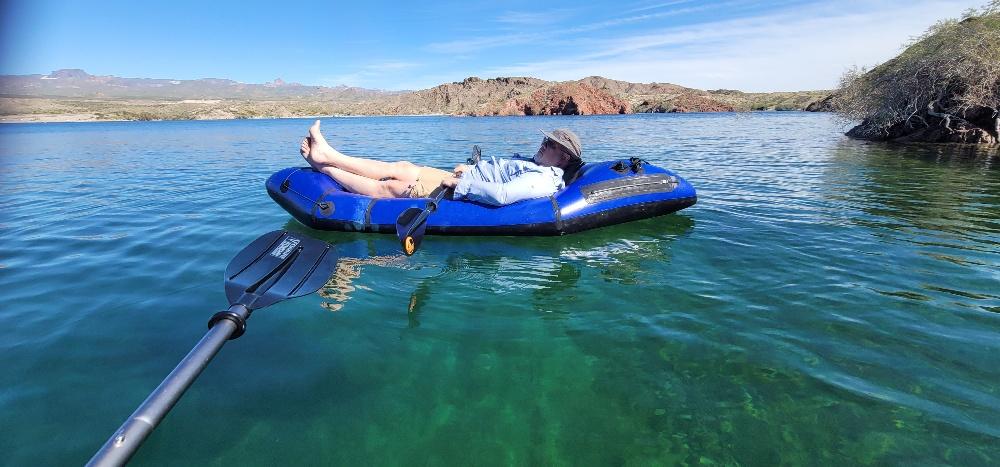
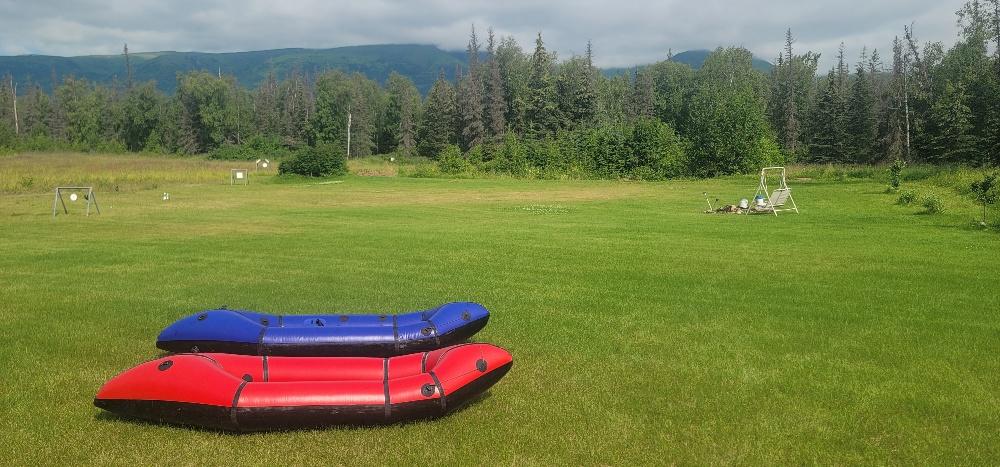
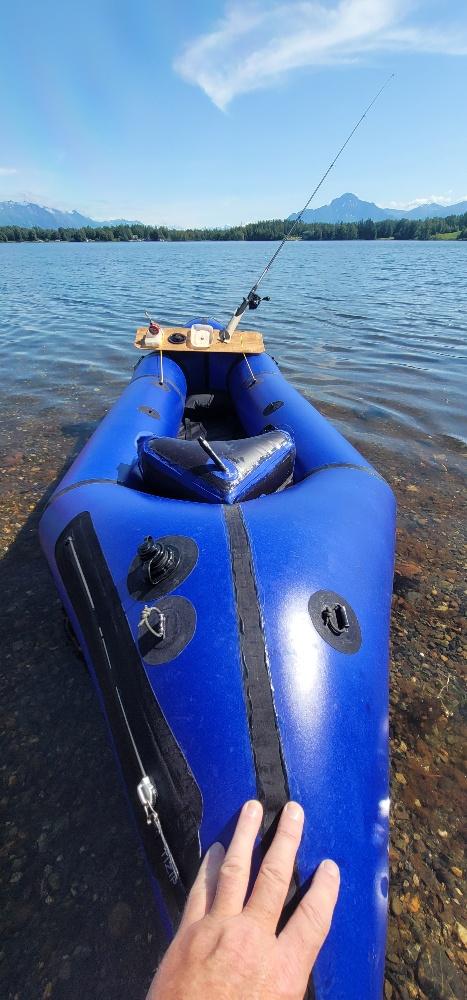
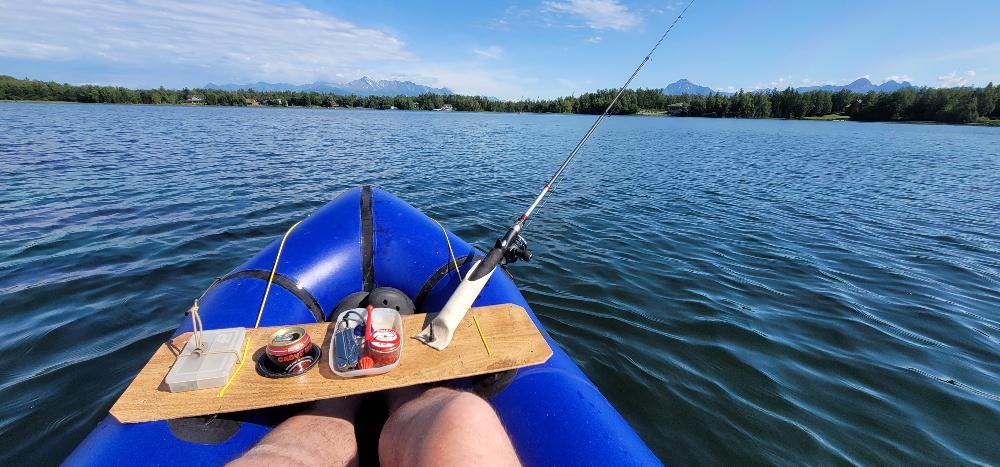
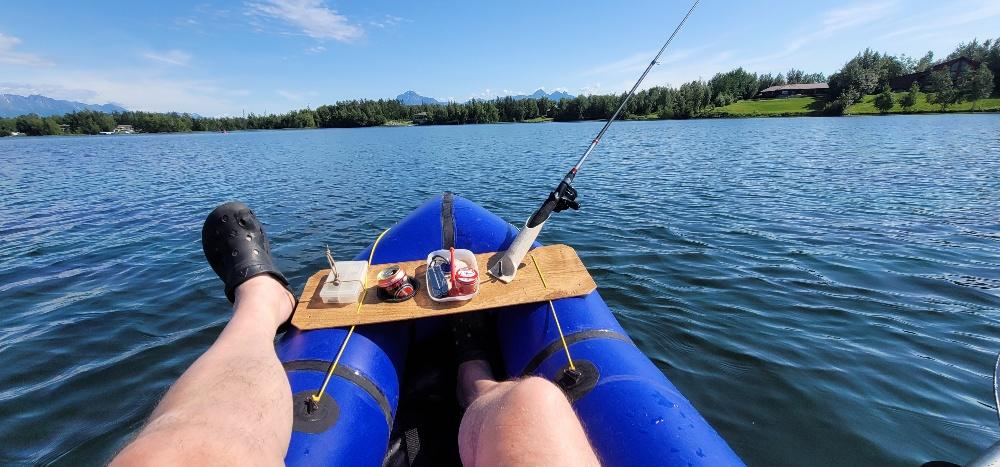
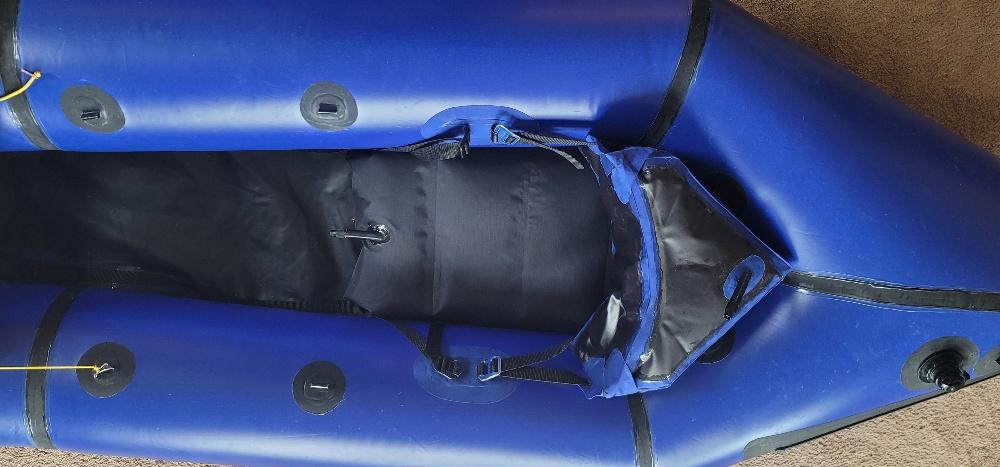
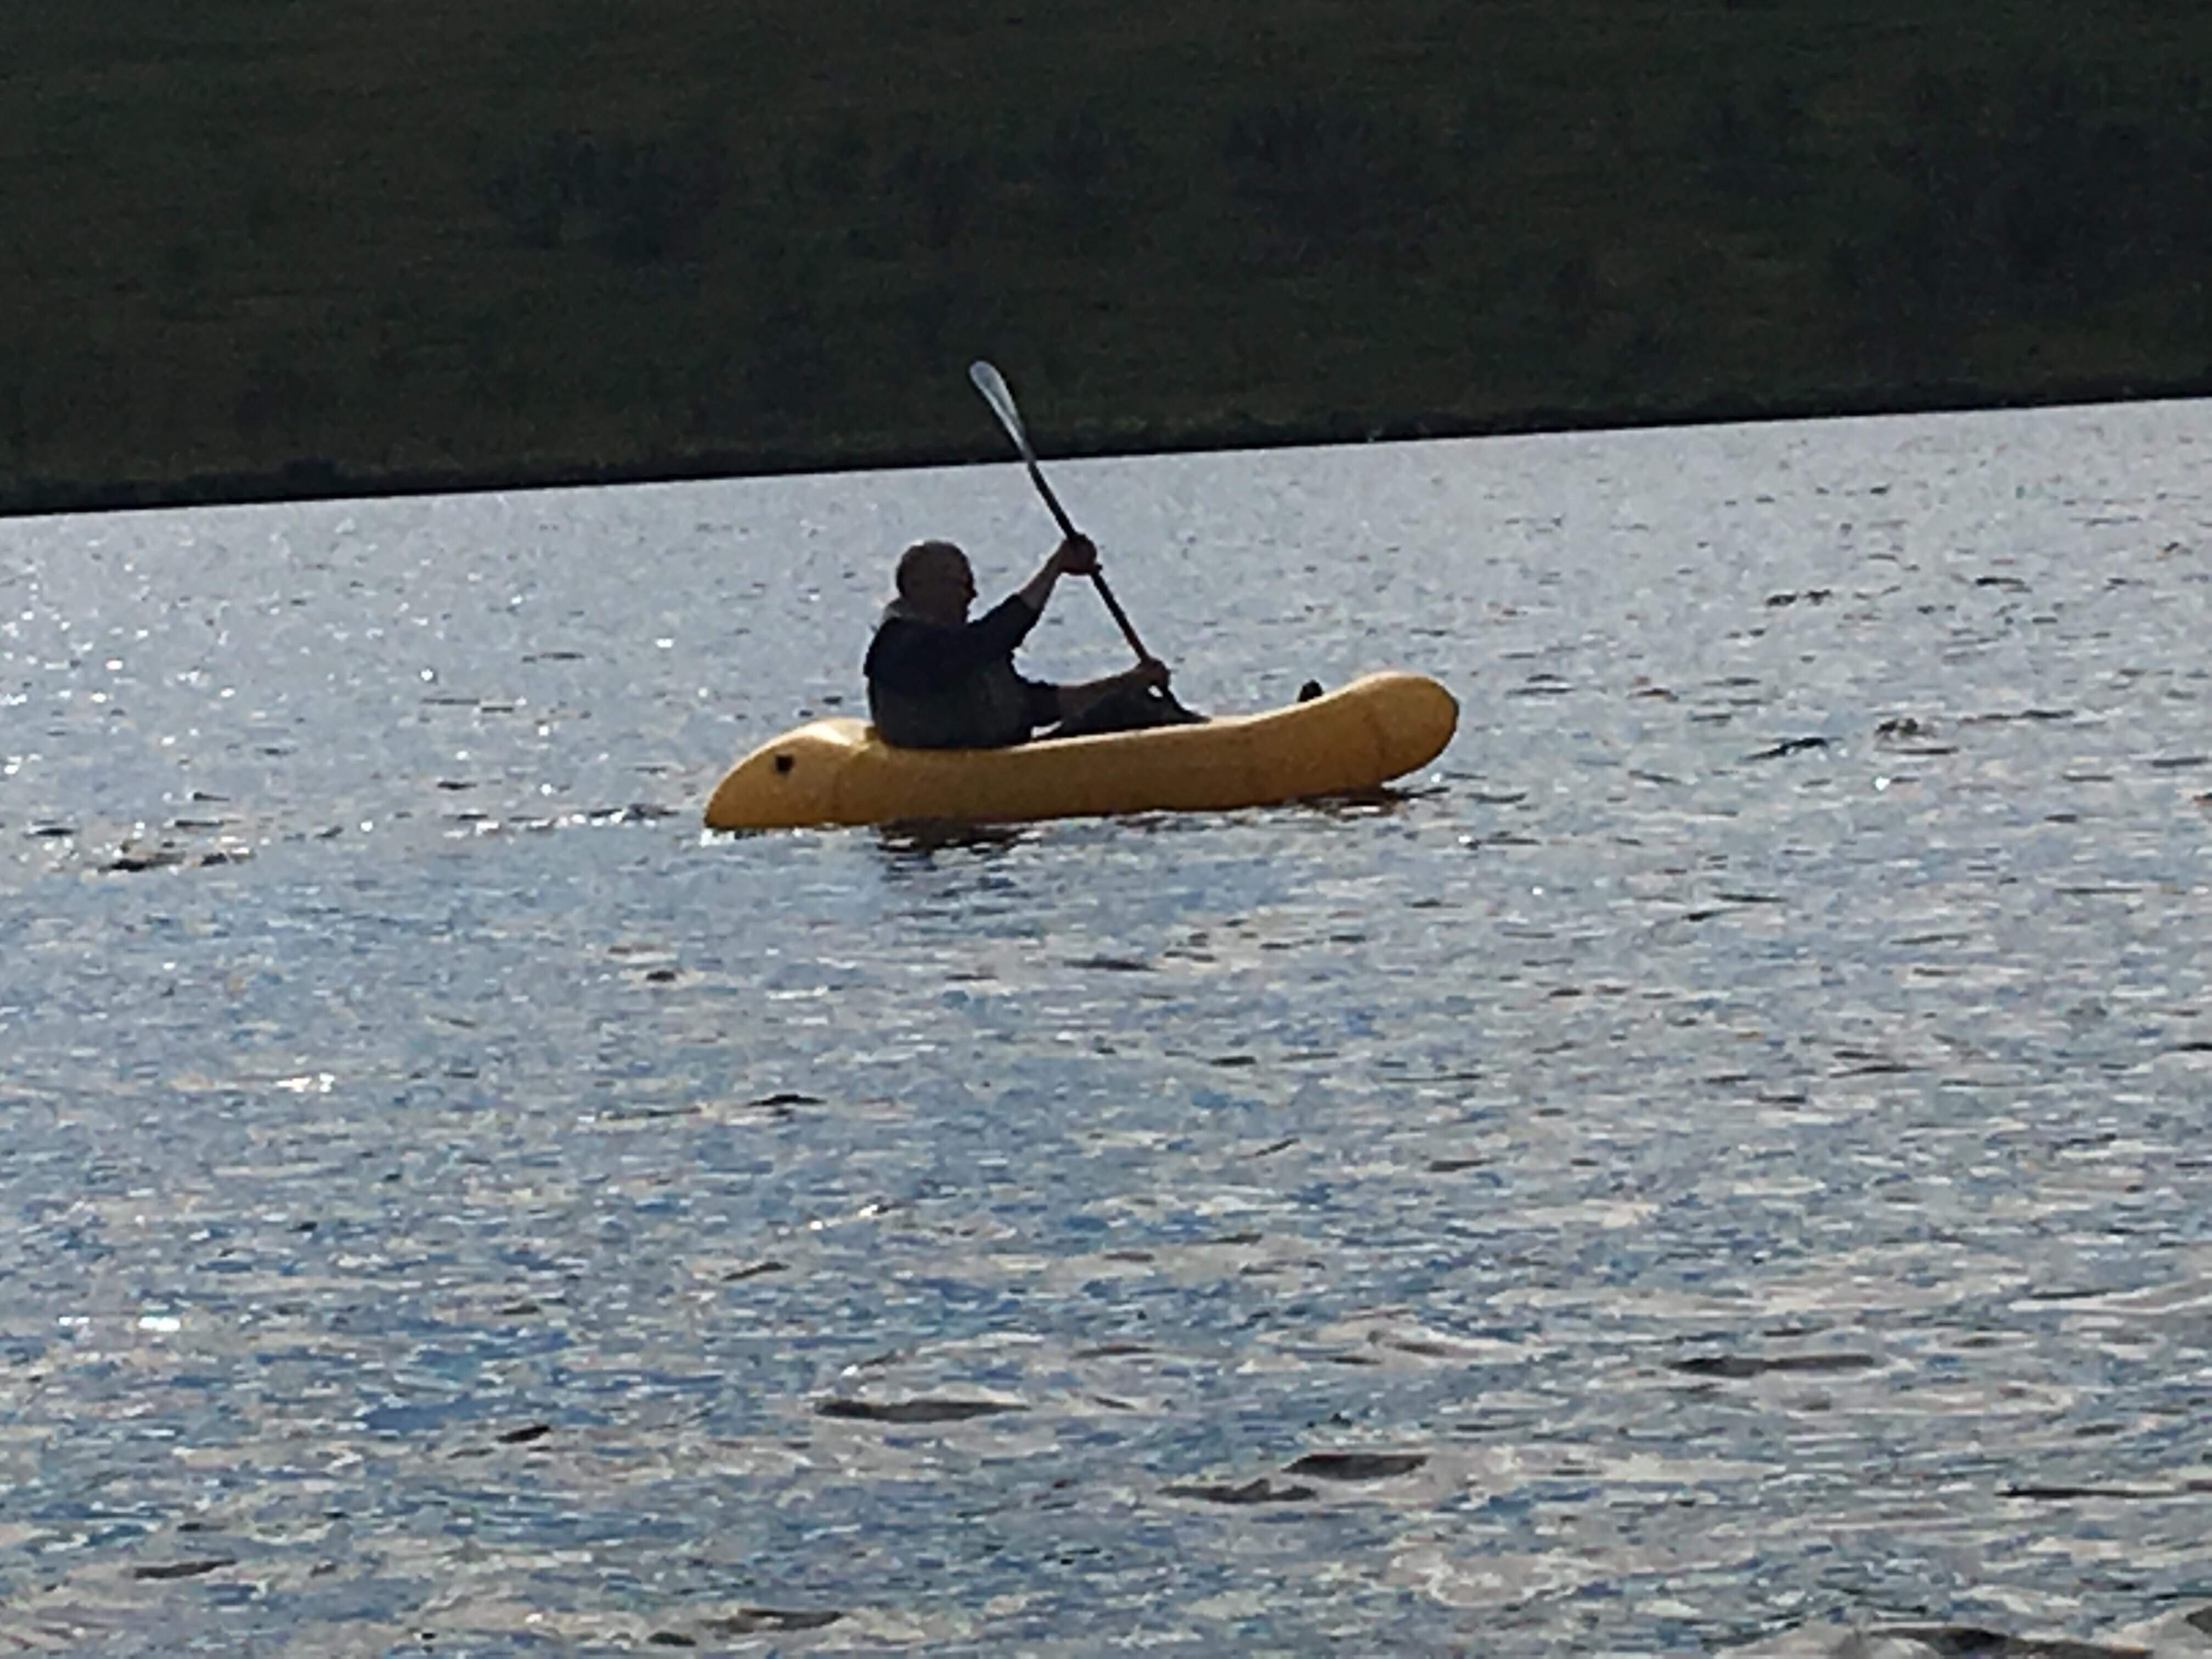
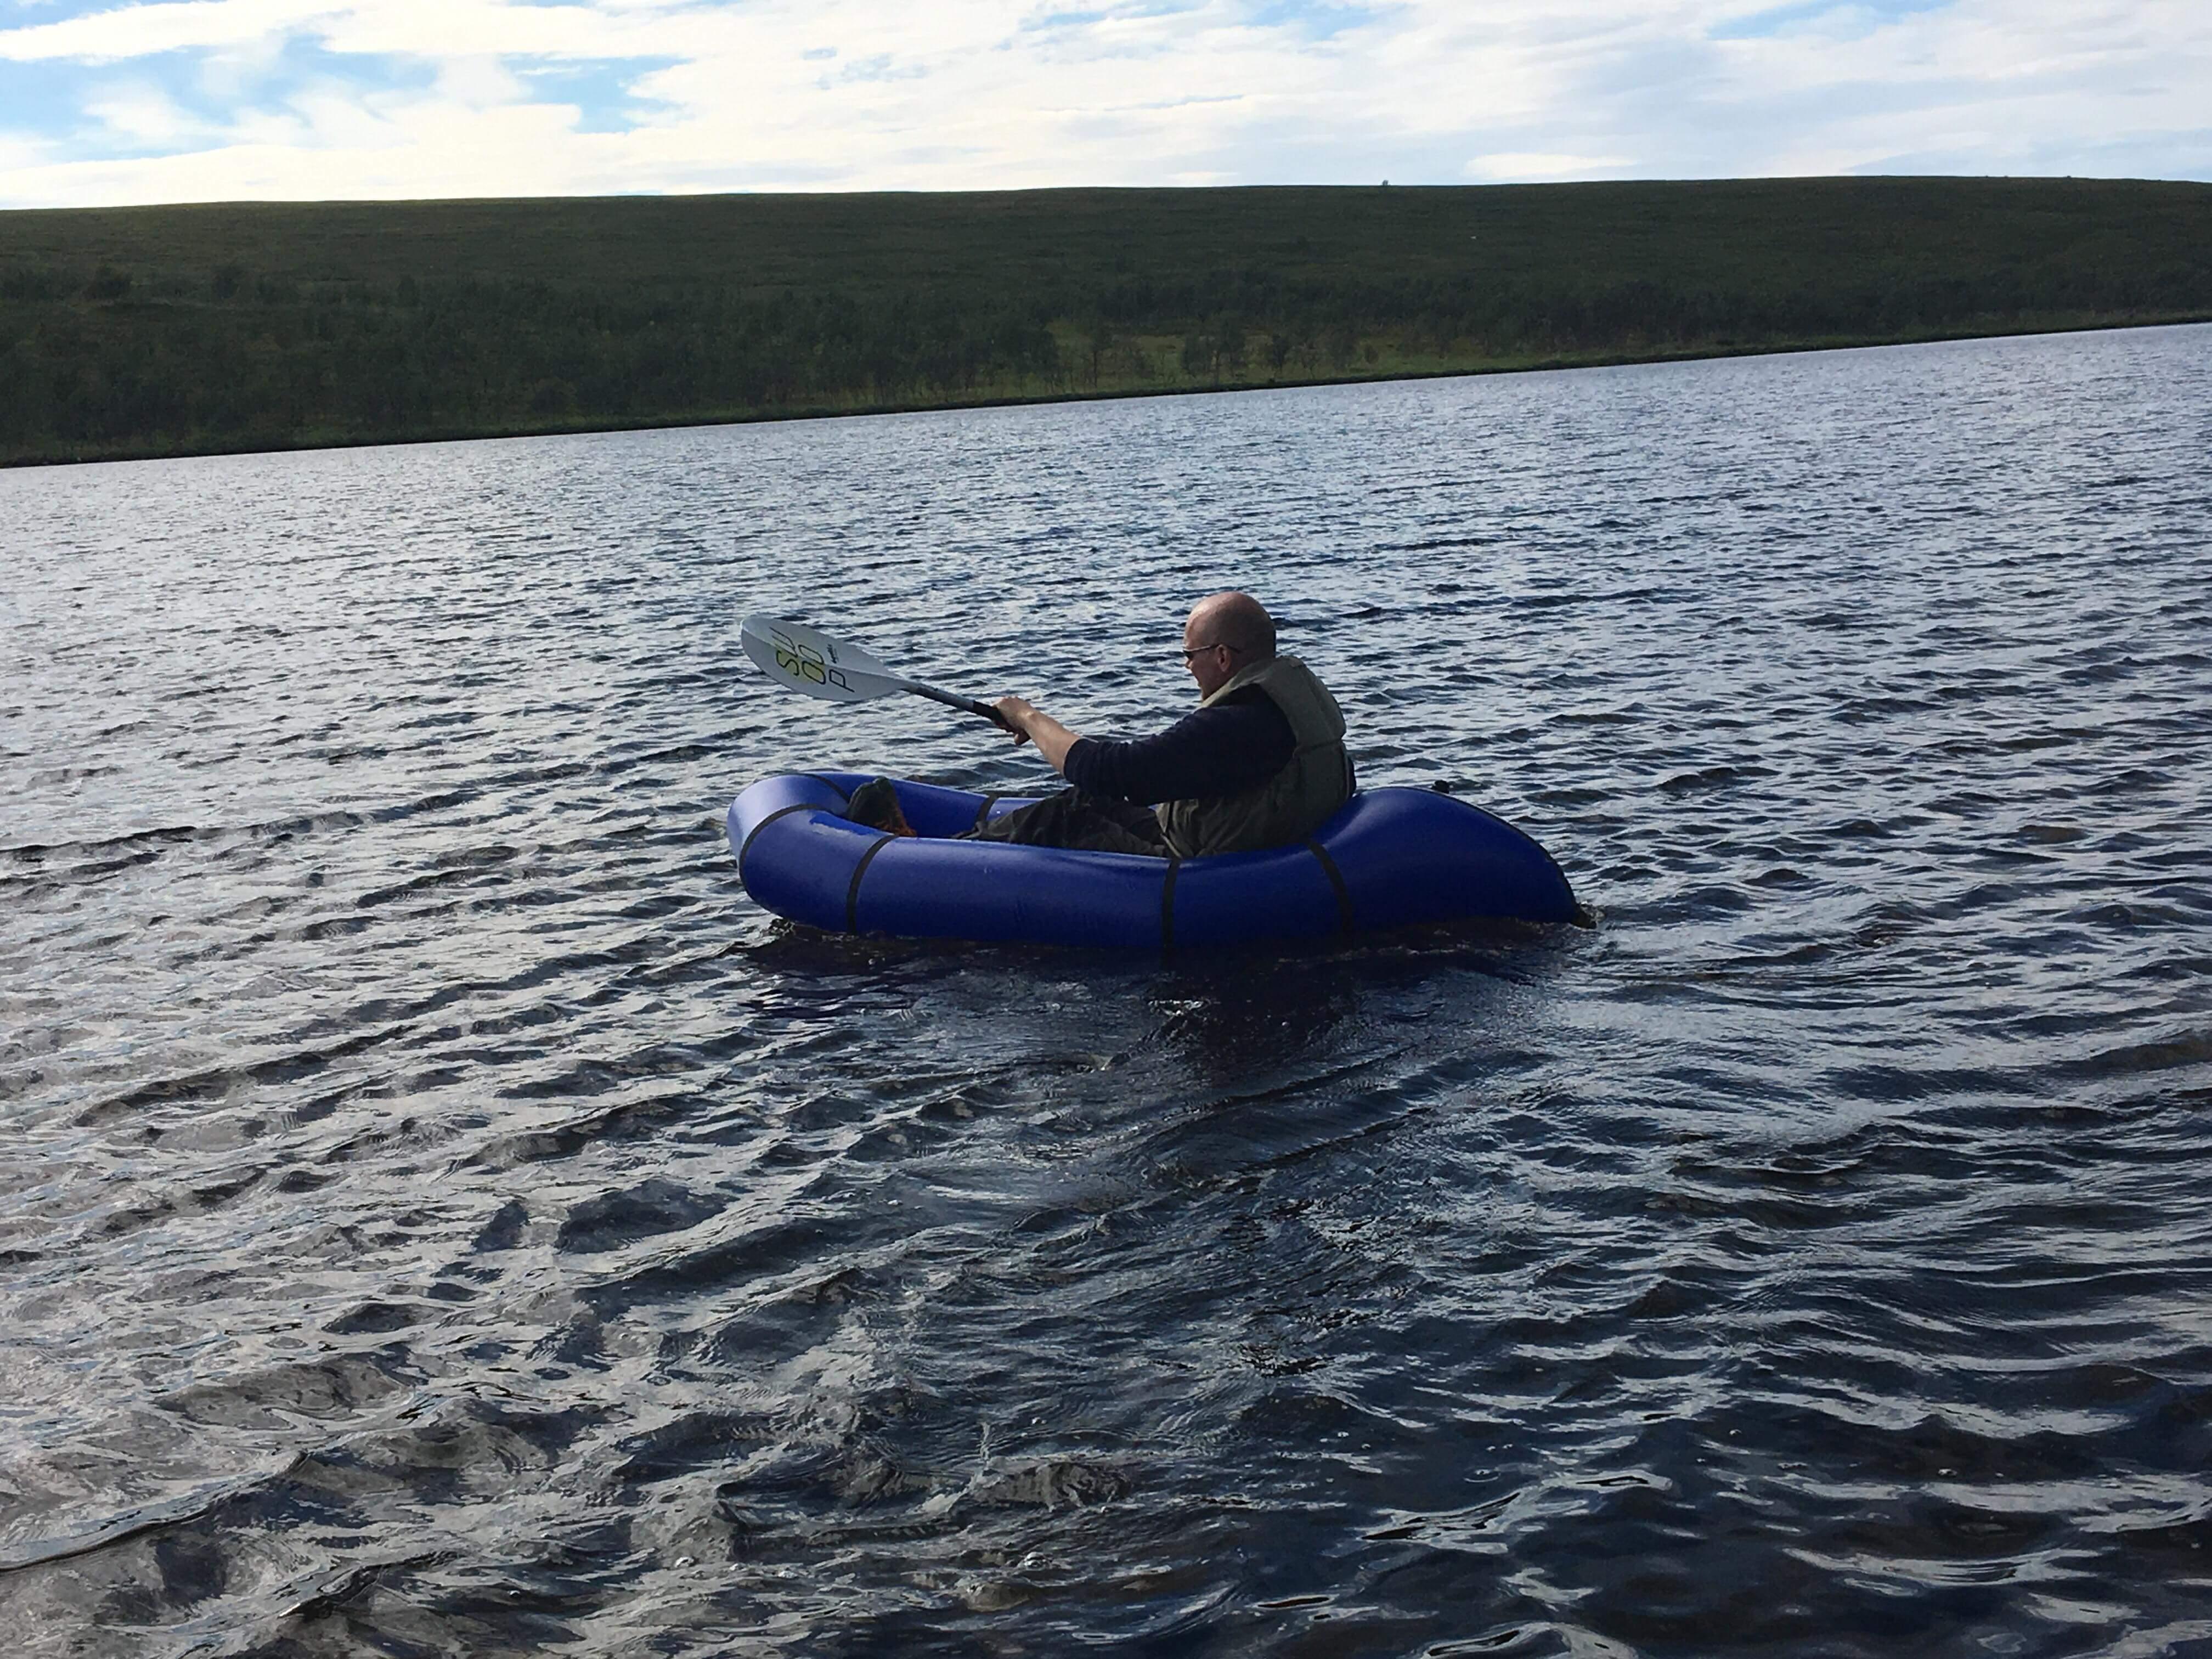


- You must be logged in to reply to this topic.