The following build report was submitted by Ken S. Some of the text might be confusing to someone who does not have a kit yet or is not familiar with the instruction pages, but Ken did a great job assembling his packraft and his perspective will be valuable for anyone starting their own project. I have made some edits for clarity and formatting, but the text and pictures are Ken’s. My comments are in italics, and I added captions to the photos. – Matt
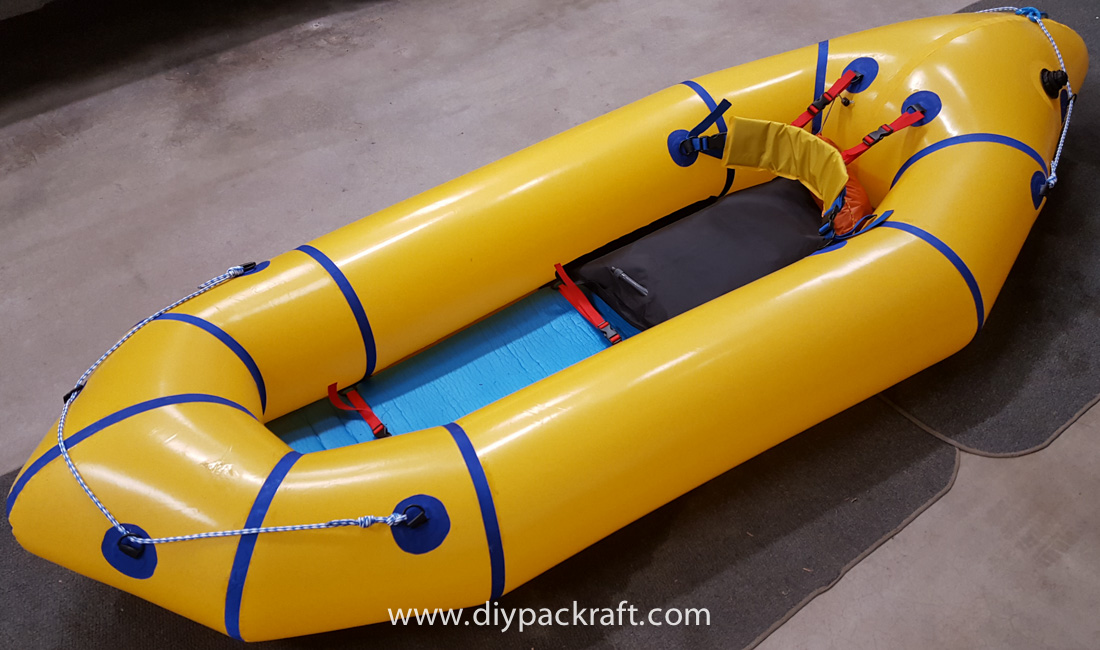
My V3 DIY Packraft kit arrived on December 11, 2018. I was eager to start building but restrained myself and, instead, pored over the construction videos and forum posts looking for tips, tricks, and other ideas before starting my DIY Packraft. I can tell you, without the videos and everyone else’s online help, I would probably have made so many mistakes I would have had to start over with a new kit.
Thanks to all of you who have been so gracious as to capture video, submit drawings and plans, and supply forum information. You have all contributed to my success and I’m sure to others. I’d like to share some of the things that worked well for me and some that didn’t. I’ll also share some of my jury-rigged tools that I concocted in my DIY Packraft construction.
Living in the U.S. the first thing I did was to find a good app to convert metric distance to English (old timey) units. That gave me an idea of rough measurements in units with which I am familiar. [I try to provide all measurements in both metric and imperial units – if I’ve missed any, please leave a comment on the appropriate page. – Matt]
Based on someone else’s post, I purchased a metal, cork-backed ruler that had both metric and English units. I used it extensively and soon found myself working completely in cm and mm, as well as using it as a backer for welding tube/floor. I checked all my measurements at least twice, sometimes more.
With older eyes, I made sure I used a good bright head lamp for most of my work as well as strong shop lights.
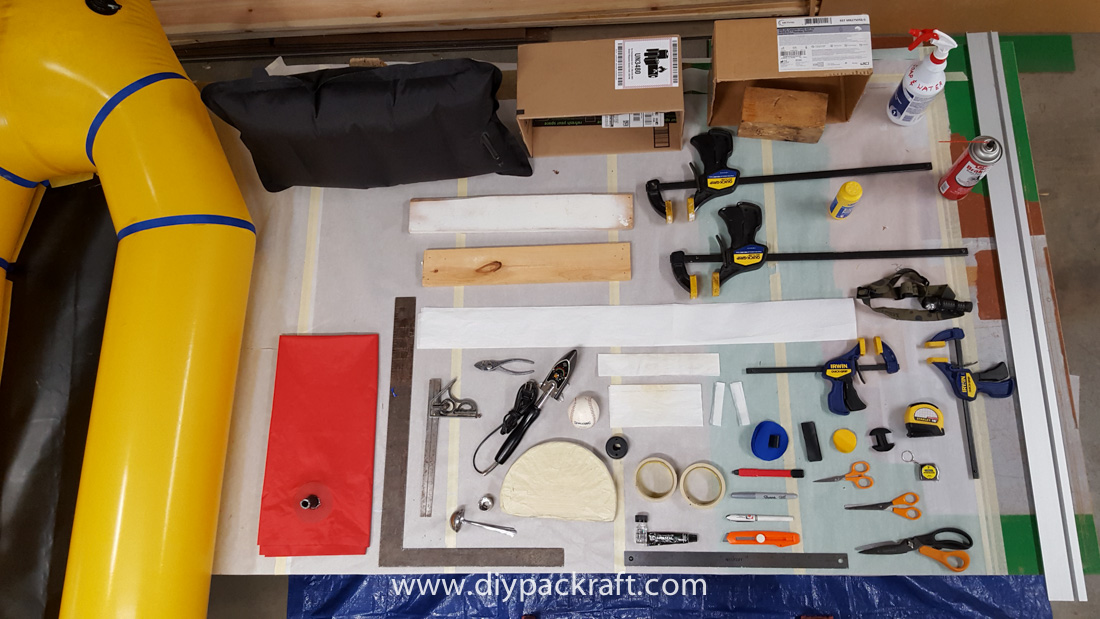
Irwin Quick Clip clamps were used to keep parts from moving around on my work table and to apply pressure with long “clamp boards” on some of the locations where I applied Aquaseal. [Ken used Aquaseal throughout. I use Seam Grip for most sealing jobs – it’s less viscous so it spreads farther, plus you get 1 oz (28 g) in a tube for the same price as 3/4 oz (21 g) of Aquaseal, and it’s basically the same stuff.]
My work table was a 4’ x 8’ C/D grade plywood sheet screwed onto 5 saw horses. I covered that with a sheet of Masonite (smooth side up) that I had left over from another project. I then covered the entire work table with cooking parchment paper as suggested by Matt and others.
A good aluminum straight-edge at one end of the Masonite table was used to cut my seam strips (I ordered a different color seam strip than normally supplied so I had to cut my own). I also used the straight-edge to cut tie down straps from the 1000D floor material as well as to square up the edges of scraps. A good, sharp box cutter makes a nice clean cut.
I took my time in understanding the layout and in marking the edges with a silver Sharpie at 4 cm distance from the edge of the floor. One thing I learned here is that on one occasion I marked a solid line of silver Sharpie. When I welded the seam it seemed as though it took more heat and time to melt the TPU under the solid line than it did at the dotted line. Thus, for the remainder of the construction I used only dotted lines.
The semi-circular wooden backer form as developed by Bruce and another person worked very well for the most part. I covered it with masking tape, sticky side up. I had to replenish the sticky side up tape 3 times through the project. For this project, masking tape might be your best friend.
Work was started by installing both #3 tube sections. I planned to work forward from there, then do the back sections. After the first few welds (and mistakes) I realized I would probably have scores of leaks to chase. I decided to take Matt’s advice and apply Aquaseal to the inside of all the section seams. Thus, I worked in a CCW direction so that it would be easier to apply the Aquaseal to each previous seam completed.
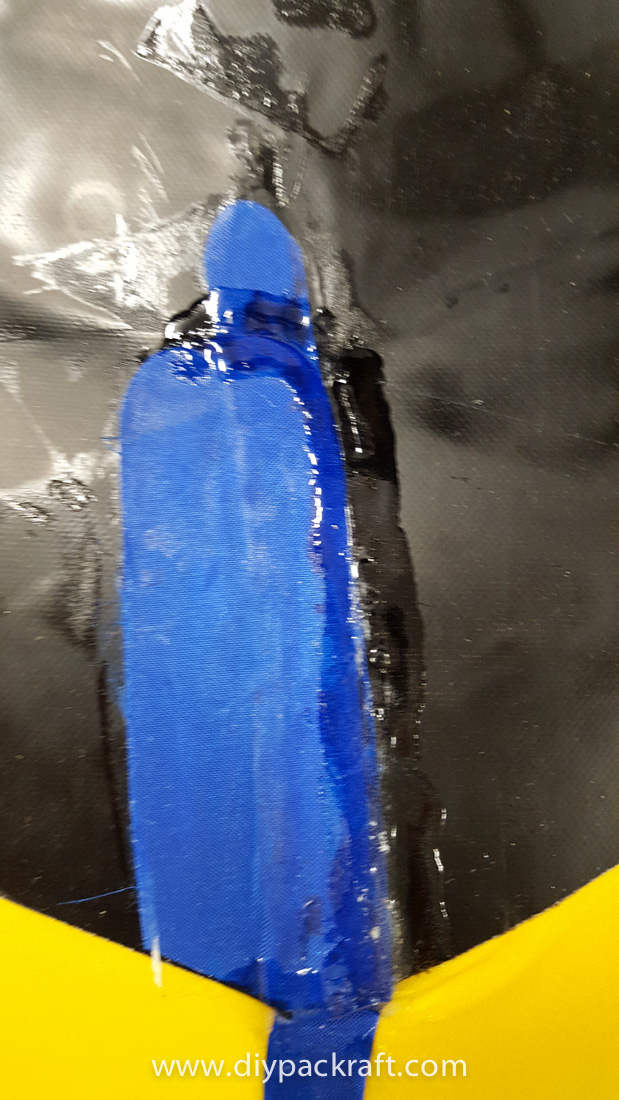
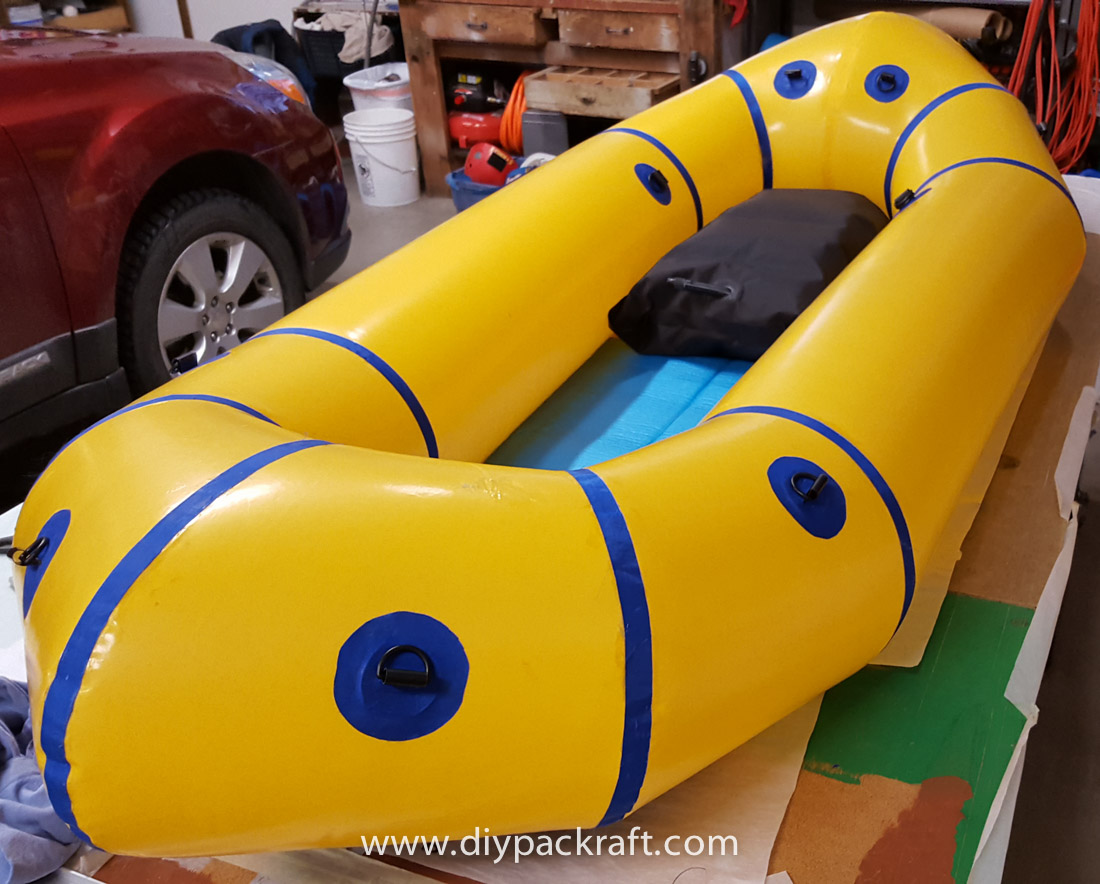
As to applying Aquaseal to the inside of the seams, I was pretty sloppy about it and my final product shows it. Aquaseal shows through as dark splotches where I inadvertently applied it to the single ply material on either side of the seam on my yellow raft. On a dark colored raft the splotches probably would not show through [they do]. Still, I am glad I sealed the inside of the seams because I’m sure it reduced the leaks. I used the cure accelerator mixed with the Aquaseal. That provided a 3-4 hour cure time rather than the 24 hours required without the accelerator.
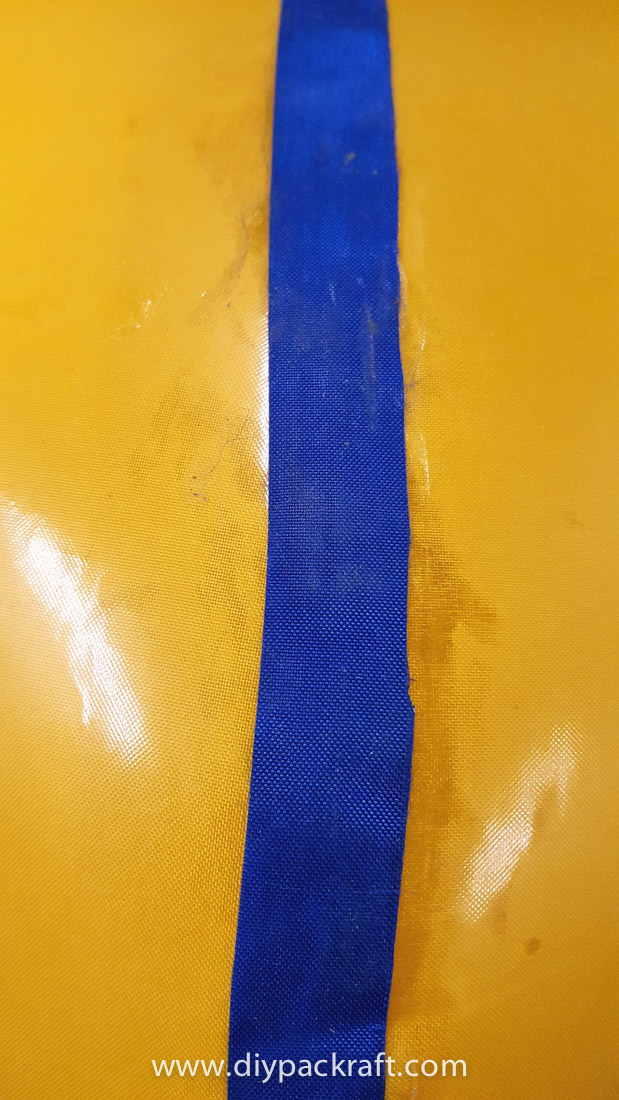
I used 2 cm (3/4”) wide seam tape for joining the tubes together. I believe I should have used a full 25 mm (1”). Matt has said that wider seam tape is more prone to wrinkle but if I had used 1” I think I would have had an easier time welding the seams with the wide iron. [The V3 kits include black seam strips 23 mm wide, but Ken wanted blue seams so he cut his own.]
After failed attempts at using the “cardboard A-frame” to hold up the tube fabric, I used a small shipping box instead. A heavy block of wood in the box helped to keep it from toppling over inside the tube. I had a couple of them that were used to keep the tubes open while welding as well as to hold the tubes open while the Aquaseal was curing. For my final rear center seam I was able to squeeze my camera tripod through the “slit” hole after applying the seam tape on the tube material. The tripod supported the seam while the Aquaseal cured.
Here’s a chuckle. I normally wore a polished wool sweater with thumb holes so that I could press down on the fresh welds with the heel of my hand. One day I wore a new flannel shirt – bad idea. The fuzz from the flannel embedded itself in the melted TPU. Now, I have fuzzy raft. [Haha! A leather glove works well for pressing on the hot fabric, as does my new favourite tool – a silicone roller.]
One person mentioned using a toilet paper roll to support the fabric while installing the Boston valve. The valve fit perfectly in the TP roll tube. However, next time I would cut a piece of cardboard to lay over the TP roll. The TP is too squishy to provide good support at the outer portion of the reinforcement patch while welding.
Thanks for the advice to mask off the threads on the Boston valve. The valve plastic melts easily with the iron and the melted plastic transfers to the iron. I noticed it when welding the back side reinforcing patch on the Boston valve. I didn’t notice the melted plastic on the iron until it started showing up on the yellow reinforcing patch, staining it a smeared black. I definitely made sure to mask the Boston valve threads on the front side, as well as cleaning the melted plastic from my iron.
After doing some of the seams I wished I had a smaller head on my iron. I had purchased the Coverite Black Baron hobby iron locally. The iron, when purchased, only heated to about 375°F. Thanks to whoever showed how to adjust the temperature on the iron [thanks, Bruce!]. I adjusted mine to heat to about 405°F – 410°F. The large shoe on the Coverite Black Baron was great for the tube/floor welds but I made a lot of mistakes on the seam welds because it was just too big. On another raft I would choose to use an iron that has a shoe of only .75” (2cm) wide [the “leather irons” from Aliexpress.com are just about the perfect width, but do require a bit of modification]. I think it would be better to be more accurate on the seams than to save time on the large welds.
Here is a big mistake I made. I really messed up with the floor slits. It seems intuitive that they should be curved and joined edge-to-edge but for some reason I didn’t pick up on that. So, I ended up with the slits at joints 1/2 and 4/5 with the floor flat and the slits separated by nearly their full open width. It wasn’t until I was working on the 1/1 slits that I realized the slits should curve up and join edge-to-edge. I was able to do it partially on the bow joint and actually did it right on the stern joint. [I’ll add a note to the instructions making this clear from the beginning.]
Matt’s suggestion of using binder clips to line up the stern did not work for me very well so I tried a different method. First, I folded the raft in half length wise and clamped it down so it wouldn’t move or unfold. Then, laying the stern fabric flat (per Matt’s pics) I marked the mis-match with a carpenter’s pencil before cutting the excess away. The method seemed to work well for me. [I’ve used this method on recent builds and it works well for me too.]
The stern joint was difficult for me at the tight “point” of the joint. The wooden form worked well until I was about 4” (10 cm) from the point. At that time I sealed the inside with Aquaseal and let it cure. Then, I got to the stern point. The wooden form didn’t work for me. I tried many different items to get the right thing to work. What worked for me was a baseball, for much of the stern point. As the radius became tighter I used a small kitchen ladle with a 2:1 diameter/depth. Finally, where the stern point is sharpest (4 cm diameter), I used a 1 ¼” (32 mm) outside diameter socket from my tool set. I wrapped all items with masking tape, sticky side up. For the approximate 4” of the stern point, I was only able to weld about ½” (10 mm) at a time before having to move the form.
After getting around the stern point I finished the 210D seam with the wooden form then used Aquaseal on the inside again, applying it down to, but not touching, the 1000d floor material. As mentioned, I kept the tube open by using my camera tripod (4” diameter) to keep the Aquaseal from touching any other inside parts.
Finally, I extracted my tripod and welded the seam tape to the floor material using the baseball to form the curve needed to bring the edges of the slit together (the way they are supposed to be). I completed the aft seam seal by applying Aquaseal to the inside of the aft slit by reaching in through the Boston valve. I made sure to mask off the threads on the inside of the valve with tape first. Then I inflated the raft enough to keep the tube walls from contacting the freshly applied Aquaseal.
At final inspection of my work I found two of the floor slits that were barely covered by seam tape. I chose to make a 4 cm wide patch that I overlaid on the narrow side of the slit coverage. Half of the patch I welded to the floor material. The other half I attached to the seam strip using Aquaseal.
At the first inflation a couple of spots “popped” apart, having been lightly stuck to each other where the internal Aquasealed seams rested on each other. Thanks, Matt, for suggesting putting some talcum powder inside the raft to coat the Aquaseal seams so they don’t stick to each other. I used about a tablespoon of talc, blew up the raft, and vigorously shook it to spread the powder around inside.
I knew my raft had leaks because it went saggy just an hour after inflation. I could not hear any hisses though. A water/soap test revealed three leaks on the bottom at seam/tape/tube joints, two more in the tub side, again at seam/tape/tube joints, and one final leak where I accidentally welded the tube to itself that, when re-melted to pull it apart, tore off some of the TPU. A subsequent leak test revealed one more floor leak at the stern seam and three very small leaks in the tub at the seam/tube/floor joints. I decided to use Aquaseal on all the tube joints rather than keep chasing them for a long time. One problem with the water/soap test is that with the typical mixture of 6-10 drops of soap per quart of water, the mixture flows off the TPU skin so fast that often the bubbles can’t be seen.
After first repairs, the raft would hold air with a tight skin for about four hours before starting to get a bit softer. I did three more water/soap leak tests and could not find any other leaks. Finally, I filled the entire tub of the raft with water then poured in about 2 teaspoons of liquid soap (slowly add the soap to the water to prevent suds frothing (when an air leak occurs it will still bubble but you won’t have to try to search for them in already sudsy water). Then I used a 1 ½” paint brush to paint all the seams with the water/soap mixture. I found one small bubble at a place where I had burned the TPU next to a seam. Soon, though, it would not bubble again. Knowing about where it was I dabbed on some liquid detergent straight from the bottle. That was the ticket – the bubbles showed up well. If I still have leaks after fixing this one, I will have to paint the entire raft with liquid soap to find them. Update #1: I did actually have to paint most of the raft with a mixture of liquid dish soap and water (1:1). I used the paint brush to coat all the seams, joints, and all areas of melted TPU where I got careless with the iron. The soap slurry showed me 6 more indications of leaks, most of which were in areas of melted TPU on the skin or next to seams. Remember to wash off all soap and dry the fabric before making repairs. Aquaseal probably won’t stick very well to the soap residue. So far I have used 2 ½ small tubes of Aquaseal. I should have been more careful with the iron. Update #2: I still have a leak somewhere but it only takes 2-3 breaths to top it off after 12 hours.
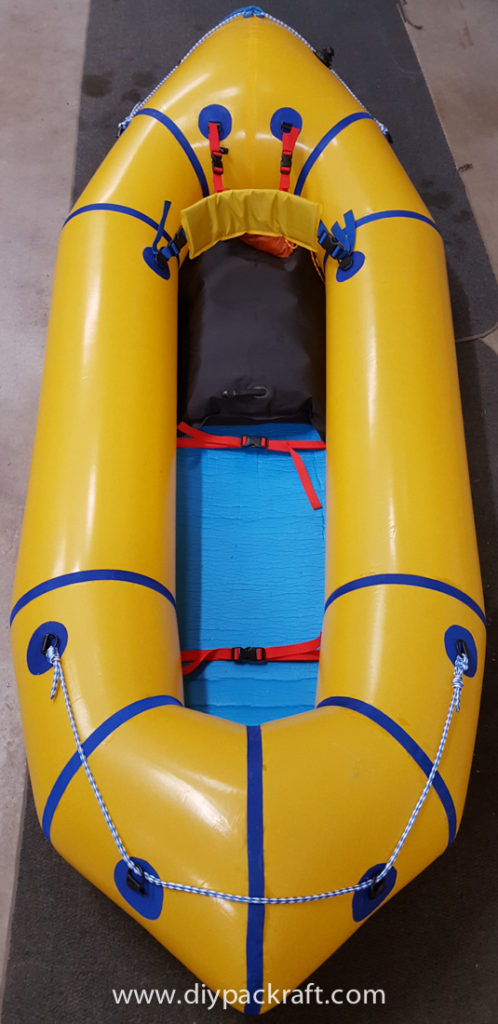
I have made tie downs per method #3 on the tie down page using plastic D rings ordered from Strapworks.com in Oregon. I used a large tomato can for the 3.5” (80 mm) diameter patches. For the 2” backing patches and “H” reinforcers I used a 2” (50 mm) hole saw for the pattern.
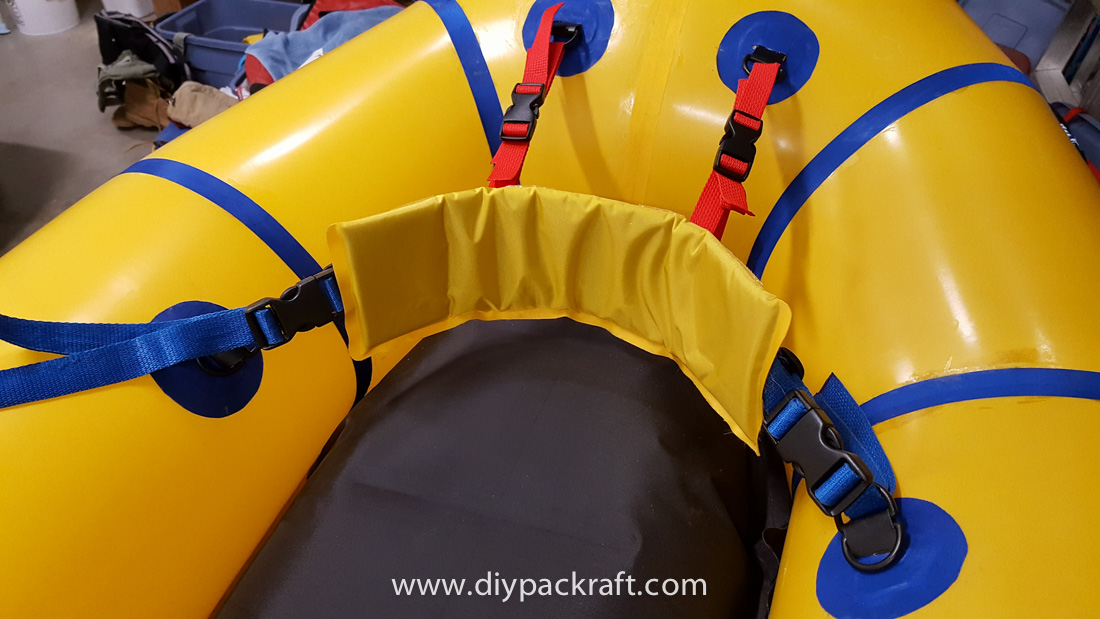
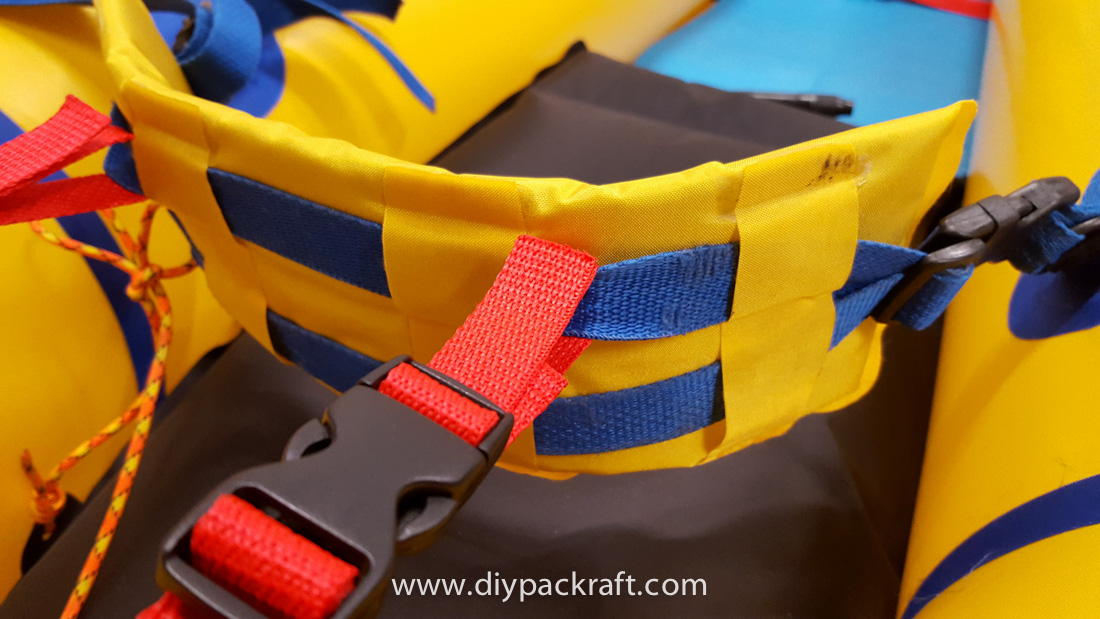
Building a back band was fairly easy but took some extra time. If I had made one with TPU side out I could have welded scrap material strap loops (like belt loops). The TPU side would shed water better. But, I chose to make it with fabric side out. It will soak up more water but will breathe easier against my back to reduce sweating in warmer weather. Therefore, I had to use Aquaseal to glue on the strap loops. I basically made a rectangular pouch and stuffed it with a piece of my old blue camp pad. After having tried it while sitting on the garage floor, I think a taller seat back would be much more comfortable than what I built. [It may be more comfortable on the water because the floor will sag and you’ll sit lower relative to the side tubes. You could also attach the red straps to the bottom blue strap instead of the top – this would raise the back band a bit.]
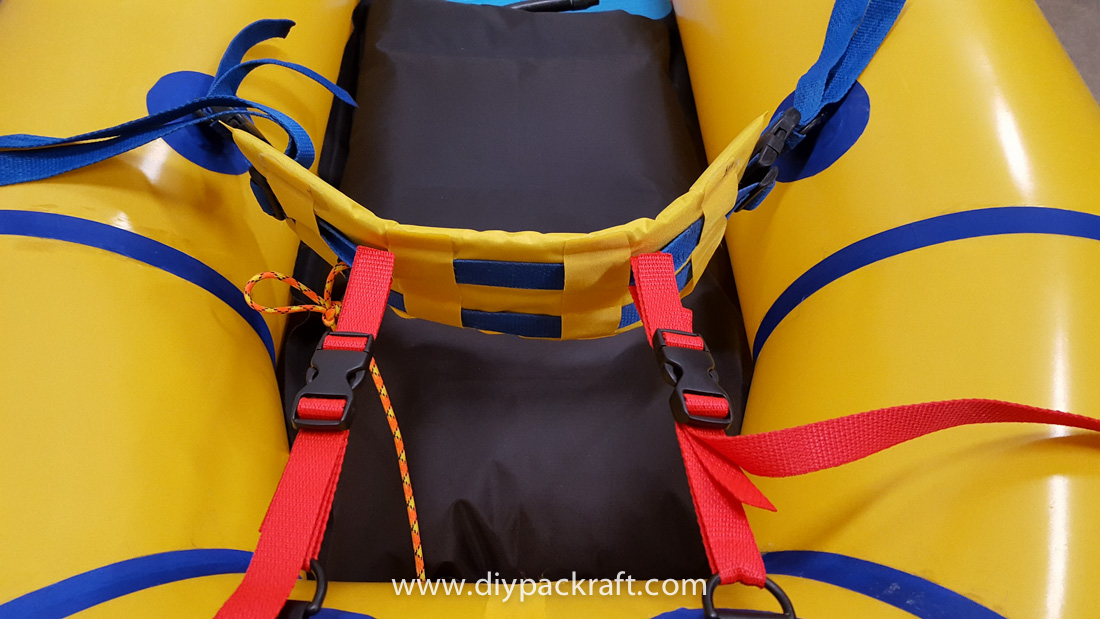
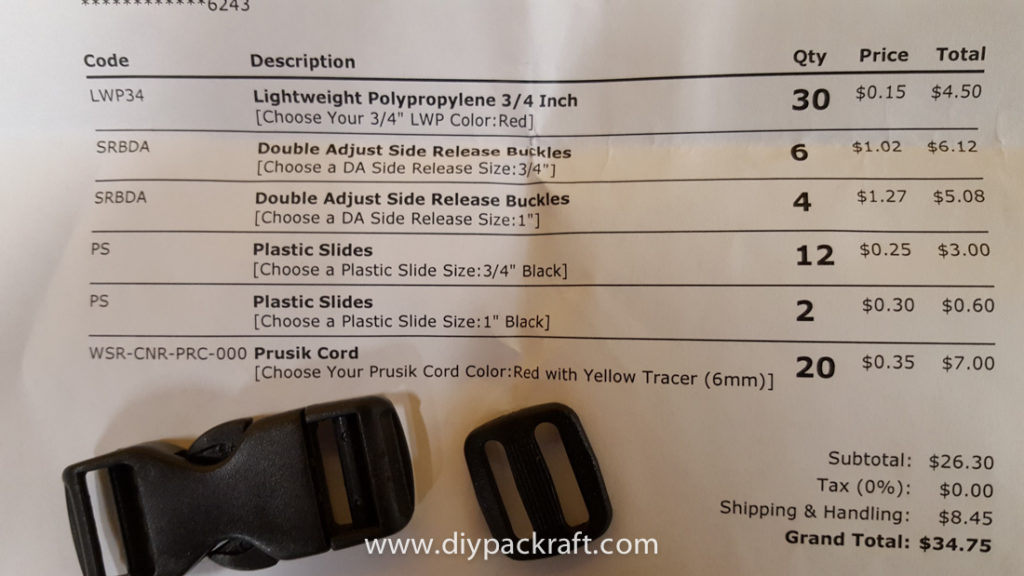
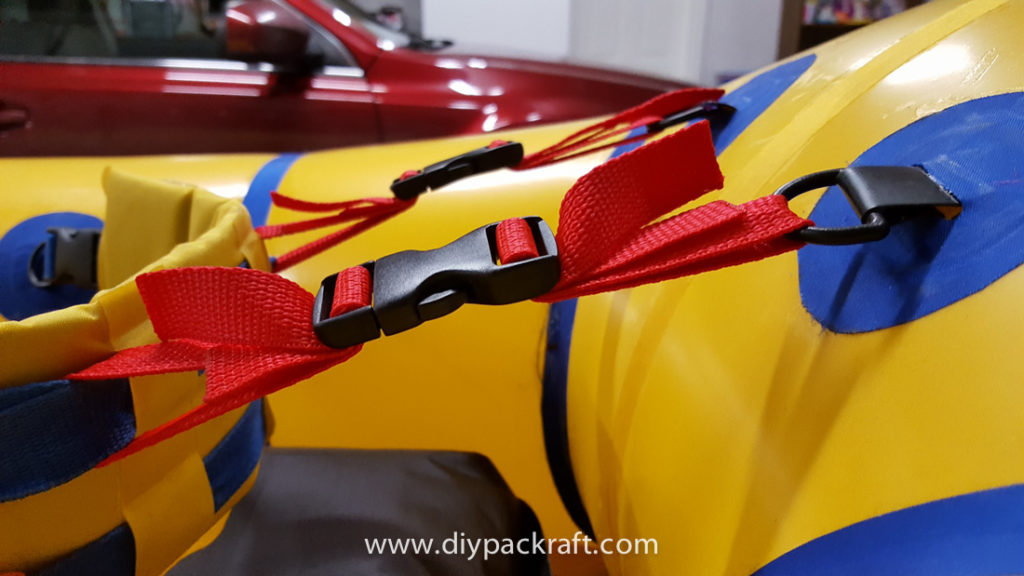
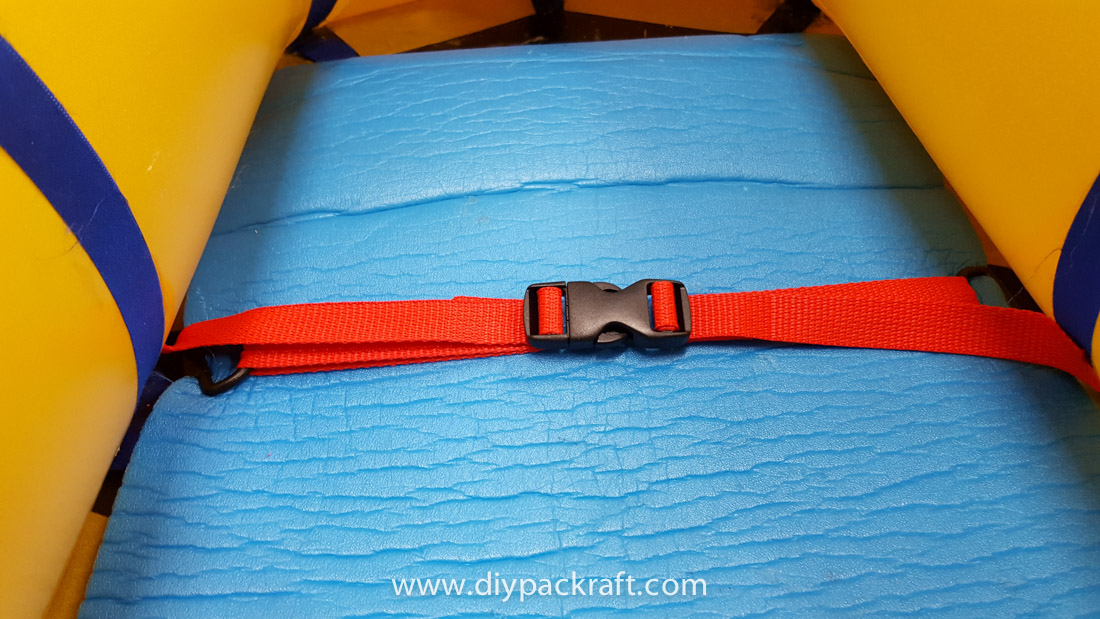
I thought long and hard about whether to use straps or cord for attaching seat, floor, back band, and other things to the tie downs. I used ¼” (6 mm) poly cord. The poly won’t stretch when wet. I chose ¾” (19 mm) flat (non-tubular) webbing with plastic double adjust side release buckles and sliders for attaching the floor and back band. I used parachute cord to attach the seat to the back band. I envision that all parts can be easily removed with the buckles and reinstalled without having to readjust them. My system should prevent any entrapment issues. I’ll have to try it out to make sure. I found all the straps, cord, and buckles at www.strapworks.com, a site I had never used before. I found their items to be of the quality I expected and deem them to be strong, well built, and reliable.
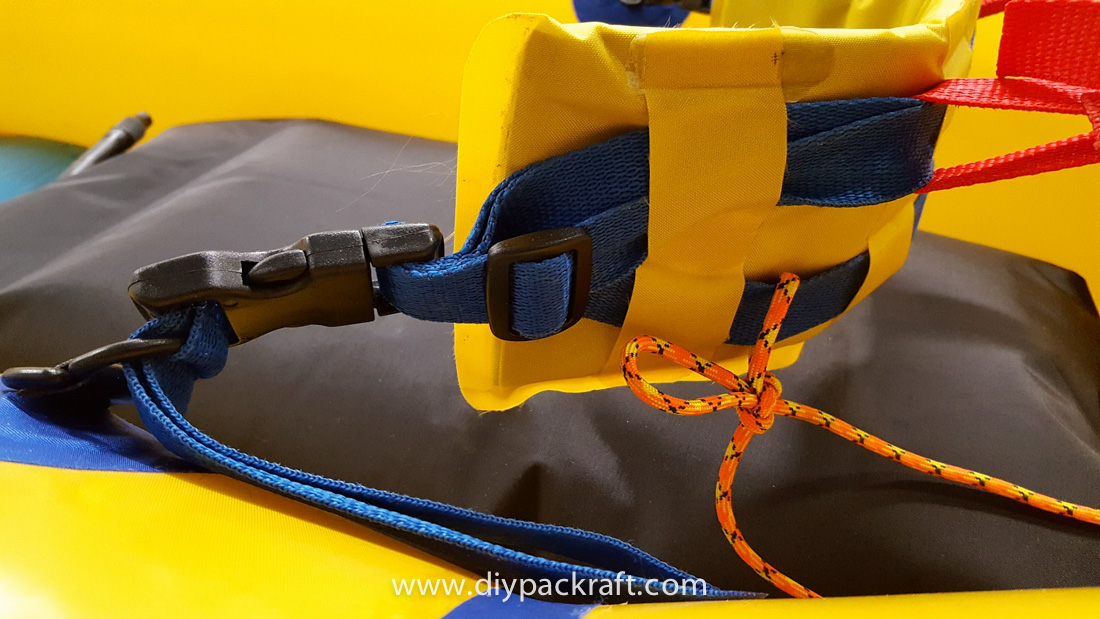
When making the kit seat I installed the top off valve with the stem perpendicular to the seat’s long axis. Now, when I sit on the seat the valve stem is under my right thigh. If I locate the seat with the valve behind my back then I can’t get to it to release pressure if needed. Others should consider placing the valve stem aligned with the long axis of the seat to avoid that.
For an insulated pad over the 1000D floor [to keep the legs warm] I double over an old sleeping pad. I cut it to the shape of the floor and will hold it in place with the ¾” webbing and buckles affixed to the 4 tie downs (with D rings) to the floor – two on each side. I had to use AquaSeal to attach the #3 style tie downs to the floor because they were partially installed over the tube/floor where there was no TPU. I built a wooden form to clamp down around the D ring tie down so the AquaSeal would be compressed equally while curing. I anticipate using the pad as my sleeping pad for overnight even though it is now oddly shaped for sleeping. I can put up with it for a couple nights.
Thanks, Ken, for the great write-up and pictures! I’m sure other people will find this helpful. – Matt
1 Comment
Ruedi · March 19, 2020 at 12:17 pm
Ken, thank you for your article. I found it very inspiring and useful as well. As I’m trying to create inflatable sponsons for a superlight kayak just now, and struggling with poor welds an several leaks, I fully understand your big work by finding and closing leaks! All the best, and a lot of joy on the water – happy paddling!