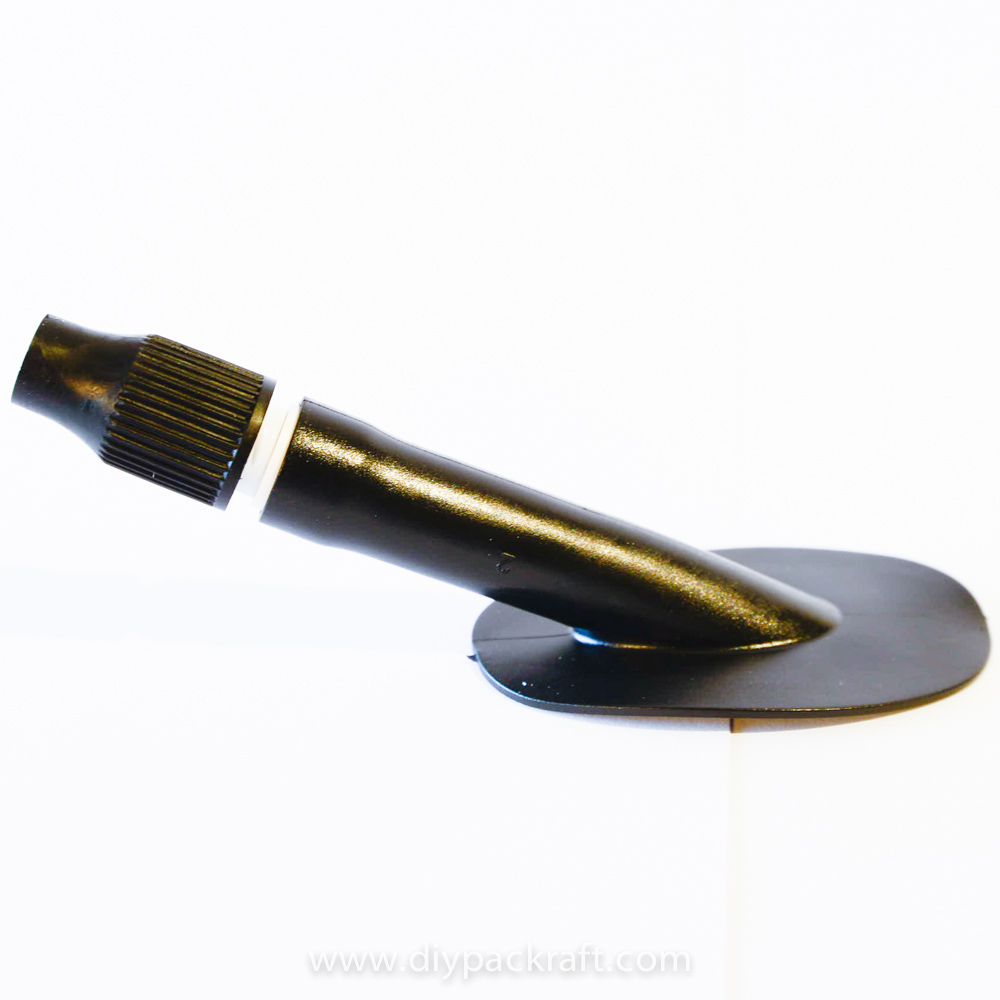
A top-up valve features a twist-lock valve at the end of a flexible stem attached to a flat, heat-sealable base, or “flange”. A length of tubing can be added between the stem and the twist-lock valve to lengthen it for easier operation.
In order to be useful, a top-up valve must be accessible on the water, and that’s the reason I recommend waiting to install it until after your packraft is otherwise complete. The ideal location for a top-up valve will depend on your body size and flexibility, and it’s hard to know beforehand where the best place for you will be, but in general a good place to start is in tube piece #5 (either Left or Right) near the seam with piece #4 and on the down-slope on the outside of the packraft.
Take your packraft for a paddle on some calm water and bring the top-up valve with you so you can practice twisting your body around so your face comes close to the tube. Experiment with different valve locations to determine where the most practical spot will be. (Stay in the shallows in case you drop the valve overboard!) If you like, you can use field repair tape or something similar to hold the valve in place.
Wherever you decide to install your top-up valve, make sure it won’t interfere with your paddle stroke!
If you’re finding it too awkward to twist your body around while sitting in the boat, an alternative placement could be on the inside of the cockpit near where your face ends up when you bend forward (i.e. close to your knee, but not so close that the valve will poke your leg as you paddle).
You might also consider adding a length of silicone or flexible PVC tubing between the black valve stem and the twist-lock valve – that way, you can install the valve in an out-of-the-way place while still being able to operate it without twisting yourself into a pretzel.
Top-Up Valve Installation:
The installation method is similar to that shown in the Boston valve video, except that the top-up valves are heat-sealable, so instead of using glue you can simply heat seal the pieces together so the valve flange is sandwiched between two layers of fabric. First, seal a patch of fabric to the valve with the valve stem poking through a hole in the patch, and then seal the valve and the patch over a small hole cut in the packraft’s tube.
Here’s a picture sent by Jeb T. showing his top-up valves mounted in fabric rings, ready to seal to the packraft tube fabric:
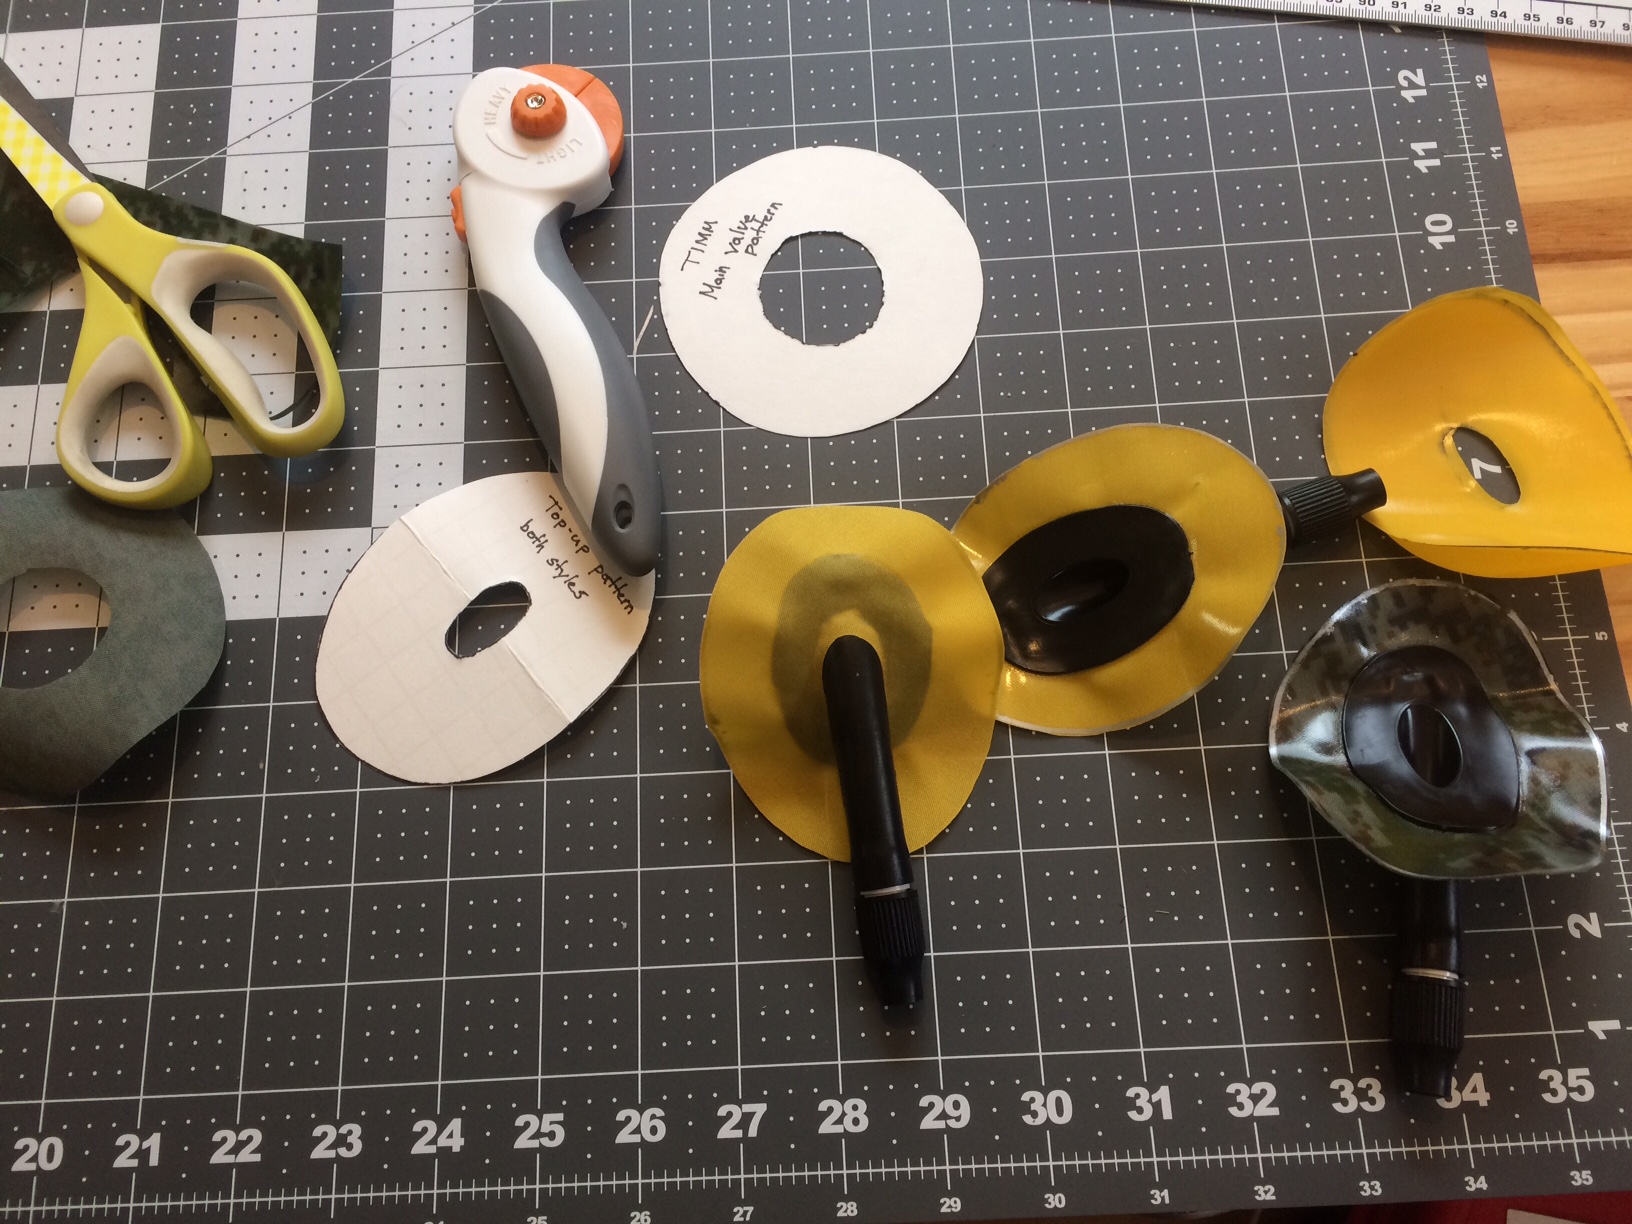
Top-up valves ready to seal to the packraft.
If you haven’t installed an airtight zipper in your packraft, you will not be able to heat seal the top-up valve in place from the inside of the tube after the boat is complete, so you may choose to add some Aquaseal on the underside of the valve’s flange after heat-sealing the fabric ring to the top side of the flange and before sealing the ring to the packraft’s tube.
Questions? Leave a Comment Below!
Step 1 – Separating Fabric Pieces
Step 2 – Drawing Alignment Marks on the Floor
Step 3.1 – Joining Tube Piece #3 to Floor (Part 1)
Step 3.2 – Joining Tube Piece #3 to Floor (Part 2)
Step 4.1 – Adding Adjacent Tube Pieces (Part 1)
Step 4.2 – Adding Adjacent Tube Pieces (Part 2)
Step 4.3 – Adding Adjacent Tube Pieces (Part 3)
Step 5 – Installing the Inflation Valve
Step 7 – Locate & Seal Any Leaks
Step 8 – Top-Up Valve Placement & Installation
0 Comments