Text and pictures submitted by Sylvain J. Excellent work, Sylvain, and thanks for the ideas! – Matt
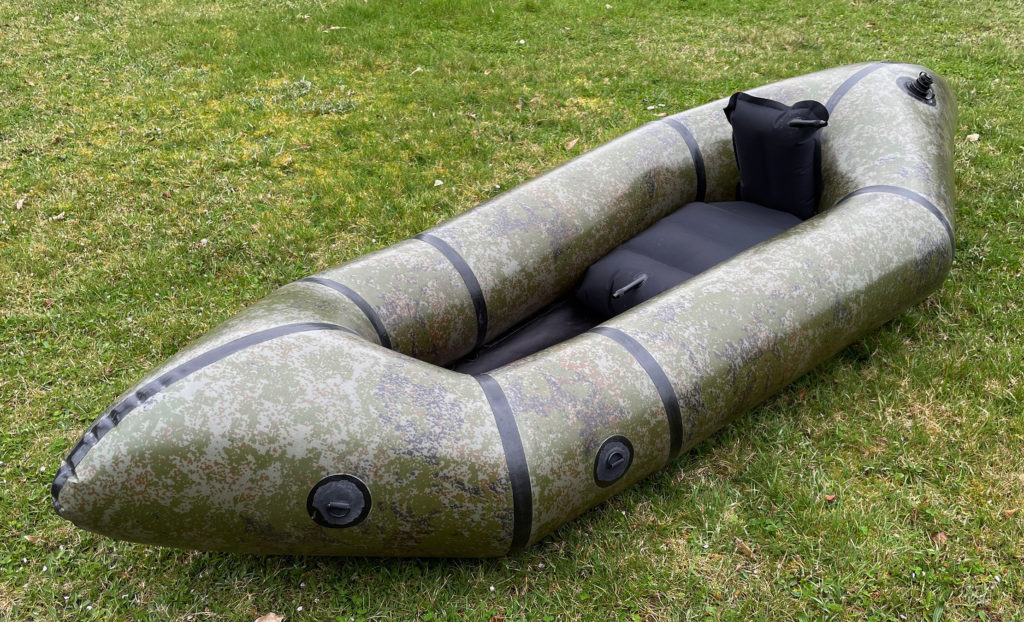
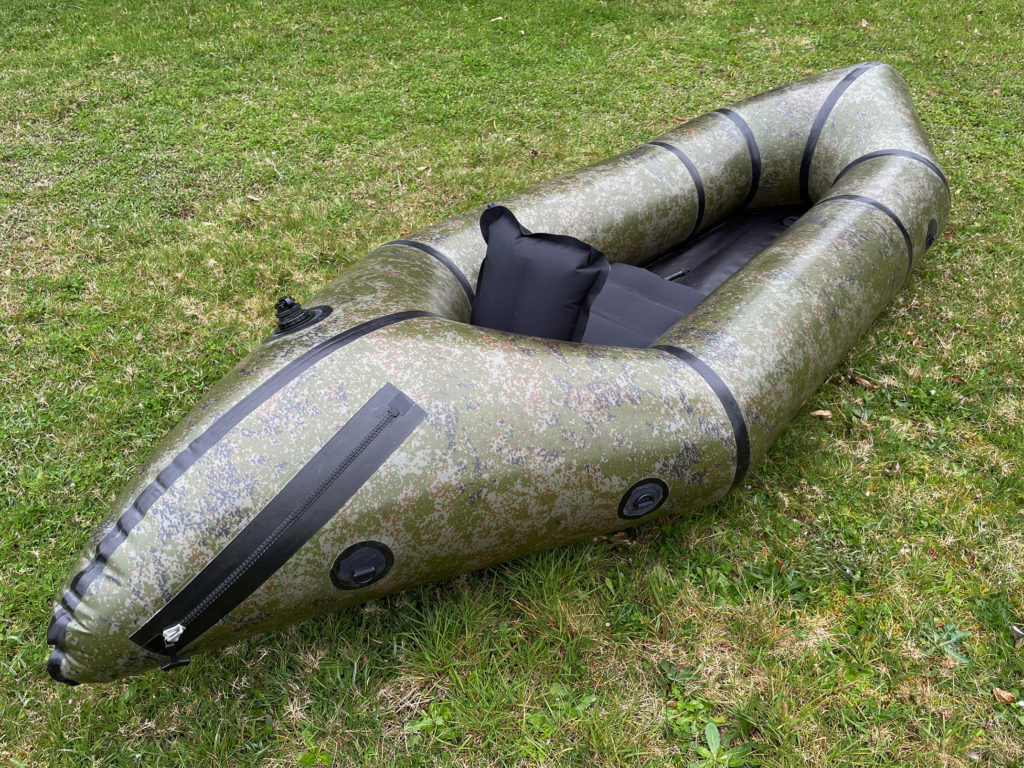
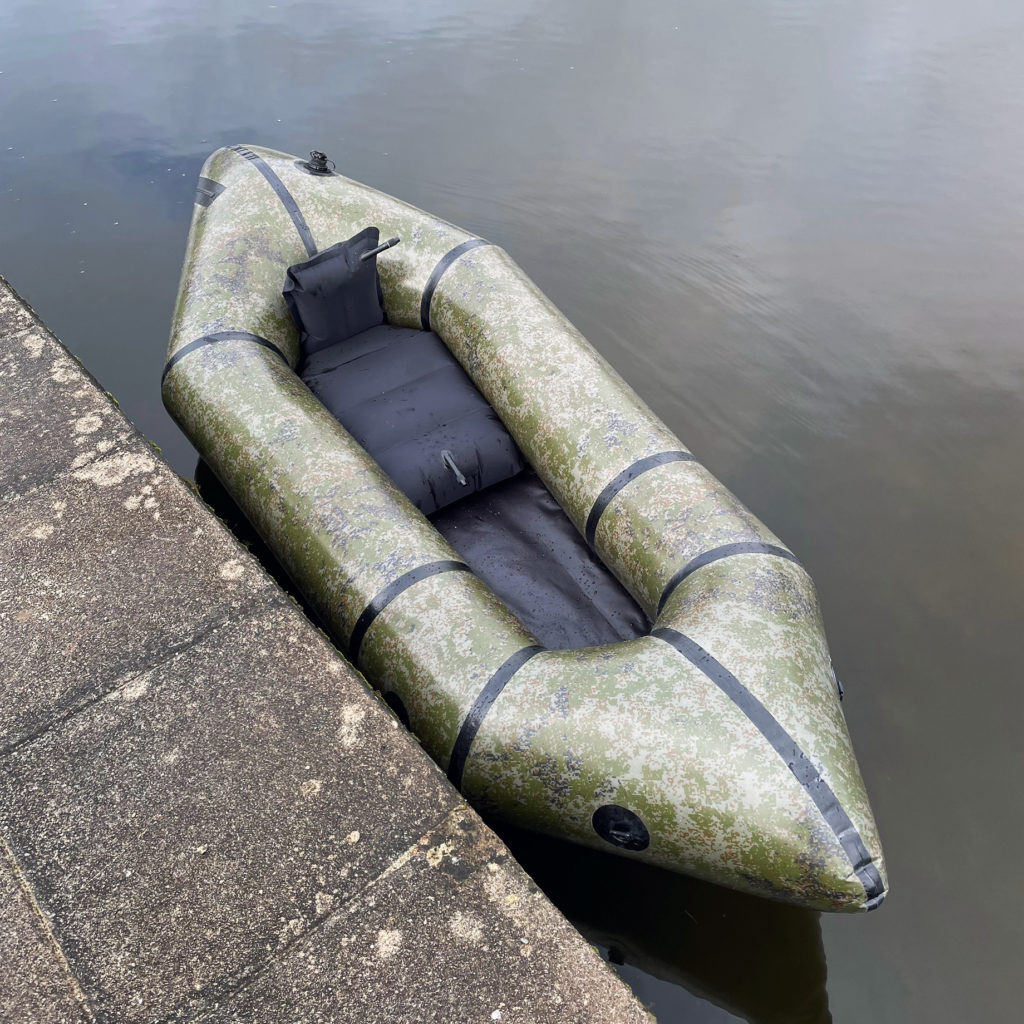
I’ve completed my first Skeena build in +/- 45 hrs (I took my time, but could have done this a bit faster though, I’ll get back to it below), it steadily holds air for 2–3 days in a row without deflating more than one (very) little breath! So very happy with the result.
A few things that happened:
- Once I put tubes 3 and 2 side by side at the start of the build, I had a 1cm overflow from one floor slit to another, both on the right and left side. I simply trimmed off 1cm from 2L and 2R where the junction between 3 and 2 is done, figured it’d work out in the end, and have had no issue afterwards.
- Seamgrip. Lots of Seamgrip. The docs mention that one 28g tube is enough for the entire packraft, I may have overdone this a bit but I covered all the inner seams and all the outer seams (inner floor, outer floor, tubes) and probably spent a good 6 or 7 tubes for the entire thing.
- I had an iron die on me and blow a fuse after a few hours working on the packraft: I live in EU and used a plug adapter instead of taking the few minutes to manually change the plug. The adapter probably had a contact failure or something while I moved the iron around and I had to wait a few days to be able to build again: better safe than stuck, change your plugs beforehand!
- I didn’t notice that the tape I put on the temperature dial went a little off when the build was almost finished and I was welding the attachment points: the iron went 30°C hotter than needed and I melted the fabric piece I was ironing on the packraft. Quite disappointing as everything went flawlessly until then, but I finished welding it properly, and put 2 thin coats of seam grip over the entire attachment point: so far no trouble. I put twice the tape over it after that.
A few things that I picked from the comments / forum:
- I saw it mentioned somewhere so I tried using a silicon sheet (60×40cm, 1mm thick) under the parchment paper, and cut some bands that I placed under the masking tape on my wooden forms. I felt that I produced better (as in – more even) welds with it than directly on my workbench.
- I had a really, really hard time figuring out how to weld the front seam. Tried a bunch of forms, never got a satisfying weld, started doing quite a mess, until I figured that both shapes might as well be welded flat. The docs mentioned it as a possible alternative but didn’t go in lengths about it, I checked the comment to see if anyone had done it with success: someone did! So I tried it myself and what a relief, this went very smoothly and it all ended with a very nice weld. The only downside might be that it’s quite impossible not to make the strip overflow a little and ironing about 1–2mm of the strip on itself, therefore the seam looks somehow « pointy », but I can totally live with that given how easier it was (and how cleaner it turned out instead of the mess I probably would have done with inner wooden forms). I didn’t bother trying with the forms for the rear seam and directly went for this technique.
A thing that could be helpful:
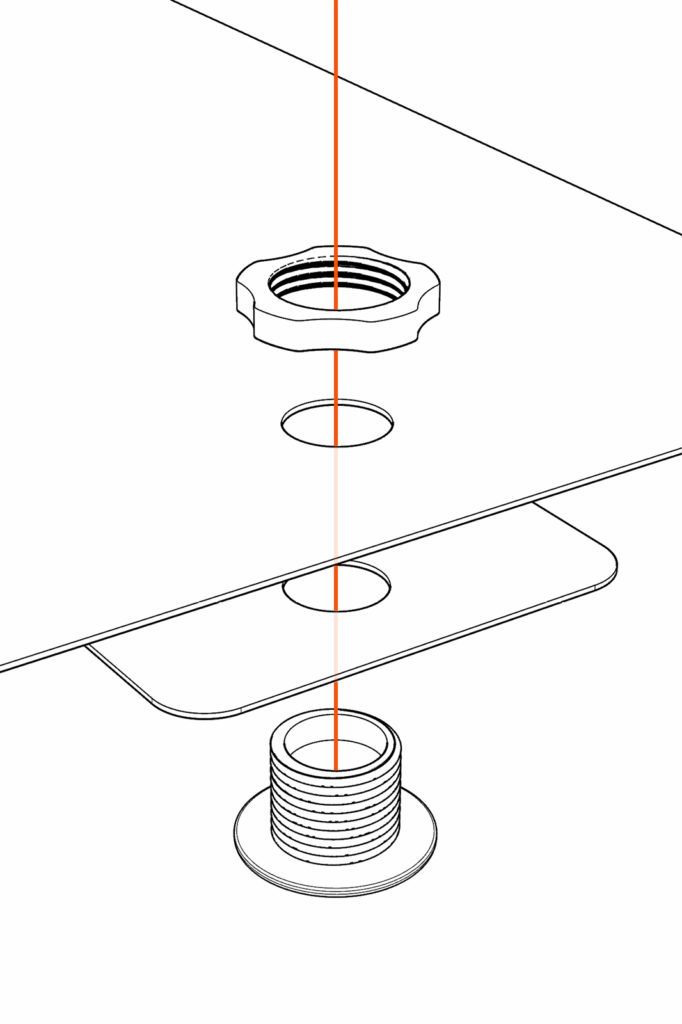
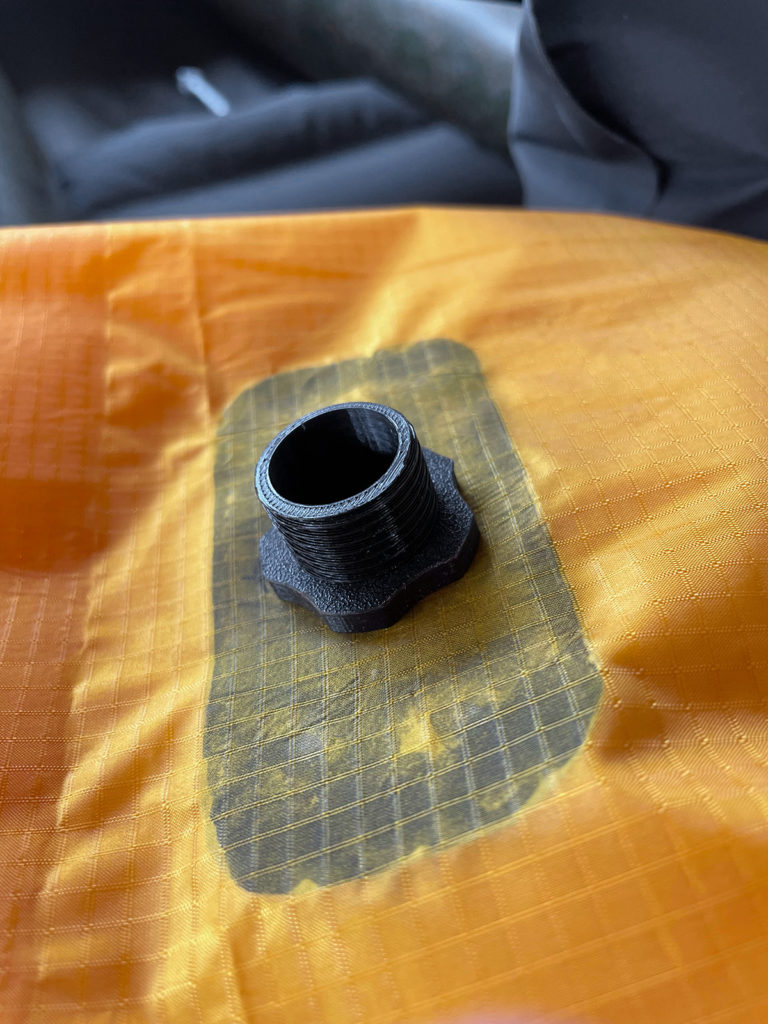
- I forked the 3D-printed top-up adapter knob made by GabC (https://www.diypackraft.com/forums/topic/top-up-valve-adapter-for-boston-valve/) and added a male threaded part fitting the Boston valve’s large opening. It makes a great and lightweight inflation bag nozzle that doesn’t require any glue and fits perfectly and easily into the valve, I’ve shared the files here: https://www.printables.com/fr/model/809119-inflation-bag-adapter-for-packraft-boston-valve
A few things I’d do differently for a second build:
- I’d make diamond-shaped attachment points like the ones of Mekong’s packrafts instead of the round ones, in order to be able to weld them as much as possible with the flat end of my iron in large patches instead of a lot of little welds with the pointy side as I feel I could’ve done a stronger job this way. The masking technique with a cutout circle in the parchment paper didn’t work out for me, I ended up damaging the TPU although covered by the baking paper.
- In retrospect I would have prefered to weld the attachment points on flat fabric instead of adding them afterwards, especially the two on the floor as welding them properly once the tubes are added, either with the packraft inflated / deflated turned out to be quite difficult as the most « confined side » of the attachment was a bit hard to reach with a hot iron. I feel it would have been way easier to do it a bit earlier and would have been more confident in my welds.
- Totally on me, but I’d make a wider wooden form. I made the flat of my wooden form only 3-4mm wider than my iron, but it turned out to be too narrow as I didn’t always perfectly center the junction of the tubes and ended up having to do multiple passes to make sure all sides are perfectly welded. Probably lost a good bunch of hours here.
Overall I’m thrilled with the experience and the packraft! I can’t emphasize enough the quality and thoroughness of the documentation you put together Matt, I felt accompanied every step of the way so huge thanks for that!