DIY Packrafter Muriel Chahine not only designed and made this clever removable spray deck system, but she also carefully documented the process so anyone can repeat it, and she graciously allowed me to share it here! Below, you’ll see Muriel’s words and photos – I’ve only made a few edits for clarity.
Thanks for sharing your clever design, Muriel!
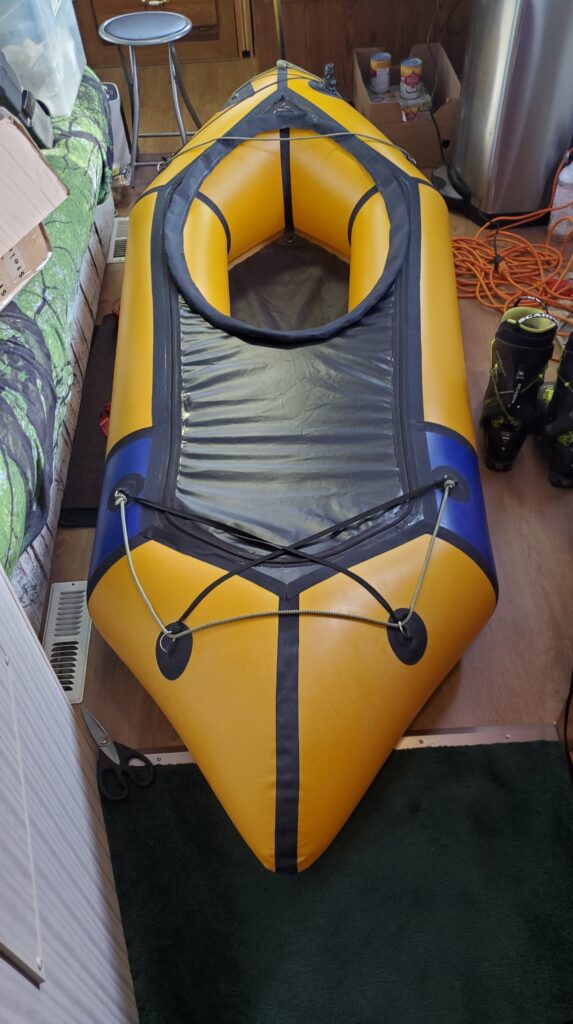
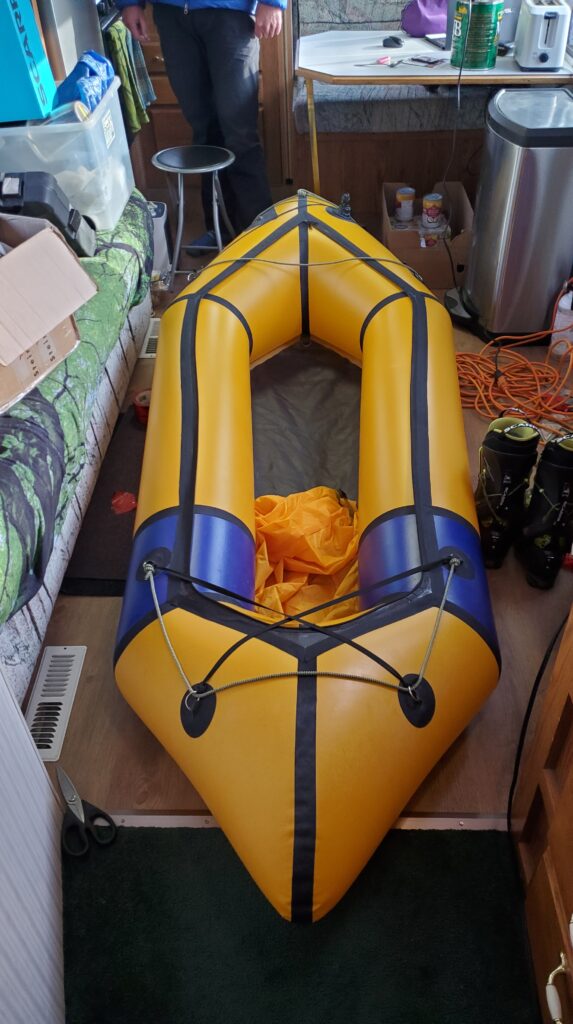
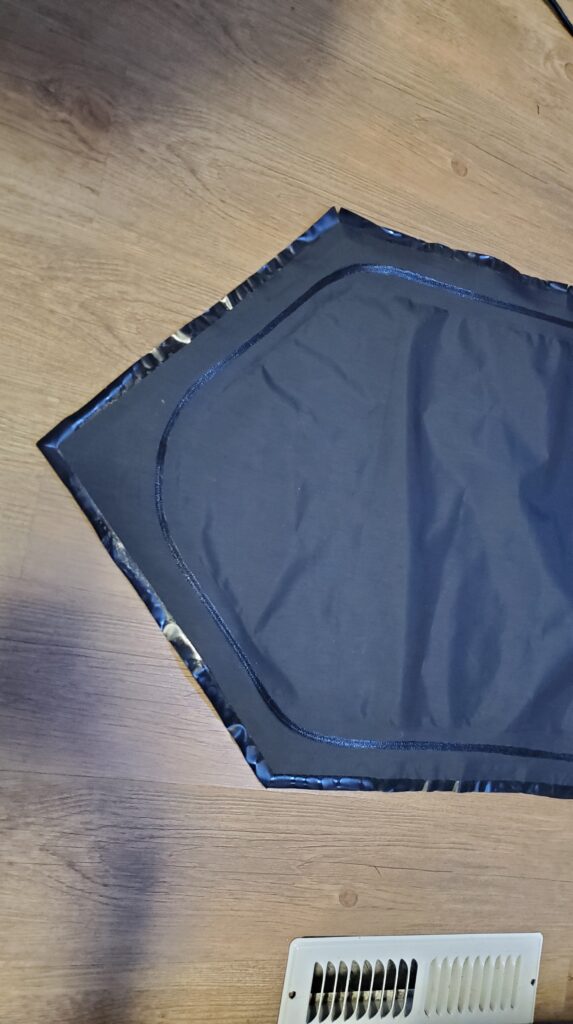
Starting with the regular DIY Packraft spray deck kit, a few additions are made, and voila:
You’ll need to purchase just a few additional parts to make your spray deck removable:
- Waterproof Zipper, TPU one side: YKK Aqua Guard #5, which can be ordered here, for example (Canada). The length you need will depend on which DIY Packraft model and size you have, but Muriel recommends 14 feet for a 130 cm / 51″ Skeena (12 feet might be enough, but will be tight). Do not use a #3 zipper to save weight – it’s not strong enough. (Zipper sizes are based on the width of the teeth in millimeters – a #5 zipper is 5 mm wide.)
- Zipper ends: here, for example.
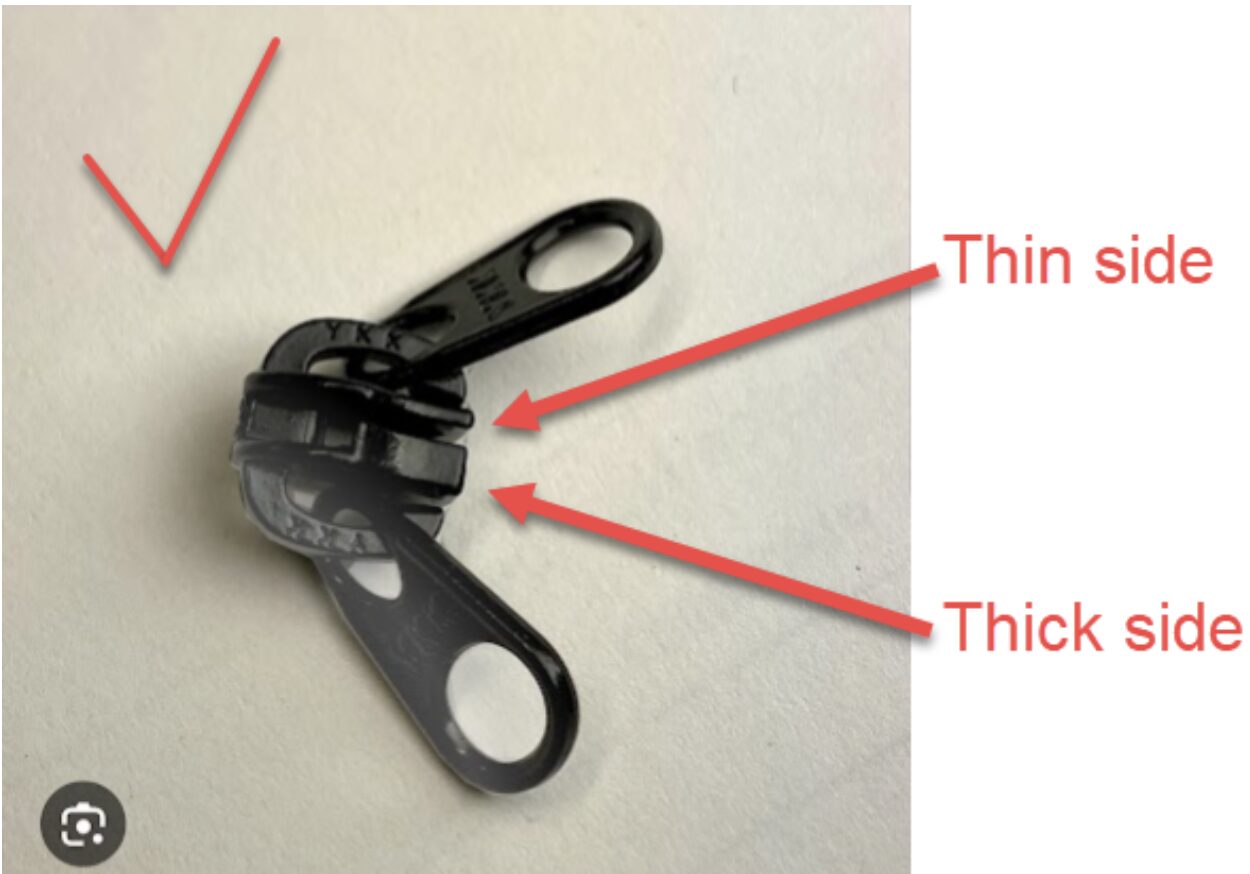
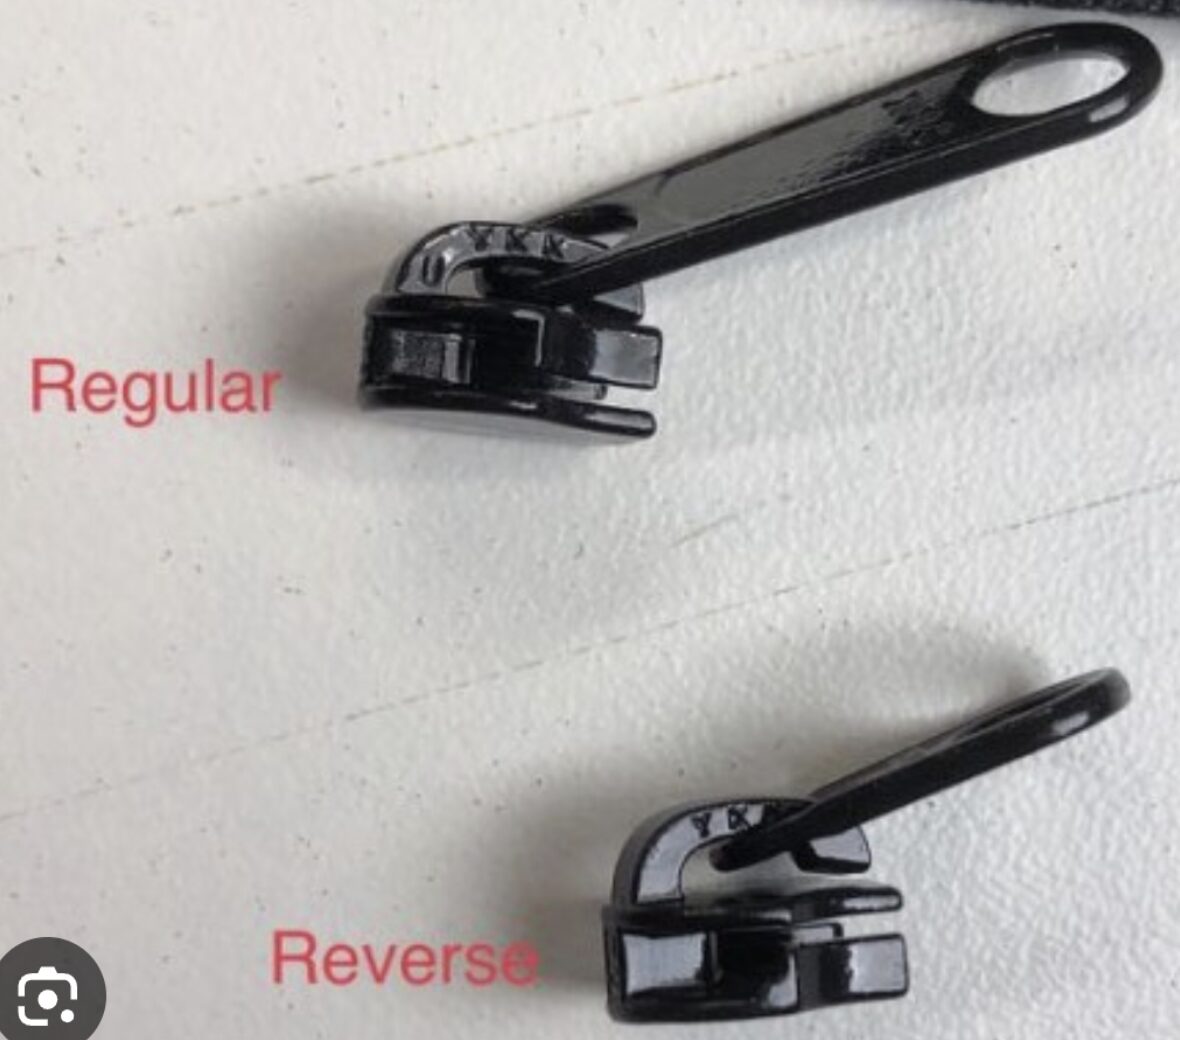
- Zipper slider: Zipper Repair Kit – #5 YKK Coil Nylon Non-Lock Double Pull Sliders – 3 Sliders Per Pack with Bottom Stoppers Included – Color: Black – Made in The United States, available here, for example.
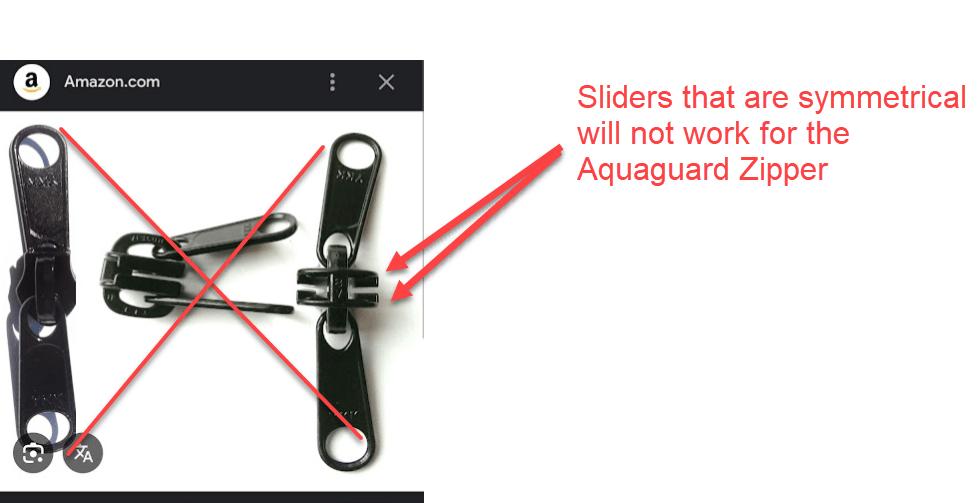
Note: Be aware of the different sliders and know that not all sliders will work with the AquaGuard Zipper chain:
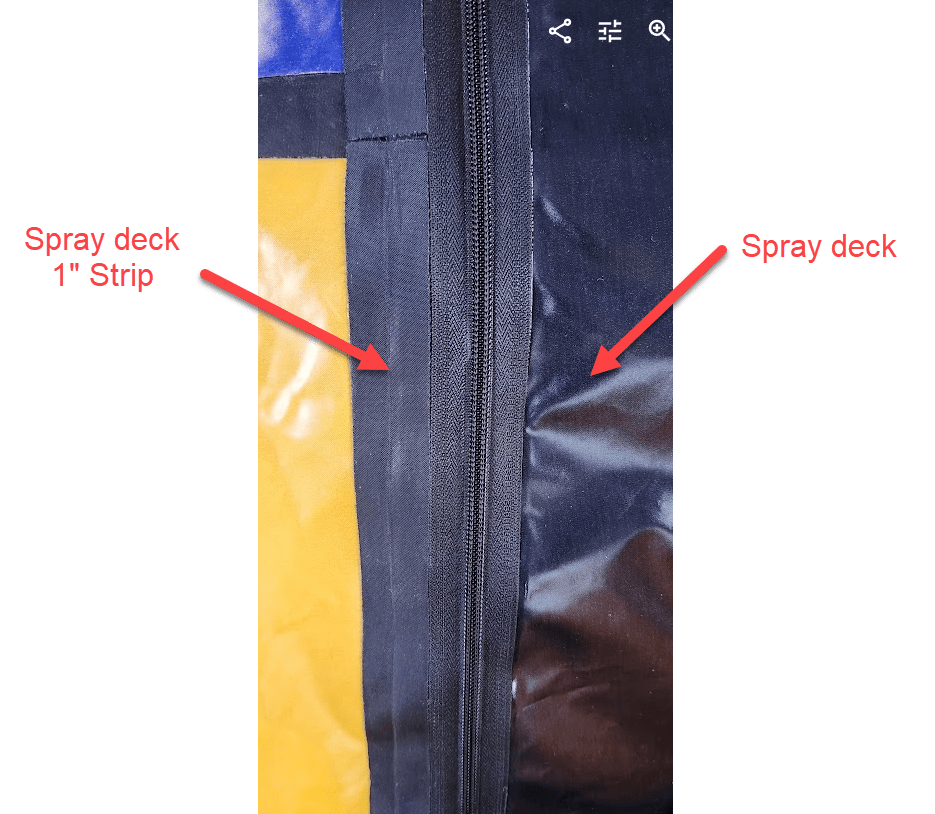
In the DIY Packraft instructions, the 1″ strips that hold the deck to the packraft get welded to the packraft’s tubes and the spray deck at the same time, after the spray deck is taped to the boat. In the case of a removable spray deck, we want the zipper to be as close as possible to the 1″ strips so that when the spray deck is unzipped/removed, minimal material will remain on the raft. I figured it would be easier to weld the 1″ strips to the spray deck first and use their edges as a guide for the zipper, as opposed to welding the zipper on 0.5″ away from the edge and trying to get the 1″ strip to line up at the end after the deck is delicately taped on the boat. So I will be welding the 1″ strip on the deck first for this project.
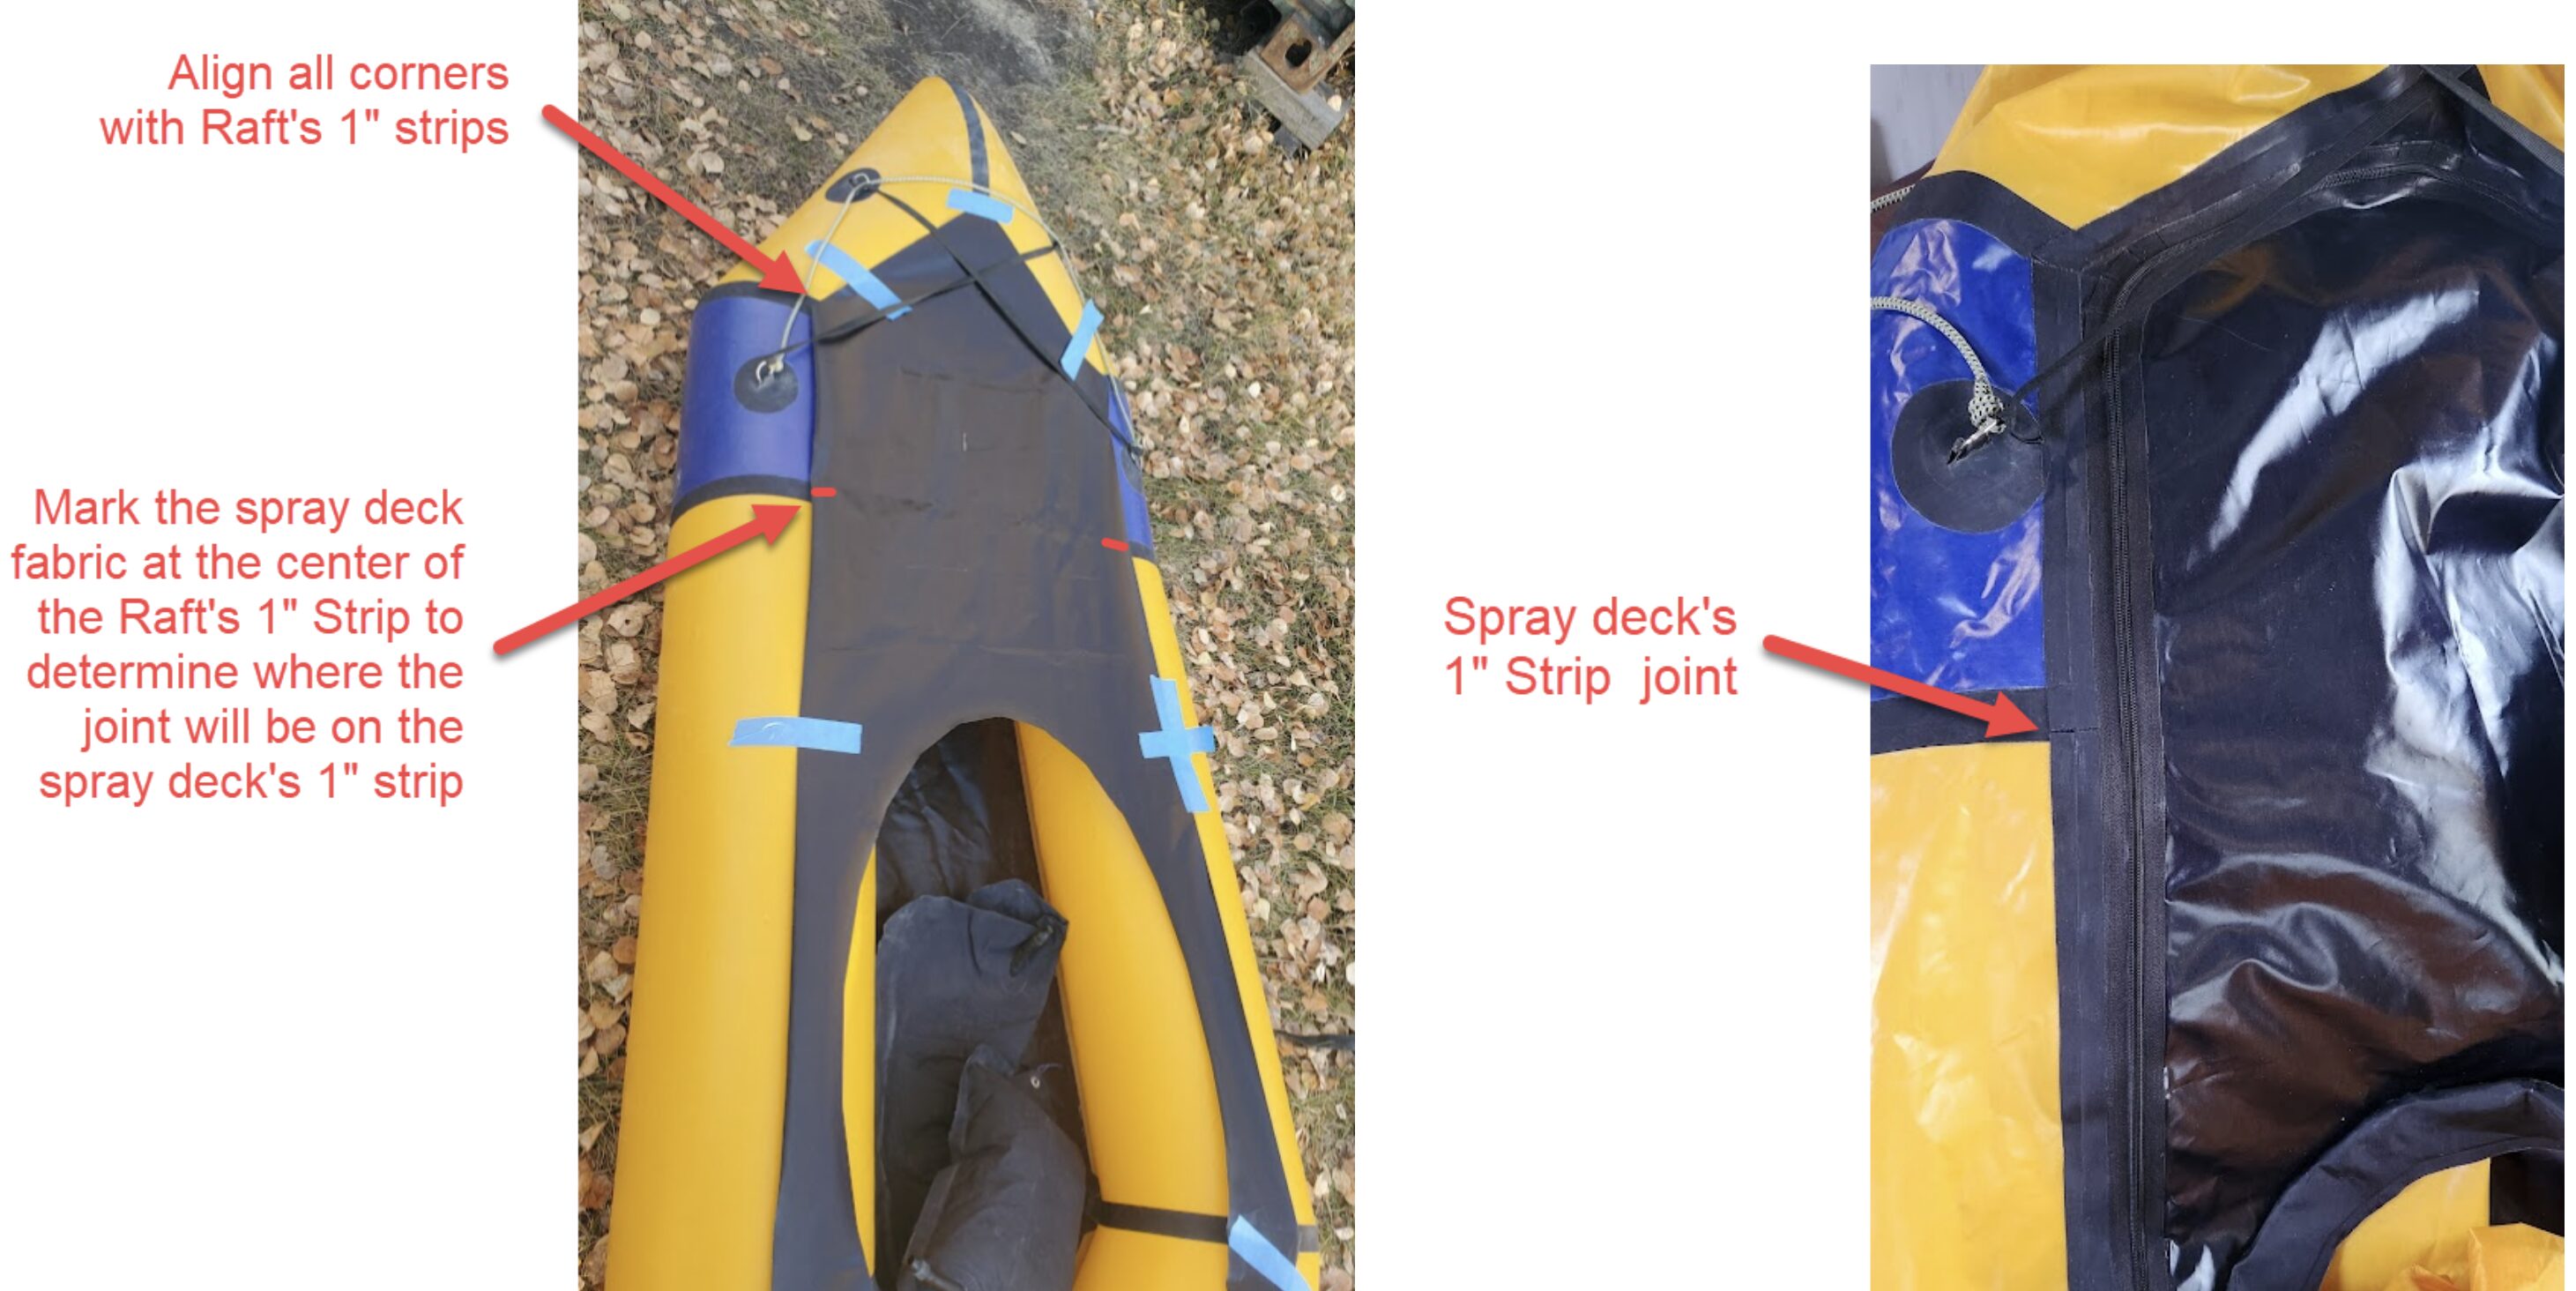
You will have to determine where the joint on the 1″ strips will be along the sides of the spray deck. Tape the deck onto the inflated raft to mark where the joints (ends) of the 1″ strips will be. Each corner of the spray deck must land on the 1″ strips of the raft. In the same manner, the joint along the straight side of the spray deck will land on the 1″ strip of the raft. Mark the deck fabric in these 2 locations
- Untape the spray deck from the boat
- Fold all corners of the deck fabric in half and mark the median with a pencil, this will help you make a clean cut of the 1″ strips in each corner
- Weld 1″ strips around the spray deck’s perimeter, overlapping the edge 0.5″ and leaving excess length in the corners such each strip will overlap the next strip slightly (leave 1″ unwelded close to the overlap to allow room for the scissors), then cut them both at the same time along median marked previously on the deck
- Repeat until the entire perimeter is welded
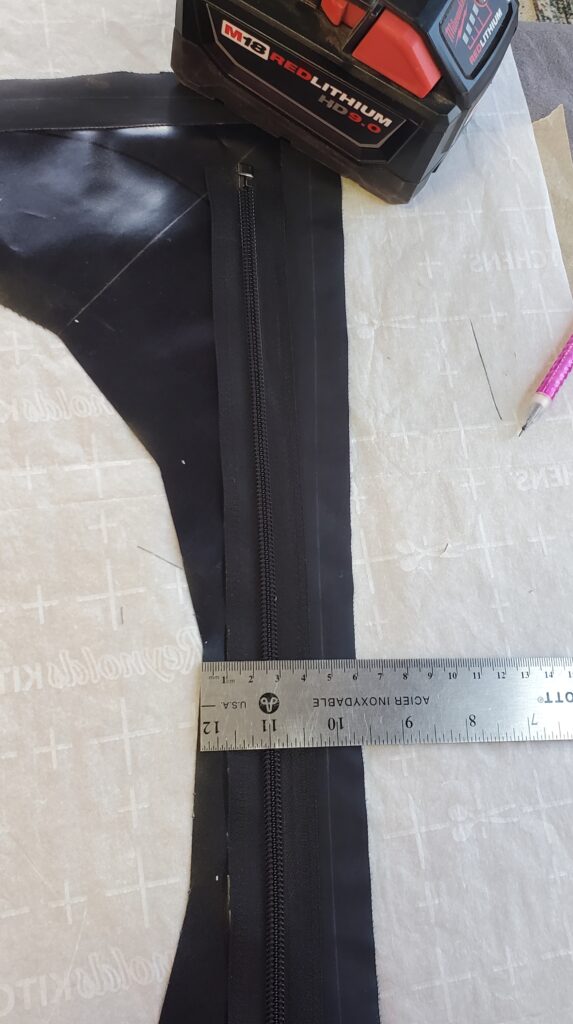
- Use a dinner plate or something round (mine had a diameter of 11.375″) to mark the curve of the zipper in the 5 corners (not required at the back as the zippers will come together at a sharp angle).
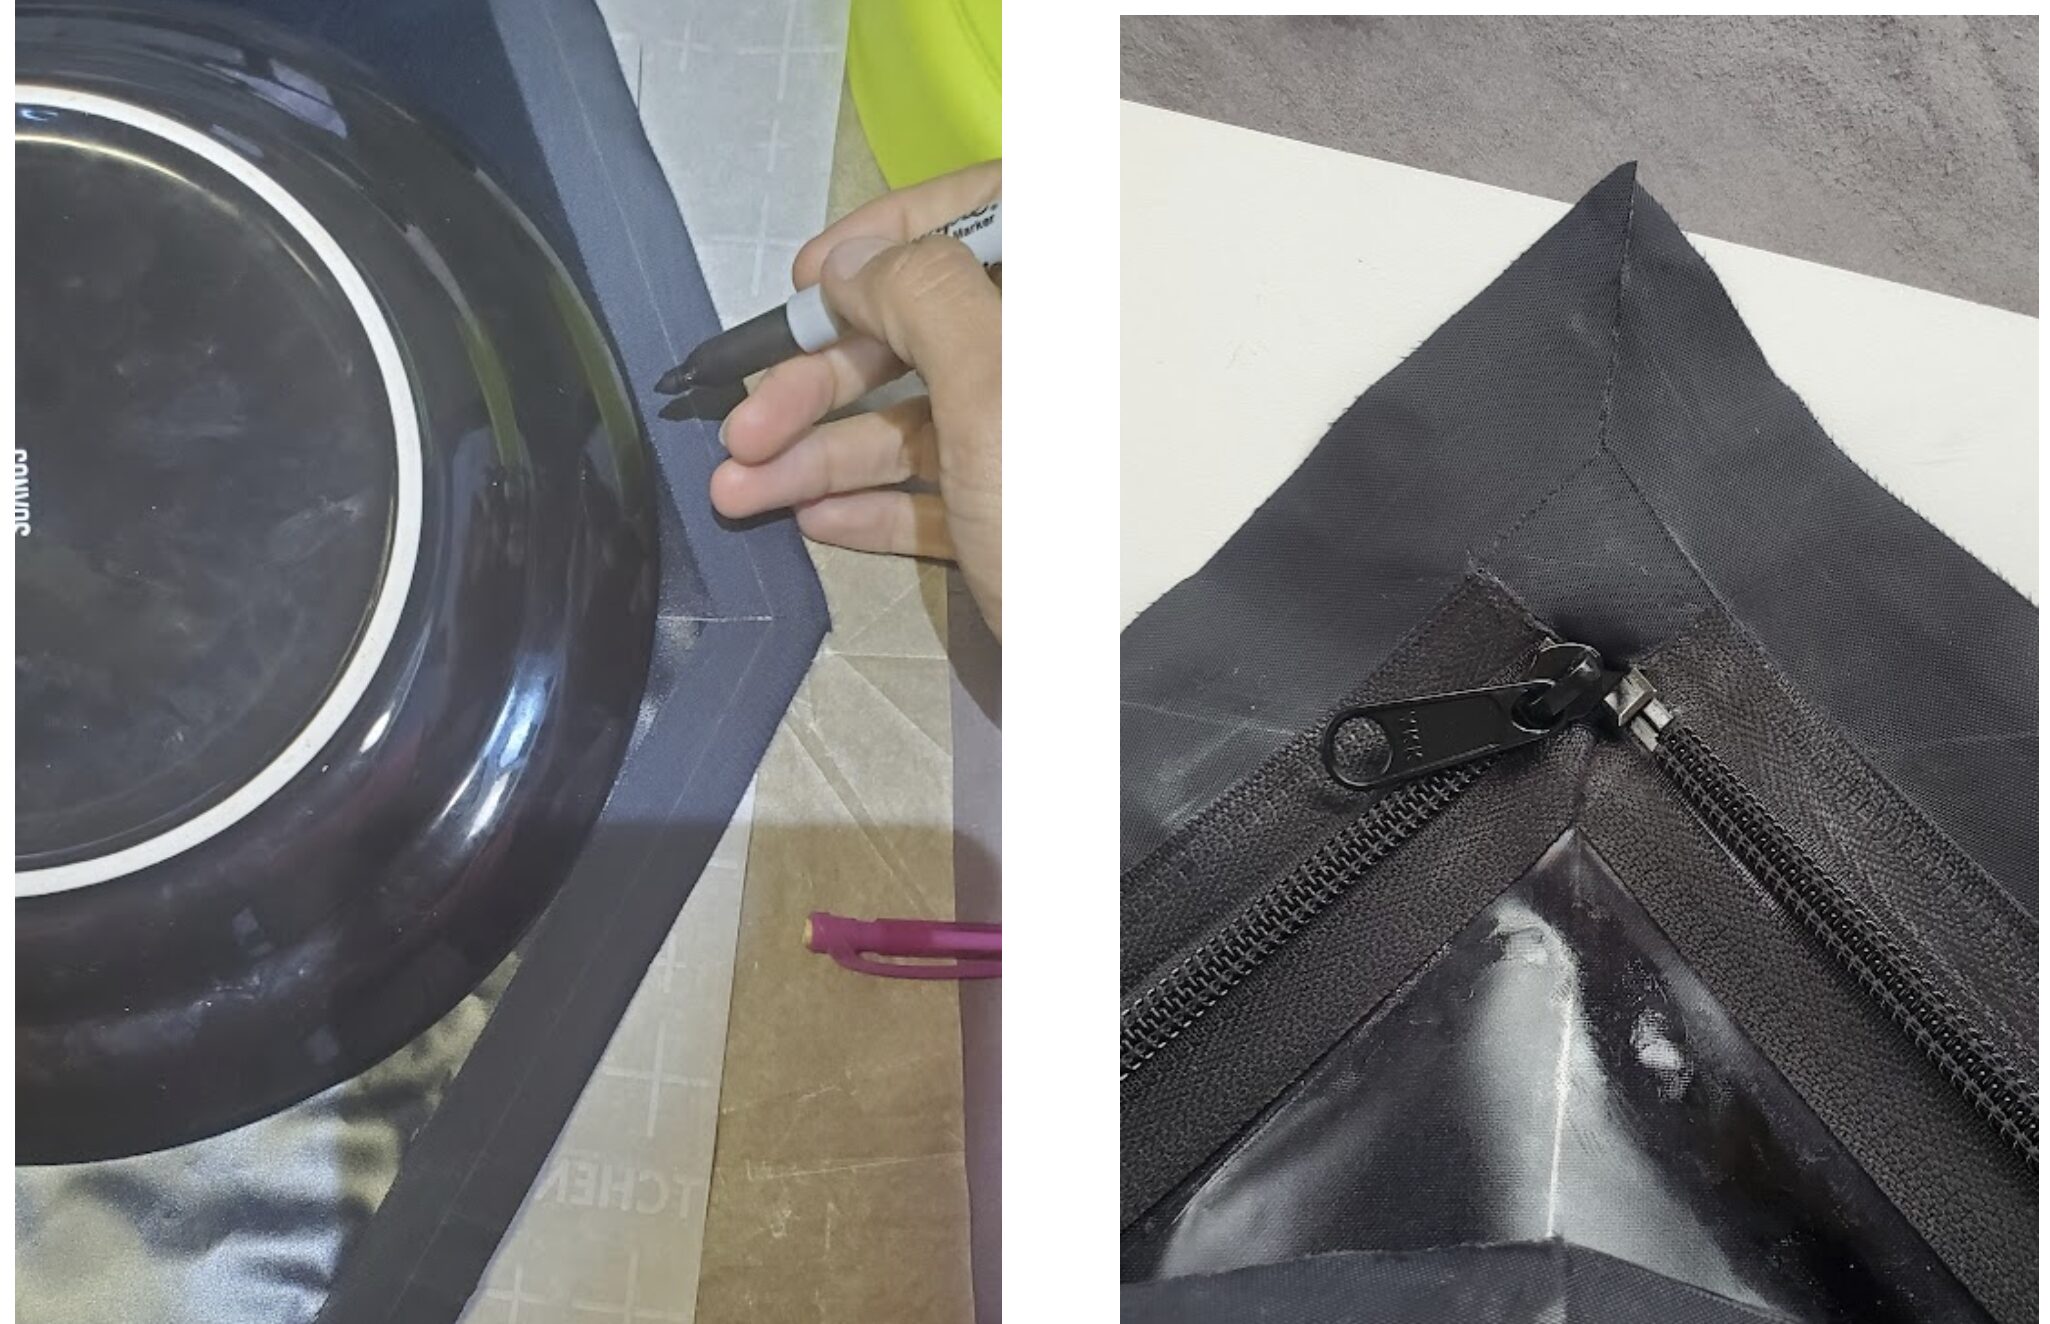
- Decide which way you want to open zipper and on which half you want the zipper slider to stay on (I made this one with the slider on the raft, but would have been better with the slider on the removable spray deck)
- Install separating ends on one end of the zipper chain accordingly. Here is a great video that explains how:
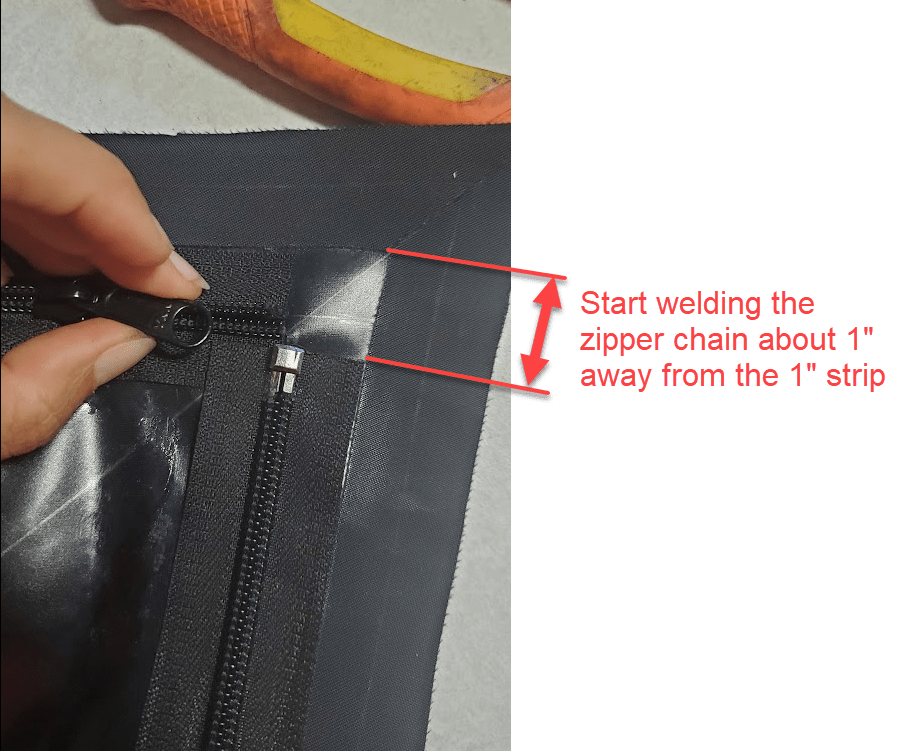
- With the zipper chain fully zipped, weld it on along the 1″ strips until you reach the first rounded corner (stop 1″ before the curve). You can weld relatively close to the zipper chain, it won’t melt easily. If using an AquaGuard Zipper #5, start about 1″ away from the corner 1″ strip:
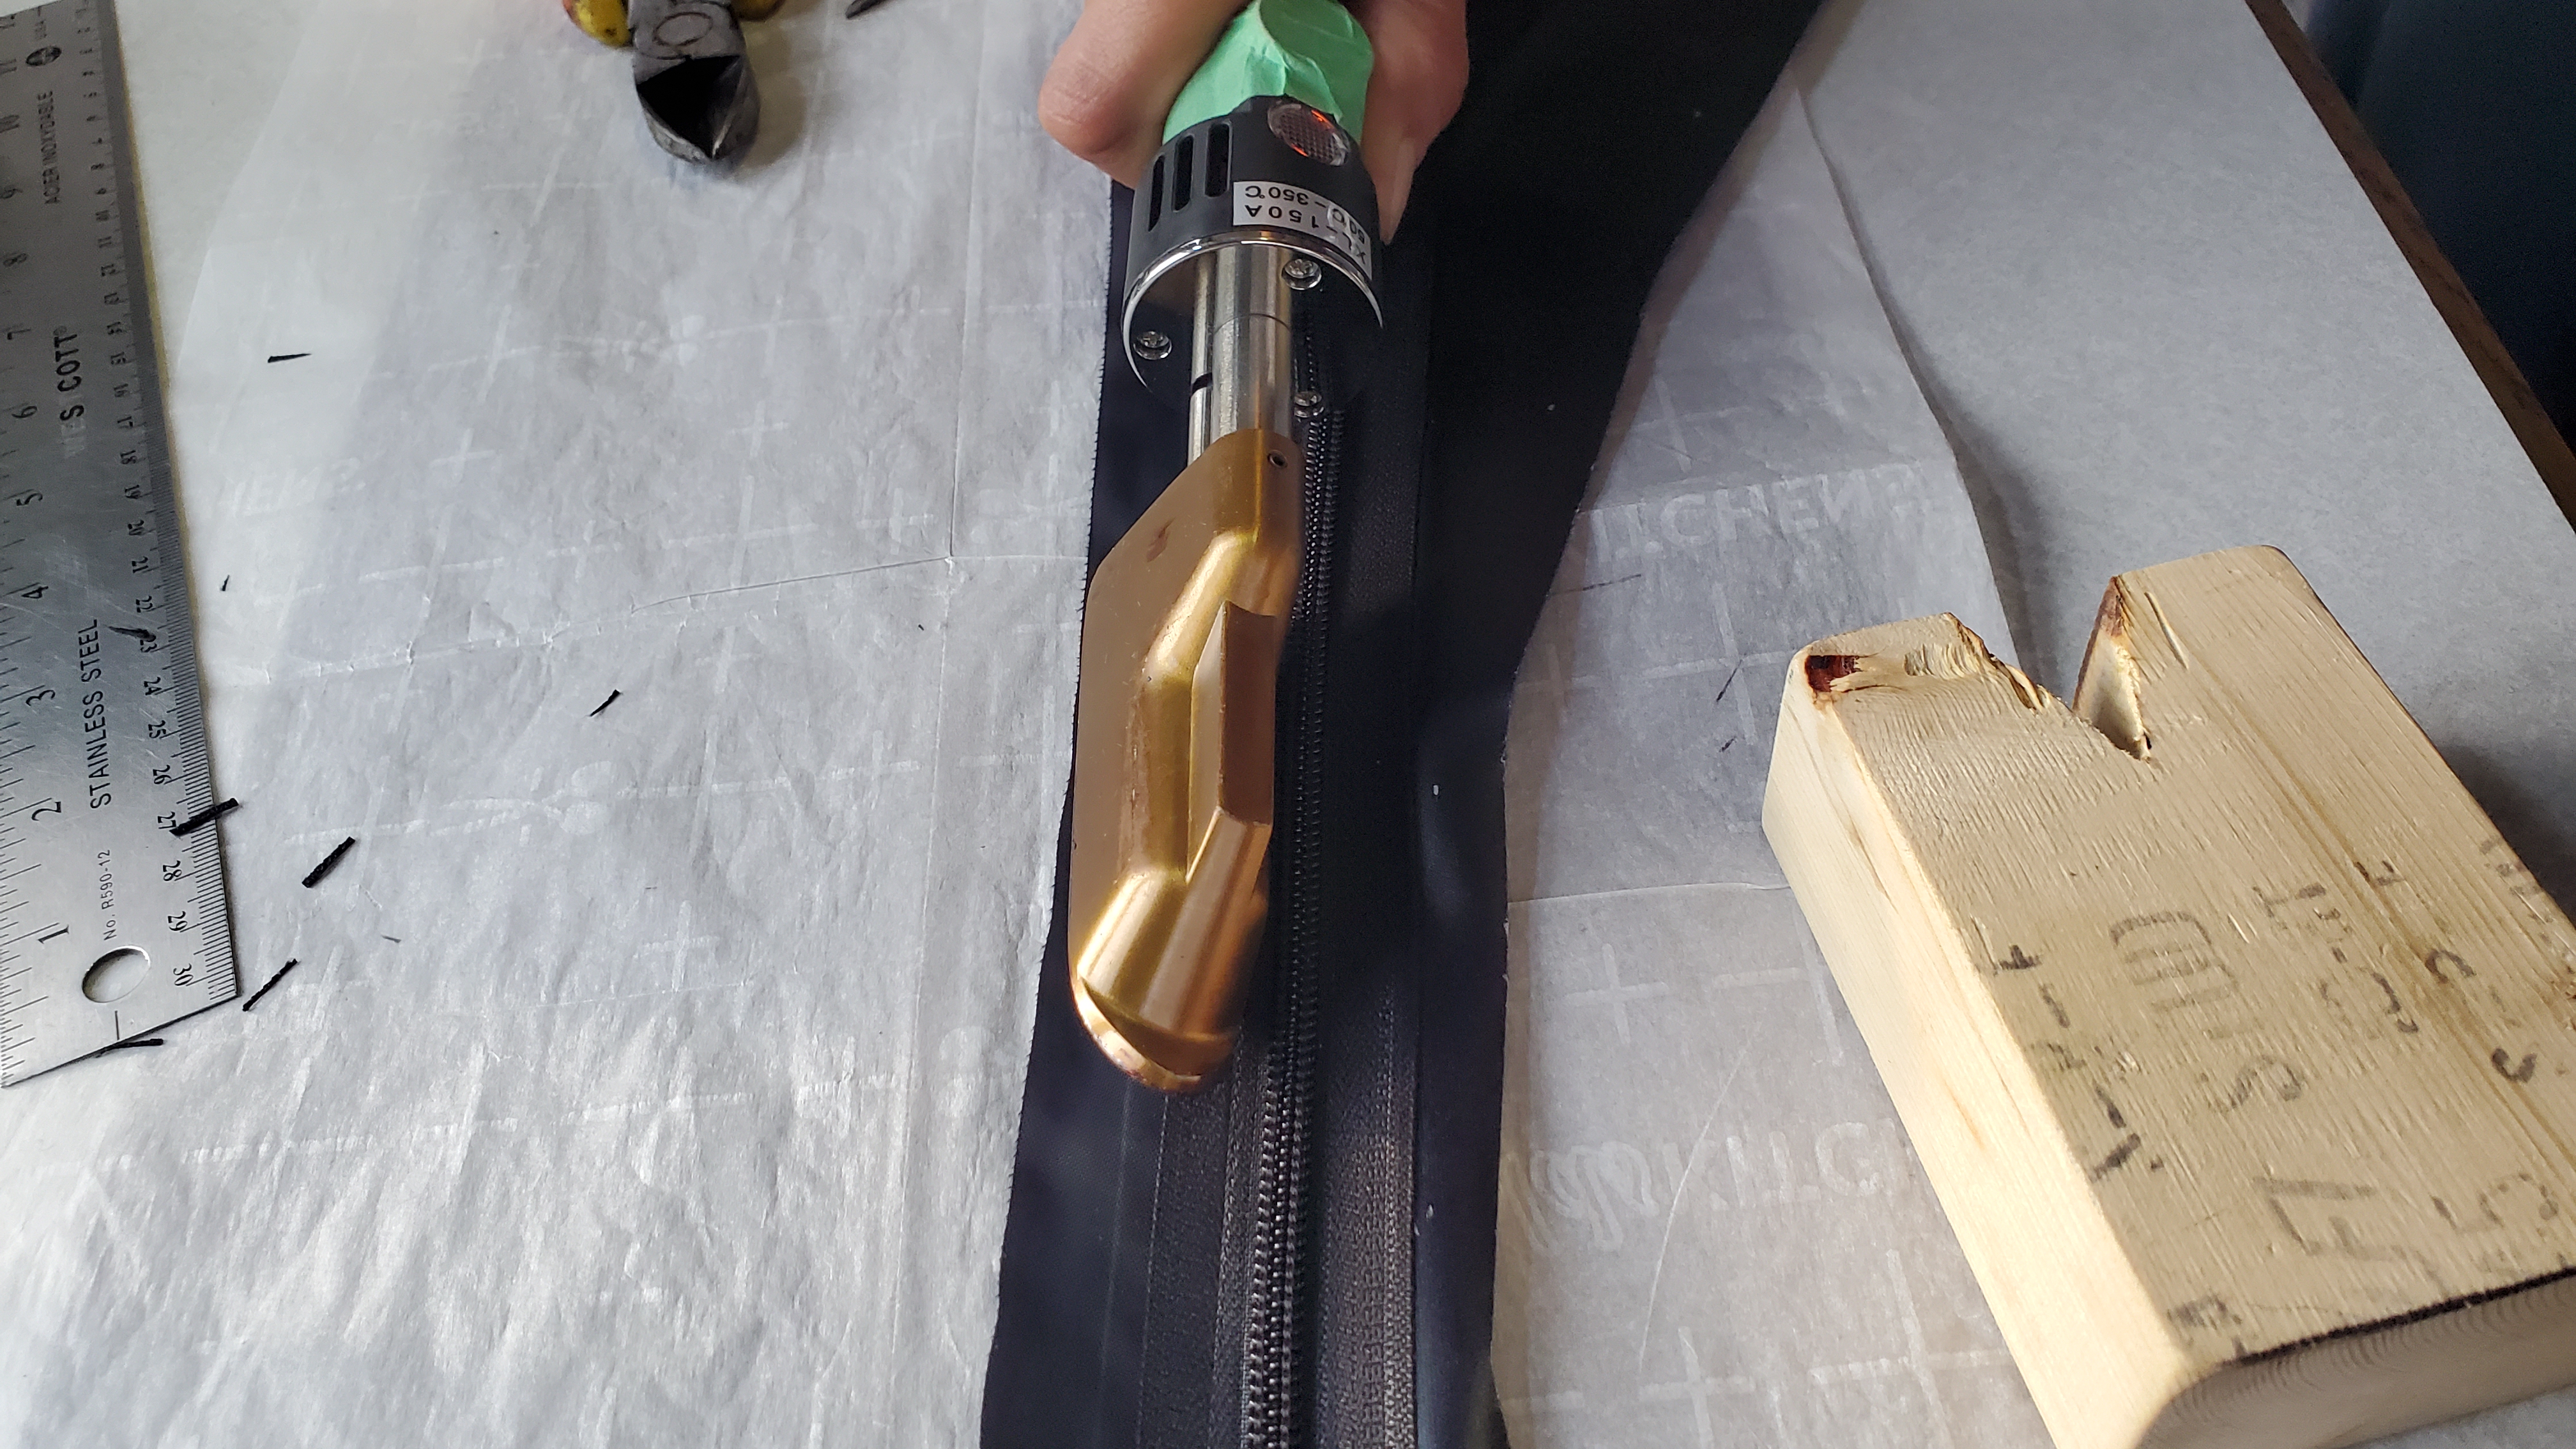
- To avoid melting the TPU beside the zipper chain, you can use two boards of the same thickness to create a step, as shown in the picture below:
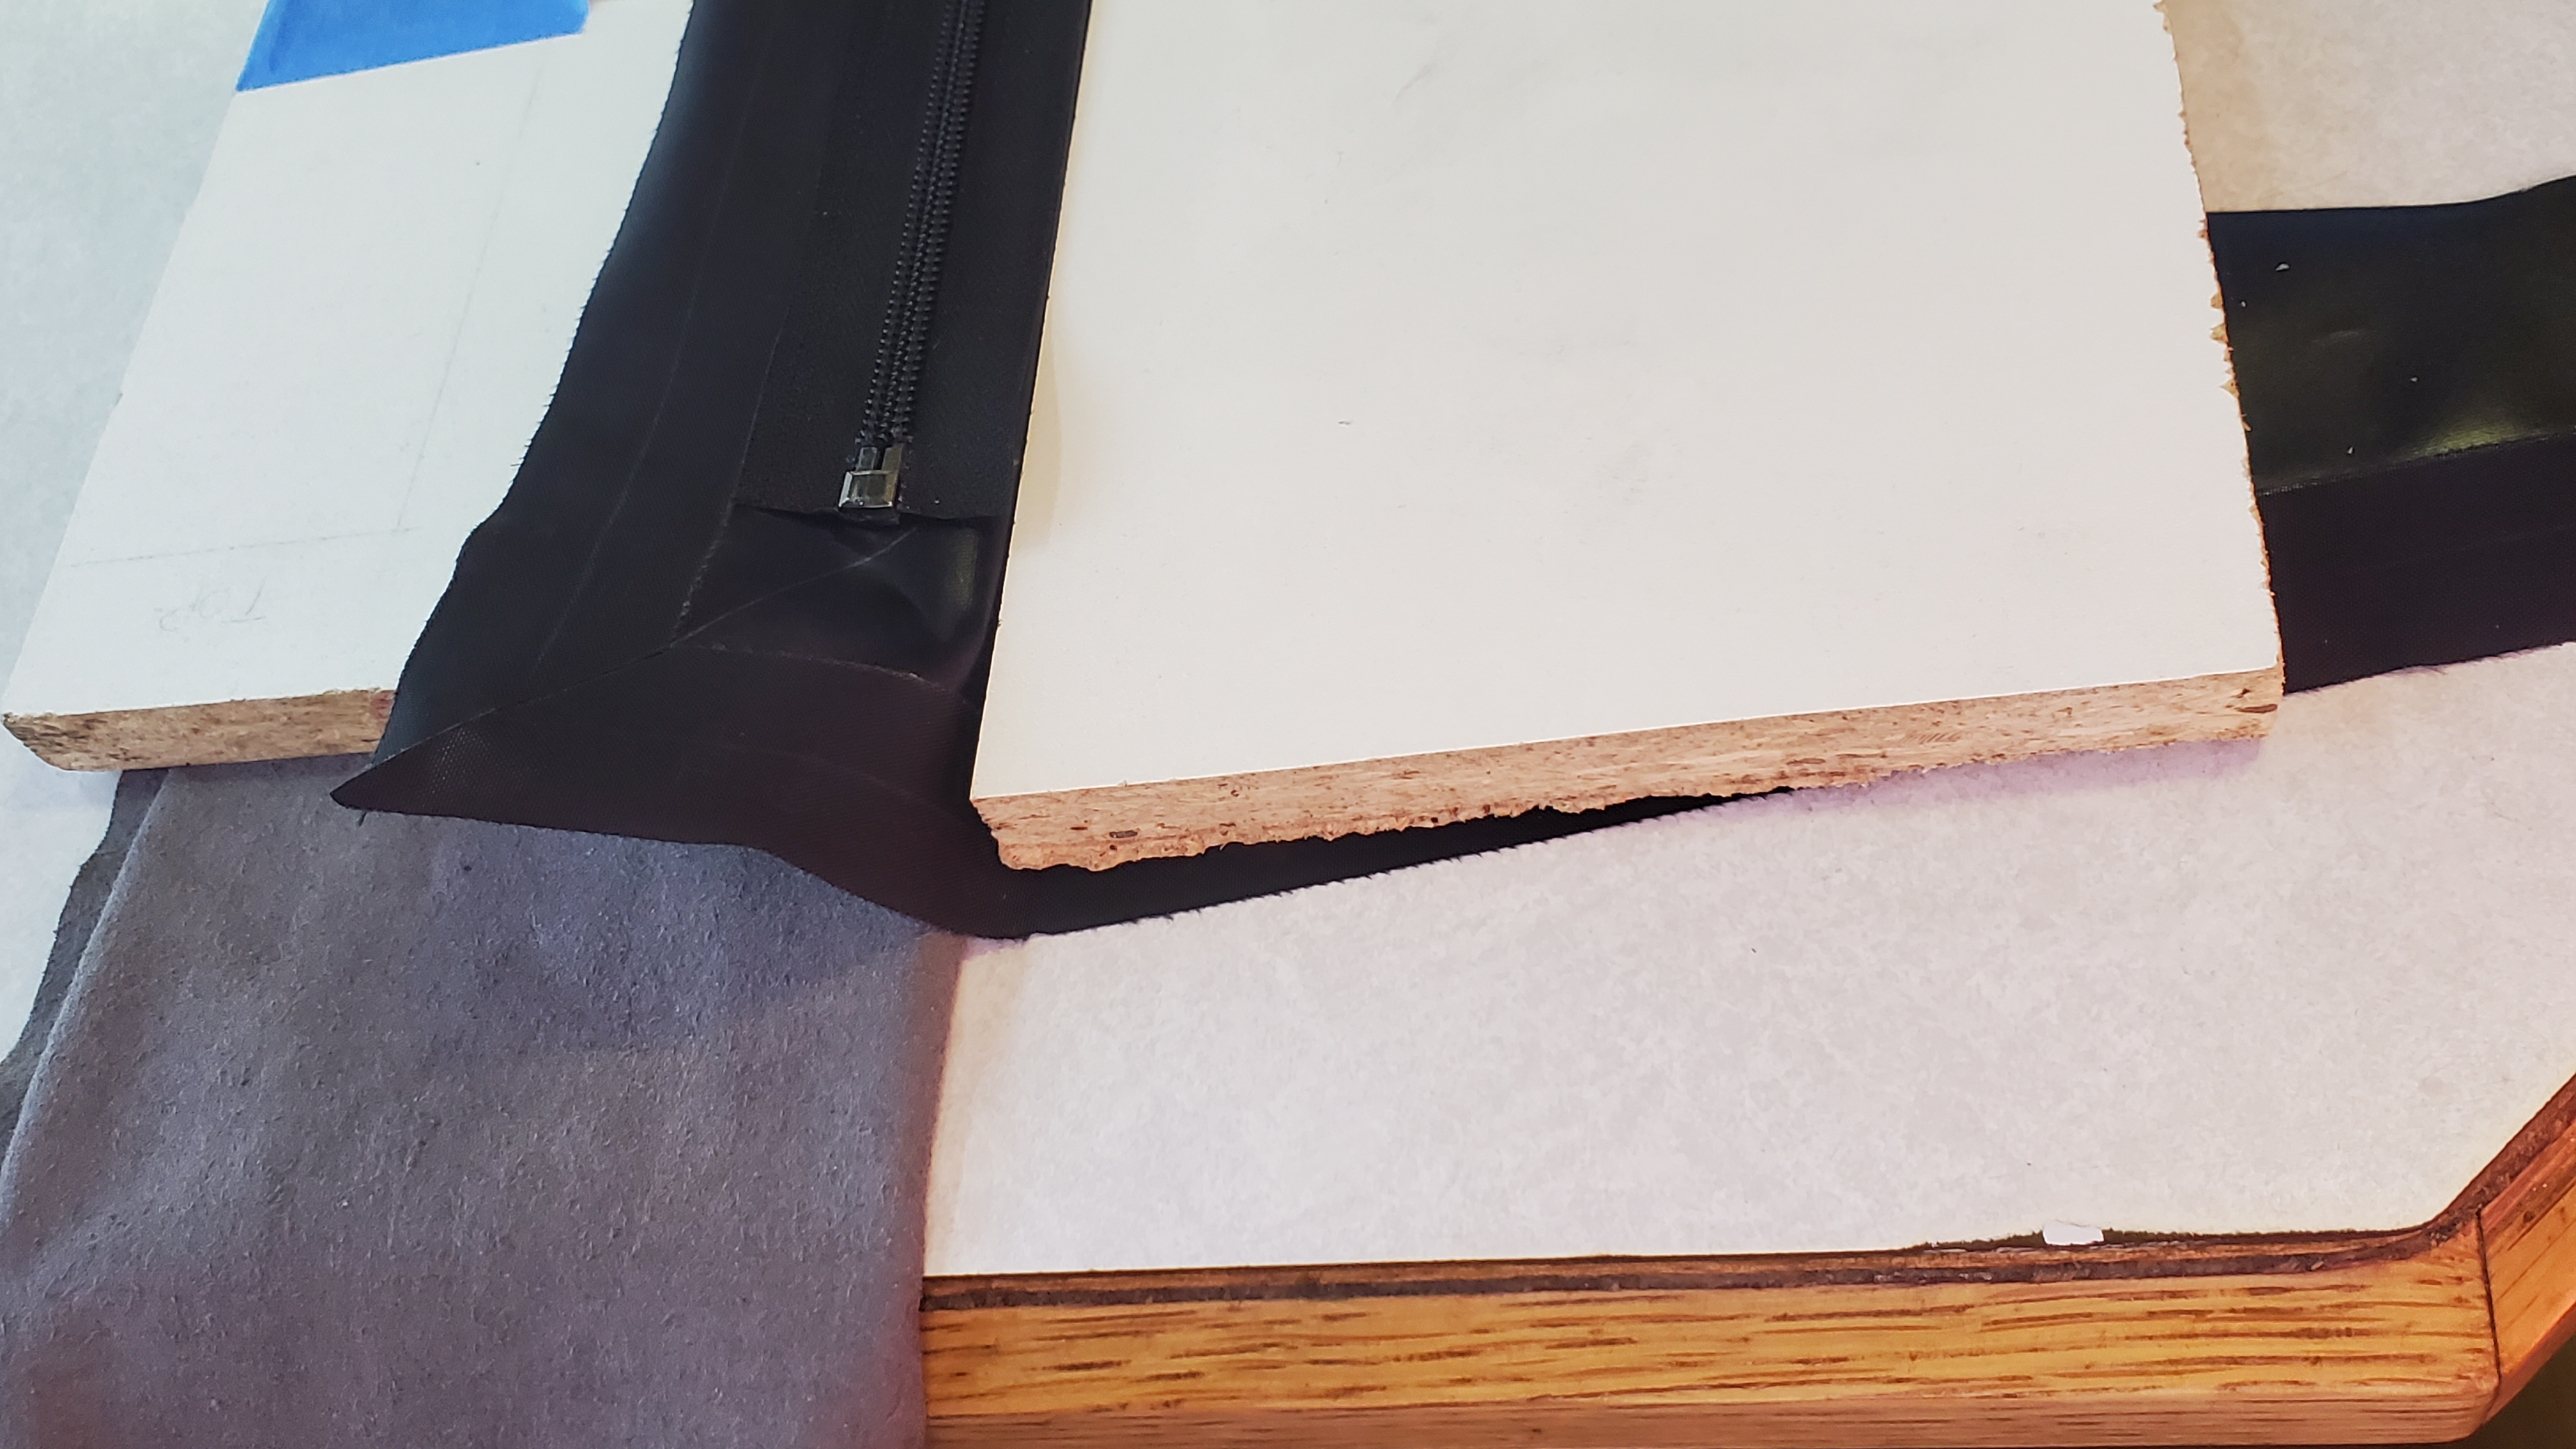
On that first stretch (and the last one), the spray deck fabric gets too narrow to fit the 1” strip, the zipper (1.25” wide for #5), and leave room to weld the tube later on. In this area only, I have made the zipper overlap slightly the 1” strip in order to leave 1 cm of TPU deck fabric exposed for the tube. The part of the zipper that overlap the 1” strip and the part of the tube that will overlap the zipper will be glued on later.
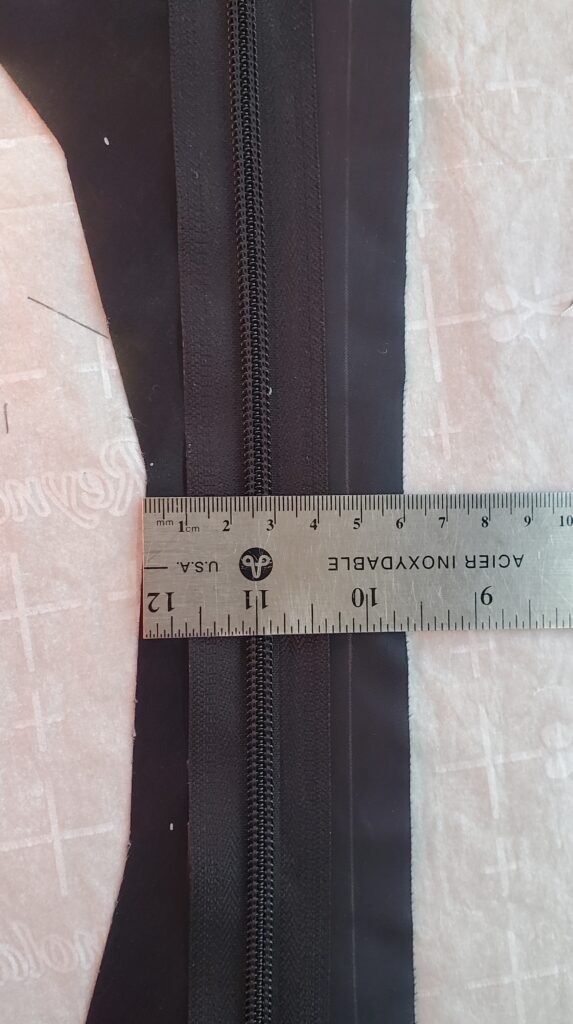
Don’t hesitate to use the edge of the iron in this area as only about 5mm of the zipper can be welded:
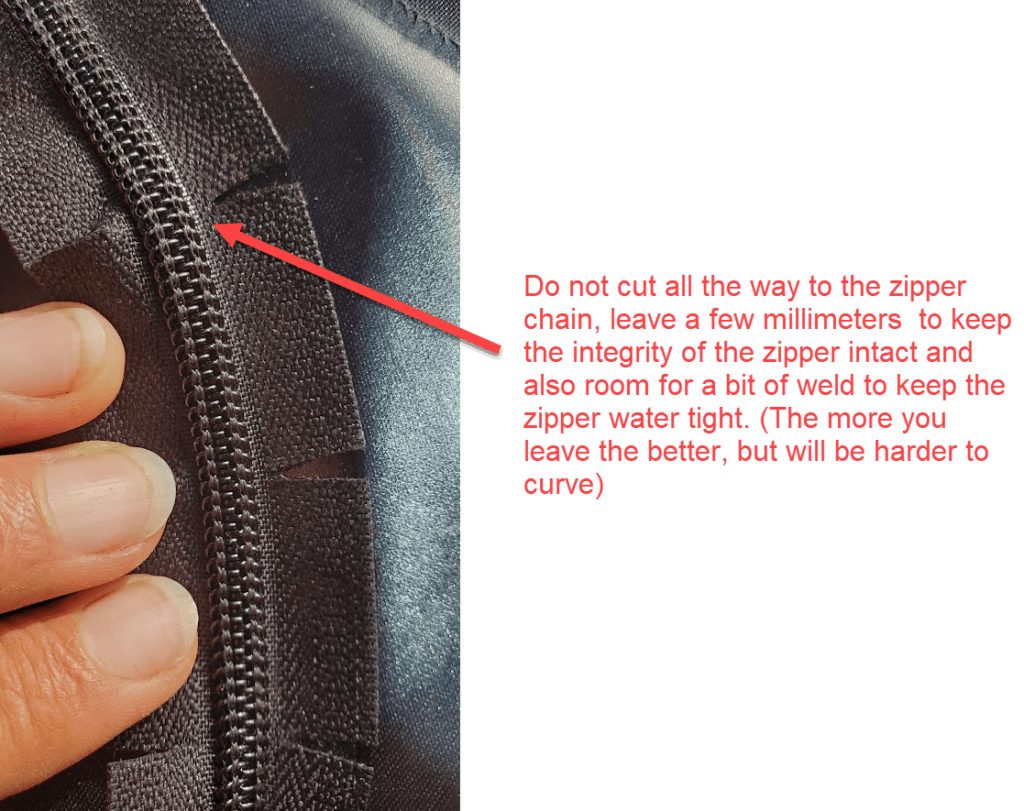
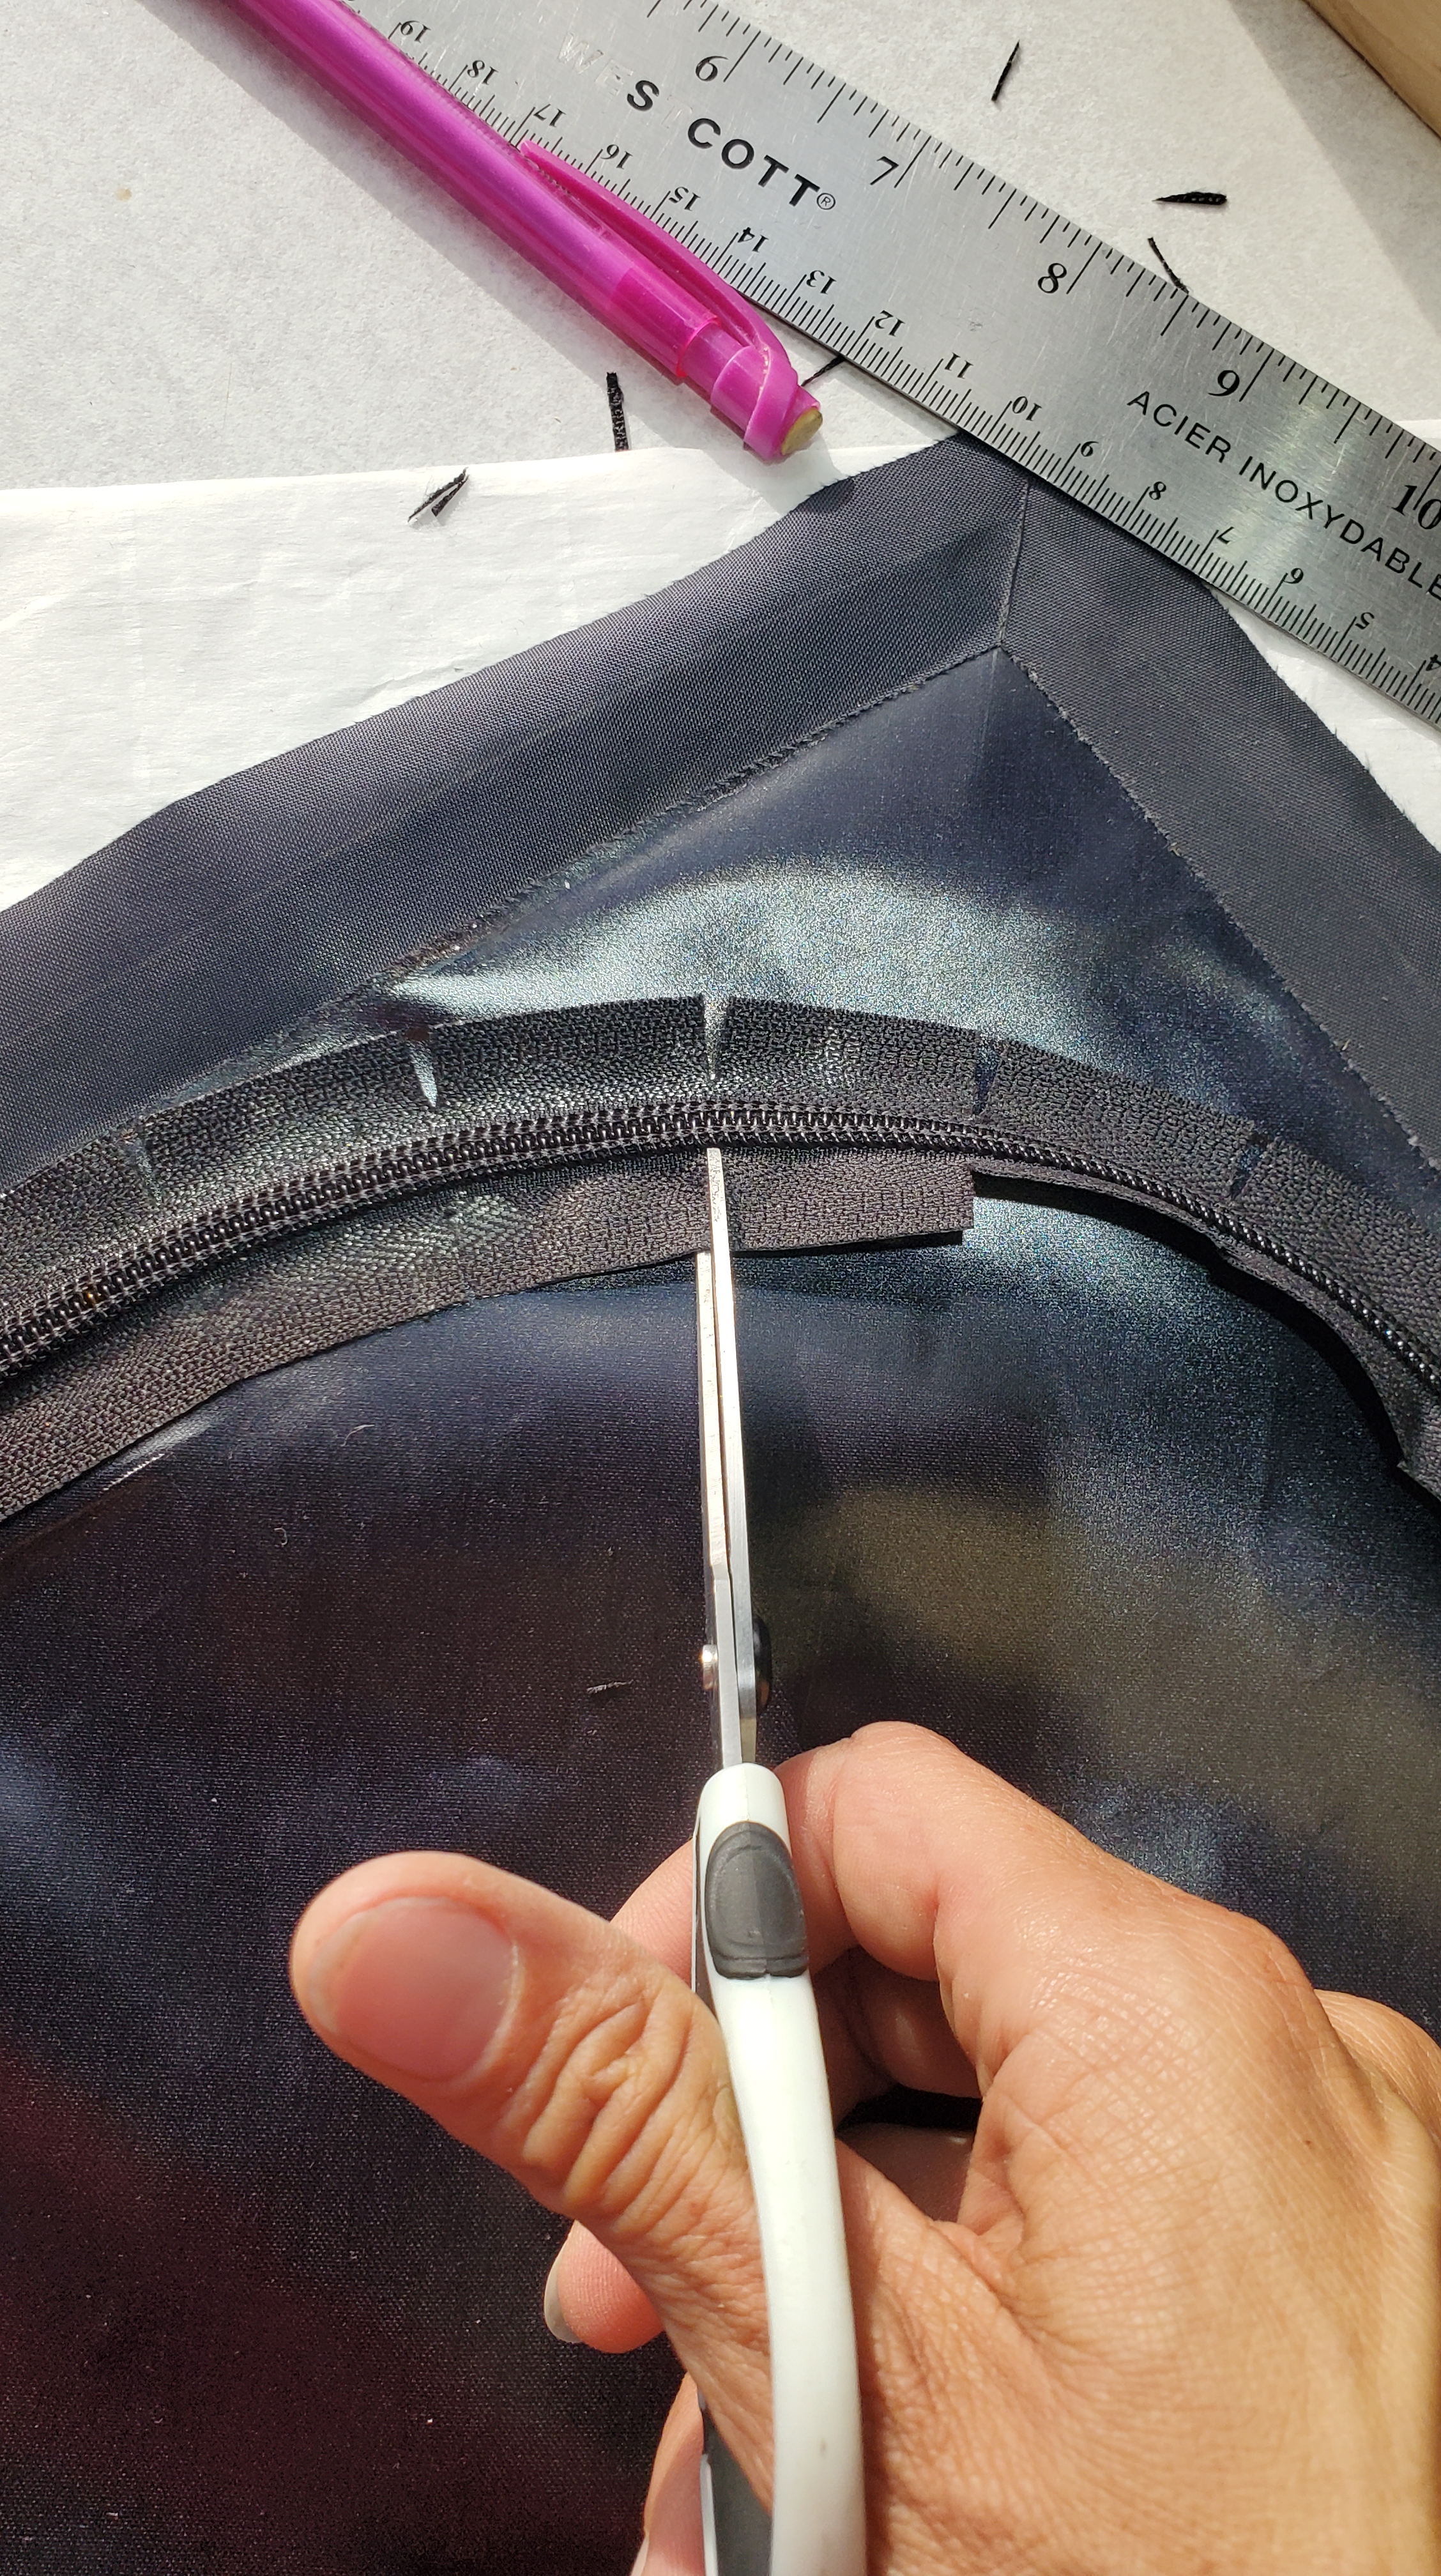
Once you get to the curve, make some cuts on the sides of the zipper chain as shown in the picture along the curved part.
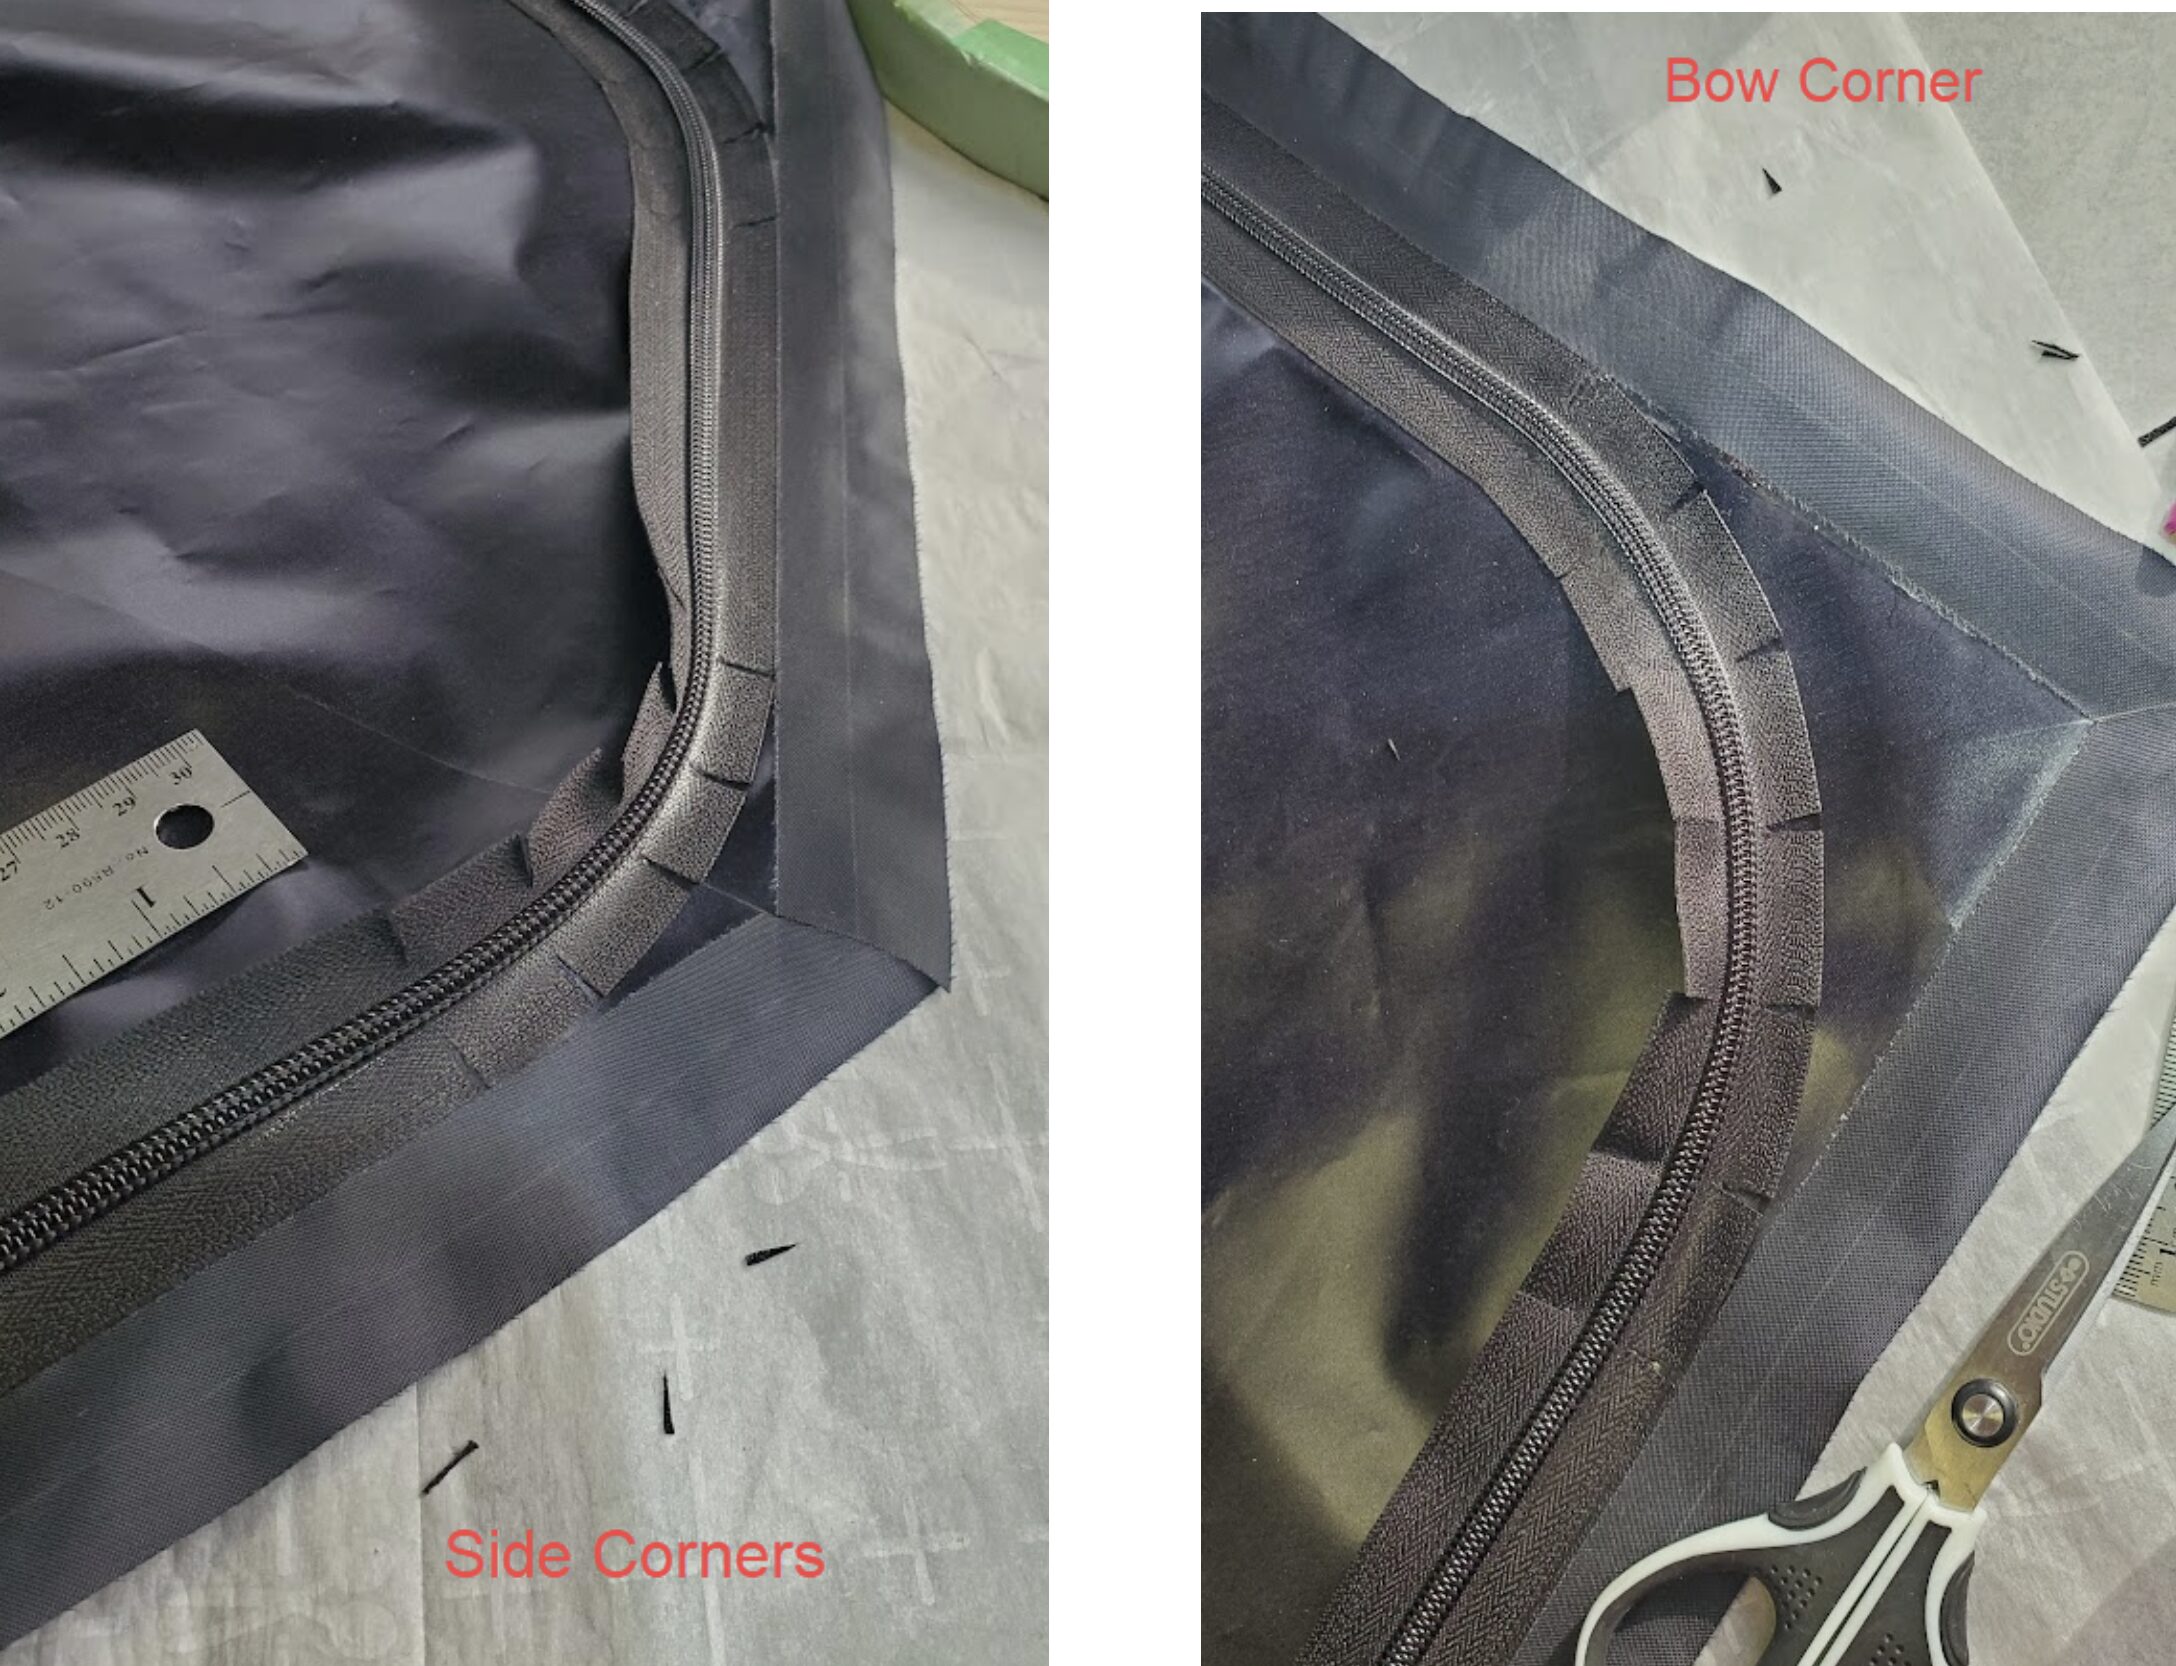
On the inside of the curve, overlap the fabric and cut through both on the median:
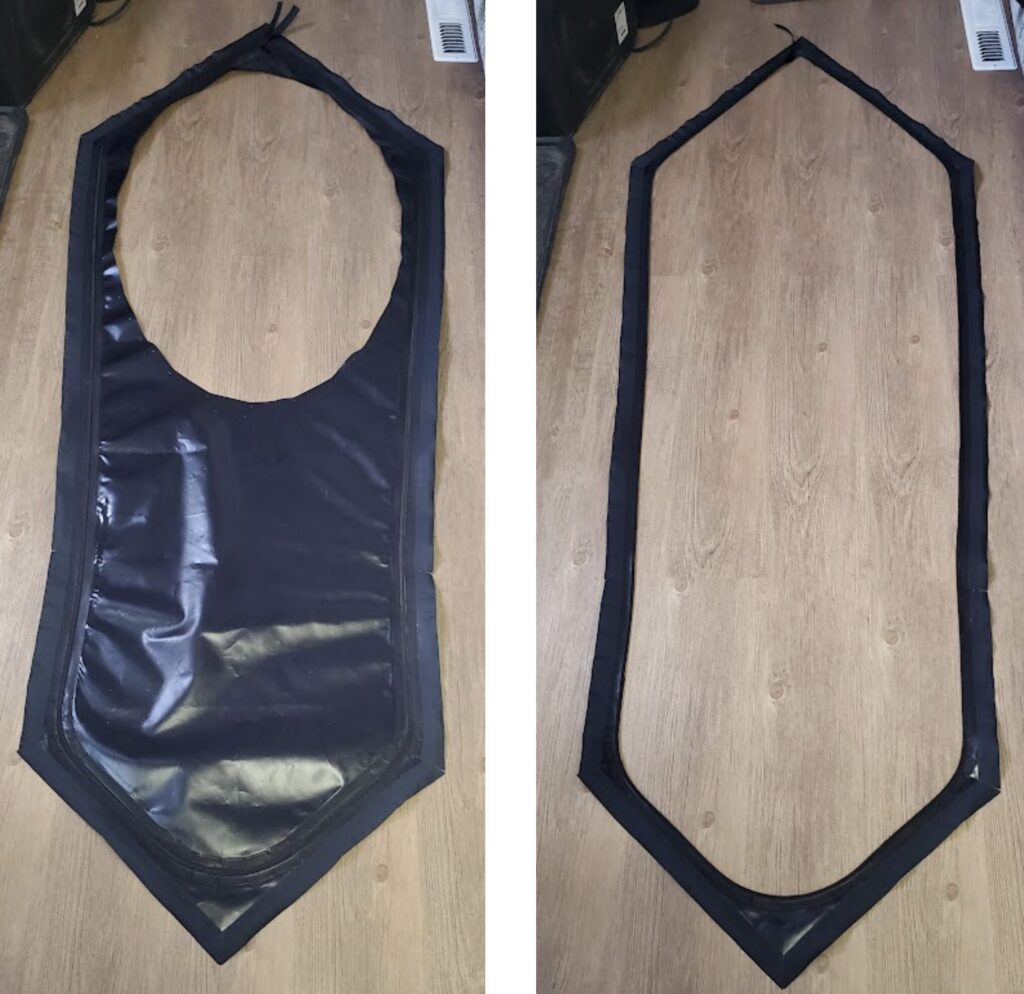
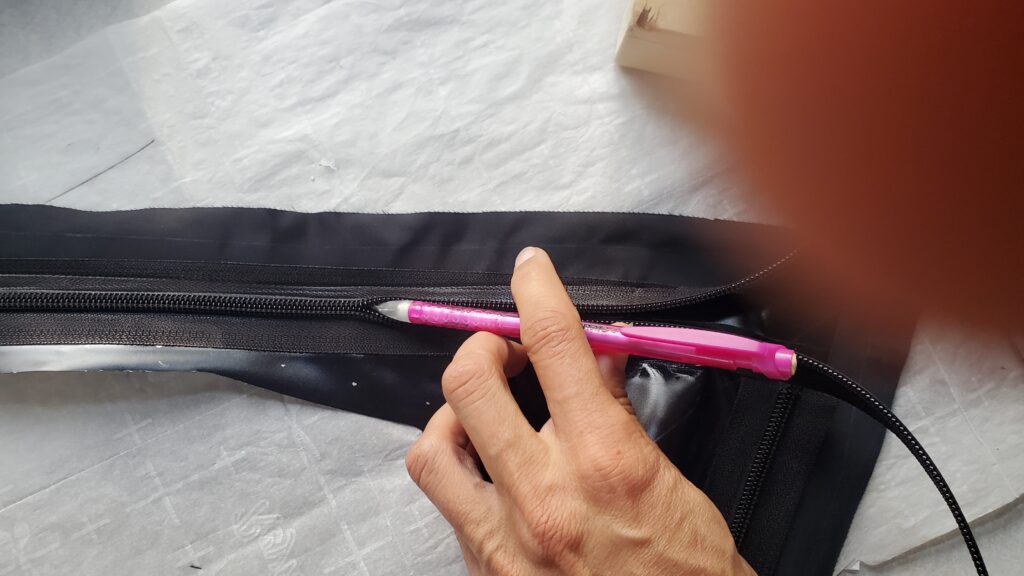
Once the zipper is welded all the way around, open it all the way (I used the tip of a pencil since the slider wasn’t on the zipper yet):
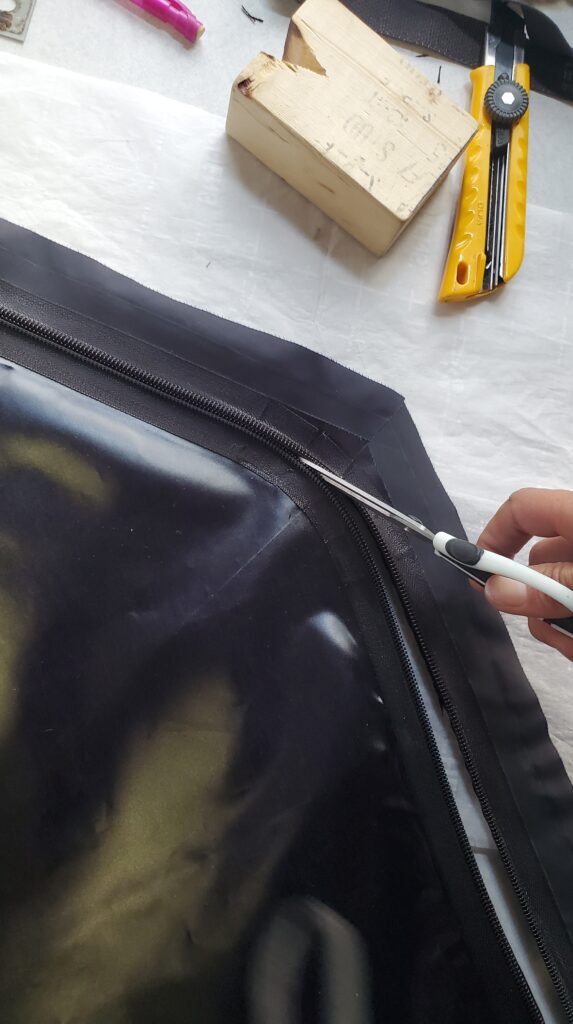
Use scissors to cut through the opening of the zipper all the way around:
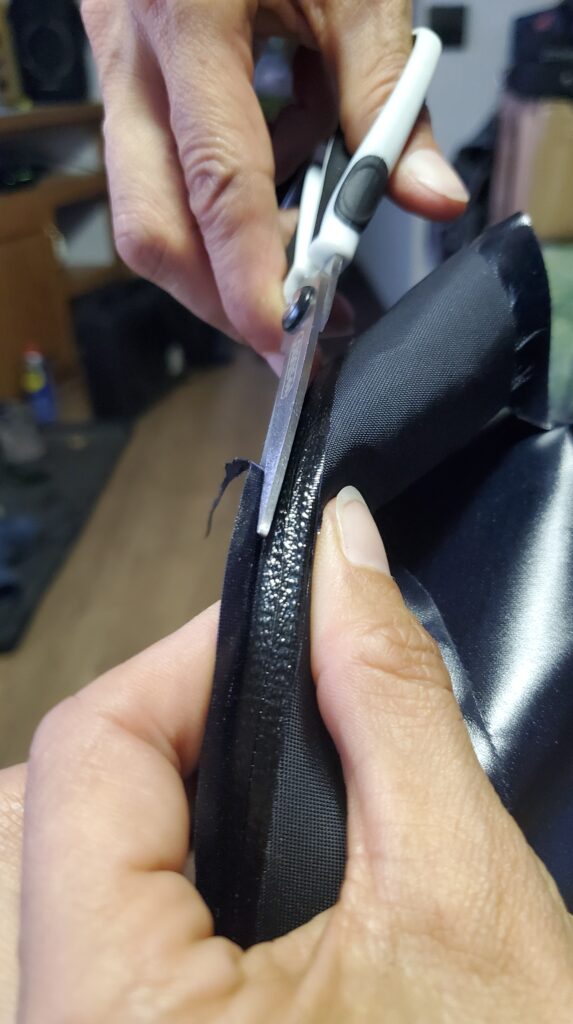
Trim the excess fabric on each side of the cut until the weld:
Now the spray deck’s coaming tube can be attached, and then the deck can be welded to the packraft, as in the standard spray deck instructions.