For a video and more up-to-date information on this topic, visit this page.
If you’re paddling an ultra-lightweight inflatable packraft in any but the most ideal conditions, it’s almost inevitable that your boat will develop a leak at some point. Fortunately, that is not a big problem, because small leaks and even large tears are easy to repair.
Contrary to common sense, a leaky packraft is nothing to be afraid of. The volume of air inside the tubes is large, and holes in the fabric are typically small, so it takes a long time to lose so much air you can’t stay afloat. With your Boston valve positioned correctly, you can even top up the air pressure with a few breaths while you are out on the water, and even with a 1 cm (~1/2 inch) puncture in your packraft, air escapes slowly enough that you can paddle to shore long before losing buoyancy. I have paddled around a lake for an hour with two people in my packraft while it was leaking air because I was too lazy to find the hole… my passenger didn’t even notice.
Because air pressure is distributed evenly inside a packraft and it is inflated to a relatively low pressure, the fabric tends to deform around objects it impacts instead of ripping open, making lightweight fabrics much more puncture-resistant than intuition would suggest. Punctures are only likely to occur in moving-water situations where momentum shoves you and your packraft against a sharp object with a great deal of force. If you are a long distance from shore, such as crossing a fjord or large lake, there are no sharp objects nearby and you are moving relatively slowly, so there is no need to worry about puncturing your packraft there unless you stop to practise juggling knives or something equally foolish.
With all of that said, it is a good idea to keep your packraft airtight, if for no other reason than it will feel more rigid and responsive on the water when fully inflated. So how do you fix a leak?
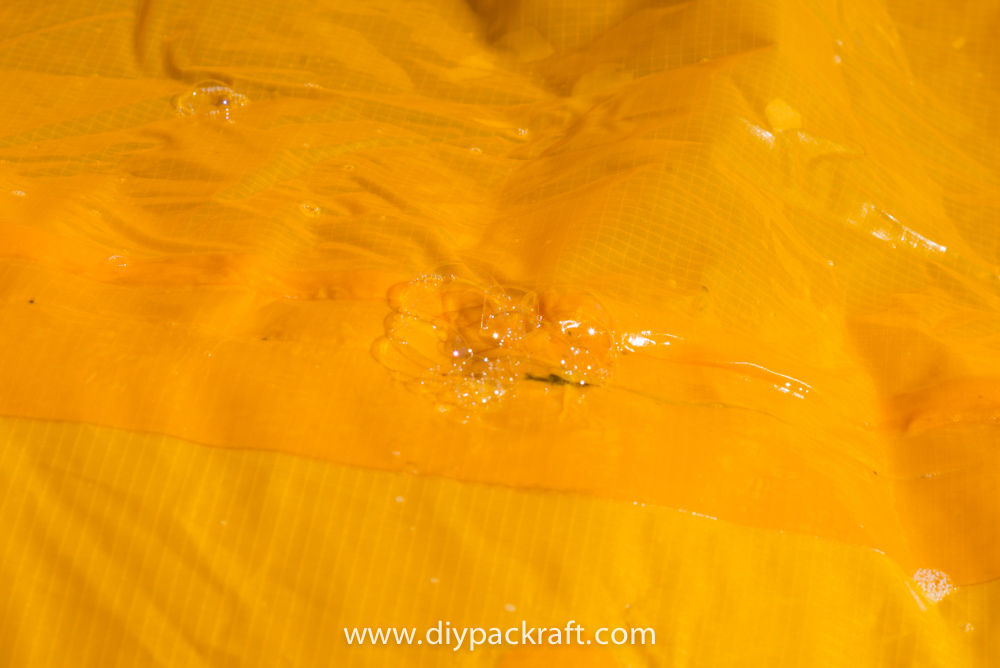
The first step is to figure out where the leak is. Large punctures will be easy to find, but most leaks are small and can take more effort to locate. Much like fixing a punctured bicycle tube, the easiest way to find the hole is to inflate the packraft and squeeze it with your hands while rotating it around your head as you listen for the hiss of escaping air. If the environment is too loud or the leak is so small that you can’t hear it, spread some soapy water over the fabric and soap bubbles will form wherever air is escaping. In the field, if you don’t have any camp soap, you can use plain water – soap just makes the bubbles more obvious. Once you have located the leak, rinse off the soap and wipe the fabric dry.
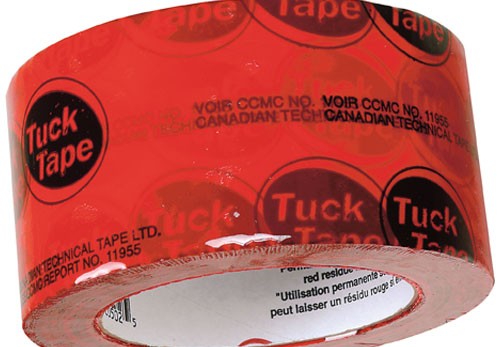
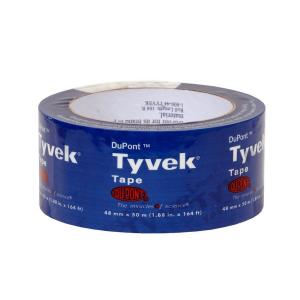
For field repairs, the best patch material I have found is adhesive tape designed for permanently sealing vapour barrier plastic sheeting in building construction. This tape is made of strong plastic film with a very sticky waterproof adhesive on one side. It bonds very well to PU and TPU coated fabric, but can be peeled off without leaving any residue. It is available in building supply stores, but it is sold under different names in different countries – here in Canada, Tuck Tape is common; in the USA, you will find Tyvek Tape at any Lowes or Home Depot; in Finland, Kerabit Air/Vapour Barrier Tape is available; and so on. If you are unsure what kind of tape to purchase, leave a comment below and I will help you find the right tape in your country; alternatively, if you know what brands of vapour barrier tape are sold in your country, leave a comment below to help others find it. Note: avoid using duct tape – the adhesive is not waterproof.
In the field, simply slap a piece of vapour barrier tape over the hole in your packraft, reinflate it, and carry on. This tape works so well you can keep paddling for months without a “permanent” fix.
Back at home, peel off the tape, make sure the fabric is clean and dry, and plug in your heat-sealing iron. Cut a piece of your heat sealable fabric large enough to cover the hole with at least 1 cm (~1/2 inch) overlap, and round off the corners with your scissors. If you’ve built your packraft with the TPU on the outside, simply place the patch over the hole, place a piece of parchment paper over the patch, and seal it in place with your iron.
If you’ve built your packraft with the TPU on the inside, you may need to enlarge the hole before rolling up the patch and sliding it inside the tube and then sealing it in place. Alternatively, you can pass the patch through the inflation valve into your partially inflated packraft and manipulate it into place (this is not too difficult if you backlight your packraft with a lamp so you can see the patch through the fabric). Seal the patch in place with your iron, being careful not to iron past the edge of the patch.
If you have a leak where multiple pieces of fabric join together and there is no way to form a TPU to TPU bond around the hole, you may have to affix your patch with glue such as Aquaseal.
19 Comments