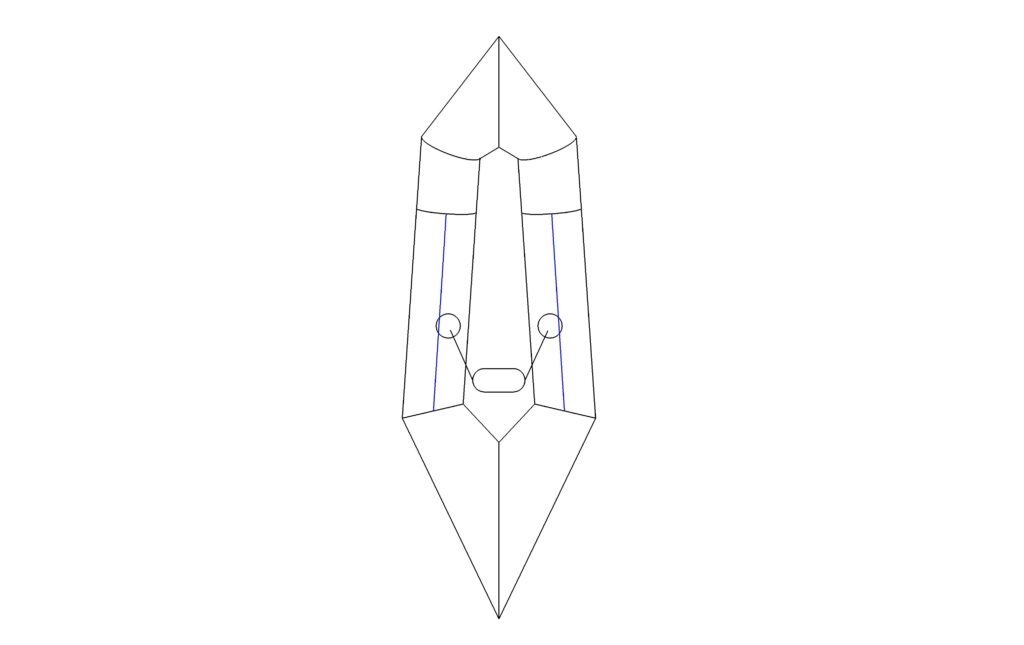
The black parts of the inflatable back band and the associated attachment points are scored into the fabric piece labeled “Seat +” and around the packraft’s floor fabric. Baffle D is scored into the sheet of colored tube fabric.
Note: if you ordered your kit before October, 2024, these parts are not pre-scored in your kit, but you can still make your backrest into a back band. You’ll just have to cut out the straps and attachment point shapes from the scrap tube and floor fabric. You can retrofit an existing backrest by cutting off the side seams and inserting straps before welding the sides together again.
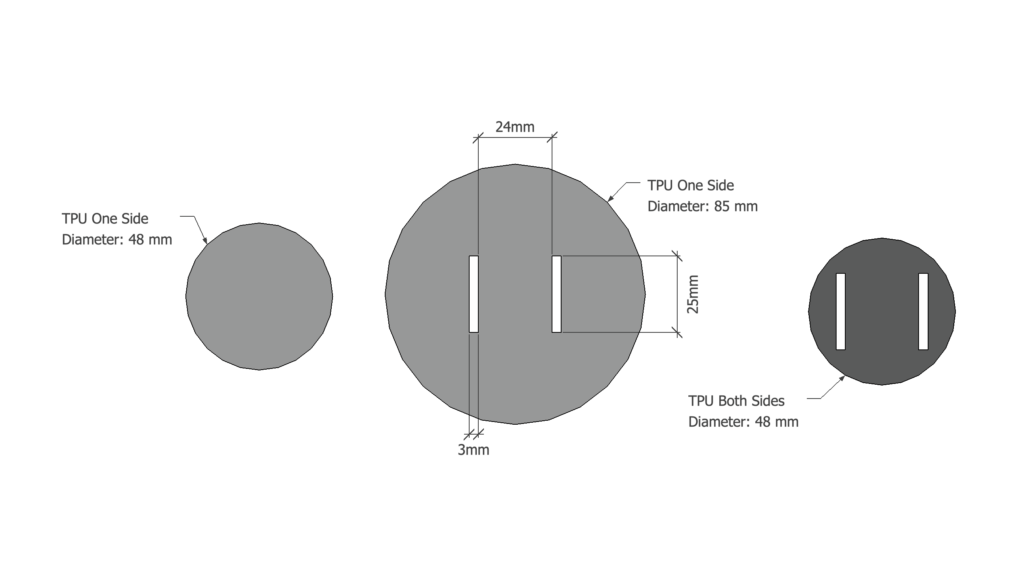
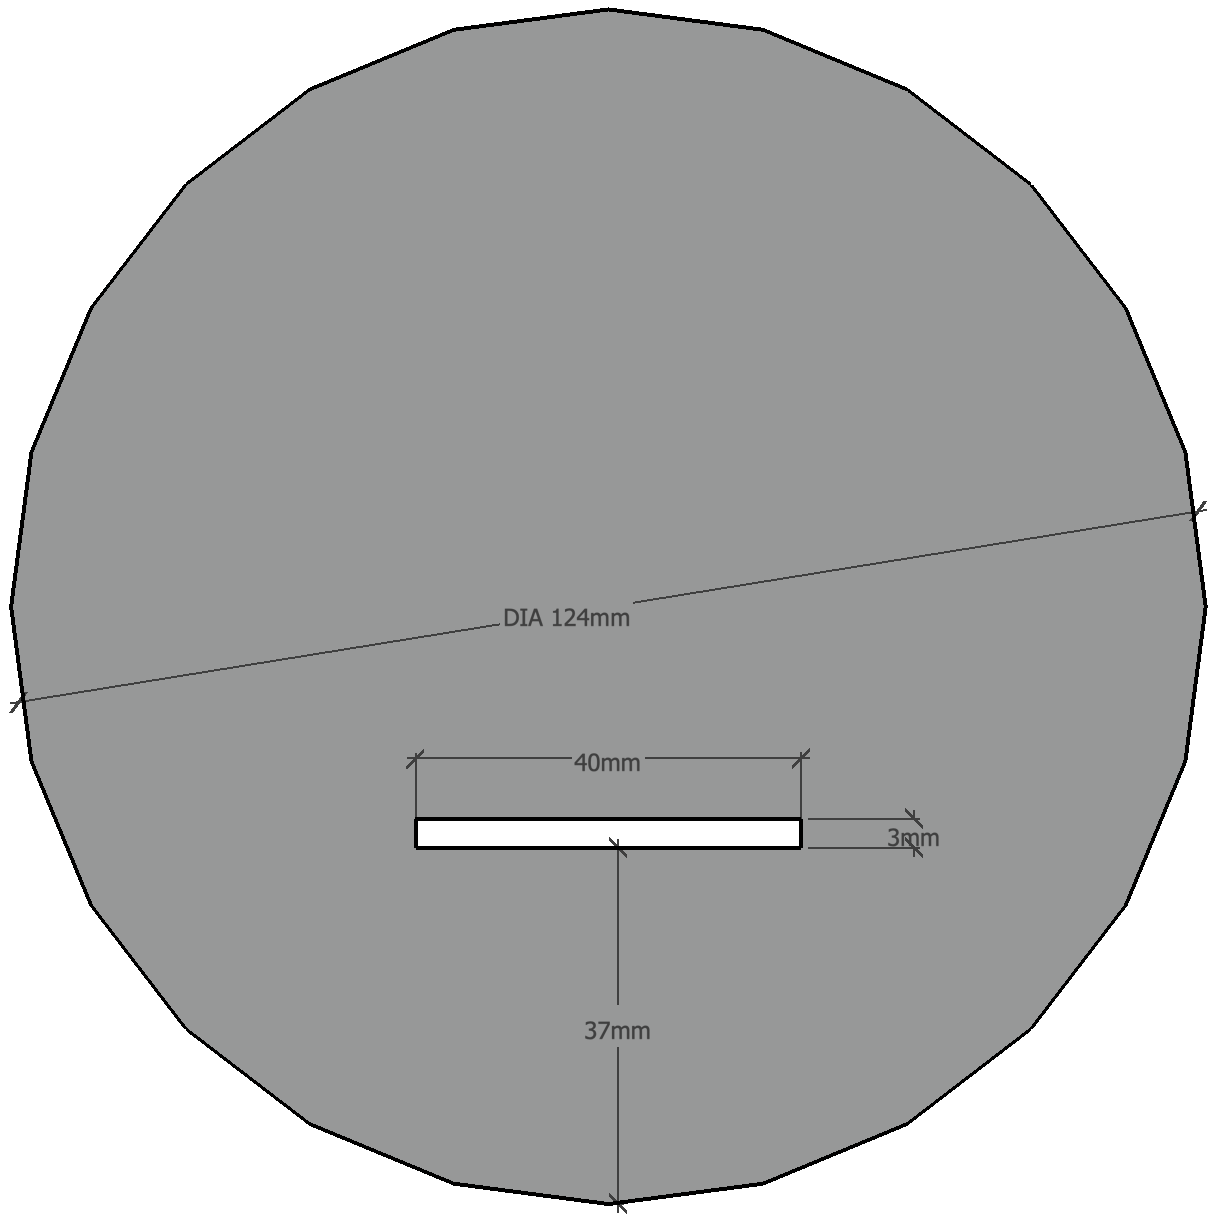
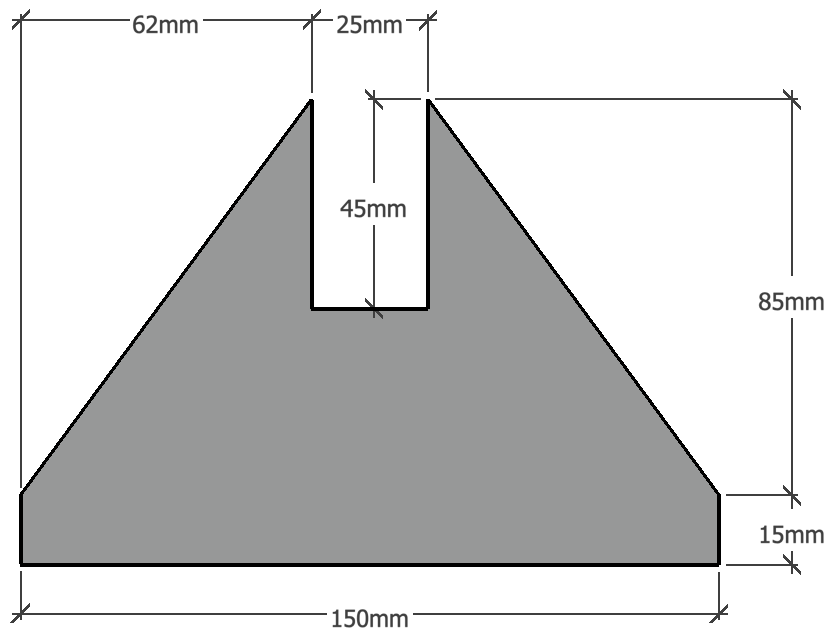
Note: Newer kits have the thicker attachment point parts pre-scored into the floor fabric. The smaller triangular attachment points (with 20 mm wide strap slots) are for the bottom of the backrest and for the seat bottom (to attach them to the rear of the cockpit floor), and the larger triangles with 25 mm strap slots are for the sides of the backrest. You may have to cut some more straps from your floor fabric to make it all work, but there should be enough material in the kit.
Back Band Assembly
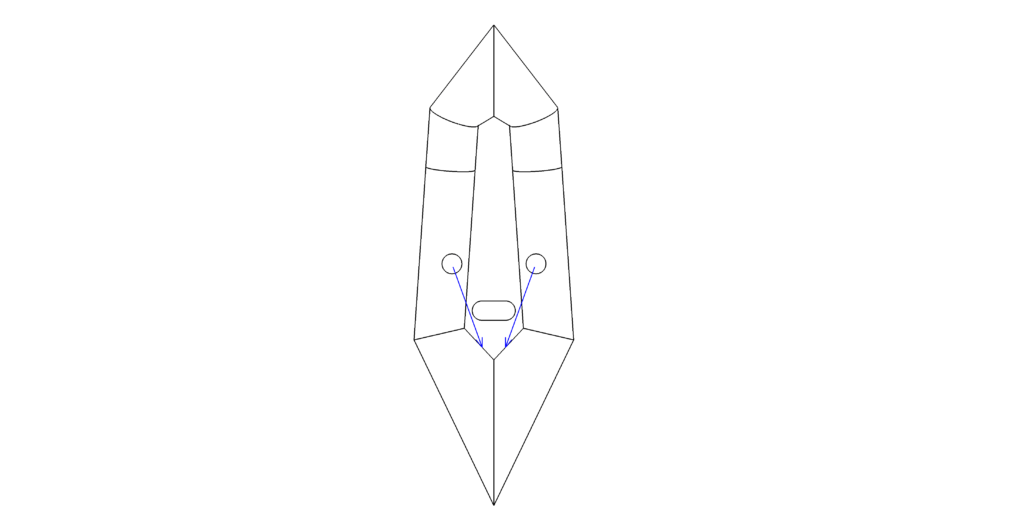
Attachment Points

Note: The back band can also be attached to the floor at the rear of the cockpit, where the seat bottom is attached. Use a Type 2 attachment point, or the smaller ladder locks that are included in newer kits.
5 Comments
adam · September 20, 2025 at 6:09 am
Hey Matt, I’m confused by the materials shown in the video/text for the back band step compared to what was included in the Skeena kit I ordered July 2025. Specifically, I’m having trouble identifying the pieces for the straps and attachments made from the double sided floor fabric. The video shows 3 triangular strap attachments being used and the graphic within the text shows them as being 150 mm across at the bottom. I have only 2 of these in my kit and 2 others shaped similarly but smaller with 120 mm width and a narrower opening for the strap.
Also the straps are confusing me. I have two pre-scored strips that are each 145 cm long. I understand that these are for the thigh straps. I don’t see any other pre-scored straps for the back band straps.
It would be great if you could help me figure out what the four triangular attachments I have are for and which sizes go where. I have enough scrap material to cut another triangle and more straps if needed but I wouldn’t be able to cut more of the larger trianglular attachments than that.
Matt (Admin) · September 21, 2025 at 2:07 pm
Hi Adam, good questions! The smaller triangles (with 20 mm strap slots) are for the bottom of the backrest and for the seat bottom (to attach them to the rear of the cockpit floor), and the larger triangles with 25 mm slots are for the sides of the backrest. You’ll have to cut some more straps to make it all work, but there should be plenty of material. I’ve been changing things up and forgot to update all the relevant pages – sorry about that. I’m travelling at the moment, so I can’t make a diagram, but I’ll add this as a note above.
adam · September 23, 2025 at 4:16 pm
Thanks! I took a guess at what needed to happen to finish up the back band based on your explanation. I think what I’ve done now will work out. I had already built the seat so I’ll use the older style attachment for it.
oldcanuck · February 10, 2025 at 4:42 am
Hi Matt..
Could you please add links, in the two appropriate lists, to these Back Band Assembly and Installation instructions, for all DIYPackraft model kits delivered with this new feature.
If I follow the How To list of instructions for my Skeena DIYPackraft, as a first-time builder I could easily carry on with the Backrest Assembly instructions and video, then realise the need to have followed the newer back band instructions and video. (don’t ask me how I know this. Haha)
oldcanuck
Matt (Admin) · February 12, 2025 at 4:44 pm
Ah, sorry, I thought I had done this already! My apologies!