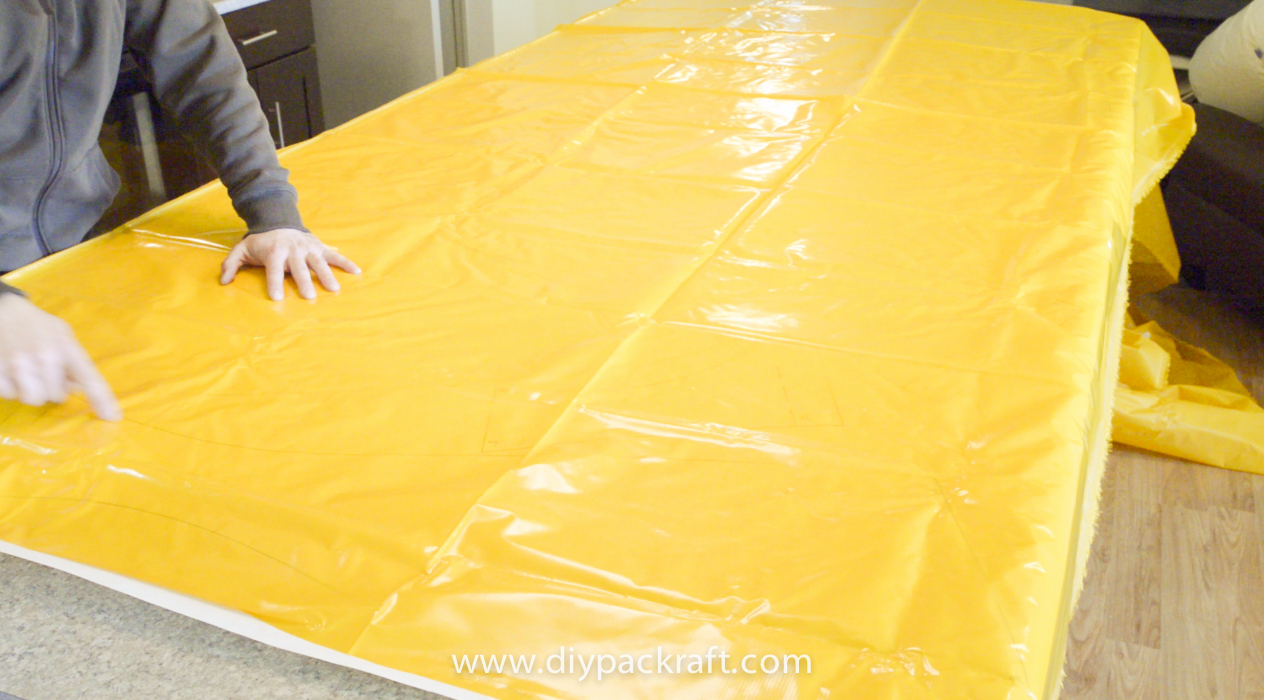
This is the first step in constructing your packraft. For this step, you’ll need a flat work surface, a permanent marker, tape, scissors, fabric, and your DIY Packraft plans (or plans of your own design).
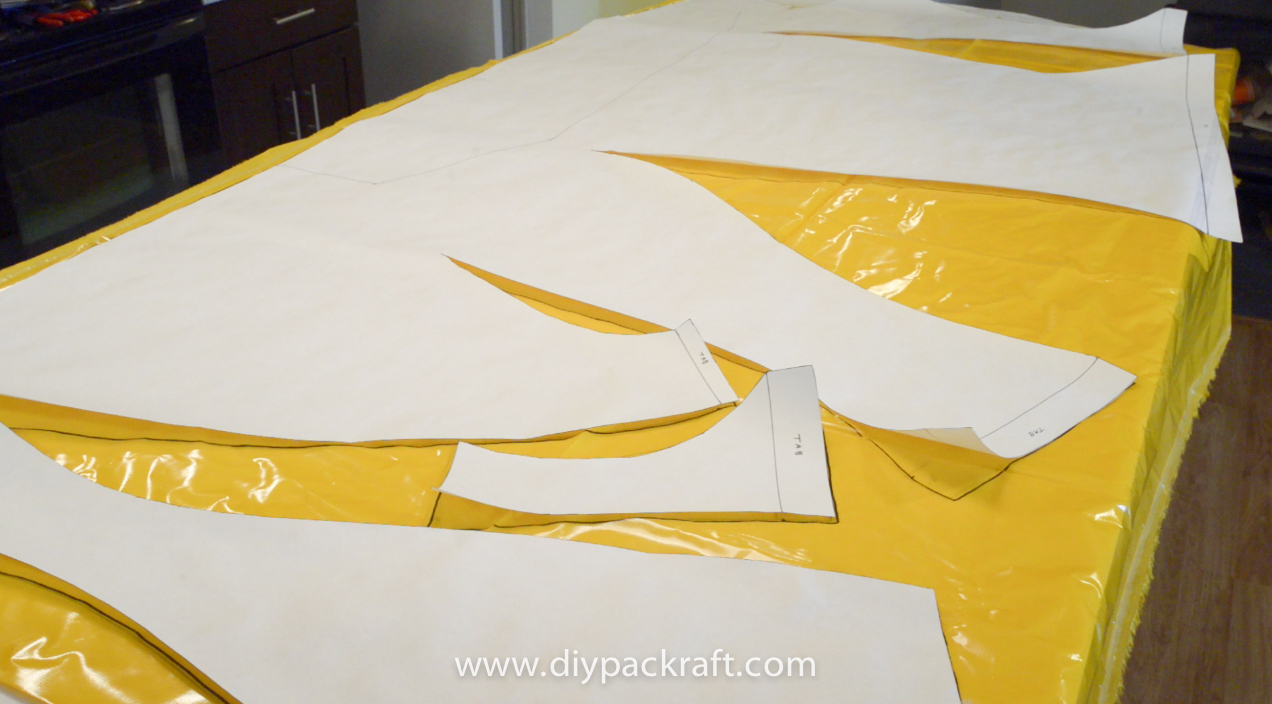
In the pictures and demo video, I’m using a TPU coated ripstop nylon that is thin enough that I can see the lines on the plans through the fabric. If you’re using a thicker fabric, you may need to cut out the plans along the solid lines and stencil the shapes onto the fabric.
 or
or
Don’t worry if your work surface is smaller than the plans – you can start at one corner and then slide the plans into a new position when you’ve done as much as you can. Just make sure you tape the plans to the fabric so they won’t shift around while you’re working.
Trace the solid lines from the plans onto the fabric. The plans are designed so that if you cut just inside the lines the fabric will fold together correctly, so it’s okay to use a permanent marker. Make a small tick at each end of the dashed lines, or trace them in with a non-permanent marker, because those areas will be visible on the finished packraft.
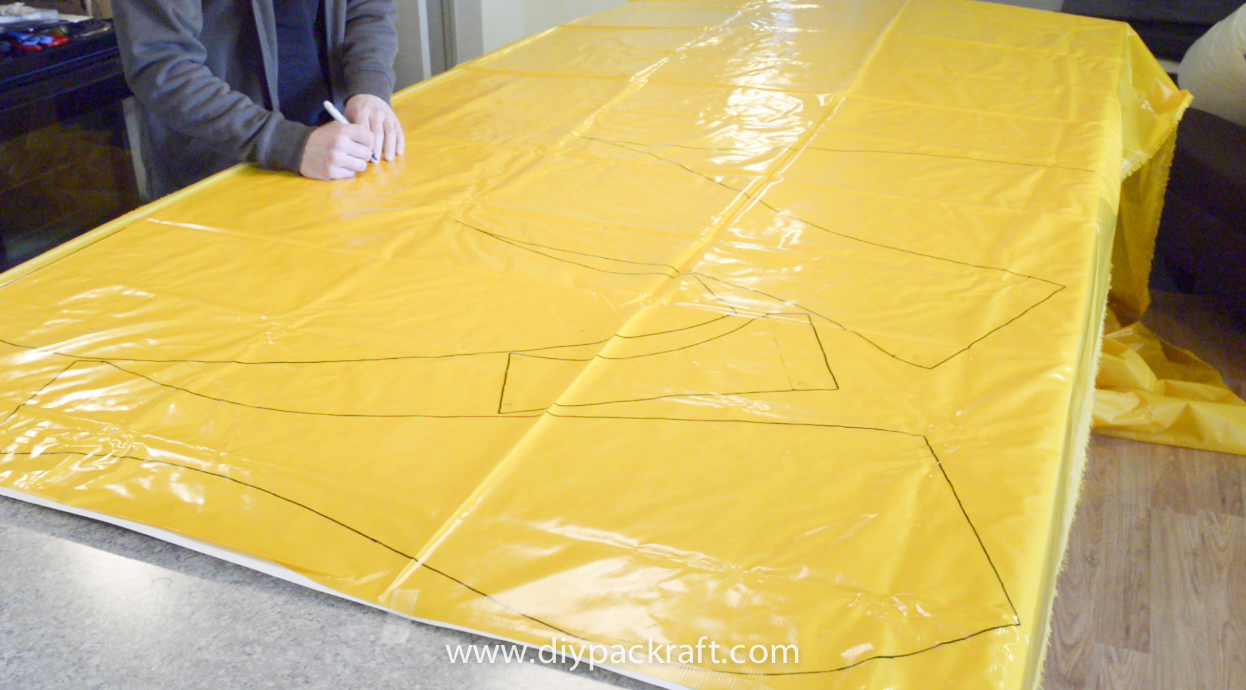
When you have traced everything onto one sheet of fabric, set that fabric aside and trace the plans again onto a second sheet, following the same procedure as before. Important: If your fabric has a different coating on each side, be sure to lay out the second piece of fabric upside down relative to the first piece. By tracing the same shapes onto opposite sides of the fabric, they become mirror images of each other, and that way you’ll end up with one left side and one right side for your packraft, not two left sides or two right sides.
After you have traced both sides of the packraft, you’re ready to start cutting them out. Begin by cutting out the shapes from one piece of fabric with a sharp pair of scissors. Cut just inside the lines so the pen marks will not end up on your finished packraft.
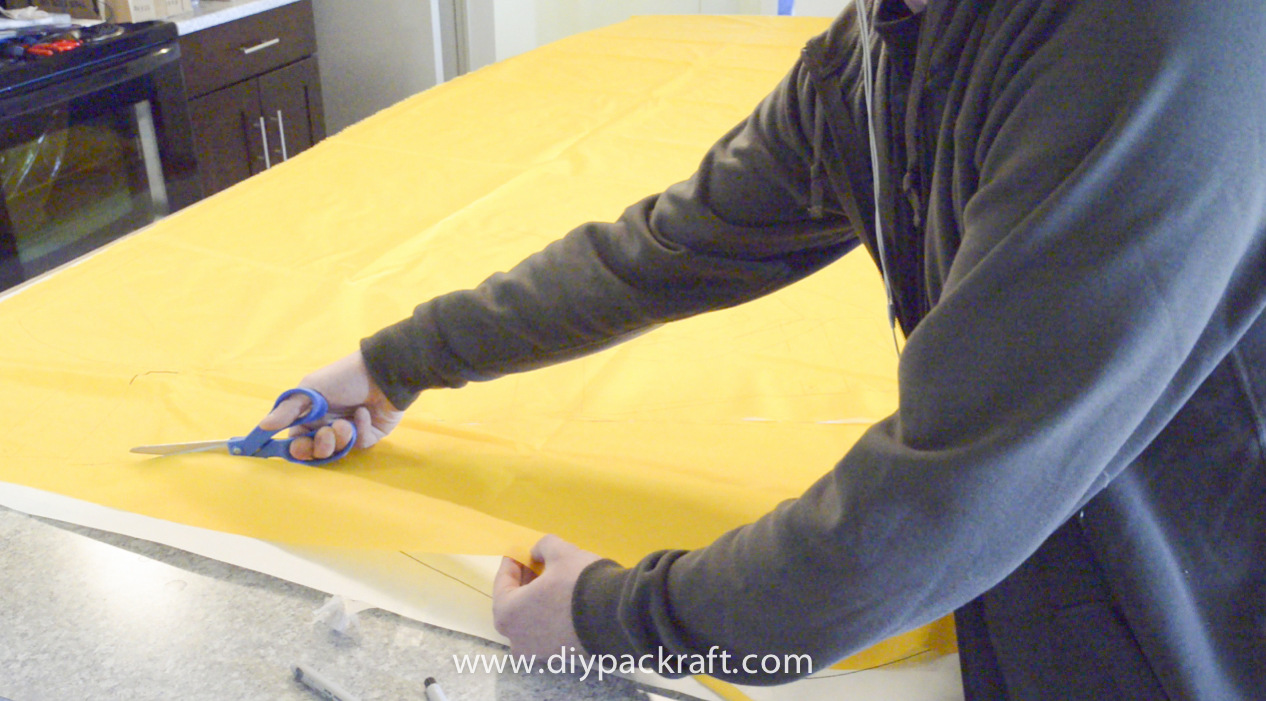
At this point, I recommend cutting out only one side of your packraft and leaving the other piece of fabric intact until you have joined the pieces of the first side together. That way you eliminate the risk of mixing up the pieces from the left and right sides of your packraft and joining the wrong ones together.
2 Comments
Ken Wong · September 27, 2016 at 3:06 pm
I received your plans for the DIY packraft. I noticed on my plans not all the dotted lines are on the plans sent.
Can you list where the dotted lines are and how far from the edge they are.
I have dotted lines for only the floor
Matt (Admin) · September 27, 2016 at 4:43 pm
Hi Ken,
Your plans are the newer version that do not have the tabs added on to the ends of the tubing walls. Those tabs are only required if you plan to make your packraft “TPU-side in”, and my recommendation is to make it with the TPU side of the fabric facing out (see an explanation in the FAQ). If you want to make your packraft TPU-side in, simply add a few (3-4) cm of fabric to the ends of the “limbs” as they appear on the plans (the exact amount is not critical – you just need enough to make a strong bond with the floor, which is what those tabs are for).
The packraft I made in the video is made with the TPU side facing out, and I trimmed those tabs off after I cut them out – I simply hadn’t decided which way I was going to make that packraft when I made the first video.
I hope that makes sense – if not, or if you have any other questions, don’t hesitate to ask.
Cheers!