Home Forums DIY Packrafts An improved tie down

  • Creator
    Topic
  • #2598
    OlympicMtnBoy
    Participant

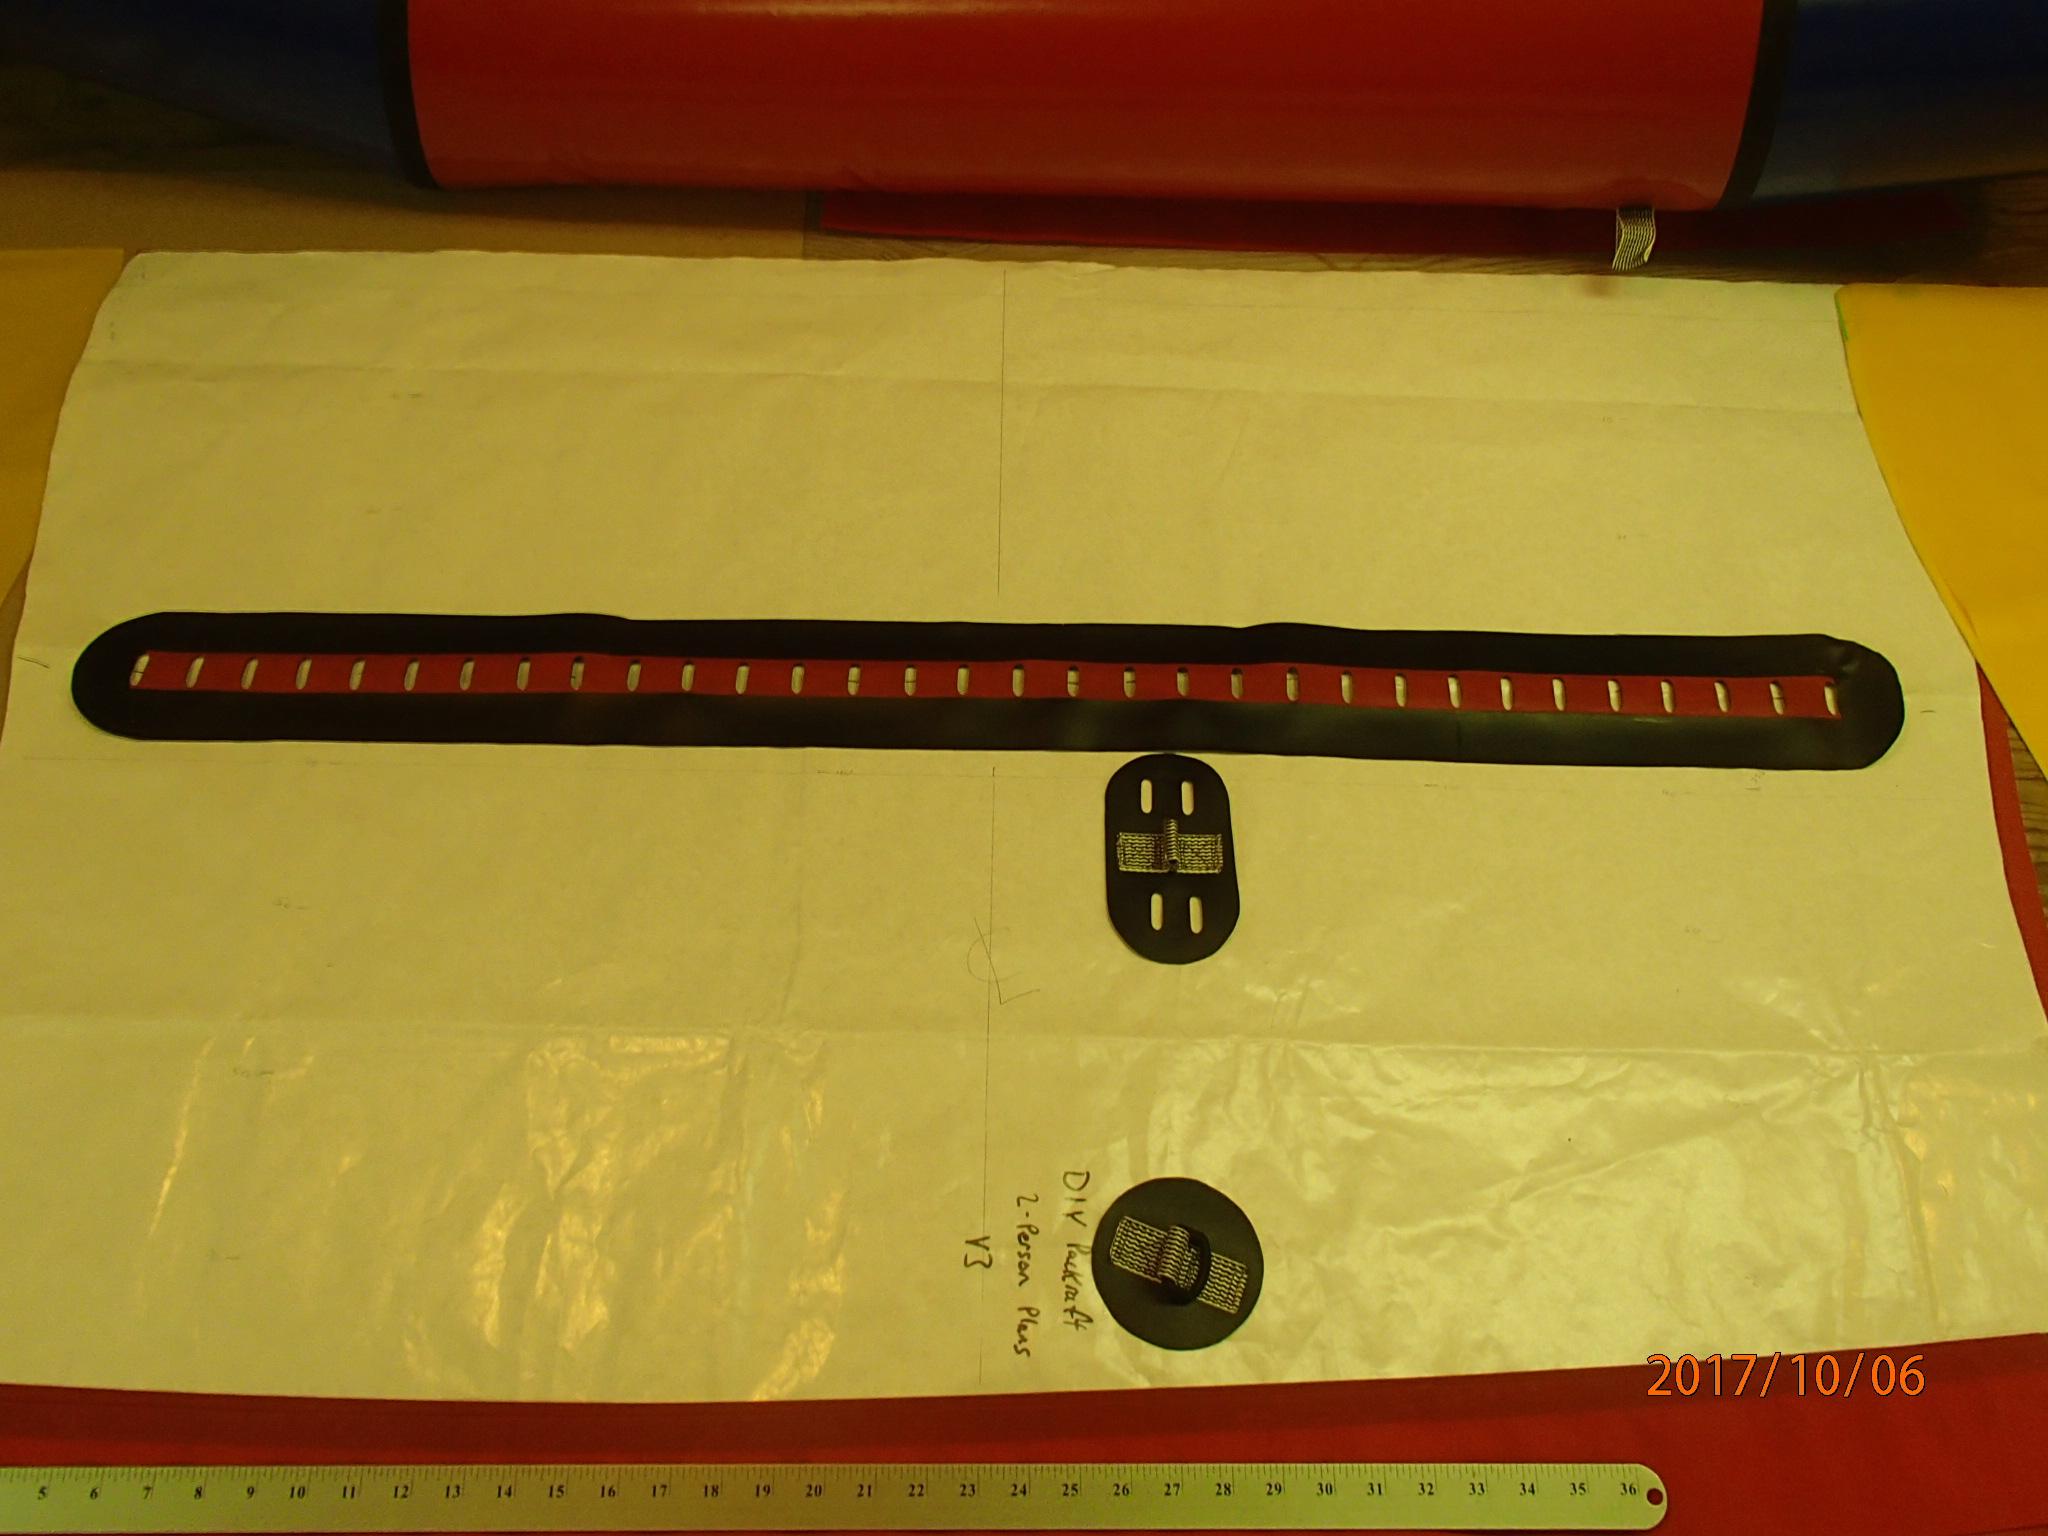
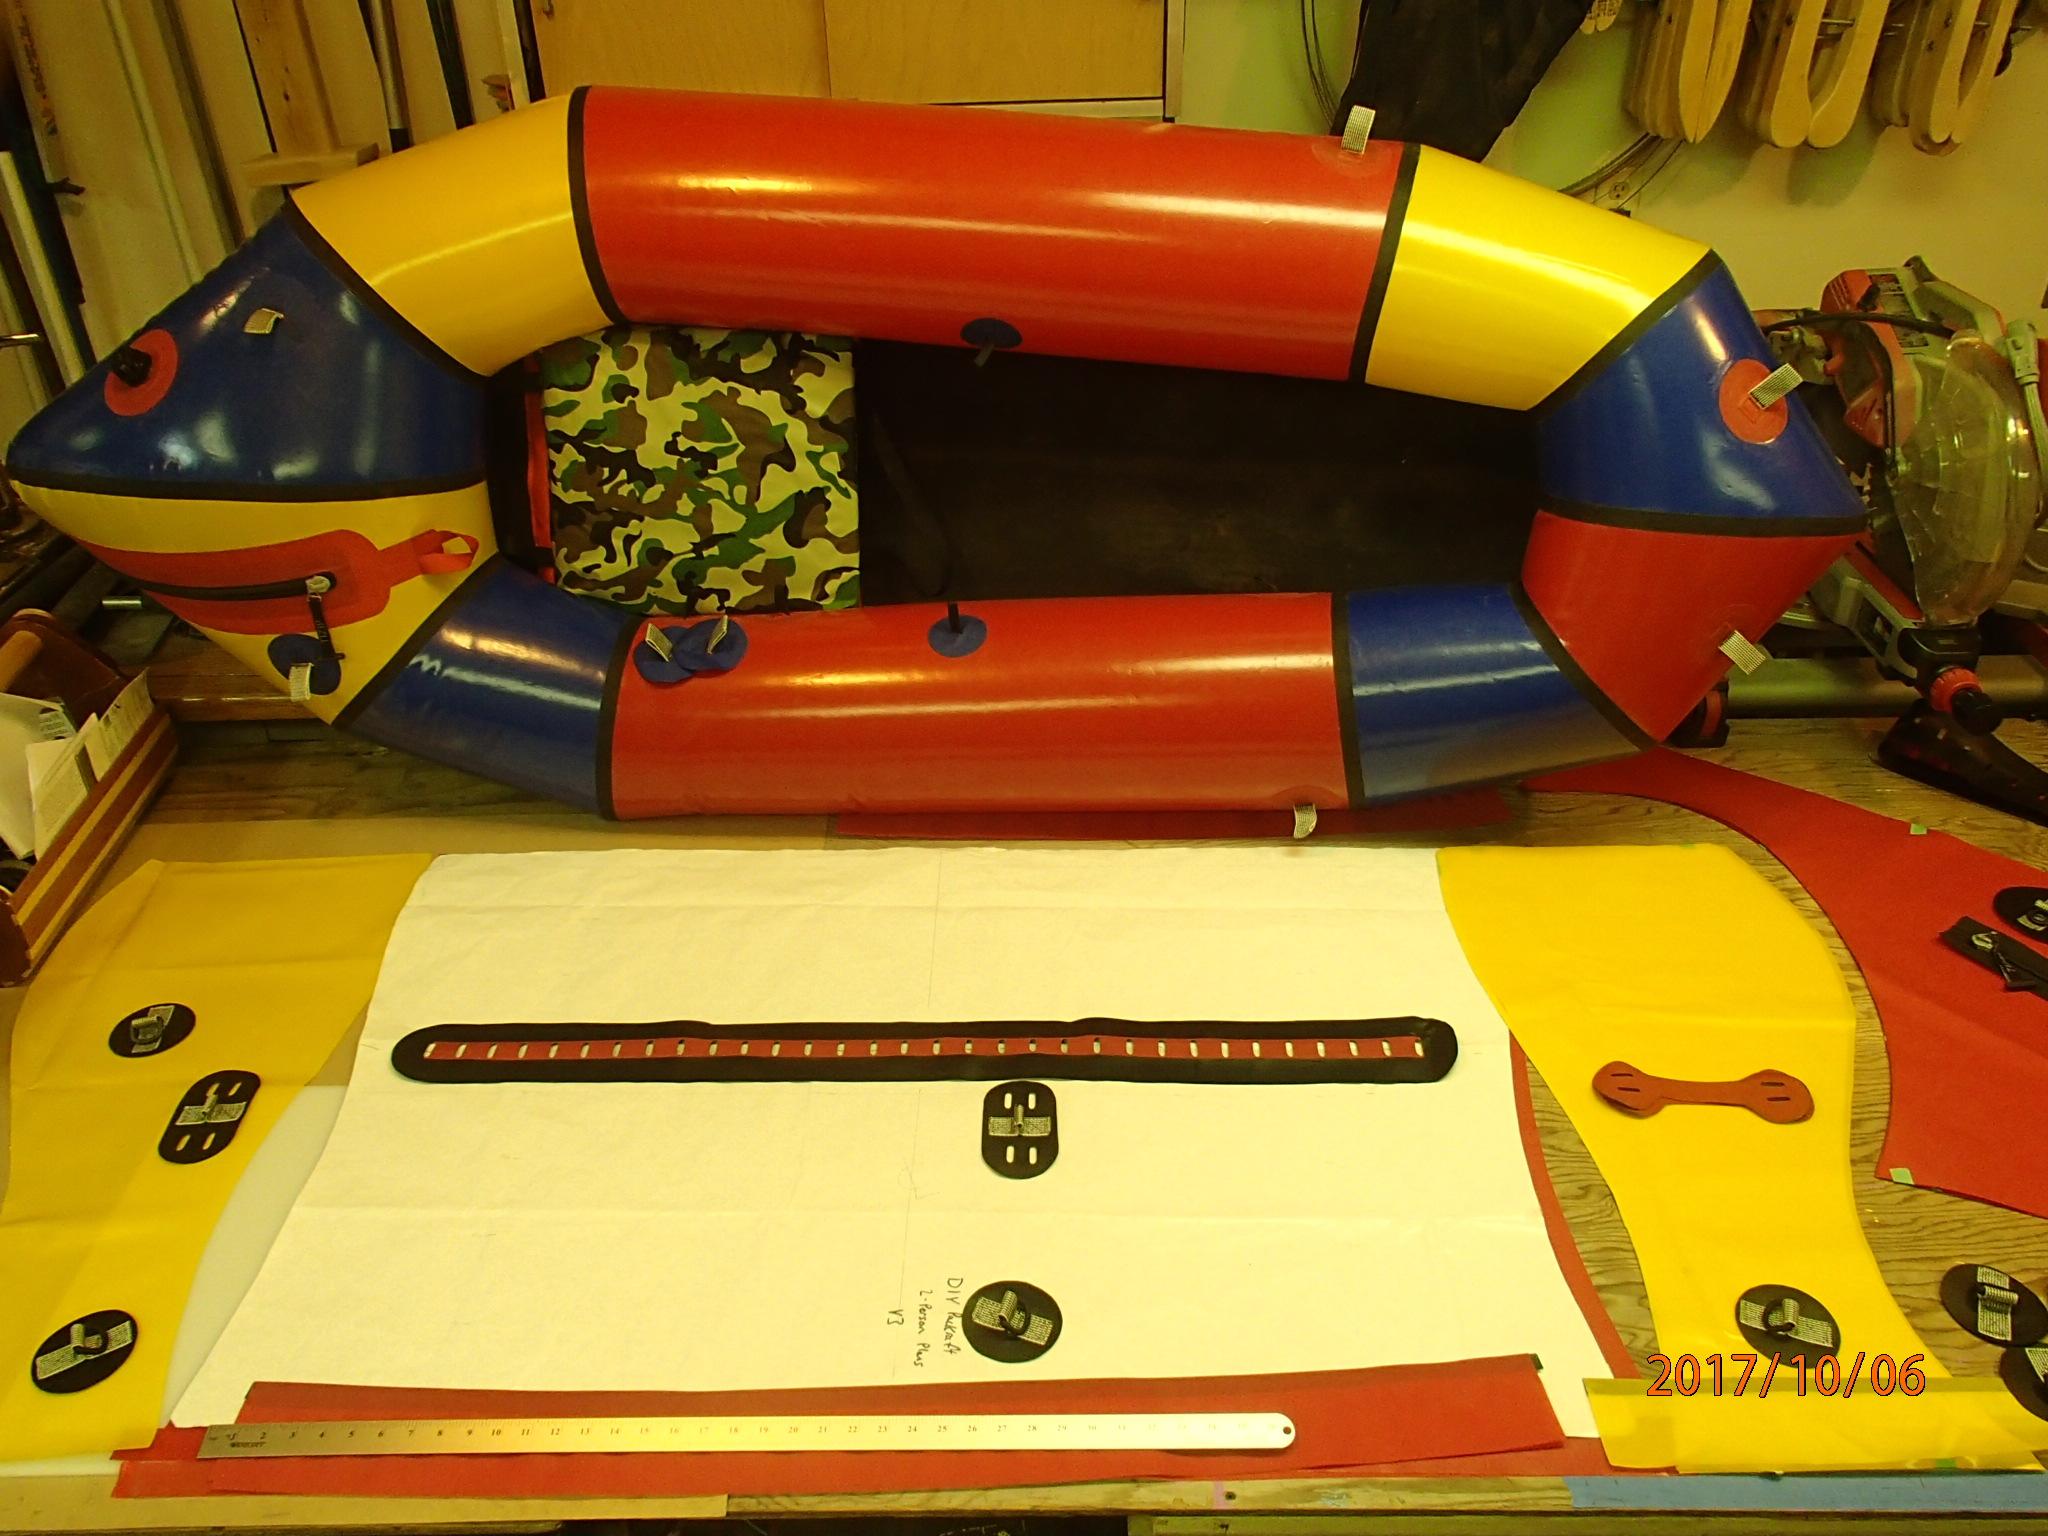
    I haven’t had much time to work on my raft (grabbing an evening a week with a friend to work on them), but I wanted to post up our last session on tie downs.  We wanted to do these before closing our tubes so we have easy access the the inside to heat seat the tie down patches on well.

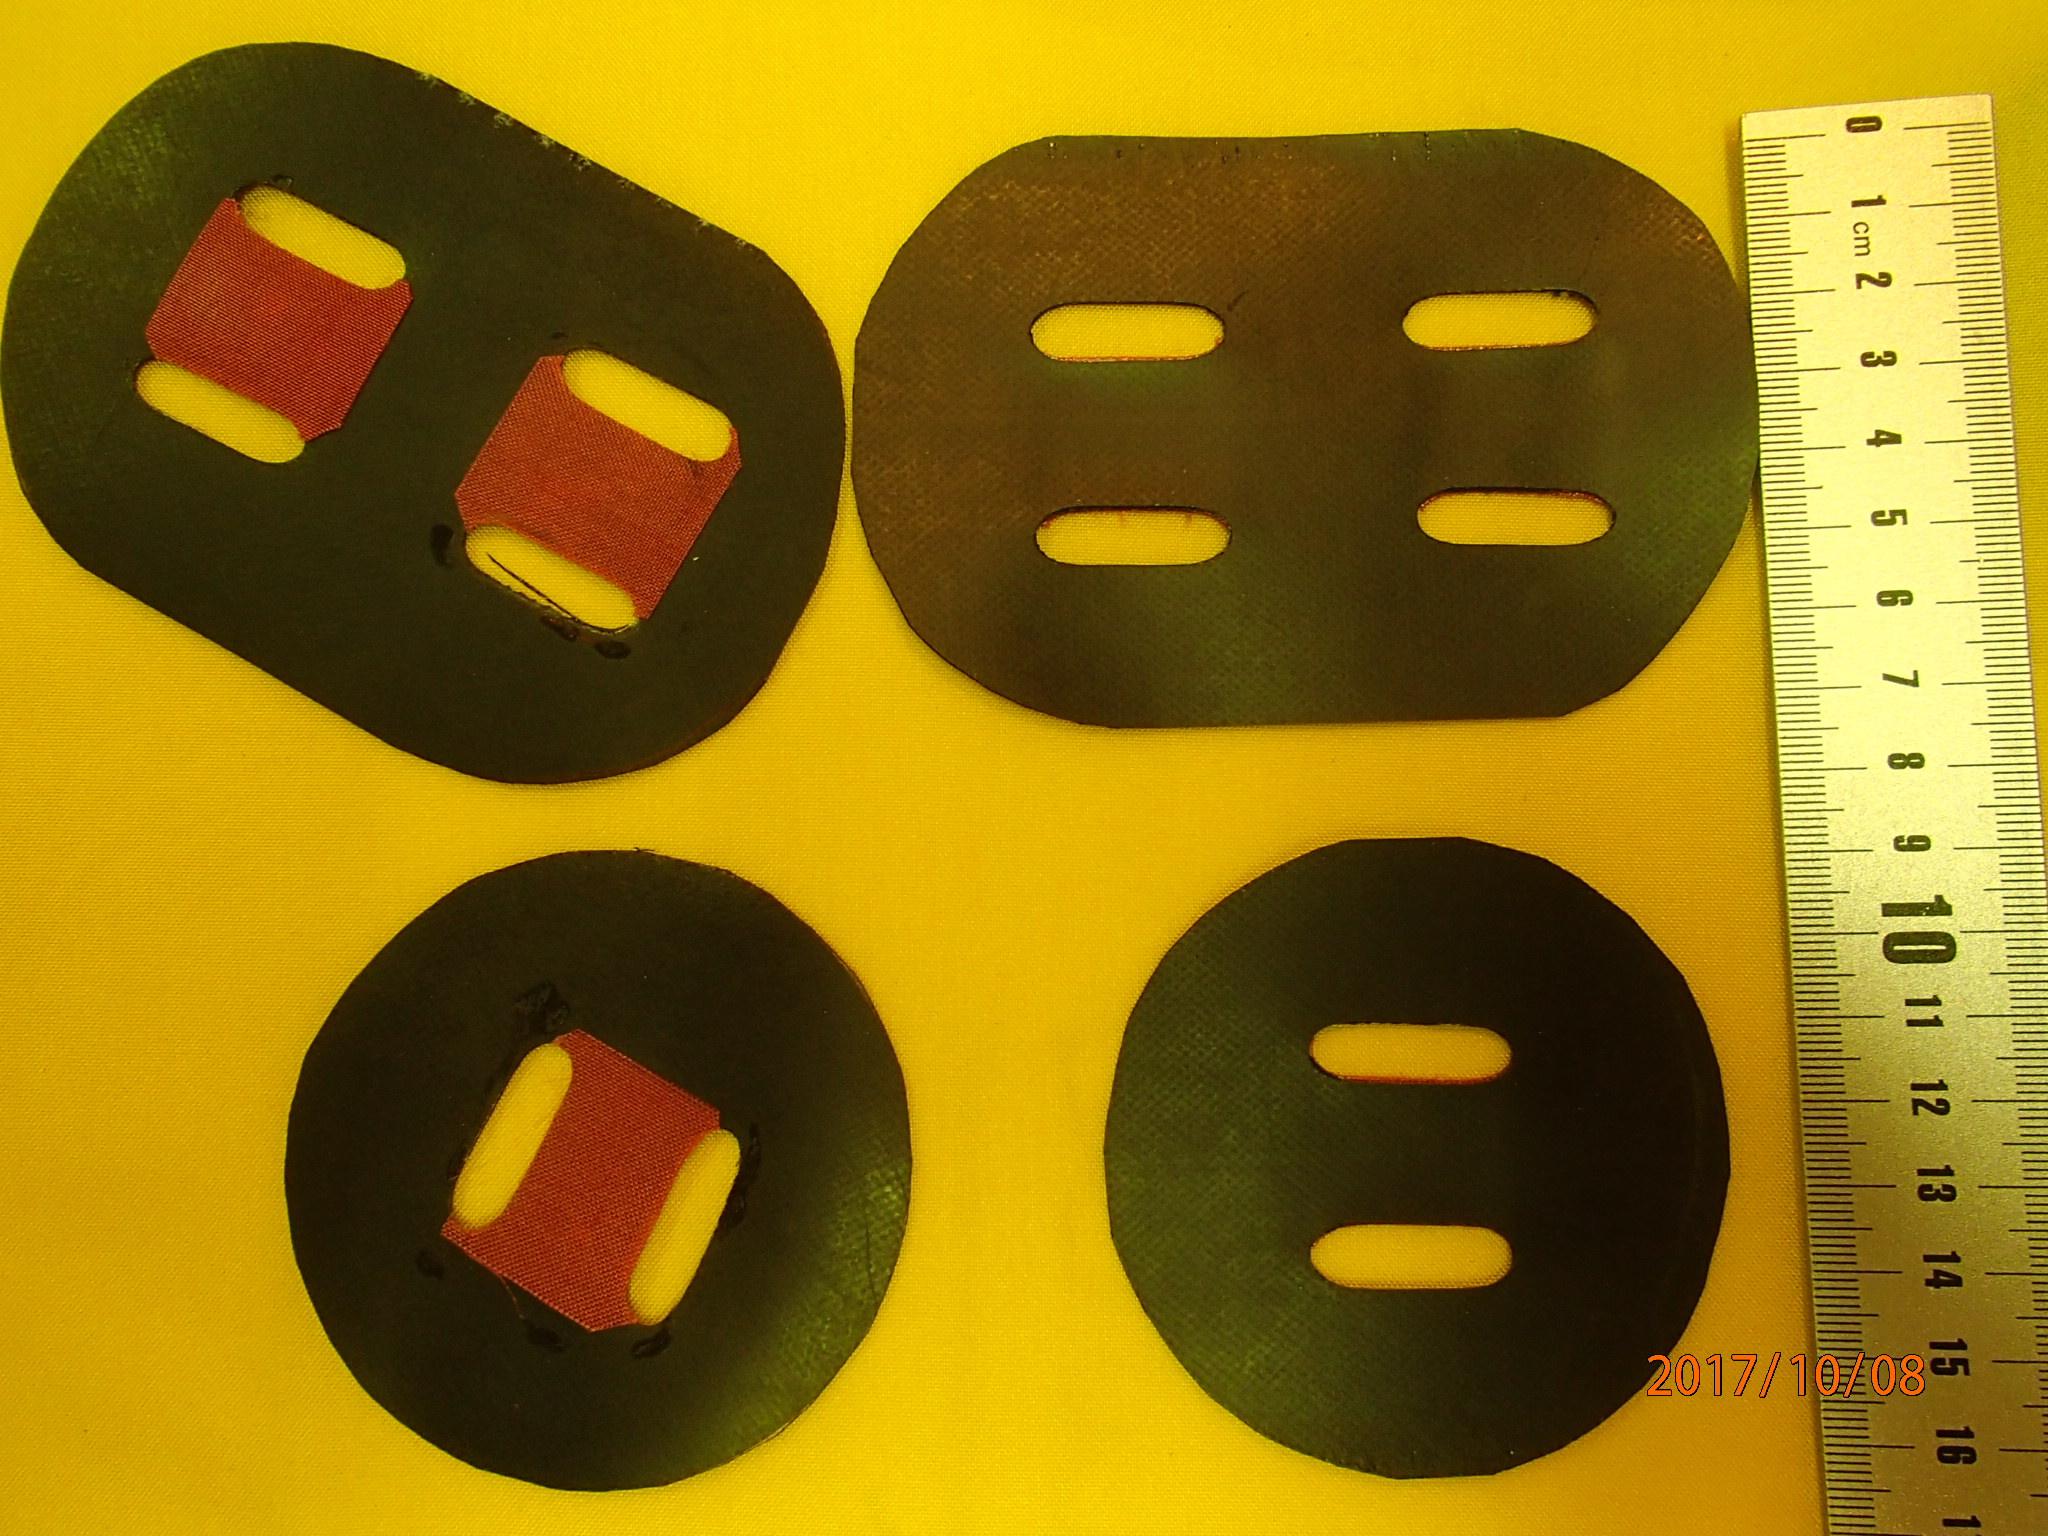
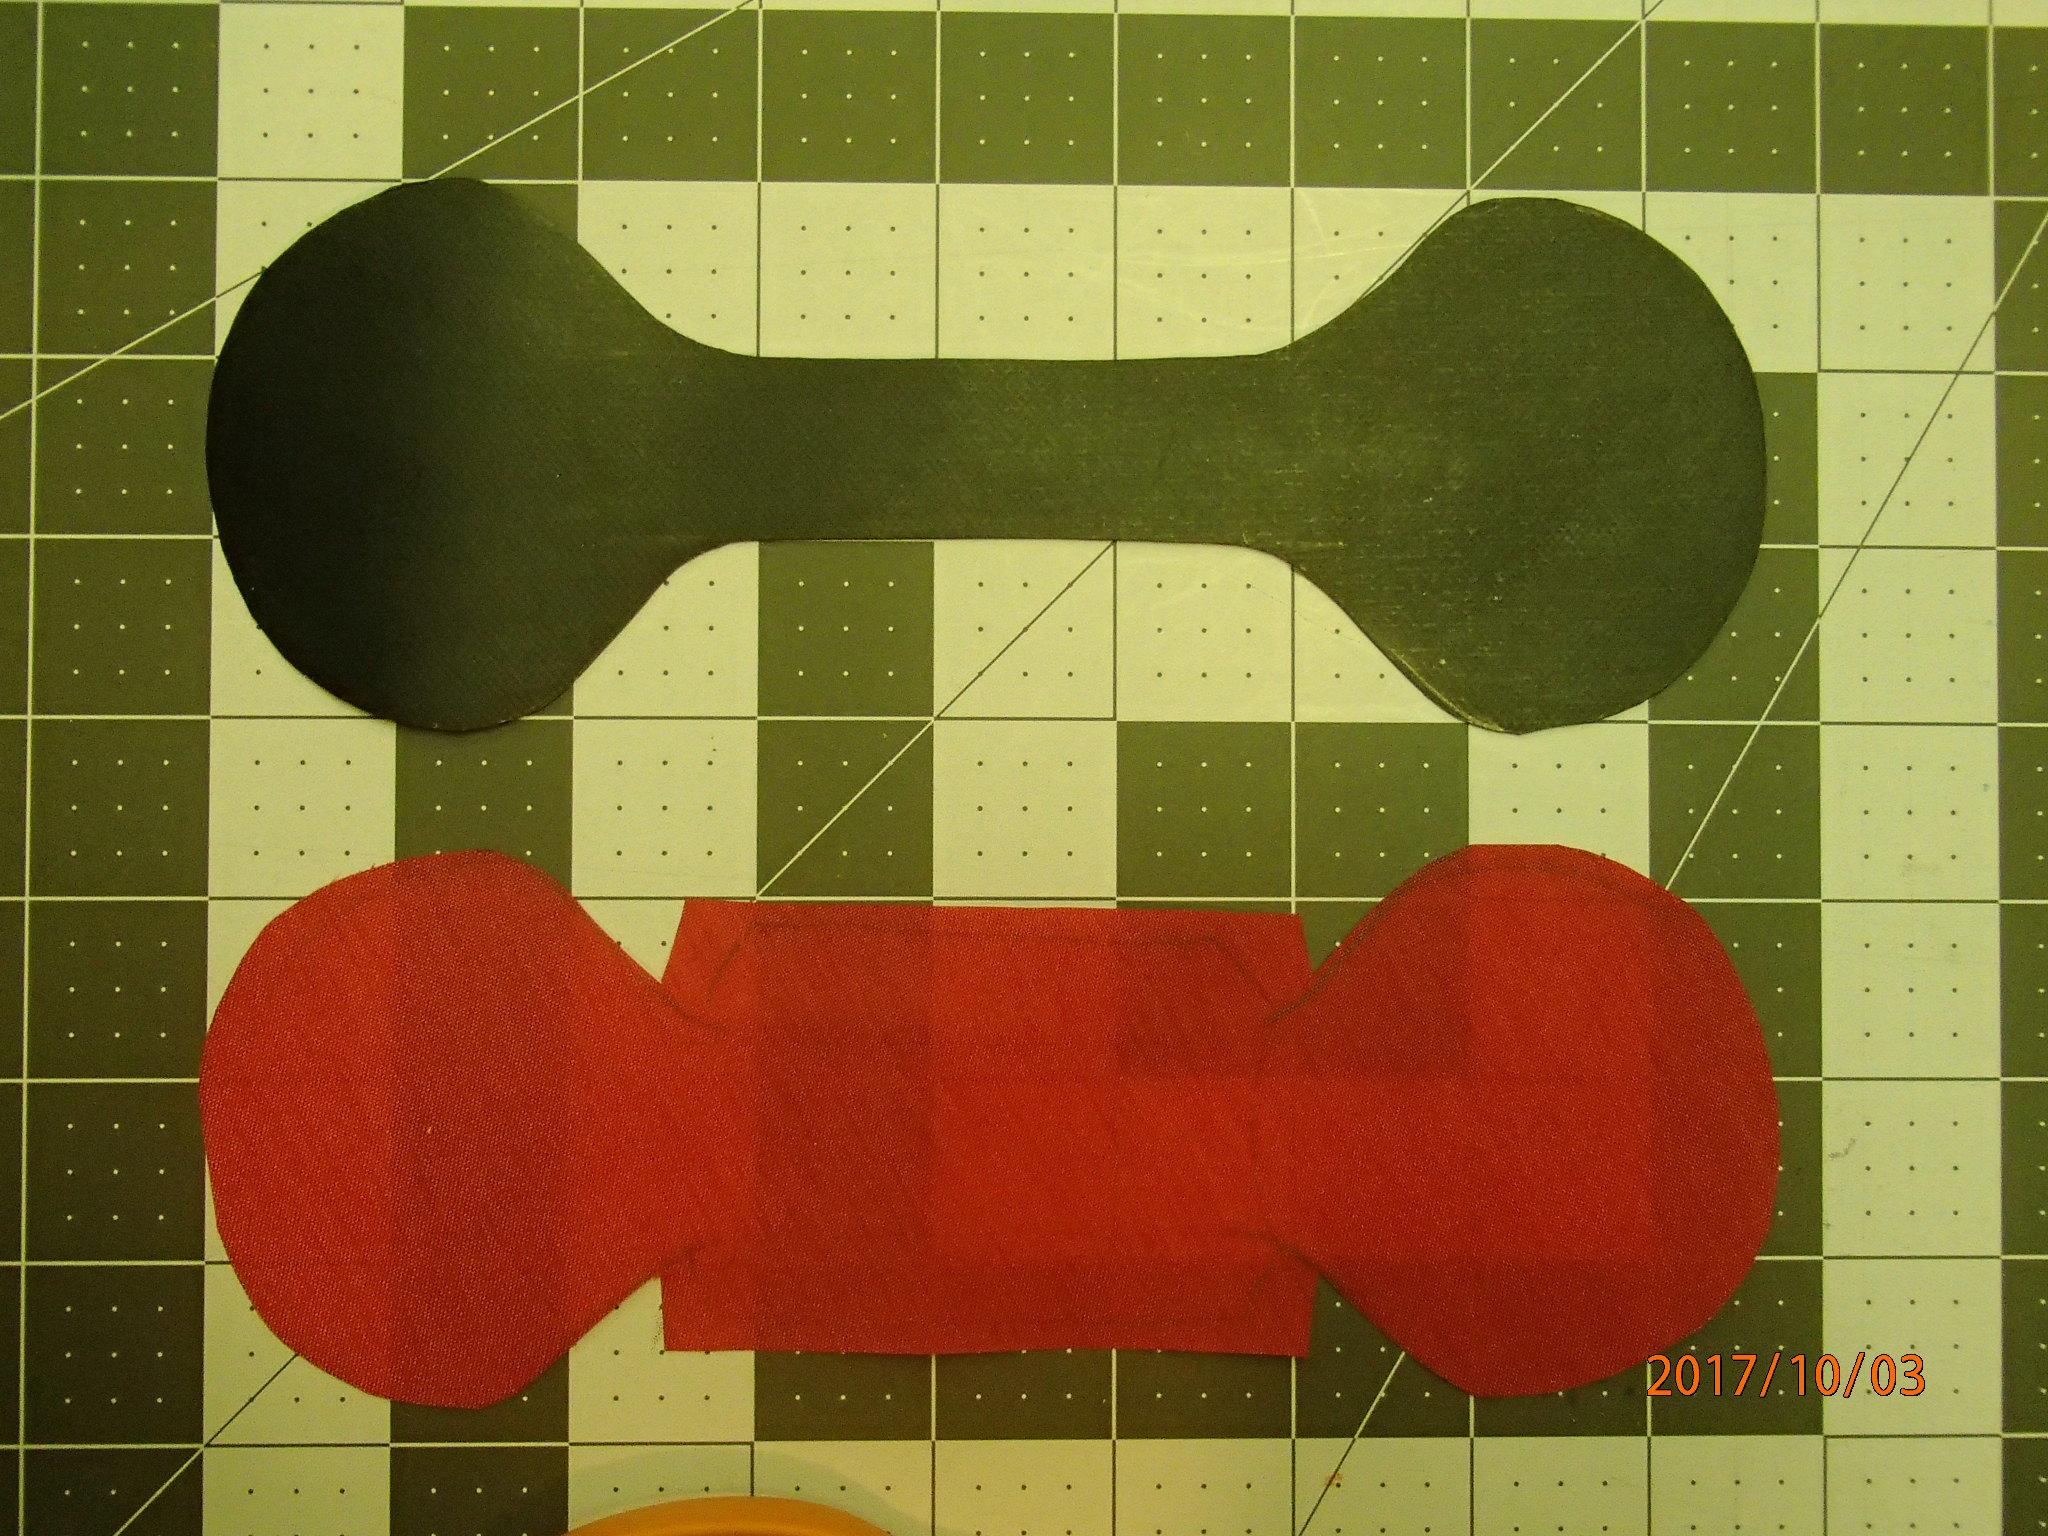
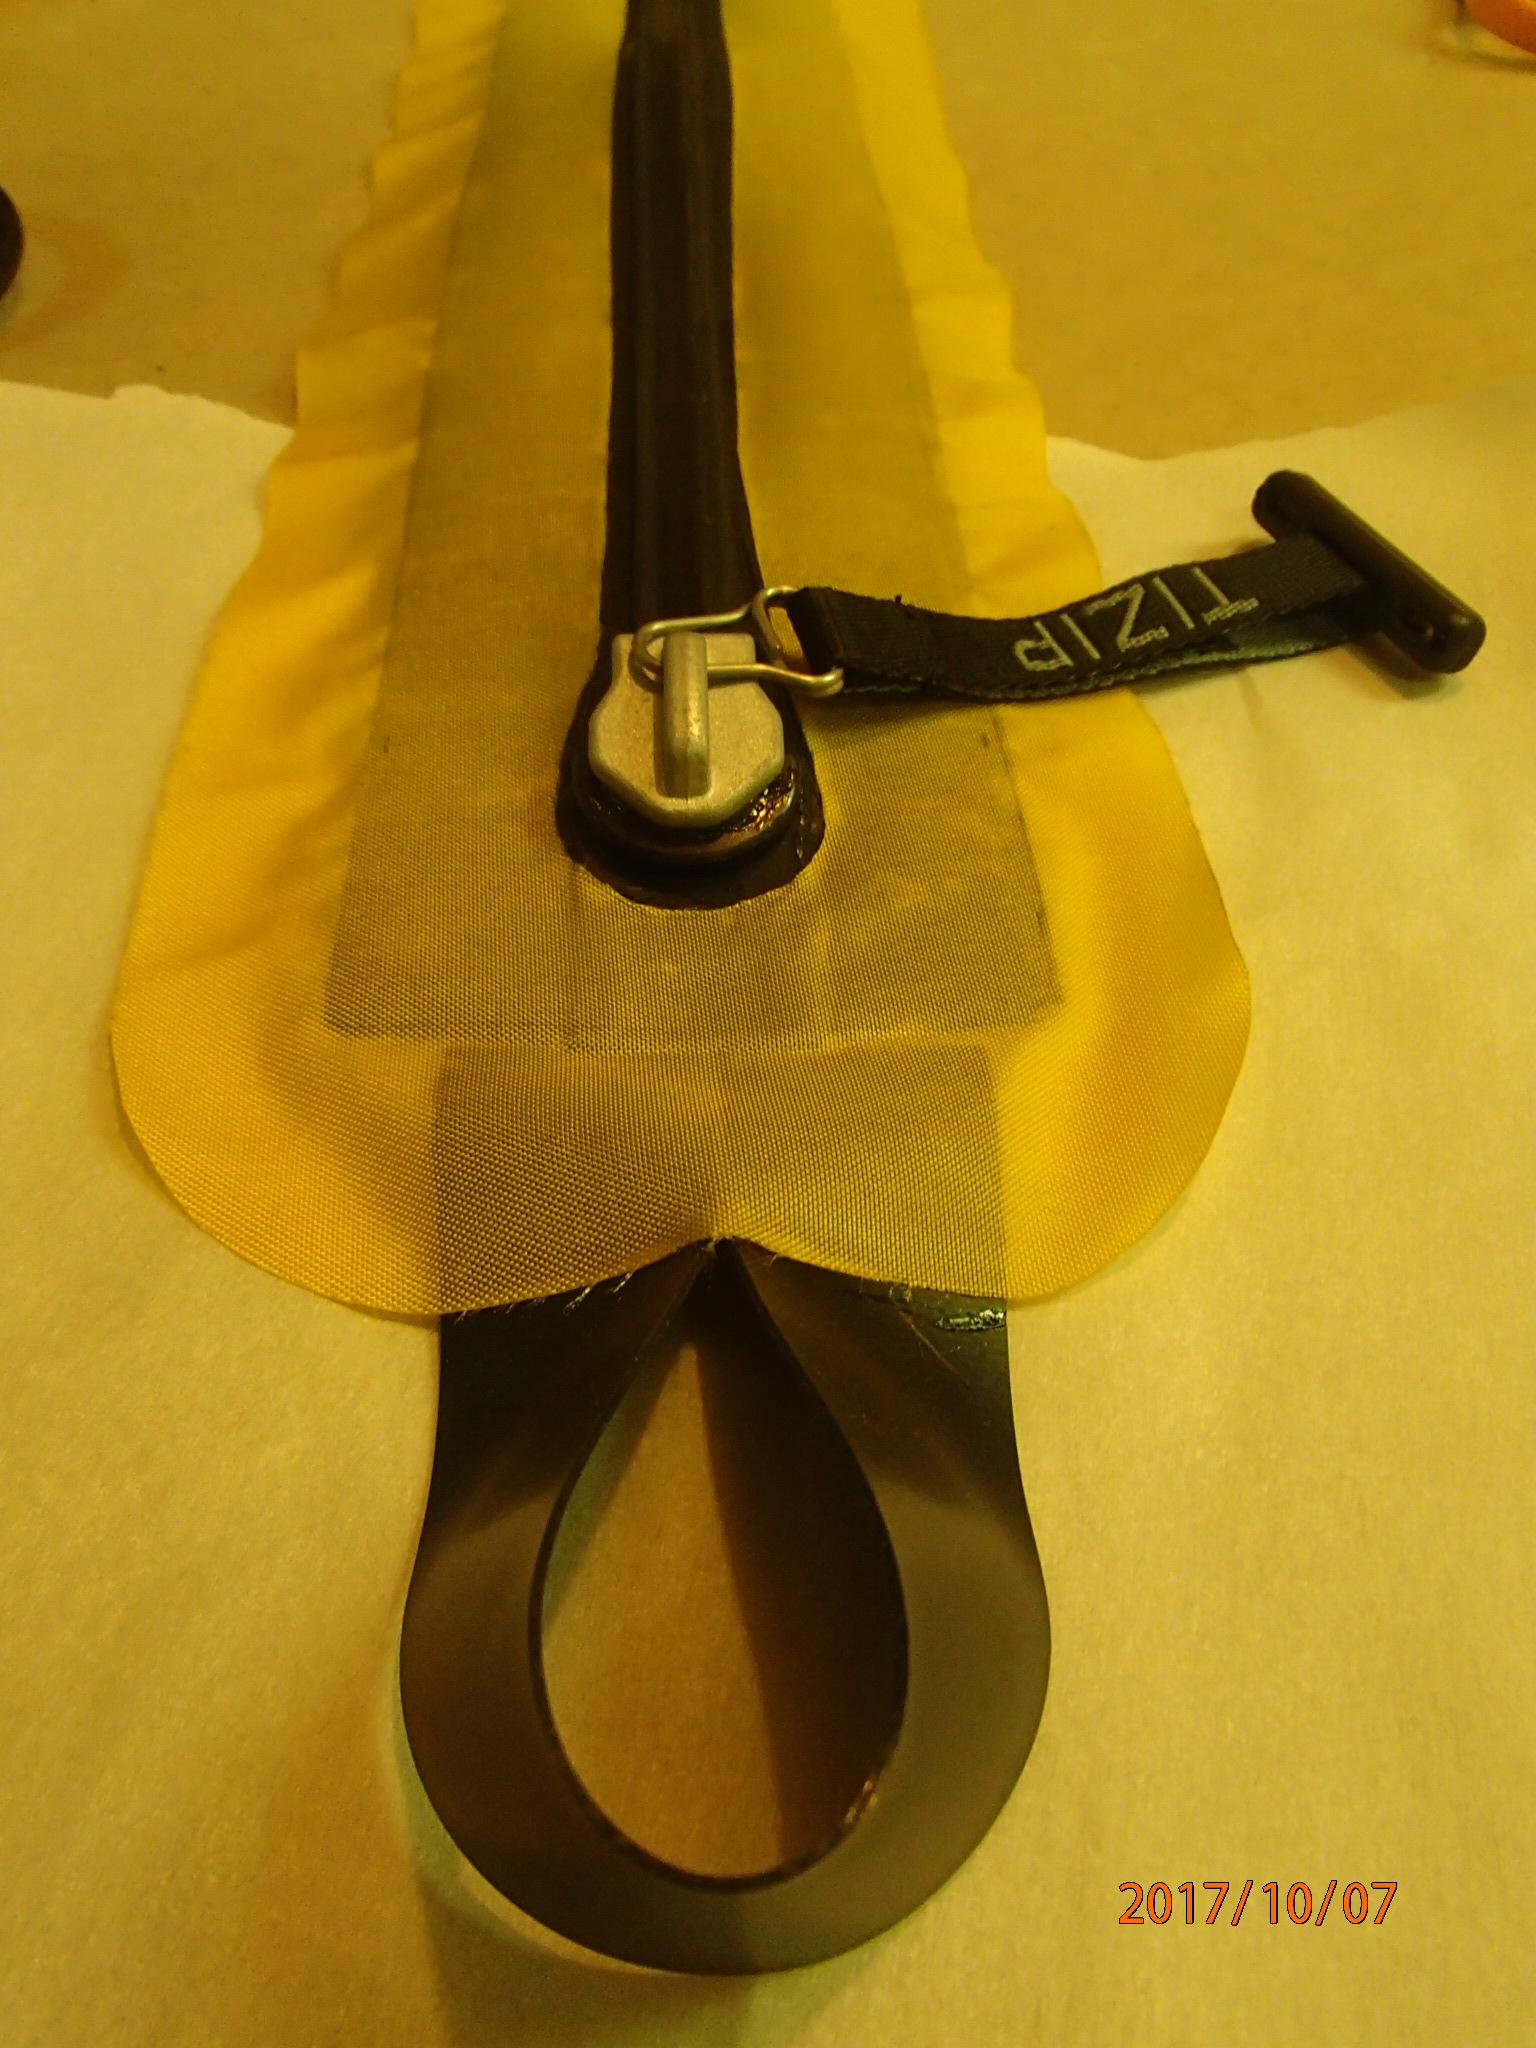
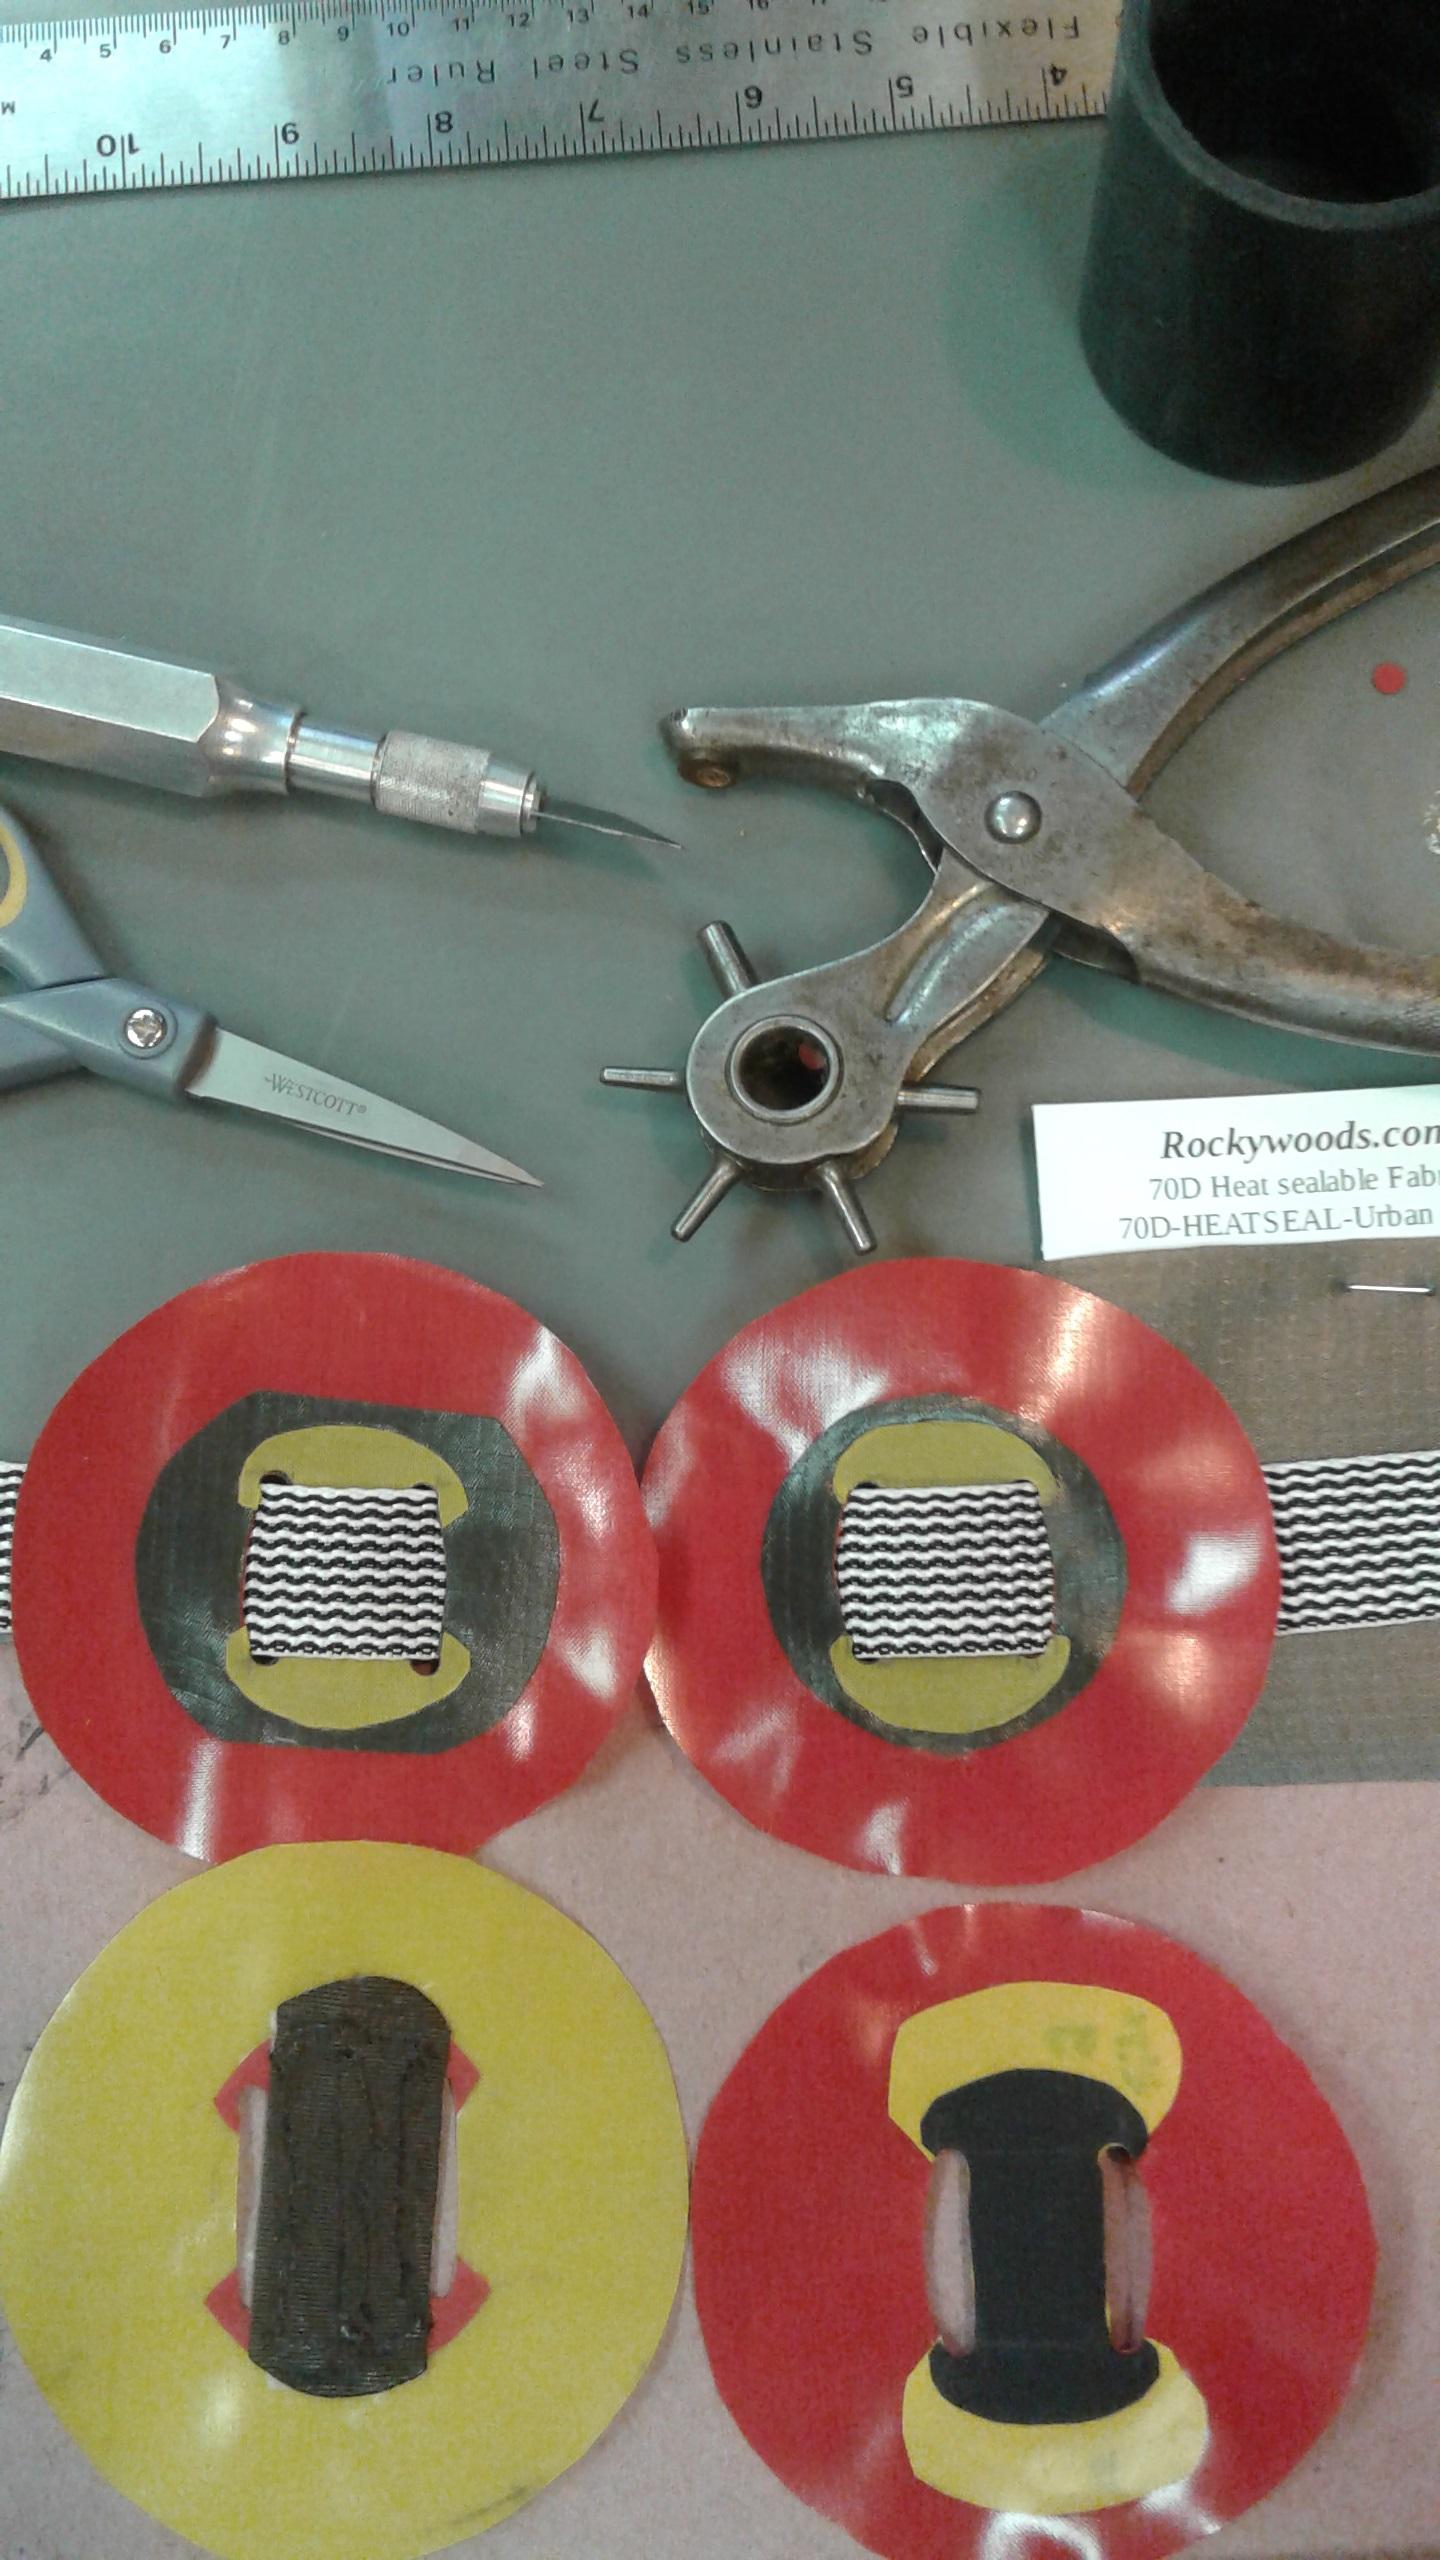
    We did up a couple as Matt demonstrated.  With the lighter fabric it was far too easy to tear.  With the 210d it worked ok but the reinforcement around the base of the loop was essential for reasonable strength.  It was a pain to make though and hard to get that reinforcement loop to not look crappy when stretched.  Without reinforcing the loop at the base you will tear the patch fabric as the legs of the loop unevenly distribute the pull.

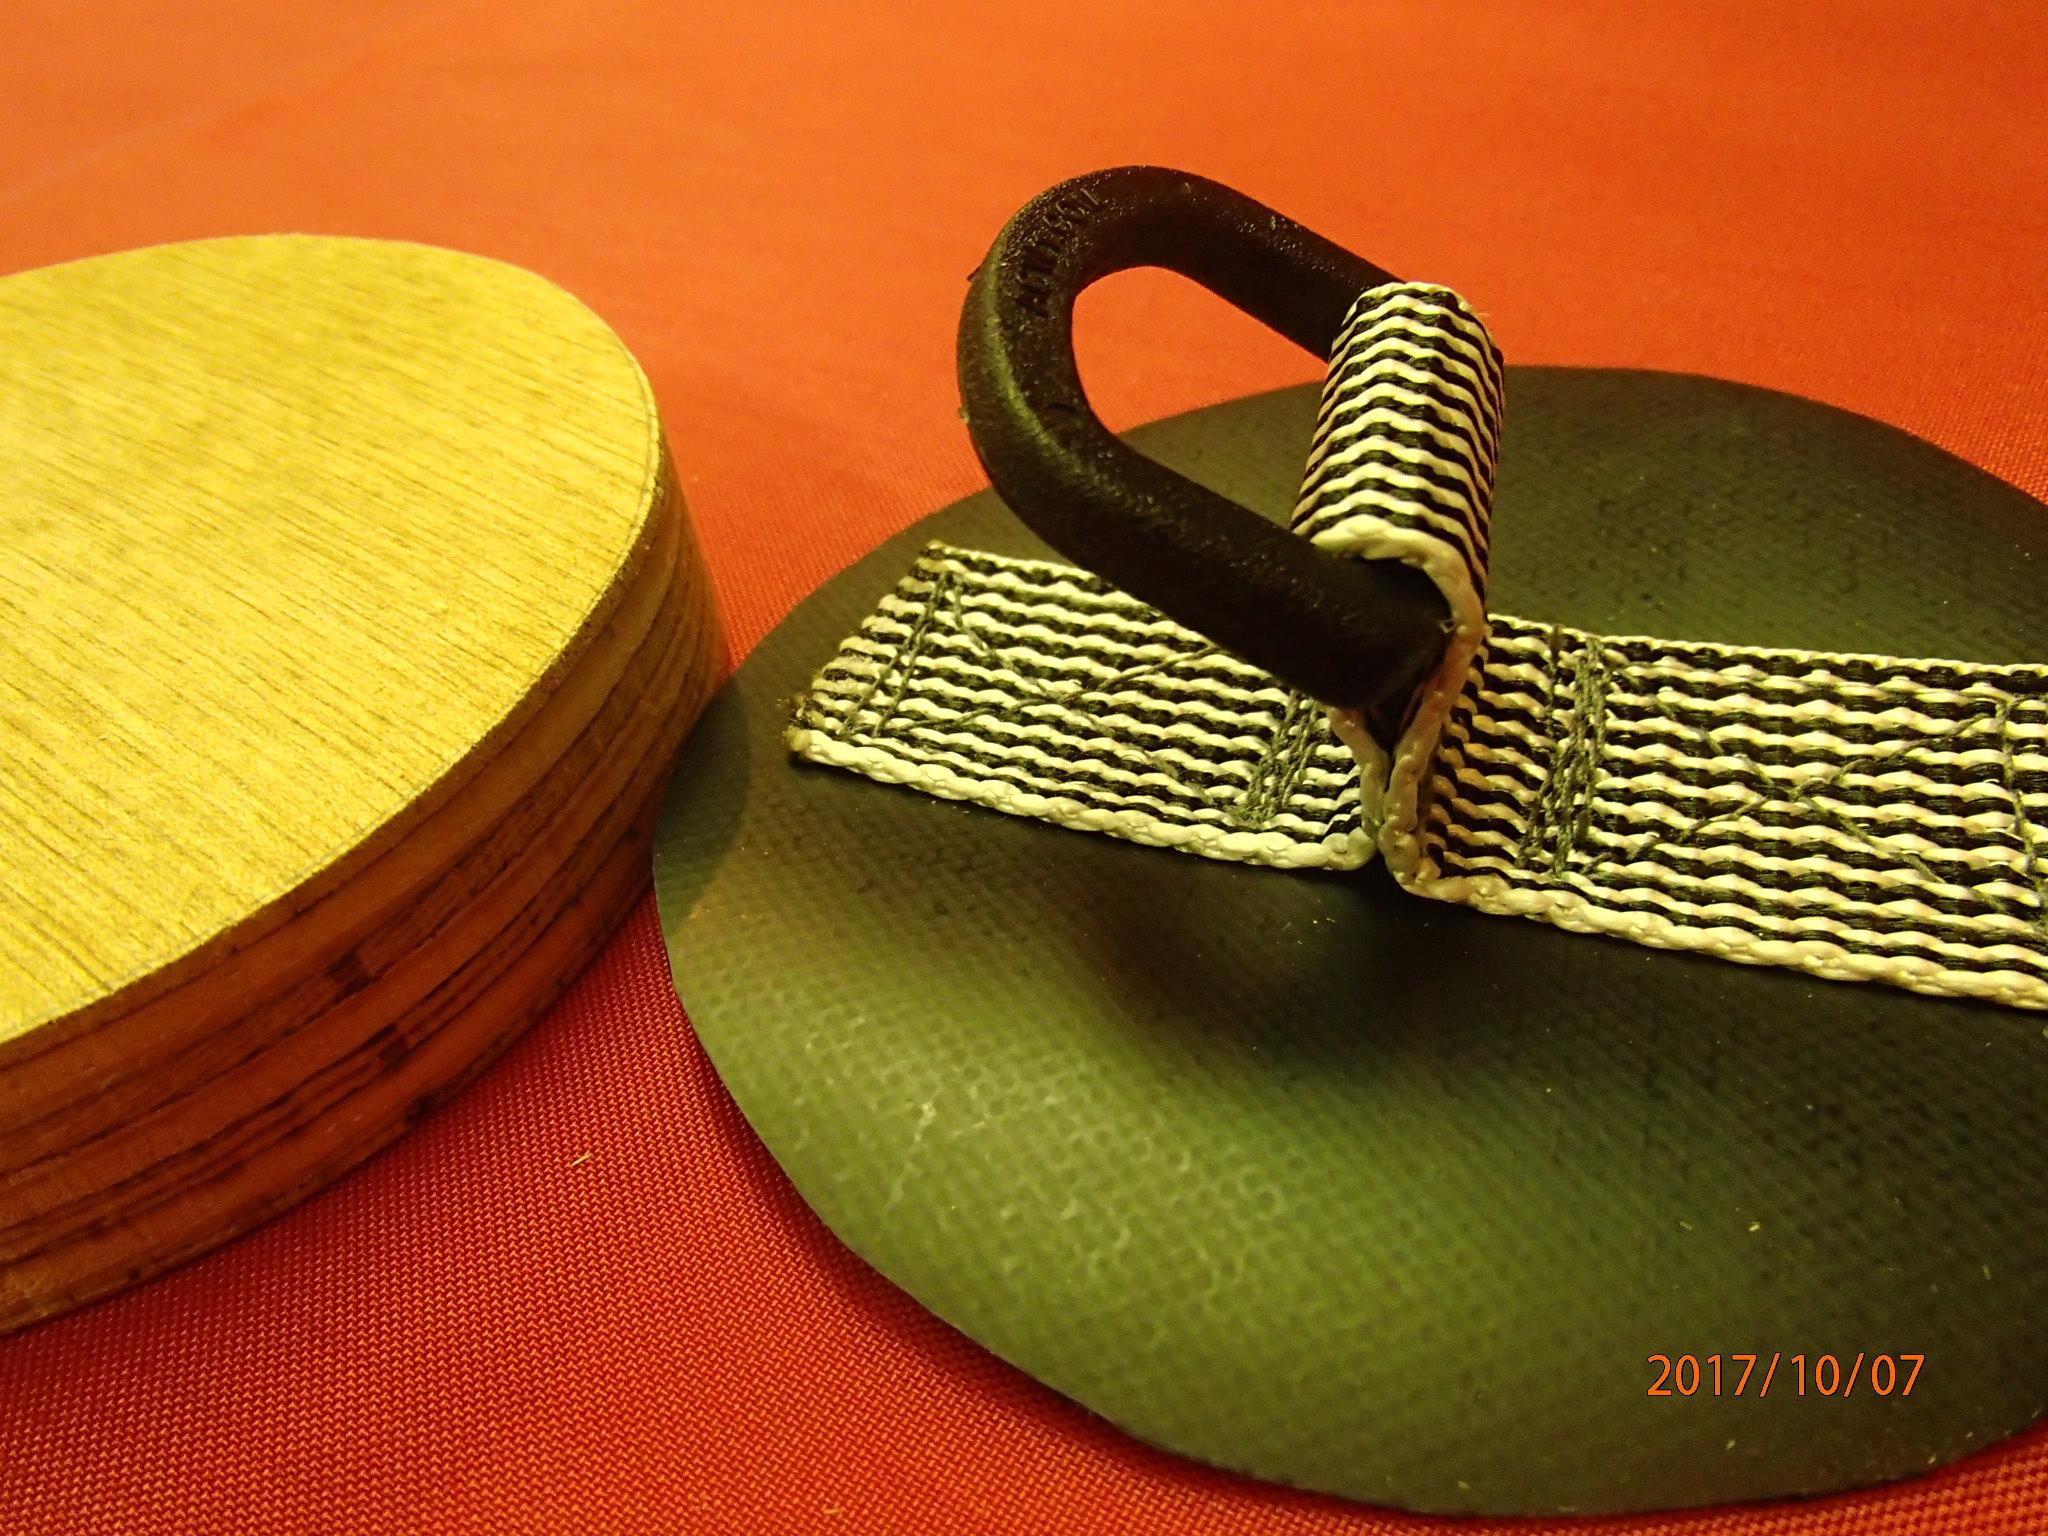
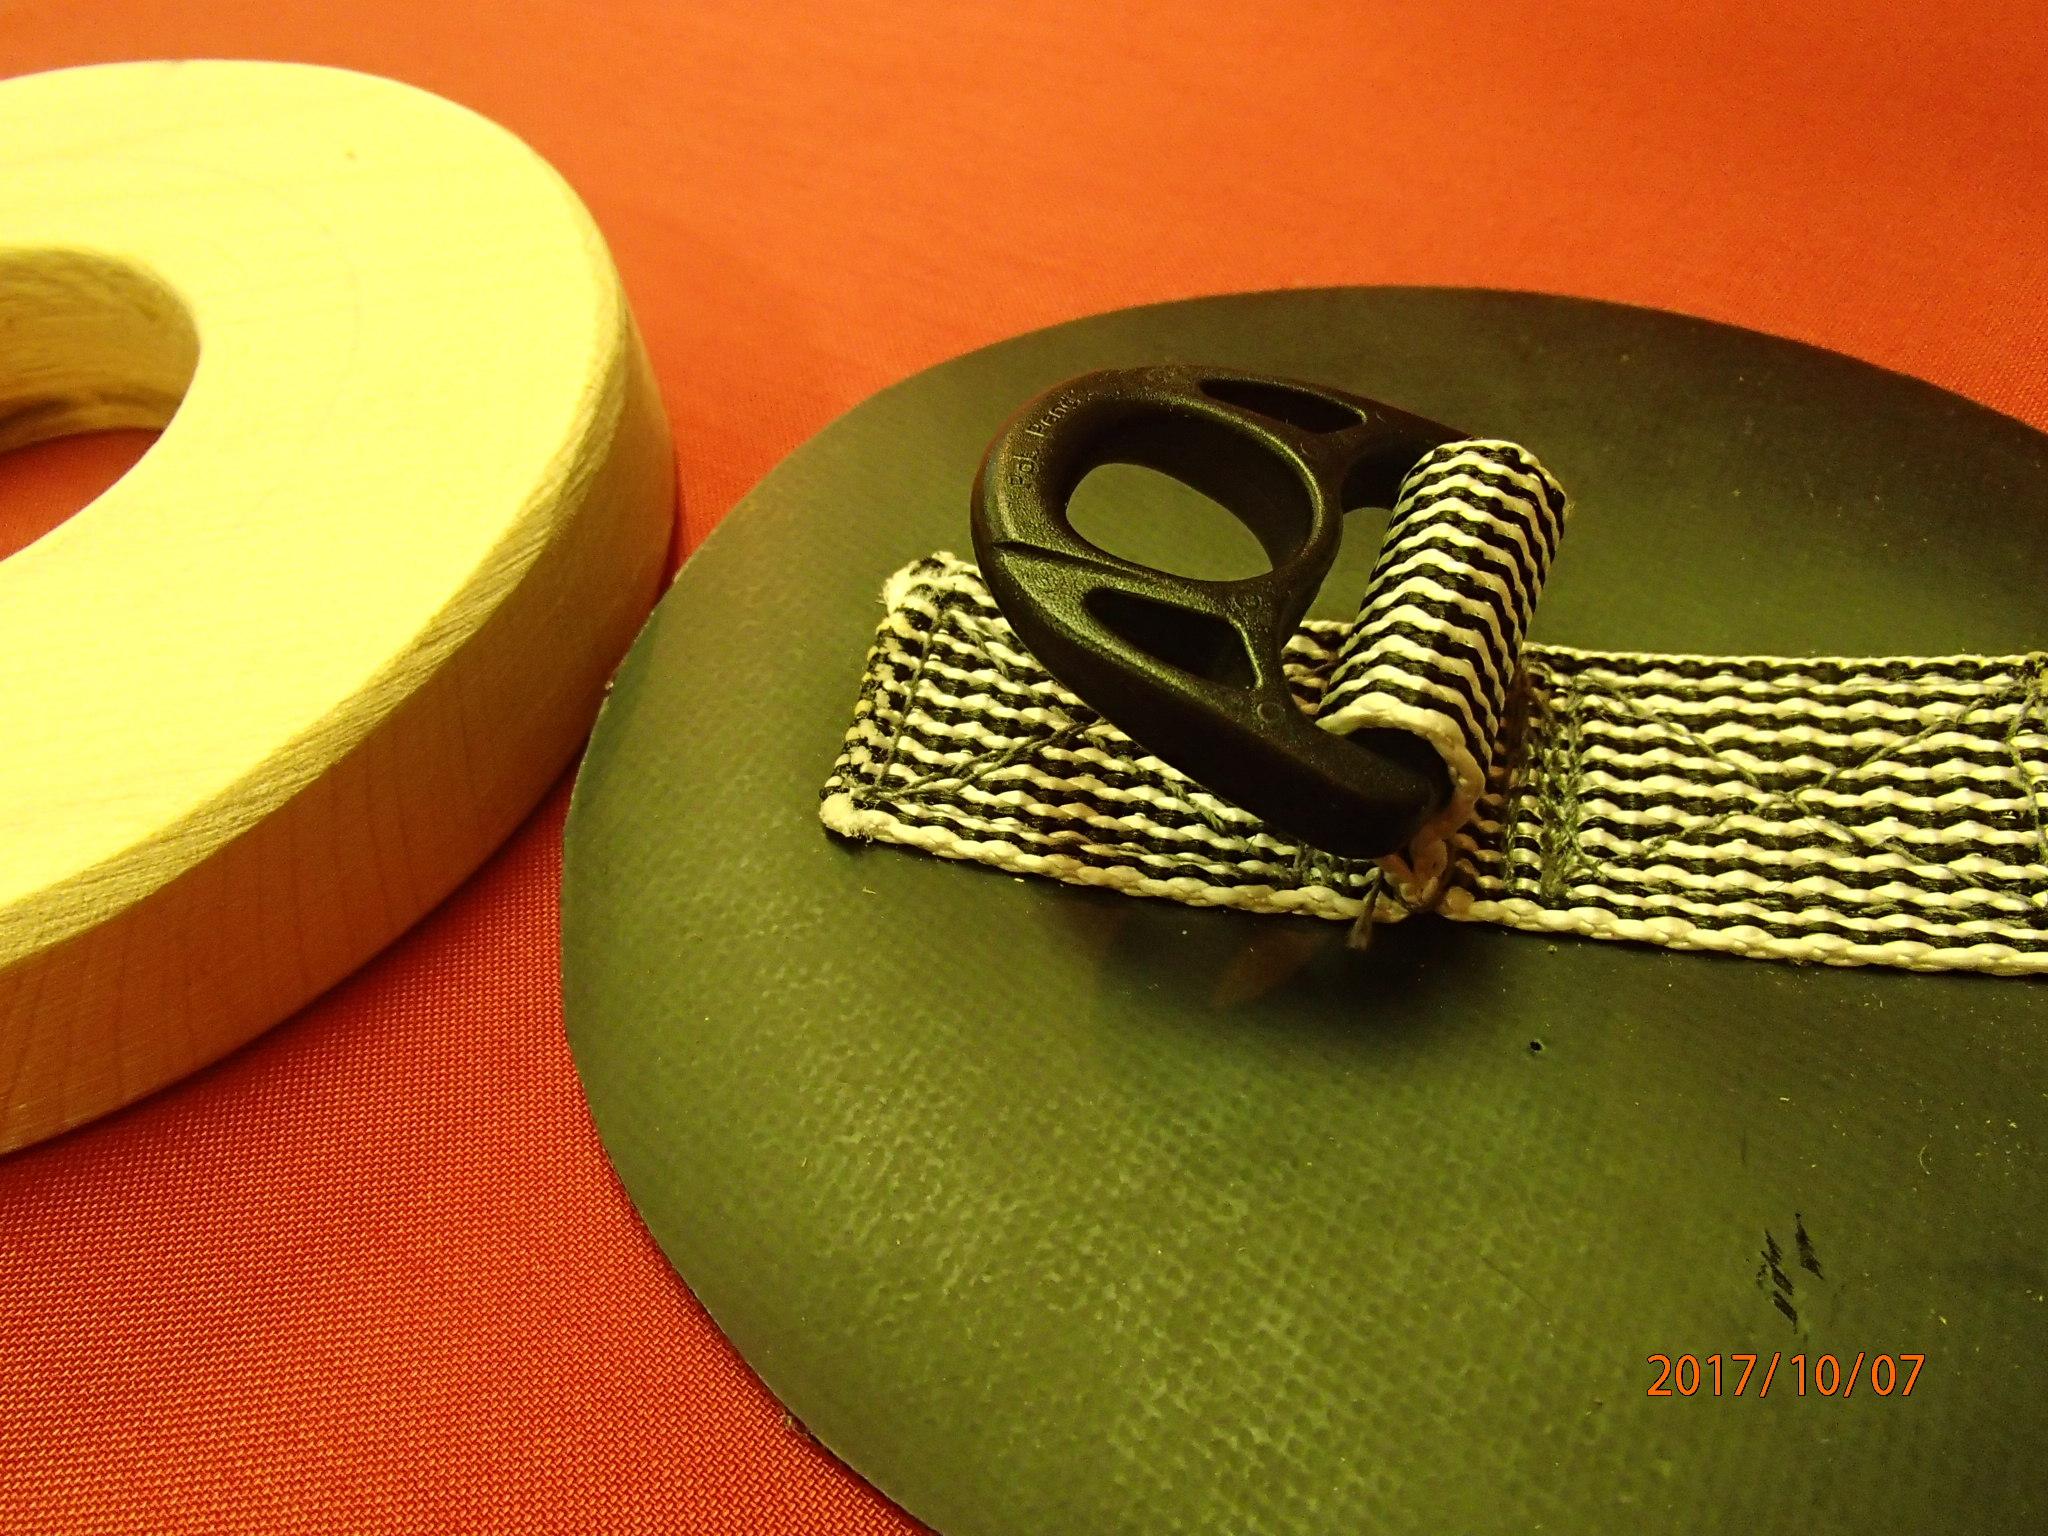
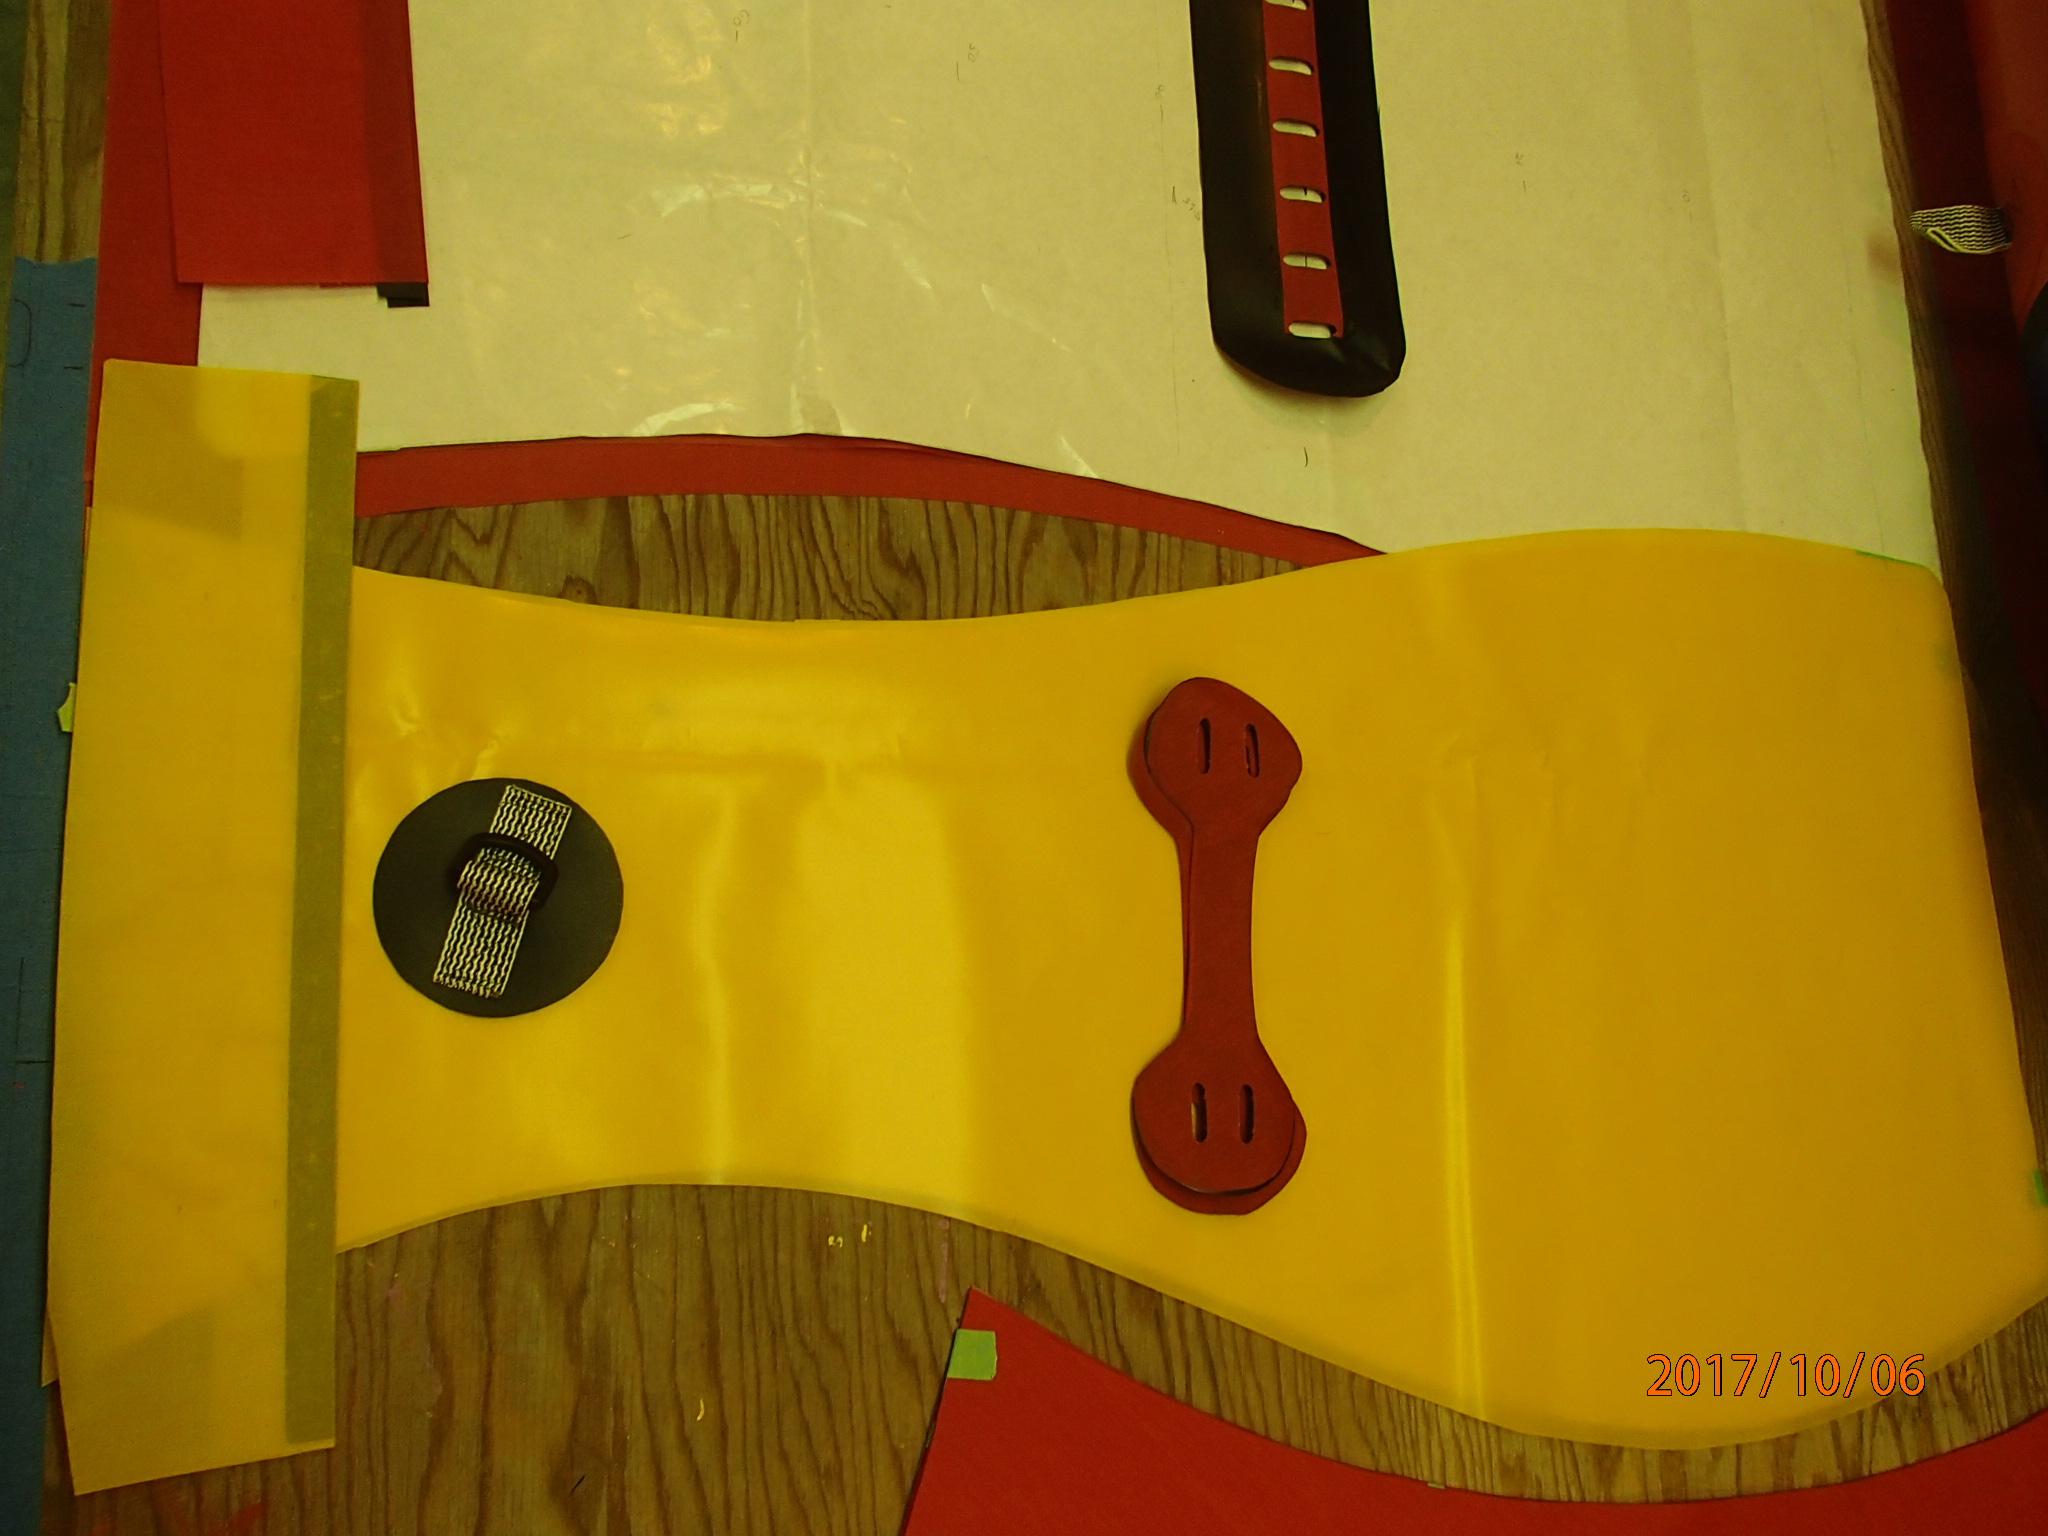
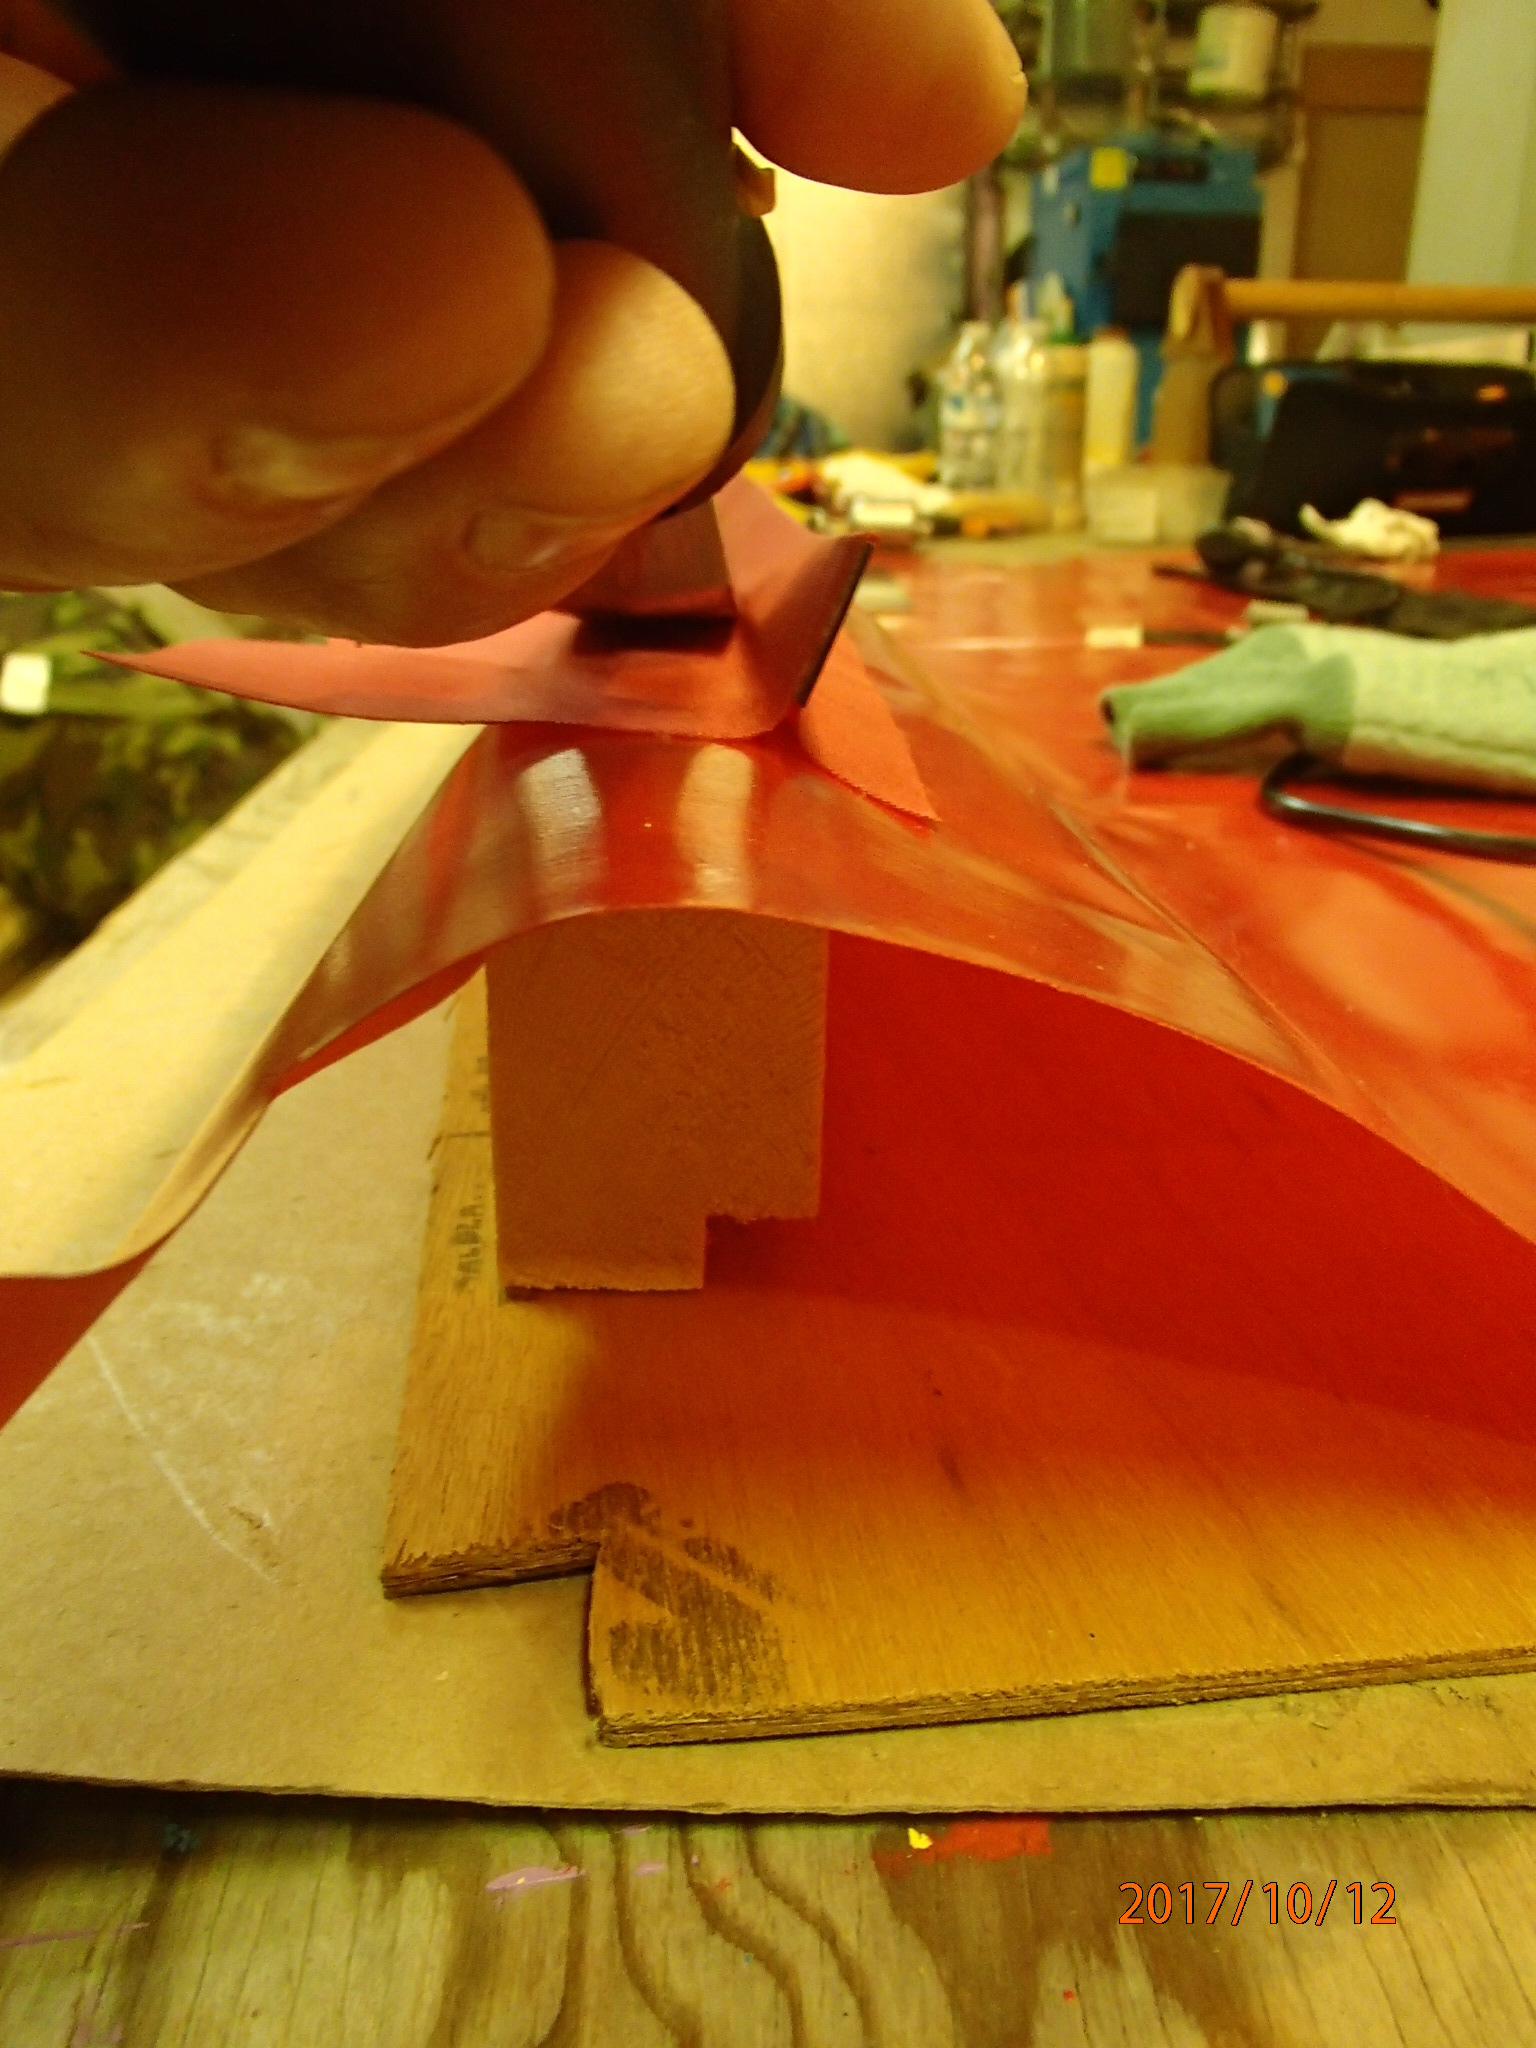
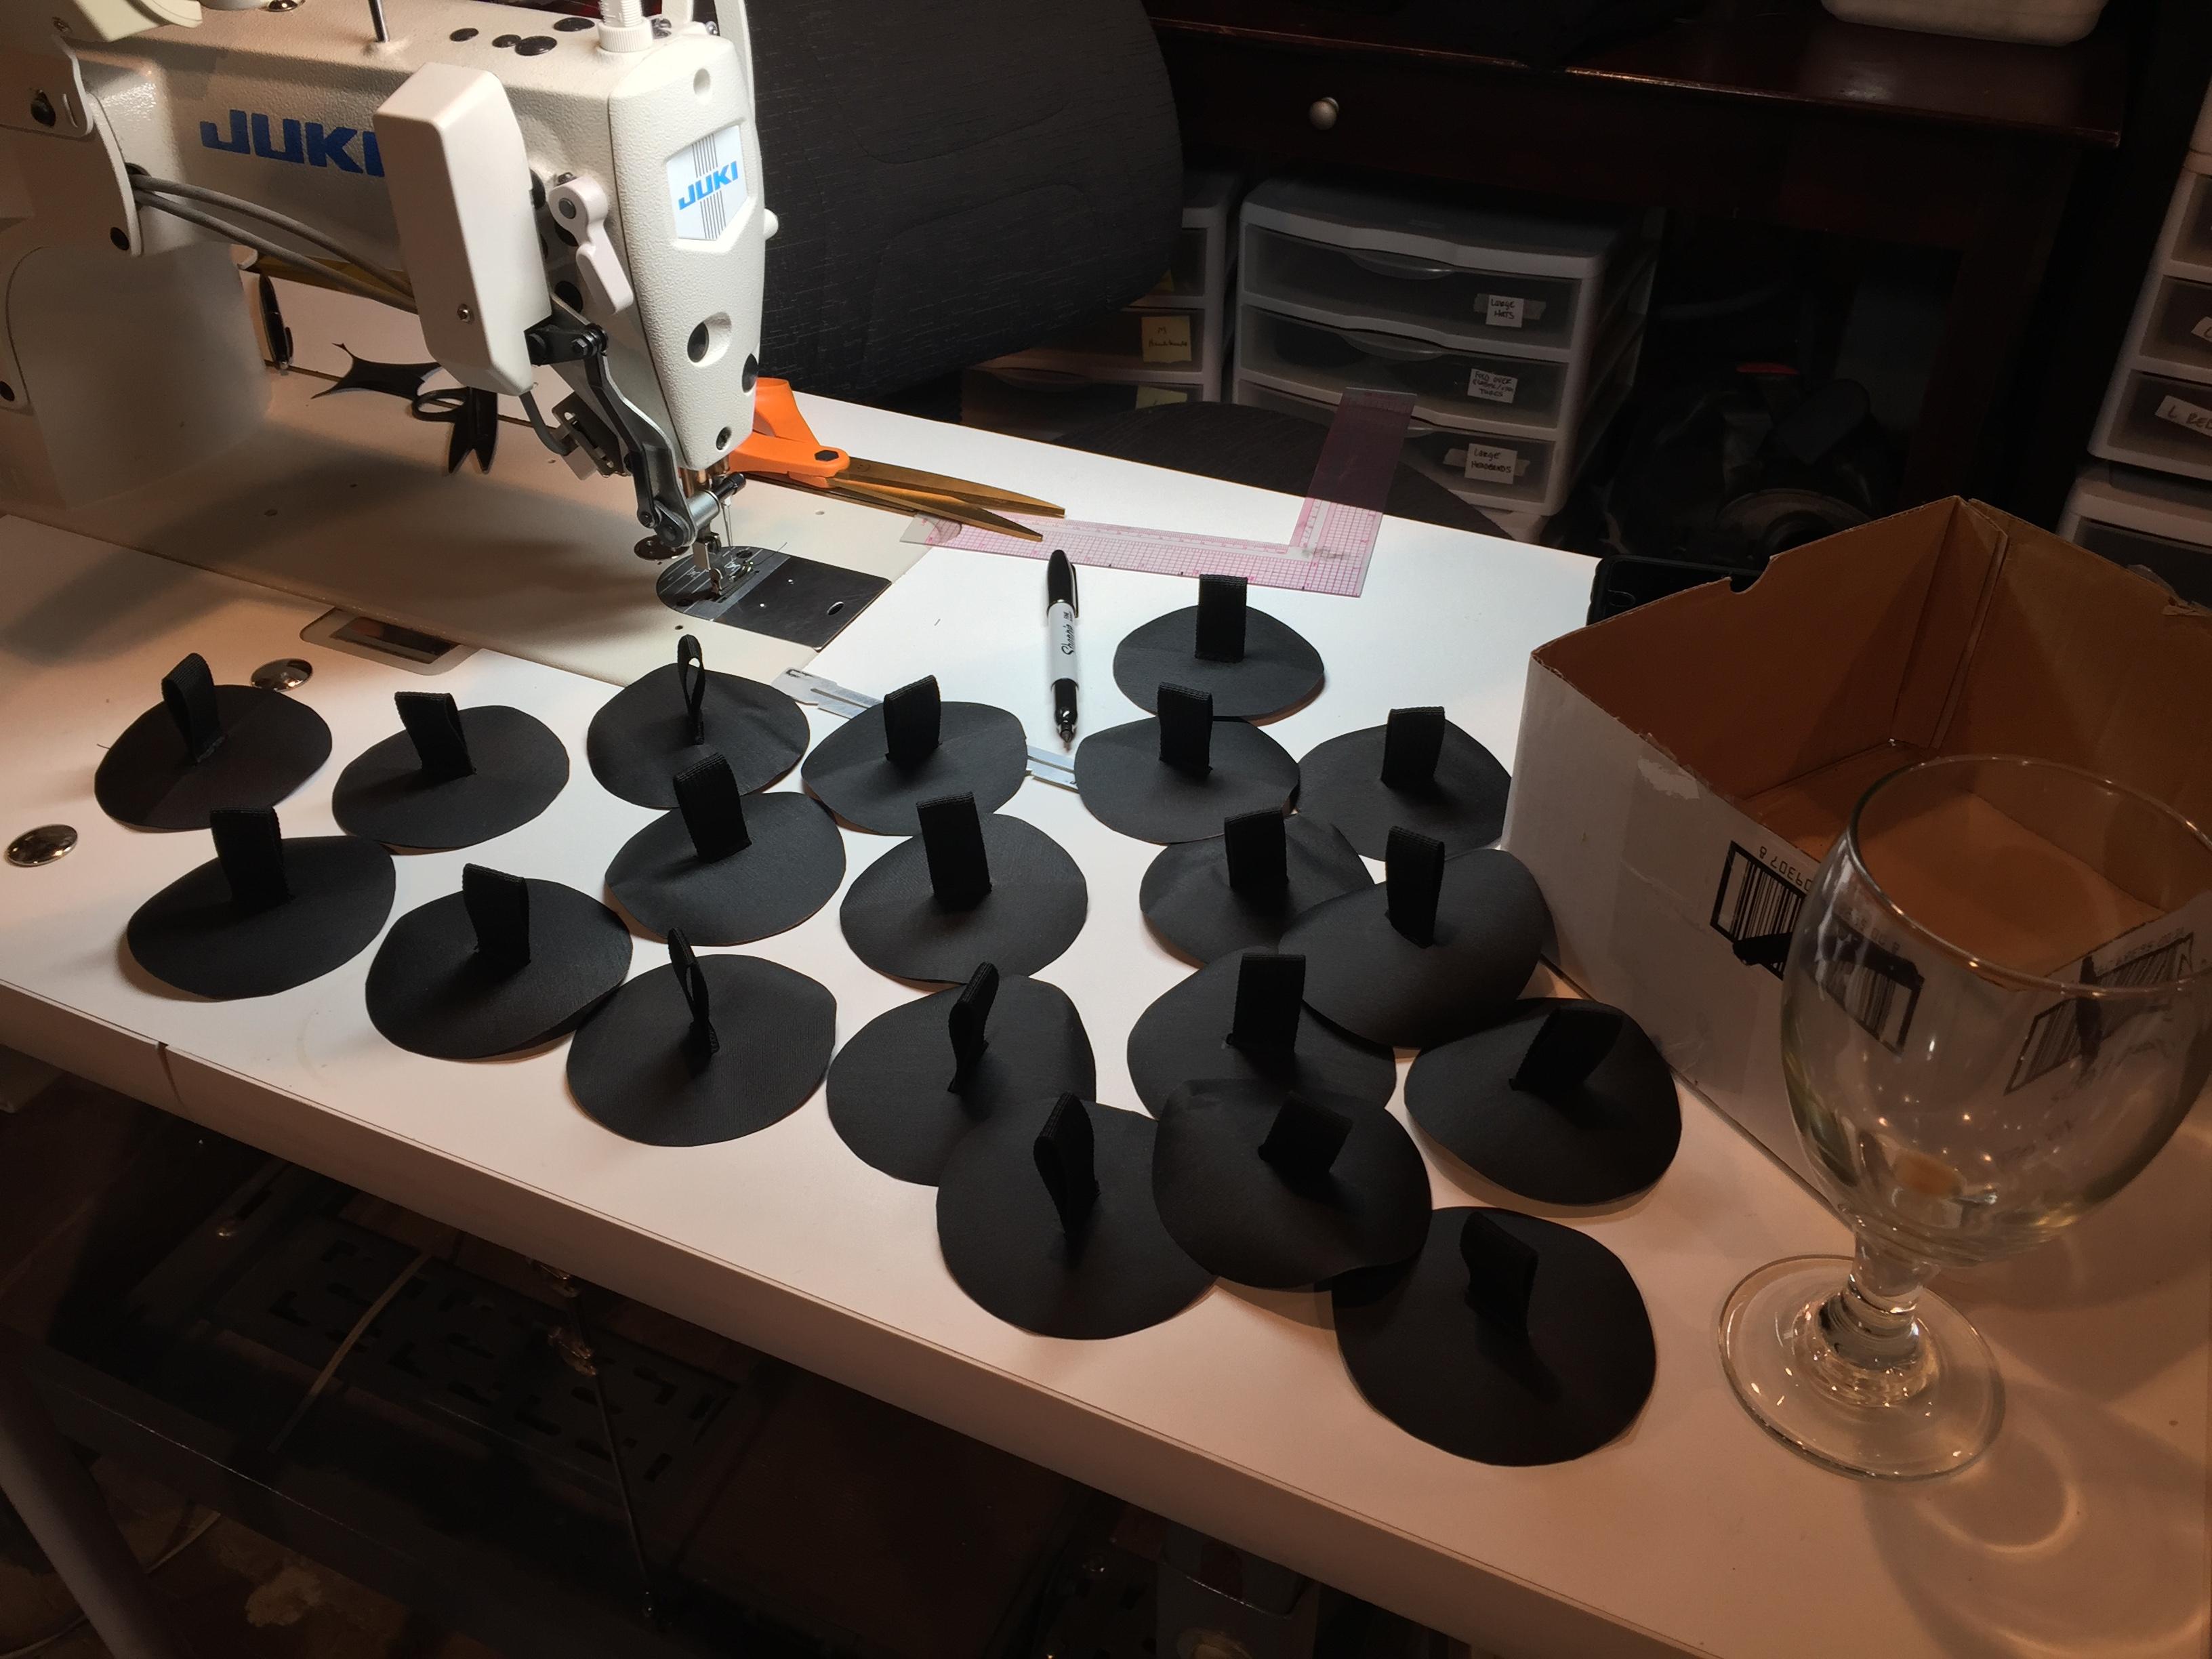
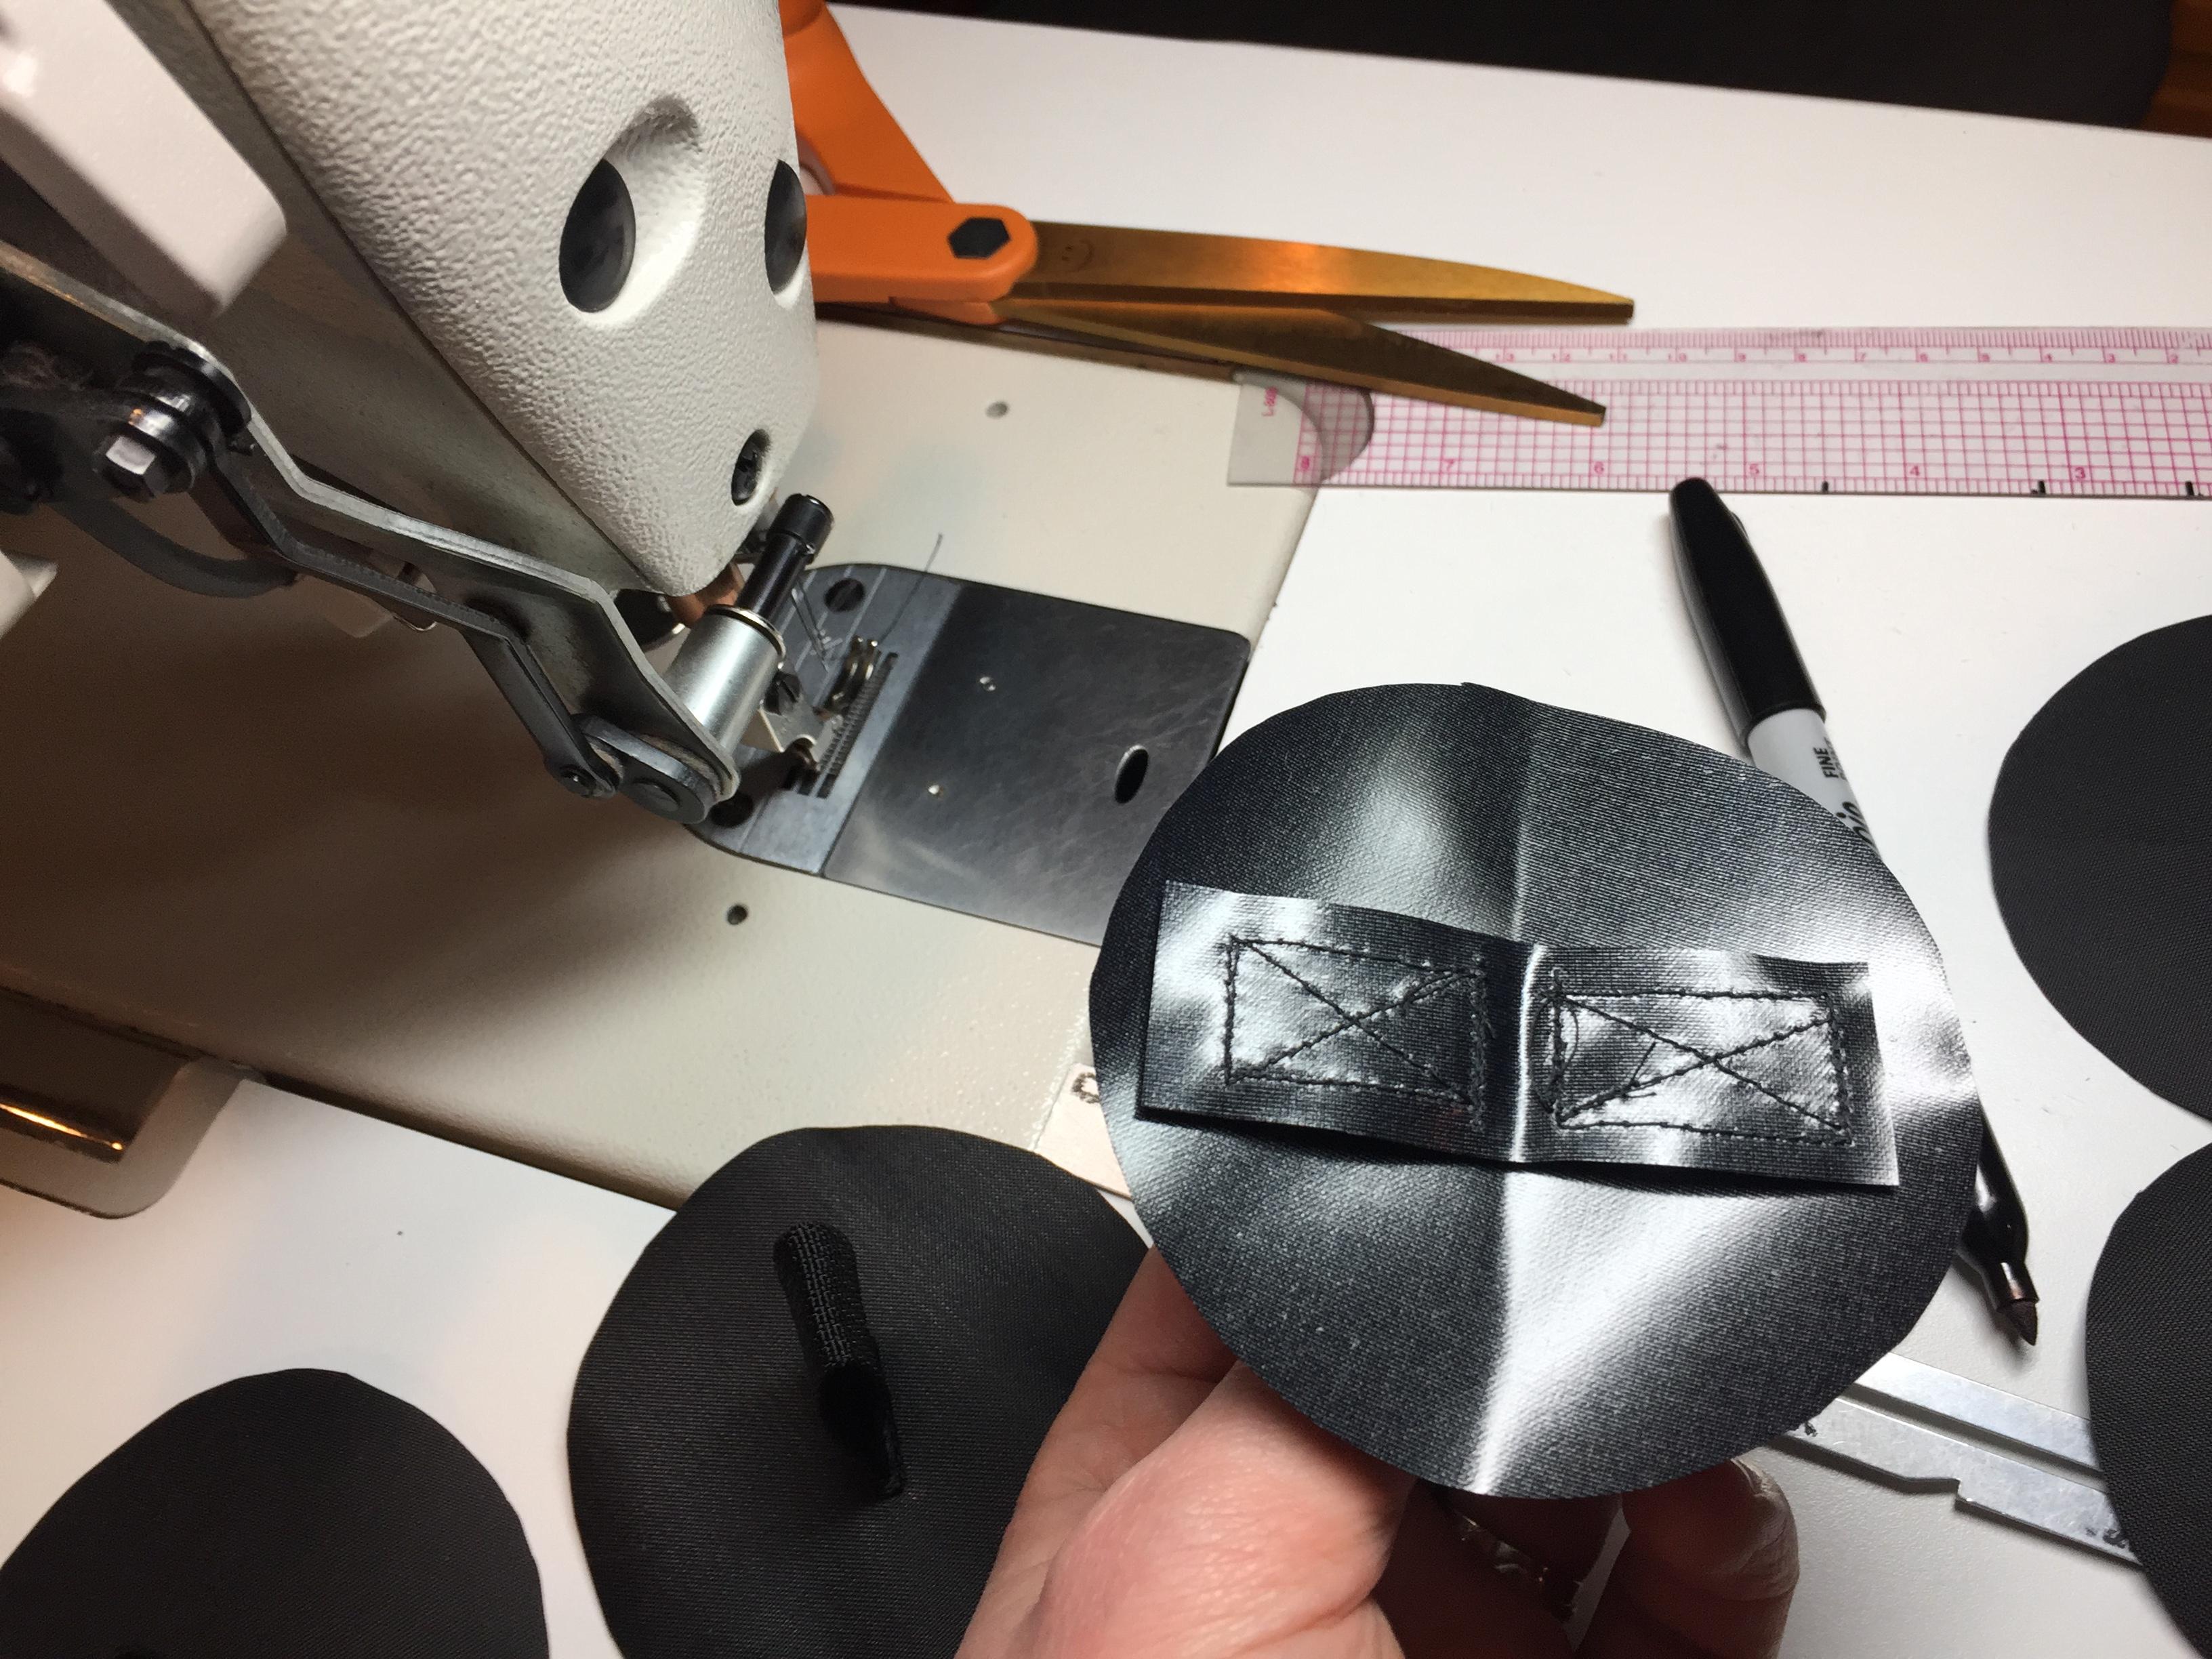
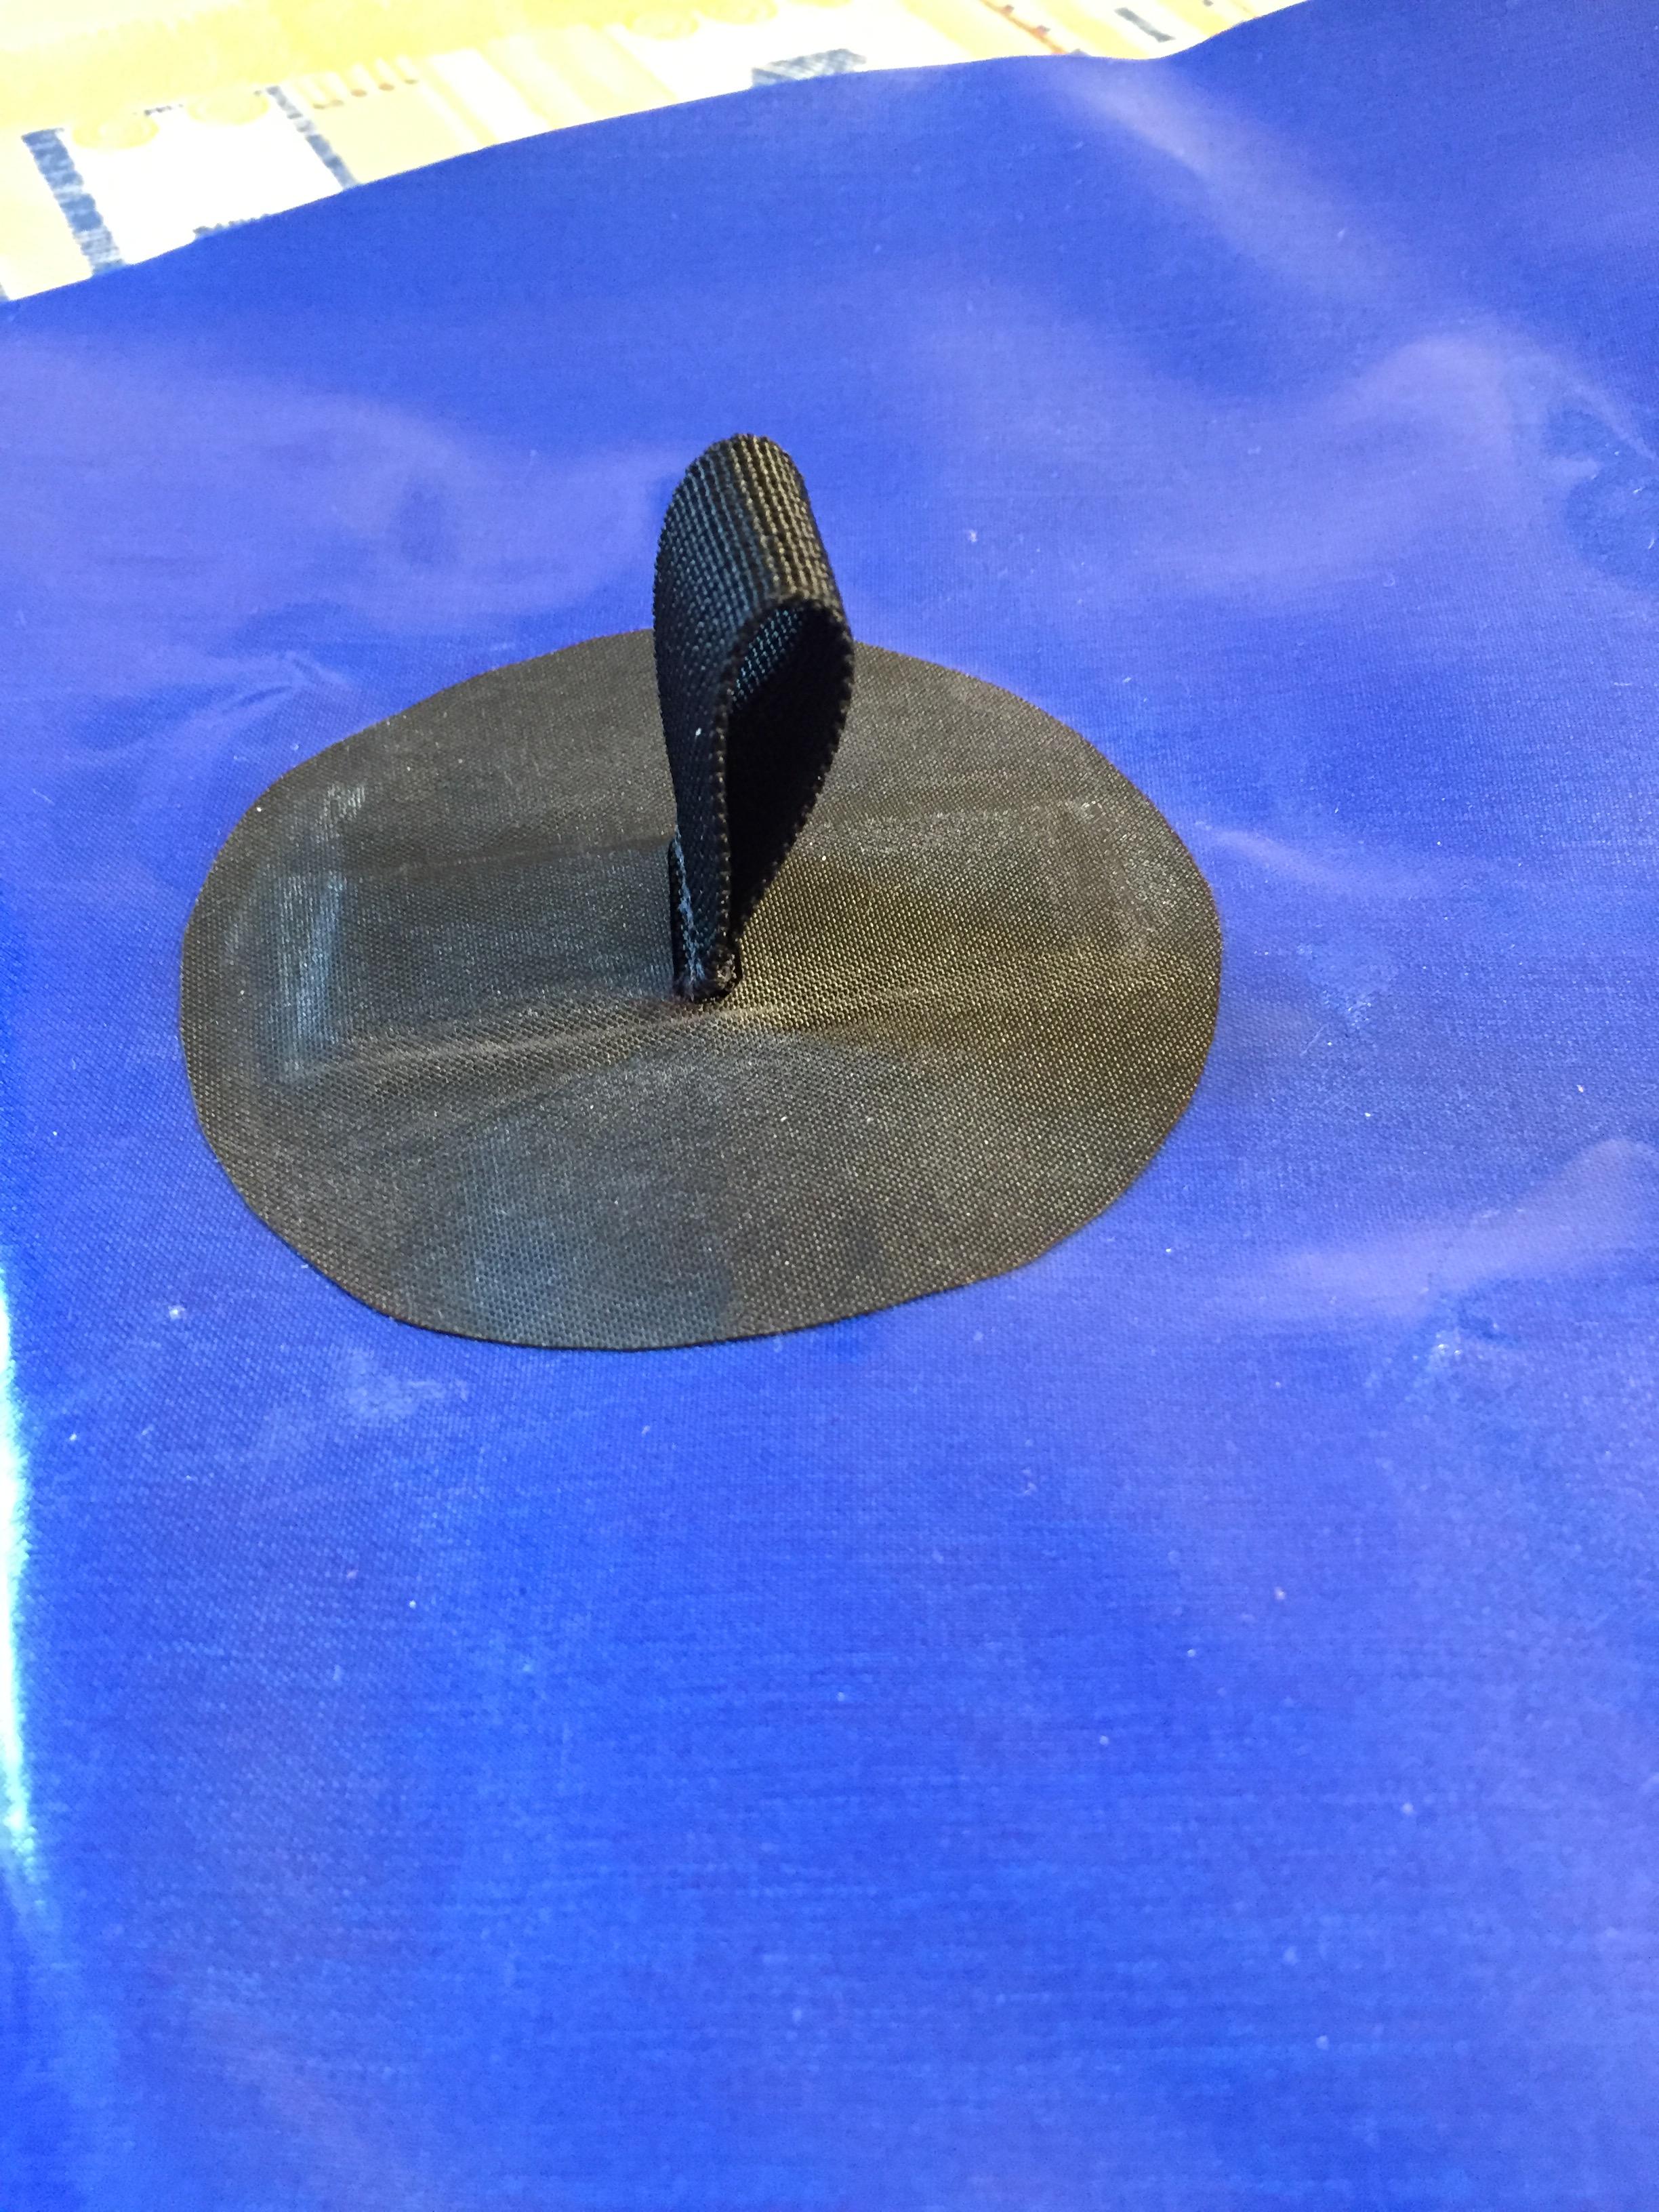
    We then tried using a strip of narrow webbing like commercial rafts.  Having a sewing machine handy we just sewed the loop shut and flattened out the ears underneath our circular patch.  Now there wasn’t as much contact with the sealable coating under the patch though and we didn’t think it would hold well (our seamgrip glue experiment failed).  The solution: also sew a small strip of fabric to the bottom of the webbing (TPU side down).  Now when we welded the tie down patch to a piece of fabric, the webbing also gets held down.

    Tie downs 1

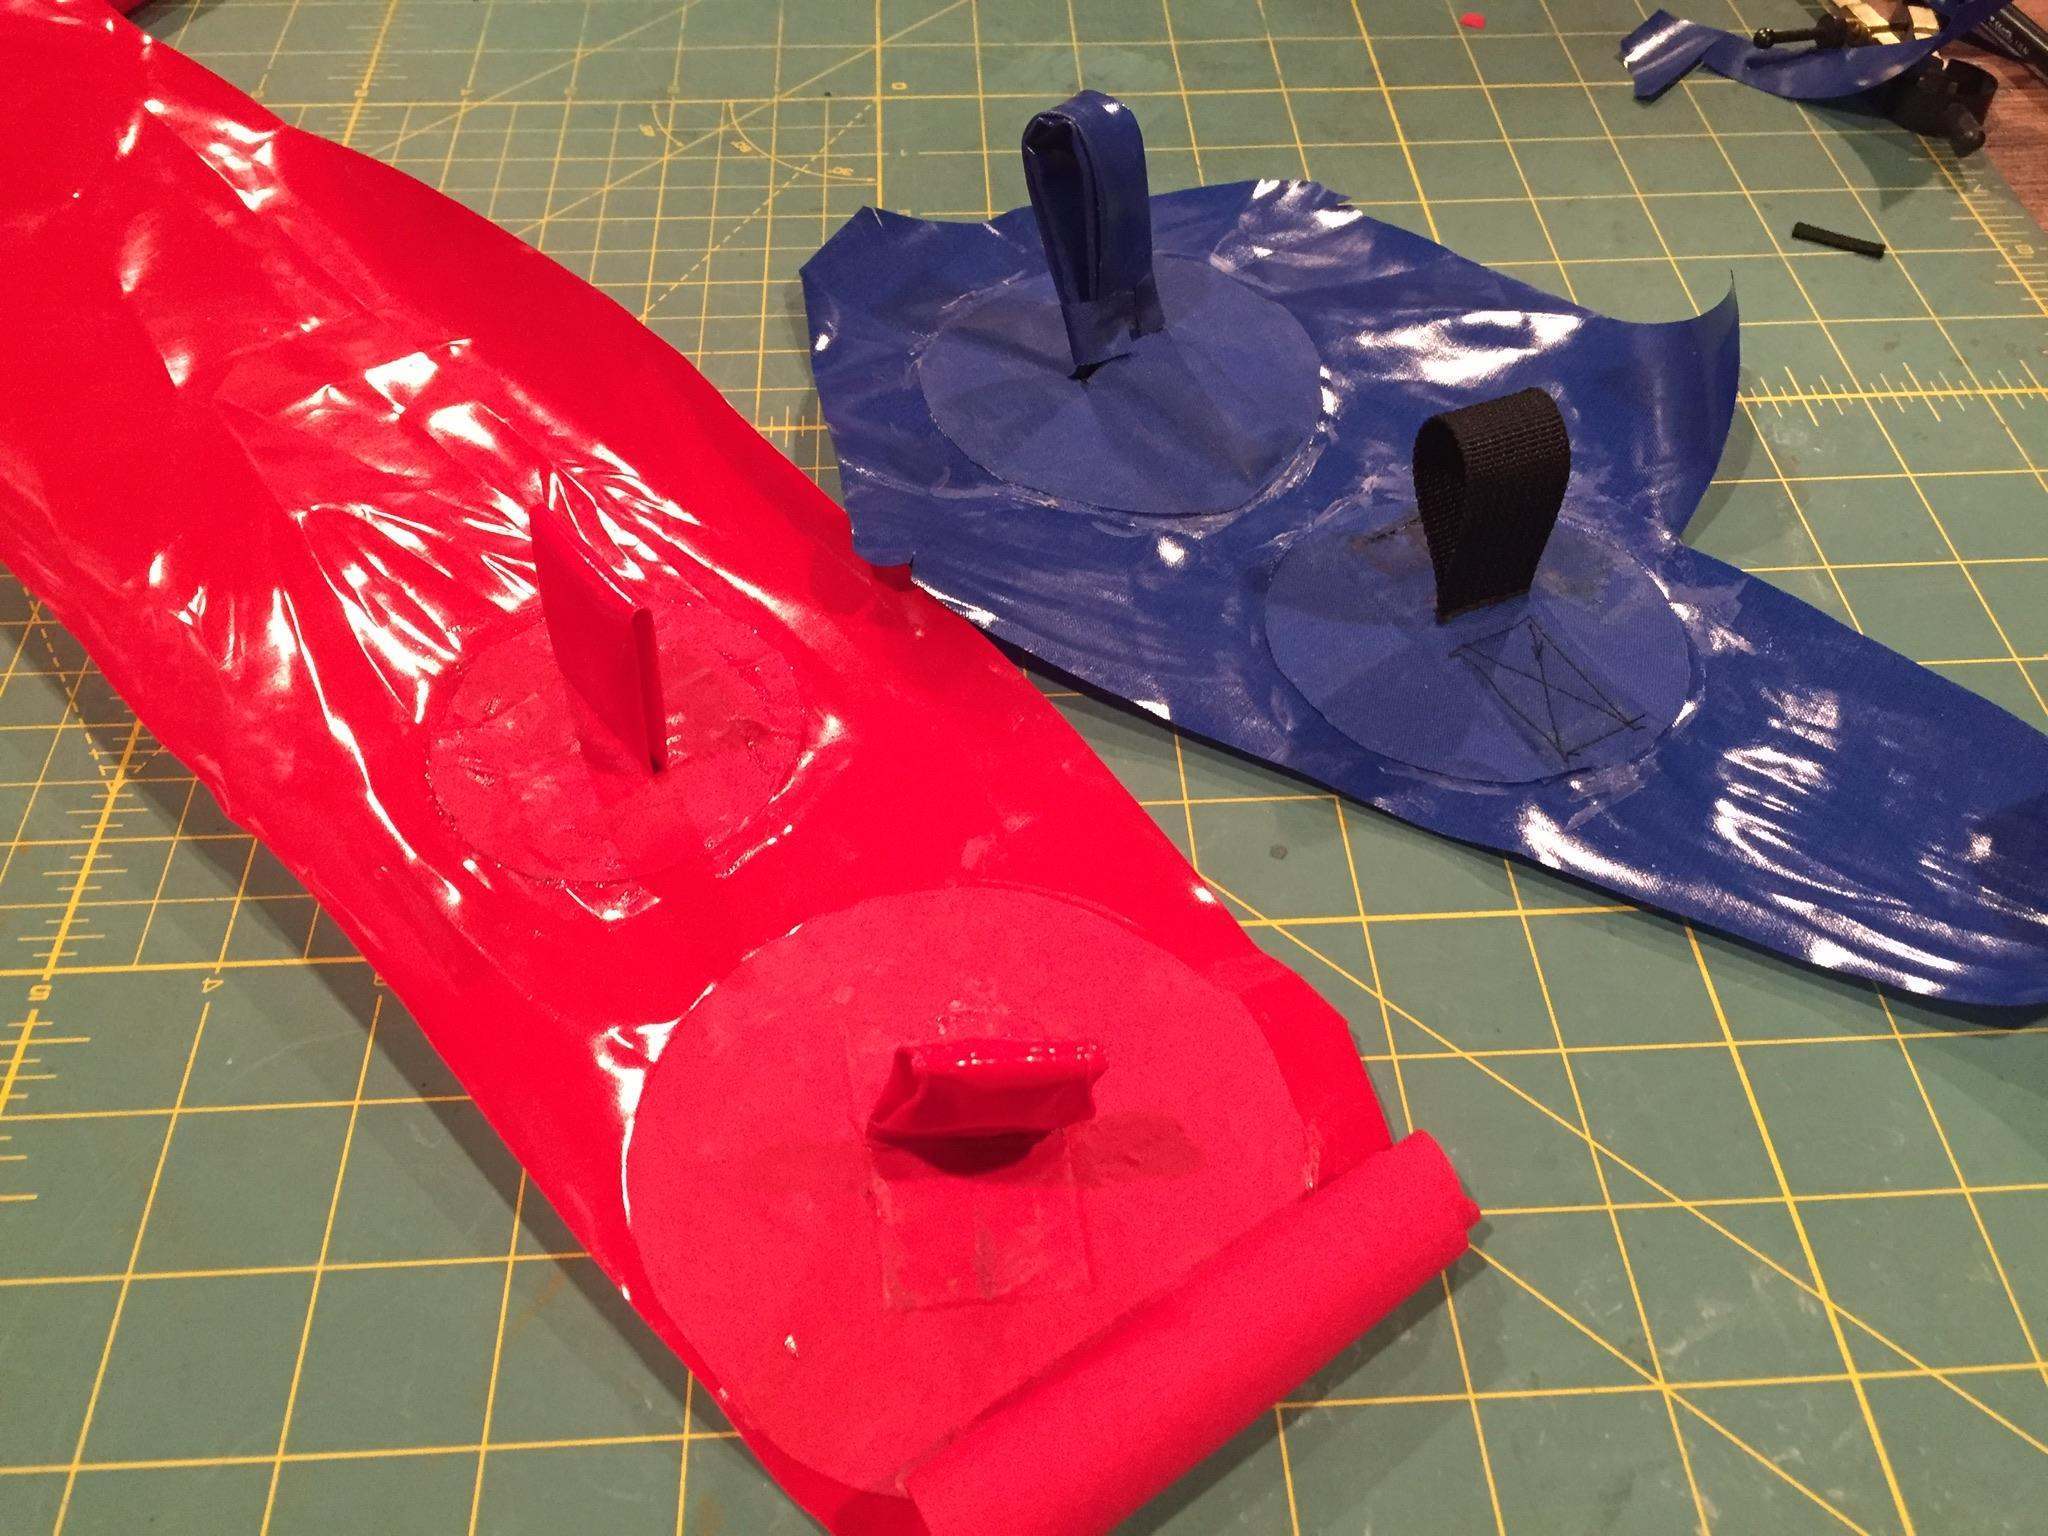
    These tie downs looked nicer to us and held a body weight pull from multiple directions.  As Matt mentioned, you may not want your tie downs to be stronger than your tube, but we knew if lashing a bike or heavy pack to multiple tie downs and yarding on them they’d have to be fairly tough.

    Tie downs 2

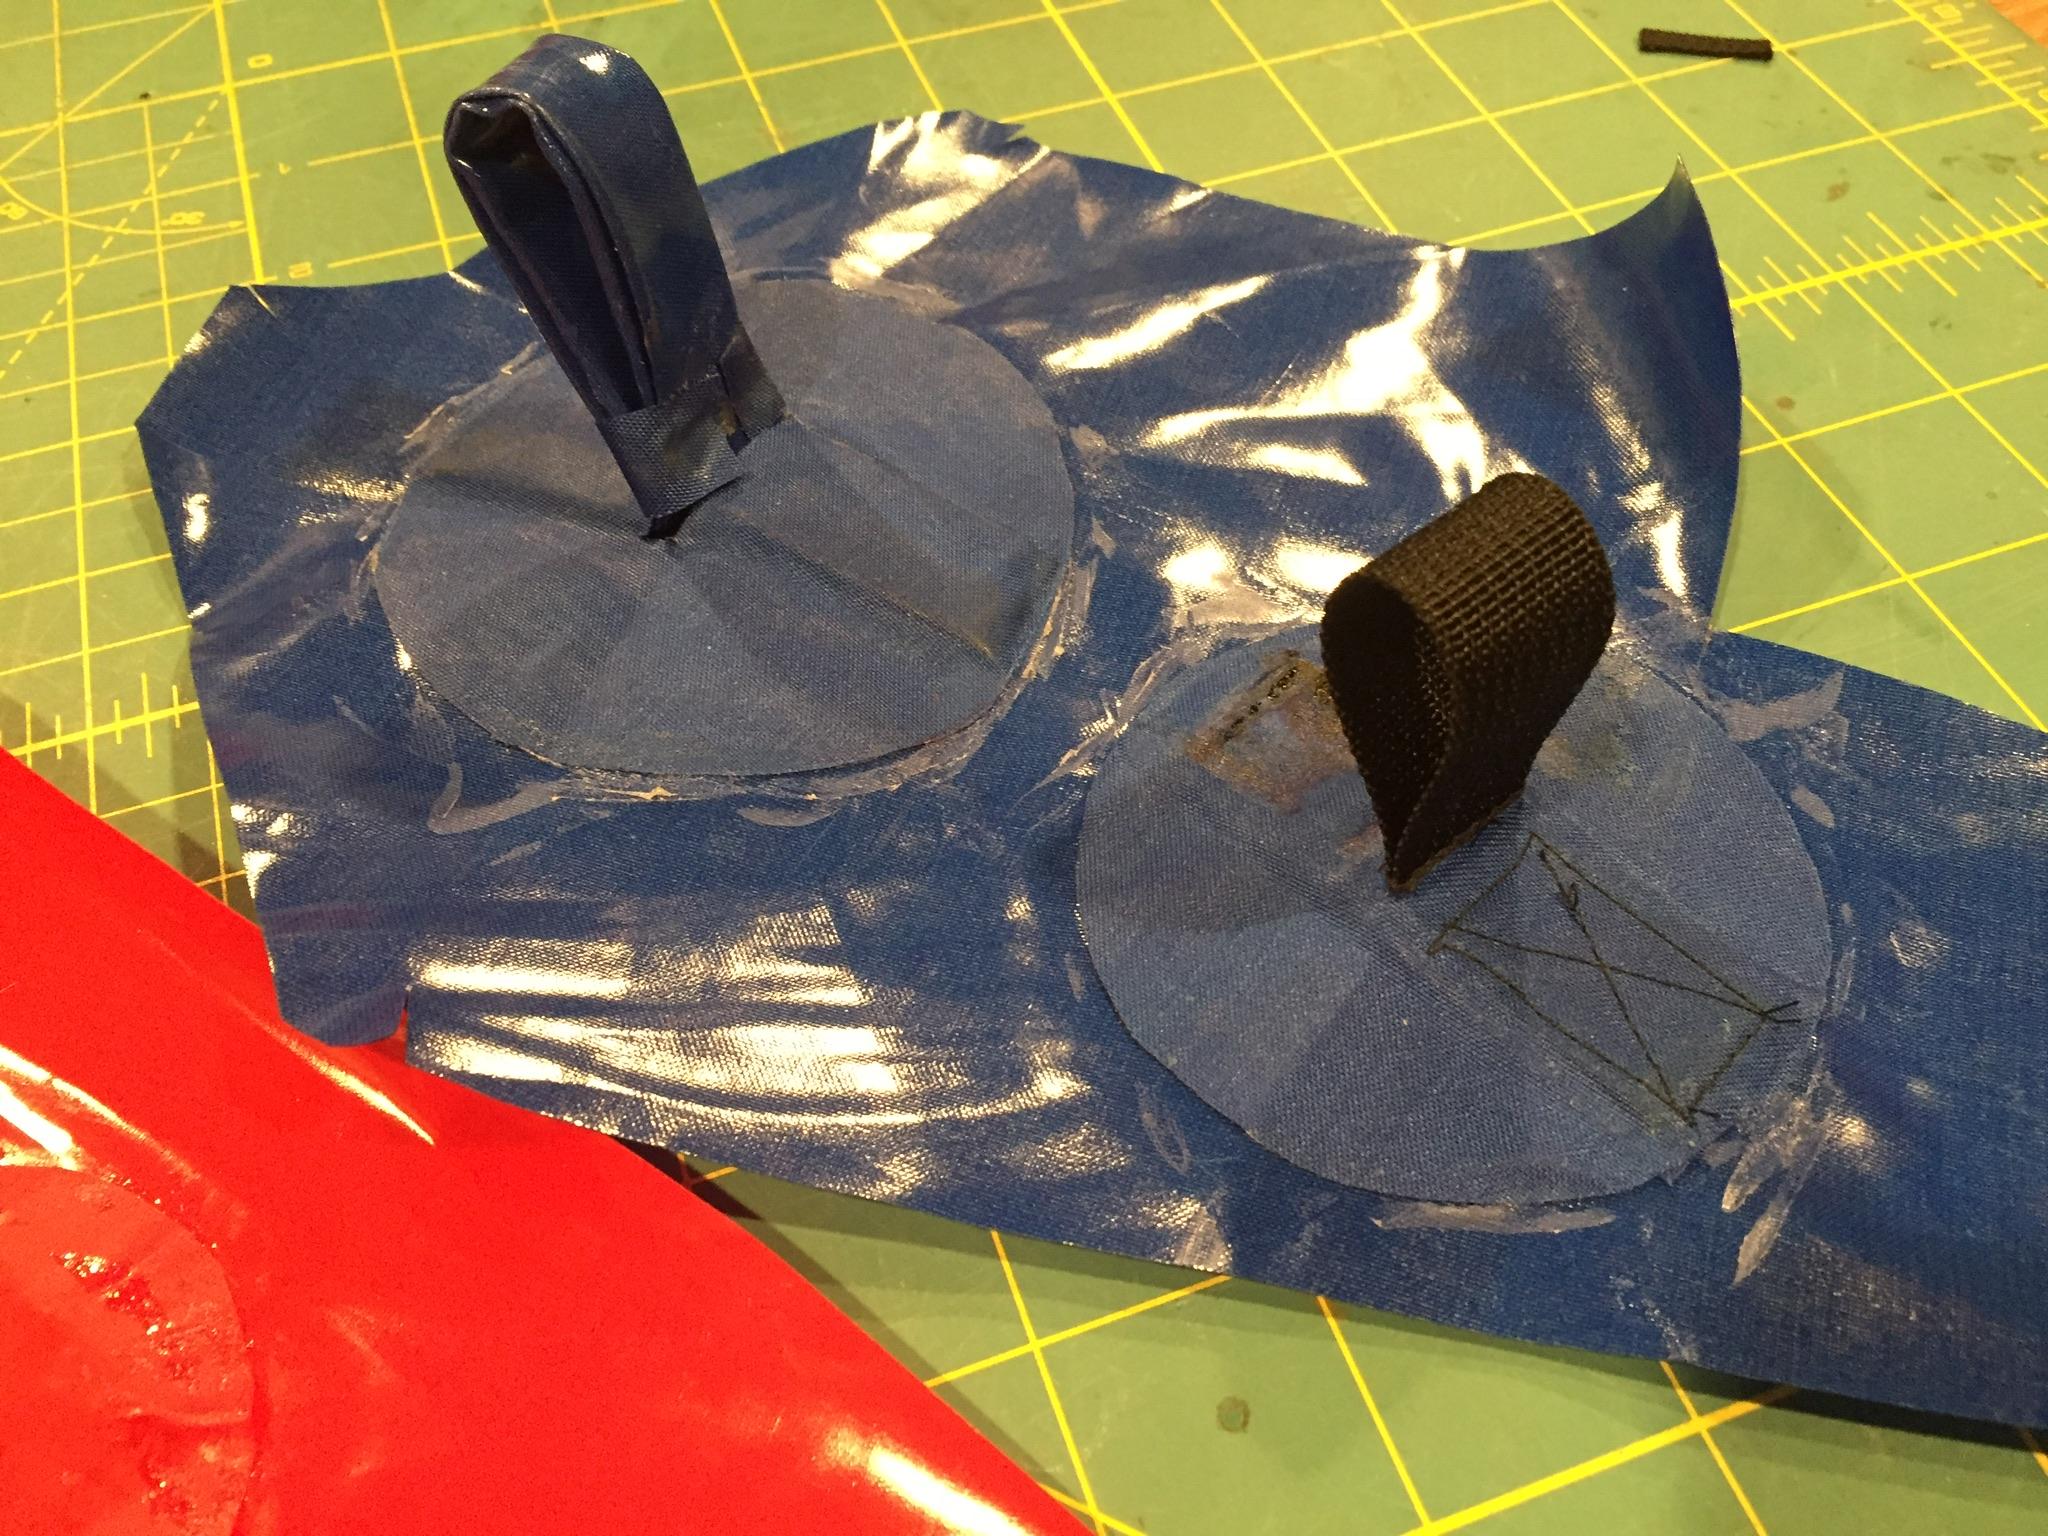
    Note we also sewed the top circle patch to the webbing, this probably wasn’t neccesary but makes it easier to position things together.  Also you need to be able to access the back to truly get a good bond, you can’t heat the strip of fabric under the webbing from the top enough the seal it.

Viewing 10 reply threads
  • Author
    Replies
    • #12979
      legslegum
      Participant

      Indeed, thanks!

    • #12852
      legslegum
      Participant

      Cool, thanks Matt. You’ve done some bikerafting, yes? Any notes there on best type to use? Would assume strap plate would be best, but turns out there’s not much of the internet getting into the nitty gritty of overbuilt vs. underbuilt DIY bike tie downs. Go figure! Saw your previous comment somewhere about laying the bike on the bow (wheels and non-drive pedal off etc) to figure out placement. Just curious if there’s anything I’m missing on strap plate vs. grab loop.

      • #12854
        Matt (Admin)
        Keymaster

        It kind of depends on whether or not you think you might want to add a spray deck sometime in the future – if not, strap plates directly under the bike frame tubes would probably work best – but they would likely interfere with the placement of a deck, so if you think you might want one in the future, I would use the loops. Hopefully that makes sense.

    • #12822
      legslegum
      Participant

      Hey folks, now that you’ve had a few years to test, got any input on best and worst tiedown designs? I just finished building a Telkwa and intend to put a bike on the bow. Just curious if anyone has any recommendations for the style of tiedown to use for that purpose.


      Thanks!

      • This reply was modified 3 years, 7 months ago by legslegum. Reason: Punctuation mistake
      • #12827
        Matt (Admin)
        Keymaster

        I’ve been using Type 2 attachment points at the rear of my cockpits to tie in the seats, and that has worked really well. I orient the hinge line perpendicular to the packraft’s center line so the attachment point can swing freely forward and back.

        I’ve been using the Type 3 attachment points for perimeter grab lines and for attaching my backpack to the packraft, and they work very well. I use a simple fabric loop or D-ring for the rear perimeter lines (as shown in the instructions) and I install female plastic buckles on the four forward ones so I can quickly clip in my backpack (I’ve attached the male buckles to the backpack). For the perimeter lines, it’s best to orient the loops so they swing horizontally, parallel to the lines, otherwise the force gets concentrated on one side of the loop and eventually there’s some visible separation between the fabric and TPU in the loop (I haven’t seen one fail though).

        (This page shows the Type 1-4 attachment points I’m referring to: https://www.diypackraft.com/construction/how-to/making-tie-downs/ )

    • #4741
      Bruce
      Participant

      The new 420D and 1000D two sided fabrics make fantastic tie downs including web plates, and D-ring points. I also used a 1.5 cm strip inside a fold on my inside tube to floor reinforcement strip, so I can punch holes in it and tie a separate floor to the raft.

      Simplest are webbing plates. I cut circles or ovals from either 420D or 1000D fabric, seal a small circle of one sided fabric on the inside (it prevents accidentally welding the center of the tab to the packraft) then I punch 2 oval holes (6mm x 25 mm) about 25 mm apart.

      Round plates are easy to attach anywhere. Oval plates make great two-point seat back attachment points.

      Round and Oval webbing plates

      I also made long attachment strips for the top of my center tube.Long webbing attachment strip, punching holes 25 mm apart.

      Another picture of the finished webbing strip laid out with an oval seat point and a round D-ring for a thigh strap.Long webbing attachment strip

      Sewing D-rings onto the 1000D fabric requires a solid sewing machine with steel internals. Better might be to take your patches to a local tent or shoe repair shop and have them sew polyester webbing on with plastic D-rings. I can recommend the sexy black and white Dyeema webbing from DutchGear.com.

      D-ring on 1000D fabric

      I made heavier duty points to attach bow and stern grab loops a swimmer could hang onto in a rescue.

      Heavier duty D-rings on 1000D fabric

      I also made one-piece grab lopps with 210D fabric cover to help a swimmer climb into a raft, of in my case provide a hold for a youngster in front of the tandem packraft.

      Grab loop and red 210D cover

      Grab loop - sealing 210D cover

      Grab loop in position on tube section 4

      I made a simple zipper pull loop from a 20mm strip of two sided 1000D fabric. This gives one a solid tab to pull against when opening the zipper.

      Simple zipper pull loop from 1000D fabric

      Other packrafters complain about their floor pad floating and floundering about when paddling in whitewater. I added a 15 mm strip of 1000D fabric inside a fold of the fabric I’m using to seal the inside of the tube to the floor. The 1000d fabric is tough enough to punch holes and weave cord to tie in a pad or a separate inflatable floor. It is so tough I couldn’t rip through it by hand.

      1000D fabric strip inside fold

      Cord woven thru punched hole

      Mounting the inside tube to floor reinforcing strip to center tube 3.

      Mounting the inside reinforcement strip with tab to center tube 3

      Laying out attachment points with inflated raft to help determine placement.Draft Layout

      Outfitting takes time. I spent weeks working out what I wanted. Of course, I’d have to spend almost as much time if I went downtown and bought a “finished” raft – judging from the time others spend adding and tuning their outfitting.

      Now I have to start assembling the raft! Wish me luck!


    • #3660
      Jamie
      Participant

      I was thinking of using plastic D-rings instead of a loop made of webbing. These could be secured to the packraft in a similar way to the above.

    • #2834
      Matt (Admin)
      Keymaster

      I don’t have a sewing machine, so I’m inclined to try Bruce’s tie-downs – I saw your test video @brucecampbell and the strength vs. weight is very impressive! Thanks for posting. (I’m in the middle of moving house, so haven’t posted your report yet.)

    • #2828
      OlympicMtnBoy
      Participant

      A few more pics of our diy patches.  They were a bit hard to get to seal right, you have to work both front and back well, but I think they look good and seem pretty strong.  About 3.5 inches in diameter.

      • #2829
        Steven
        Participant

        Those look awesome, great work! The stitching makes it stronger im sure, plus it looks legit.

    • #2792
      Steven
      Participant
    • #2791
      Steven
      Participant

      I’m not quite sure what I’ll do for tie downs once I get to the step (method, etc). Just a quick question… Stumbled upon this web page: http://www.stitchesnstuff91.com/dringsandhandles.html


      Anyone think any of these type of premade rings/tiedowns would work?


      Thanks for the input!

      Steve

      • #2795
        Steven
        Participant

        Well someone just directed me to the alpacka page that has their tie downs and strap plates. I think these are the way to go if you aren’t up for making your own. I’m still up in the air as to whether I’ll tackle making my own.

    • #2772
      Bruce
      Participant

      I will try stitching loops to fabric next, like Olympic Mtn Boy above. In the image below are four flat tie down patches with simple slots cut for webbing. I tested a two layer version, with the center “tab” doubled by heat sealing a piece of TPU coated fabric to the bottom. This served to prevent it from being unevenly sealed to the raft creating a stress point, and it tested to failure at 120 lbs (50 kg). I added a third layer of two-sided TPU coated 70D ripstop I purchased from Rockywoods Fabrics (12.99/yd) and the third layer increased strength to over 150 lbs (70kg).


      In the photo there are four test assemblies, the one with a flat brown webbing was too weak to bother testing.

    • #2609
      Matt (Admin)
      Keymaster

      Looks good! I think this is a good option for those with access to a sewing machine. Thanks for the tip!

      • This reply was modified 7 years, 1 month ago by Matt (Admin).
Viewing 10 reply threads
  • You must be logged in to reply to this topic.