- This topic has 0 replies, 1 voice, and was last updated 6 years, 3 months ago by
 .
.
-
Topic
-
Hi everybody,
I am a first time builder of a Telkwa kit with the 735 GSM floor material.
My welding tools where a sanded AliExpress leather iron and sometimes also a heat gun from a 852D+ SMD station (eBay).
I followed most of the instruction, but did some things differently:
Deviations
- For sealing I used a 2K Polyurethane glue (Bostik 520 PU for inflatables). This is not a sealant like Aquaseal but a contact adhesive. The TPU to TPU bonds when used as contact adhesive are as good if not better than welds. You need pliers to pull them apart.
Since I had it collecting dust, I did some tests with Matt’s fabrics and found that it could be used also as a sealant. It remains very flexible and is not sticky after curing. This saved me from using talcum which I only had available as a scented babypowder. (“Nice packraft you have, buddy and it also smells good” 🙂 ) - I struggled with the front center seam, maybe I just did not have the right bowl to insert to weld the tip. For the rear center seam I used therefore a modified technique which this reenactment picture illustrates:
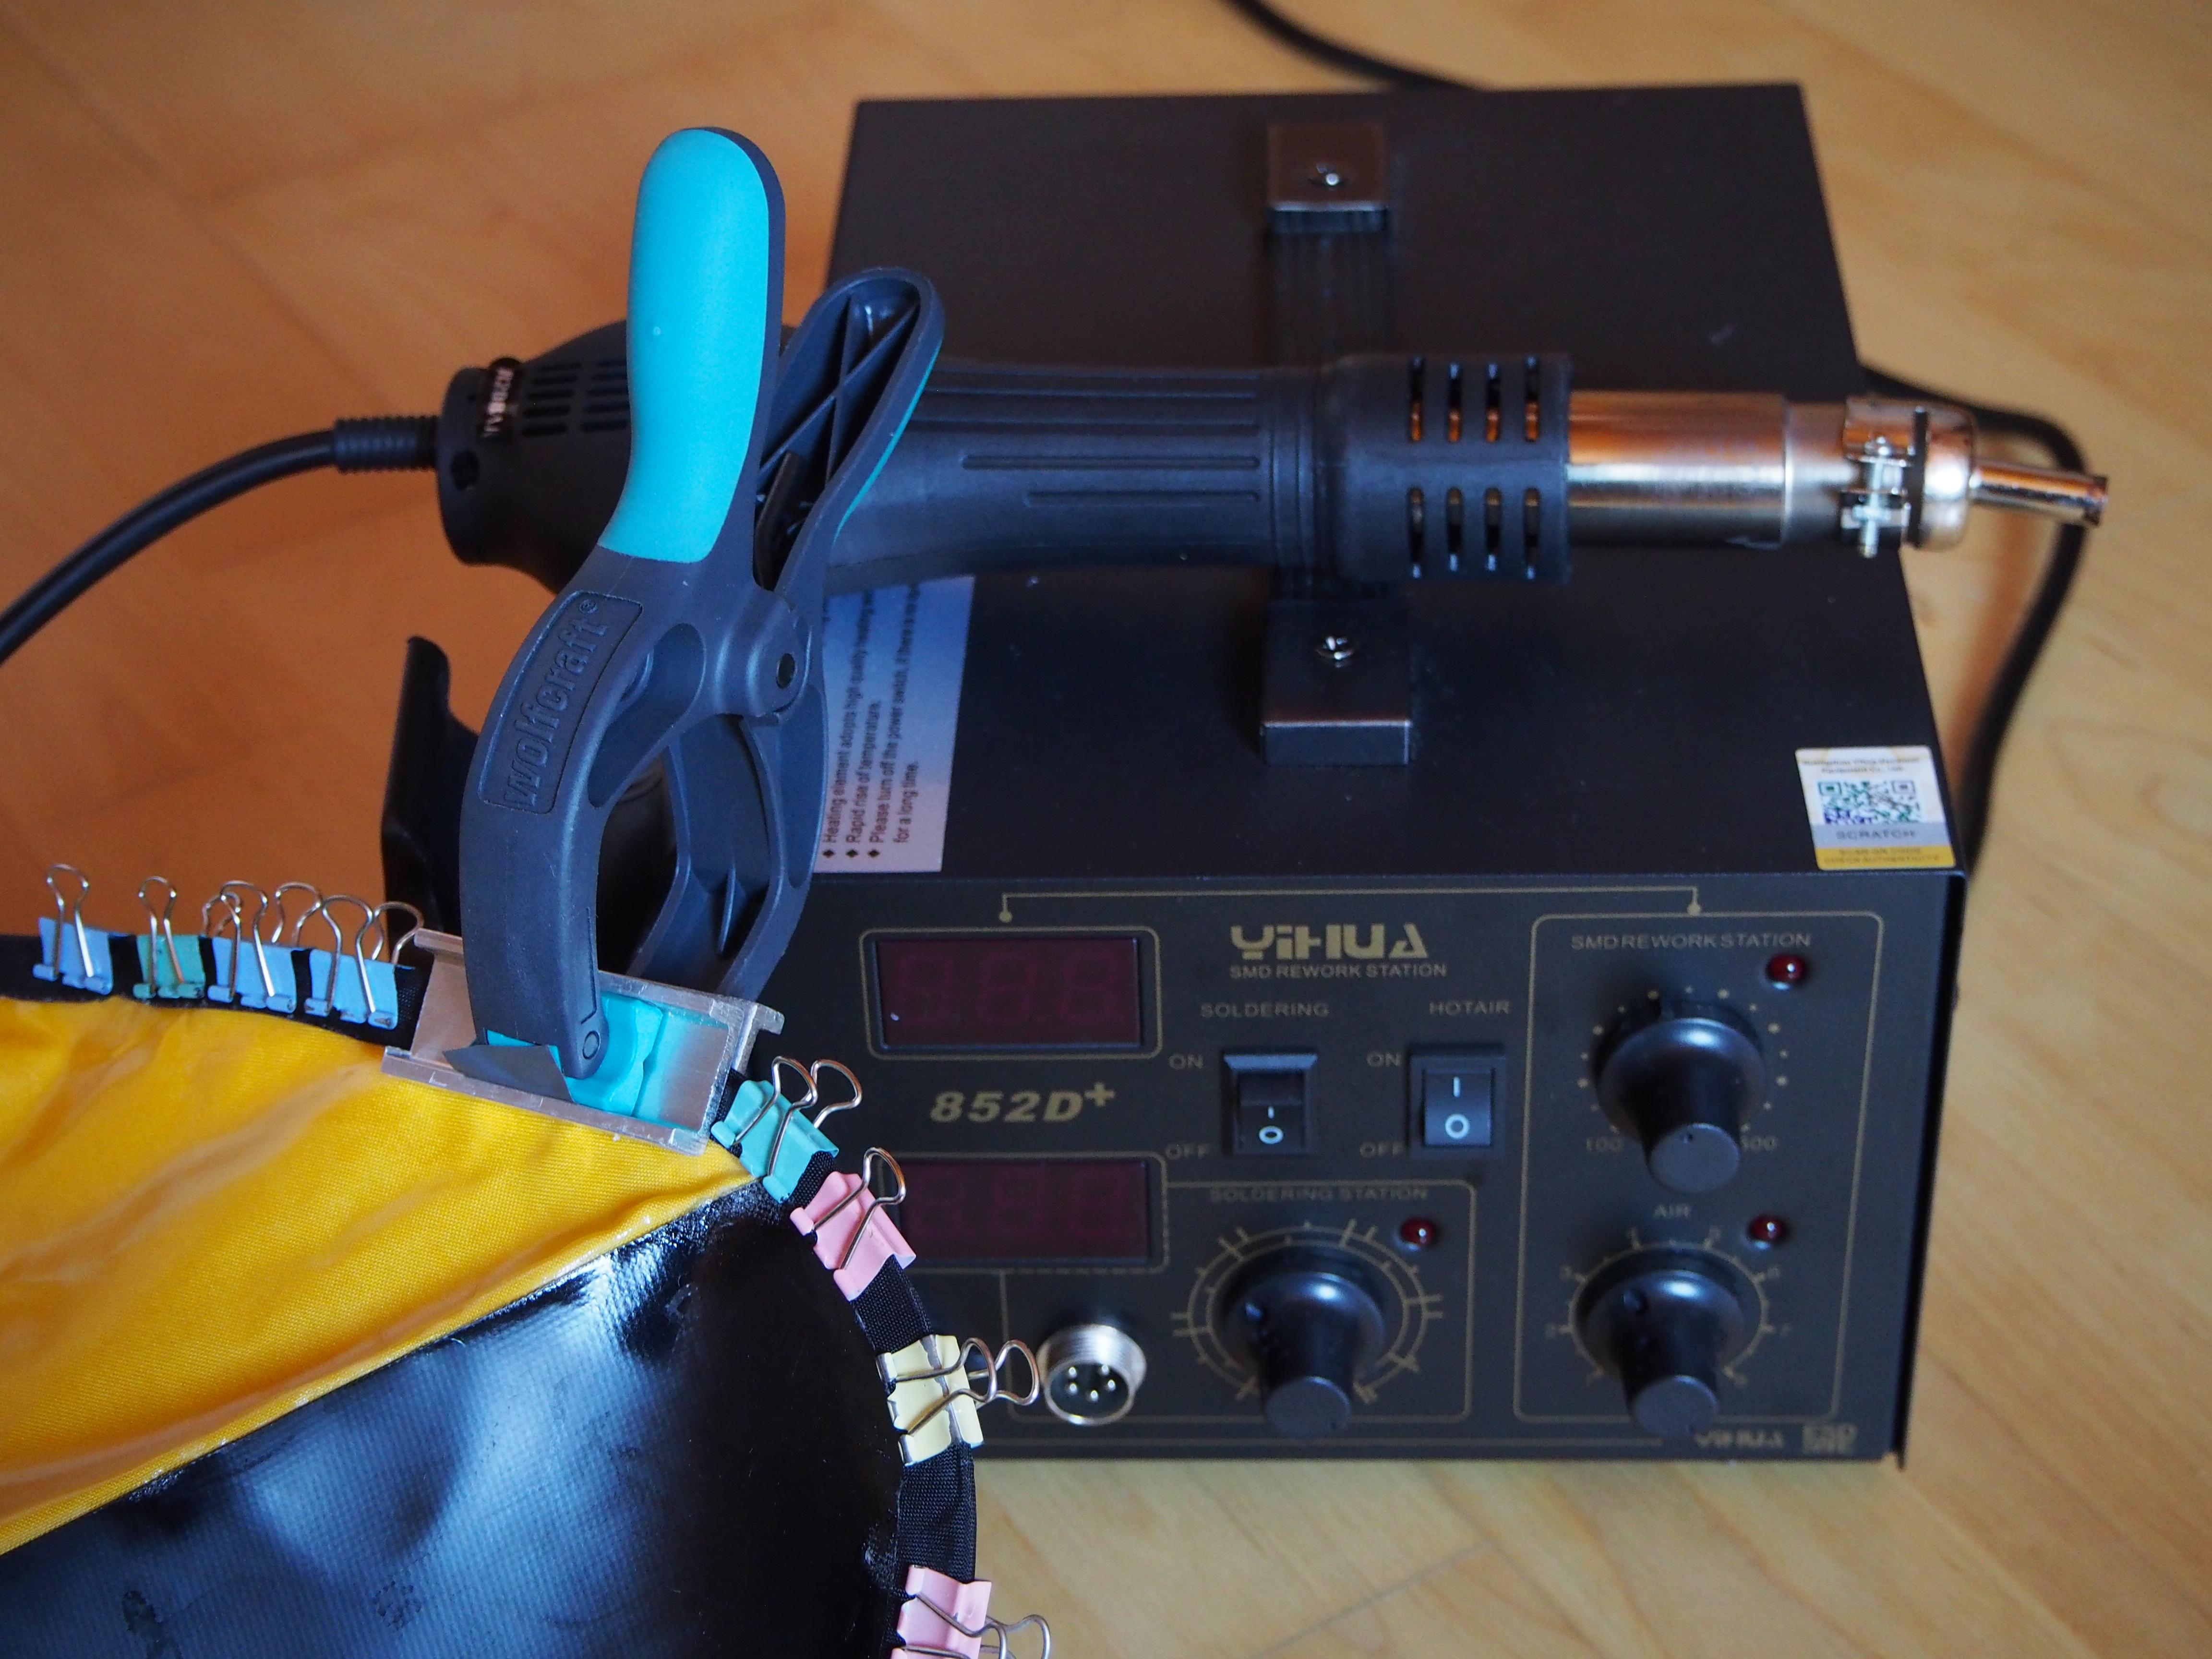
I clamped the the two sides of the seam flat and flush on each other with the seam strip bent over in a U fashion. Then I heated sections from both sides with the heat gun and used a little tool to clamp down the seals. The purpose of the clamp tool is to create an even pressure, the aluminium pieces support fast cooling of the welds. Pliers did not work well for me, the area than can be pressed is small and the force is not exactly perpendicular to the weld.
Here’s a detailed shot of the clamp tool and the wall hook which was sacrificed for a noble goal.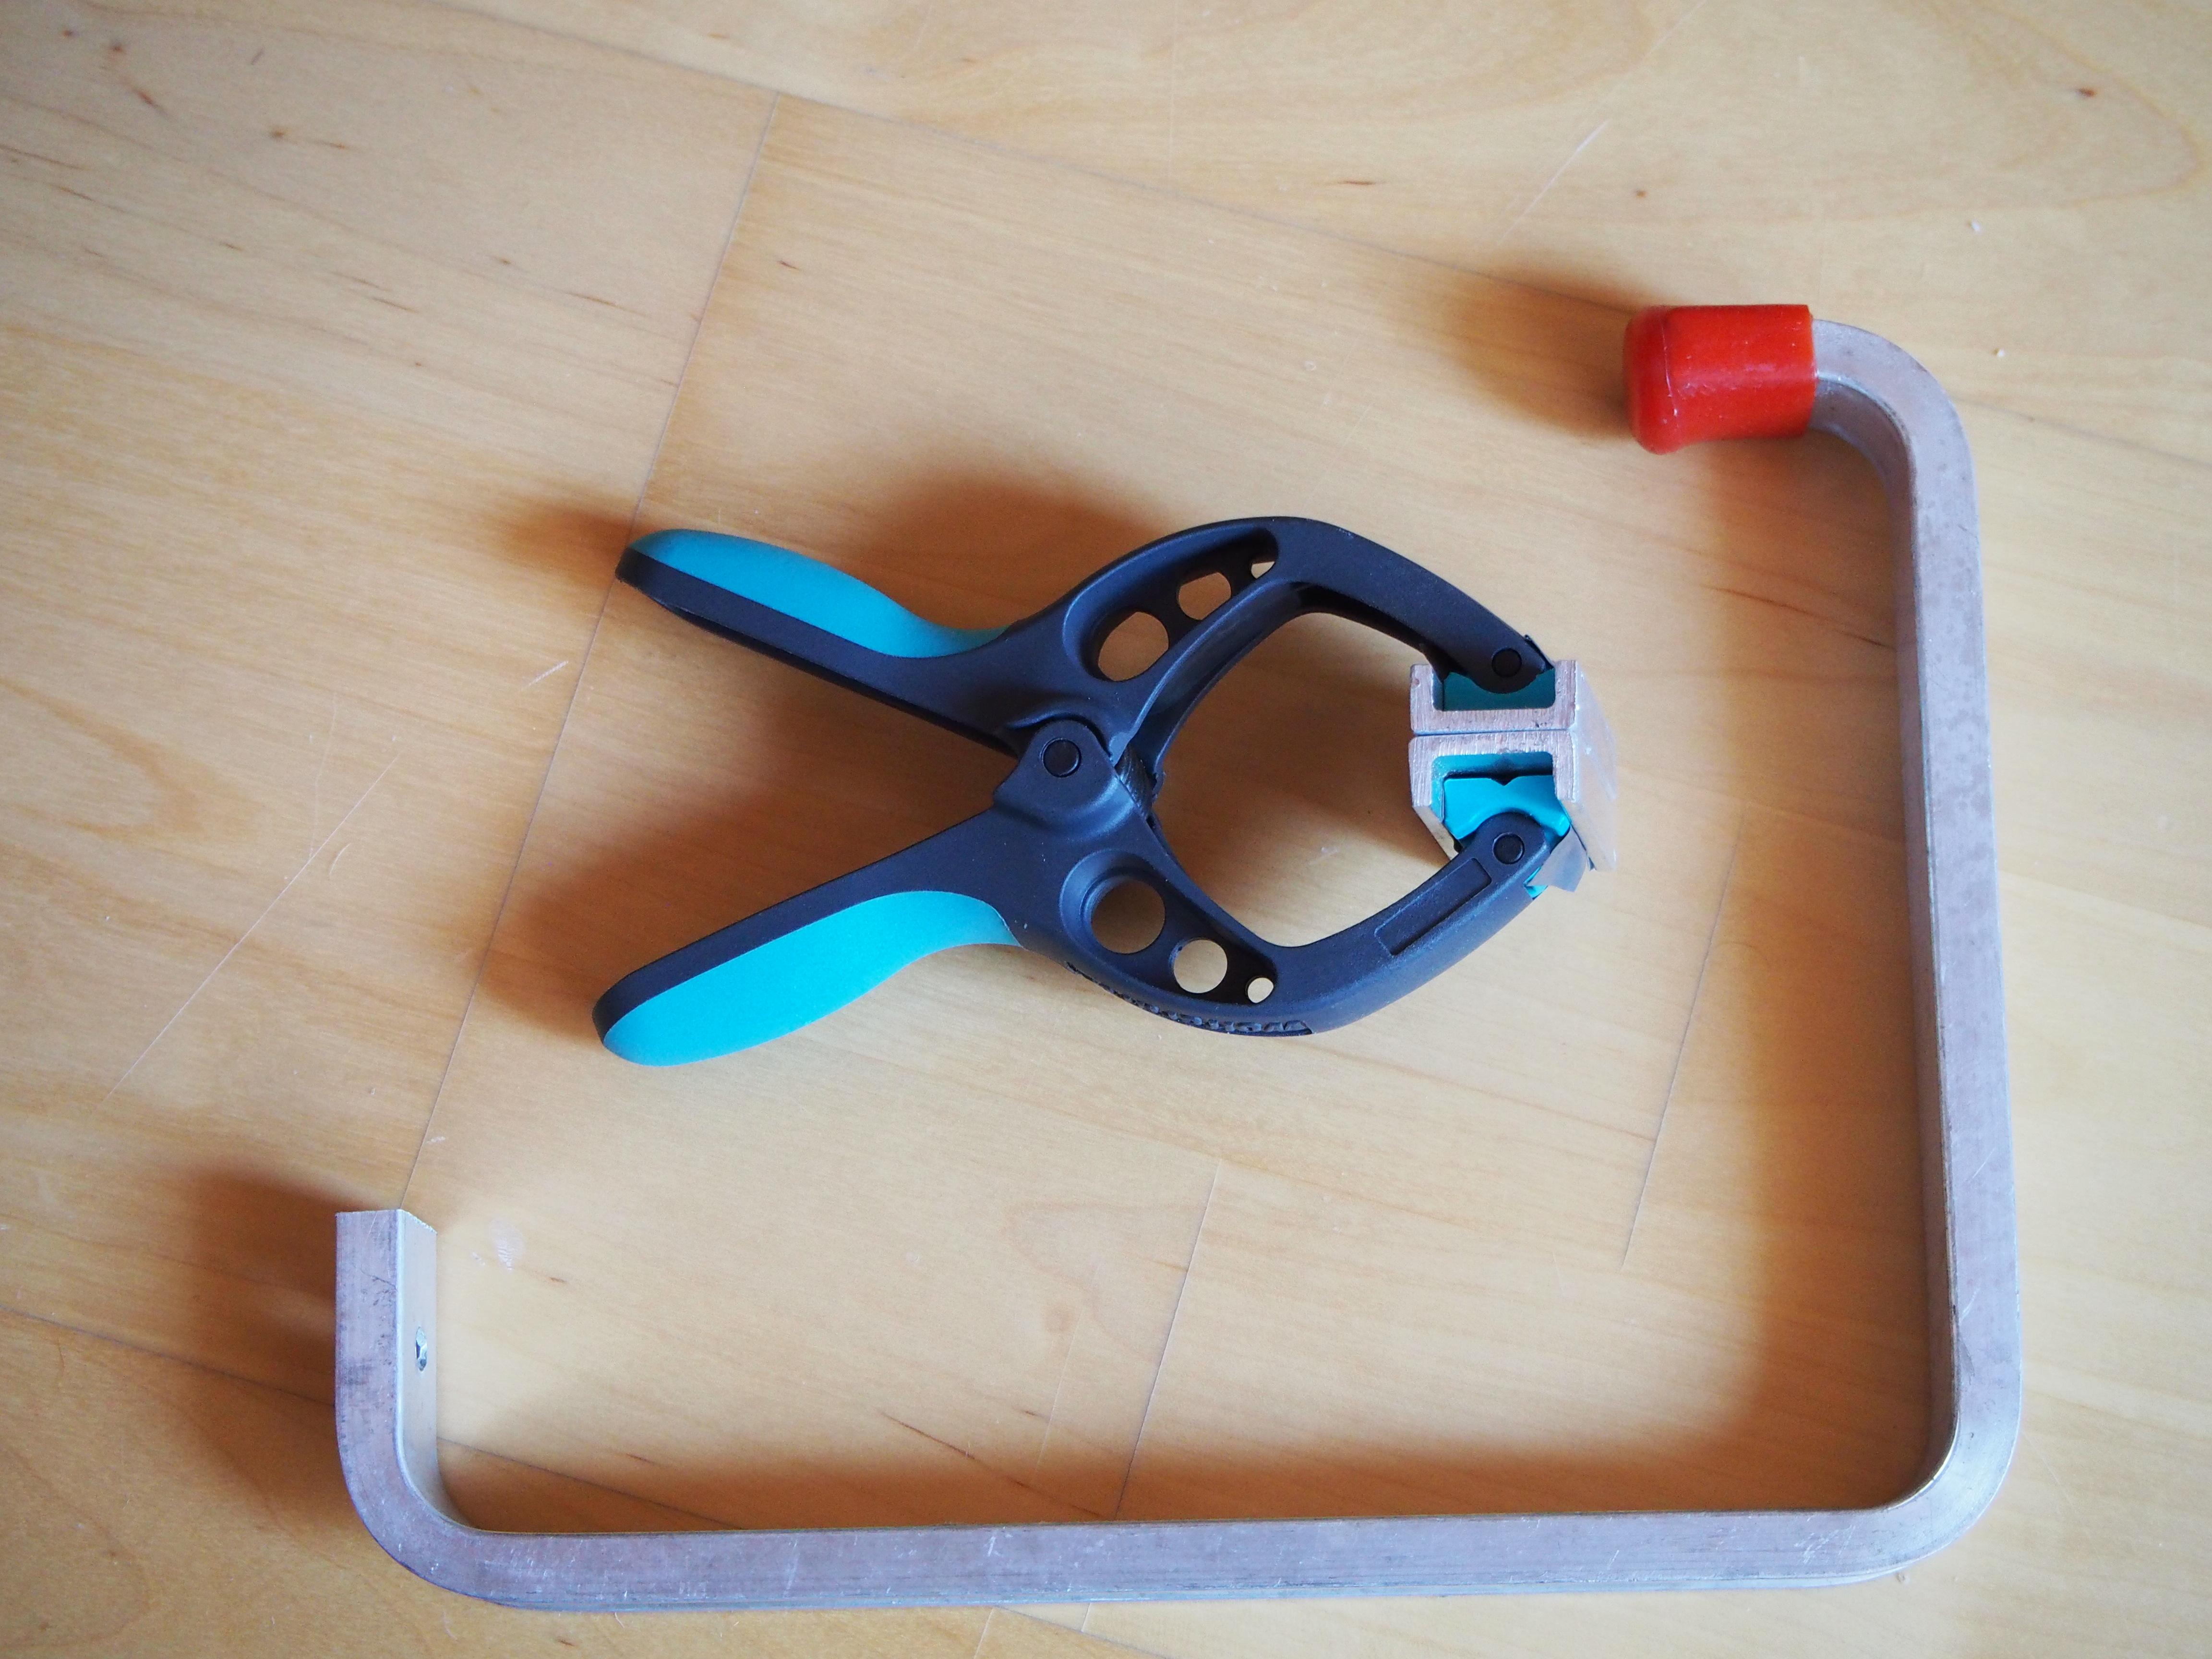
Build Quality and 735 GSM floor
Upon inflation I had two hissers where 3R and 3L tubes join the floor. These where the first joints I made and the process was complicated because the number three tubes where a centimeter to short, which probably weakened the joint. I had quite some microleaks and these always occured where airbubbles were trapped or the seam had slighly opened. I attribute the airbubbles to my jig not being 100% smooth and rectangular.
Being an absolute Newcomer to packrafting and not interested in Ultralight I bought a Telkwa with the strongest floor. The iron neads to be dialed at least 25 degrees Celsius up when sealing to this floor material otherwise seals might be bad. The inside-out inversion process looked scary, but was doable and a good test for seam quality as well 🙂
Applying sealant from the inside for patching leaks is preferable, but with the 735 Material you can reach down through the zippper only as long as your arms are. There’s no way to invert the raft through the zipper as in the lighter builds.Things I would do differently
Glue patches on the inside of the tubes where two tubes and the floor meet since not all of these are accessible from the inside through the zipper.
Suggested Improvements to the Instructions or the Kit
- Cutting of the fabrics went well, my scissors proved sharp enough. The scoring on the GSM worked very well to guide the scissors. The scoring on the top fabric was hard to, I therefore retraced traced it first with a pen. I’d prefer a pen line instead of scoring on the top fabric.
- The instructions where easy to follow. I would suggest the following change: Move the instruction for creating a proper floor joint (the picture with the red and green lines on the seam strip) into Step 3 when tubes 3 and 2 are married.
- I found the 2.5 centimeter seam strips too narrow. While they are exactly the size of the leather iron, it is all too easy to slightly melt the TPU on the sides. I would prefer a 2-3 mm buffer zone on each side.
- The kit comes without instructions for a beerholder nor does the forum address this topic. Some guidance or a build option would be appreciated 🙂
On the Water
Had the raft only for a quick test on a lake while I am waiting for proper paddles to arrive. Handles well, even with my Intex toy paddles.
- For sealing I used a 2K Polyurethane glue (Bostik 520 PU for inflatables). This is not a sealant like Aquaseal but a contact adhesive. The TPU to TPU bonds when used as contact adhesive are as good if not better than welds. You need pliers to pull them apart.
- You must be logged in to reply to this topic.