Home › Forums › DIY Packrafts › DIY Accessories
- This topic has 41 replies, 9 voices, and was last updated 4 months, 2 weeks ago by
 Andriy.
-
CreatorTopic
-
February 15, 2024 at 12:57 pm #19000Matt (Admin)Keymaster
A place to share pictures, descriptions, and designs of the packrafting accessories you’ve made.
(I split this topic off of the DIY Packraft Pictures topic, and when I did, the nested replies all got moved to the same level. I had to try to figure out which comment was replying to what, and then move each of them individually, so if I made a mistake, please tell me!)
-
This topic was modified 2 years, 3 months ago by Matt (Admin).
-
This topic was modified 2 years, 3 months ago by Matt (Admin).
-
This topic was modified 2 years, 3 months ago by Matt (Admin).
-
This topic was modified 2 years, 3 months ago by
-
CreatorTopic
-
AuthorReplies
-
-
February 27, 2026 at 7:20 am #21381AndriyParticipant
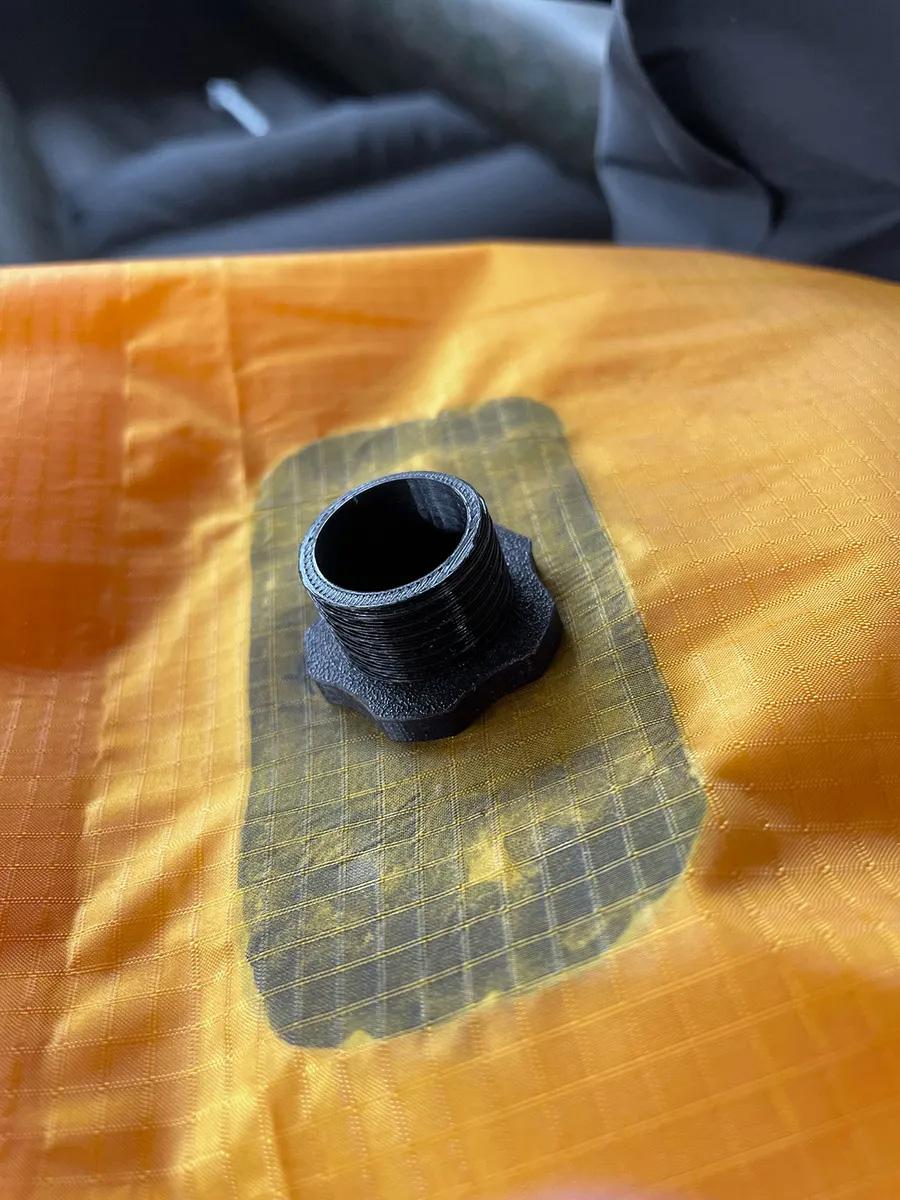
I want to show you how I make the valve. The only drawback is that you need to make two of them. One to inflate, the other to deflate. But it’s still easier than a Boston valve. I can’t post a photo of the boat without permission, since I designed it myself, so I’m posting a photo of the valve so you can understand the principle on a boat with a smooth side inside. If you’re interested, I’ll add more photos.
-
February 27, 2026 at 7:23 am #21382AndriyParticipant
The translator did not translate correctly. These two valves are lighter than one Boston valve.
-
March 2, 2026 at 6:50 am #21388Christian001Participant
Hi Andriy,
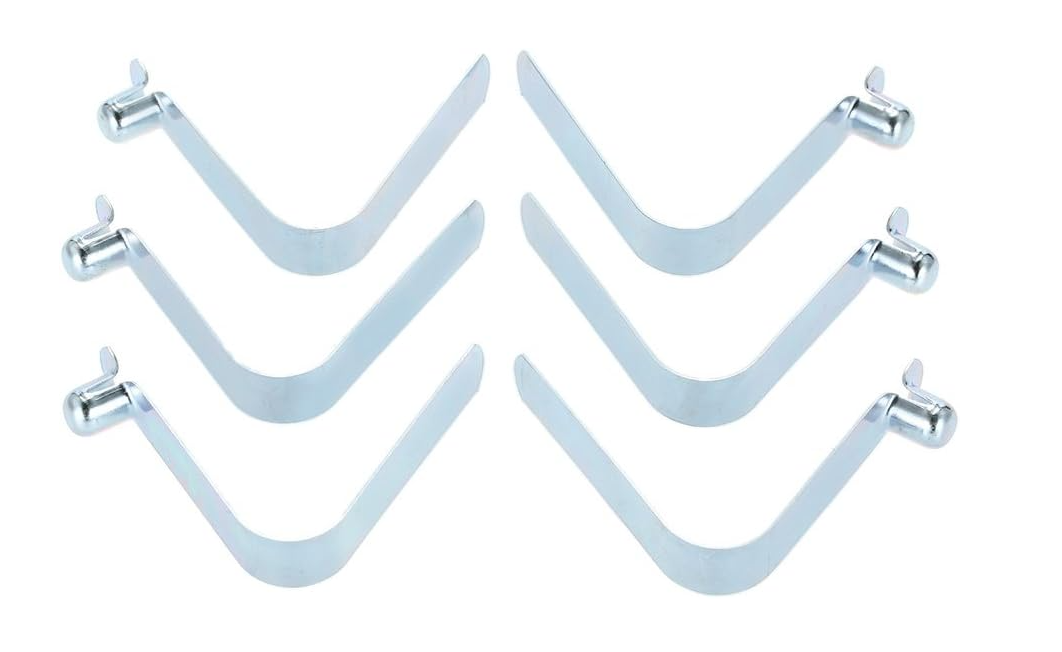
you don’t need two valves. One is enough. I use a clothespin. One side I’ve shortened slightly. This allows me to insert it into the bottle valve. This holds the lower flap open, allowing the air to be released.
-
This reply was modified 4 months, 2 weeks ago by Christian001.
-
March 2, 2026 at 11:38 pm #21391AndriyParticipant
It’s a good idea, but I made boats for friends for special military operations. Speed, simplicity, and weight are essential there. They take several boats. Usually, when a mine hit, they threw the boat away. If it survived, they unscrewed the plug, threw it away, quickly deflated it, and left. There are several spare plugs in the pocket. If the boat is to be used for travel, then your decision is very good.
-
This reply was modified 4 months, 2 weeks ago by
-
-
-
September 26, 2025 at 10:16 pm #21042Uncle FredParticipant
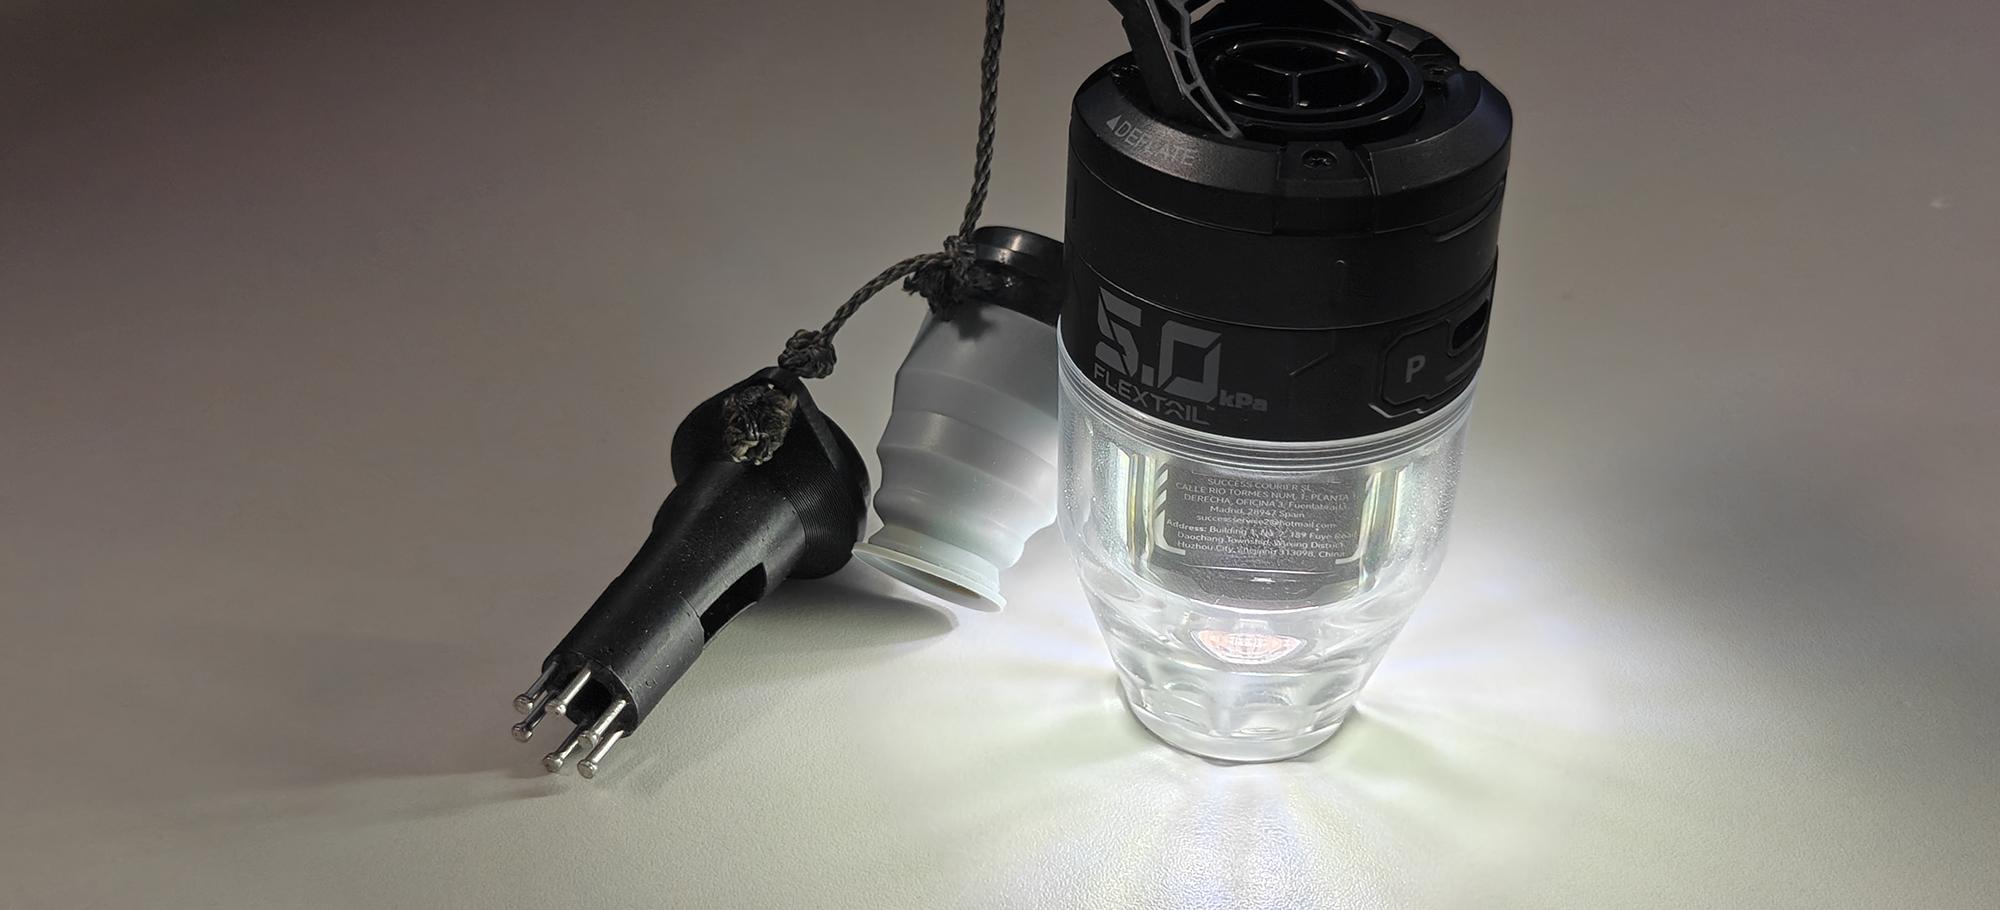
Update on the Boston valve to pump adapter.
I’ve modified the original adapter design by @krafter to fit the 2025 Flextail Max Pump 3.
This pump offers 5KPa pressure. Flextail has a larger, 12KPa boat pump, but it’s only available second-hand as of October 2025.
Updated design. The mount for this pump consists of a tiny lip, necessitating a redesign for best airflow and for a snug fit. If you use my design, you will need to sand the lip a tiny bit for a perfect fit.
The file can be copied and printed here.
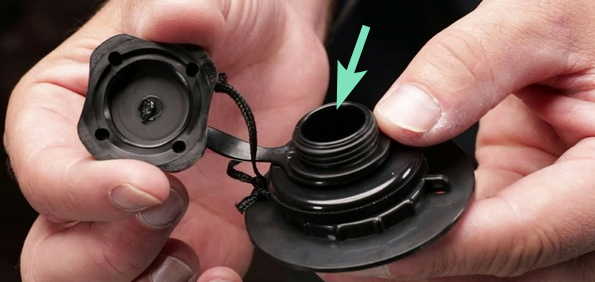
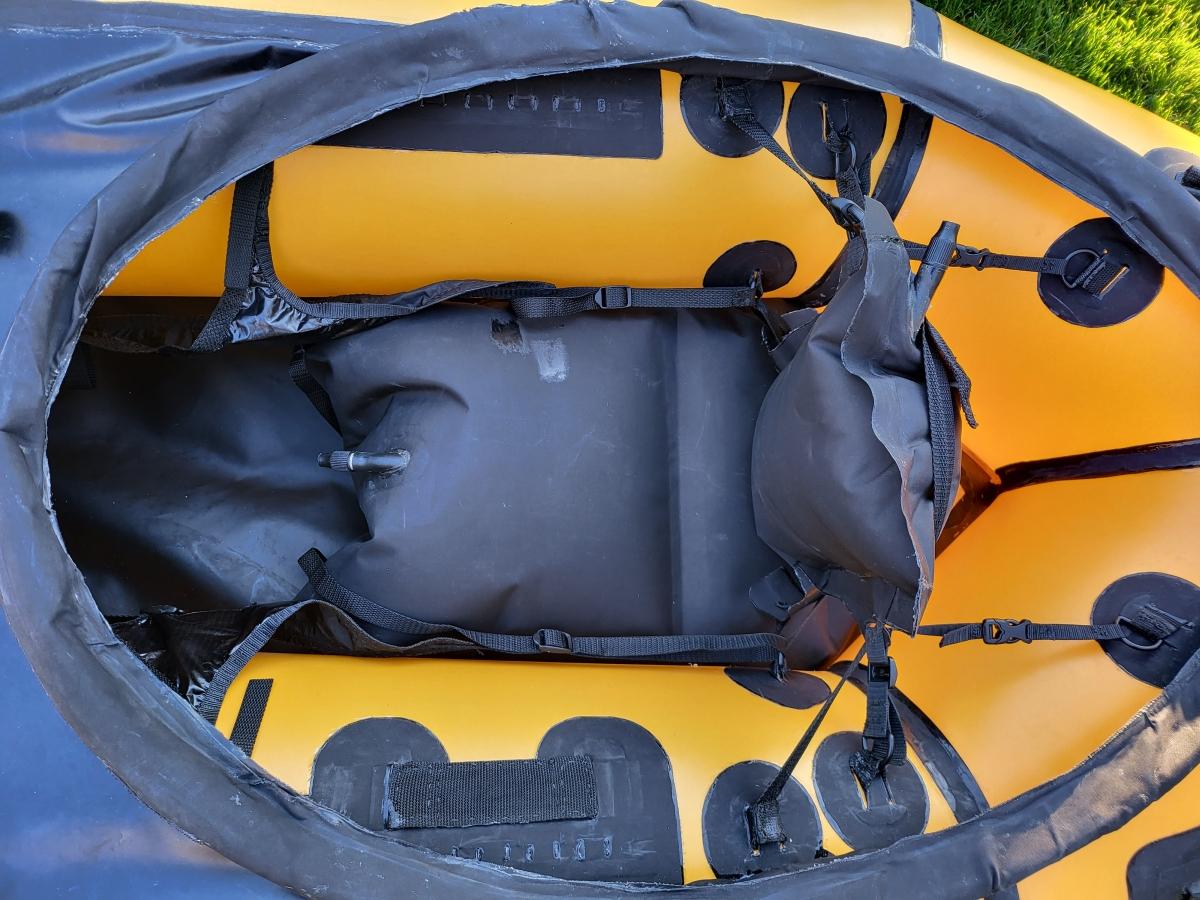
This adapter is a huge quality of life improvement. Without the adapter, these electric pumps couldn’t push through the Boston Valve rubber, requiring the boats to be filled via the deflation opening as shown below:
With the adapter, the nail heads slot through the plastic and push away the valve. I can finally fill the boats straight from the Valve opening.
I can inflate the packrafts up to something like 95% inflated. I like the packrafts firm I still manually temper them further, but they are very usable even without the additional effort.
For nails, I recommend using a small finishing nail and drill out the holes with a 1/16” bit to rough out the interior surface for JB weld epoxy. Use large cutters to cut the nails down.
Matt, I highly recommend adding pumps and Boston adapters to all of your kit menus. These things make a world of difference. I think a lot more people would adopt these boats if they had an easy inflation option.
-
September 29, 2025 at 11:17 am #21047Matt (Admin)Keymaster
Very cool! Thanks for posting.
-
-
July 17, 2025 at 12:53 pm #20754Uncle FredParticipant
Didn’t see Matt’s leg straps post. Cool! Glad I could help.
-
June 2, 2024 at 4:54 am #19177SylvainParticipant
I’ve forked the previously-shared top-up nozzle and made a 3D printed inflation valve adapter for the inflation bag, to use instead of the pipe:
-
May 10, 2024 at 10:02 pm #19131Uncle FredParticipant
Simple new project for today. Used 250GSM fabric to make a phone pouch for an Anfibio inflatable lifejacket. The pouches of these jackets are mesh panels that wouldn’t hold anything if you lean over, much less take a dunk in the water.

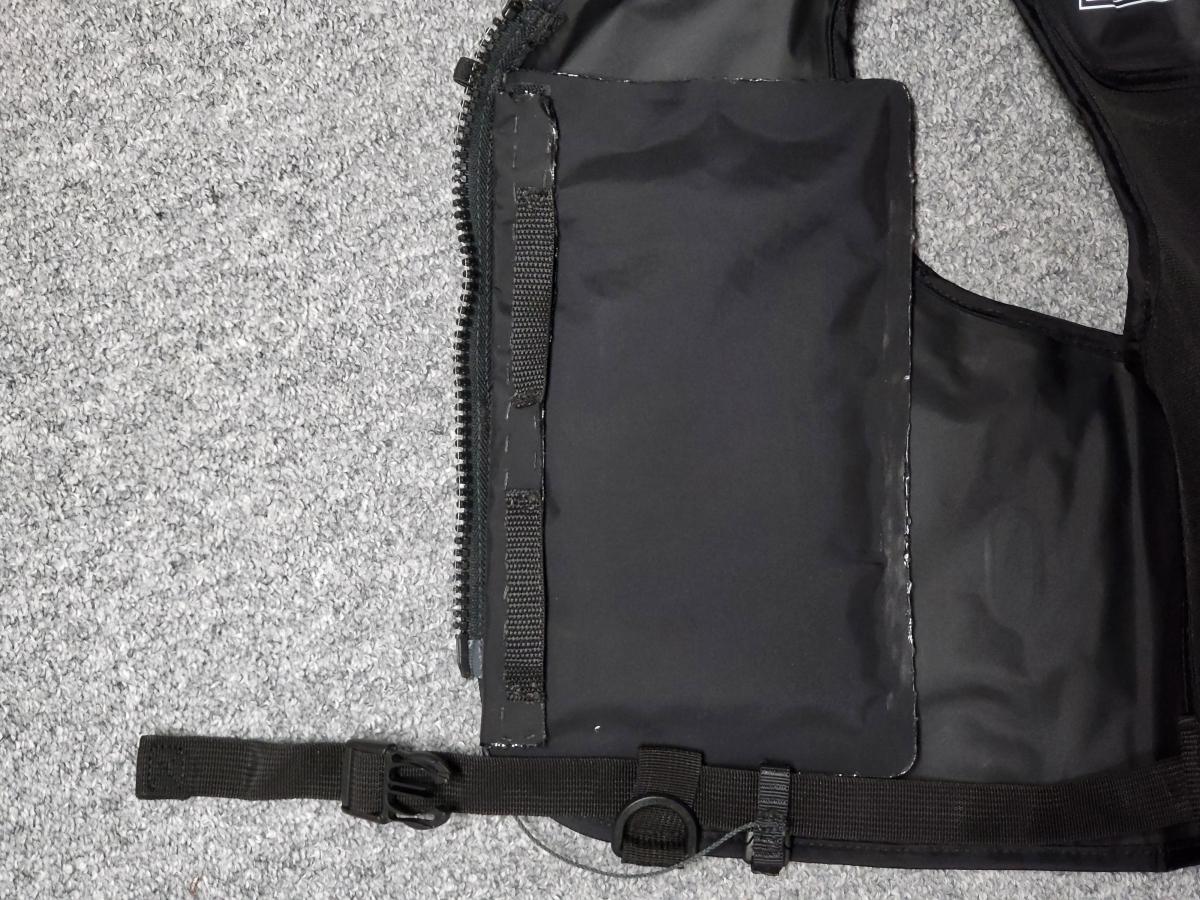
Sits inside the chest area, velcro closure with webbing pull handles.
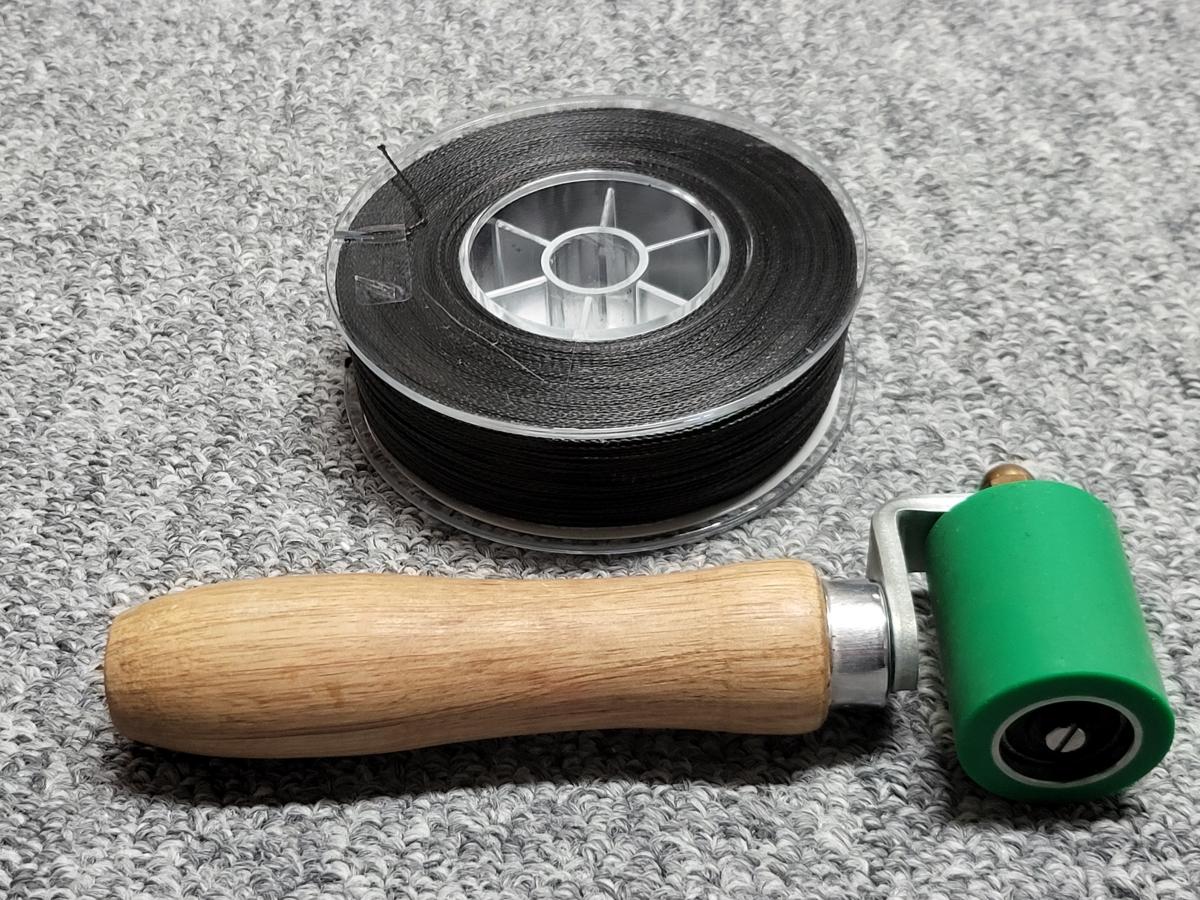
Above is a new roll of that UHMWPE thread I like.
-
This reply was modified 2 years, 2 months ago by Uncle Fred.
-
This reply was modified 2 years, 2 months ago by Uncle Fred.
-
May 13, 2024 at 12:18 pm #19137Matt (Admin)Keymaster
Cool! Great idea!
-
This reply was modified 2 years, 2 months ago by
-
April 15, 2024 at 4:18 pm #19013Uncle FredParticipant
Here is one of my modified spray skirts, as requested.
(Above) Side profile.
(Above) Front profile.
(Above) Rear profile.
I had an issue where my more forward seating position made the spray skirt too tight around the waist. To address this, the torso funnel was cut off and four additional 150GSM fabric panels were cut from the fill bags. Two of the panels are cut in a way to offer a lot of added material behind the seat.
The panels are welded wherever possible and sewn everywhere else. This has to be done in a way that bunches the fabric, otherwise it will not retain the cone shape. Seam grip is applied, as always.
It’s a bit Frankenstein, but this design allowed the reuse of existing fabric and has the give needed to handle heavy waves without detaching from the combing ring.
Funny enough, it seems MRS might have had a spray skirt design that did something similar at one point.

To see how it looks in action, refer to one of my previous posts where I’m sitting in a boat.
I’ve also added shoulder straps. Use a single tri-glide per strap if you want a skirt to be adjustable. I have one with adjustment and one without as I don’t need adjustable straps for my personal boat.
In the most ideal situation, rather than adding a ton of material in the rear of the skirt, the combing ring opening would be repositioned forward to account for the more aggressive seating position.
Lastly, I’ve added ten strips of velcro all around the skirt and pull tabs at both the front and rear. The velcro speeds up the process of attaching the skirt from 0:30 – 1:30 to under 20 seconds. The rear pull tab also allows me to get it over the rear area more easily and center it.
Perhaps a more ideal setup would use less velcro and instead offer double-strength elastic cables.
Mat’s kits are generally excellent. However, the current spray skirt is probably the one bit of kit that I feel needs a bit of work to be ready for more serious waters. Even assuming a user doesn’t adjust the seating position, and assuming they are using the new recommended combing ring, I still think the vanilla design is vulnerable to a wave pulling the skirt off the combing ring.
-
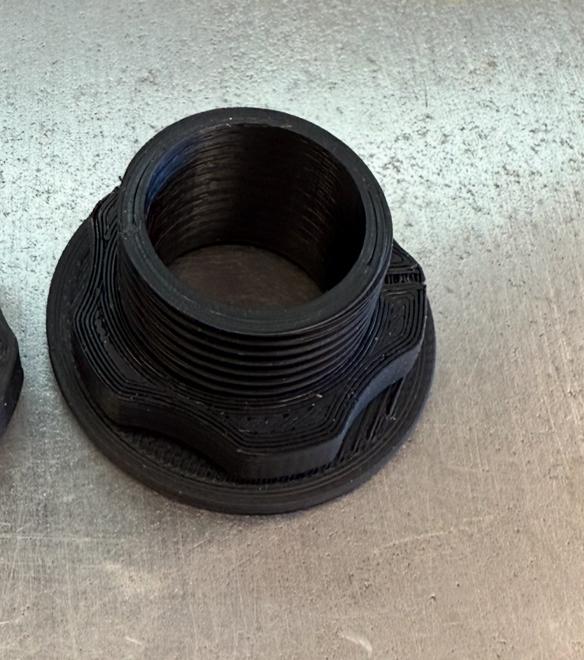
April 8, 2024 at 9:59 pm #18919krafterParticipant
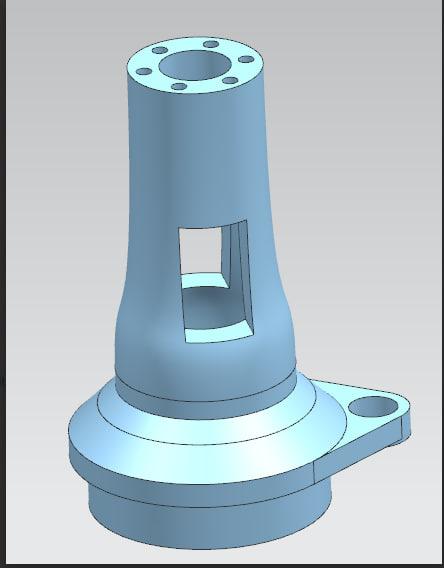
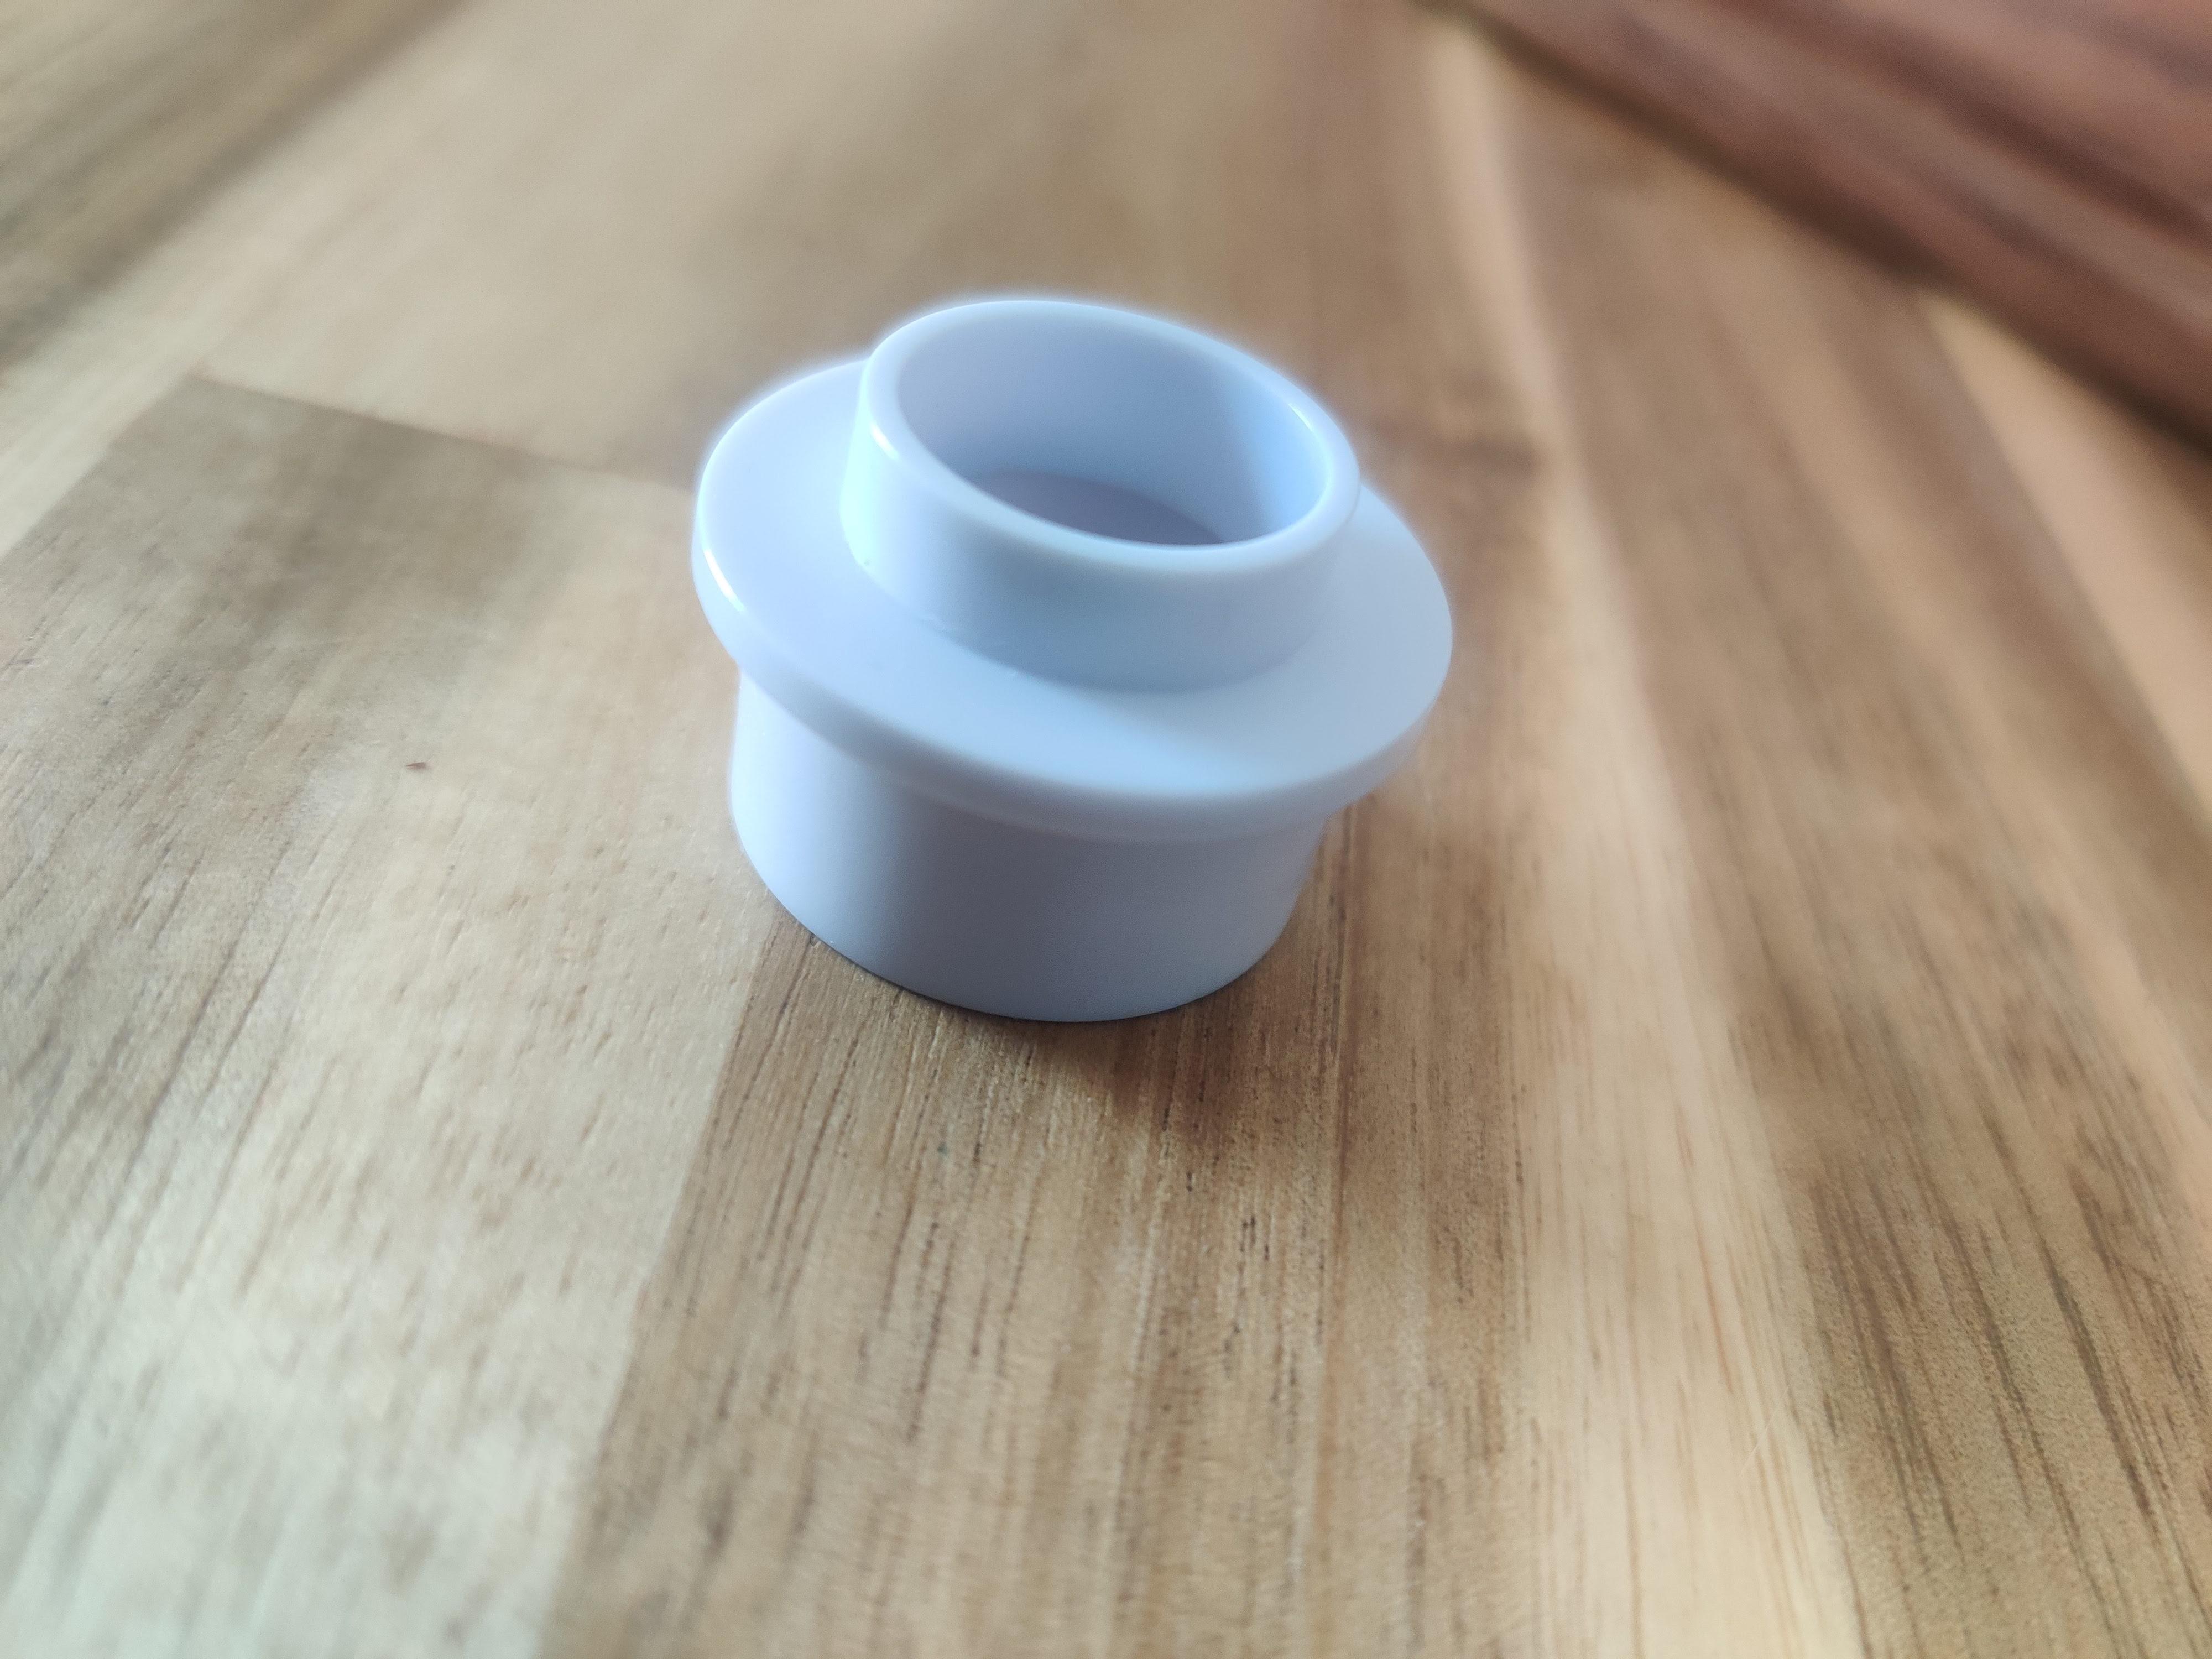
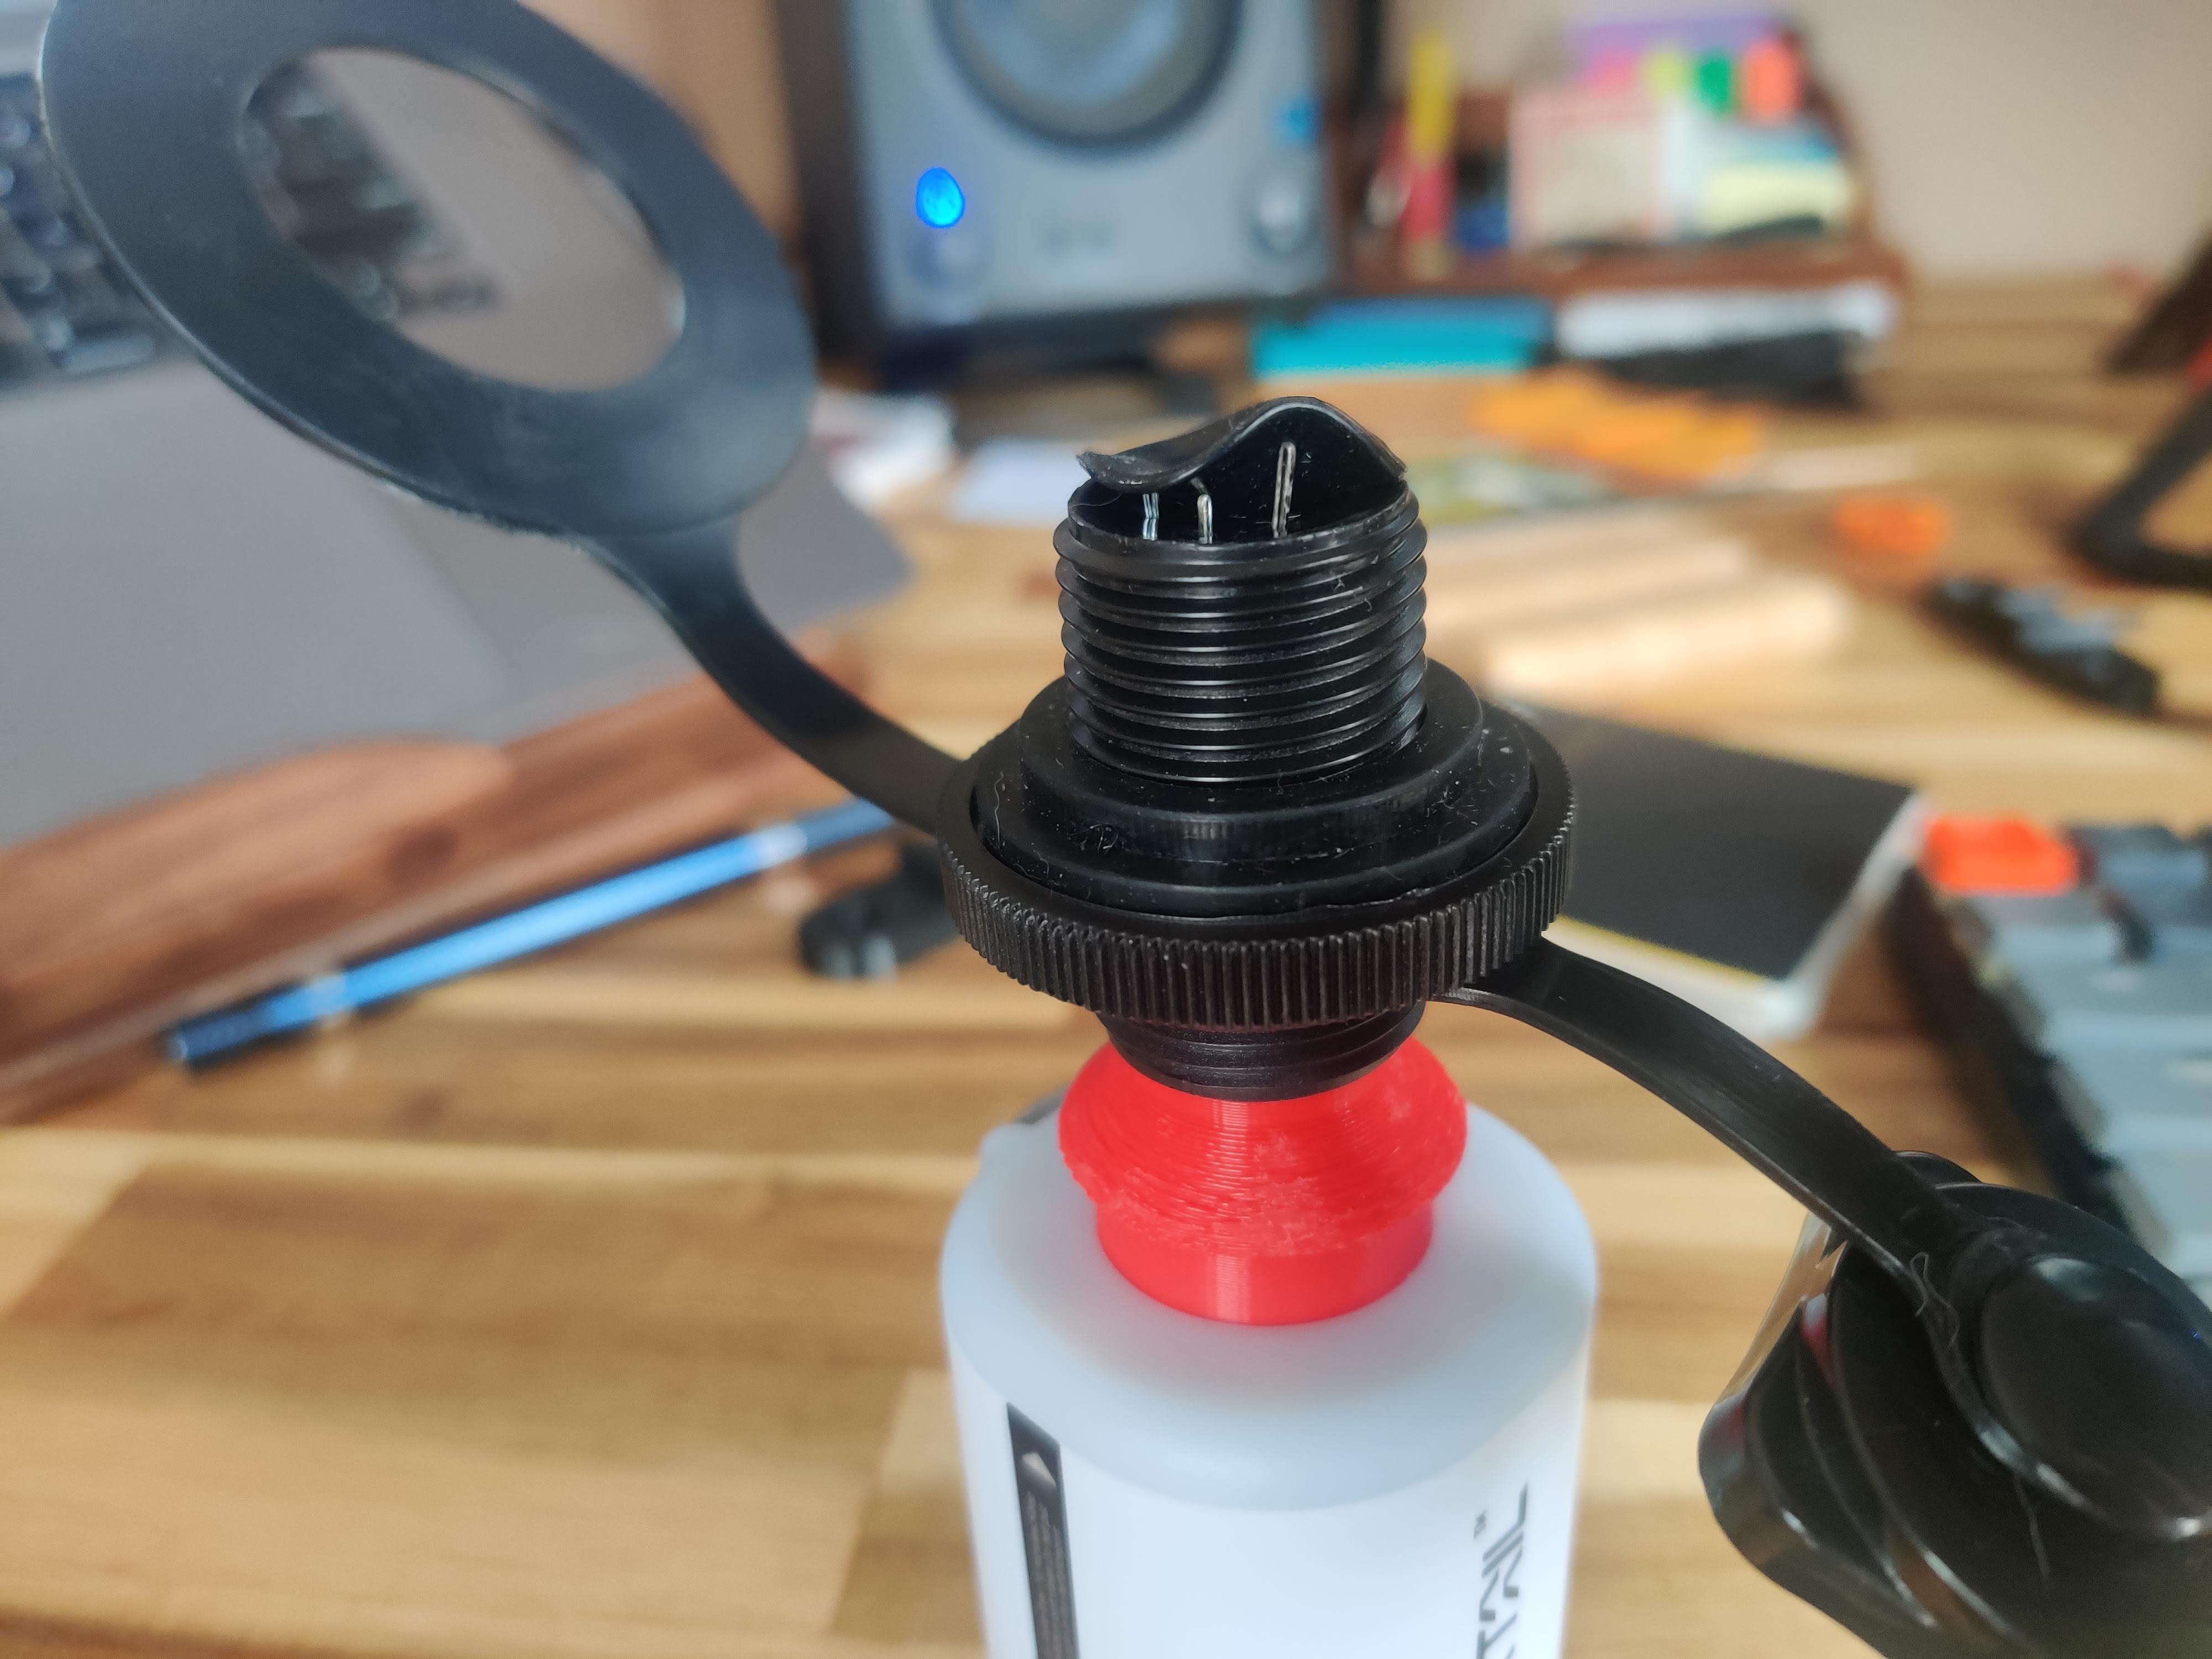
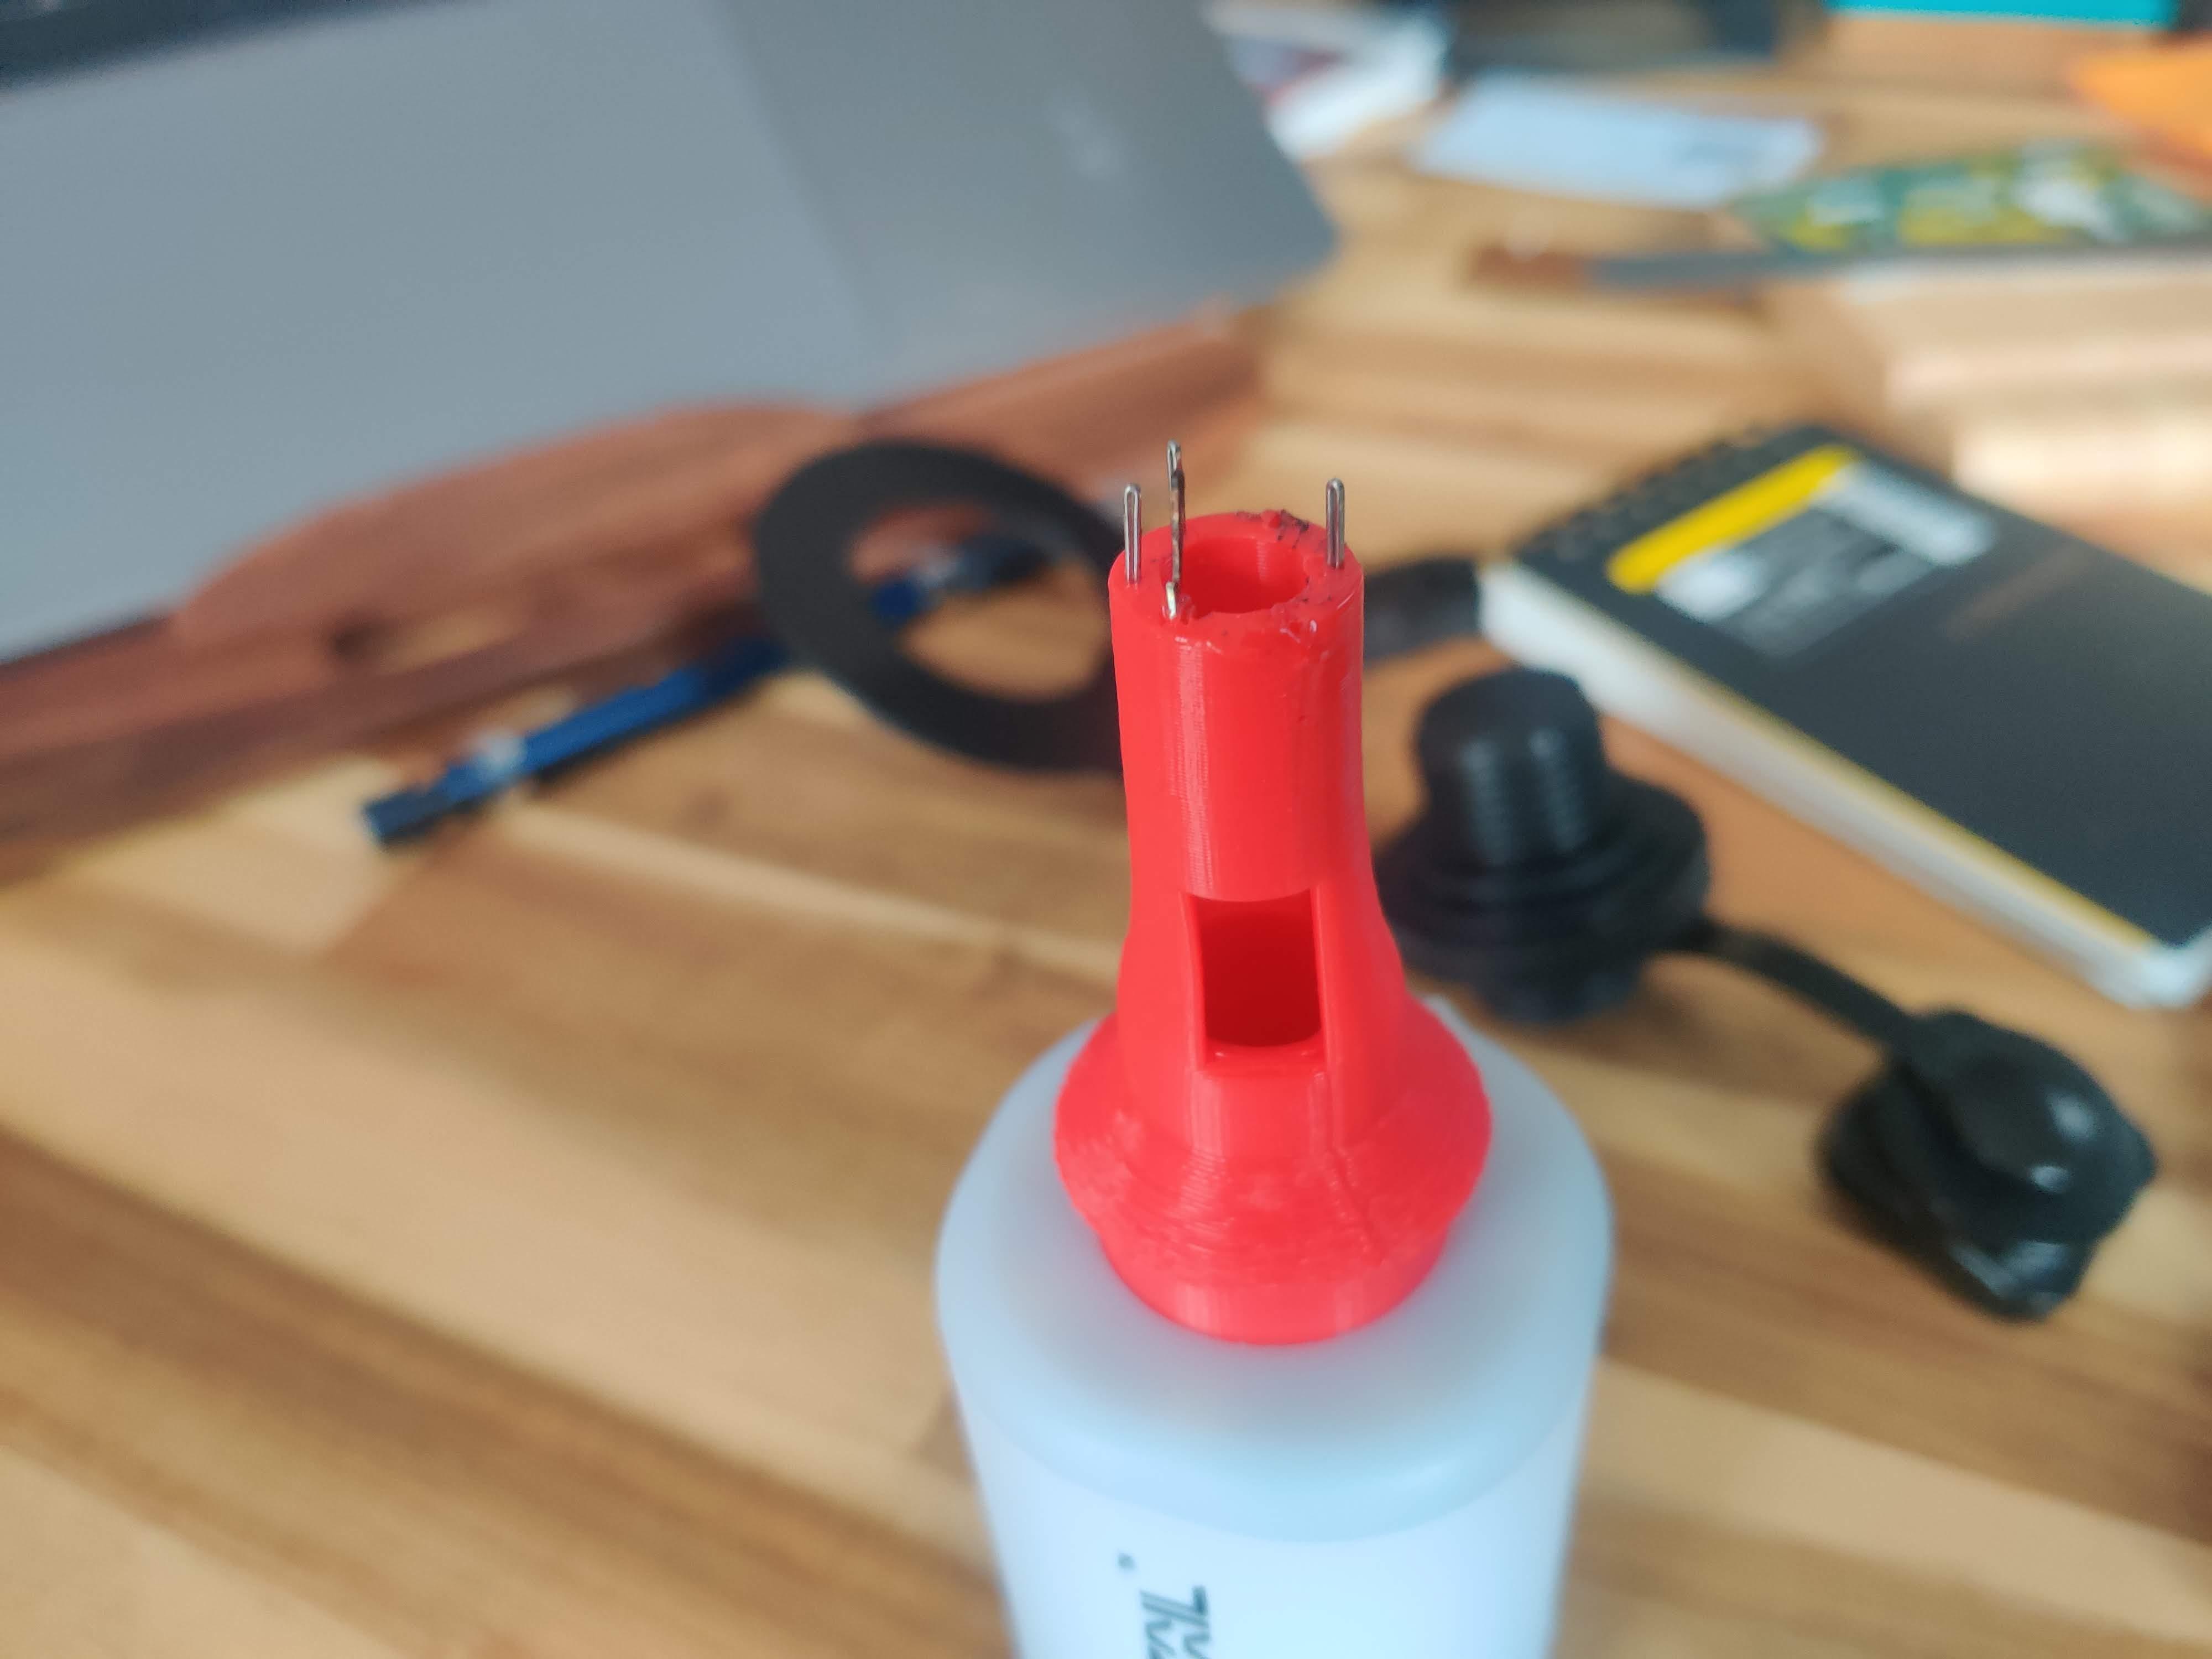
My first useful contribution here: I designed a 3d-printed adapter for the Flextail tiny pump 2x to the boston valve that can open up the check valve part and let air flow through freely. Print it with the narrow part down and the wide part up (upside down). If the flextail pumps have the same diameter output (which I suspect is true) it should work for all of them.
It needs some post work. You have to drill out the holes in the nozzle – they go 10mm deep – with a 1mm bit and then glue insert thin paperclips or pins and cut them to extend 4-5mm above the surface. Alternatively, you can heat up either the pins or the holes with a hot air gun and press them into the holes (preferred if you can manage it). I used stapler pins folded empty, which is just about the right thickness on my print.
Add a small dab of plastic/epoxy/hot glue to the ends if you’re worried about sharpness. Finally, remove the valve from its seat, insert the adapter, line up the pins with the holes (look under the check valve on the other side to confirm), and push through. Mark off matching points on the adapter and the valve with a notch so that you can line up the pins and the holes easily from then on.
The pins could be a little flimsy, so you might have to carry the adapter in a pill case or something.
-
May 28, 2024 at 9:58 am #19167KeytreeParticipant
I received an assortment of adapters with a new Flextail pump I got through Aliexpress. I took apart another boston valve and just attached it so I can screw this in to my raft when it’s time to inflate. Need to be a bit fast when it’s done to swap out the valve insert, but it allows for no hands inflation.

-
April 19, 2024 at 9:17 pm #19039Uncle FredParticipant
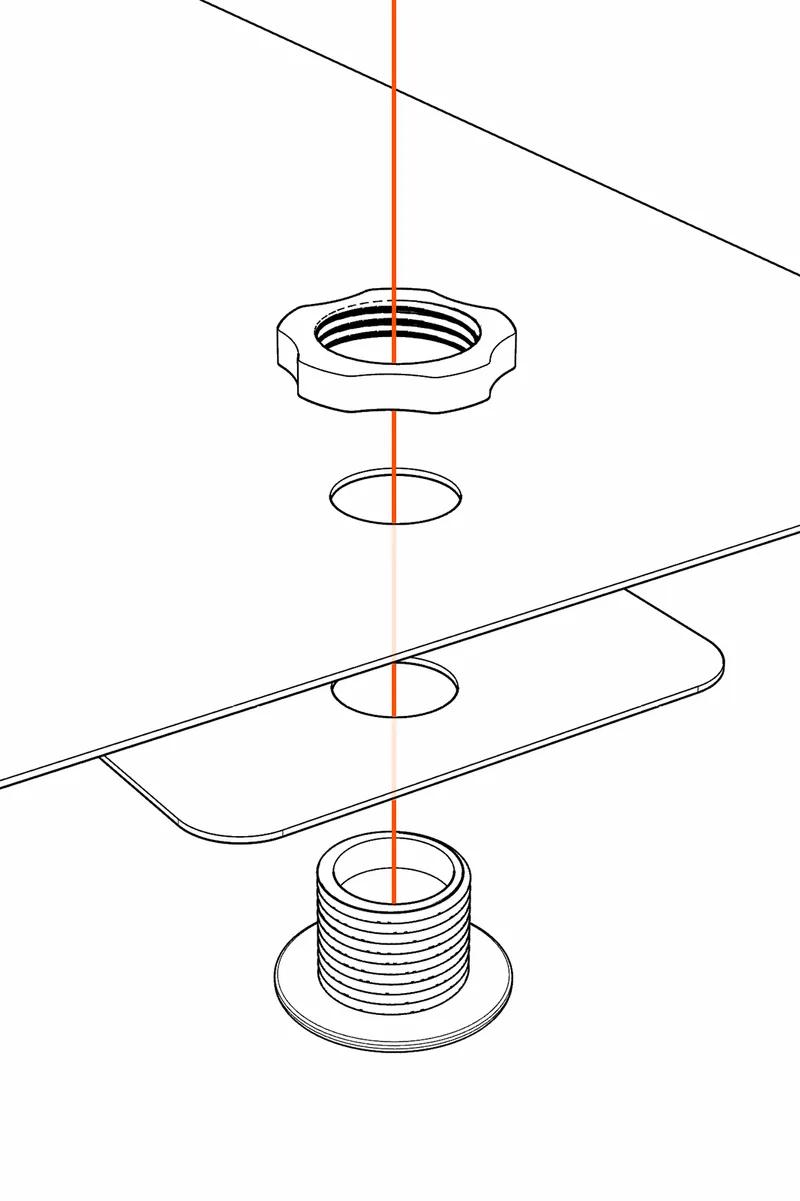
Hey Krafter, have you seen the screw-on adapter shown here? Merging your design with the Boston Valve screw-on on threads would allow hands-free operation.
-
April 20, 2024 at 8:23 am #19040krafterParticipant
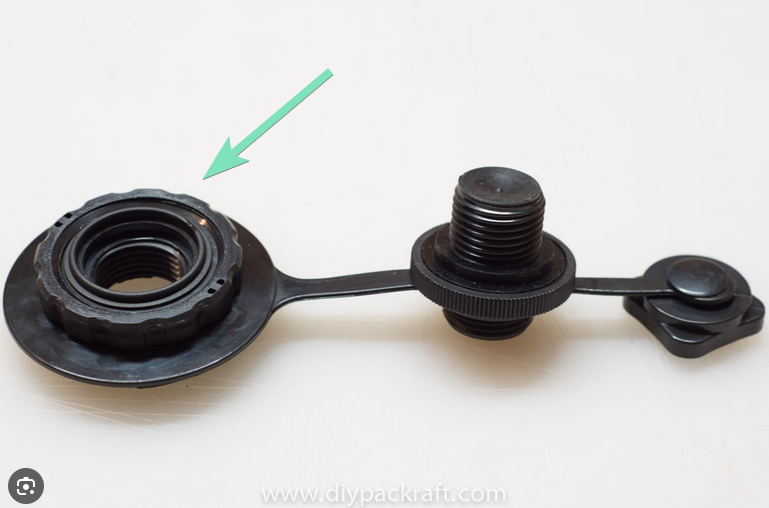
I see this, but the tightness of the fit should already work for hands free operation. I based the dimensions off the flextail adapter for Boston valves, which is the one with the the little rubber attachment – if you pull that off you’ll find that the little plastic piece left over fits perfectly onto the valve.
I’m still building my packraft – if I find that the pump doesn’t hold on I’ll add the screw top.
-
May 5, 2024 at 4:13 pm #19094Uncle FredParticipant
Yup, that adapter that tapers right? lol

Maybe I need to take the rubber off. I find that it stays in for a little bit, but once the pressure becomes higher, it pops out. I still have to fill it for another 30 seconds by breathing into it.
-
May 7, 2024 at 3:14 pm #19116krafterParticipant
Surprisingly that’s not it – this is the one:
You’ll find that this is a very tight fit on the valve. I extended the fitted part into the nozzle head and added the little conical bit to have it print properly without overhangs on the advice of my friend.
-
May 10, 2024 at 9:50 pm #19130Uncle FredParticipant
Nice. Have you tried to see if your adapter will friction fit tight enough to leave it until it’s full? How pressured can you get the boat?
-
-
-
-
-
April 11, 2024 at 1:28 pm #18934krafterParticipant
@UncleFred, I did print out a prototype and test it – it fits perfectly into the pump and is a tight fit on the valve as well. I messed up on the pins by heating the whole adapter at once with a hair dryer, which caused a couple of the holes to close up. This messed up the insertion of the rest of the pins. See photos.
I fixed the design to have larger holes. Additionally, I’ll be heating the pins with a soldering iron and inserting them one by one.
I don’t have a 3d printer myself – I’m using a friend’s. These things are inexpensive to print. If you look around in your closest city you’re almost certain to find a 3d print shop – some universities also have them, so if you have contacts with people and ask around you should be able to do this.
That’s the reason the design is public – I’d like anyone to have access. Printing it locally definitely beats all other methods. In the worst case, I think there are online 3d print services that allow you to do the same thing anyway – you just have to submit this file to them I think.
-
This reply was modified 2 years, 3 months ago by krafter.
-
This reply was modified 2 years, 3 months ago by krafter.
-
This reply was modified 2 years, 3 months ago by Matt (Admin).
-
April 12, 2024 at 5:50 pm #18969Uncle FredParticipant
The pictures were helpful. Yes, I’ll look into that.
Question. Have you tried to see if this adapter works with the smaller inflation valves Matt sells? Currently, I have one of the white adapters that came with the Flextail pump epoxy’d on permanently. It fits loosely over the valve’s head but is sufficient to get these smaller objects filled quickly while still fitting snuggly into the Boston Valve so long as the top is completely removed.
It would be nice if this adapter could be configured as a one-size-fits-all setup.
-
April 12, 2024 at 8:22 pm #18974krafterParticipant
Are you talking about the backrest/seat tube-style valves or the little red tab-open valves that you see on camping pillows?
This doesn’t work with the tube-style valves because the pins get in the way; I haven’t tried the other ones, but I suspect it might work if you don’t mind where the pins end up on the other side. The one caveat is that the little air windows on the side of the valve (theoretically designed to increase airflow and not create a backward flow in the boston valve) might stick outside and let air escape that way. That’s also what happens with the tube style valves anyway.
-
This reply was modified 2 years, 3 months ago by krafter.
-
April 13, 2024 at 9:36 am #18979Uncle FredParticipant
Yes, the valve used for the seat.
It would be interesting if your design could be modified in a way that would be workable for both the Boston Valve and these seat valves.
Carrying multiple adapters isn’t practical when using these boats for something like portage backpacking. Too easy to lose small accessories.
I bet a similar design without the air windows and maybe a slight modification to the nozzle tip would do the trick. What do you think?
-
April 15, 2024 at 10:31 am #19009krafterParticipant
The windows aren’t the real problem – you can close them with your fingers in a pinch.
The problem is that the pins on the end don’t allow for a mating with the other valve. The location of the holes in the Boston valve determine the inner and outer diameter of the adapter. It’s too big to fit inside the other valve and too small to fit outside.
The solution would be to have the adapter split into two pieces, one with the pins and one without, but that comes back to the original problem of having multiple pieces. If push came to shove I’d rather be blowing up the seats than the packraft.
-
April 15, 2024 at 11:50 am #19010Uncle FredParticipant
I think the solution might have been staring us in the face.
Why not maintain your original design, but add an adapter designed to slot over your existing one? We could then cut out an adapter attachment similar to what the Boston valve uses.
If designed with a lip, you’d just need to epoxy one ring to each adapter.
This would have the added benefit of shielding the pins.
-
This reply was modified 2 years, 3 months ago by Uncle Fred.
-
This reply was modified 2 years, 3 months ago by
-
-
-
This reply was modified 2 years, 3 months ago by
-
-
April 12, 2024 at 10:01 am #18944Matt (Admin)Keymaster
Very cool! I should really get one of those pumps… and a 3D printer! I’m seeing some great ideas lately.
-
April 13, 2024 at 9:40 am #18980Uncle FredParticipant
The pumps are easily worth it. It’s so much better than inflating a boat manually. Plus they are great for filling air mattresses, inflatable life jackets, and helping campfires. I’m honestly surprised they aren’t just standard kit with these boats.
-
This reply was modified 2 years, 3 months ago by Uncle Fred.
-
This reply was modified 2 years, 3 months ago by
-
-
This reply was modified 2 years, 3 months ago by
-
April 10, 2024 at 7:06 pm #18932Uncle FredParticipant
Krafter, have you made any of these adapters and tested them? I want this!
To answer Matt’s question: For my version which is the max pump, no. The pump is not powerful enough to push air through the check valve.
An attachment like this would be a huge godsend. Krafter, If you’ve printed out any of these, I’d happily pay for one as I don’t have a 3-d printer. If you’re interested, can you send me your contact details?
-
April 10, 2024 at 9:22 am #18930Matt (Admin)Keymaster
What a cool idea! Thanks for sharing. This might deserve to be a whole forum topic on its own.
It’s an interesting idea to use prongs to hold the check valve open – is the pump not strong enough to pump air through the valve, or does it just work faster that way?
-
-
February 15, 2024 at 1:06 pm #18737Uncle FredParticipant
New year, new improvements for the rafts.
Above, we see a portage carrying handle (bottom center), a 9-point adjustable seat back, and 4-point adjustable leg straps. These adjustable straps fit boaters 5’3″ (160cm) to 6′-4″ (193cm).
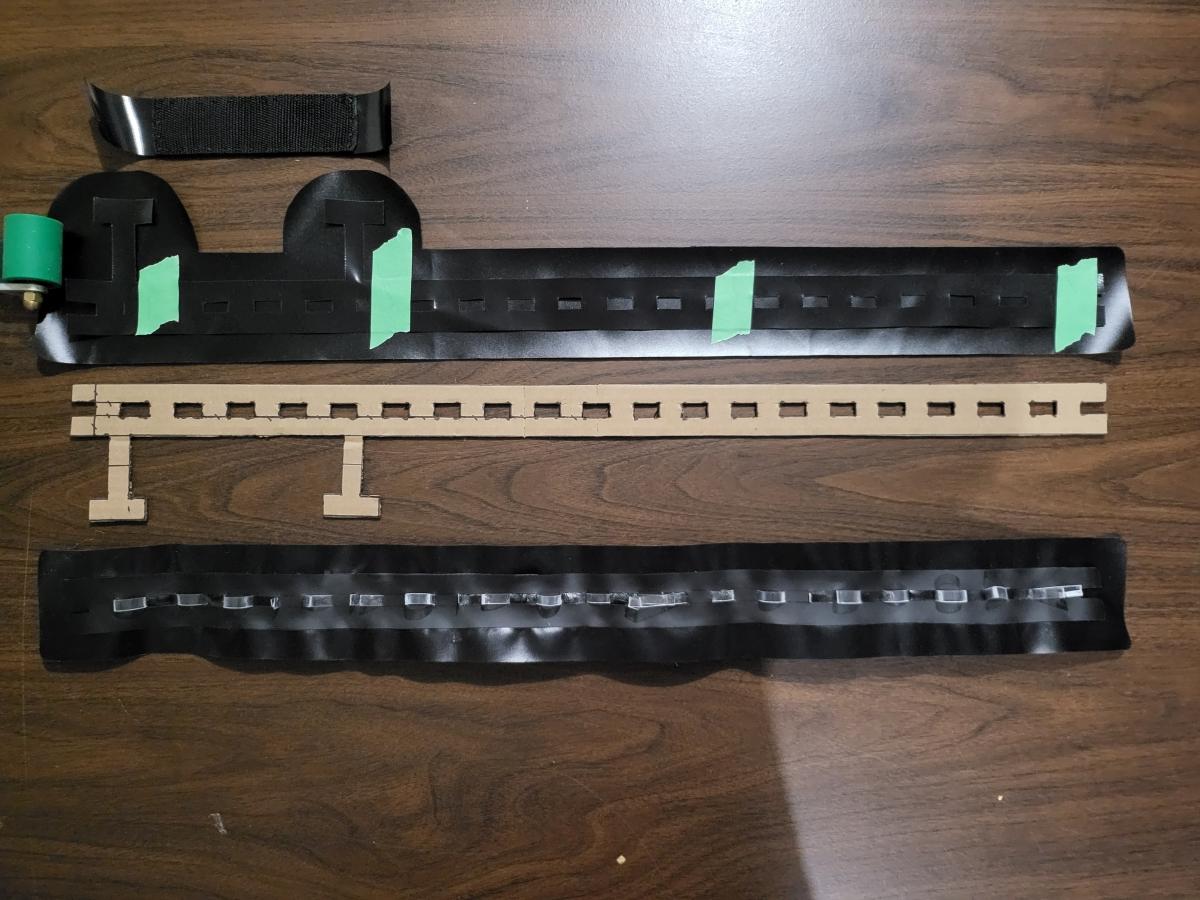
(Above) The adjustable leg strap attachment point. For the straps themselves, I used the same design for the 4-point strap as my previous boat. This attachment point allows for the two top attachment points around either side of your knee to move toward the bow or stern of the boat. The plastic strips weaved through the material are temporary and cut from a grocery store spinach container. These strips prevent the welding iron from welding those areas to the boat. These “slots” are used to feed the removable hook clip.
Two additional standard round attachment points with D rings are used. One in the bow area and one next to the seat. The 5/8″ strap uses a tri-glides at both ends to allow adjustment.
(Above) The leg straps are attached using aluminum G-Buckle Webbing Hooks (one right and one left variant) from Extremtextil. A lot of tedious welding is required, and you’ll still need to run something through each slot a couple times to ensure they are usable. In the image above, you can also see the tri-glides used to adjust the strap that runs through the bow area attachment point and another that runs to the seat area attachment point.
For the grip handle, use an I bar-shaped leftover piece of 450GSM fabric. Two pieces of 2.5″ polypropylene webbing were sewn together on both sides to serve as the handle. The bars are placed under the attachment point and welded from the underside of the pack raft tubing.
I also seam-seal every fabric edge to avoid fraying. This sealing process includes carefully sealing the edges of attachment point slots. The plastic can be removed when this is done.
You might be wondering why the backrest is using a nine – yes nine – point attachment system. Well, I’ve found that comfort for long-term tripping is immensely improved by having the firmest backrest possible. This is a huge quality-of-life upgrade to a packraft, akin to adding a skeg, probably more so. The blue raft uses a custom bag and a five-point attachment system that I’ve detailed in the past. While I like this system, it was a pain to seal and I wanted to see if a strap alternative for the yellow boat could be found. A nine-point system was the result of these efforts. When fully inflated, the seat won’t move in any direction, even with 100 pounds (45KGs) of force applied via persons or weight plates. The backrest can be removed.
If I had any recommendations for Matt’s future designs, it would be to shift the sitting position a bit forward and provide instructions to set up a firm, upright backrest. Ideally, this includes adjusting the spray deck opening forward a bit. I can’t emphasize enough how this change improves comfort, tracking, and paddling efficiency; it’s like having a different boat.
-
October 25, 2024 at 11:56 am #19790Matt (Admin)Keymaster
After many prototypes, I finally got the thigh straps and back band to a place where I’m happy with them and I’ve incorporated them into the new kits.
Thanks for the inspiration!
-
February 21, 2024 at 3:02 pm #18747Matt (Admin)Keymaster
It looks like my previous response got lost… hmmm 🙁
Awesome posts! Could you send me a picture or drawing of your changes to the spray skirt? I’m happy to change the design if that would make it more useful. I was also testing a version of your thigh straps here before freeze-up, and a more forward seating position.
One thing I noticed with the forward seating position is there’s more flex in the boat (the rear tubes flex upwards in waves unless the air pressure is quite high in the tubes). What are your thoughts/experiences?
-
February 21, 2024 at 8:02 pm #18748Uncle FredParticipant
Hello Matt.
Okay. I’ll post something on the skirts when I have time.
Nice! A four-point leg strap system would be a great option for builders.
On the issue of flex, I don’t notice anything unless I’m facing directly into the wind with light choppy waves. The bow tends to bounce on these. I don’t recall this feeling any different from my early tests with the backrest sitting against the stern. However, I’m extremely light.
After using the FlextailGear pump I tend to blow until I physically can’t force air into it any further. I find these boats are best inflated as firmly as possible.
FlextailGear recently released a high-pressure battery pump specifically intended for inflatable boats. It even has an adapter for Boston Valves. I might get this pump sometime this year and see how it compares. With their original pump, I have to unscrew the one-way valve and awkwardly screw the cap on quickly as the pump lacks the pressure needed to fill through the one-way valve.
-
This reply was modified 2 years, 4 months ago by Uncle Fred.
-
This reply was modified 2 years, 4 months ago by
-
-
-
February 15, 2024 at 12:57 pm #18736Uncle FredParticipant
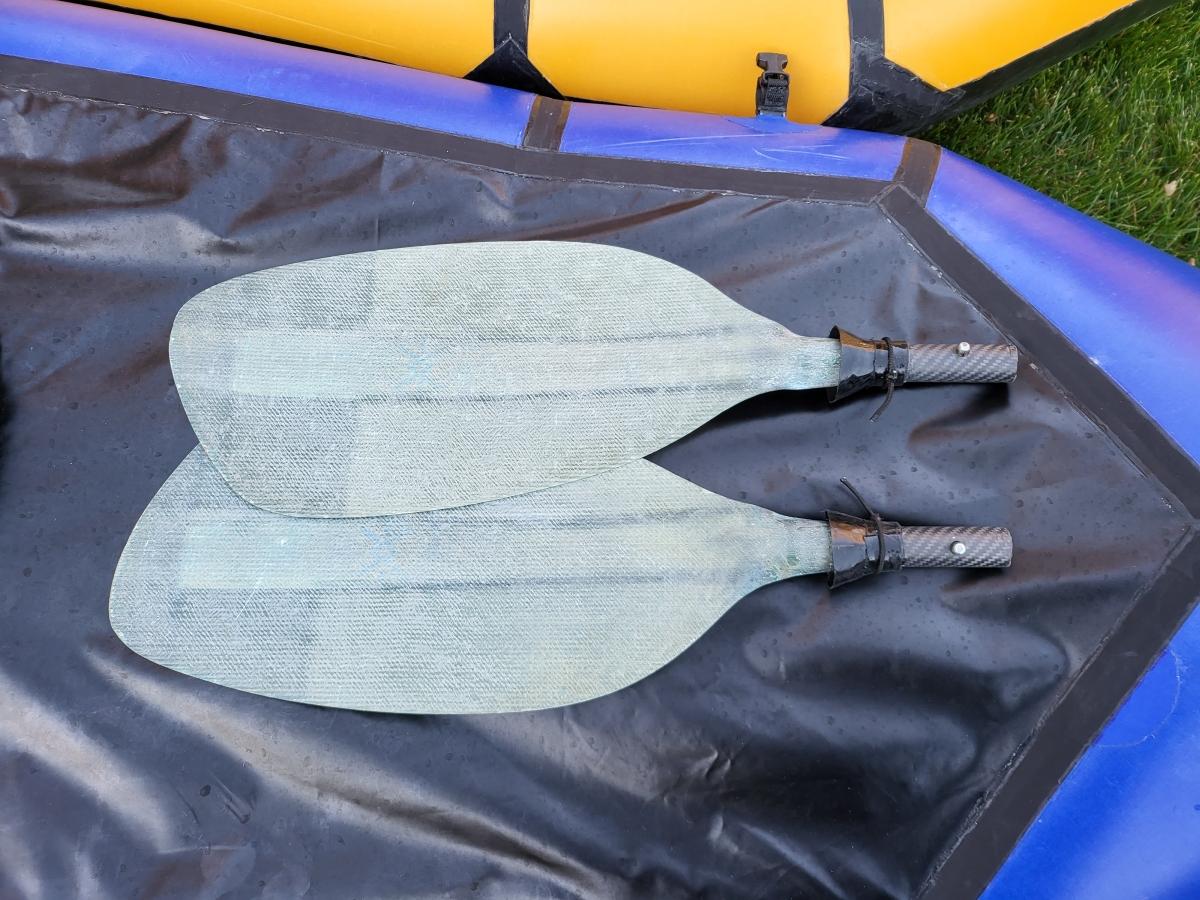
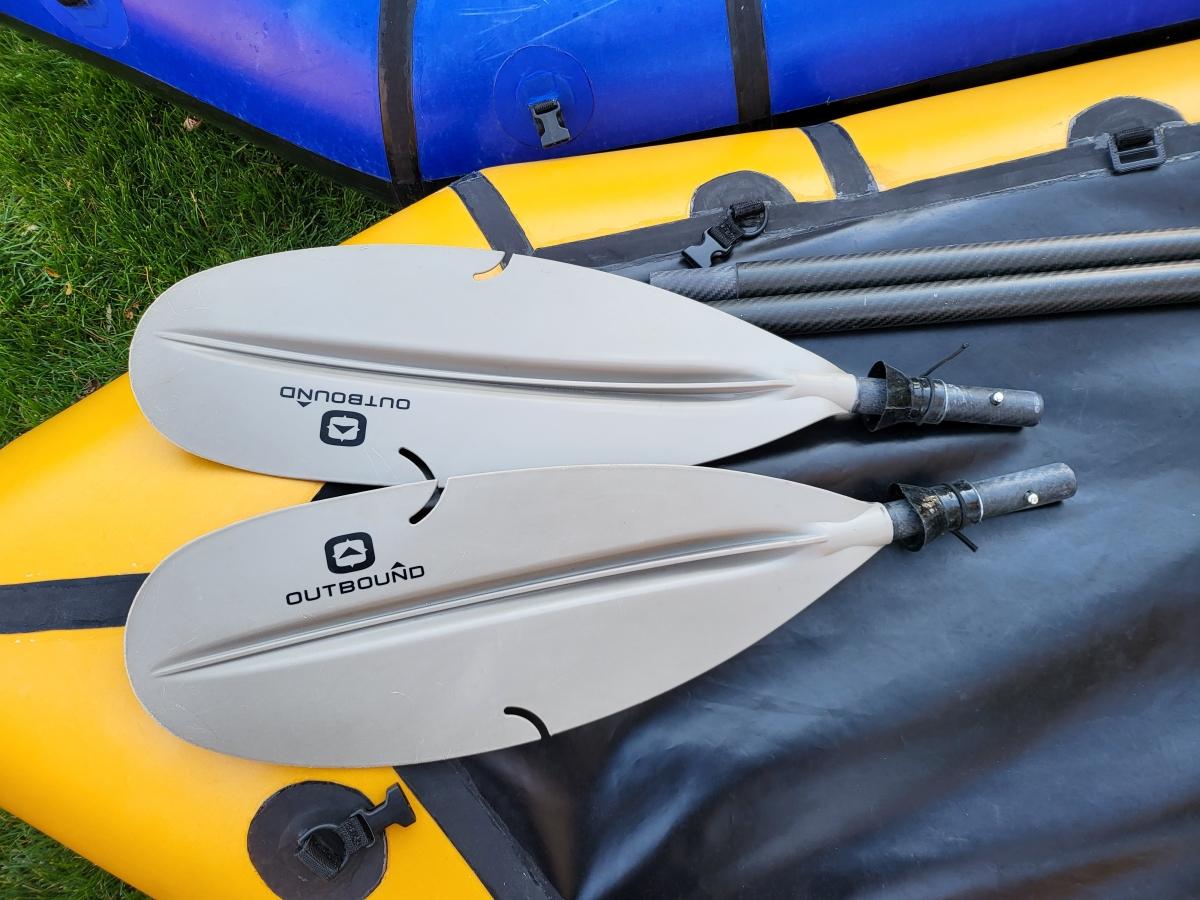
Above are two sets of 5-piece paddles. I’ve further refined the water cups from the previous year by shortening the cup fabric and painting it inside and out with Seam Grip. Doing this adds a ton of abrasion resistance and rigidity. Both paddles use custom carbon fibre tubing. The tubing is available via Aliexpress. The seller Best Carbon Fiber Products is great. Email him directly and he can get a custom order set up on the site with the exact amount and lengths you need.
To match traditional paddle sizing in a 5-piece paddle, you’ll want the following order:
29x25x400mm, 3 pcs (these are the three sections of the paddle shaft)
25x21x130mm, 4 pcs (these are the four internal fittings slotted inside the paddle shaft).
Note that you may need to drill/dremel your paddle blades and or purchase an additional two internal fitting sections depending on the construction of your paddle. The first Werner paddle is all fibreglass and doesn’t need any additional sections. I just slotted a 25x21x130mm tube and applied JB weld. The cheap Canada Tire thermoplastic paddle needed extensive drilling and 1/2″ (12.7mm) additional fittings. I suggest you cut your paddles apart before ordering to see what you need.
To complete the paddles, you’ll need to sand the inner fitting tubes until they fit halfway inside the shaft tubes. Next, soften all exterior facing tube ends with a rotary tool like a Dremel. Glue one side of the inner tubing with JB weld.
Next, you’ll need to drill holes and install 9mm single-pin spring clips. These can be bought from Aliexpress or Amazon. Make sure you get the ones that are both hollow and stainless. Important: don’t trust sellers. Put the clips into a glass of water overnight and dry them for a second day in a plastic bag to ensure they are stainless. It took two orders to get actual stainless steel.
Second, you’ll need to clip off about 3cms of the spring clip tail. If you don’t do this they’ll never work correctly. When drilling the holes for the clips, make sure the tubes are already inserted for perfect alignment. Start from a small drill bit, and work up from there. If you make a mistake, you’ll end up with a wobbly paddle and it will feel terrible. You’ll need to use a Dremel and smooth out the hole inside and outside a fair bit. Resist the urge to simply drill a bigger hole. The holes must be exactly 9mm or there will be wobble. If the button depresses and doesn’t pop back up, use the Dremel along with constant pushes of your thumb until the spring clip operates smoothly. This process will take some time but it will work well 100% reliably with some effort.
When you are done, you’ll have a backpacking/airline-ready paddle setup!
Not sure if I covered this one before, but I’ve also upgraded the spray skirt. The original skirt isn’t configured for this more upright/forward-sitting setup, and it just doesn’t have enough fabric give at the base for the kind of pressures and movements you’ll experience in whitewater. I cut the skirt apart and added four additional 150gsm panels and ironed/sewed and seam sealed them around the waist area. This is a huge improvement and allows for a full range of twisting without worry that the fabric will become too taunt and pull off. Honestly, I see no downside to this addition and feel the skirt should offer more fabric by default around the base.
A couple of final points. First, Matt’s combing ring tube upgrade recommendation is a must for a proper whitewater setup. This solved a lot of water ingress and combing ring strength issues. I had originally replaced the blue tubing with another black Nylon one, but it also proved to be too weak. This new 1/2 Pex tube is great.
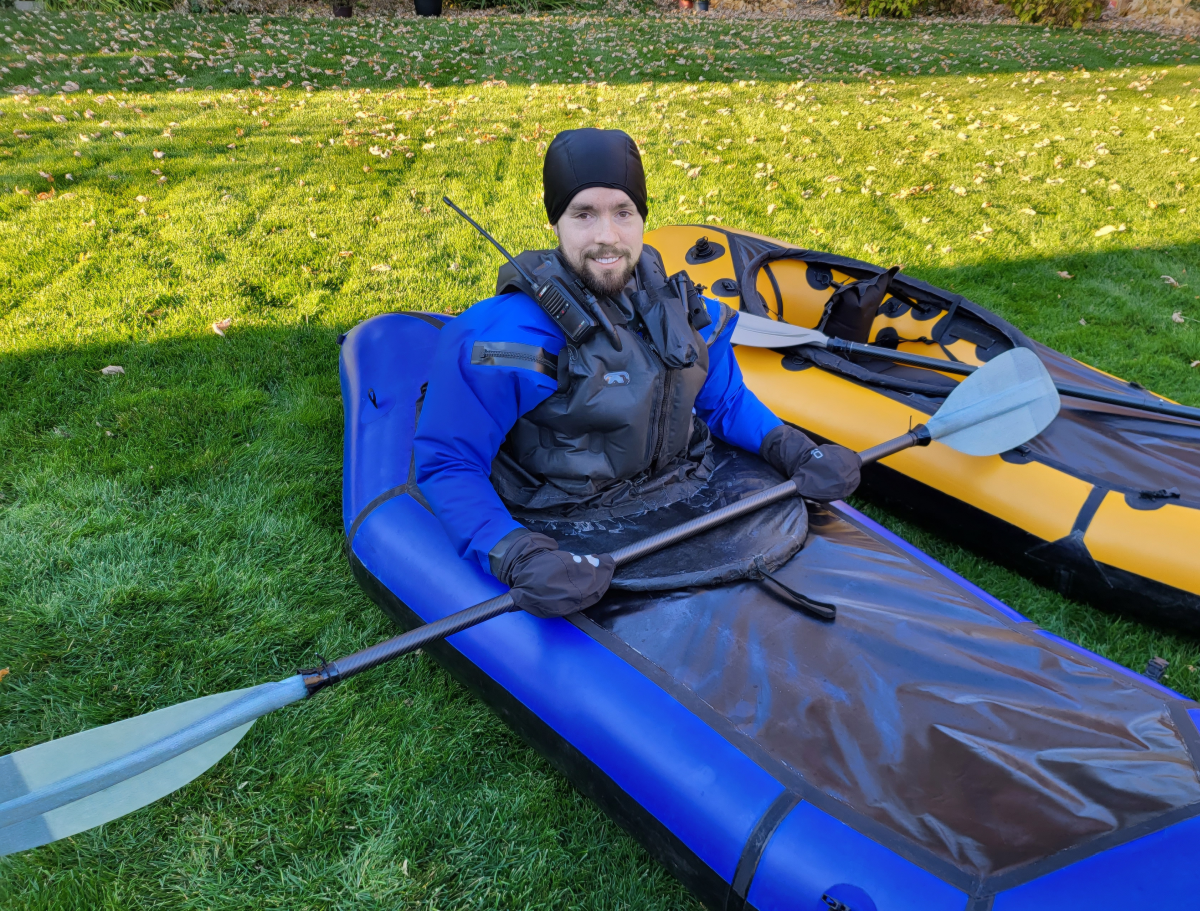
Lastly, I can’t recommend the gear from Anfibio enough. In the picture above, I’m using their inflatable lifejacket and their customizable packraft drysuit. Amazing gear for backpacking. The only issue is shipping. If you live in Canada or the US, you’ll need to work through a parcel forwarding service. This is a major pain, but zero shipping options for North America seems to be common for German companies. I recommend the service ShipGerman and selecting the post-service option to keep your costs down.
(Above) one final upgrade: I’ve replaced the rather wonky value on the Thermarest XTherm with one of Matt’s values. This allows for a FlexTailGear pump I use for the rafts to inflate the pad in a few seconds. The black fabric is leftovers used to seal the original value opening.
This is a long post! The next projects for 2024 are an inflatable flatwater sail and an inflatable helmet. The goal is to make an international backcountry whitewater kit that requires only a single backpack for everything. A couple of European startups are working on inflatable helmets, so I’ll try whichever model comes to market first.
-
February 15, 2024 at 12:57 pm #18933Uncle FredParticipant
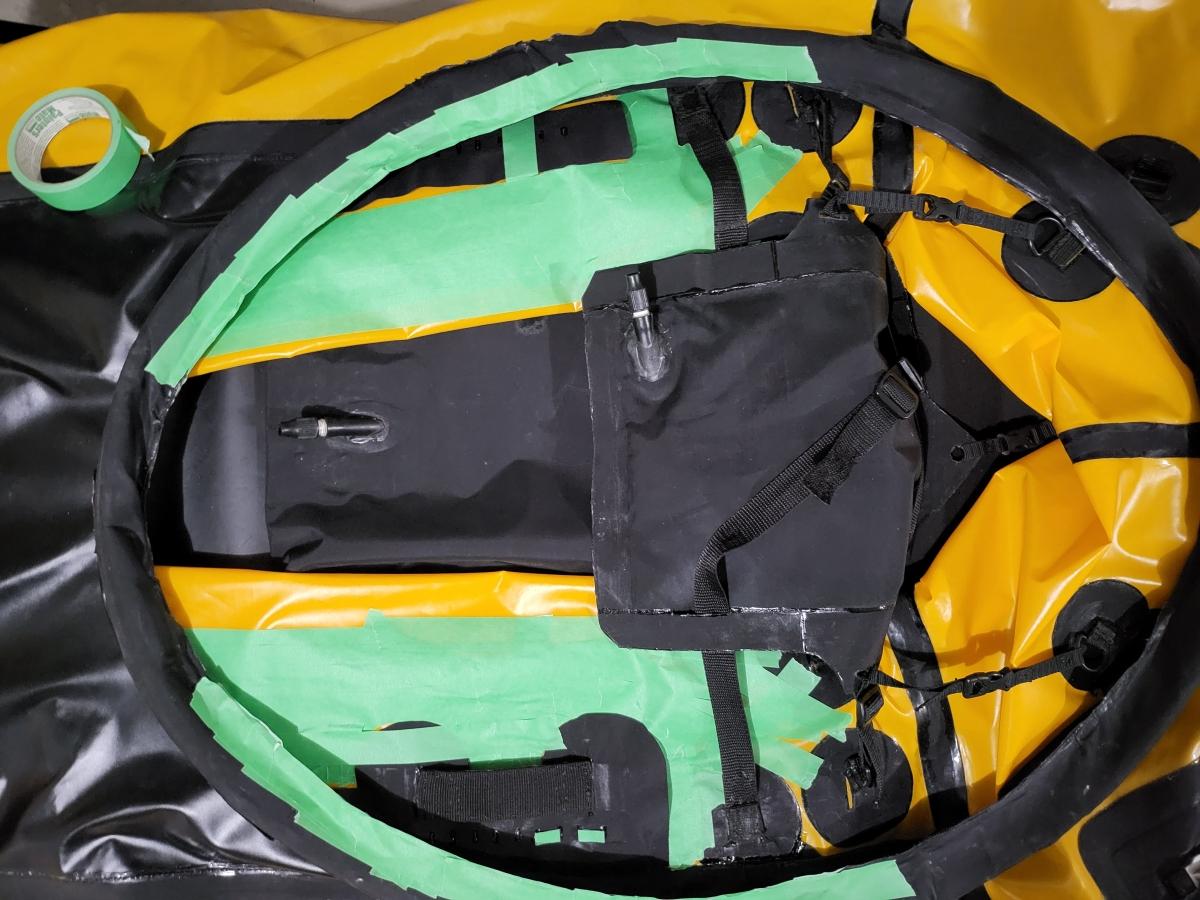
New project to show off.
A lot of hardshell boats offer sturdy foot rests to brace your feet against. This is something I miss from packrafts.
Matt was kind enough to send some extra 250GSM fabric in my latest order. After some trial and error, I came up with a relatively simple footrest design.
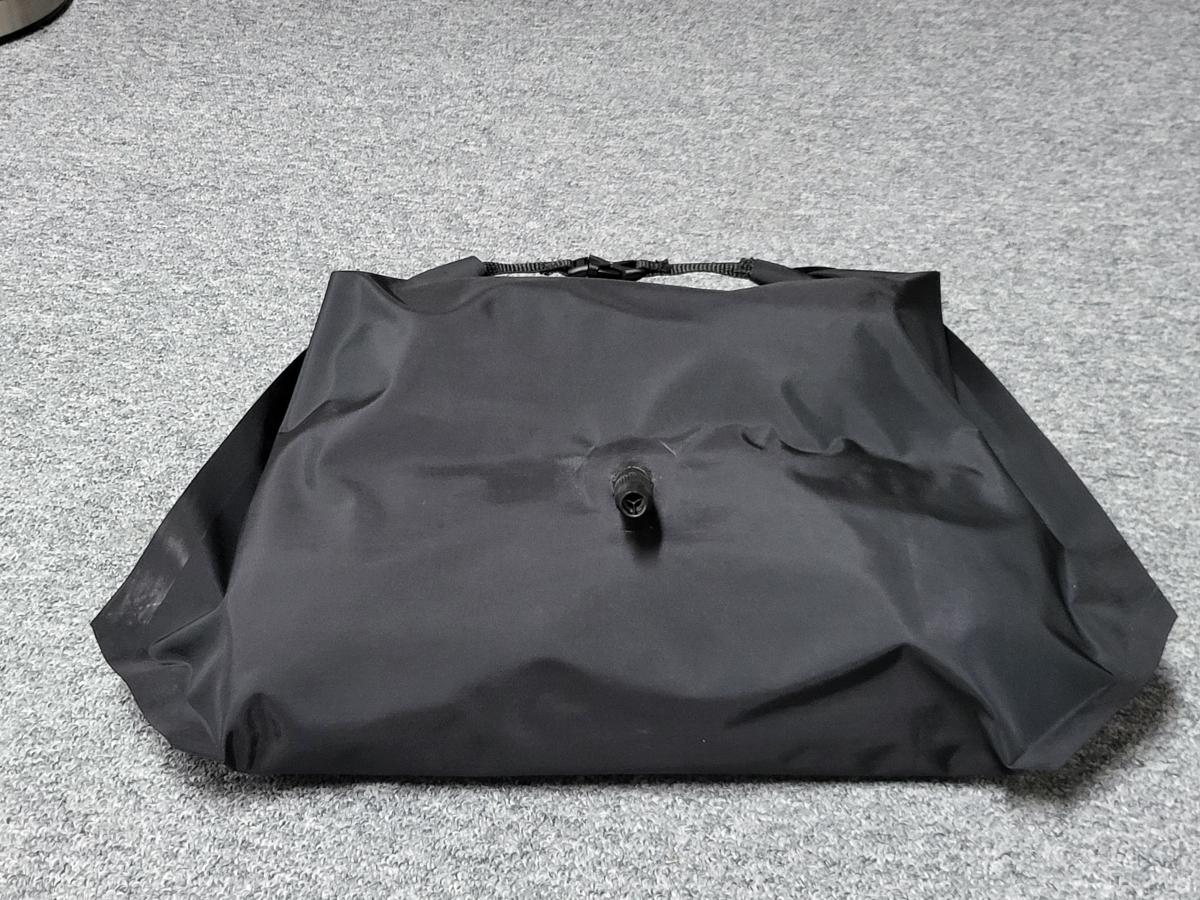
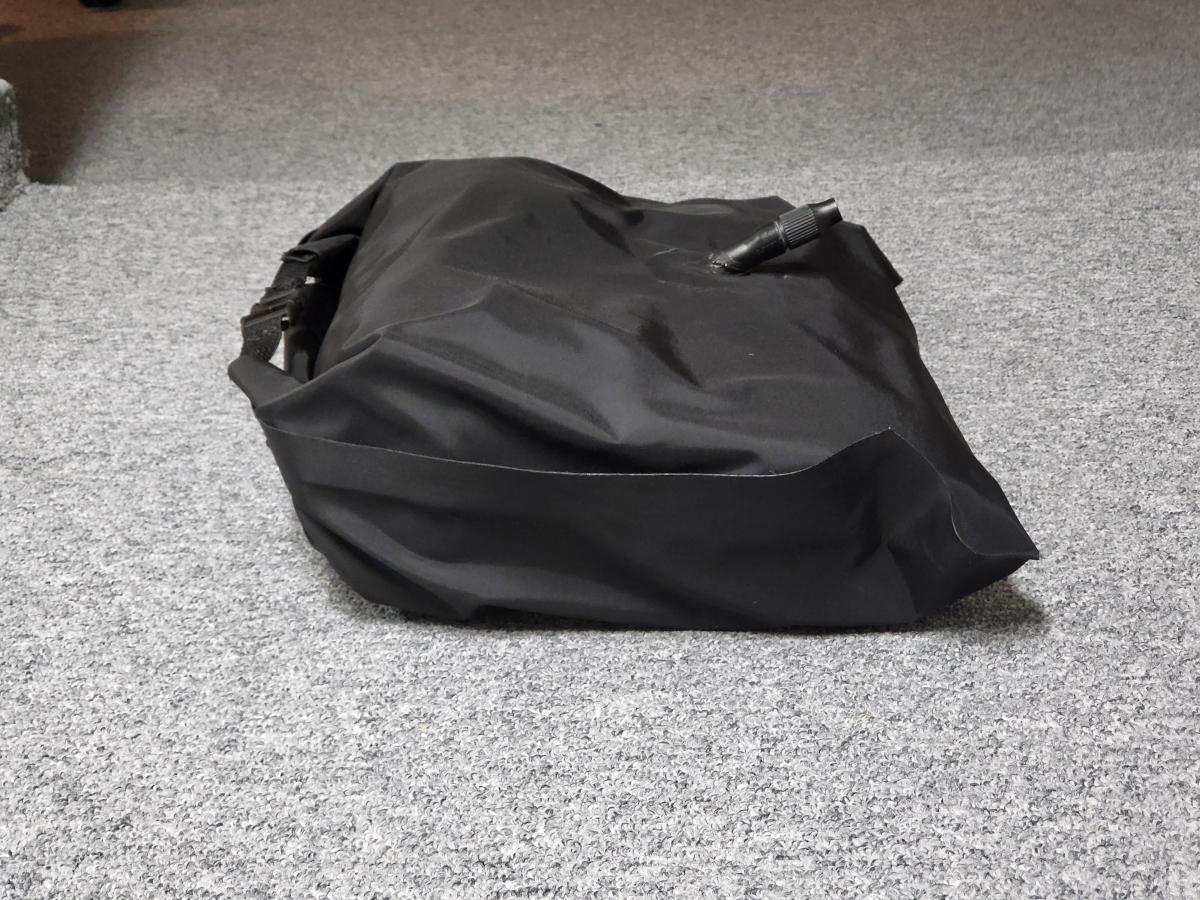
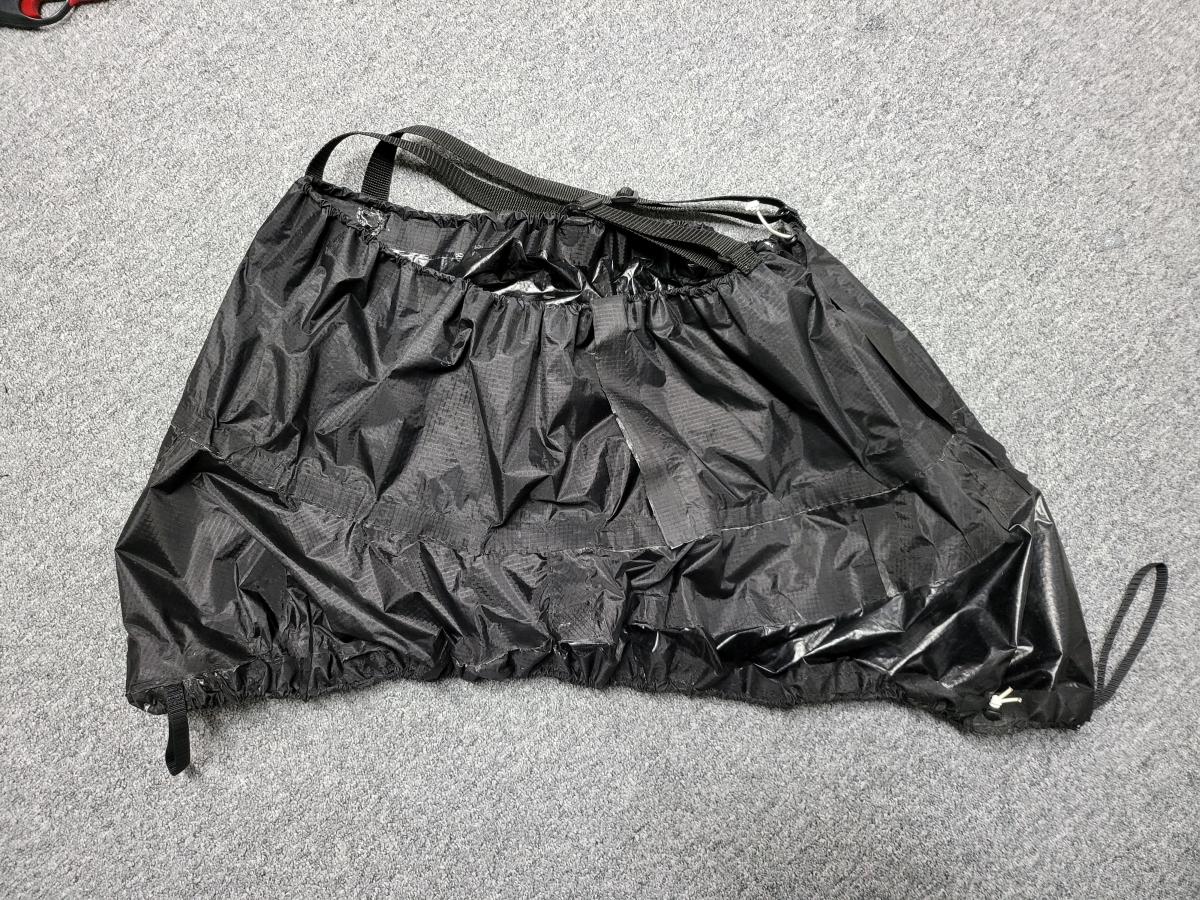
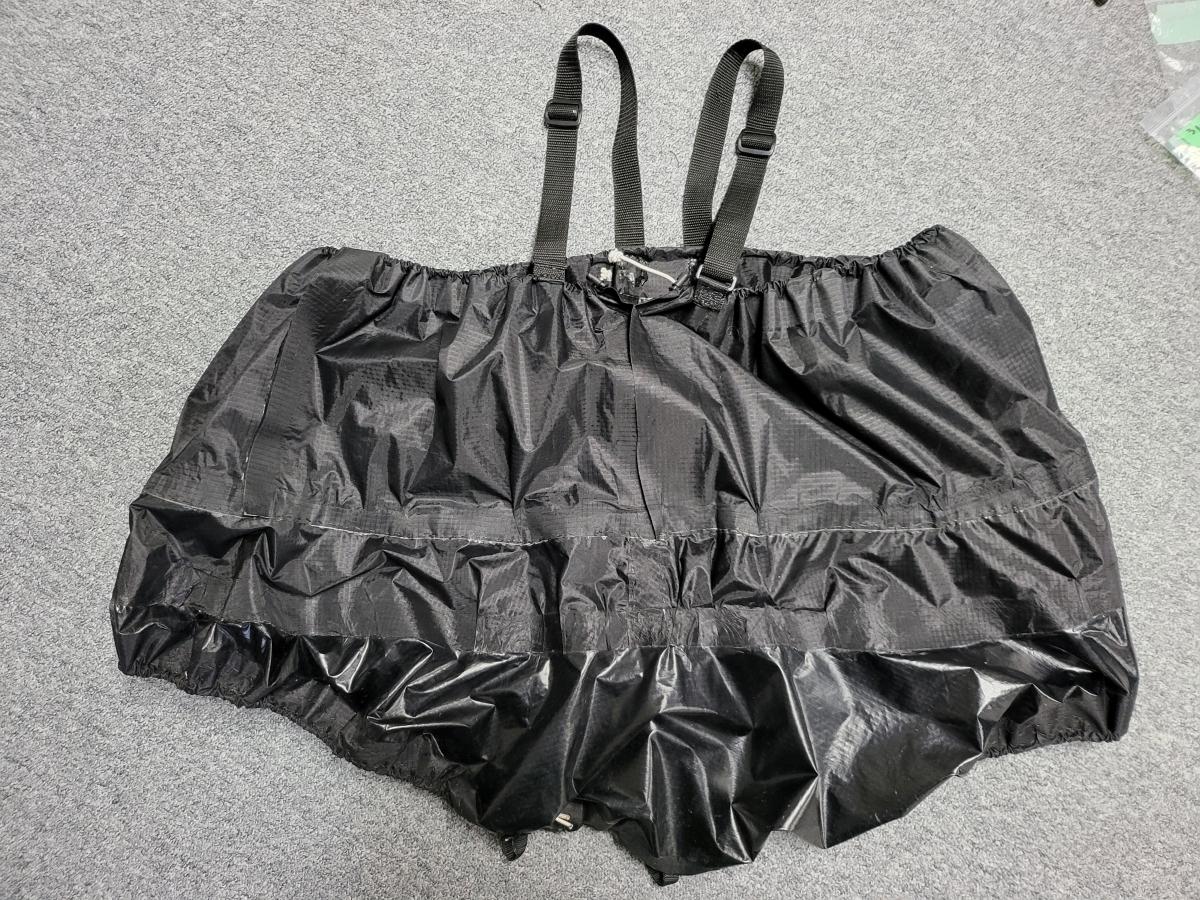
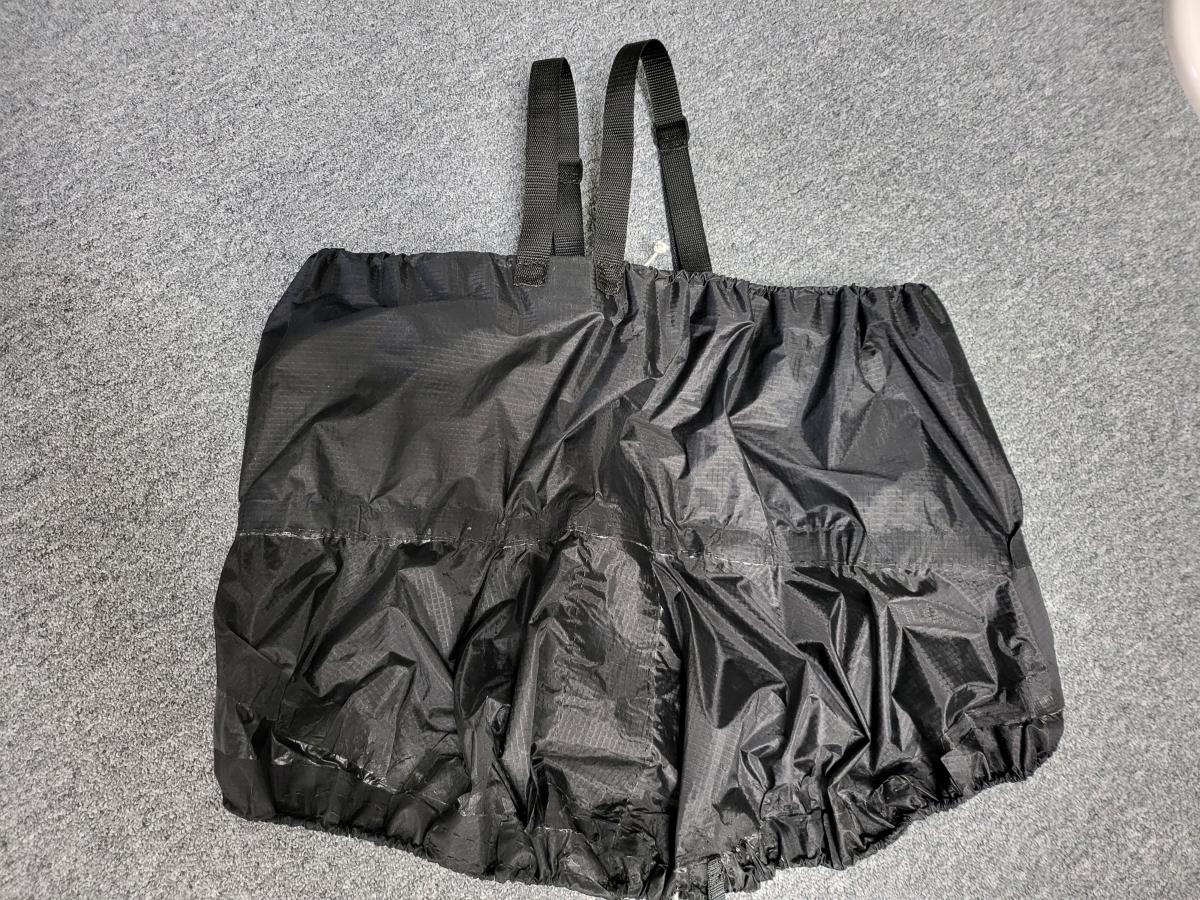
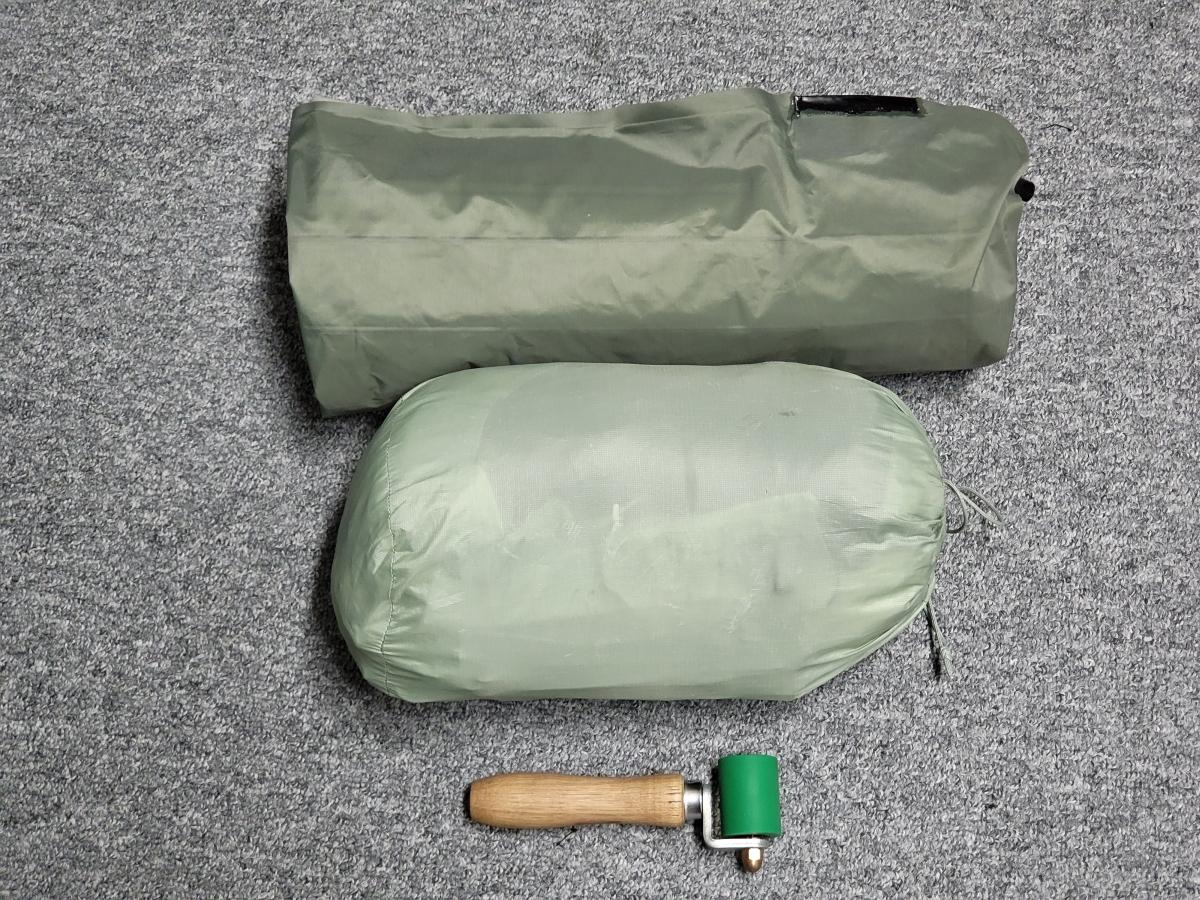
This drybag is designed to be wedged into the bow foot space of your boat.
The original plan was to make this an inflated dry bag to rest your feet on.
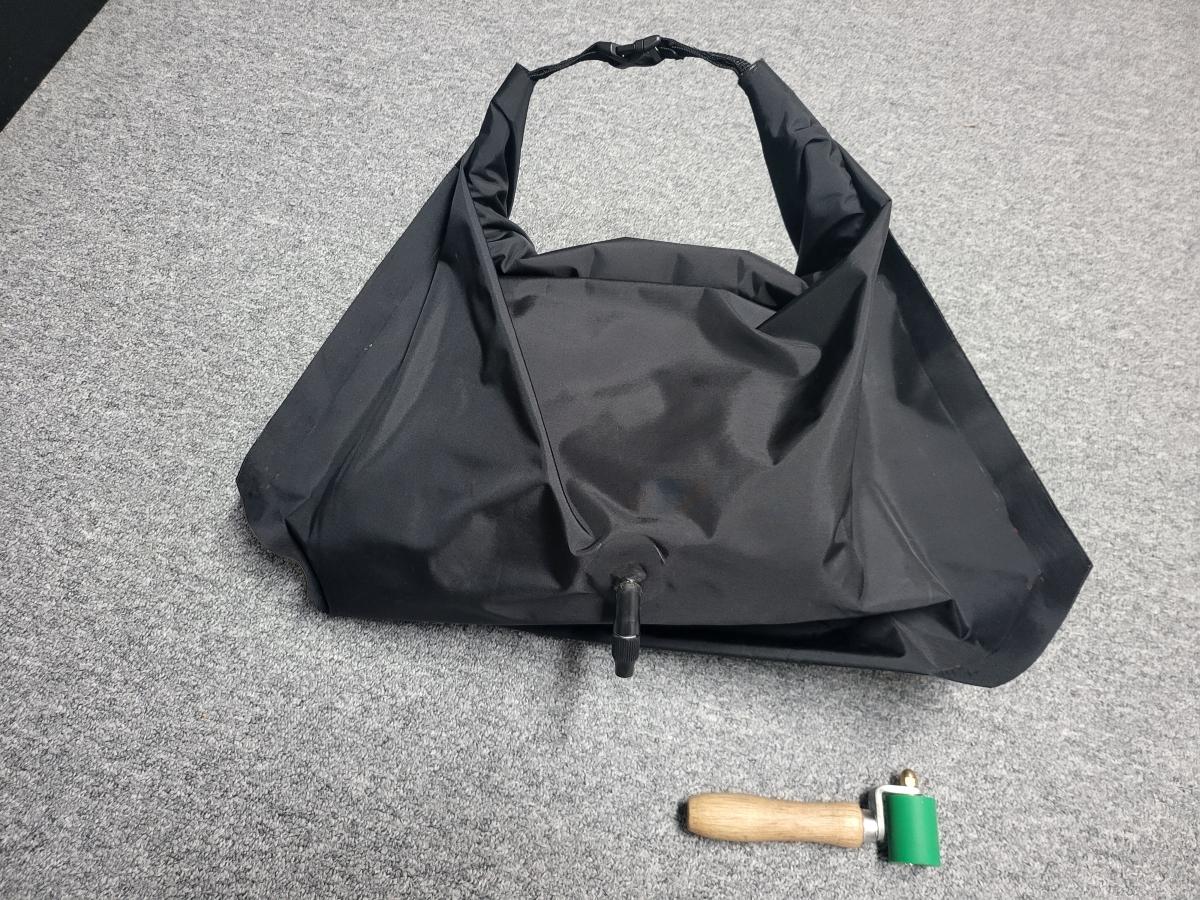
(Above) The larger, initial design. Someone asked me if I was making a pursue!
After making this, I quickly discovered that an inflation bag is a terrible idea. It was the equivalent of pressing your feet against a balloon. It provided zero support for your feet. It was also too big, as Matt suggested in an email.
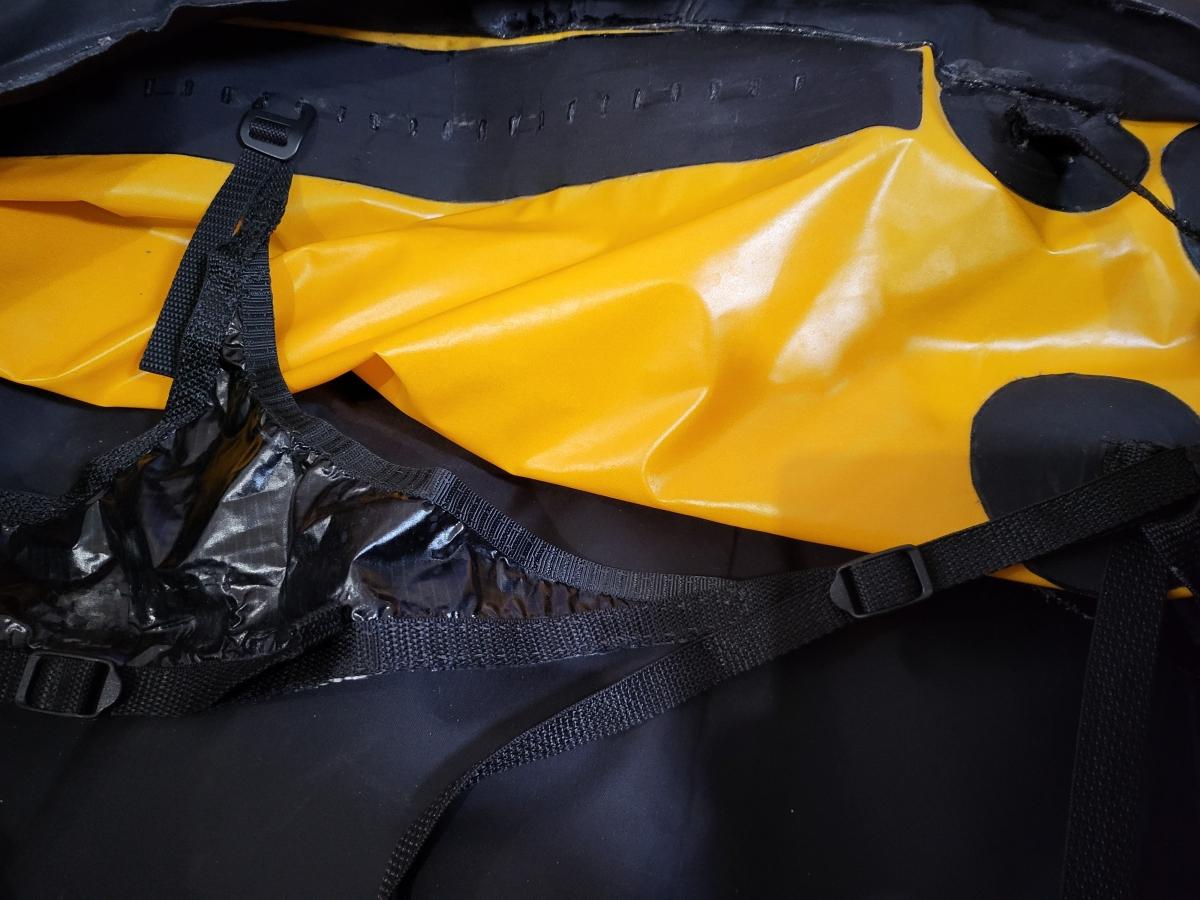
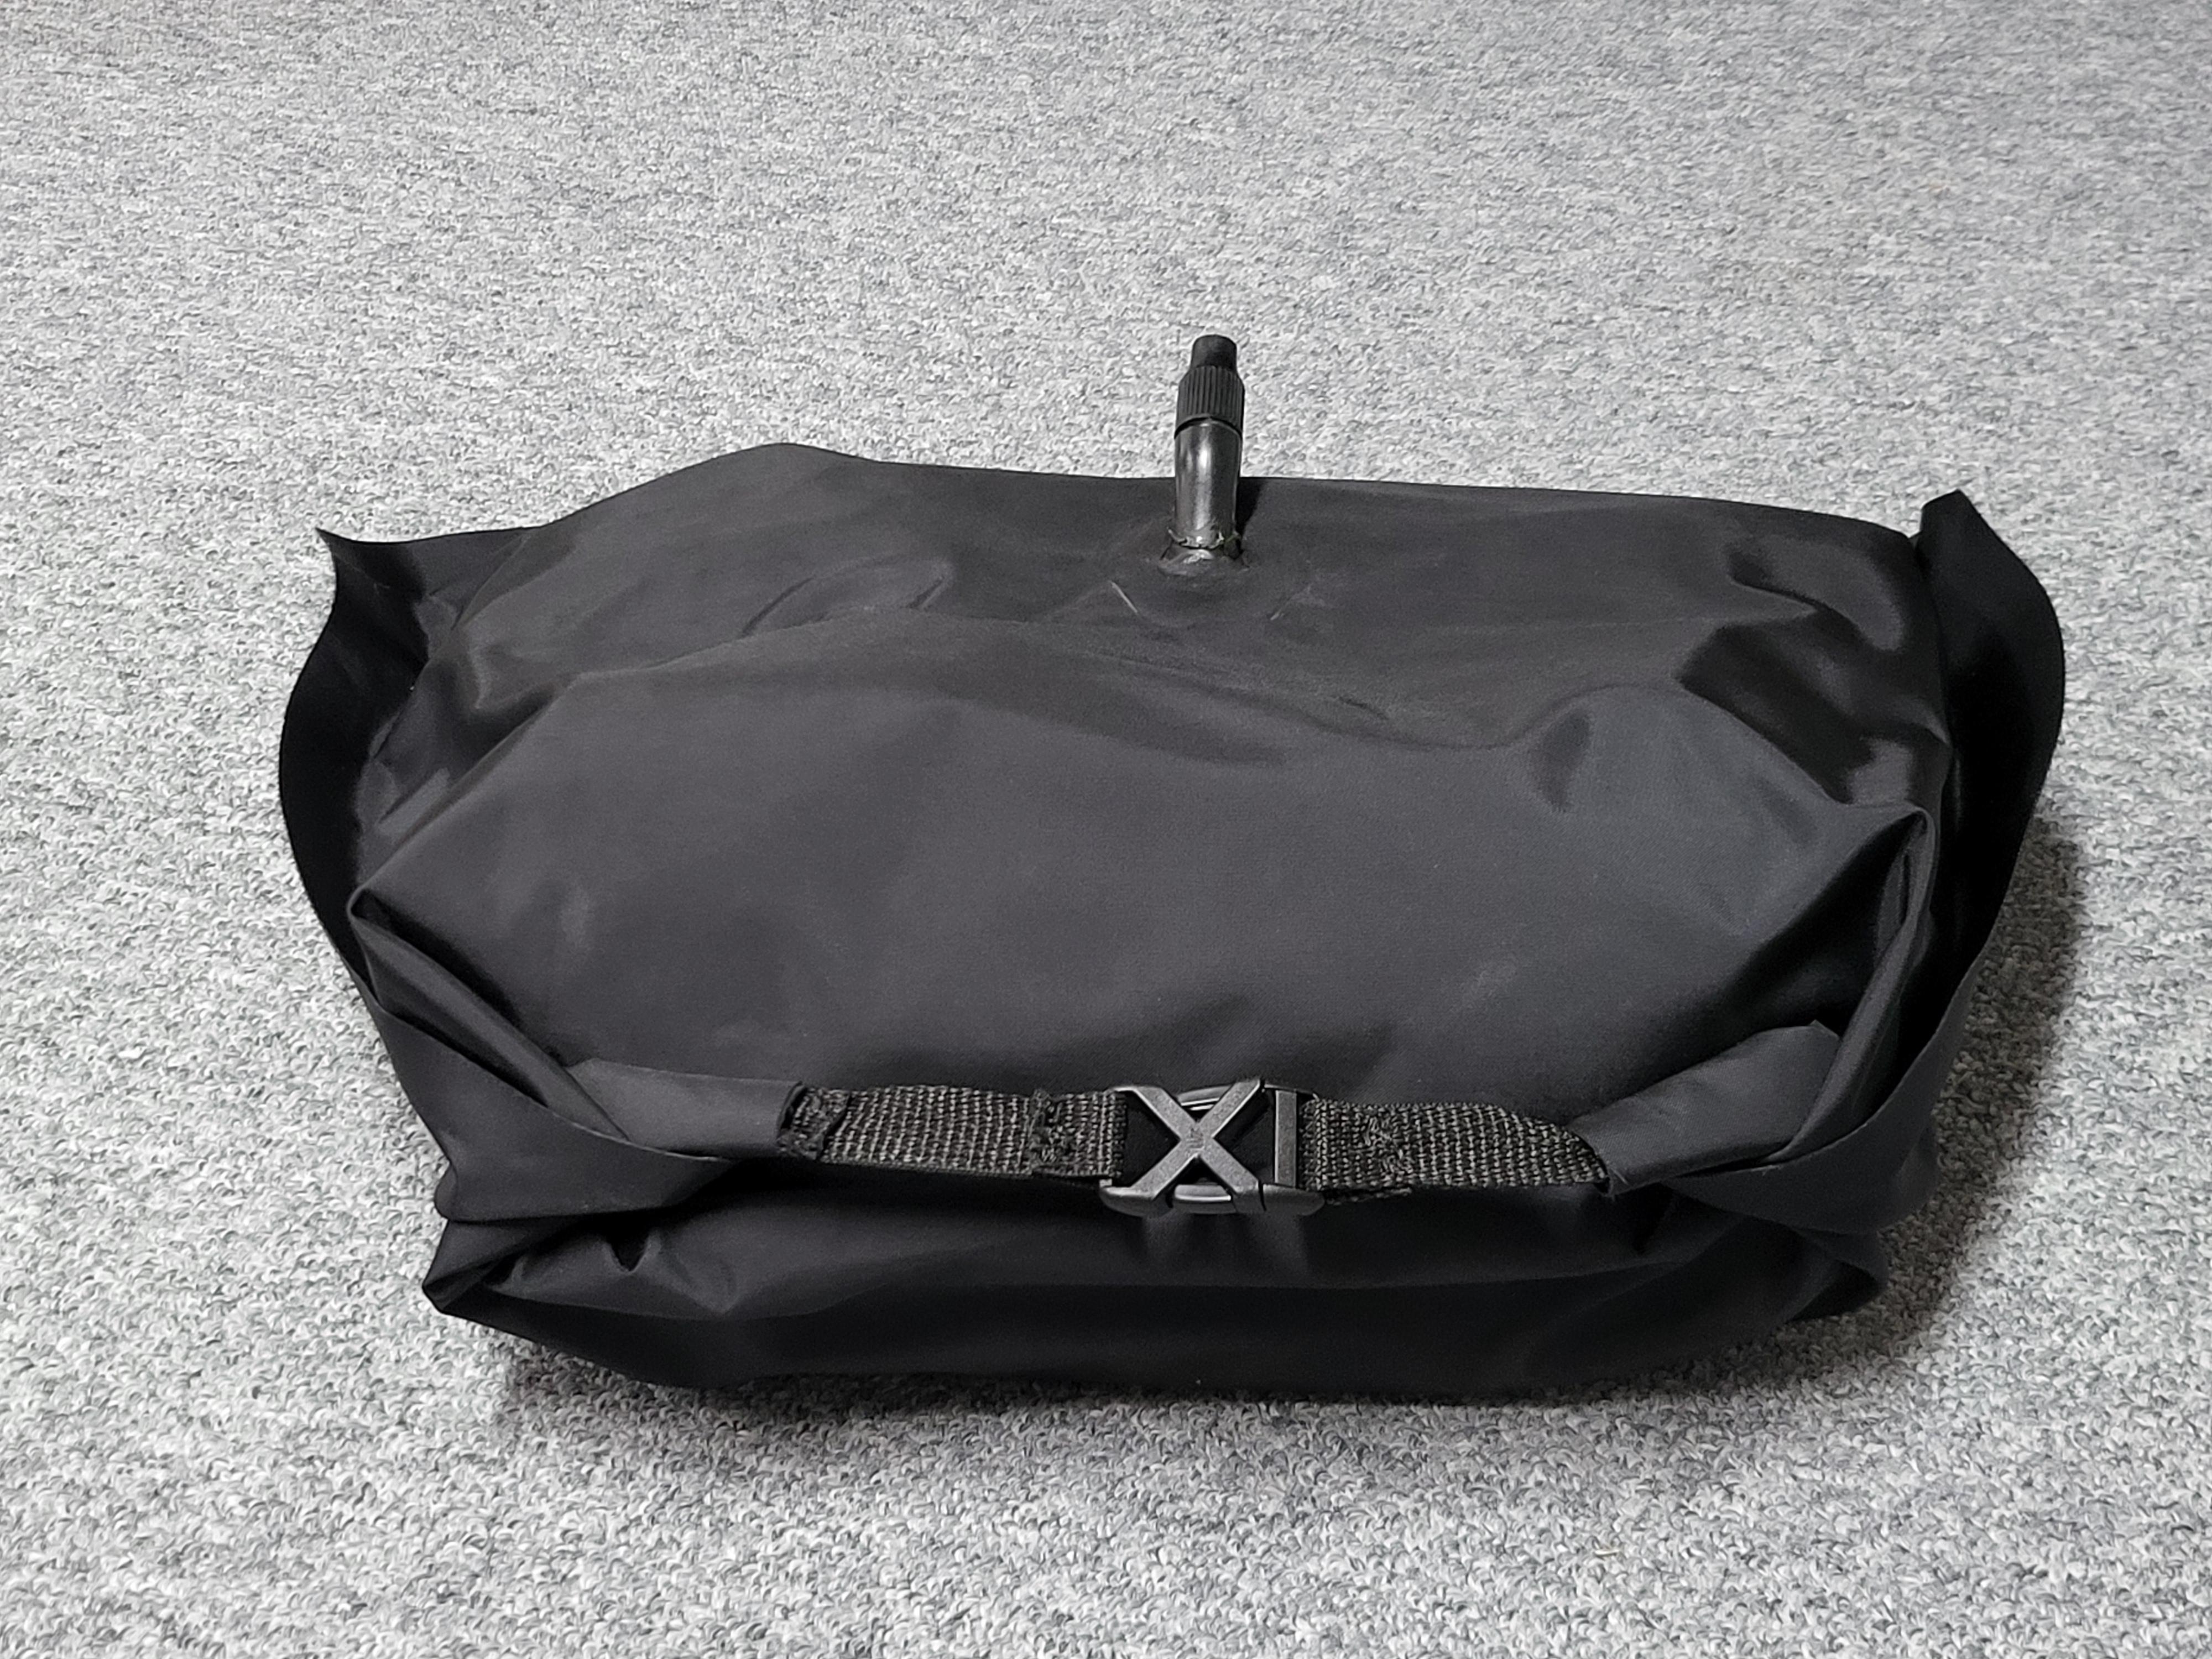
I cut it down significantly:
The drybag aspect remains as putting items inside it what gives it structure. This design is large enough to comfortably fit a Dan Durston X-Mid 1 tent and a Thermarest XTherm Max Wide (25″ wide) sleeping air mattress.
The webbing straps are 3/4″ polypropylene. Avoid Nylon for all boat stuff as it absorbs water. These straps are sewed in by hand on each side of the opening using UHMWPE thread. Some may know this material as Spectra or Dyneema. It is far tougher than nylon thread. You can pick this up as 65Ib UHMWPE fishing line on Amazon.
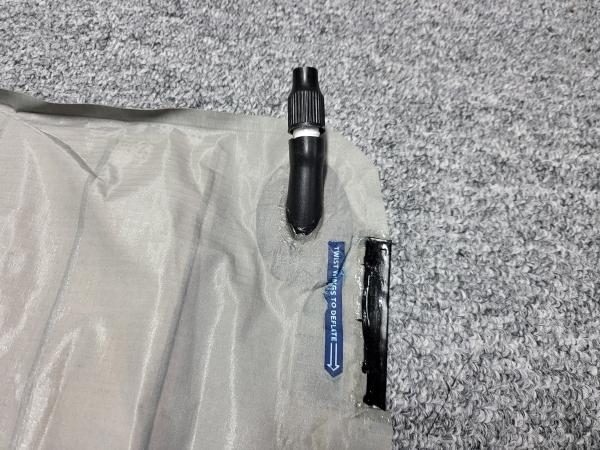
The valve allows for the air to be pushed out of the bag. With the air removed, the bag offers a really firm surface for your feet.
The foot rest friction fits very snugly into the leg area of the Telkwa.
The roll top allows for size adjustment. Roll it more and fill it less for more legroom.
Lastly, don’t forget to brush Seam Grip over any fabric edges or fraying will occur.
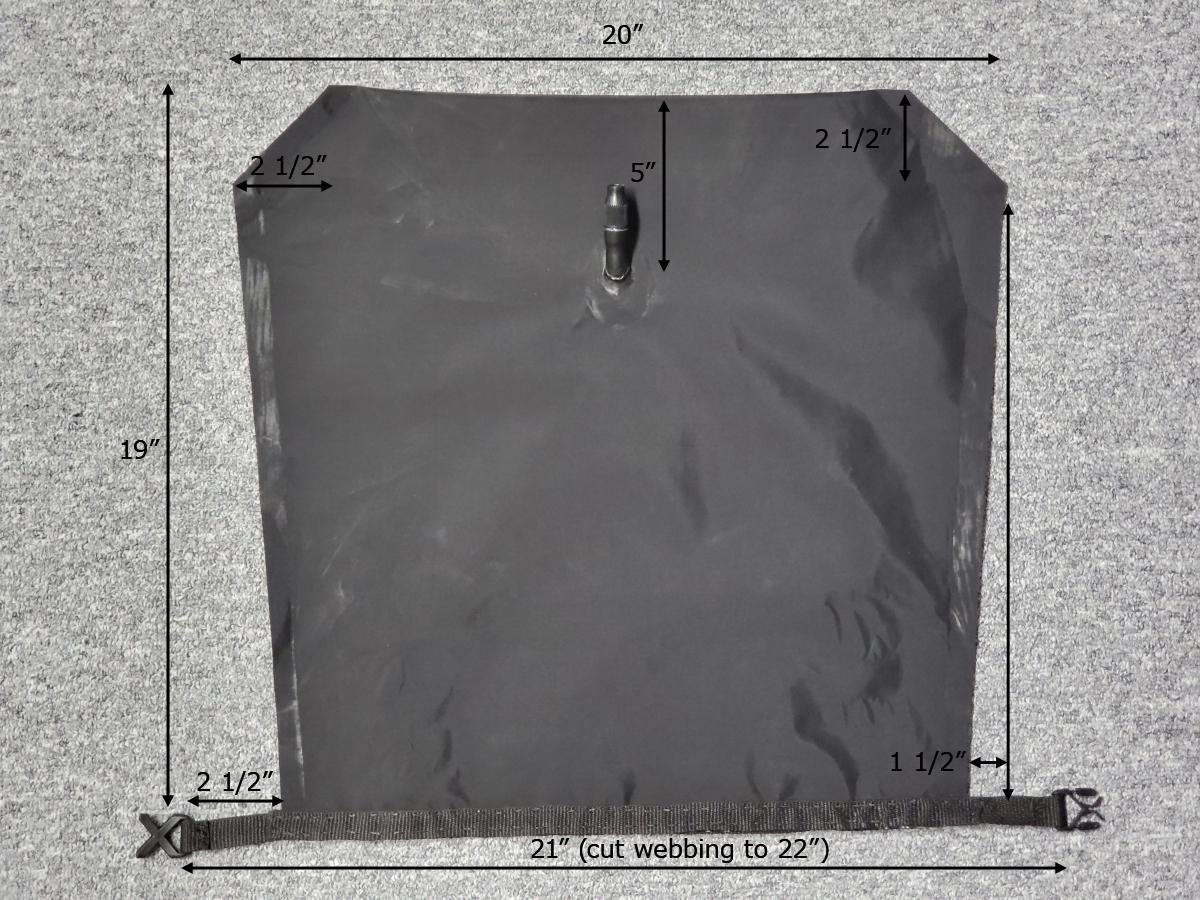
Something interesting I’ve learned from this project is that an airtight drybag is entirely possible. For example, a 22″ opening reinforced with 3/4″ webbing can be made airtight with twelve fabric folds. No additional hardware is required. However, I tested it with seven folds and it will loosen at high pressures and deflate.
-
April 12, 2024 at 7:47 pm #18973zachschiadaParticipant
You maybe could add some sort of foam balls or something like that to inflate and then deflate so that they conform to your foot spot. I’ve got Jackson happy feet in my ww kayak with this. Most have mixed feelings about it, but I love the way it conforms to my feet in my kayak.
-
April 12, 2024 at 10:13 am #18946Matt (Admin)Keymaster
Very cool! I was thinking about foot rests just before you posted this, because I’m testing out a new seat, somewhat similar to yours. The footrest looks like a great design. I’m curious if you’ve tried using it without stuff inside it, just inflated – you mentioned that the larger one felt like pressing against a balloon, but I wonder if this one would feel better. I ask because on a day trip, people might not have stuff to put inside, and also I see that Alpacka uses an inflatable footrest in their whitewater boats.
-
April 13, 2024 at 9:56 am #18982Uncle FredParticipant
Yes, adding some fabric things like a rolled-up sleeping mat seems to create a kind of surface that conforms to your feet fairly well once the air is pushed out through the valve.
-
April 12, 2024 at 5:36 pm #18968Uncle FredParticipant
Yes, I’ve tried the smaller design just inflated. It was Alpacka’s offering that made me confident an inflated footrest would work. I filled the bag as full as possible without using a mechanical pump. The issue is that your feet don’t apply even pressure on the footrest when paddling. It only felt solid once you added an object and pushed out all the air.
Maybe it’s possible to get it firmer. There may also be a solution by dividing the internal area into two separate compartments. You could probably use an internal wall to limit compression to a single direction. For me, retaining foot space storage is a must, so these experiments were never tried.
-
-
-
-
AuthorReplies
- You must be logged in to reply to this topic.