- This topic has 3 replies, 3 voices, and was last updated 8 years, 5 months ago by
 .
.
-
Topic
-
I have had this gun for several months now, and learnt its various quirks and ways it likes to be used. I will try to make this report detailed enough so that others can use one of these and benefit from my experiences.
For a long time it would do a series of perfect practice welds and then burn holes, or fail to weld. The reason turns out to be two-fold: firstly the temperature control knob is simply too tiny to adjust uniformly and accurately every time; secondly it changes temperature when turned over. I discovered all this after finally getting a BBQ thermometer to check it with.
As the temperature variations proved to be quite huge, I then got a ‘digital oven thermometer’ off amazon, drilled holes in the nozzles for the short sensor, and wrapped a piece of flat elastic around the body to hold the display on with.
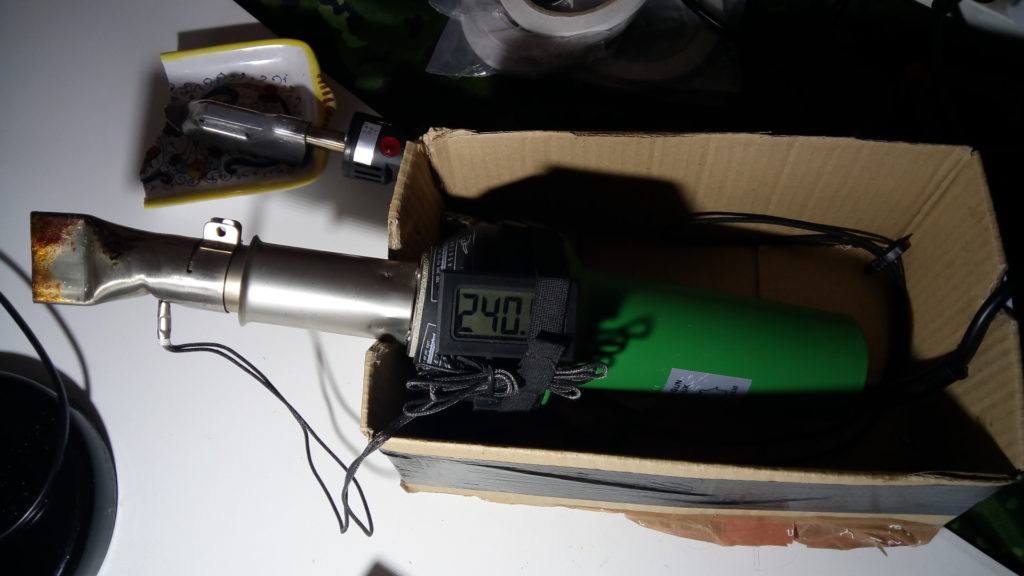
This temperature gauge is key to getting good and consistent results. It may be usable without it for heavy pvc roofing possibly, but for our use case this gauge is essential.
As for the temperature changing when the gun is rotated, the internal sensor is a little wedge-shaped thing which fits into a similarly shaped socket. The fit is too loose, but packing the socket with silicon grease mitigates the issue to a large extent. You simply take the barrel off, as though to replace a heater element, and the sensor will be visible. It is still important to keep a sharp eye on the gauge though.
The new gauge sensor is at the end of the barrel in the full flow of hot air. The temperature at the end of the nozzle is considerably lower than that indicated, by something like 20 – 40deg depending on the particular nozzle being used, and the actual welding temperature will depend quite heavily on the distance of the nozzle from the fabric and the speed at which the gun is moved along. The preferred temperature to use also depends heavily on the fabric being welded and on whether the air flow can escape (eg with a seam tape) or if it’s trapped (eg welding the tubes to the floor).
What works for me:
- for seam tapes, around 260 – 270 indicated, with sufficient gap after the nozzle that the melting tpu is visible. In the video it’s not really visible, but close up there should be no trouble in controlling the heat and melting/welding. At 260 it is possible to push the nozzle directly into the fabric without burning holes – a very useful test
- for welding the tube edges to the floor, where I’ve clamped a board (or aluminium channel) along the fabric so as to allow only a strip to be welded, around 240 seems good. The nozzle needs to be right inside where you can’t really see what is happening, so practice is needed to be confident here. Heat will build up quickly as it can’t escape. The 40mm nozzle is useful here.
- for very light fabric, eg the 40D/100gsm UL fabric, something like 230 is good, but the process needs care as there is no weight in the fabric to absorb heat. However, the air flow from this gun is 230lt/min and it’s very difficult to hold light-weight fabric straight without it folding and wrinkling and thus welding itself to itself.
- other fabrics may have chemically different tpu coatings, eg I have some 500D cordura with tpu on one side which needs a lot of heat to make a weld. The fabric is only 370gsm but the coating behaves quite differently to the coating on Matt’s fabrics.
These findings are true for my gun and gauge – yours may differ.
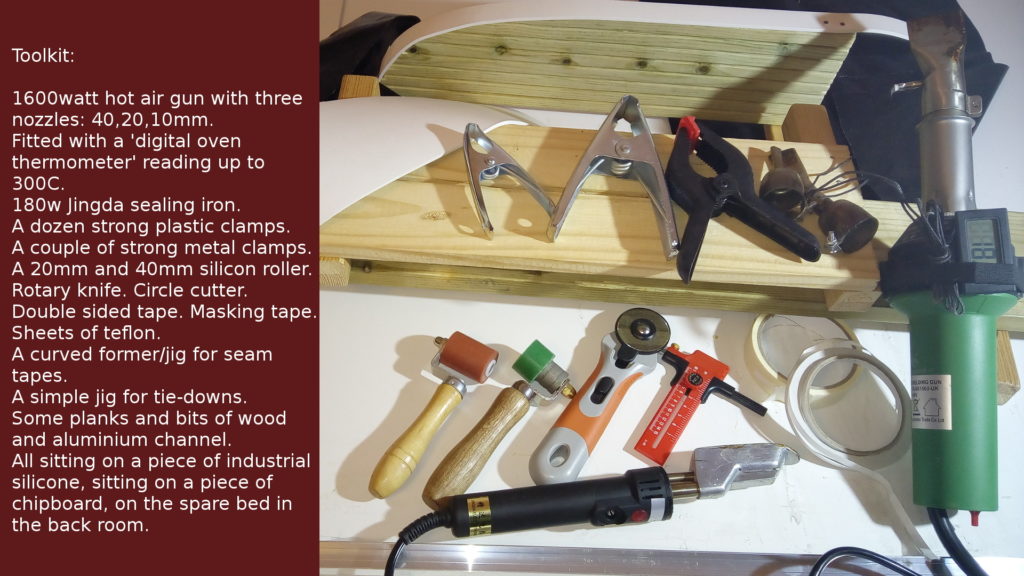
At 1600watts this is a powerful tool. There are similar guns at 1000watts available, but I chose the 1600 largely on the basis that there are spare heater elements available for that, but not for the smaller one. I suspect the smaller one would not do the job nearly as well as the 1600, and if I had to replace the gun I would get the same again. The 20mm nozzle is just right for seam tapes and various other jobs, while the 40mm is just right for a 30mm wide weld between the hull and floor. The 10mm nozzle is a round one squashed down and is little used apart from seat baffles.
<p>
The video below is in a number of parts:- welding seam tape with a 20mm nozzle at 260deg over a curved former. On these two boats I have welded all the tube pieces together first – Alpacka sew theirs at this point but welding has the rather convenient advantage of being air-tight. Where you see the fabric stretched over the former and clamped tight, this earlier welding (with a sealing iron) is what allows this to happen.
- welding v-tape on the hull, with the tape clamped in place and only a 20mm strip welded.
- welding the inner edge of the hull to the floor, again with the fabric clamped in place
- welding the v-tape to the floor, tensioning it away from the direction of weld so that the roller does no make it creep and wrinkle.
- welding the floor to the outer edge of the hull, using a plank placed inside the hull and the floor and hull fabric clamped
separately to the plank. - making tie-downs after the style posted by Matt but with the gun. These are 8cm diameter and have alloy d-rings fitted
Here is the video: http://www.zolotek.net/diy/hagx02x720.mp4
-
This topic was modified 8 years, 5 months ago by .
-
This topic was modified 8 years, 5 months ago by .
-
This topic was modified 8 years, 5 months ago by .
-
This topic was modified 8 years, 5 months ago by .
-
This topic was modified 8 years, 5 months ago by .
-
This topic was modified 8 years, 5 months ago by .
- You must be logged in to reply to this topic.