- This topic has 2 replies, 3 voices, and was last updated 7 years, 2 months ago by
 .
.
-
Topic
-
I want an inflatable floor for my packraft because it stiffens the bottom of the boat and improves both speed and handling.
I first made a floor using the DIY seat as a model. When it inflated it certainly tightened the floor, but when I added the seat on top of the floor, as I intended, it was too tall for my older Large V2 and my longer 140 V3 raft. I need to make another, but using 2″ (50mm) tall baffles.
I also had this old surplus camping pad. As I recall, the leading packraft maker sells a Therm-a-Rest pad that roughly fits their raft. It is a standard mid-length Therm-a-Rest with rounded ends. Could I modify my surplus military Therm-a-Rest that I had patched several holes in, and was just the right price. $0.00.
Could I cut and reseal the pad? Short answer = Yes!
First I marked the pad to the length and width of my 140 V3 floor. Adding an inch of width and length because the pad shortens when inflated. Remember, I wanted to stiffen the raft when inflating the floor.
Then I cut it. That was the hard part!
A Therm-a-Rest pad is TPU coated fabric just like our DIT packrafts. The big difference is that the fabric is also heat sealed to the open cell urethane foam inside the pad. This prevents the pad from ballooning into an unusable shape. Could I remove the foam and reseal the pad? Yes!
I first used a razor sharp knife to cut away the foam from the fabric. I found it best to cut a a 1-inch (25 mm) or larger “V” into the foam.
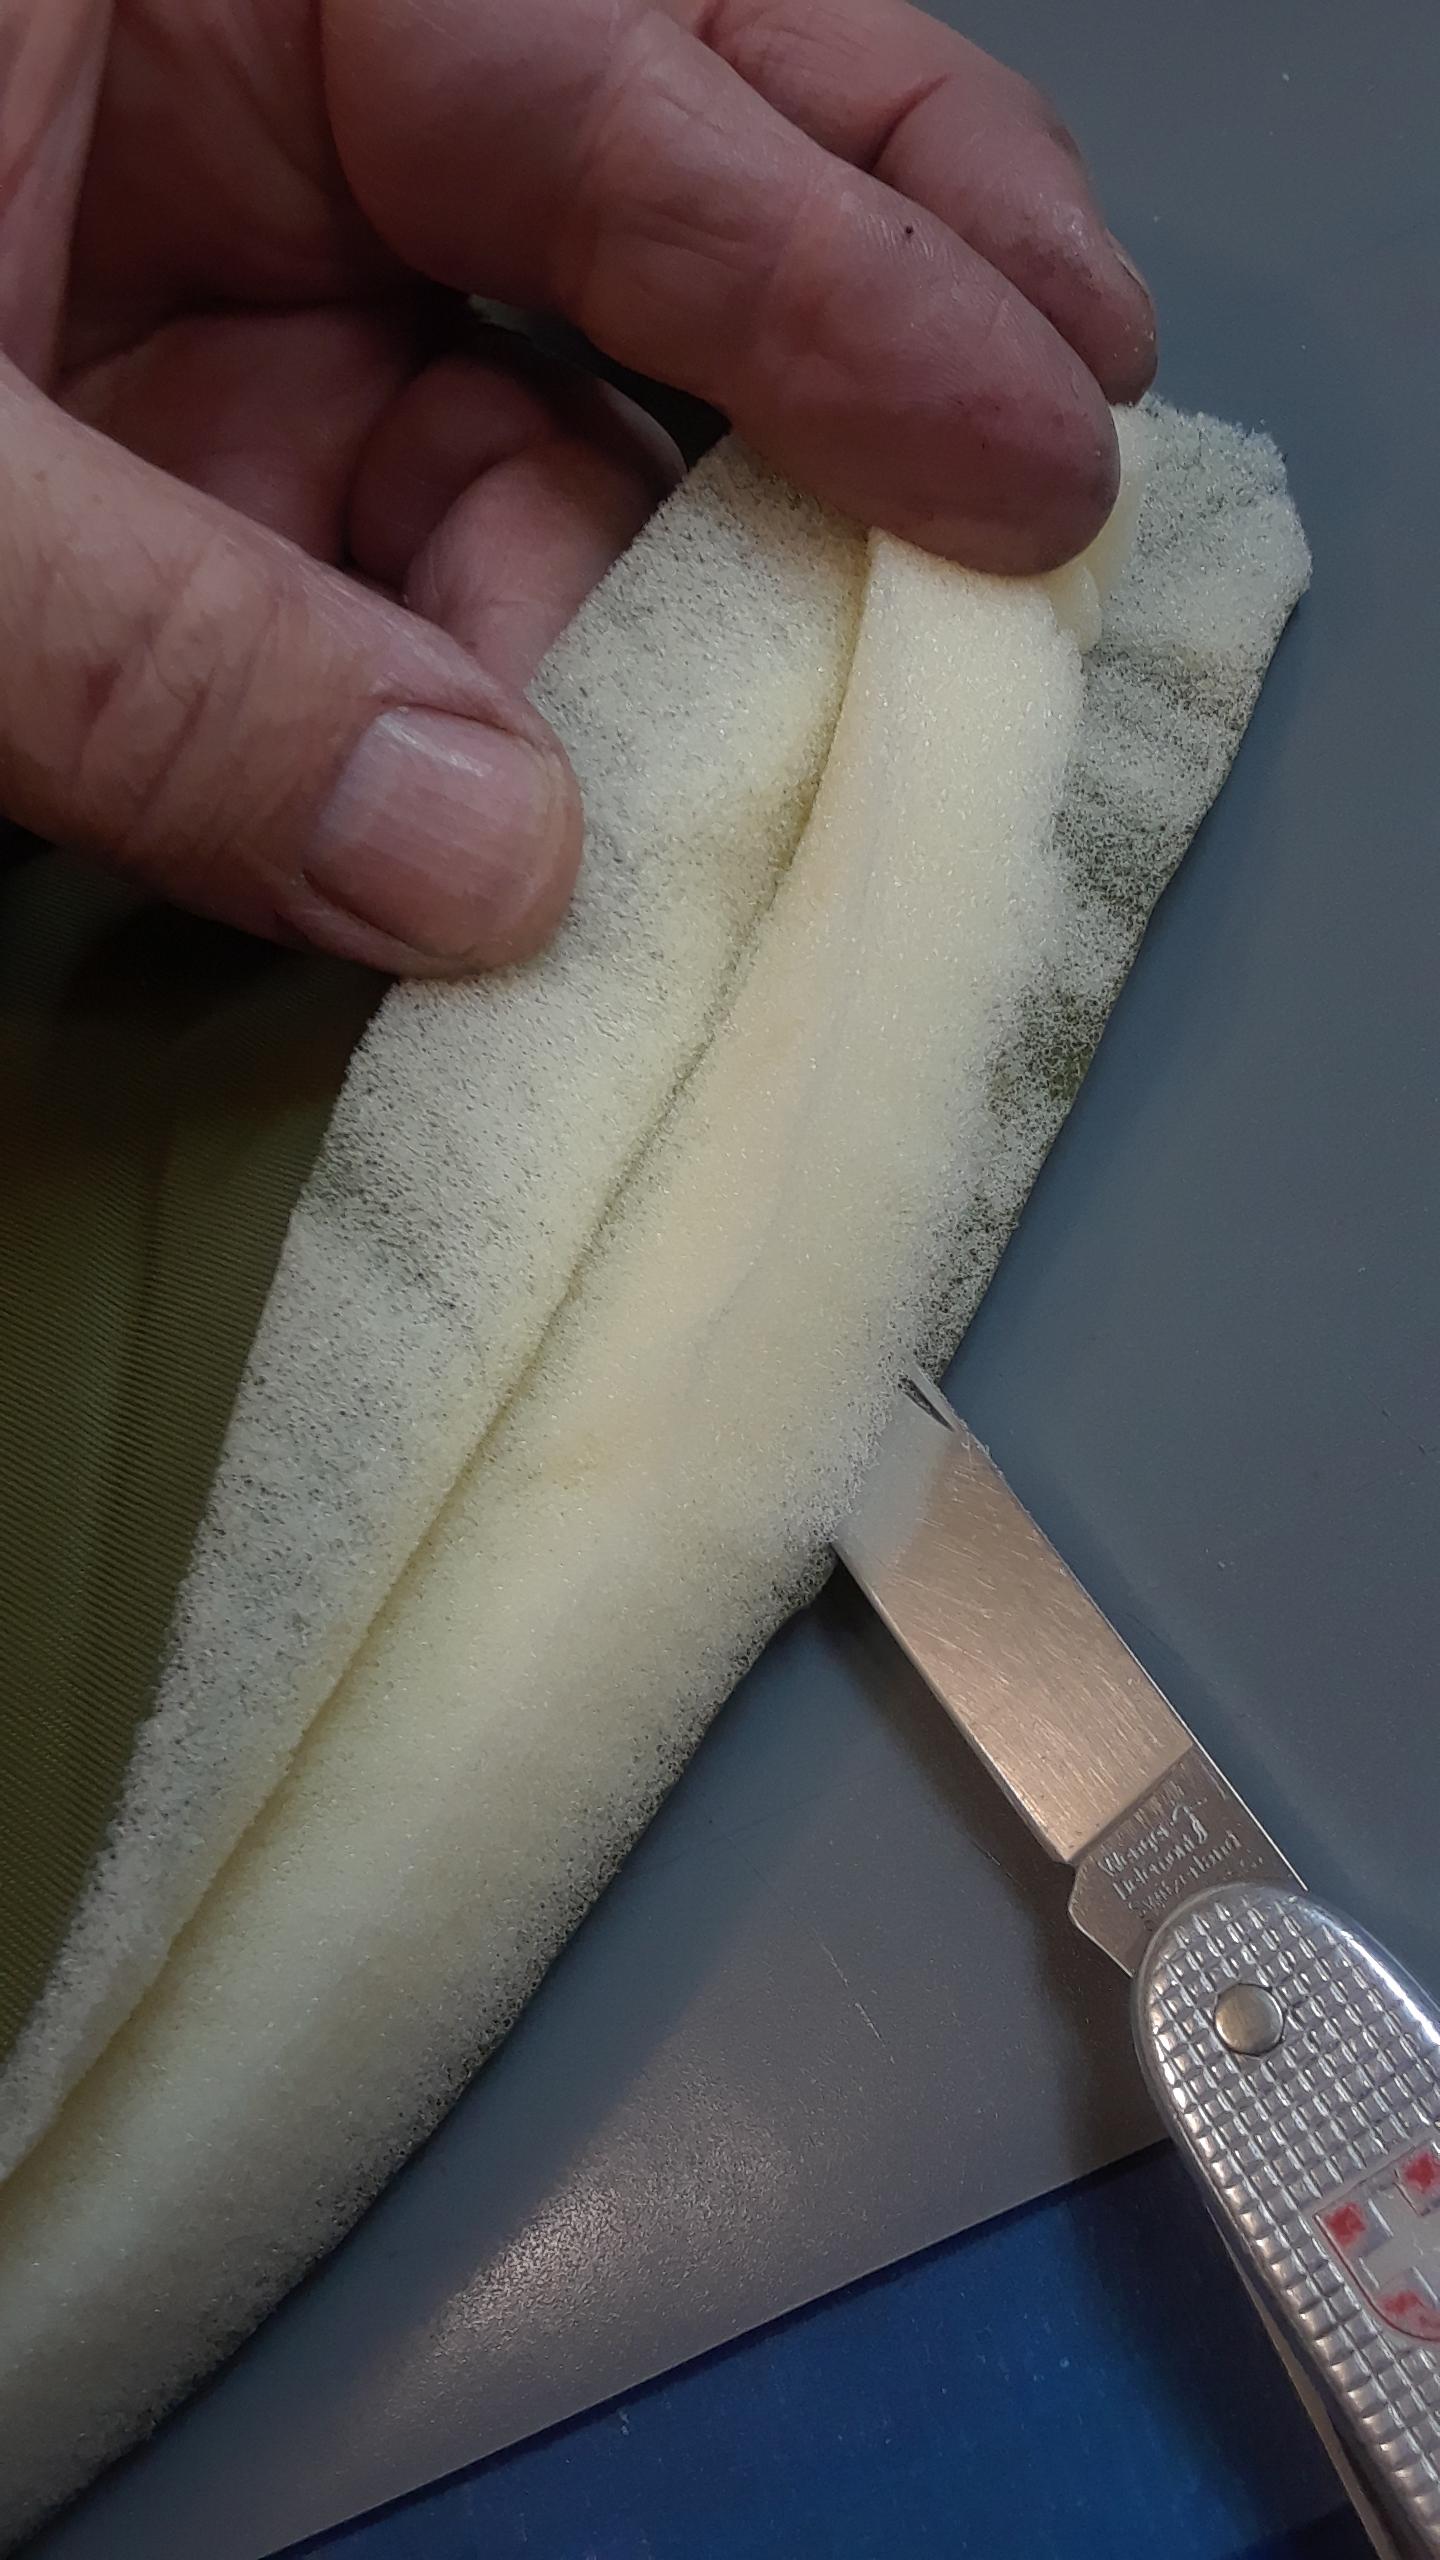
I tore out the strip of foam.

To form the new seam I scraped away the foam heat sealed to the fabric. At first I scraped it with my knife, which worked. But I found the foam fragments were sticking to everything with static electricity. So I dribbled isopropyl alcohol onto the foam to wet it and minimize the dust. I also discovered I could then scrape away the wet foam with my fingernails. This was even easier than the knife.
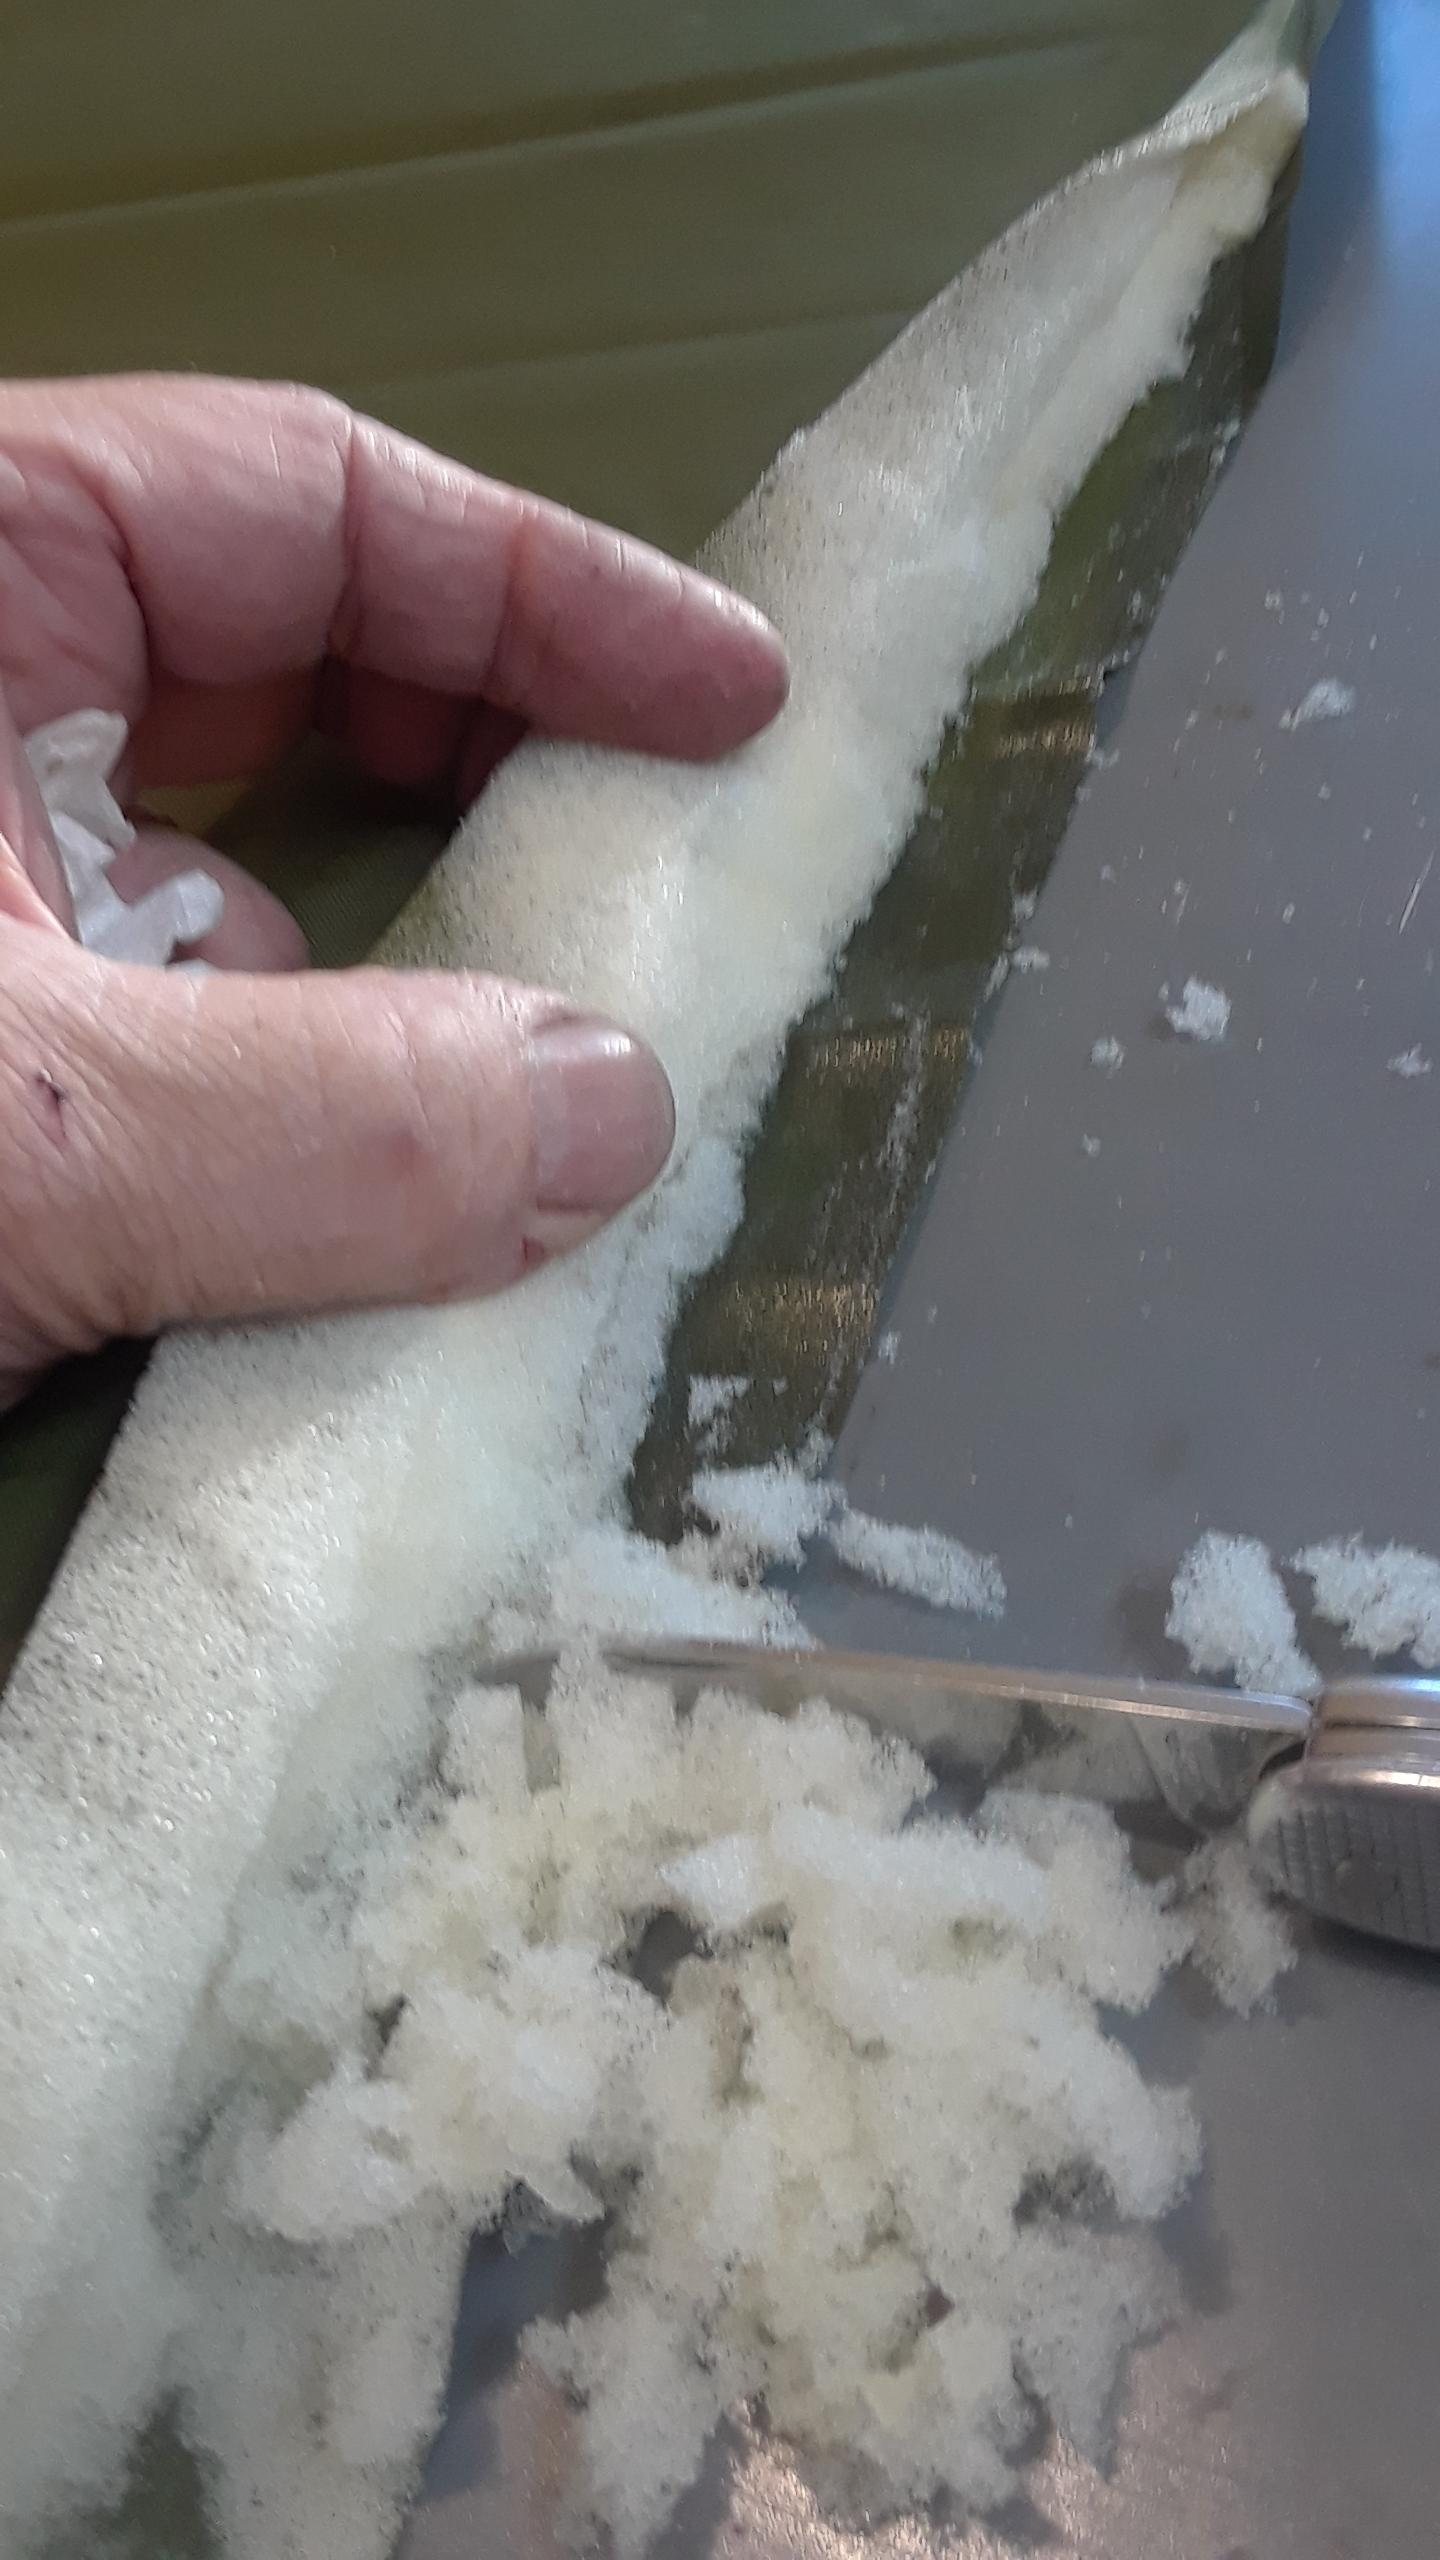
Once I had an inch (25 mm) or more of cleaned fabric, I heat sealed the edges together. Getting the top panel of fabric to align with the bottom was not easy because of the foam. I had to use a thin piece of wood under the fabric while pressing down with another piece of wood in order to keep the edges aligned.

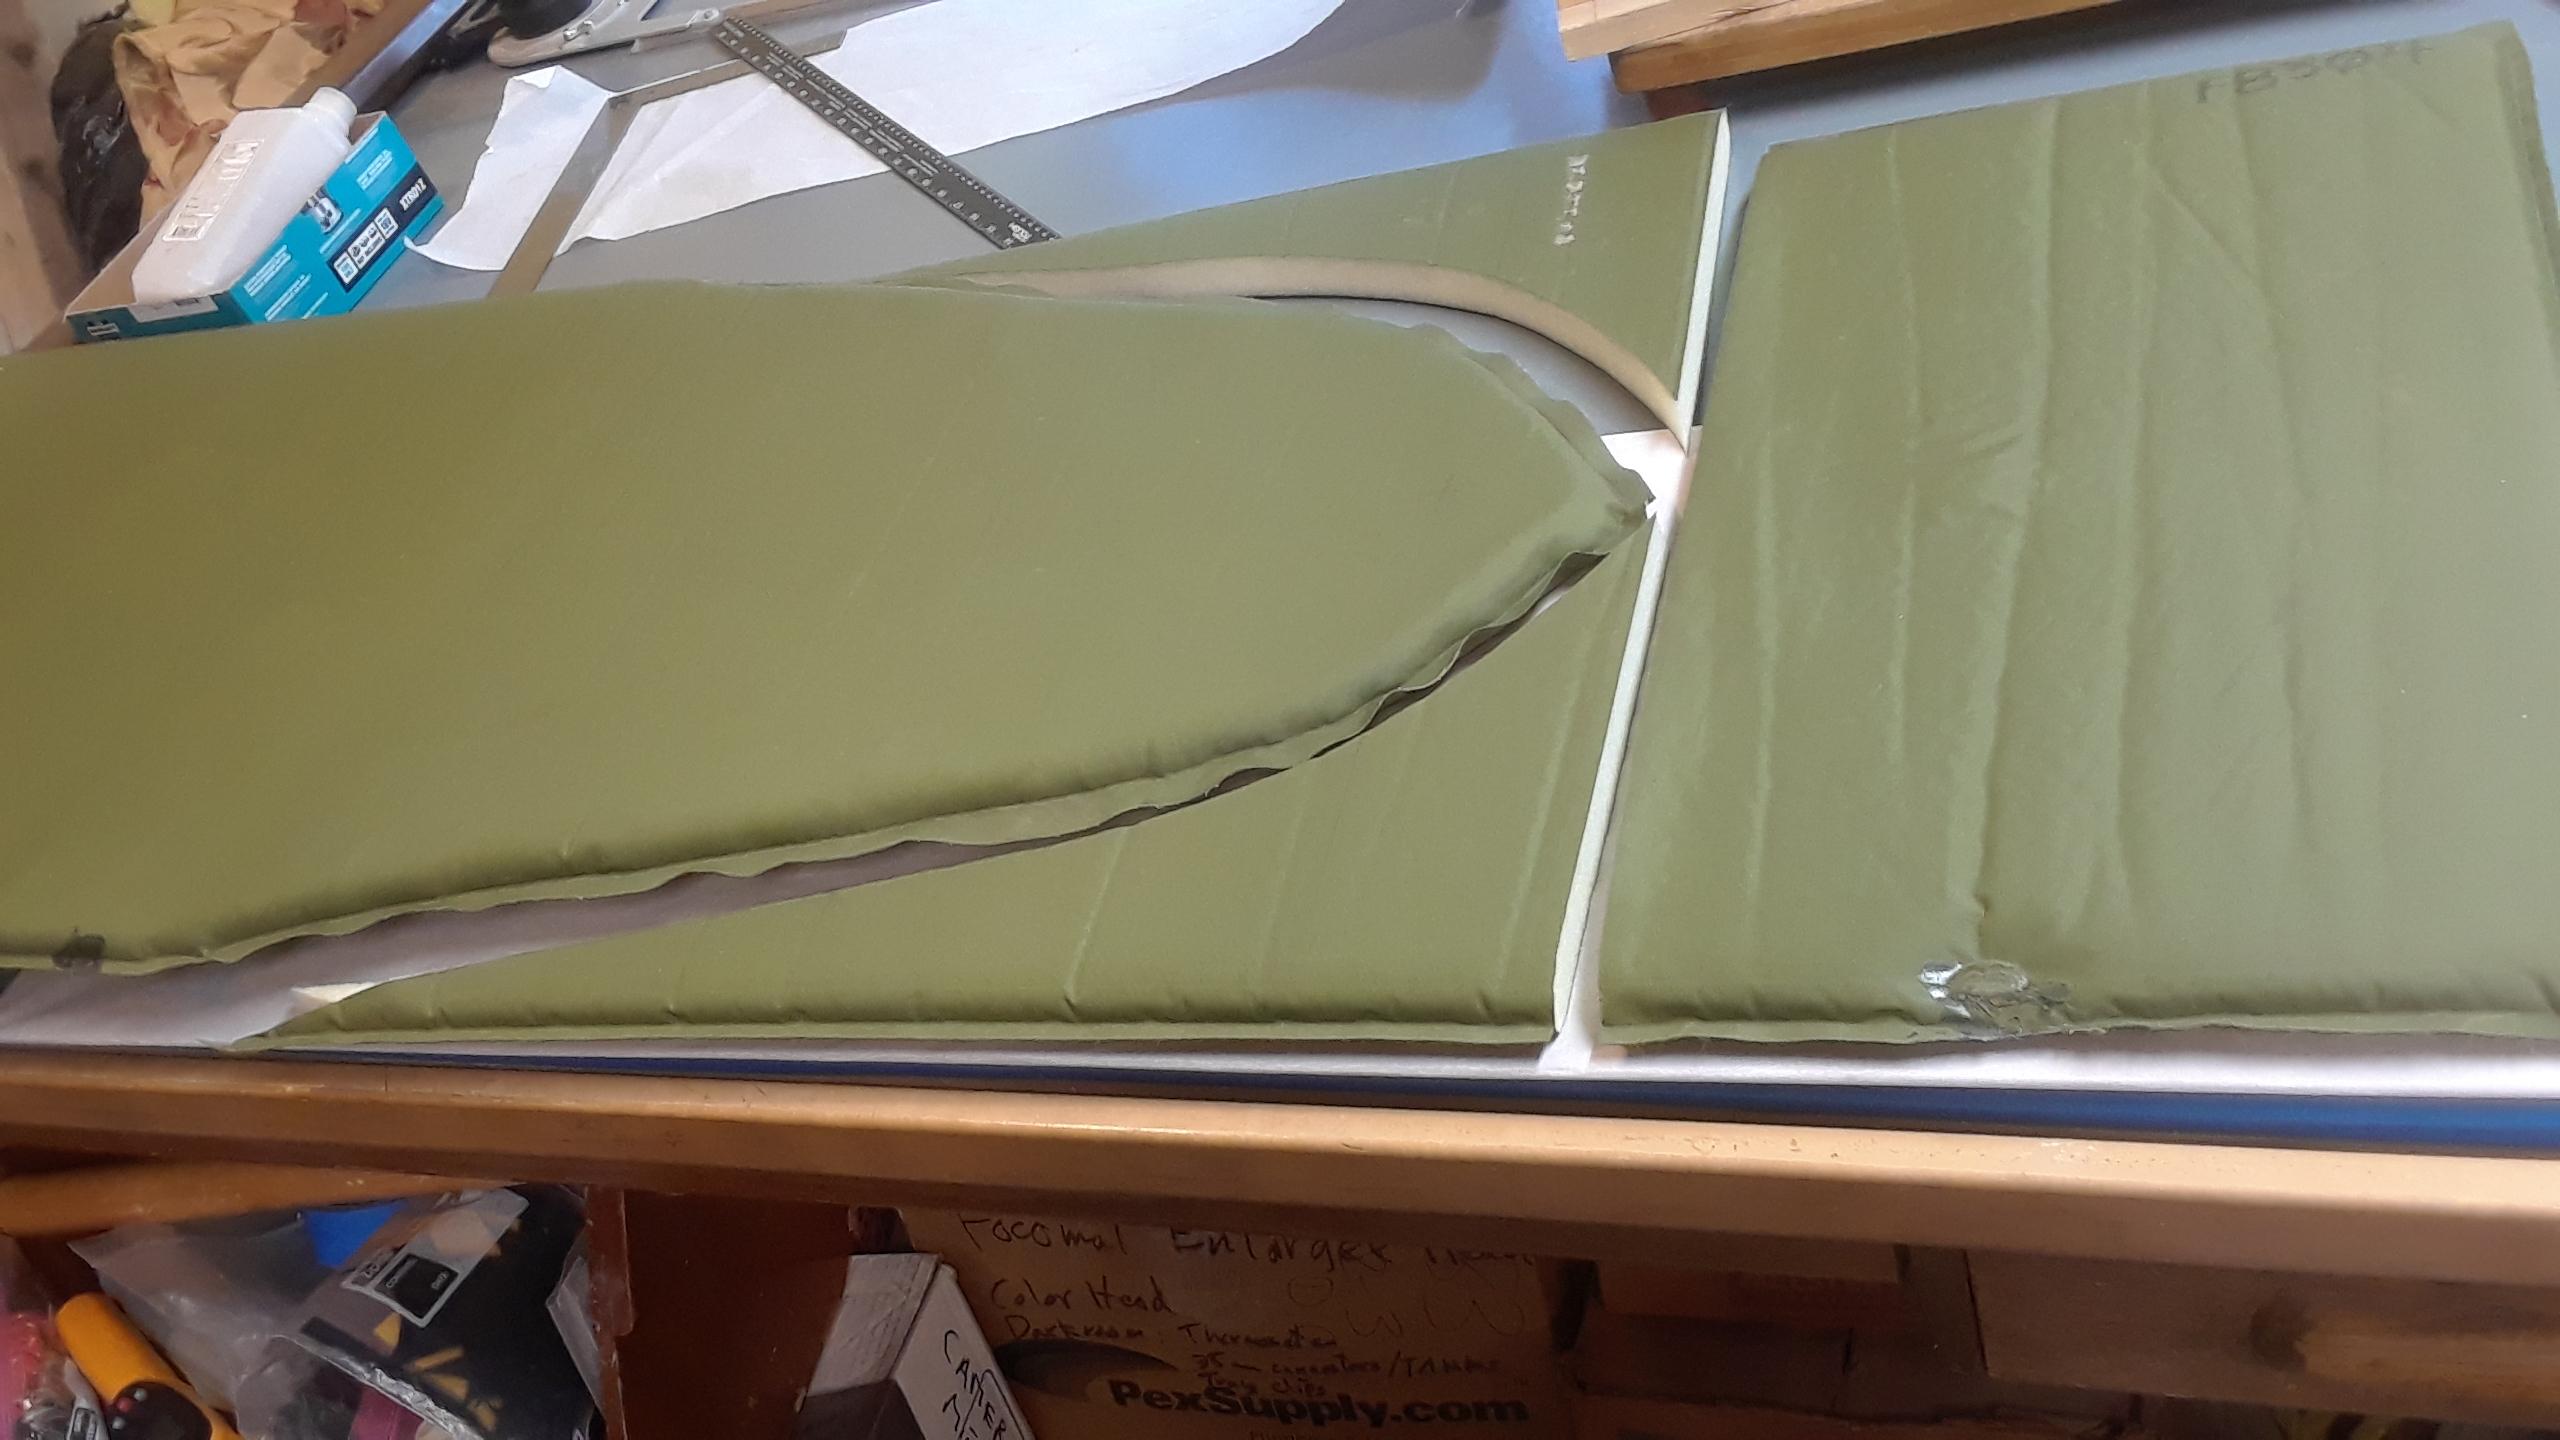
The hardest part was the junction of the old seam and the new seam. The foam at this point kept getting in the way and I may have worked it too hard. It had tiny needle or pin size bubbles at each of the two junctions. Aquaseal or Seam Sealer to the rescue!
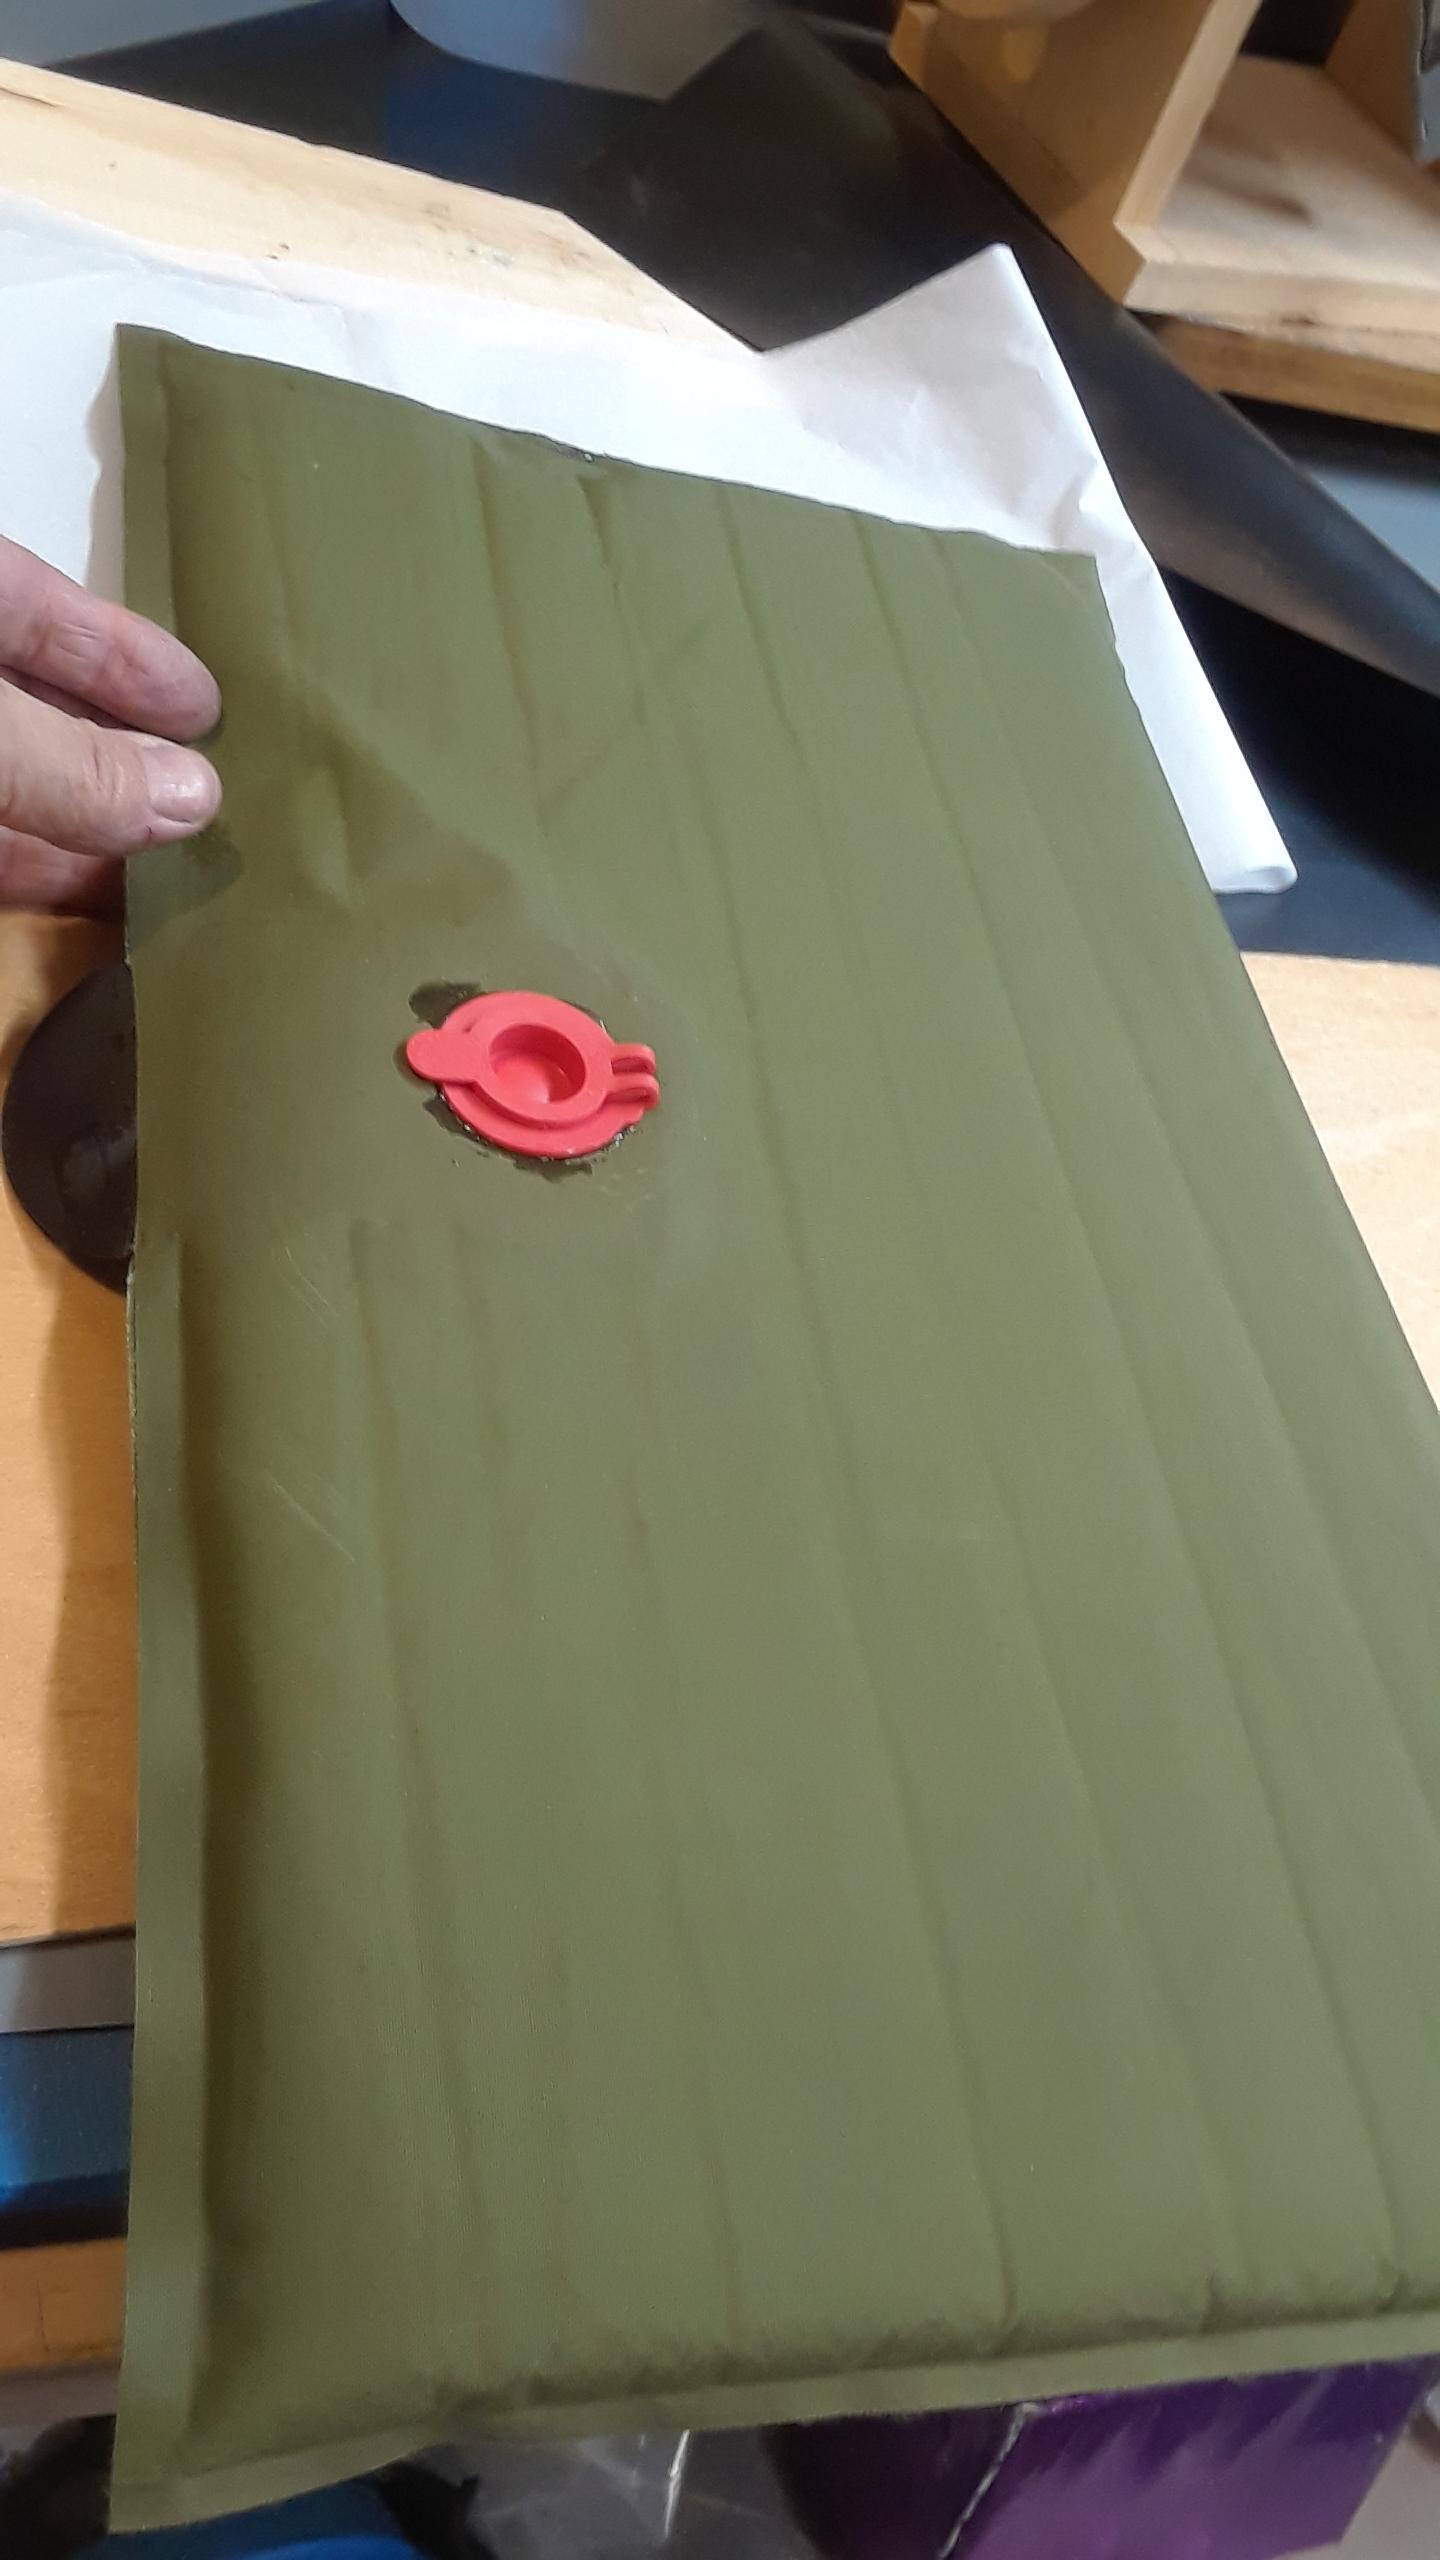
I made a small seat pad out of the end of the pad by adding a red one-way valve, with a 420D two-sided reinforcement patch. I extended the patch beyond the seam edge to give me a purchase when opening the valve. Or as a tie down.
I now had a 1 inch (25 mm) thick pad fitted to the floor of my packraft. If I were doing it again, I would take extra care to remove foam where I cut through the old seam. I would also add 420D tabs for tie downs. I would even consider adding a 1/2″ (12 mm) strip of 420D fabric around the perimeter of the pad. I think the extra TPU coating on the two-sided fabric would help the TPU to saturate through any remaining foam particles, and insure the strength of the heat sealed seam.
- You must be logged in to reply to this topic.