Home › Forums › DIY Packrafts › Tips & Tricks
- This topic has 29 replies, 11 voices, and was last updated 1 year, 10 months ago by
 Opie.
Opie.
-
CreatorTopic
-
February 14, 2017 at 7:18 pm #2735Matt (Admin)Keymaster
Please post any tips and tricks you have developed during construction of your DIY Packraft! I frequently update the How-To pages based on your feedback, so you’ll be doing everyone a favor, and I always try to give credit where credit is due.
Note: If you wish to reply to a specific comment below (instead of starting a new thread), click the grey “Reply” link above the specific comment you are responding to – then your comment will appear nested below that comment. If you don’t click the “Reply” link for that comment then your own comment will appear out of context.
-
This topic was modified 9 years, 4 months ago by Matt (Admin).
-
This topic was modified 8 years, 2 months ago by Matt (Admin).
-
This topic was modified 4 years, 1 month ago by Matt (Admin).
-
This topic was modified 9 years, 4 months ago by
-
CreatorTopic
-
AuthorReplies
-
-
August 4, 2024 at 1:05 am #19480OpieParticipant
<p style=”text-align: left;”>Here are some things I learned and ideas from my Green 2P build .</p>
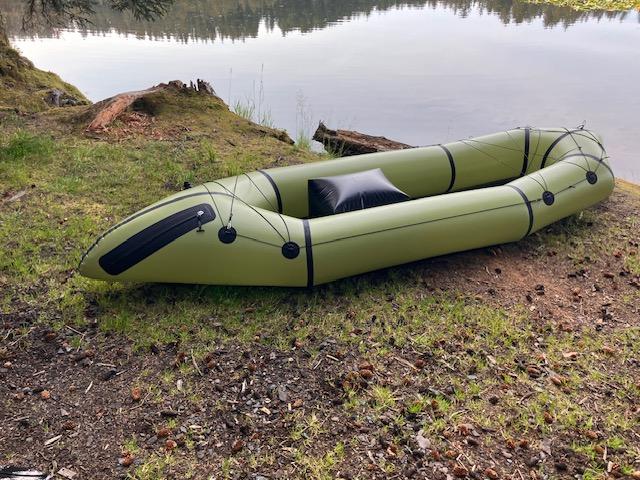
I personally preferred aquaseal fd over seam grip. I sealed every tube and floor seam on the inside only and used a 1-1.5cm wide application of sealant.
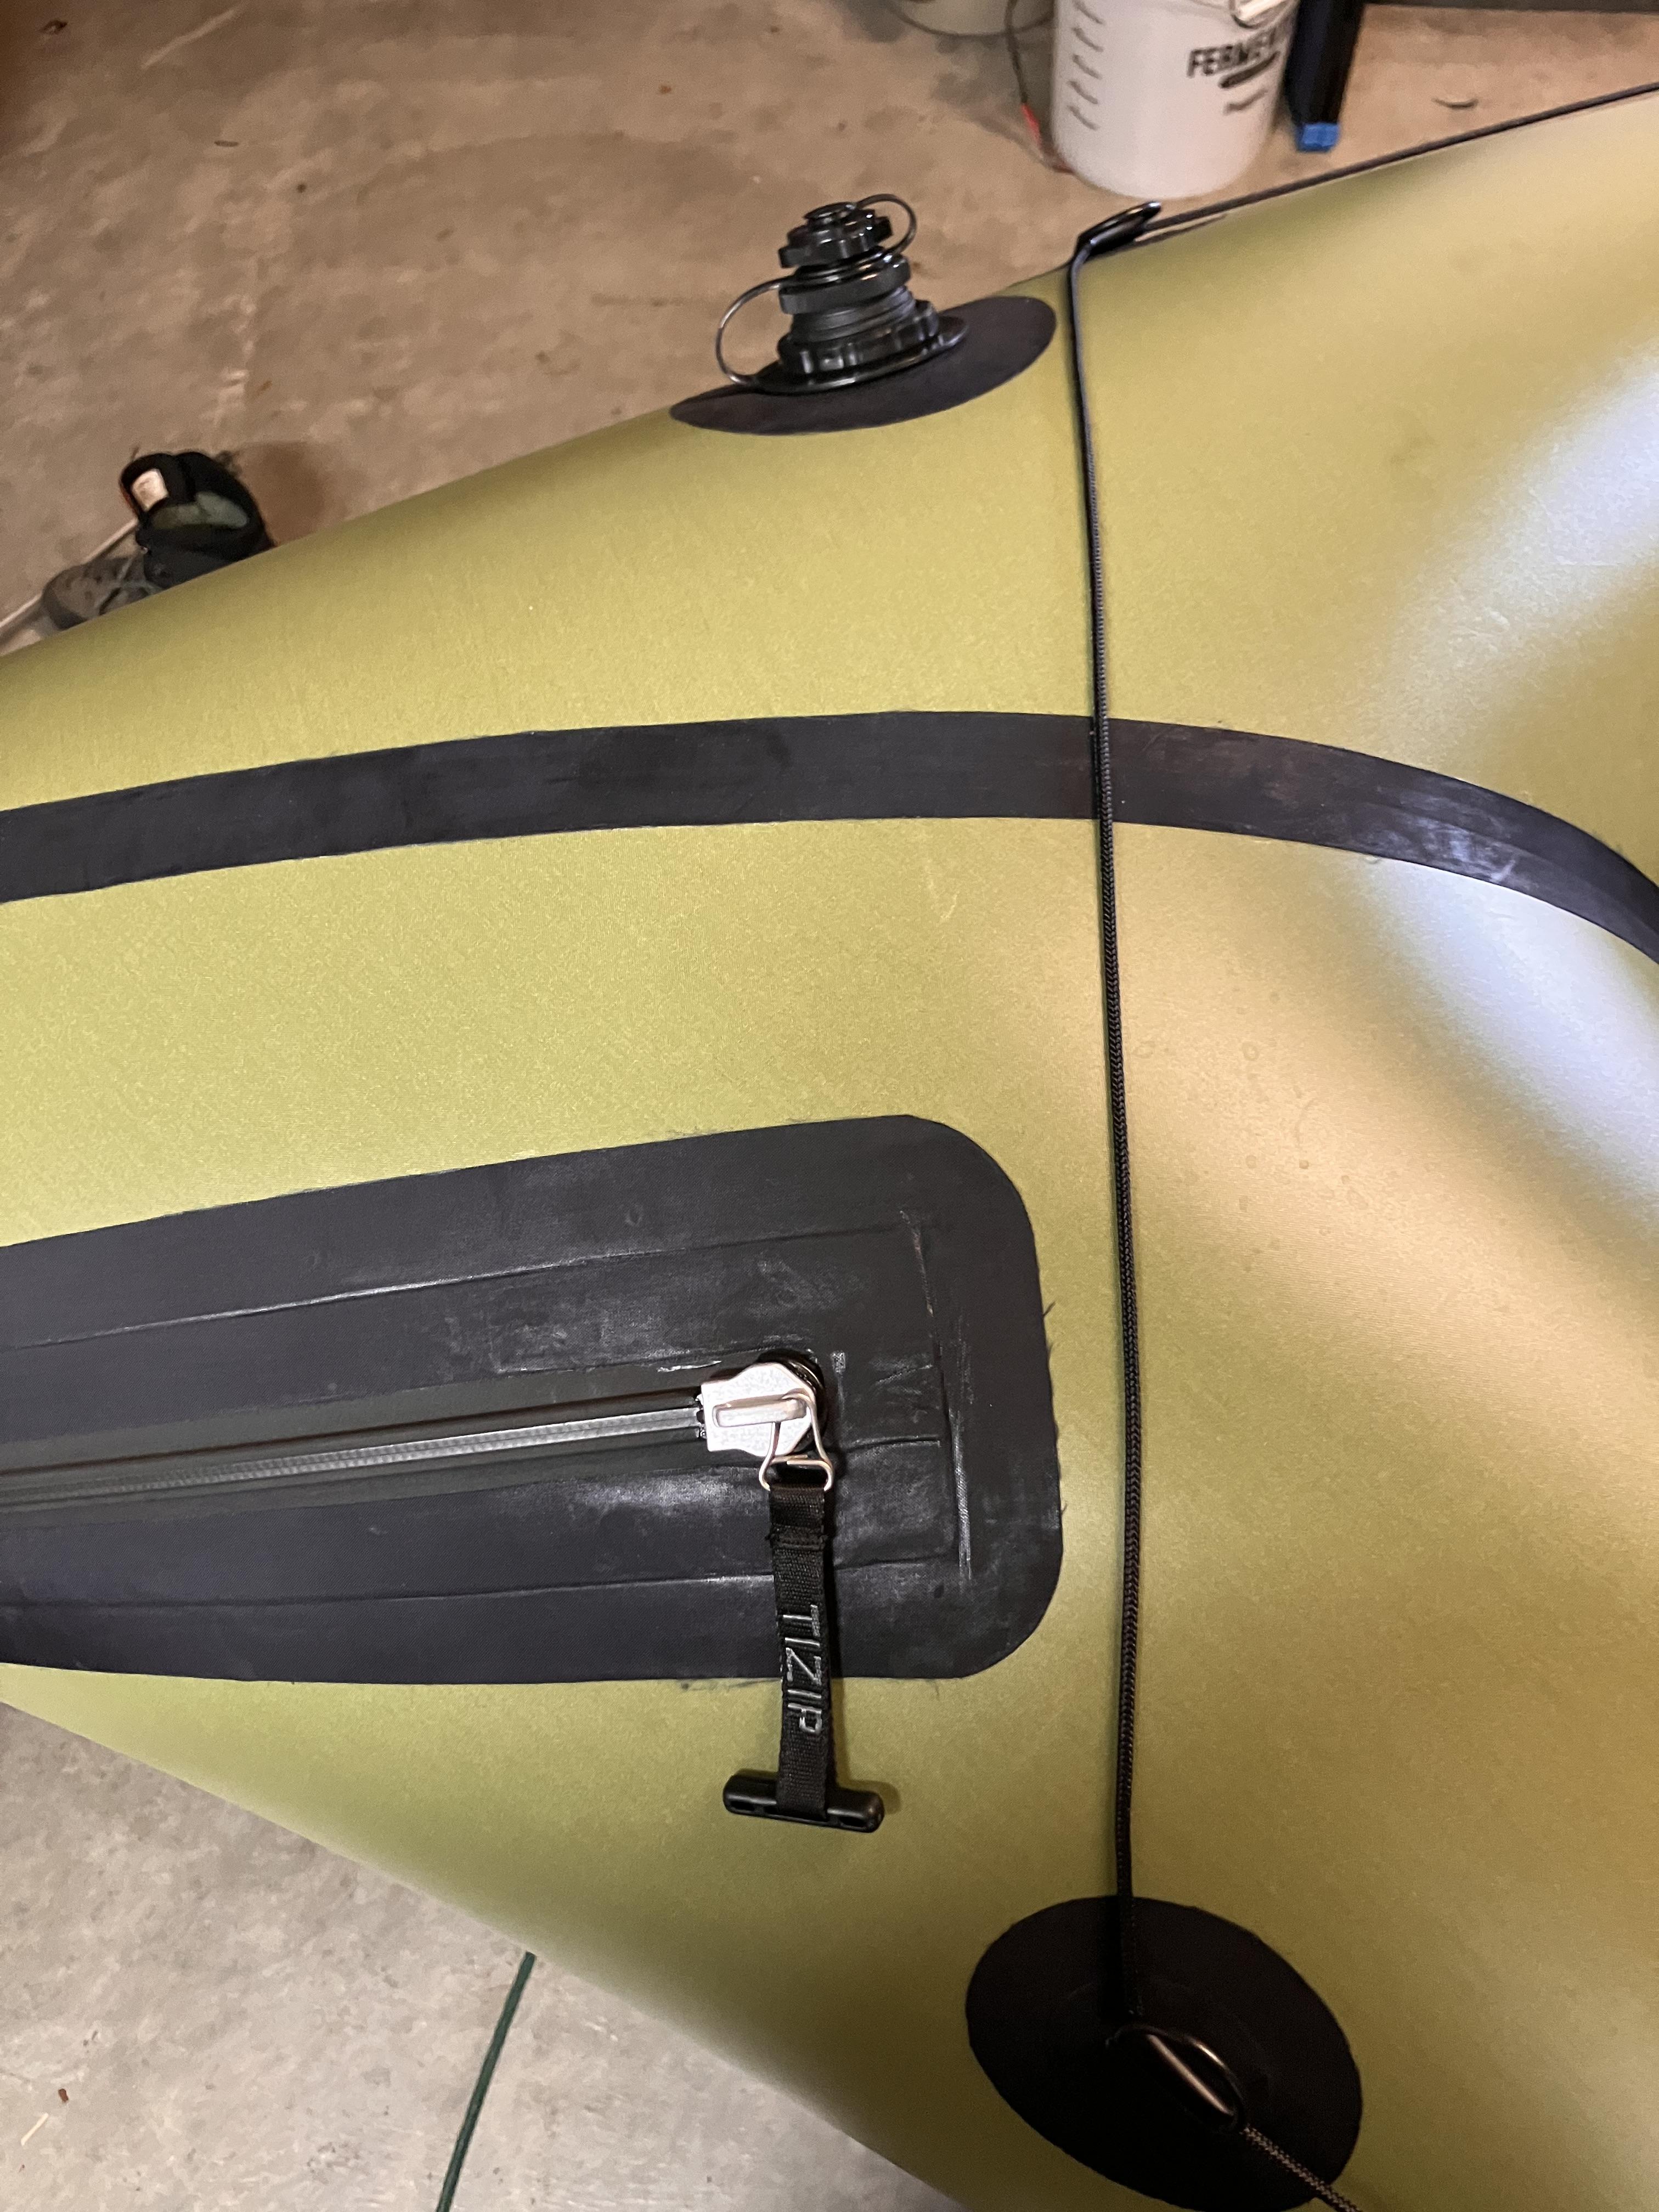
I installed the Boston valve and zipper using the recommendations however I moved the zipper forward (parallel to the seam but more towards the bow 1 inch, which I’m glad I did due to slightly trimming to make the stern seam even). I might have moved the inflation valve to match the distance from the seam to the same as the end of the zipper(about 150mm). This would have made installing tie down points easier to make symmetrical however the valve may be in the way to tie things down to the stern in that location.
I seam sealed the zipper flange to the tube material after it was completely installed into the panel. I don’t know if it helped but I know it didn’t hurt anything.
I installed the Boston valve before I welded the panel onto the floor and it worked very well.
Install the Boston valve and zipper into both panels then lay panels on top of each other to ensure they are exactly the same size/shape before attaching to the floor. I did not do this and I think my stern seam would have come out a lot more straight if I had. It is the only part of the raft that I feel I could have done a better job given my experience level.
I welded all the tie down points on while inflated. This was very easy to do but I made a demo video of installing while inflated that I will try to post. https://youtu.be/AjPfHmqTkBA?si=uzcMUYzyfIH3E_QI
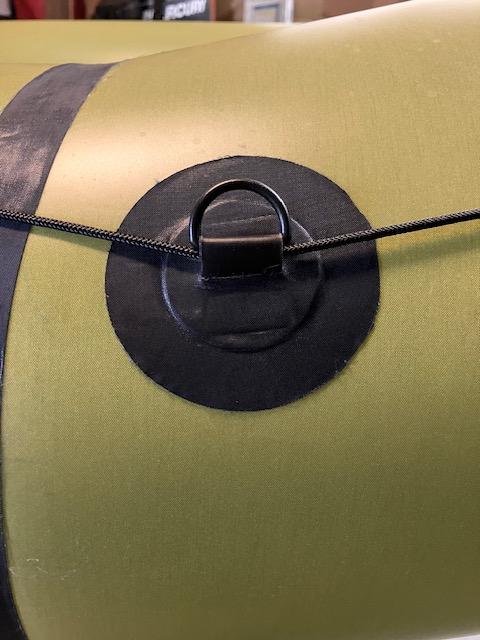
I placed the tie downs outward about 45 degrees from the top of the tube.
I made a jig from a 2×4 to hold the d ring and tab straight while assembling the tie downs. I also made a video for that. https://youtu.be/yWElGk-94PY?si=atYpiCYKCukSl5Wm
I cut the d ring tabs 60mm long. It’s a personal preference but I think it came out well.
I will likley add 3 more tie downs per side on tube section 3 but I ran out of d rings. The 2p raft has a lot of surface area for a solo paddler to use and the weight penalty will be worth it.
The inside floor slit backing piece I cut 5cm wide.
I welded the reinforcement strips to the floor as wide as my iron. This means the reinforcement strip to tube material is narrower but it helped me. It’s not centered from point to point but it protected the floor from over ironing.
I would have installed the tie down tabs in the reinforcement strip if I had read about them before I got to the attachment point step. It was a missed opportunity for me.
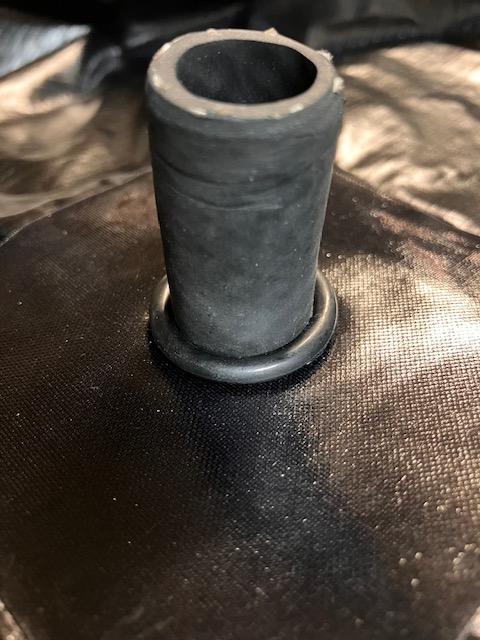
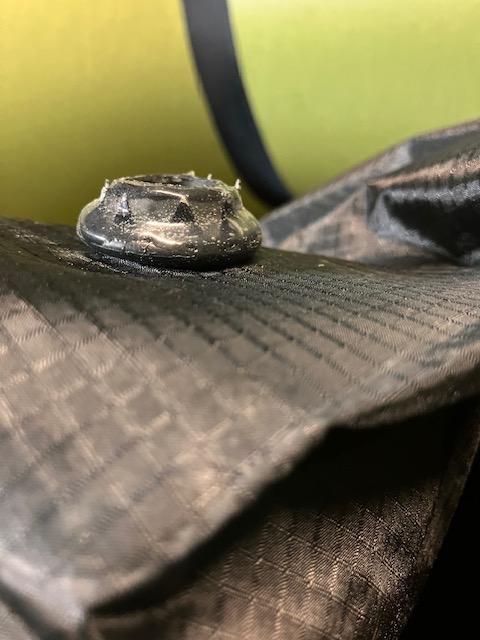
I used o-rings on the inflation bag hose to support the sealant better. I’ll post pics.
I made the inflation bag into a roll top bag as others have.I used my silver sharpie to make very small dots. I noticed the welds don’t stick as good wherever the sharpie was placed.
<p style=”text-align: left;”>The seat was my biggest problem surprisingly. I would not recommend that as a first step. Being all black it’s difficult to determine your weld especially without the hours of experience you get from the raft. Use a metal straight edge to weld against to get ur seams perfectly straight and even. Use tailors chalk to mark your lines. Install a top flange over the Boston valve just like the raft. The biggest change I would do is to cut a 20cm slit in the seat to turn the seat inside out. Then weld a strip of fabric directly over the slit. I had to go this route after hours of battling the strip over the edge weld and needed to reweld the entire seat. My second seat will go much better however I am installing a tpu zipper in the seat for storage so the slit should not be necessary.</p>
<p style=”text-align: left;”>Let me know if anyone has any questions or would like measurements of zipper/valve/ tie down locations.</p>-
August 22, 2024 at 4:05 pm #19601Matt (Admin)Keymaster
Thanks for the tips and the feedback, Opie! There’s great information here, so I’ve combined your two posts into a Customer Build Report, which I’ve posted here.
One thing I would suggest is to coat the outside of the seam strips below the waterline with Seam Grip+WP or Aquaseal, otherwise they will start to peel when you’re scraping down those shallow rivers.
Cheers!
-
-
December 8, 2023 at 2:32 pm #18551clcranorParticipant
Thanks. I also have a 360 camera and a stick for it. I was thinking of putting a fishing rod holder in the spray deck, slightly smaller, right behind the back seat, and adding a strap tie-in for it further up one of the rear tubes. most of the rivers I run have at least 1 stretch of class II-III and I want video of it. I haven’t attached the spray deck to either boat yet (not finished with the second one). I’ll post if I end up doing that.
Clay
-
December 8, 2023 at 3:35 pm #18552Matt (Admin)Keymaster
Cool – sounds good!
-
-
December 6, 2023 at 8:48 pm #18544clcranorParticipant
I didn’t know where else to ask this… You have some great video paddling on your trips. How do you secure your camera to the boat? I can thin of several ways, but none of them will get the same high point of view you have….
Clay
-
December 7, 2023 at 10:12 am #18549Matt (Admin)Keymaster
Thanks, Clay – I use a 360 degree action camera on the end of my trekking pole. The camera captures video of everything around it, and then I frame the shots when I’m editing at home. The trekking pole disappears from the shot because it’s hidden in the stitch line between the camera’s two lenses.
It takes some experimenting to figure out the best places to rest the trekking pole in the packraft – what height the camera should be, how far away, etc. Maybe I’ll make a how-to video about that sometime if people are interested – that’s something I’ve been thinking about for years, but never bothered to do.
Editing 360 video is time consuming, but it does give some unique perspectives, so I think it’s worthwhile sometimes.
Cheers
-
-
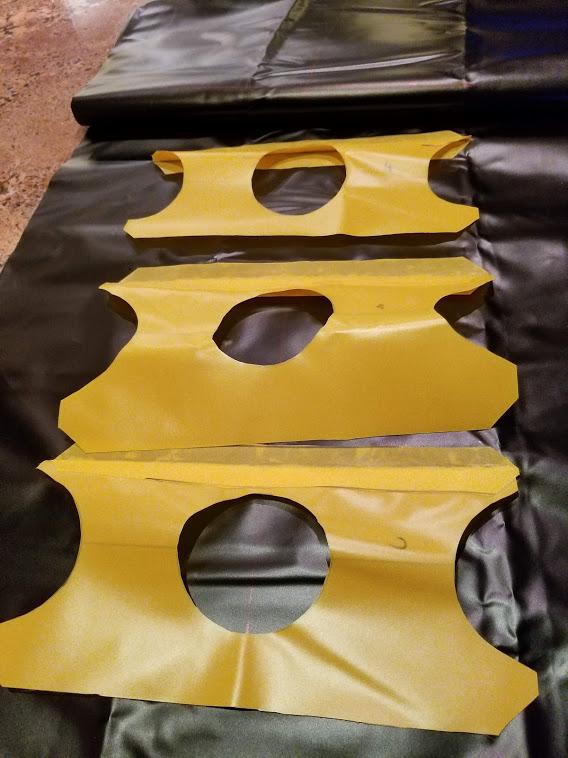
October 22, 2023 at 8:35 am #18438GReynParticipant
With some advice from Matt I made some directional attachment points for adding an Alpacka raft backband. The photos are pretty self-explanatory if you’ve gotten to this stage of your build. Outer dimensions ~3.5″x6.5″.


-
October 23, 2023 at 8:40 pm #18439Matt (Admin)Keymaster
Thanks for posting this! Cheers
-
-
August 3, 2023 at 2:34 pm #18204jJBBParticipant
I made my curved forms out of florist foam like this: https://www.walmart.com/ip/FloraCraft-FloraF-M-Foam-Disc-1-9-inch-x-9-8-inch-Green/593218875?from=/search
It’s easy to cut a large and small form out of one disc using a bread knife. I added a few layers of aluminum foil before the masking tape to keep it from melting and had no problems. After reading Leslie’s tip above, I would probably use a strip of silicone instead of the foil. A single silicone placemat would probably work great and be enough material.
It’s a good, cheap option for people who don’t have access to the tools to make them out of wood.
-
August 8, 2023 at 5:46 pm #18220Matt (Admin)Keymaster
That is a great idea! I’m going to add these heat sealing form tips to the Heat Sealing page.
-
-
June 10, 2022 at 9:53 pm #16406LeslieParticipant
I picked up a silicone bread loaf pan from the the thrift store and cut the smooth outer edge off (the straighter and longer the edge the better… maybe a cake pan?). I found this worked perfectly for welding seams as it has a slight give to it when you press with the iron and you don’t end up with nearly as many voids in the weld as you do when working on a hard surface. It is also fine with high heat, doesn’t stick and the underside of the weld is smooth and unblemished.
-
June 13, 2022 at 7:36 pm #16411Matt (Admin)Keymaster
That is a great idea – I will try it myself!
-
-
January 22, 2022 at 5:18 am #15668LuckyjimParticipant
Jigs and tools I used… The 8″ cast iron pan made a great Hot Iron holder. It also acted as a heat sink so the Iron did not get to hot. My first raft…..
-
January 22, 2022 at 10:46 am #15669Matt (Admin)Keymaster
Great idea! I find that the weight of the iron’s cord sometimes drags the light aluminum stand off my table – this would certainly solve that problem!
-
-
June 4, 2021 at 6:17 pm #14594heatshearParticipant
Weight-weenie idea: I cut some fabric out of the seat baffles. I expect these would be plenty strong if made out the 115 GSM fabric?
-
June 5, 2021 at 9:32 am #14600Matt (Admin)Keymaster
Yep, I’ve been testing seats made entirely of 115 GSM fabric and haven’t had a problem yet (except where I did a poor heat sealing job on one!).
-
-
November 24, 2019 at 12:02 pm #11270unnamedpeaksParticipant
I got it at a dollar store. It looks something like this https://www.amazon.com/IMISNO-Sheets-Paper-Colors-thickness/dp/B01I1TED18/ref=sr_1_4?keywords=1mm+foam&qid=1574625656&sr=8-4
-
November 15, 2019 at 4:38 pm #11233unnamedpeaksParticipant
I found some very thin foam at a craft store, 1mm or less, and use this under the seams when I iron, as well as affix it to my bowl or form. It makes things WAY easier. The welding is faster, and requires less passes, usually can do in one go. If it’s too thick it causes problems, but if you can find some thin stuff to make the surface have a little give, you will love the result.
-
November 17, 2019 at 2:48 pm #11247Matt (Admin)Keymaster
Cool – any idea what kind of foam it is? Thanks!
-
-
June 12, 2018 at 3:01 pm #6584alaskastinsonParticipant
Turn it inside out.
I tacked the 3 tube down using the cardboard tunnel, then turned the entire tube inside out and finished the seam. I found this a lot easier than trying to chase bubbles and inspect the seam looking through the tunnel. I thought I had a good seam until I looked it in the daylight and saw all the flaws.
With minimal origami folding skills, I was even able to turn the entire raft inside out through the zipper hole. After tacking the bow seam from the outside, I turned it inside out and ironed the bow 1-1 seam from the inside. (You’ll only be able to work on one side at a time, since the opposite side will be inside the other.)
This method also works well for adding attachment points. Tape them to the outside, turn the raft inside out and seal away. No AquaSeal needed.
Hope this helps,
Duncan
-
This reply was modified 8 years, 1 month ago by alaskastinson.
-
June 18, 2018 at 1:03 pm #6625Matt (Admin)Keymaster
This is an excellent tip! I had just assumed it would be too difficult to turn the tubes inside out so I didn’t even try it. I’ll give it a go on my next build though!
Thanks
-
This reply was modified 8 years, 1 month ago by
-
April 26, 2018 at 1:11 pm #6166Matt (Admin)Keymaster
I’m sticking this topic to the front page because it got buried – please post tips here instead of starting a new topic.
-
February 14, 2017 at 7:18 pm #2483MikeGuest
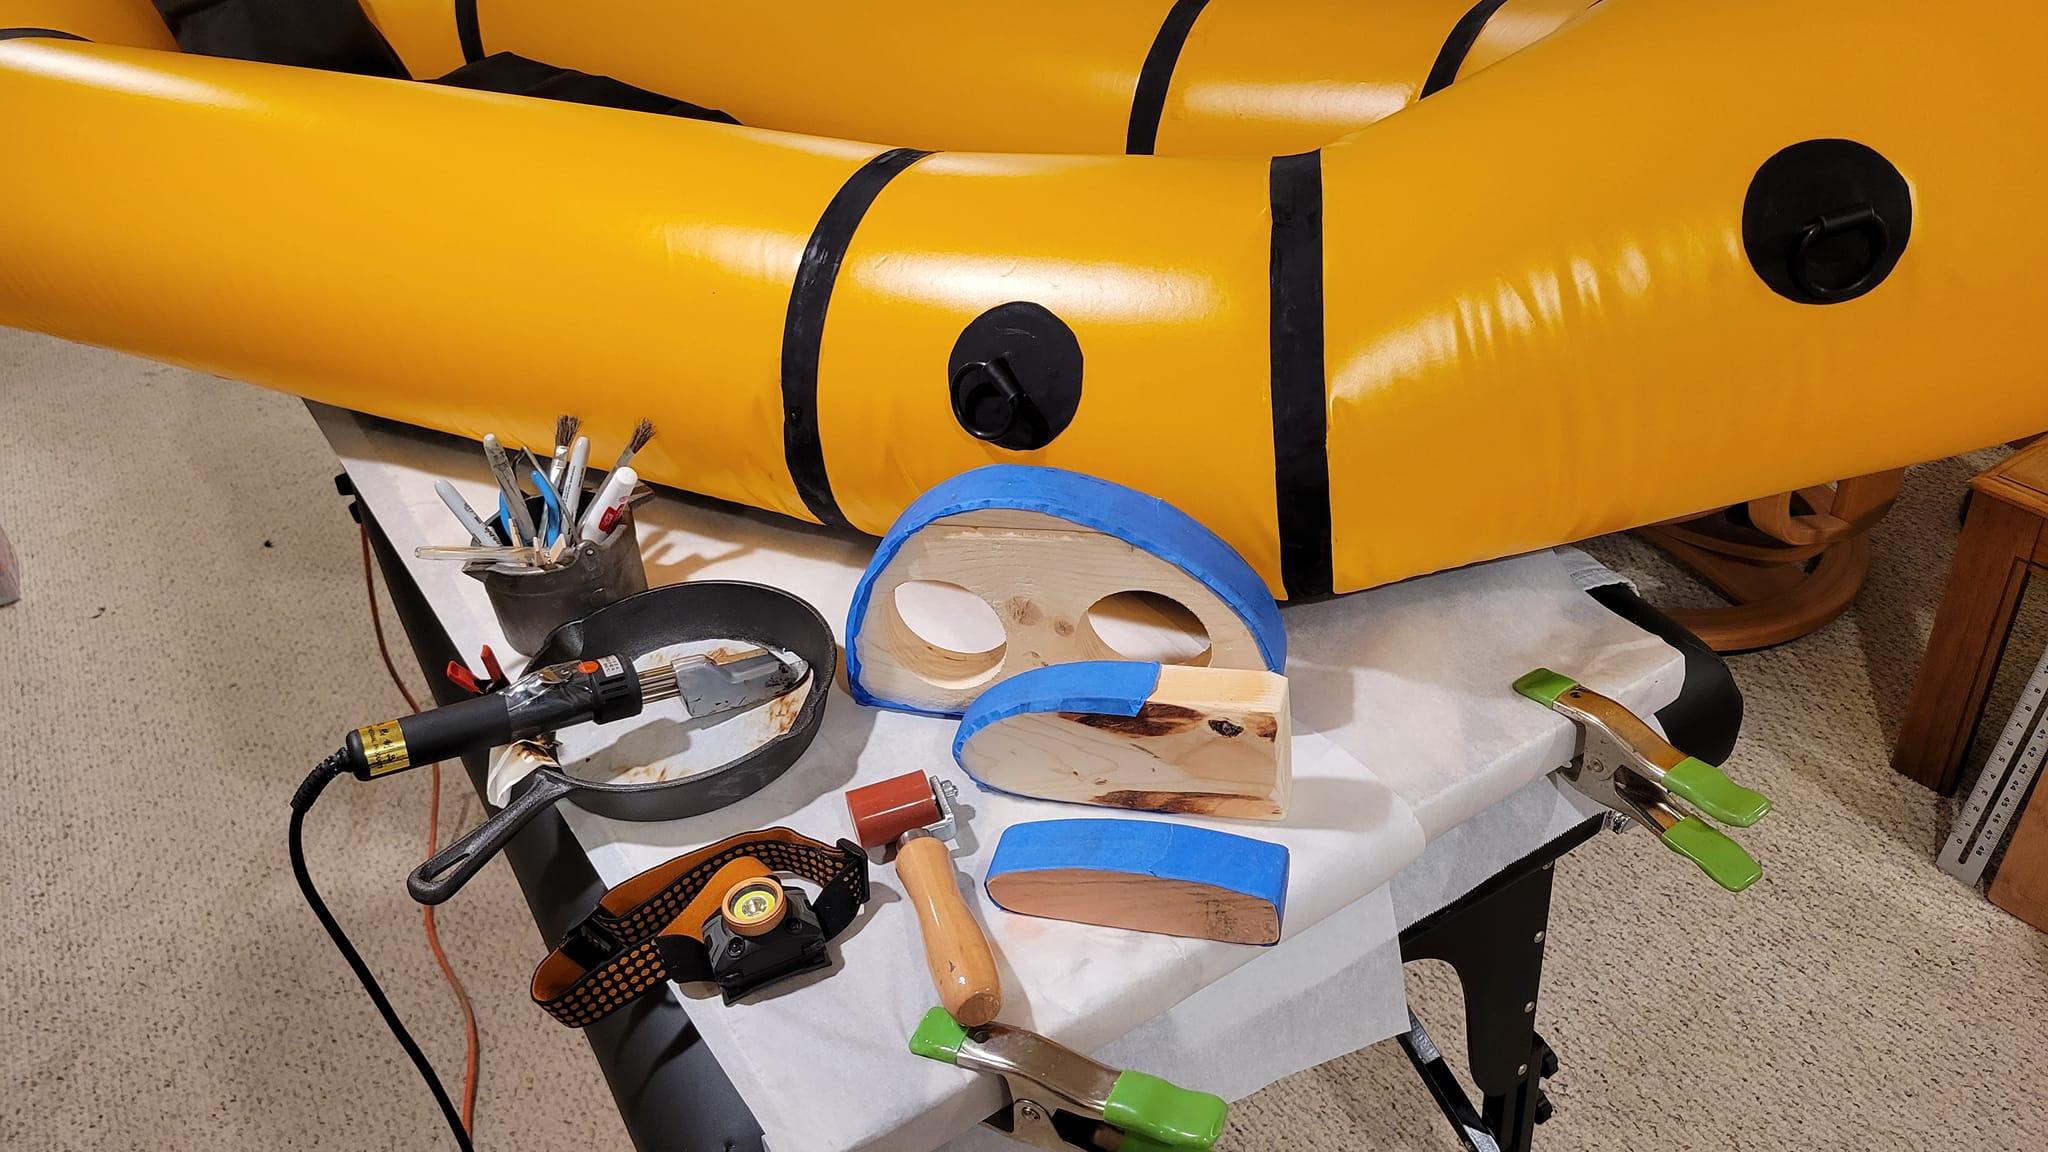
Matt has some very good instructional videos on building his packrafts and all of the techniques will work to make a packraft. I have a few methods that I have used that may be less of a challenge.
I use a sticky stick and semi circle that works very well to hold the fabric while I weld on the belts. These are simply put, 2″ wide masking tape secured to a surface sticky side up, either flat or ached. The advantage is that you can lay your fabric on these surfaces and they will hold the fabric in place while you align the mating panel. once the panels are aligned you can lay the belt centered over the panel joint and weld about a 4-6″ section without the fear of the fabric shifting. After you weld your section you peel off the fabric and move up the panel to do the same procedure again. I find this much faster than the bowl and parchment paper.
Another I do is use a press block to press the welded joint after the weld rather than use the heat iron. I use a different type of heat system but the same idea, heat up the fabric, remove the heat and run a pressing block over the weld to set it tight. The press is nothing more than a piece of aluminum shaped like a boat with a wood block handle glued to it with JB weld. It’s only about 3″ long and 1″ wide so it’s easy to add a lot of pressure to the weld and not strain your welding tool.
Another thing I have done is to leave a window when welding up the final front and rear chamber weld. This is really simple, at a point that is over the joint junction I only weld one side of the panels for about 4″. After the “skip” on one side I continue the weld to the floor. Now I can add the sealant to the intersection at the front and rear of the raft plus some sealant at the rear tight bend on the inside. Once the sealant is dry I can go back and carefully weld the second half of the panel to the welding belt.
I also have used a small box, not much taller than a shoe box to help in the “tunnel” work. I cut a small hole in the top and taped a headlamp into it to shine down. I also cut a hole at the back (away side) to allow a flashlight to shine through.
These tricks have worked well for me but your mileage may vary. If one or more of these help I’m glad to share
Mike
-
February 15, 2017 at 8:27 am #2490MikeGuest
I tried to title the images but it didn’t take so
First is the 4-5″ access hole in the front and rear center welds before final seam weld up.
The box with the light in the top is next,
Then the press block
Then the sticky stick and sticky arch block with the masking tape mounted.
Mike
-
February 15, 2017 at 8:23 am #2489MikeGuest

-
February 15, 2017 at 8:21 am #2488MikeGuest

-
February 15, 2017 at 8:20 am #2487MikeGuest

-
February 15, 2017 at 8:18 am #2486MikeGuest

-
-
-
AuthorReplies
- You must be logged in to reply to this topic.