Why an Inflation Bag?
The average adult human can expel less than 4 litres of air per breath and a packraft has a volume of over 300 litres, so to inflate a packraft by mouth would take over 75 maximum-capacity breaths (and realistically it takes a lot more breaths than that). Trying to inflate a packraft in this way is an unpleasant and time-consuming task that leads to dizziness and tingling fingers – I tried it once and after gave up after half an hour, when my packraft was only partially inflated.
Luckily, there is a lightweight solution to this problem: the inflation bag. The inflation bag allows you to scoop a large volume of air into the bag, twist the top closed, and then squeeze it to force the air through a nozzle into the packraft.
Packraft inflation bag kit parts:
- Small piece of black silicone rubber tubing (roughly 5 cm or 2″ long and 2 cm or 7/8″ in diameter)
- Small piece of packraft floor fabric fabric, approximately 10 cm (4″) square (you can cut this from the excess fabric attached to your floor piece)
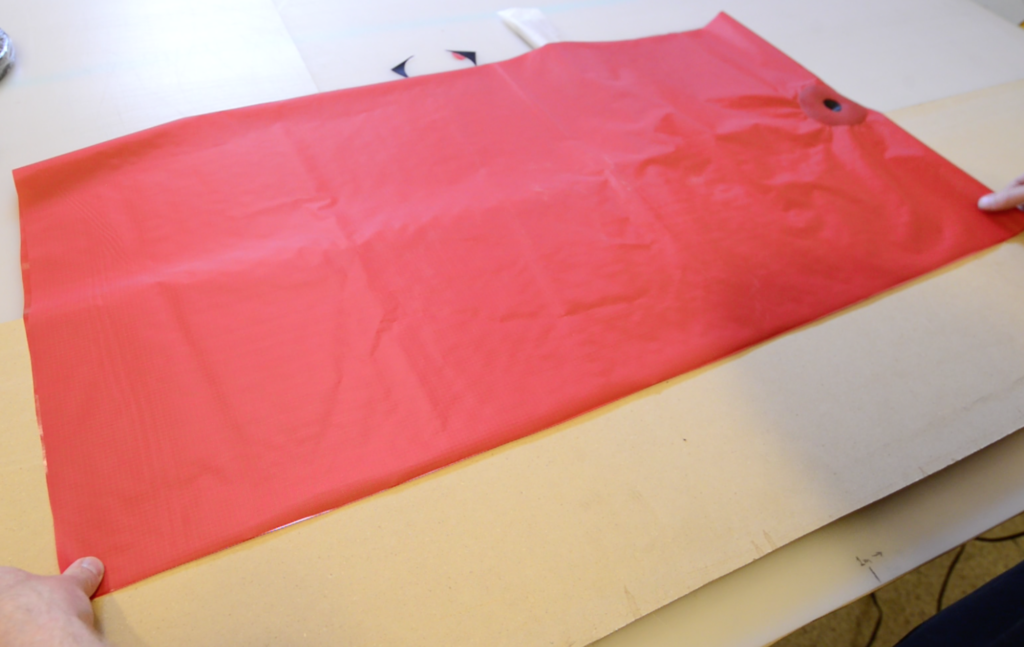
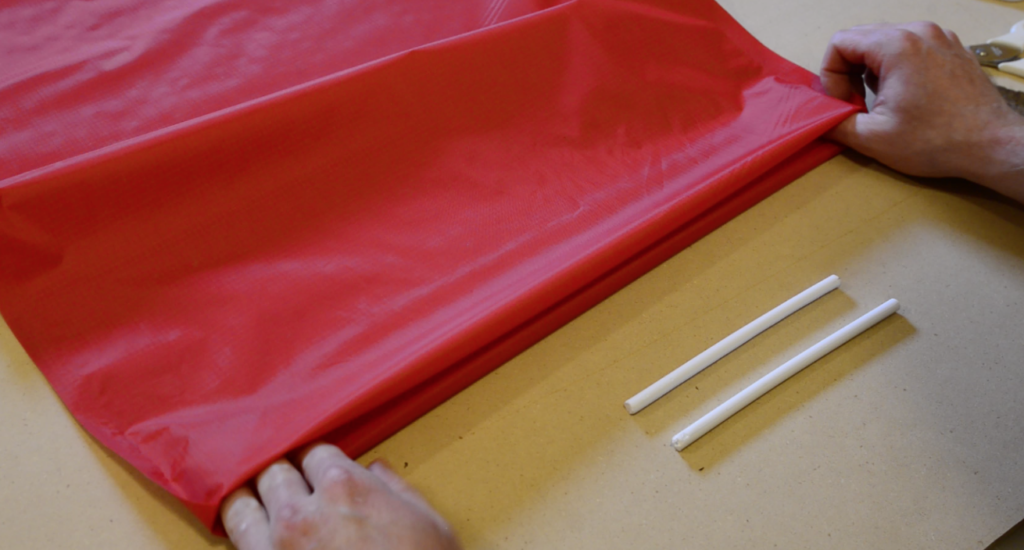
- Approximately 1 x 1.45 m (57 x 39″) of lightweight ripstop fabric
- Caution: If you ordered a spray skirt kit with your packraft kit, the skirt fabric may be the same lightweight ripstop fabric as the inflation bag fabric (depending on when you ordered). Check for scored lines on the fabric before proceeding – scored lines indicate that it is the spray skirt fabric; the inflation bag fabric has no scored lines.
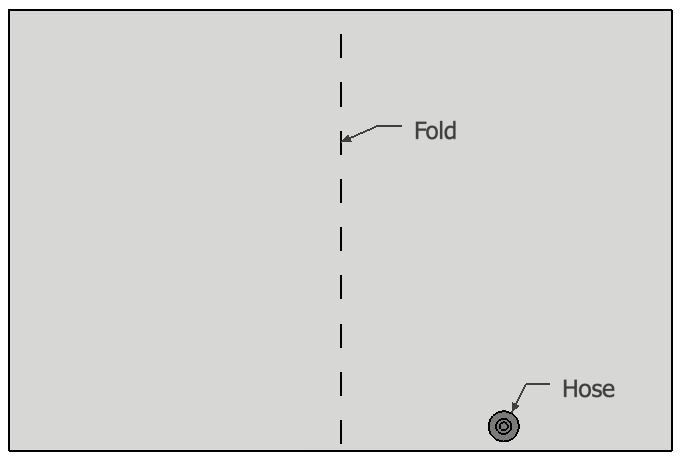
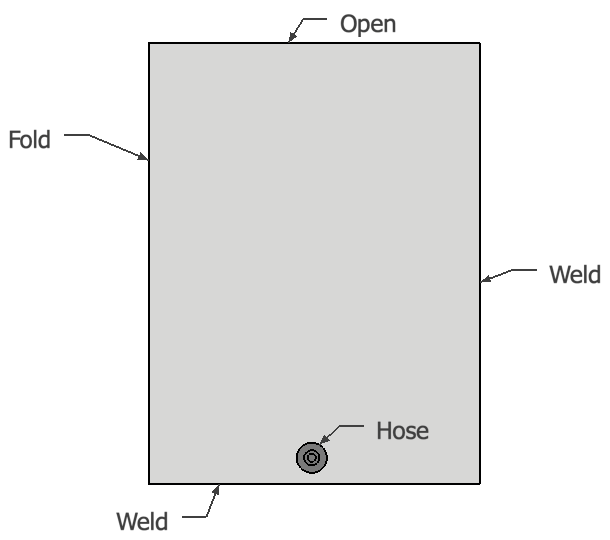
- Note: Newer kits contain a larger piece of fabric than the one shown in the video (see drawings below). In older kits with the 0.5 x 2.0 m piece of fabric, the fabric was folded in half to make a rectangle of 0.5 x 1 m and the nozzle was installed beside the fold. The newer fabric size (~1.0 x 1.45 m) should be folded in half to make a rectangular bag with sides approximately 1.0 m and 0.75 m long. Install the nozzle beside the center of one of the shorter (~0.76 m) sides (i.e. not beside the fold).

Tools required:
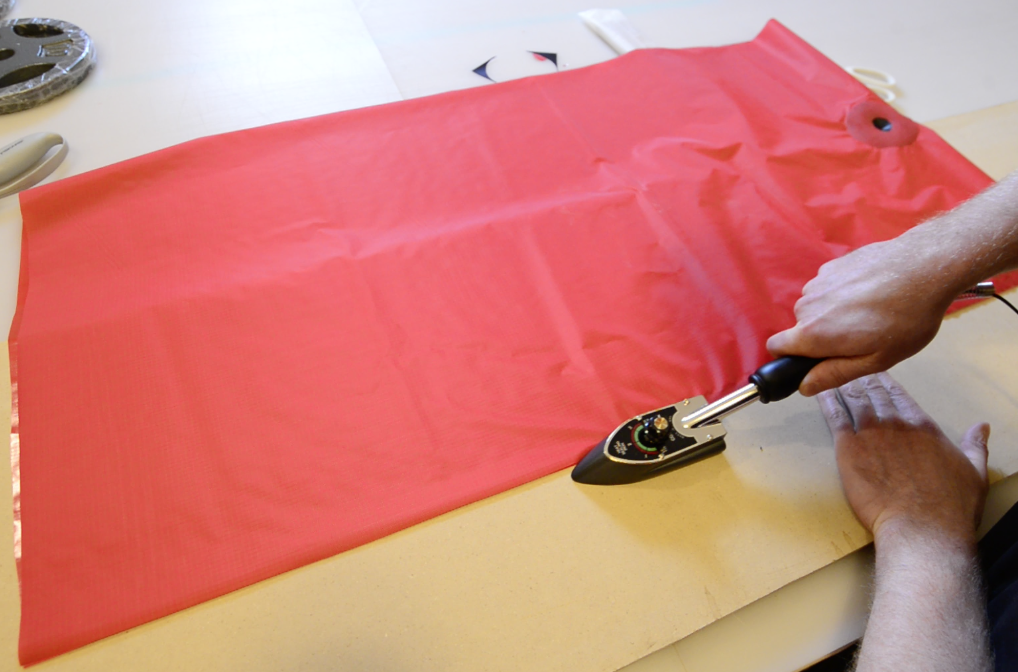
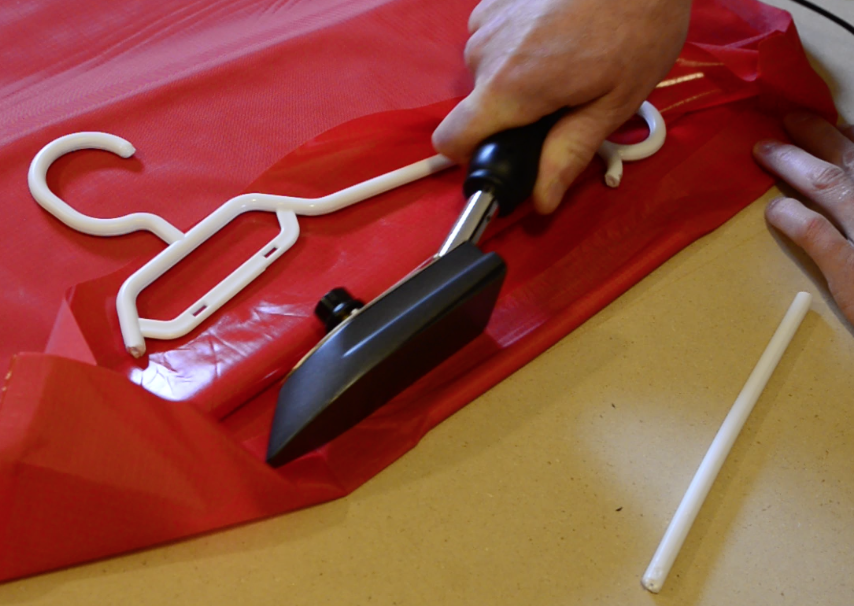
- Heat sealing iron
- Scissors
- Parchment paper (silicone coated baking paper)
- Polyurethane glue, such as Aquaseal
- Ruler
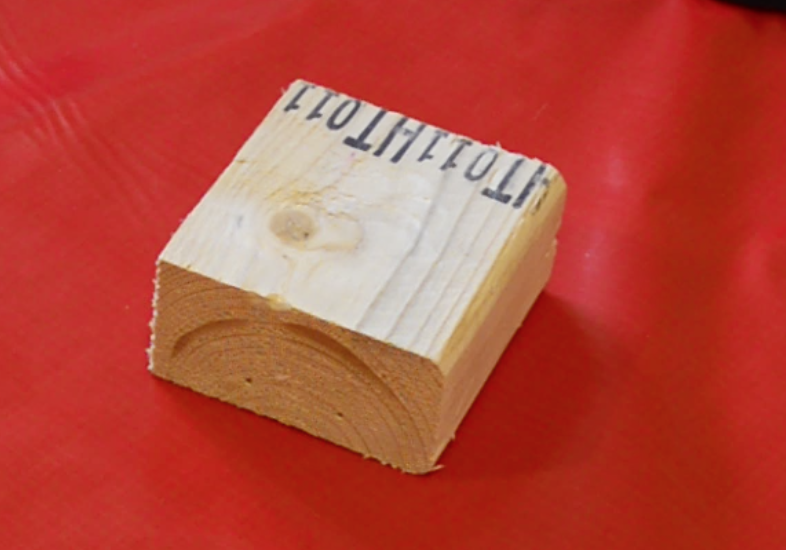
- Small wood block or thick book
- Heat-resistant work surface
- Sandpaper
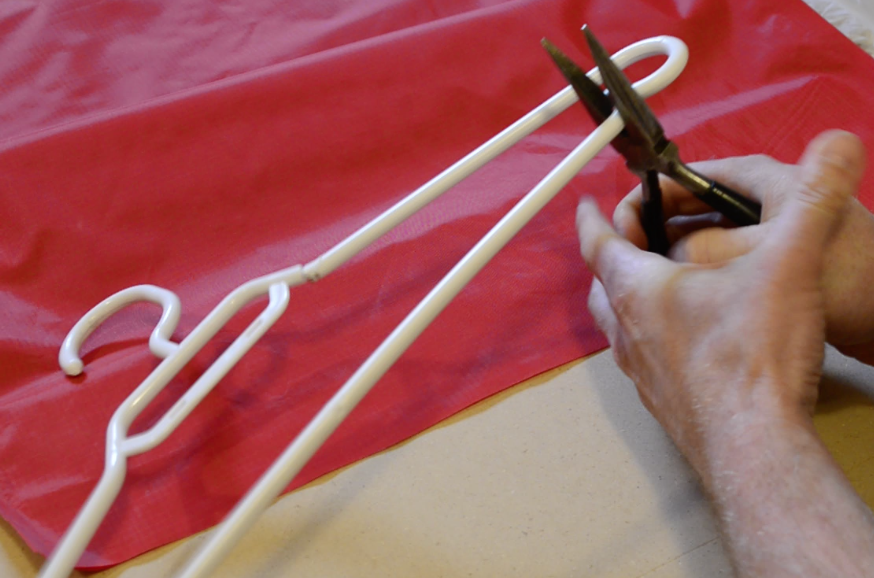
- Plastic coat hanger (optional)
Putting the pieces together:
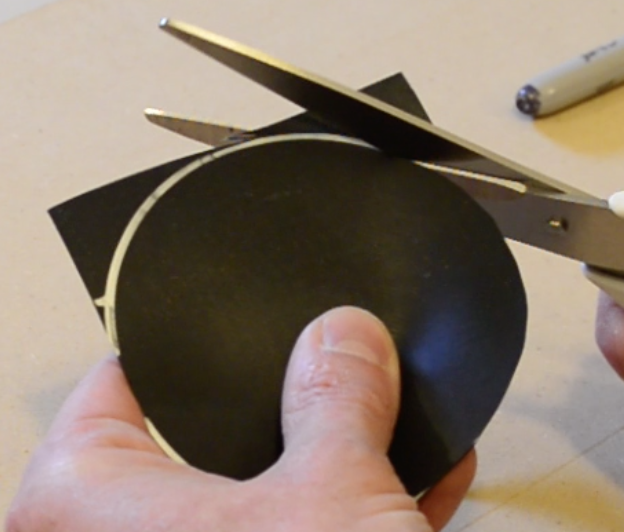
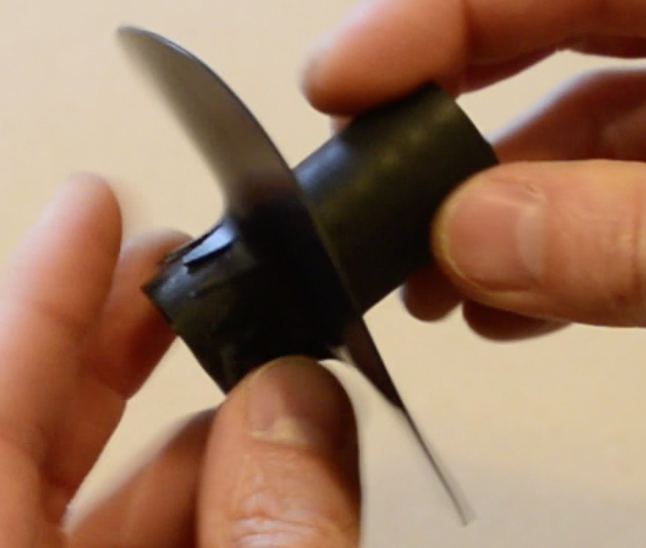
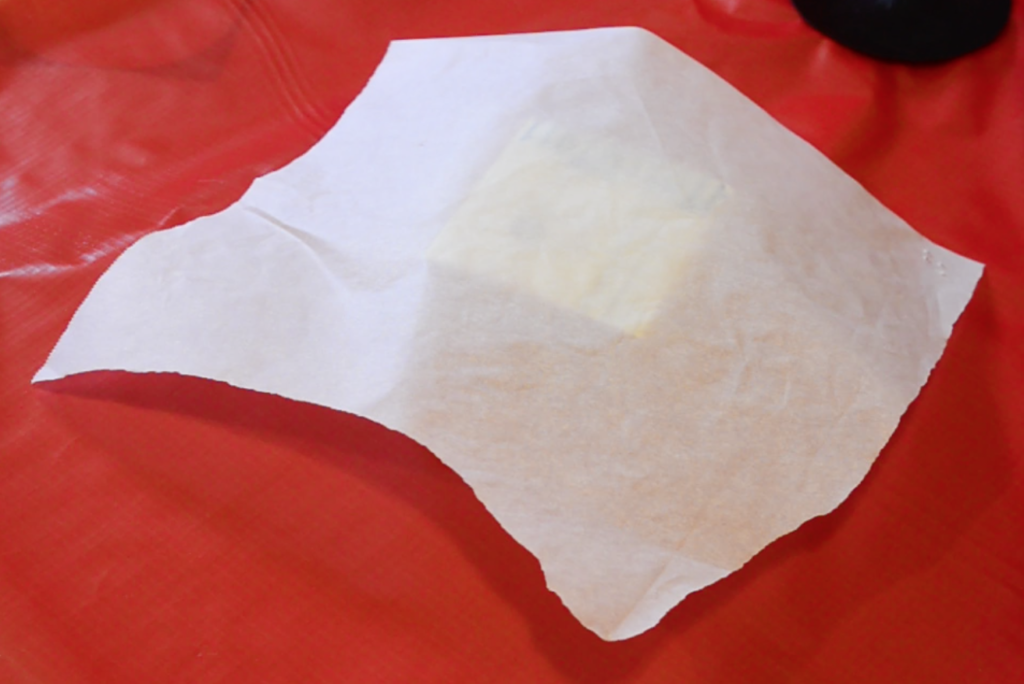
Cut the small square of scrap floor fabric into a circle roughly 8-10 cm (3-4″) in diameter:

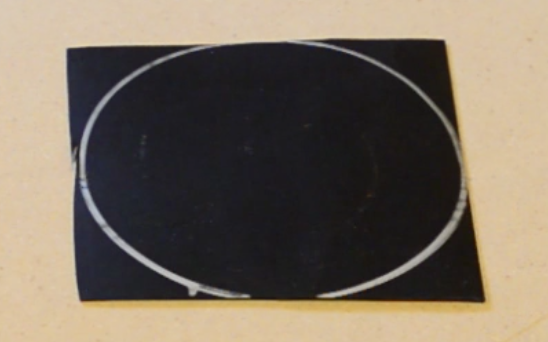
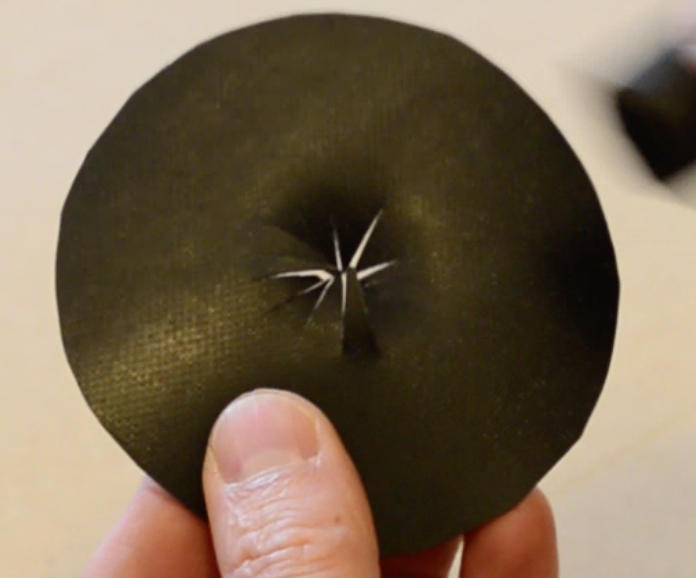
Find the center of the circle by folding it in half twice. Mark it:
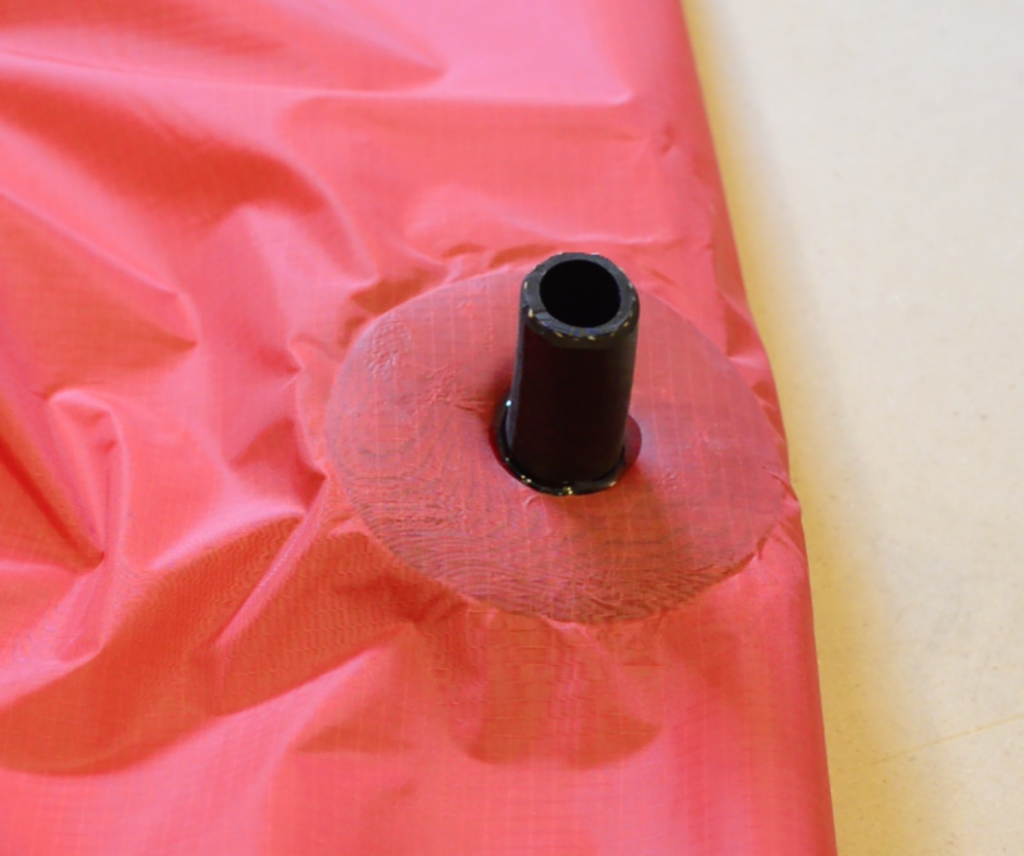
Cut slits in the center of the circle in a starburst pattern (radiating out from the center), just wide enough so you can slide the short length of black silicone tubing through the hole without stretching the fabric excessively:

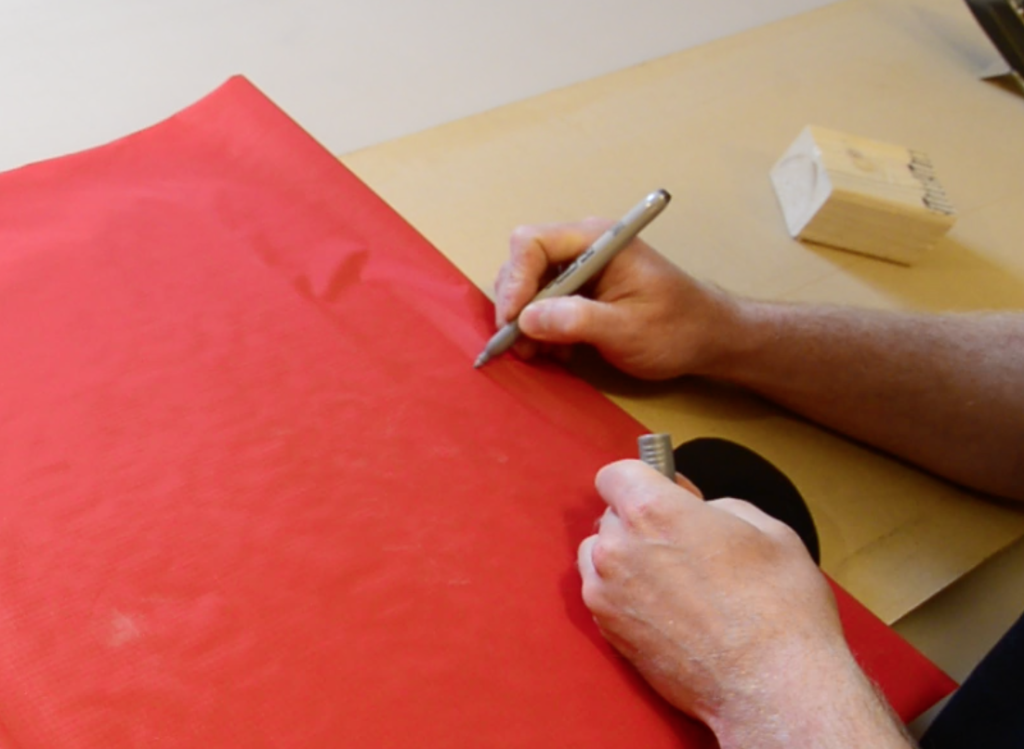
Fold the lightweight ripstop fabric in half and mark a spot where you want to locate the inflation nozzle.

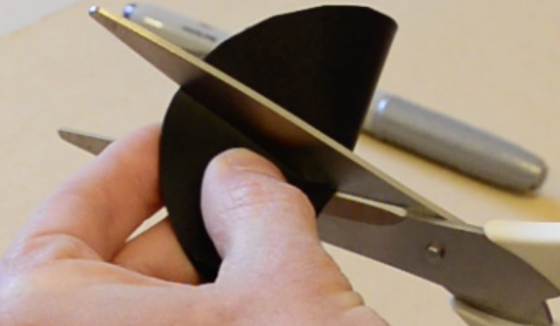
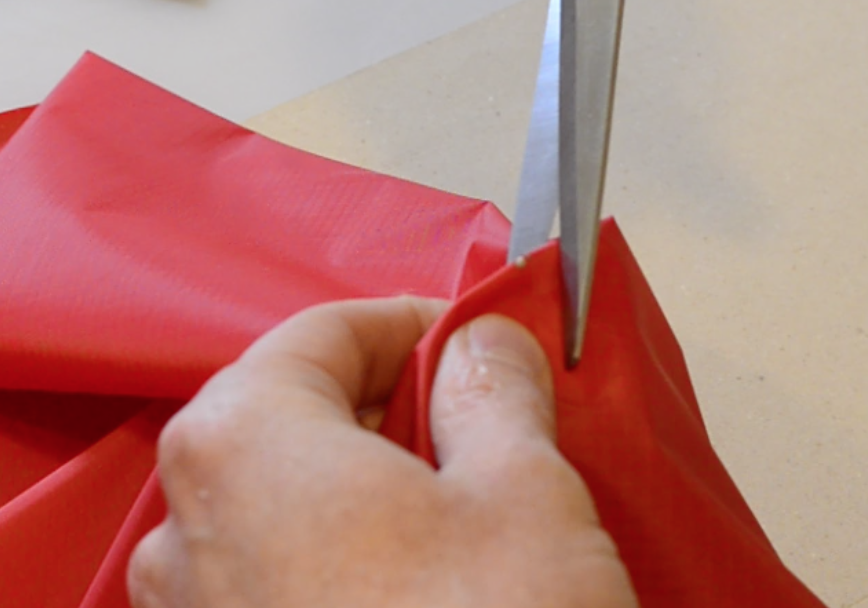
Cut a 2-3 cm (1″) hole at the marked spot:

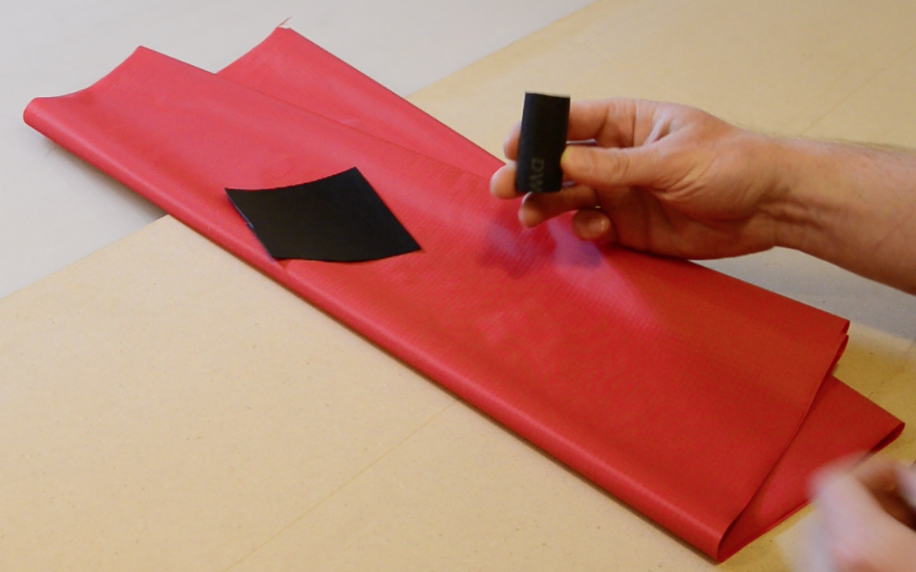
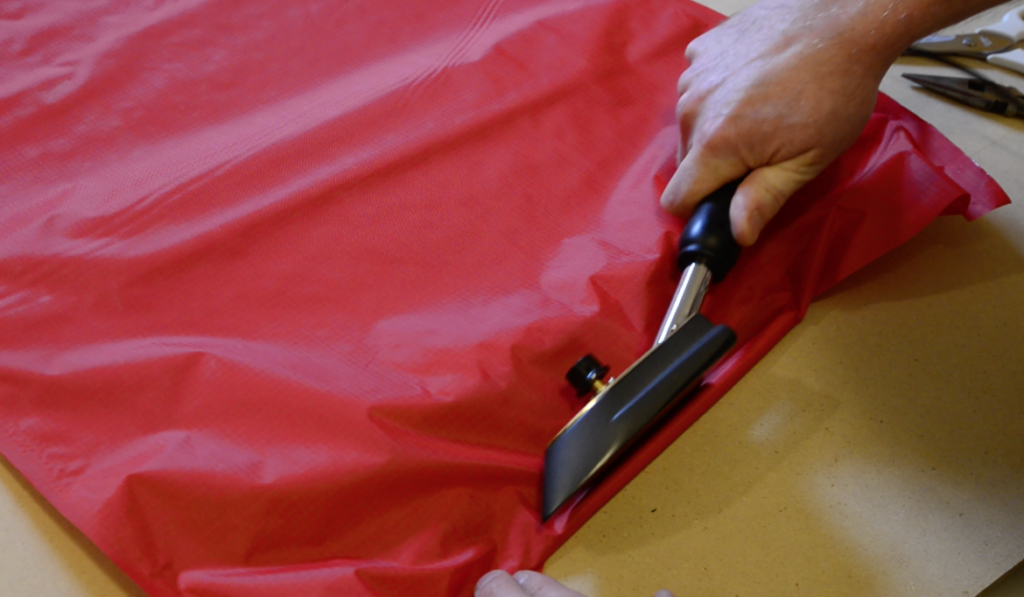
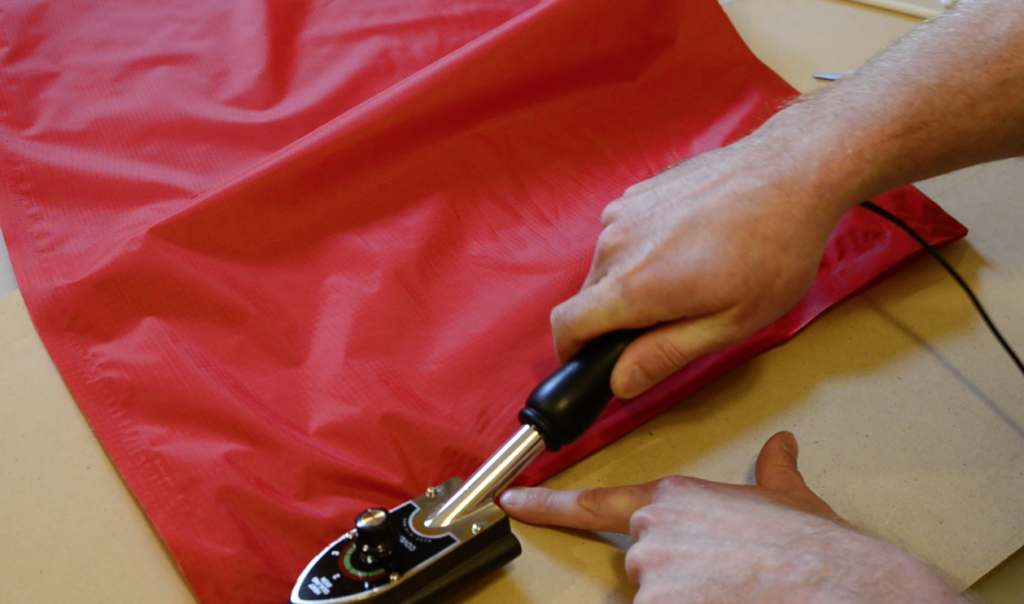
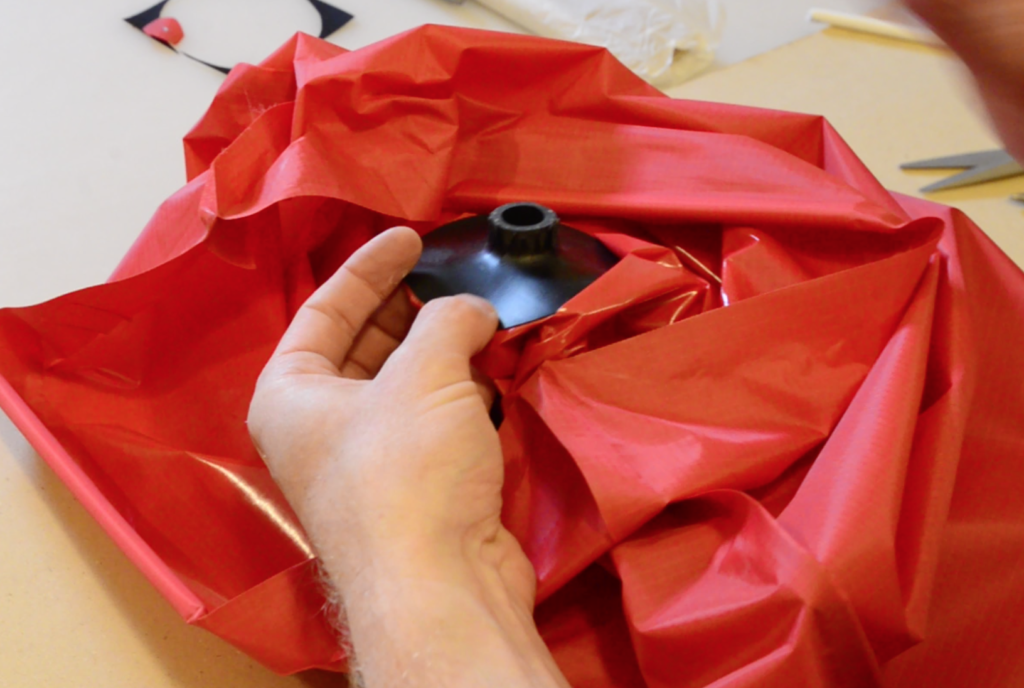
Align the hole in the ripstop fabric with the starburst hole in the circle and heat seal the two together by ironing the uncoated side of the ripstop fabric (you may find it easiest to place a wooden block covered in parchment paper under the circle):

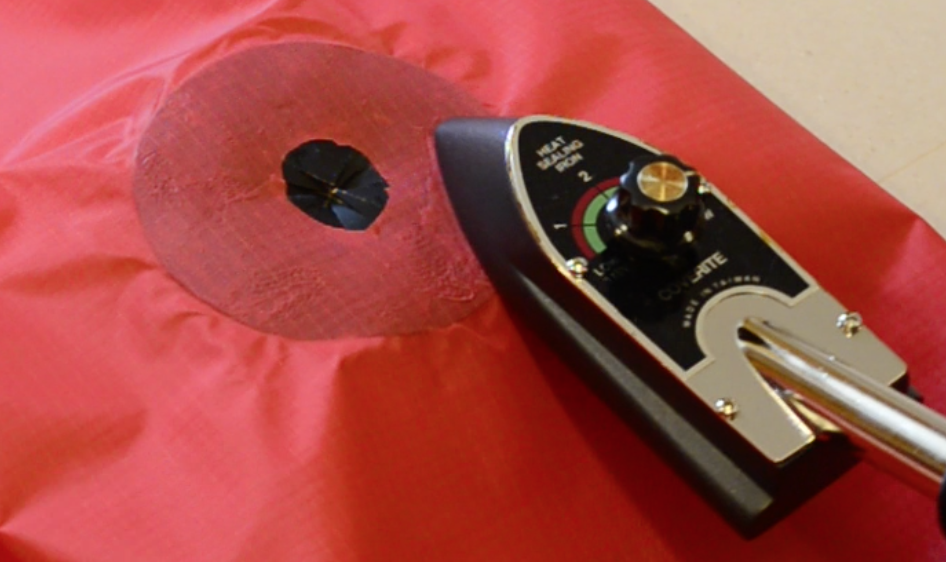
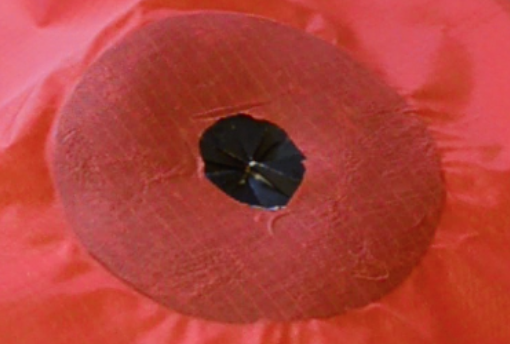
Note: The lightweight fabric is coated with TPU on one side and the heavy floor fabric is coated on both sides (the finish may be glossy on one side and matte on the other). If you iron for too long you could melt through to the TPU on the far side of the black circle – practice on a scrap first.)
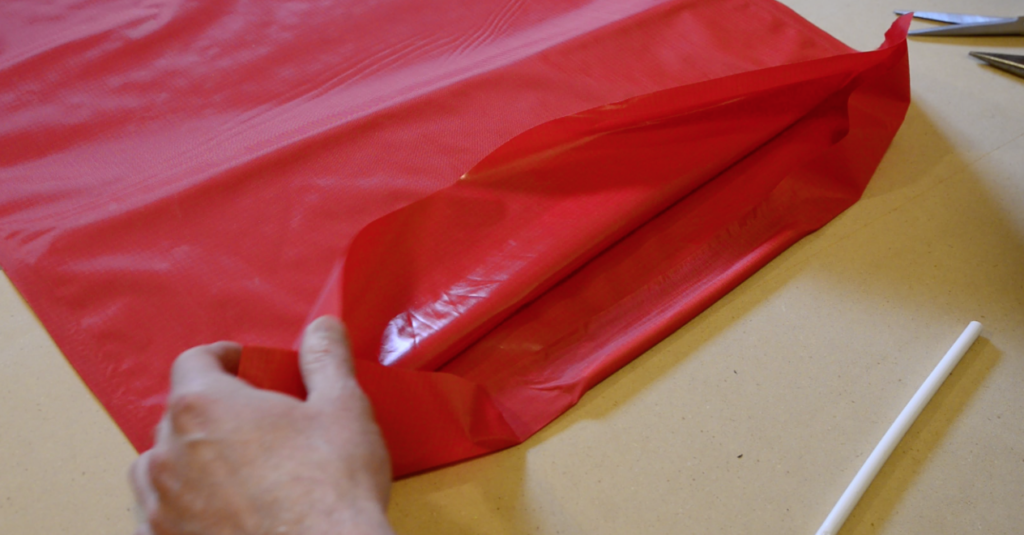
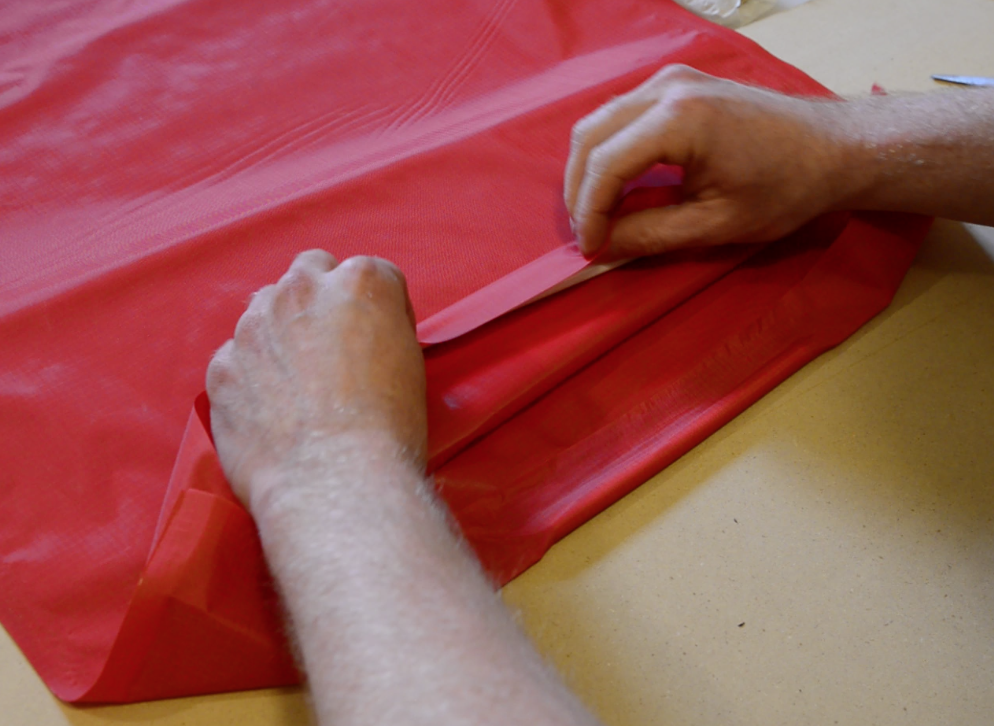
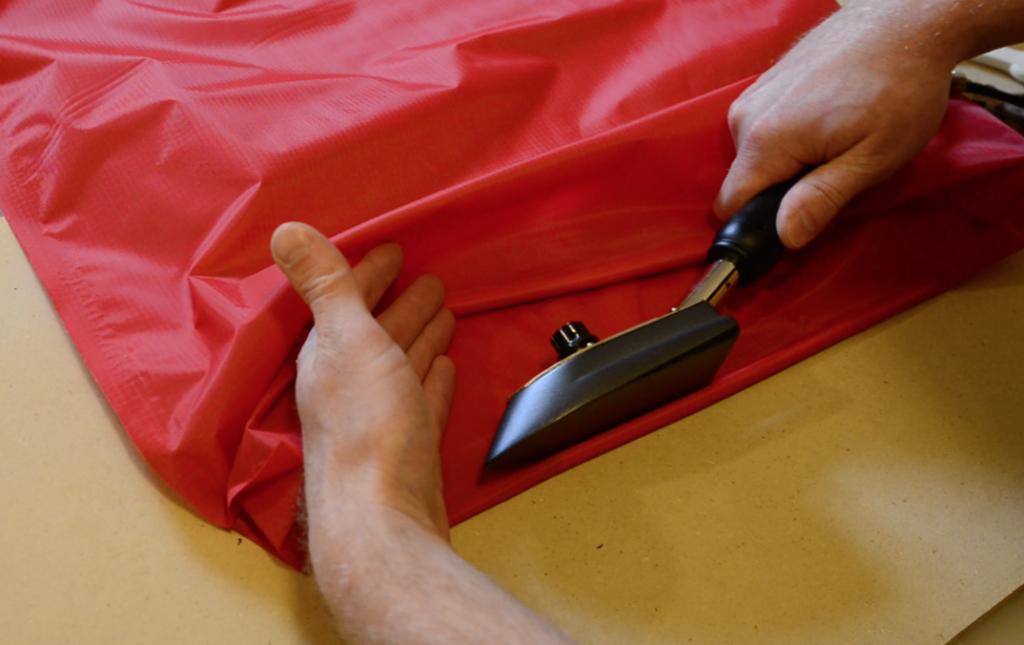
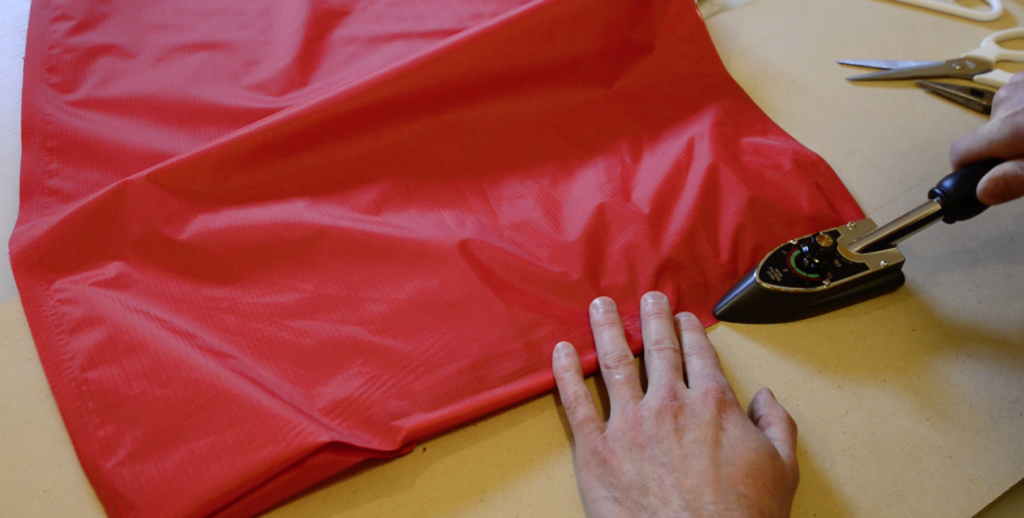
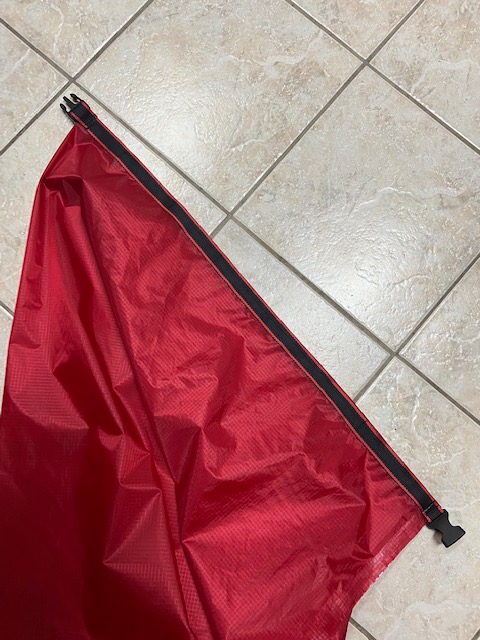
Fold the ripstop fabric in half and align the edges. Heat seal the edges together in a strip 1-2 cm (0.5″) wide. Do the same on the other side to form a sack with three sides closed (one fold and two heat sealed edges):
Optional: Cut two ~15 cm (6″) lengths of plastic rod from a plastic coat hanger or other cheap plastic object. These will make convenient handles for your inflation bag, but are not necessary if you want to save a few grams.
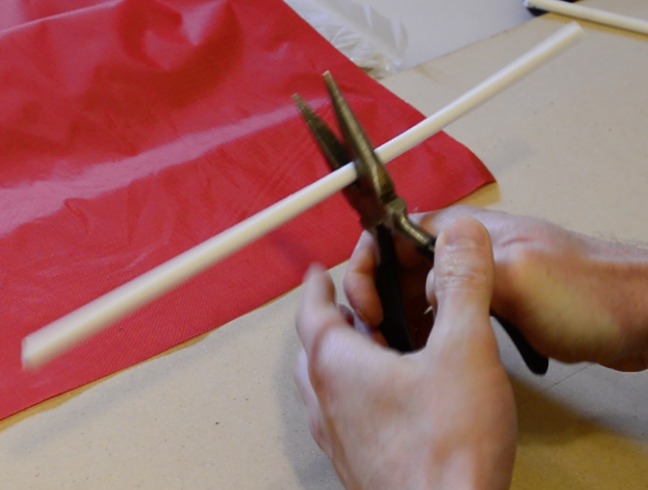
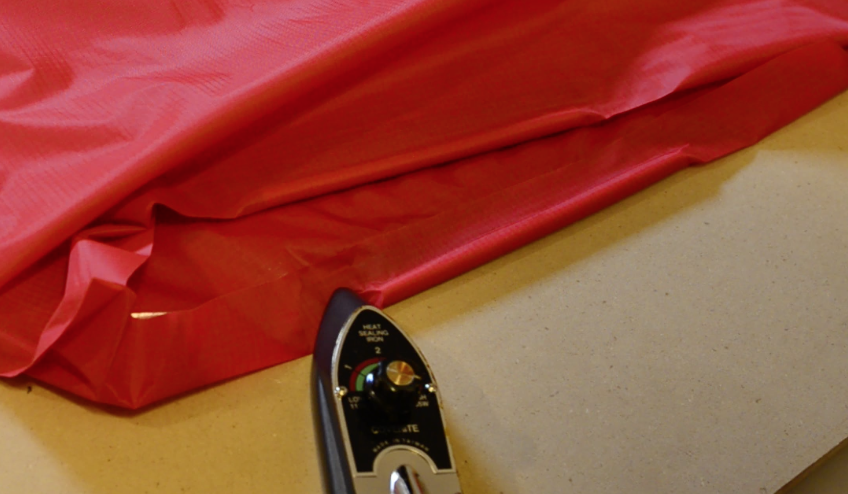
Fold approximately 3-5 cm (1-2″) of the unfinished end of the sack inward around the optional plastic rod and center the plastic rod between the two edges of the sack. Heat seal the fold around the plastic rod or, if you are not adding plastic rods, simply heat seal the fold to provide a finished edge to your inflation bag. Flip the bag over and do the same on the other side.
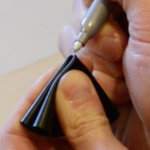
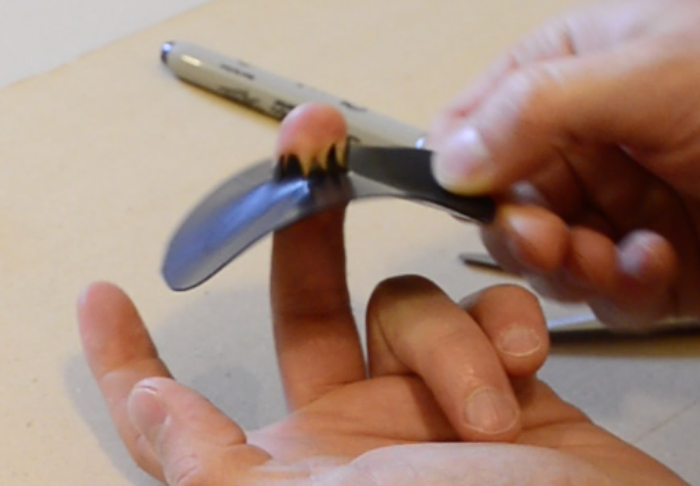
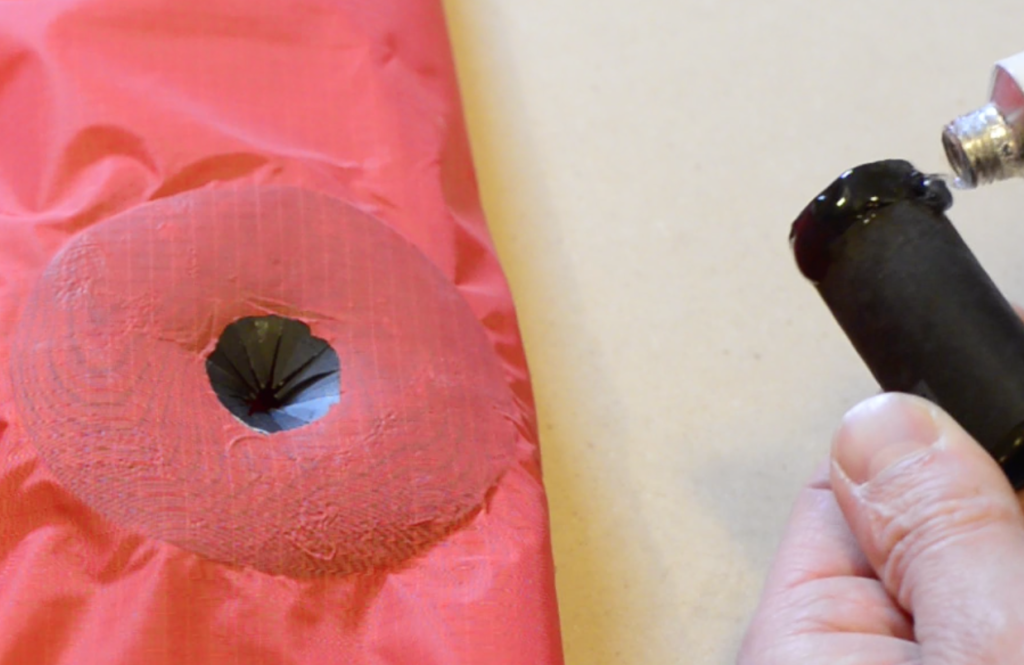
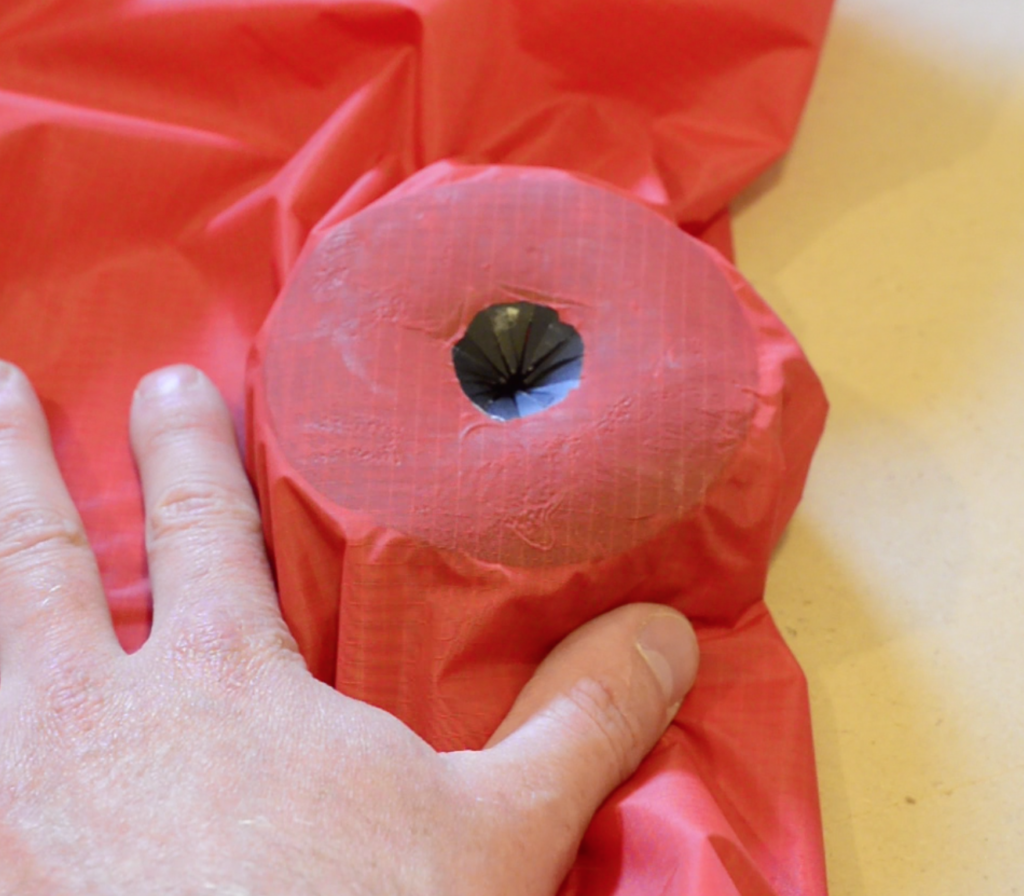
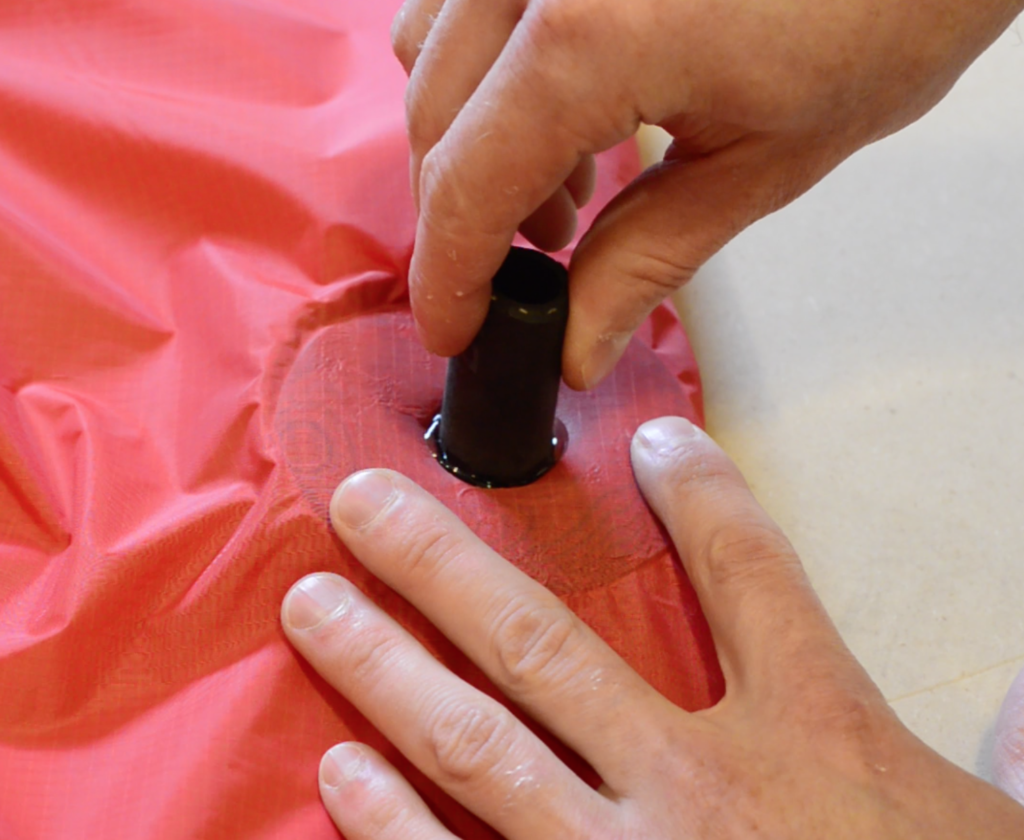
Roughen one end of the black silicone tube with sandpaper and then coat it with Aquaseal and force it through the starburst hole in the black fabric, just far enough that the triangles of fabric (formed by the starburst cut) are fully in contact with the silicone tube. Set it aside and allow the glue to cure.
Note: If you prefer to have the TPU-coated side of the ripstop fabric facing out (i.e. TPU on the outside of the bag), turn the bag inside out before inserting the silicone tube.
Tip: Use a sharp knife to shave some material from the end of the black silicone tube so it’s slightly tapered (as in the video above) so it’s easier to insert it into the Boston valve.
Using the inflation bag to inflate your packraft:
Note: The silicone tubing on your inflation bag is sized to fit the Boston valve’s larger opening – the threaded part that is permanently welded to the packraft – not the one-way valve. (The one-way valve restricts airflow too much to efficiently inflate the packraft through it.) With practice, you will be able to inflate your packraft in about three minutes following this procedure:
- Unscrew the one-way valve from the Boston valve, exposing the larger threaded opening.
- Press the silicone tubing into the threads with a clockwise twisting motion. The threads inside the valve will grab onto the soft silicone tubing.
- Holding the inflation bag by the open end with two hands, scoop air into the bag
- Quickly close the bag and twist the top so air cannot escape
- Squeeze the air-filled bag between your arms and body to force air through the valve into the packraft
- Repeat steps 3-5 until the packraft is fully inflated
- Holding a finger over the inflation bag tube to prevent air from escaping, remove the inflation bag from the Boston valve by pulling and twisting the silicone tube counter-clockwise. As the tubing comes out of the valve, quickly place a finger over the valve opening to prevent air from escaping
- Screw the one-way part of the valve into the threaded flange
- Unscrew the cap on the Boston valve’s one-way valve
- Top off the air pressure in the packraft by blowing in through the one-way valve until the packraft is firm
- Screw the cap back onto the one-way part of the Boston valve
Note: Inflating your packraft entirely through the one-way check valve is possible, but airflow is quite restricted by the check valve, so it takes longer than the above method, even though some air is lost to back-flow when using the above method.
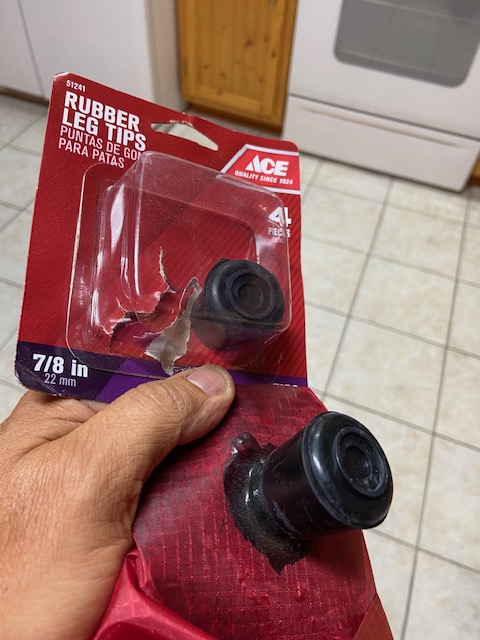
Tip: Your inflation bag can do double duty as a drybag! Ron S. found that a rubber chair leg tip with an inner diameter of 7/8″ (22 mm) makes a great cap for the inflation tube, and he added a buckle to his inflation bag so the top can be rolled and then clipped closed:
Questions? Leave a comment below!
30 Comments
Tamas · May 17, 2023 at 11:50 am
Hi Matt,
I built a nice packraft, thanks or the design, but I have a problem with the small hose the kit has, the rubber hose’s diameter doesn’t match with the Boston valve! Now I have to be on a hunt at home depot to find something that fits. Am i missing something here? Thanks
Matt (Admin) · May 17, 2023 at 12:55 pm
Hi Tamas, I use that hose in the larger part of the Boston valve, not the inner check valve, because it’s much faster to inflate it that way even though you lose some air. Then screw in the check valve when it’s almost fully inflated and finish with a few breaths. Hopefully that answers your question!
Alexander Latham · January 8, 2022 at 4:10 am
Hi Matt, I’m finally starting my packraft build! Phew…
I’m still not clear on the placement of the nozzle with the new 1×1.45m fabric however. I have read all the comments and notes and I see this info:
“Install the nozzle beside the center of one of the shorter (~0.76 m) sides (i.e. not beside the fold).”
What I’m not so clear about however – does that mean the nozzle is installed slightly in from a welded edge? That’s very different to the video where the nozzle is installed slightly in from a folded edge.
Any clarification here would be appreciated. Thanks. 🙂
Matt (Admin) · January 8, 2022 at 9:30 am
I will post a picture above.
Alexander Latham · January 11, 2022 at 10:30 am
Hi Matt, thanks that picture makes it absolutely clear! Cheers!
GabC · June 1, 2021 at 3:45 pm
I don’t know if I’m just overthinking this but it seems to me that the piece of fabric for the inflation bag in my kit is pretty large when I fold it widthwise. It’s almost square then, while in the vids the proportions are closer to 2:1 (L:W).
I’m assuming there’s just more fabric than needed and I can make it narrower?
Matt (Admin) · June 1, 2021 at 3:59 pm
I’m not sure which way you mean by widthwise, but regardless, did you see the first and second “Notes” above? I think those will answer your question.
GabC · June 1, 2021 at 5:46 pm
Aha! Weird that I read the entire thing and still missed that. Thanks.
Matt (Admin) · June 2, 2021 at 2:34 pm
No problem 🙂
Anthony DeLorenzo · April 5, 2020 at 4:21 pm
Hey Matt! Is this red 115 GSM fabric available for sale?
Matt (Admin) · April 6, 2020 at 8:21 am
Not at this time. Cheers!
Curtis MacDonald · January 20, 2020 at 8:11 pm
Hi there, would this project still be possible with using a higher threaded fabric for the main body closer to 440D? Or would that be too heavy?
Matt (Admin) · January 21, 2020 at 8:17 am
I wouldn’t recommend it, but it would be possible.
citybadger · May 22, 2019 at 8:59 am
“…fold it in half so it is 1.0 x 0.76 m and locate the nozzle near the center of one of the 0.76 m sides.”
I think this would be clearer if it read “locate the nozzle just beside the center of one of the 0.76m edges.”
Also the 7/8″ hose is 2cm (7/8″) hose. Bouncing around between systems is jarring. Maybe you Canadians are more used to it. 🙂
krstahl · December 15, 2018 at 11:49 am
Matt, First off: You have a great product and some really good instructions on how to build a packraft! I finally purchased my V3 kit and received it recently.
Question: Your inflation bag video and pics you show that you are assembling with the TPU on the inside of the bag. In Bruce Campbell’s pics he is assembling with the TPU on the outside. I intend on picking up on Bruce’s idea of using the IB as a drybag. I assume that for a dry bag I’d want the TPU on the exterior. I practiced on a “mini” bag with scraps, sans nozzle, and it seemed pretty simple to weld TPU inside then turn the whole thing inside out. So, would the only difference be installing the nozzle in reverse reinforcement and protrusion of the nozzle tube?
Matt (Admin) · December 16, 2018 at 8:46 am
Thanks! That’s right 🙂
Matteo · August 23, 2018 at 11:45 pm
Is it possible to use a thinner tube so it can be attached to the smaller top valve? ( the piece you screw off )
Matt (Admin) · August 24, 2018 at 7:45 pm
Yes, I find it inflates a packraft too slowly though, because the air flow through the check valve is much more restricted. It also makes an annoying noise.
Matteo Scalas · September 1, 2018 at 6:20 pm
Yes I agree, I tried to use an adaptor from a Kmart pump and the noise is really annoying
Peter · July 5, 2018 at 1:50 pm
Hi. I’ve just received three v3kits. Can it be that my red fabric should be turned 90deg compared to the guide above? (Its app 140x100cm)
Regards Peter
Matt (Admin) · July 5, 2018 at 2:17 pm
Yes, please do. I will update the instructions above to reflect the new, larger size. Thanks!
Ted · April 25, 2018 at 5:06 pm
Just finished mine, and it works great! I was just thinking that with a little effort, it could double as a removable splash deck. You know, since you’re taking it with you anyway, it may as well be useful the whole time.
DatLima25 · November 10, 2018 at 7:57 am
Or you can use it as a drybag.
Matt (Admin) · November 19, 2018 at 10:17 am
Yep, that’s what I do – inflate the packraft and then stow my gear in the inflation bag 🙂
unnamedpeaks · January 25, 2020 at 8:14 am
How do you seal the inflation end when it’s a piece of unthreaded tubing?
Matt (Admin) · January 25, 2020 at 10:09 am
You can make a cork for it, or just use it as a splash-proof cover and not a true drybag.
Craig · April 22, 2018 at 11:13 am
I used a knife to taper the exposed end of the black tubing. This made it much easier to insert the tubing firmly into the valve and inflate the boat.
Matt (Admin) · April 23, 2018 at 9:06 am
Hi Craig, thanks for the tip – I’ve added this to the written instructions above.
Simon · March 9, 2018 at 12:28 am
FWIW, I happened to have TPU webbing (https://www.shelbyoutdoor.com/product_info.php?products_id=2842) that I used for handles. So far the idea seems to work as expected. Weldable and flexible, but provides some handles and stiffness.
Bruce Campbell · September 10, 2017 at 11:38 pm
I just completed an inflation bag, took me about two hours,. The 40D ripstop material is great for an inflation bag. It was much faster than the one I sewed together from Sil Nylon. Of course, I made a few changes. I left a gap and will glue the 7/8″ tubing into a bottom corner, added 1/2″ nylon webbing and a plastic buckle at the top so I can use it as a behind-the-seat drybag. I’ll post photos in the forum.