The following build report text and photos are by James Cummins, except where noted. Thanks, James! – Matt
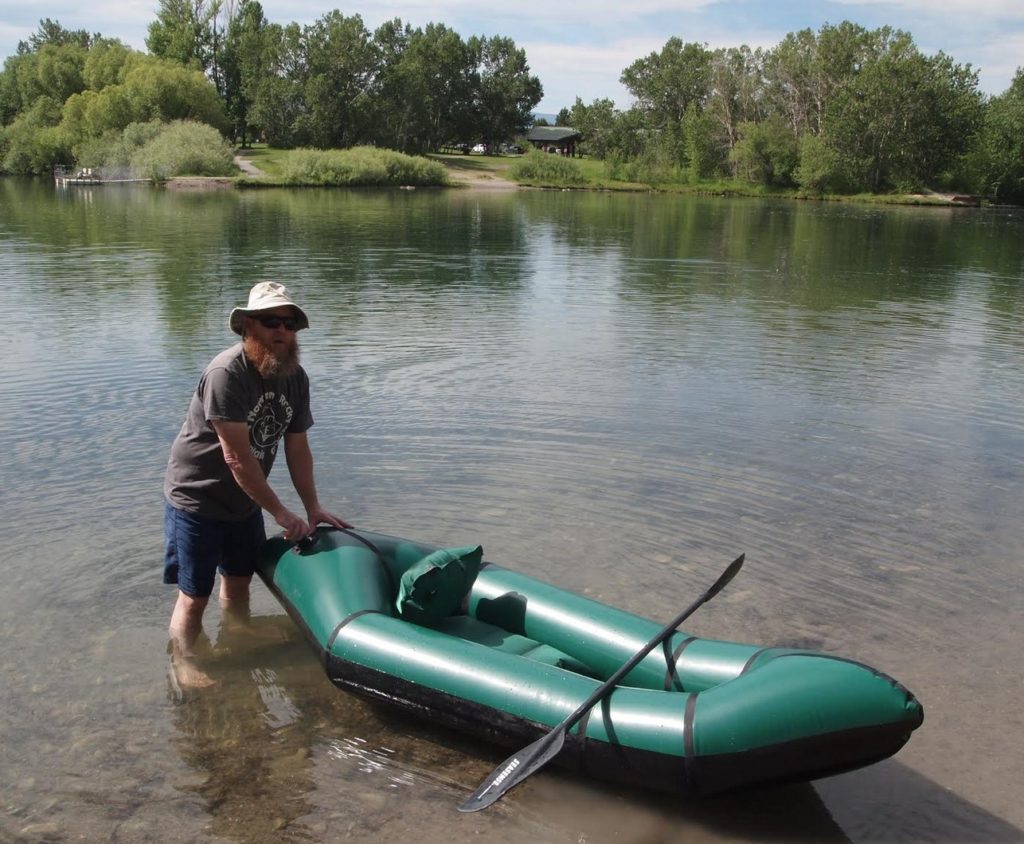
I had wanted a pack raft for a long time, but couldn’t afford the cost of a production boat. Then I heard about DIY Packrafts and took a look at the website. I also knew someone who had built several DIY rafts and he recommended them. I’ve done a lot of sewing projects and generally enjoy building things myself. I decided to try building one and chose a Telkwa 130cm.
I ordered the kit early in May 2020 and it arrived on time despite the developing Covid-19 outbreak.
At the same time I ordered a Leather Iron from Ali Express for $17 US from China and a used Tower Hobbies Tacking Iron from the USA on Ebay for $10 US plus $10 shipping.
The Tacking Iron arrived on time a few days before the raft kit.
I began working on the seat with the tacking iron and waited for the narrower leather iron to arrive before building the raft.
The seat building was good practice and before long I had a seat that was holding air despite a few leaks at the corners. Eventually I fixed these with seam grip applied on the outside. I felt I had learned the basics and that I was ready to build the raft. The two inch wide tacking iron was too wide for the one inch raft seams so I waited for the narrower leather iron to be delivered from China.
And I waited…
I had been invited to do a pack rafting trip on the Sun River in Montana beginning July 2 so I was hoping to finish my raft in time to make this trip. It was now halfway through June and I still didn’t have the correct iron. So I ordered one from Amazon for $65 US with the US 110 volt plug already in place. It arrived two days later and I began to build the raft on June 16.
I studied the videos and had the instructions up and running while I carried out the initial steps. As I progressed the process became familiar and I only had to refer to the instructions occasionally.
Initially I thought I had the iron set too hot as the double TPU sided floor fabric was showing the effects of overheating. I turned the temp down a little although now I think I was initially moving the iron too slowly in places.
I was rushed on the build and doubled up several steps. I should have done one seam at a time, but instead I pushed ahead and worked for 5-6 hours straight when 2-3 hours at a time would have produced better quality seams. I spent about 38 hours building the raft. I was also trying to use as little seam glue as possible and I should have applied more during construction. I ended up regluing all the seams on the inside by carefully turning the boat inside out through the zipper.
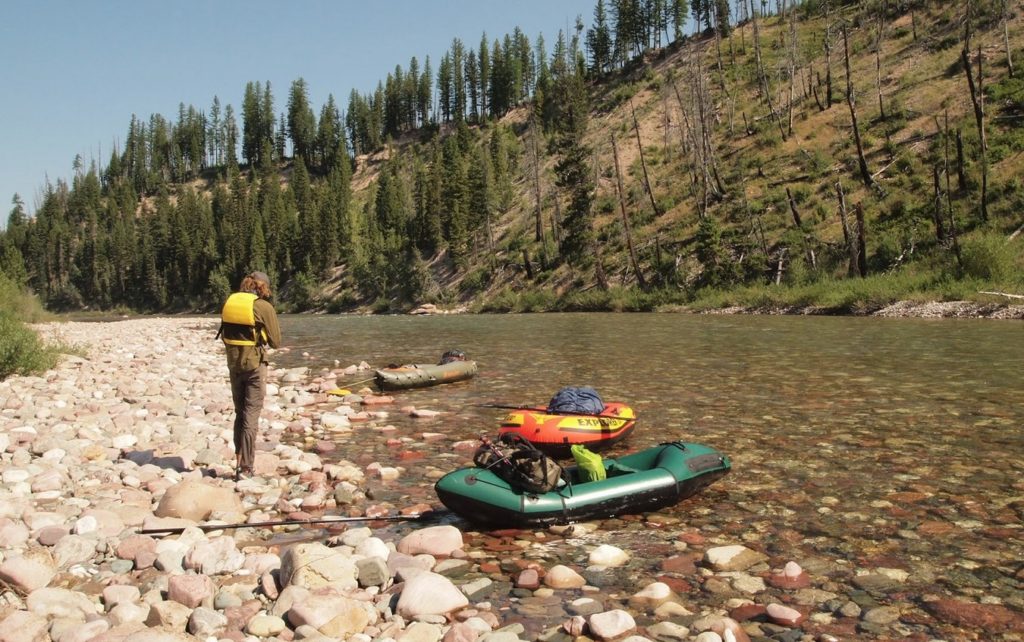
Despite the rush I had a raft ready by the 27th of June and made a seven mile float on the Gallatin River near Bozeman. It went well although I had to add air several times. I was impressed by the handling of the boat and I was psyched to have built my own river craft!
Then I had to get ready for the Sun River and added the tie downs the night before the trip. I knew the boat had some slow leaks so I brought along a tube of seam glue to seal them as I found them.
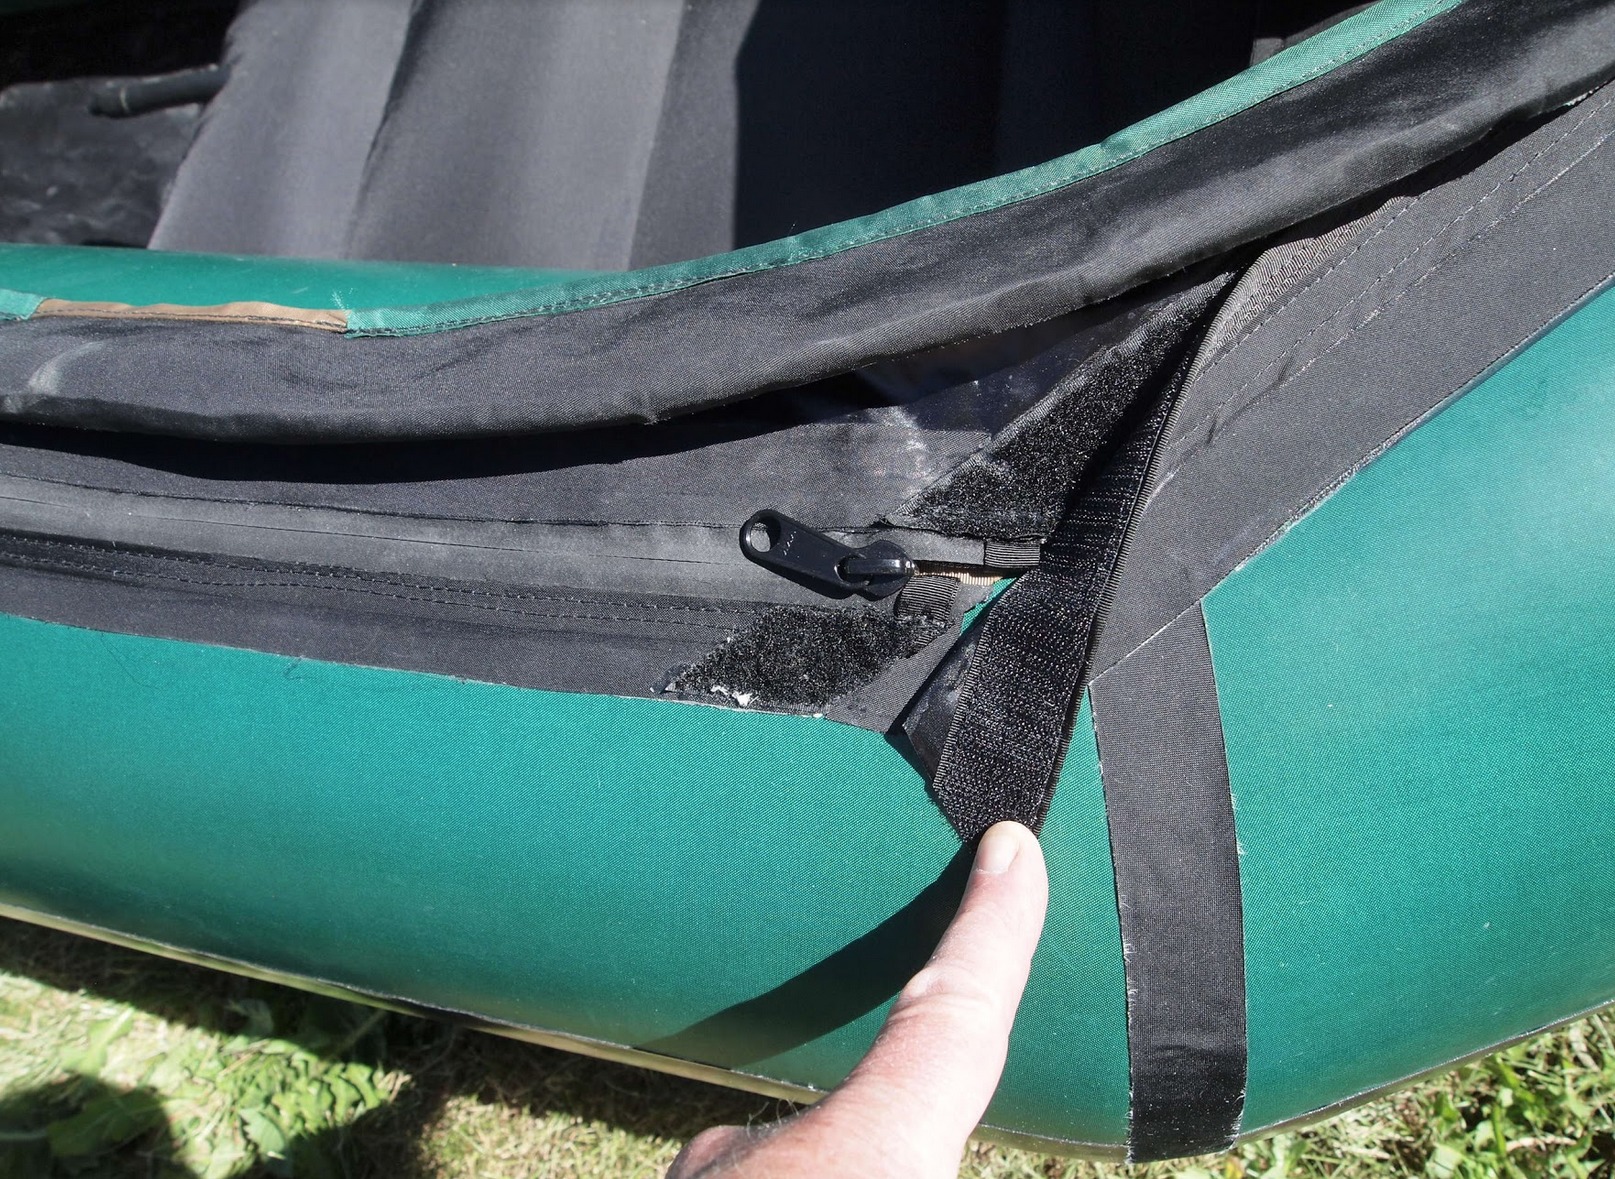
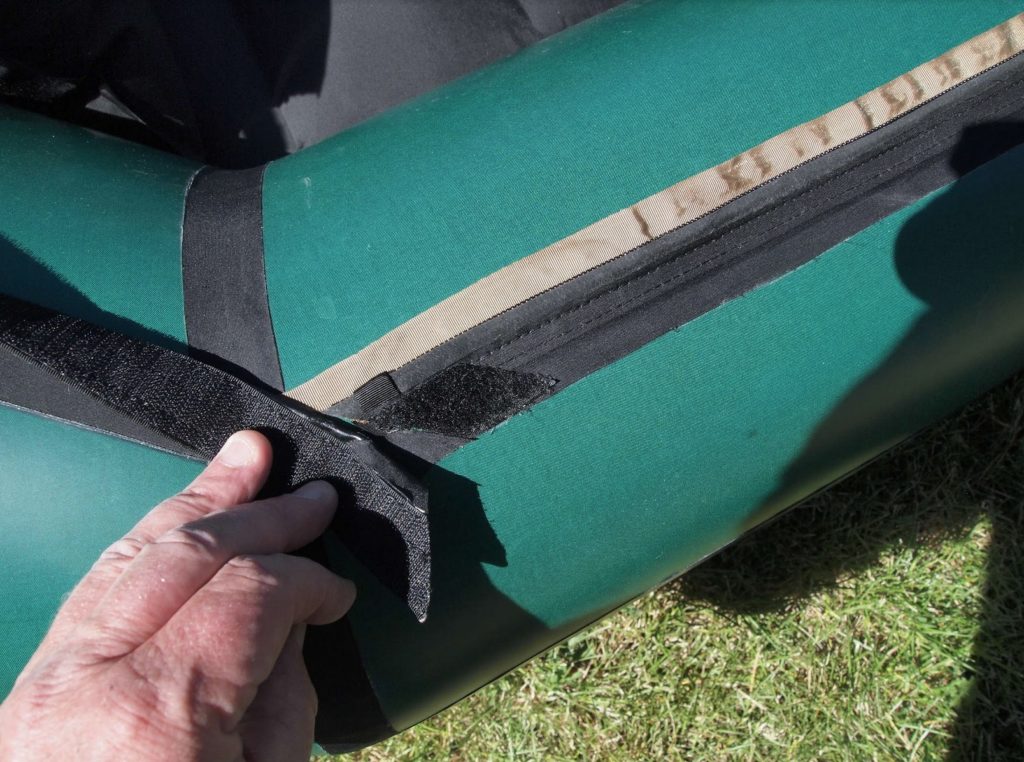
The main leaks were where the tube seams met the floor fabric. These were easily located and repaired from the inside of the tubes. The cargo zipper made this easy to do. A couple of other minor leaks were along the tube seams and required a going over with the iron and some seam-sealer on the inside once I was back in town.
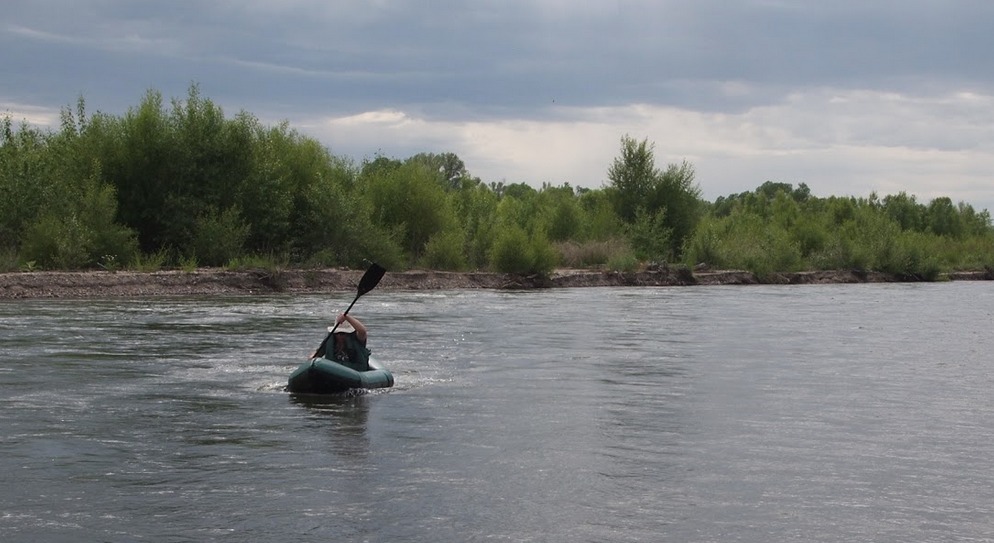
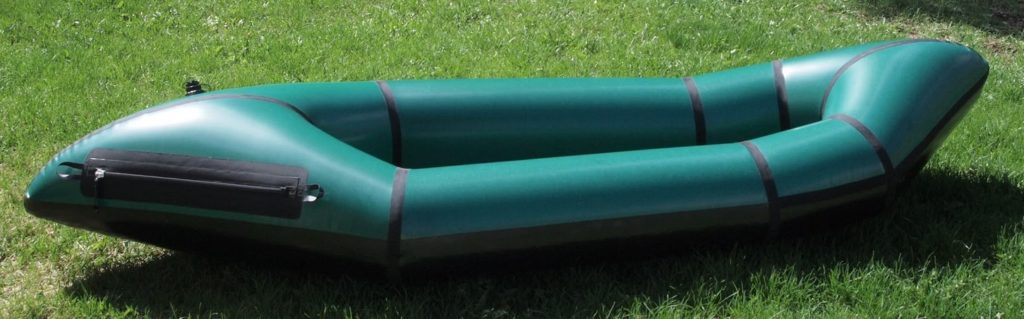
The float on the Sun River involved some healthy second class whitewater. I hit several sharp rocks dead on without any punctures and only minor abrasion to the fabric. It’s a good thing the Telkwa has the wrap around floor fabric protecting the sides of the boat. Since this was an open boat I swamped it a couple of times in the bigger rapids and dragged it heavily loaded over rocks and branches to dump the water out on the river banks.
It held up to the abuse and each night of the three day trip I repaired the small leaks I identified during the days travel.
A couple of slow leaks were on the seams and on the river I temporarily fixed these with clear tape. Then at home I re-sealed them effectively with my iron set at a slightly higher temp. I think initially I had my iron temp set a bit too low and moved it too fast over some sections.
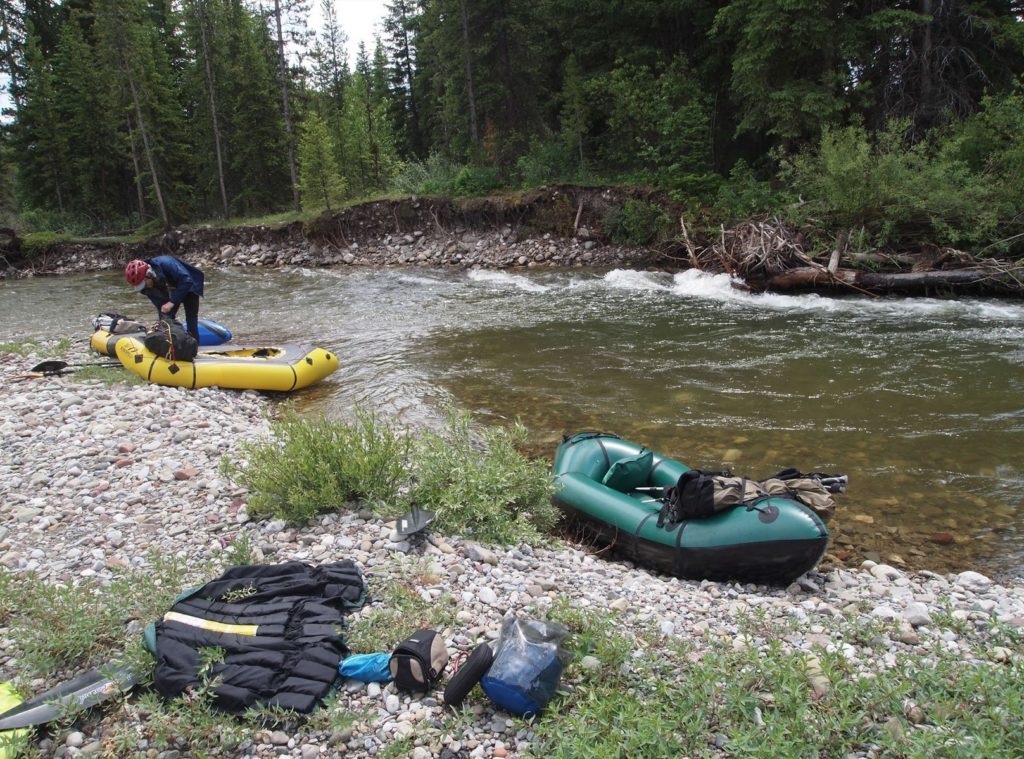
The next trip was a float on the South Fork of the Flathead River at the end of July. This was at the end of a ten day caving expedition and the raft was loaded down with gear. I stowed a large part of it inside the raft. It handled well with the load on this class two float. Along the way I located and fixed two minor champagne bubble size leaks on the floor seams.
I am very pleased with the results I had building a pack raft from a kit. I rushed the build and this was the biggest mistake I made. I plan to build another Telkwa this year.
[Updated 2021.]
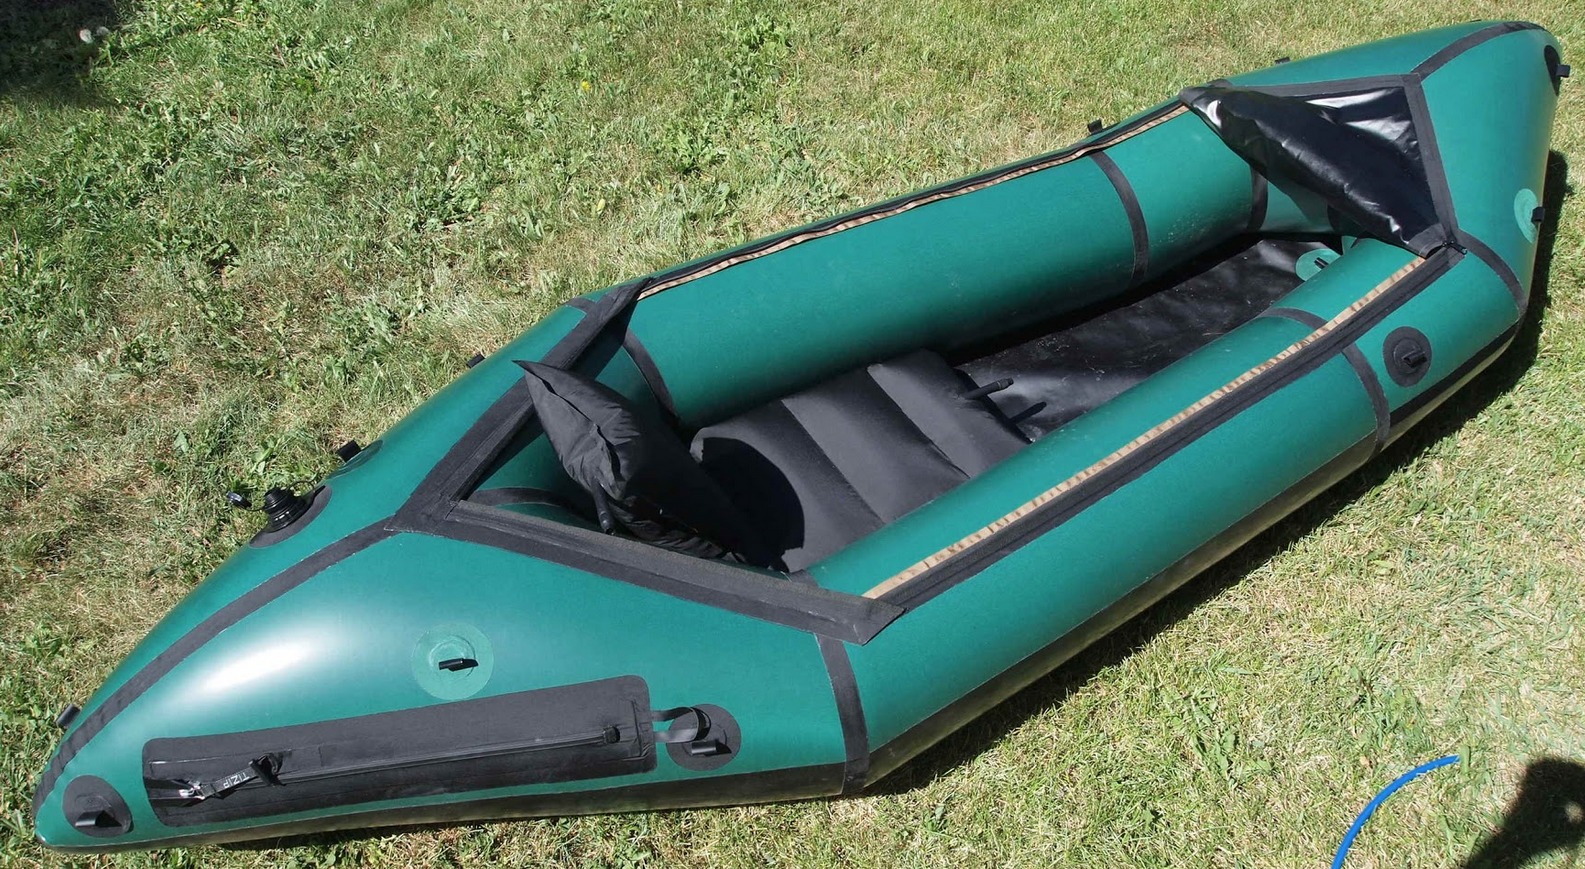
In the spring of 2021 I built another Telkwa in the same color. I took even more time with this one and added a convertible spray deck. I wasn’t rushed on the build and worked for two to three hours until I felt I was starting to make mistakes and then stopped. This resulted in a cleaner build with less leaks and cosmetic blemishes. I was also careful to keep the seam glue on the seams and not have it bleed in to and darken the fabric next to the seams.
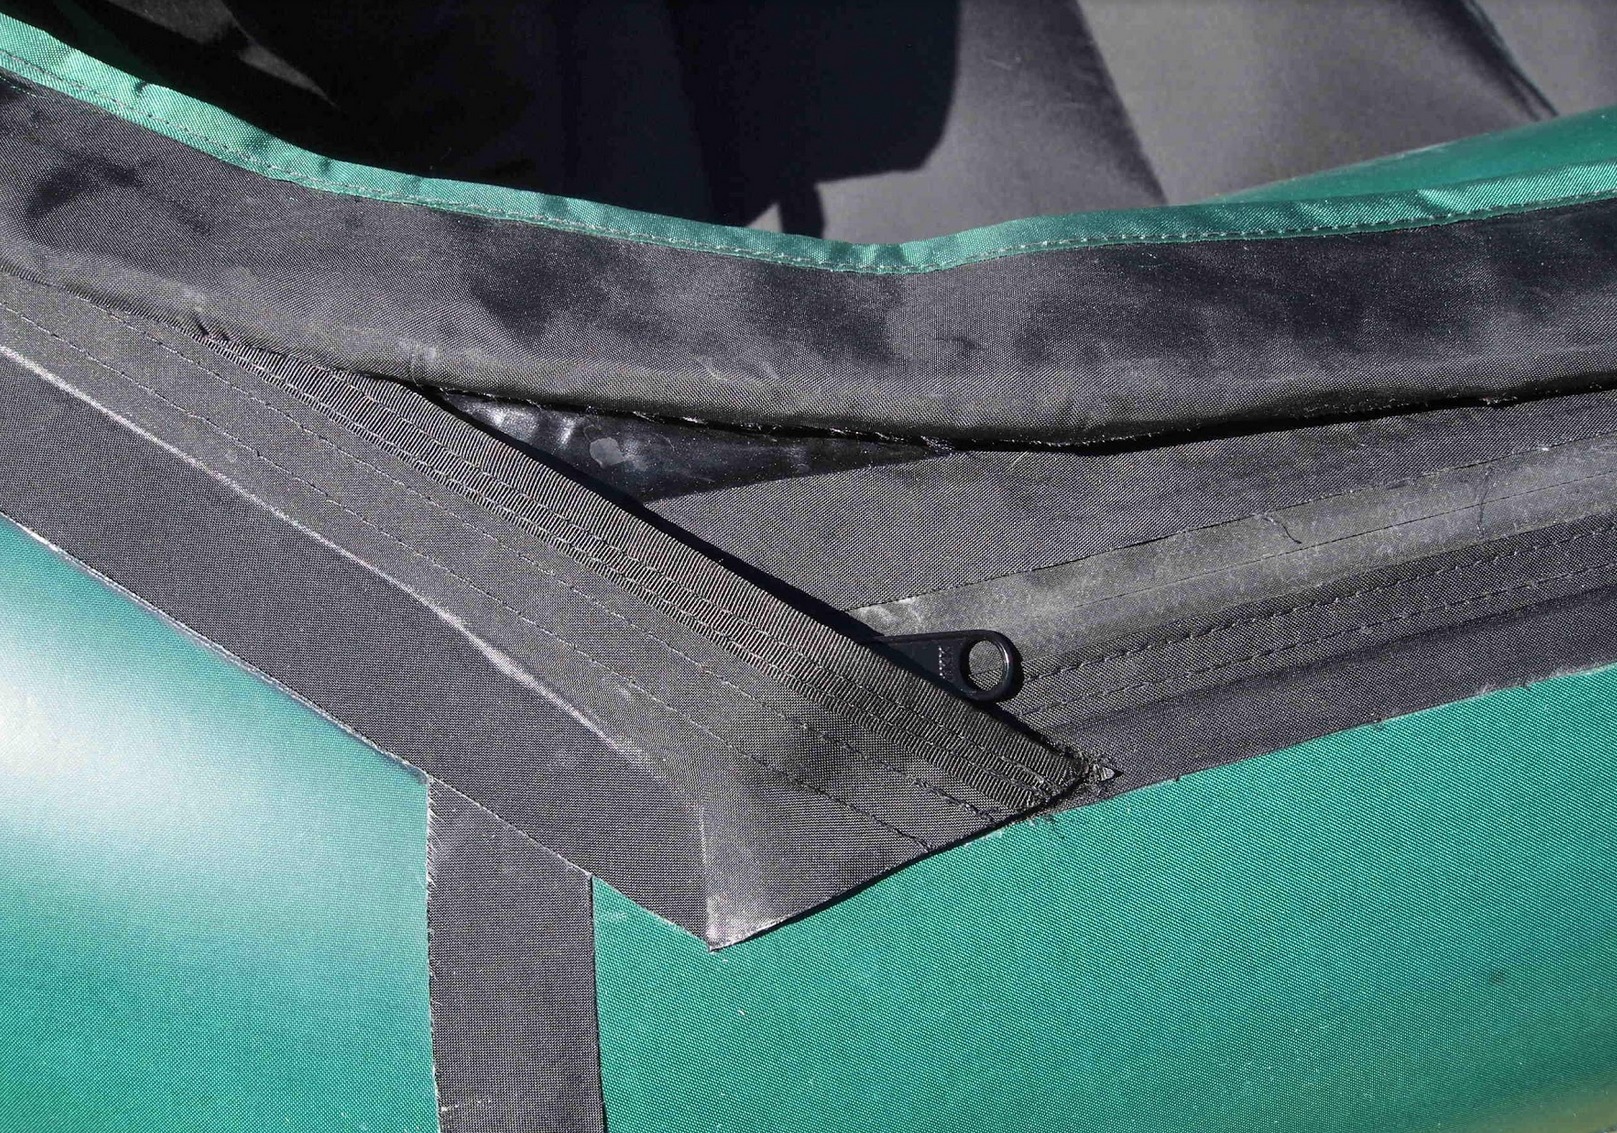
The most crucial point for me was where the tube seams meet the floor fabric. If you build one carefully watch the video instructions and pay attention to the details on Ken S.’s build report. Completely sealing the one inch tape to the tube seams is also important. On the inflated raft locate the places where the edge of the tape is not completely sealed down. Use a piece of chalk to mark these areas along the tube seams. Then deflate the raft and go over them with the iron and a baking paper covered board placed inside the raft. Don’t work on tube seams with the raft inflated.
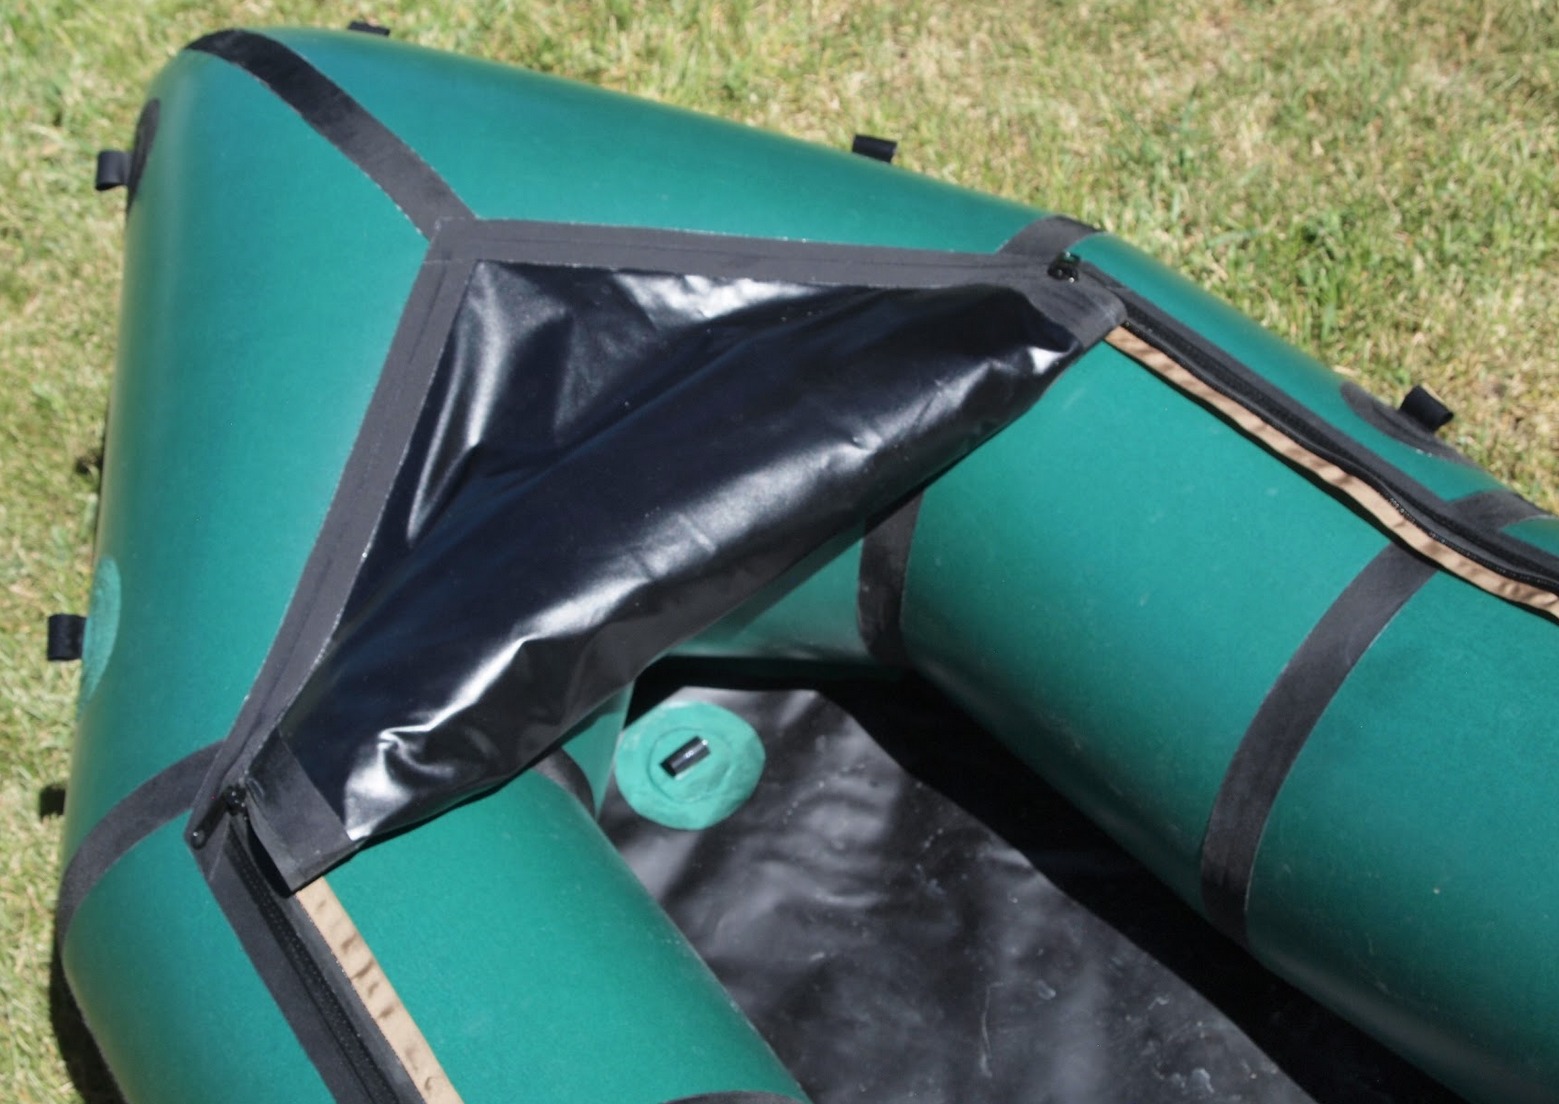
I closely followed Dom’s design for a convertible spray deck using velcro and water resistant zippers. I used YKK #8 water resistant coil zipper. I sewed the zippers to the spray deck fabric and to the one inch strips of TPU coated fabric. Then I sewed one side of one inch wide strips of velcro to the stern end of the spray deck cut-out and the other side of the velcro to a two inch wide strip of TPU coated fabric. This two inch wide strip was then sealed to the raft and formed the detachable stern end of the spray deck.
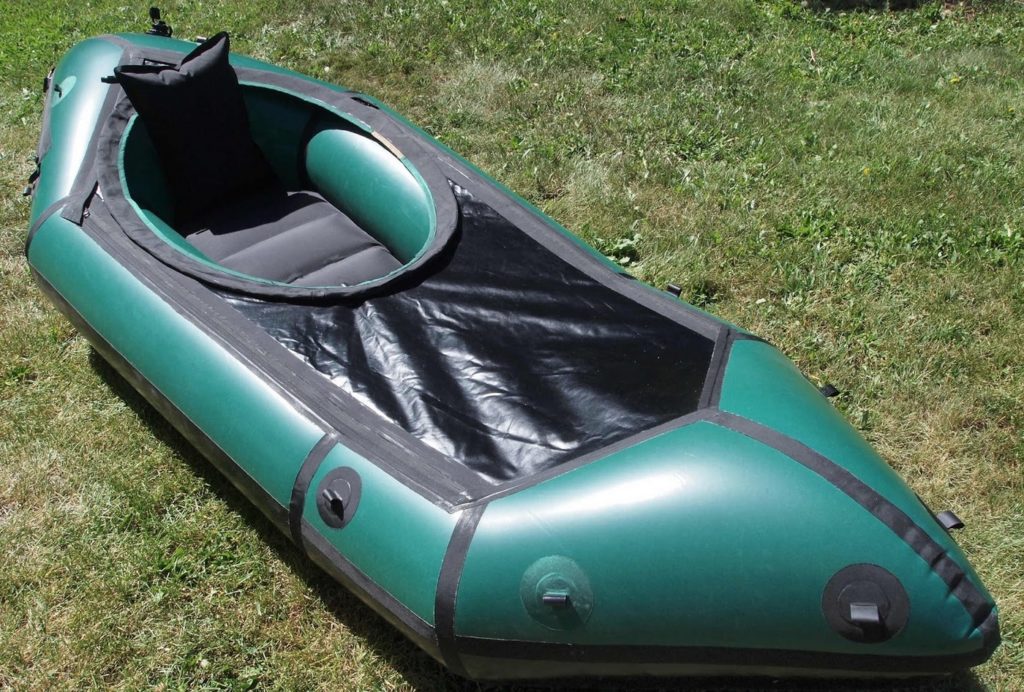

With the raft inflated I located the spray deck and held it in place with masking tape. Then I sealed it to the raft removing the masking tape as I went along. At first I was worried about heat sealing on an inflated raft, but it works just fine. I also added the tie-downs to the inflated boat. The zippers are on top of the tubes and are non-separating so the deck rolls up to the front of the cockpit. I added a strip of bias tape under the zipper to keep it from abrading the tube fabric. If separating zippers were employed the deck could be made to be removable.
I haven’t done a river trip in the new raft yet, but I have taken it out on some flat water.
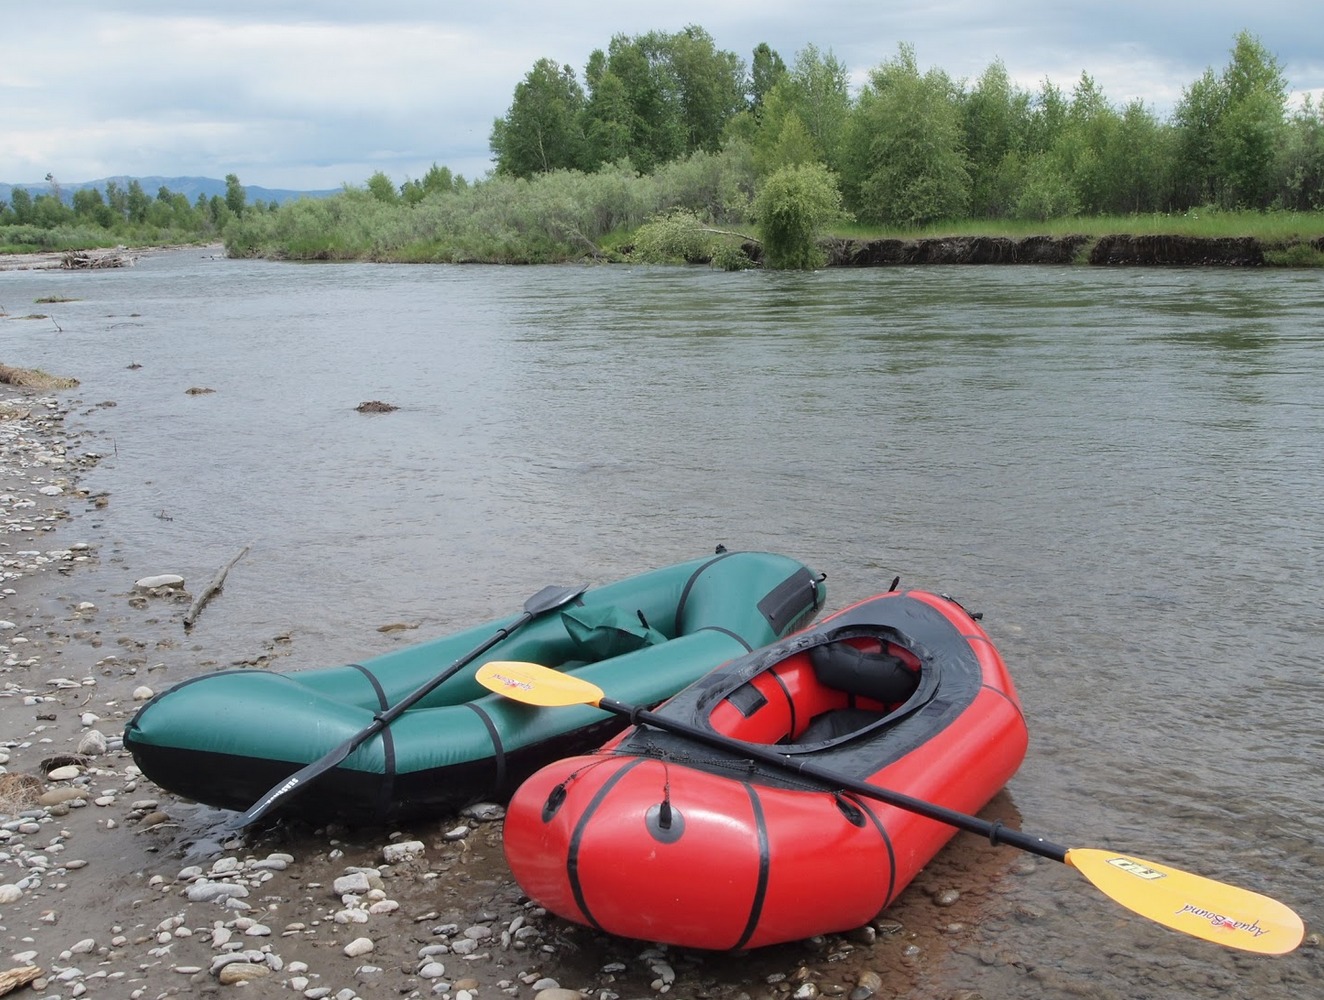
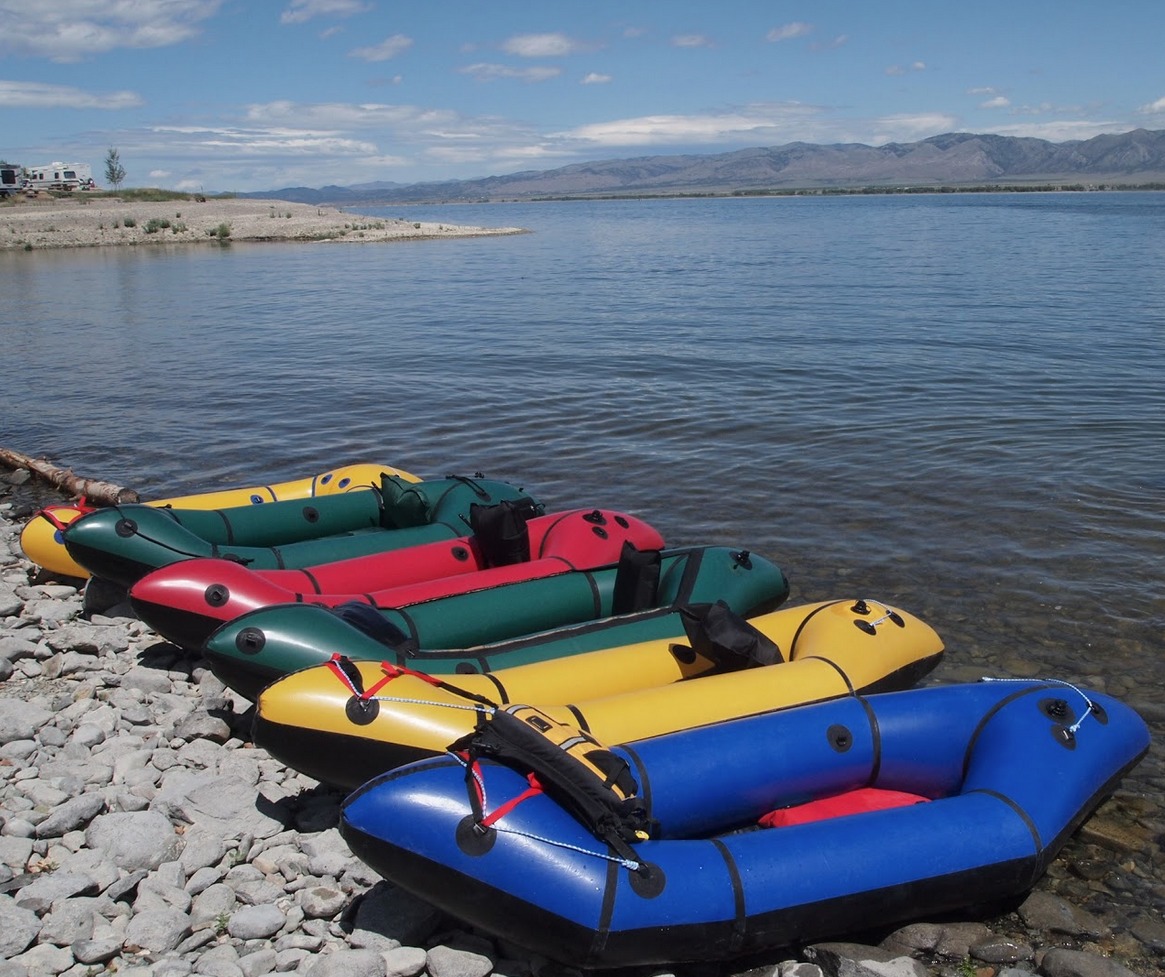
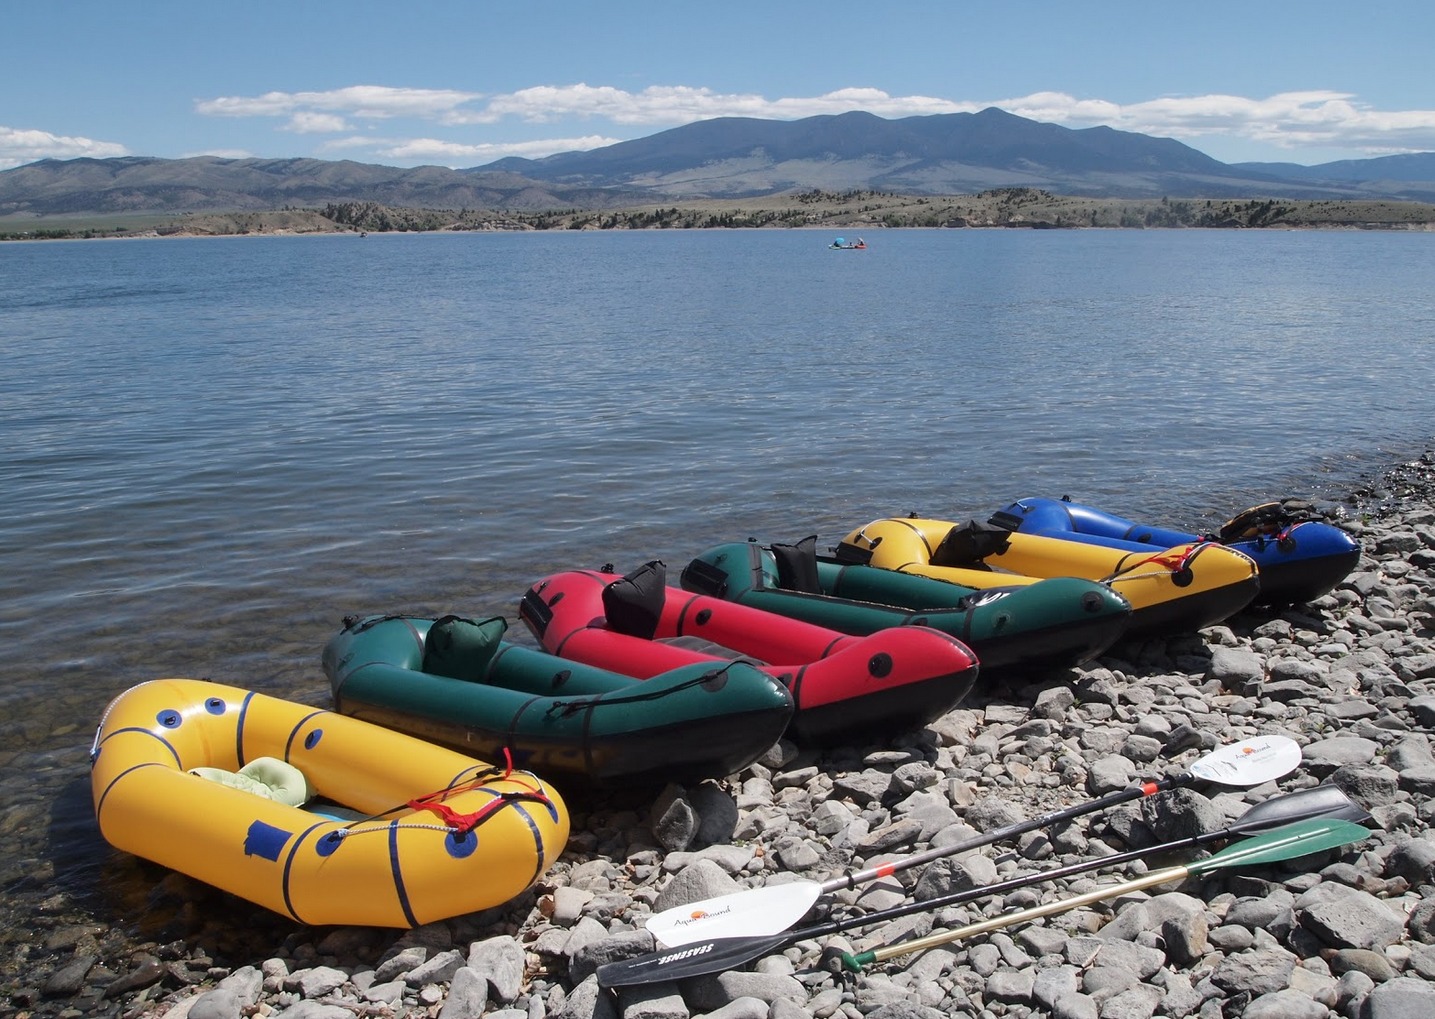
In mid-June 2021 I went to a camp-out on Canyon Ferry Reservoir near Helena Montana. Another DIY raft builder (Ken S.) was there and we put all our DIY rafts side by side and took some pictures.

I will likely build another raft in the future. It’s a great winter/spring project and the boats are light and functional.
2 Comments
JYP · May 4, 2023 at 7:05 pm
Thanks for the build report. Very helpful. I noticed that working for too long I start to make mistakes. It’s great to keep it to 2-3 hour chunks.
Mat · September 26, 2022 at 8:59 am
what a nice build report! thanks for sharing your experience and your pictures 🙂