Home › Forums › DIY Packrafts › Help & Questions re: DIY Packraft Construction
Tagged: construction, heat sealing, help, technique, temperature
- This topic has 91 replies, 25 voices, and was last updated 6 years, 2 months ago by
 Matt (Admin).
-
CreatorTopic
-
December 16, 2016 at 5:54 pm #2718Matt (Admin)Keymaster
I’ve closed this topic because it makes more sense for all the questions/answers about DIY Packraft kit construction to be posted on the appropriate instructions page. If you have a question, please post it as a comment on the relevant page or, if you have pictures to illustrate your question, please email me directly and attach the pictures (reply to your order receipt, or if you can’t find that, send me a message through the Contact page and then you can attach pictures to my reply). Thanks! ~Matt
-
This topic was modified 9 years, 4 months ago by Matt (Admin).
-
This topic was modified 9 years, 4 months ago by Matt (Admin).
-
This topic was modified 9 years, 4 months ago by Matt (Admin).
-
This topic was modified 6 years, 2 months ago by Matt (Admin). Reason: Closing topic
-
This topic was modified 9 years, 4 months ago by
-
CreatorTopic
-
AuthorReplies
-
-
May 19, 2020 at 9:56 pm #12311AaronParticipant
Hi!
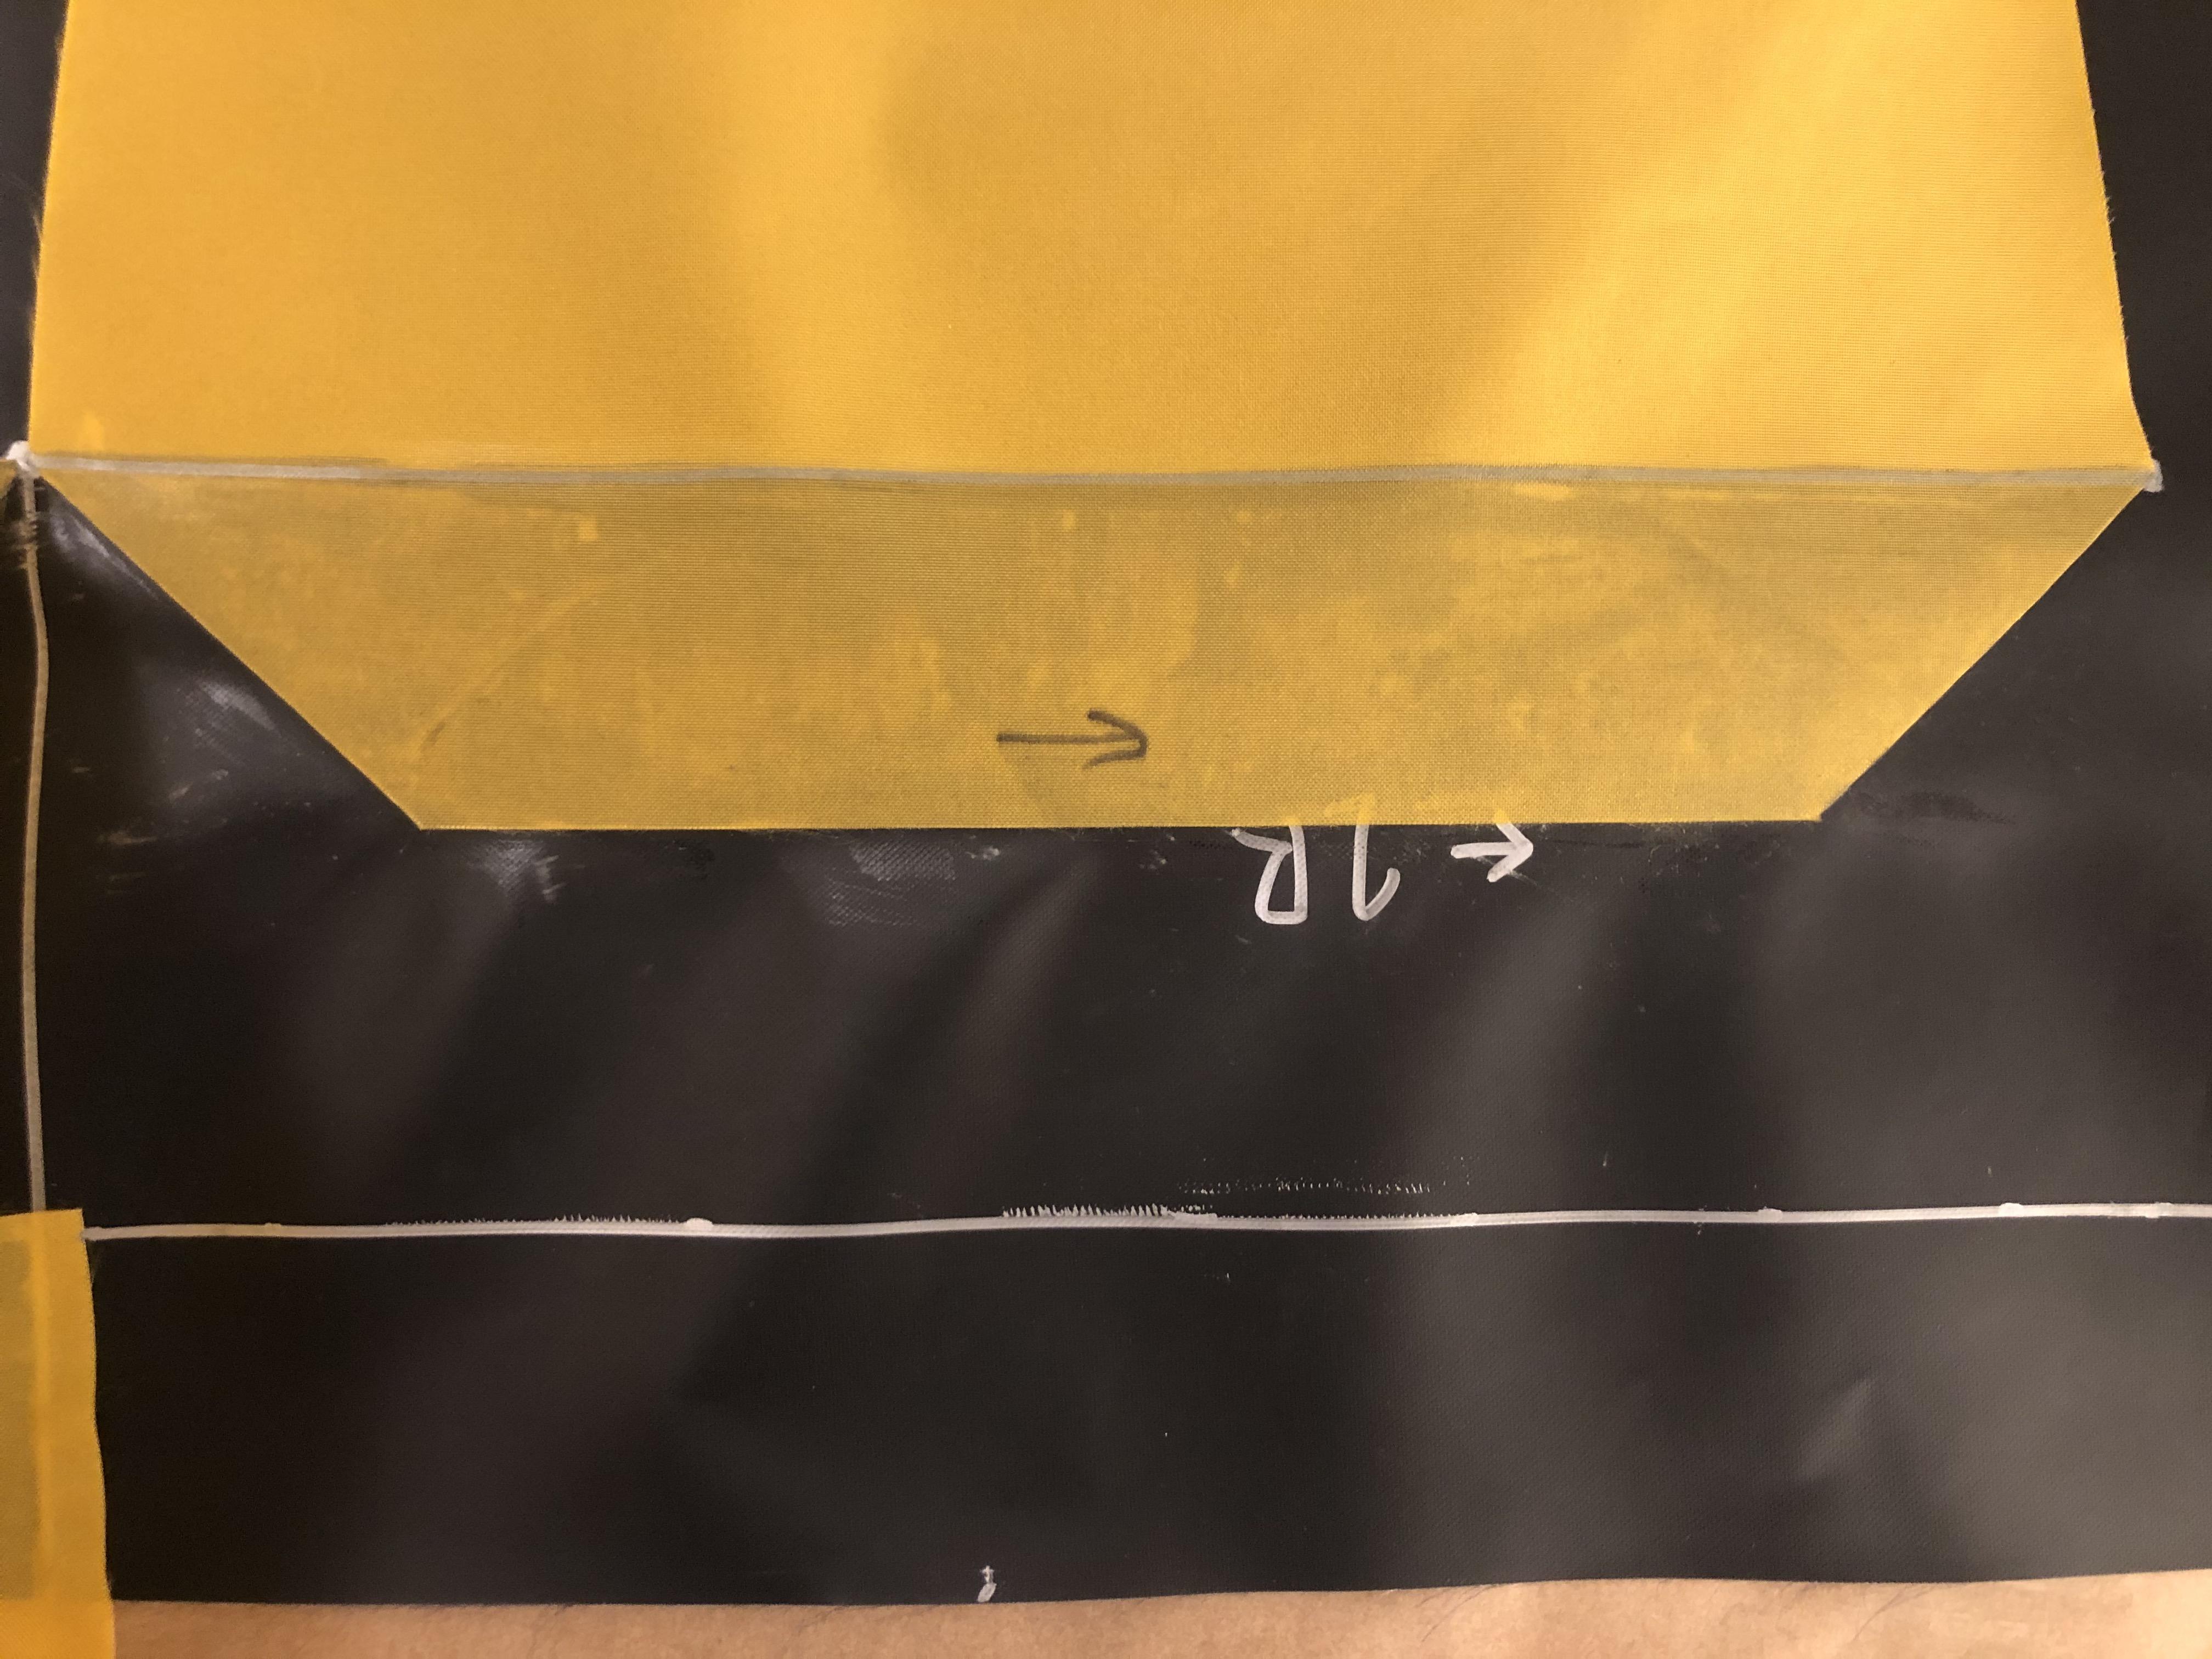
I have a couple questions before fully moving onto 2R and 2L on my Skeena. Things seem to be going well so far!
The outside floor part of 3L has some overlap from where it should have ended up based on the dot above. Right now I’ve just sealed to the line I made, but is it alright to seal that fully down and then trim 2L at the slit between 1 and 2?
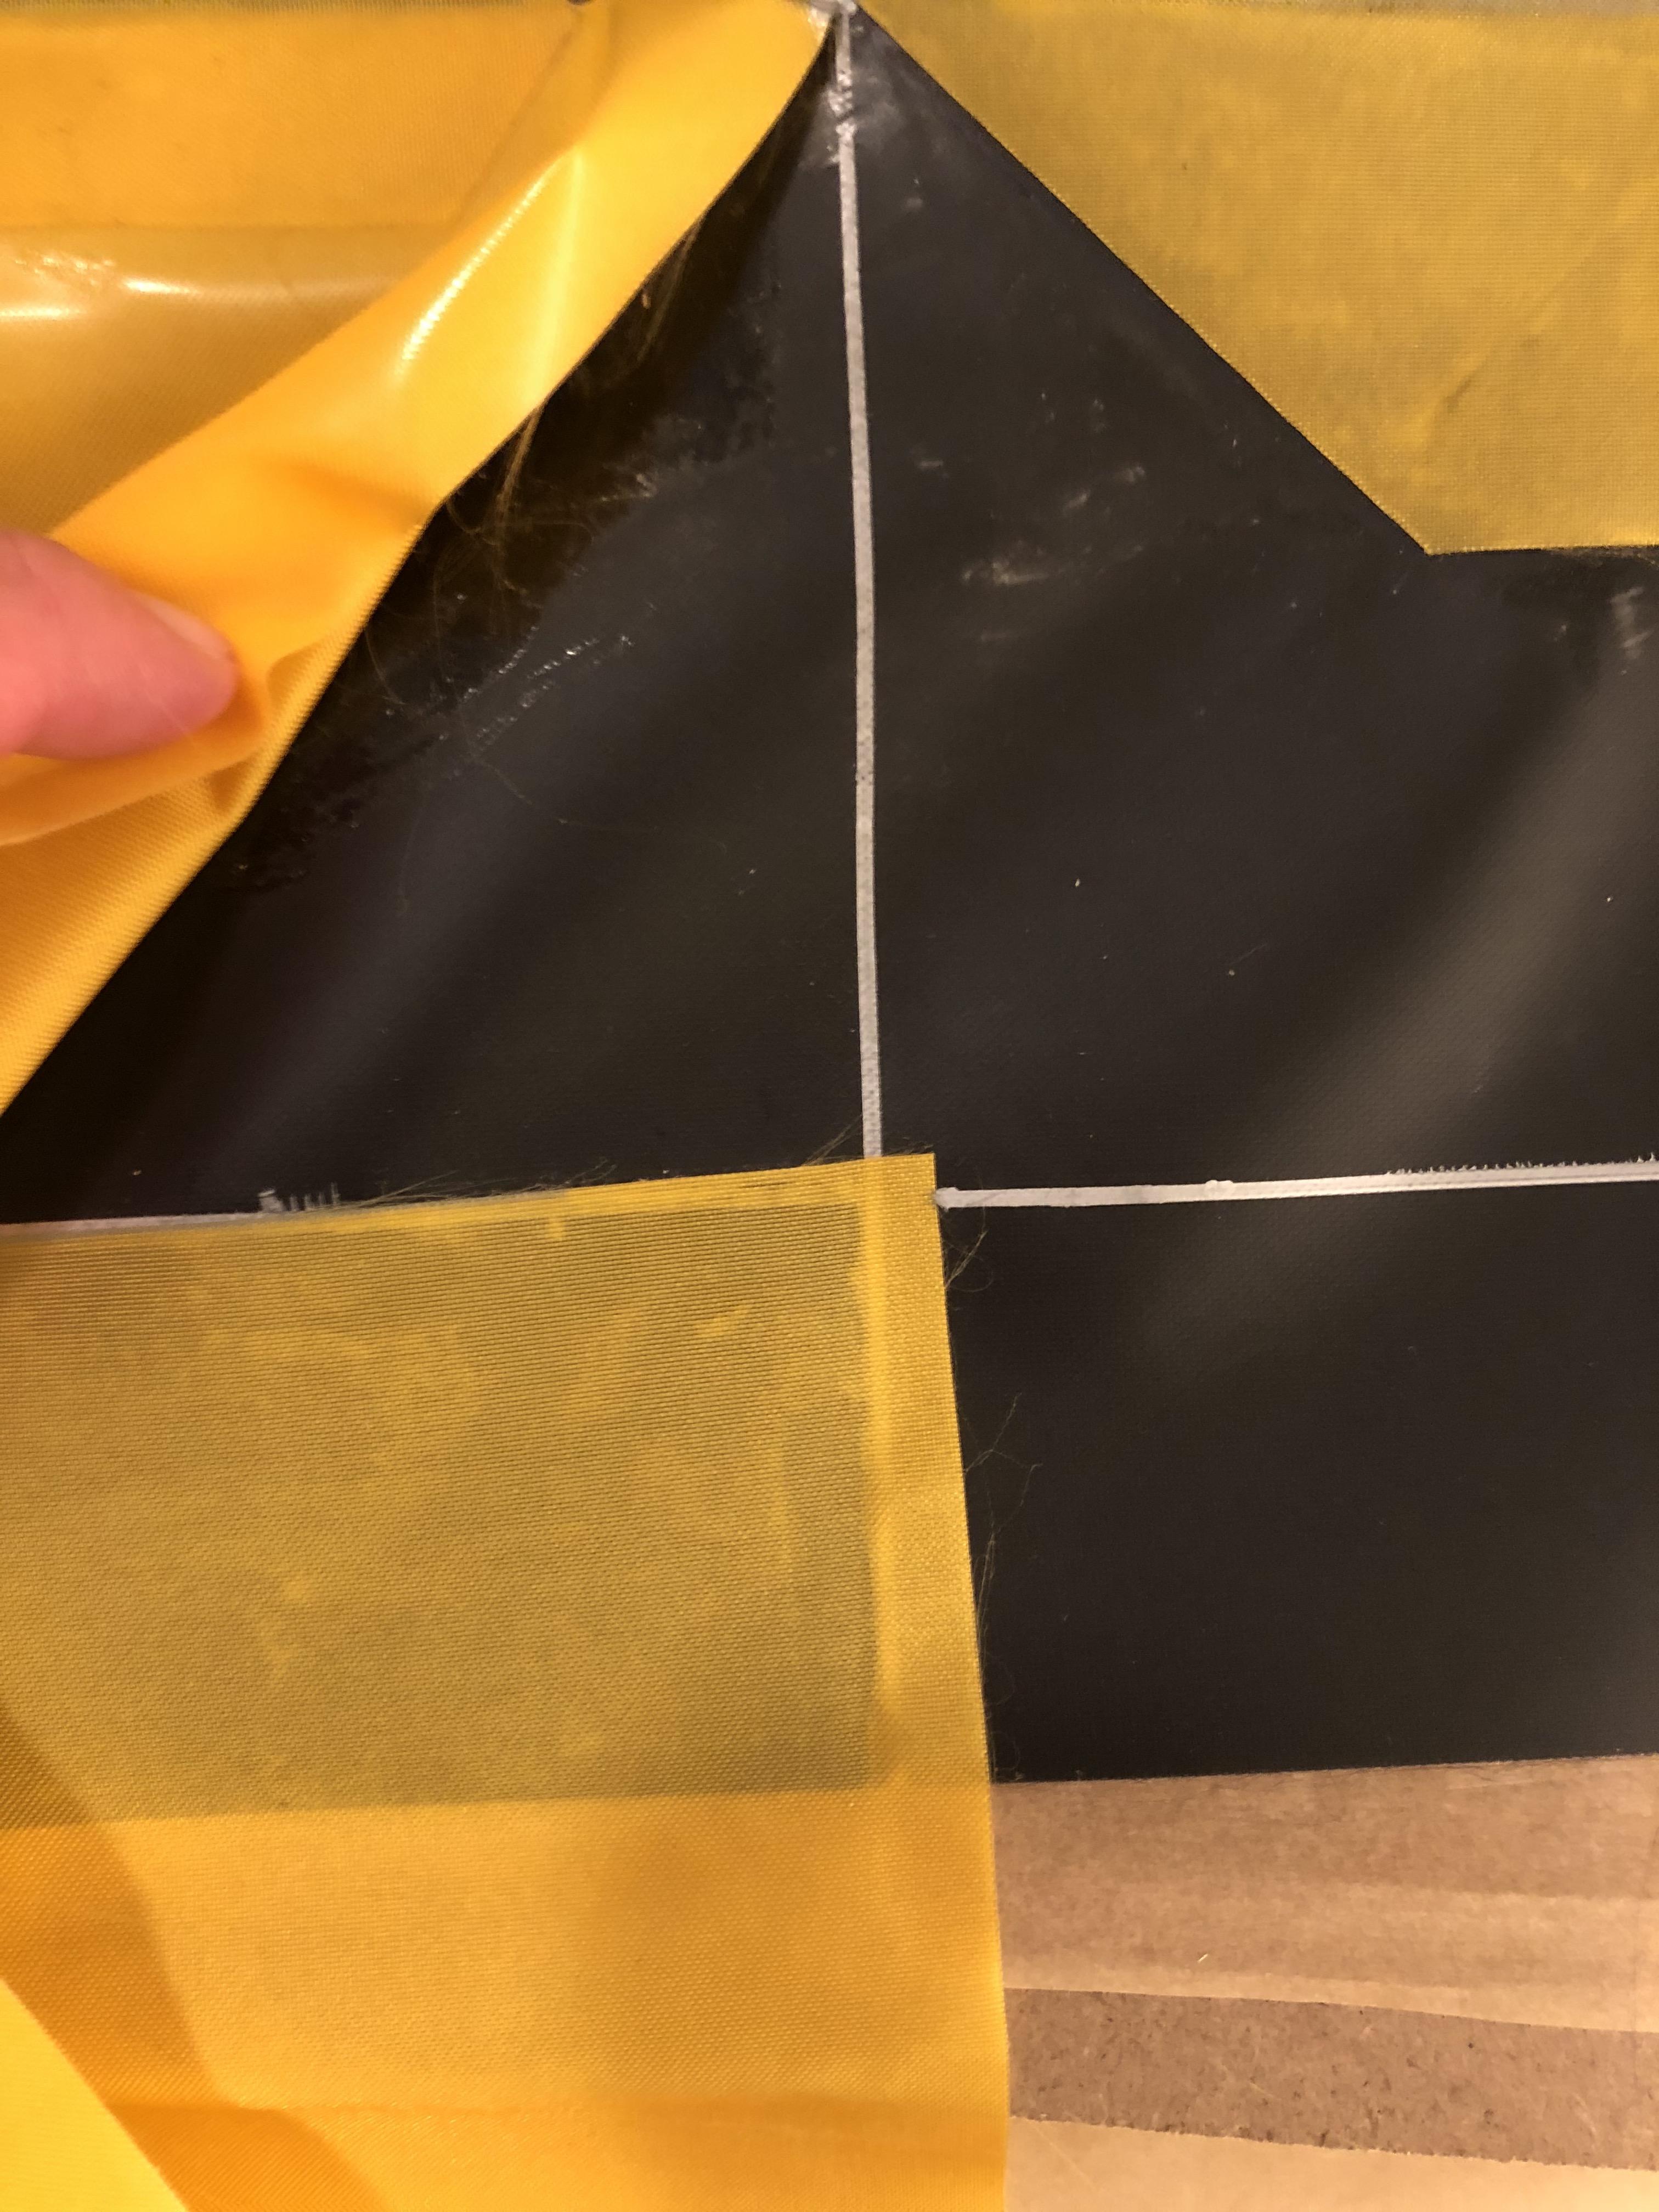
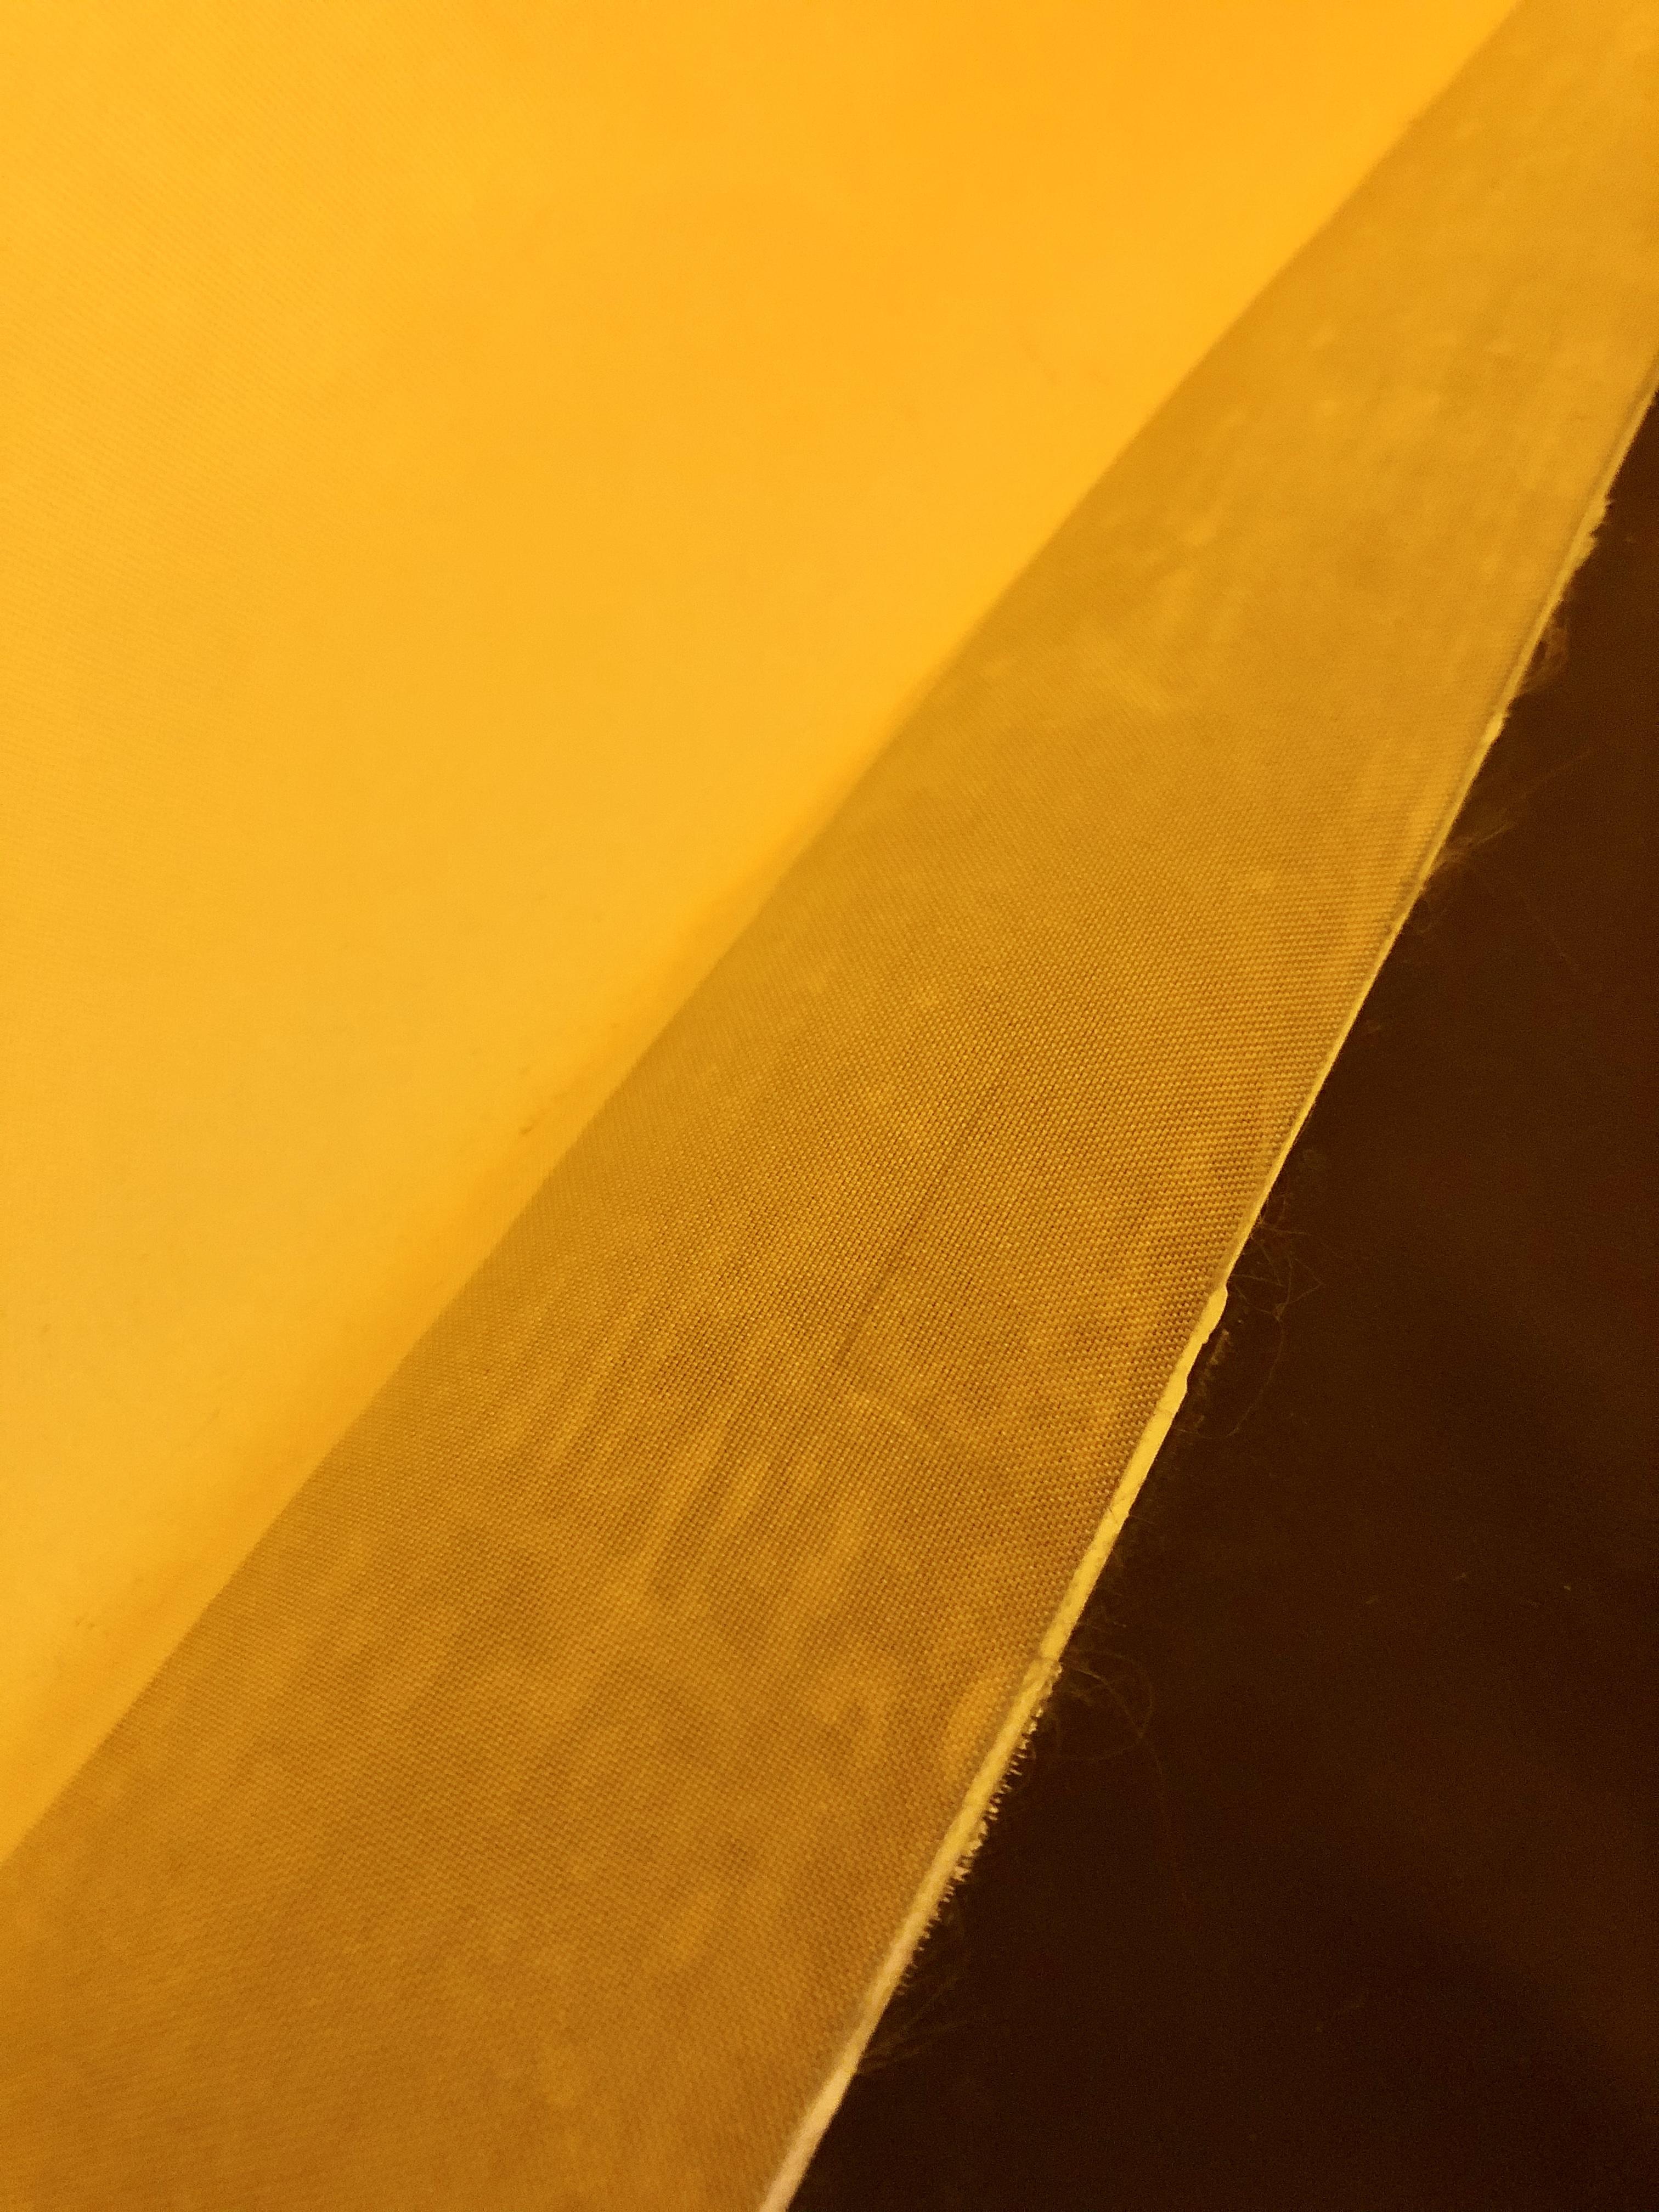
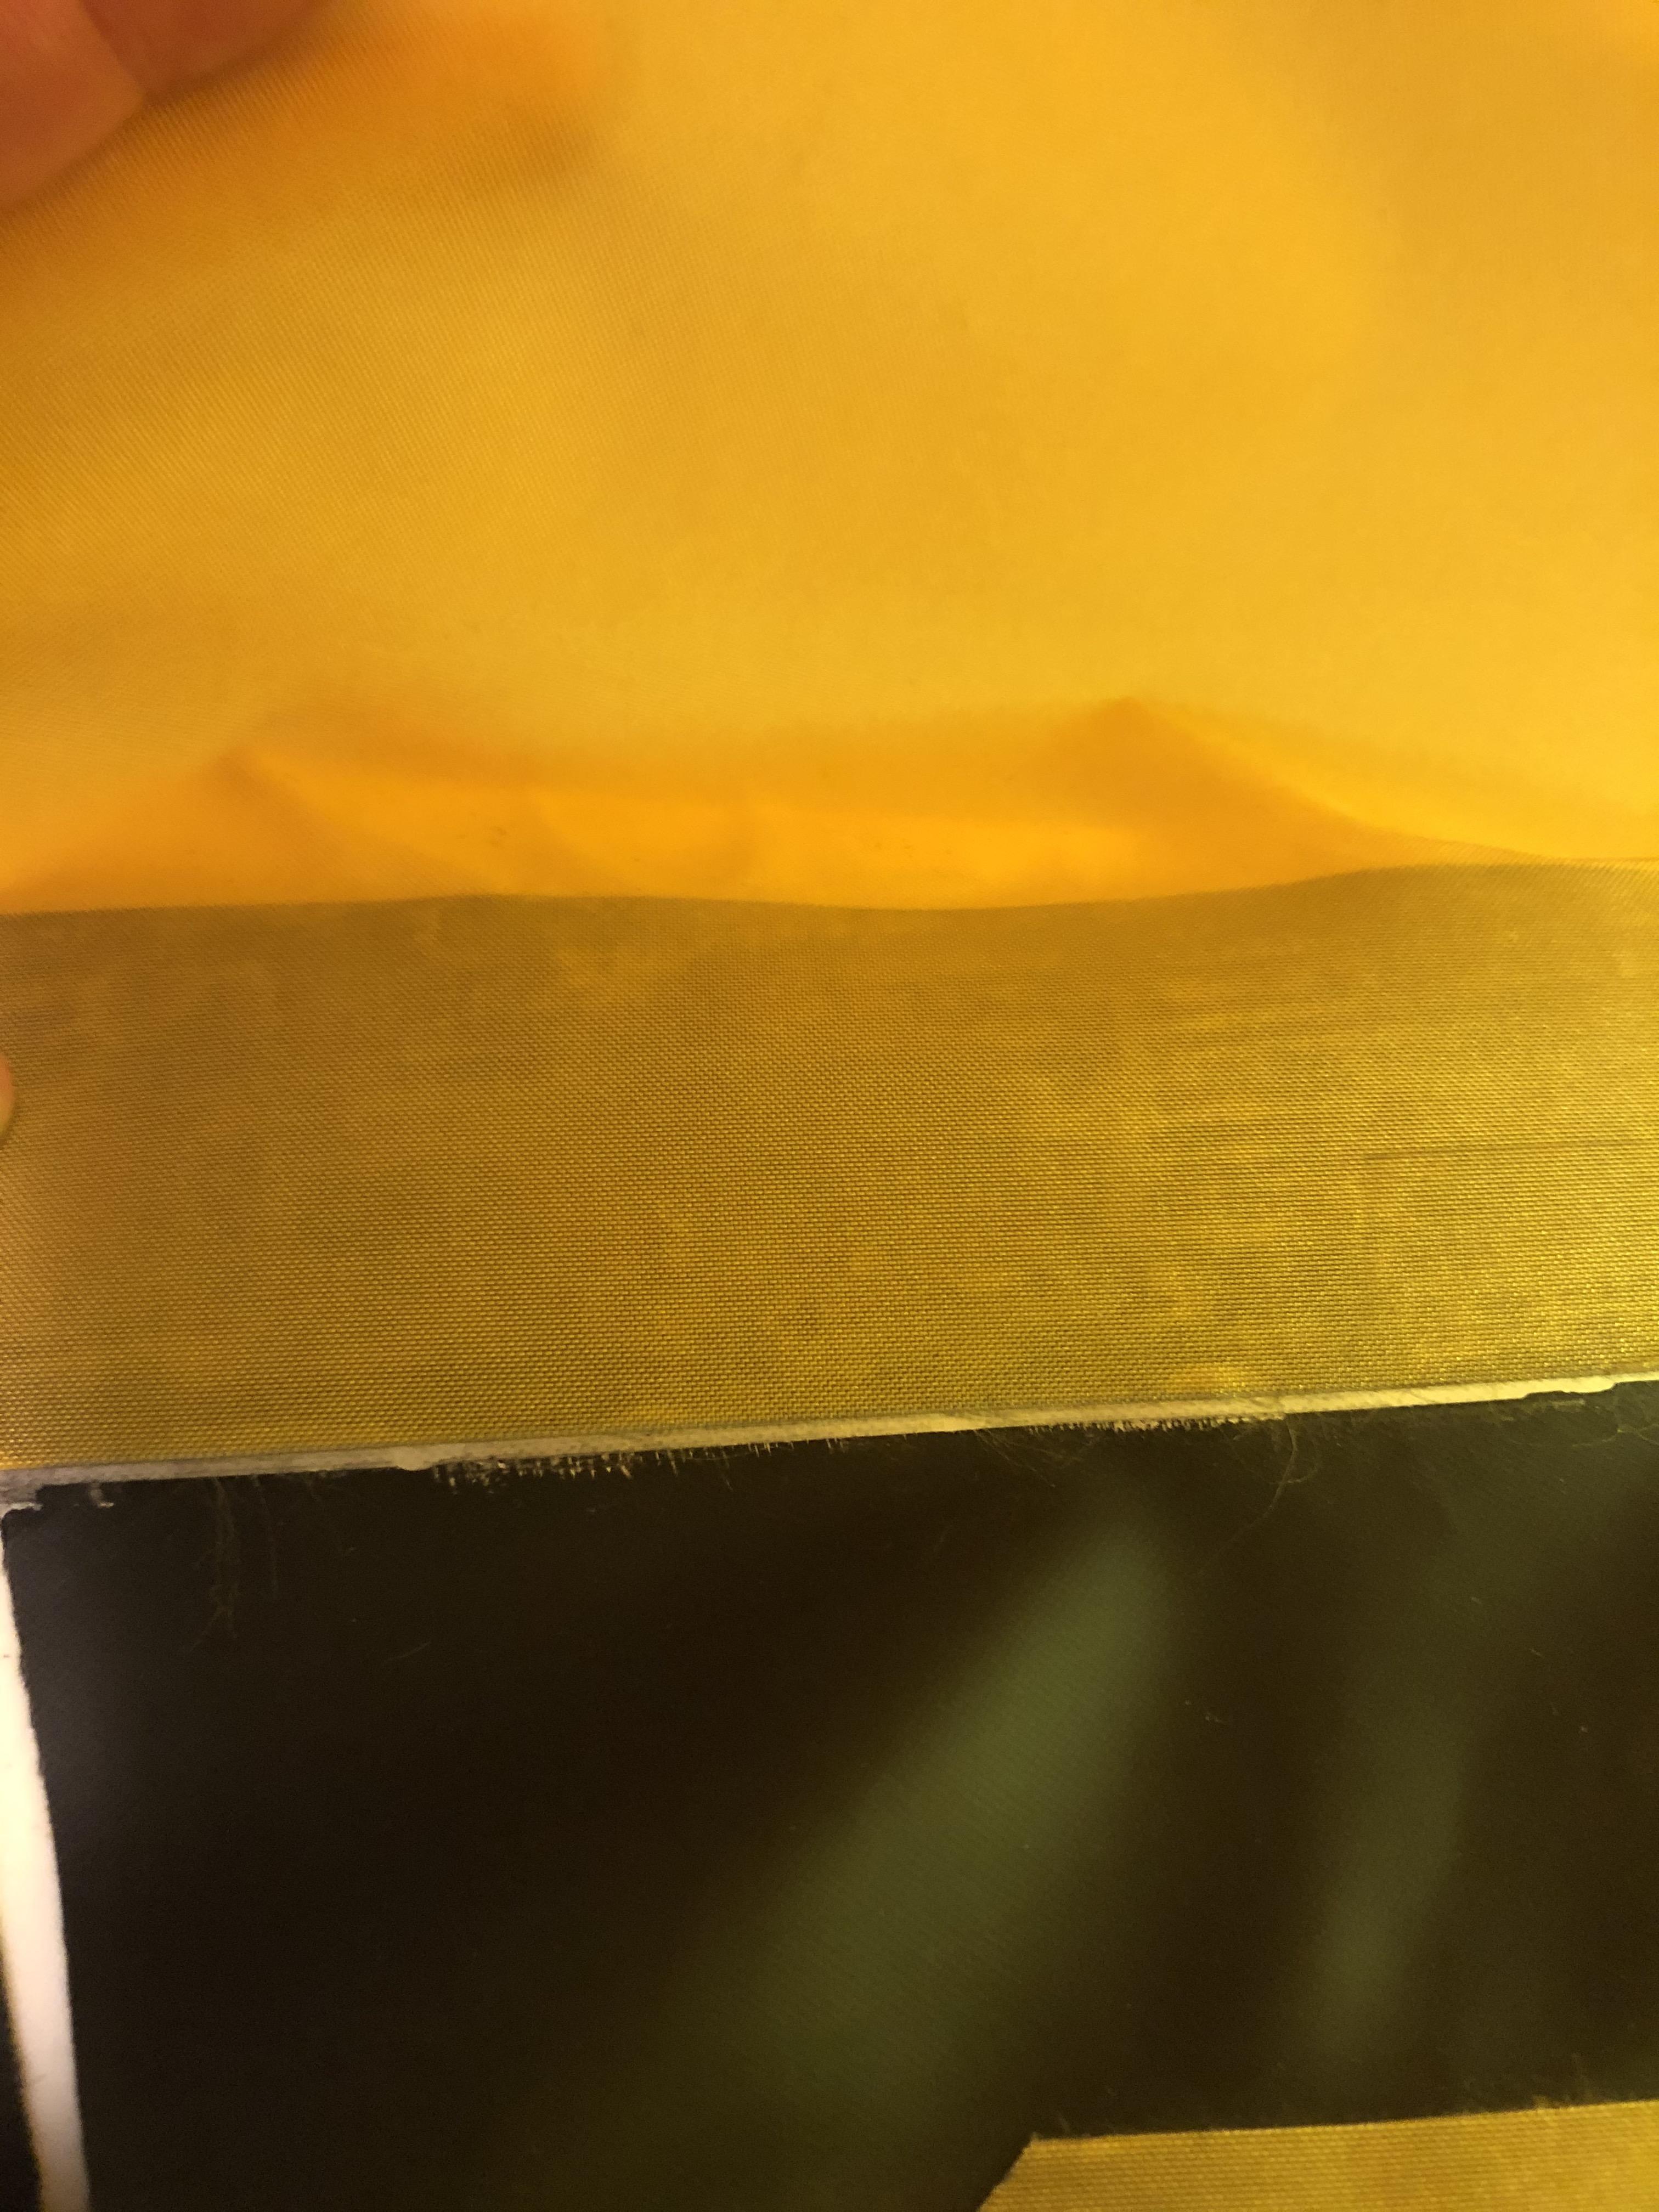
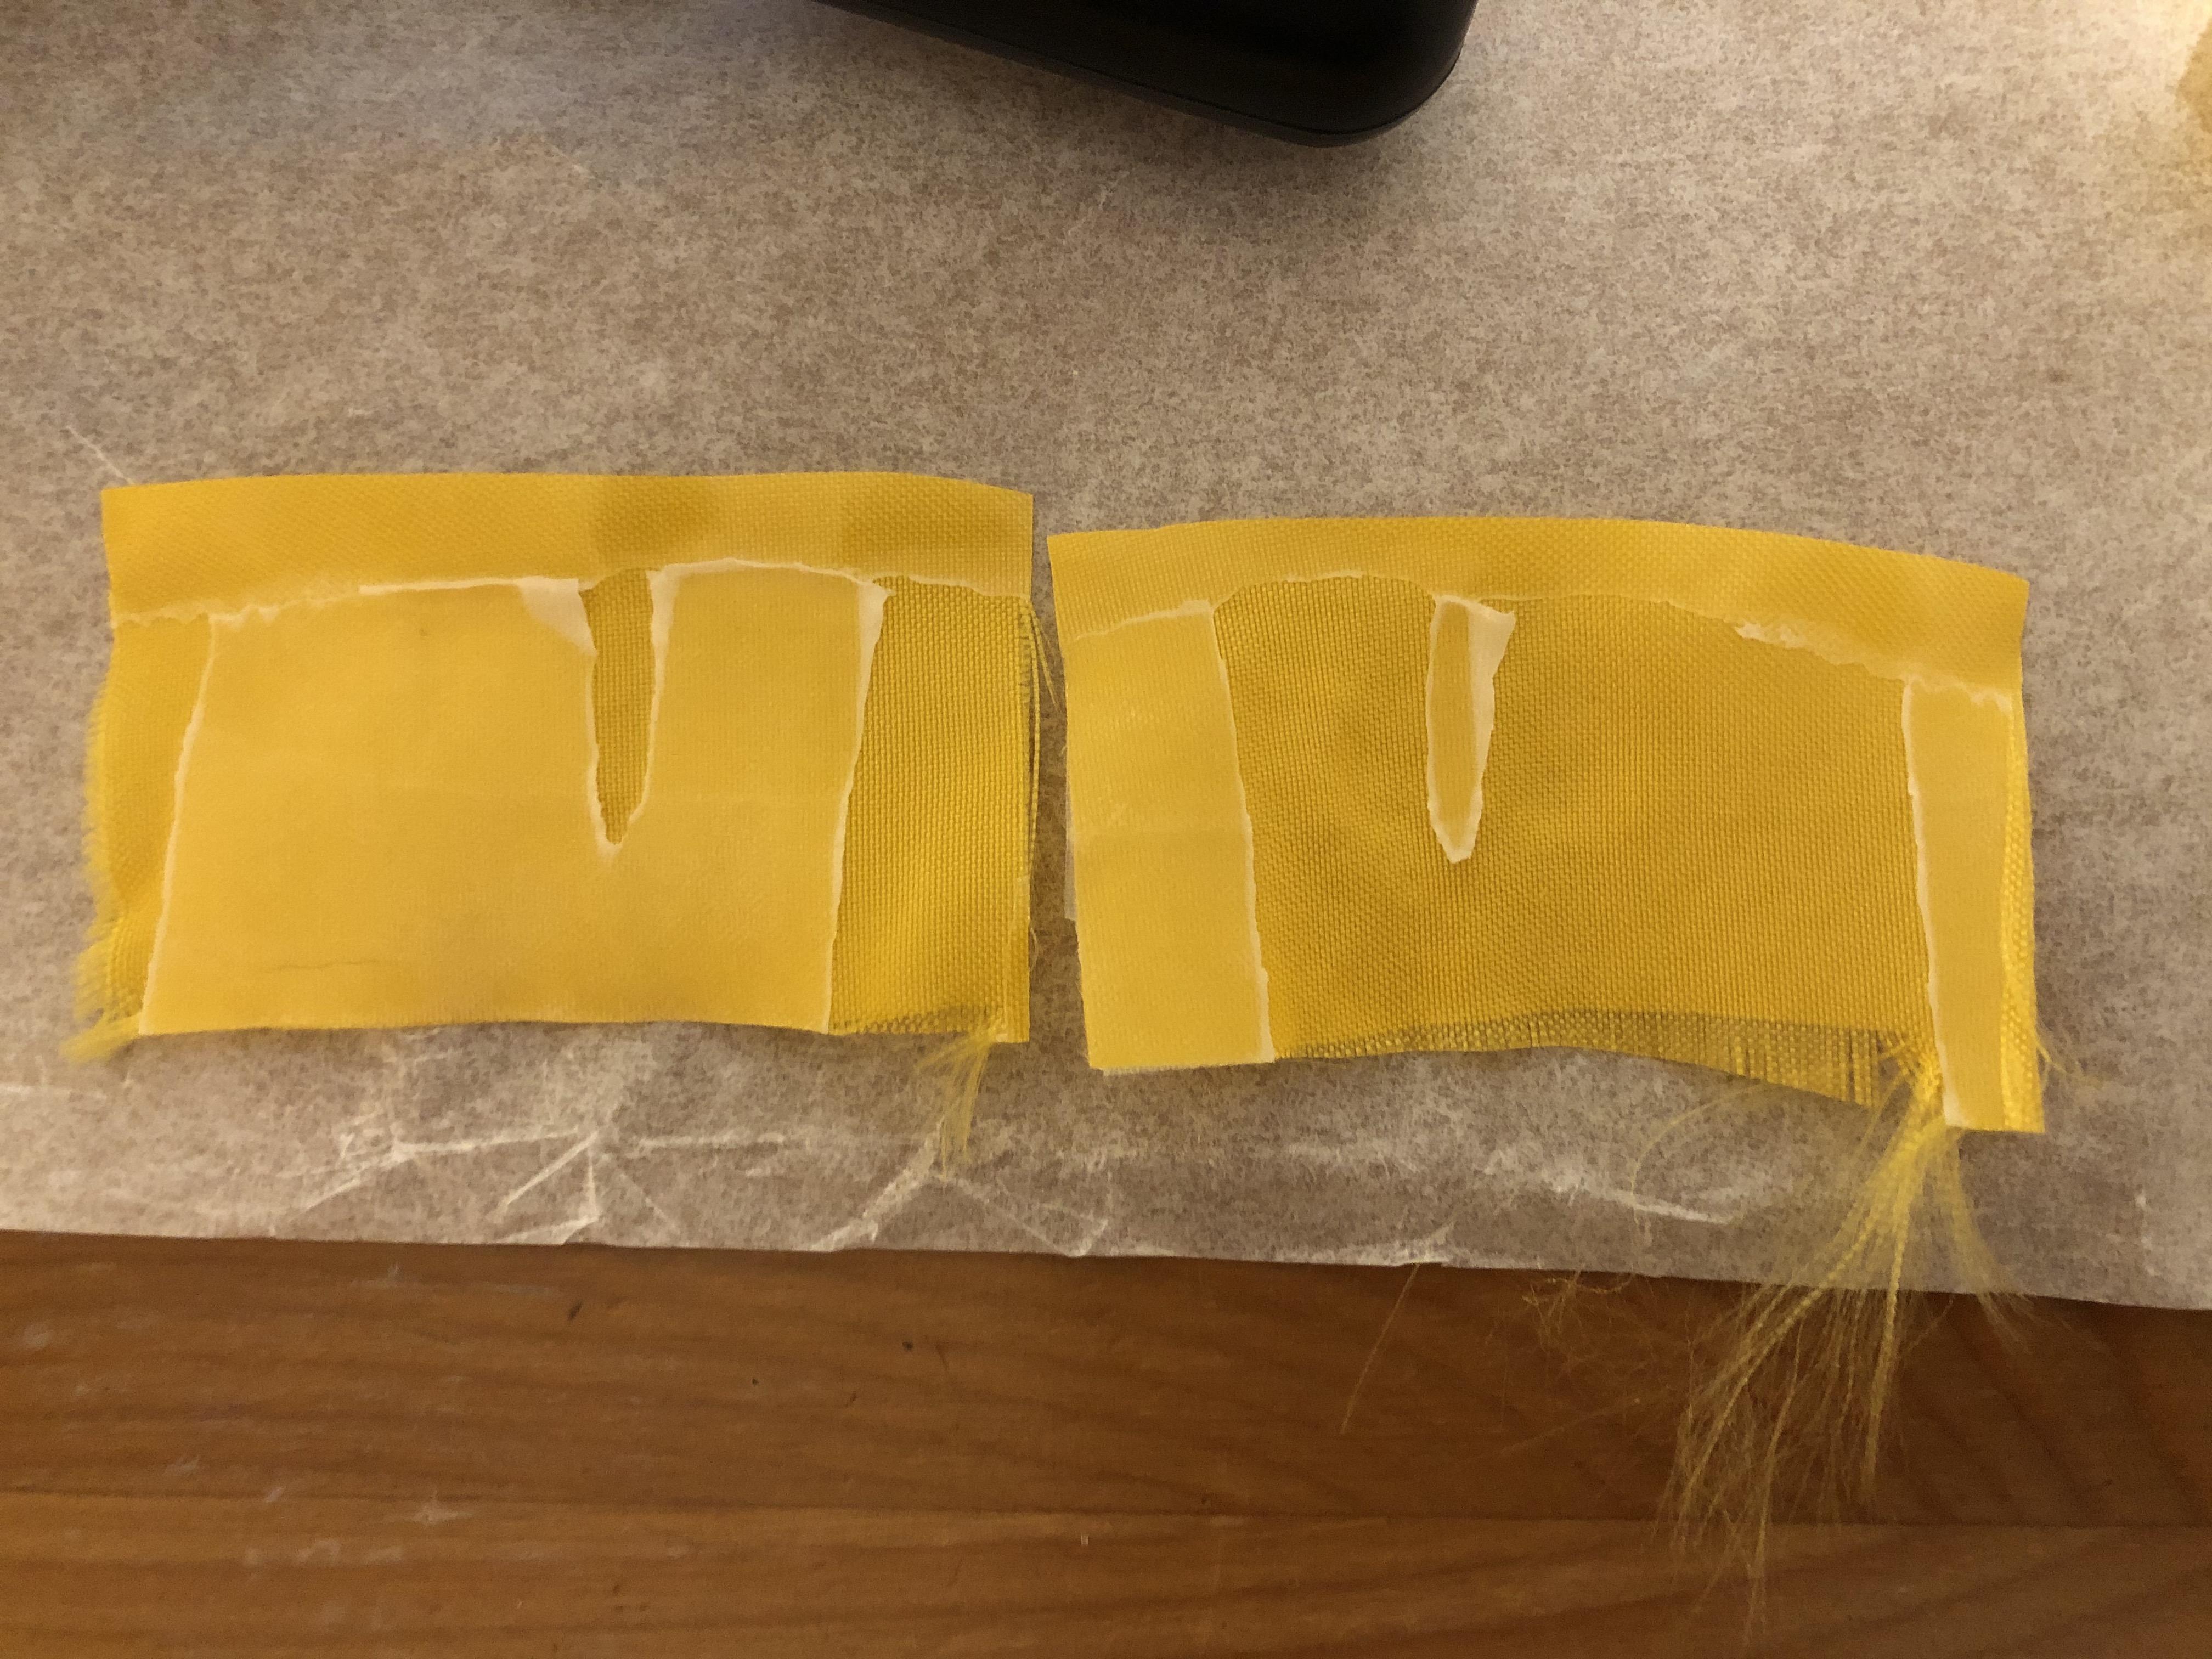
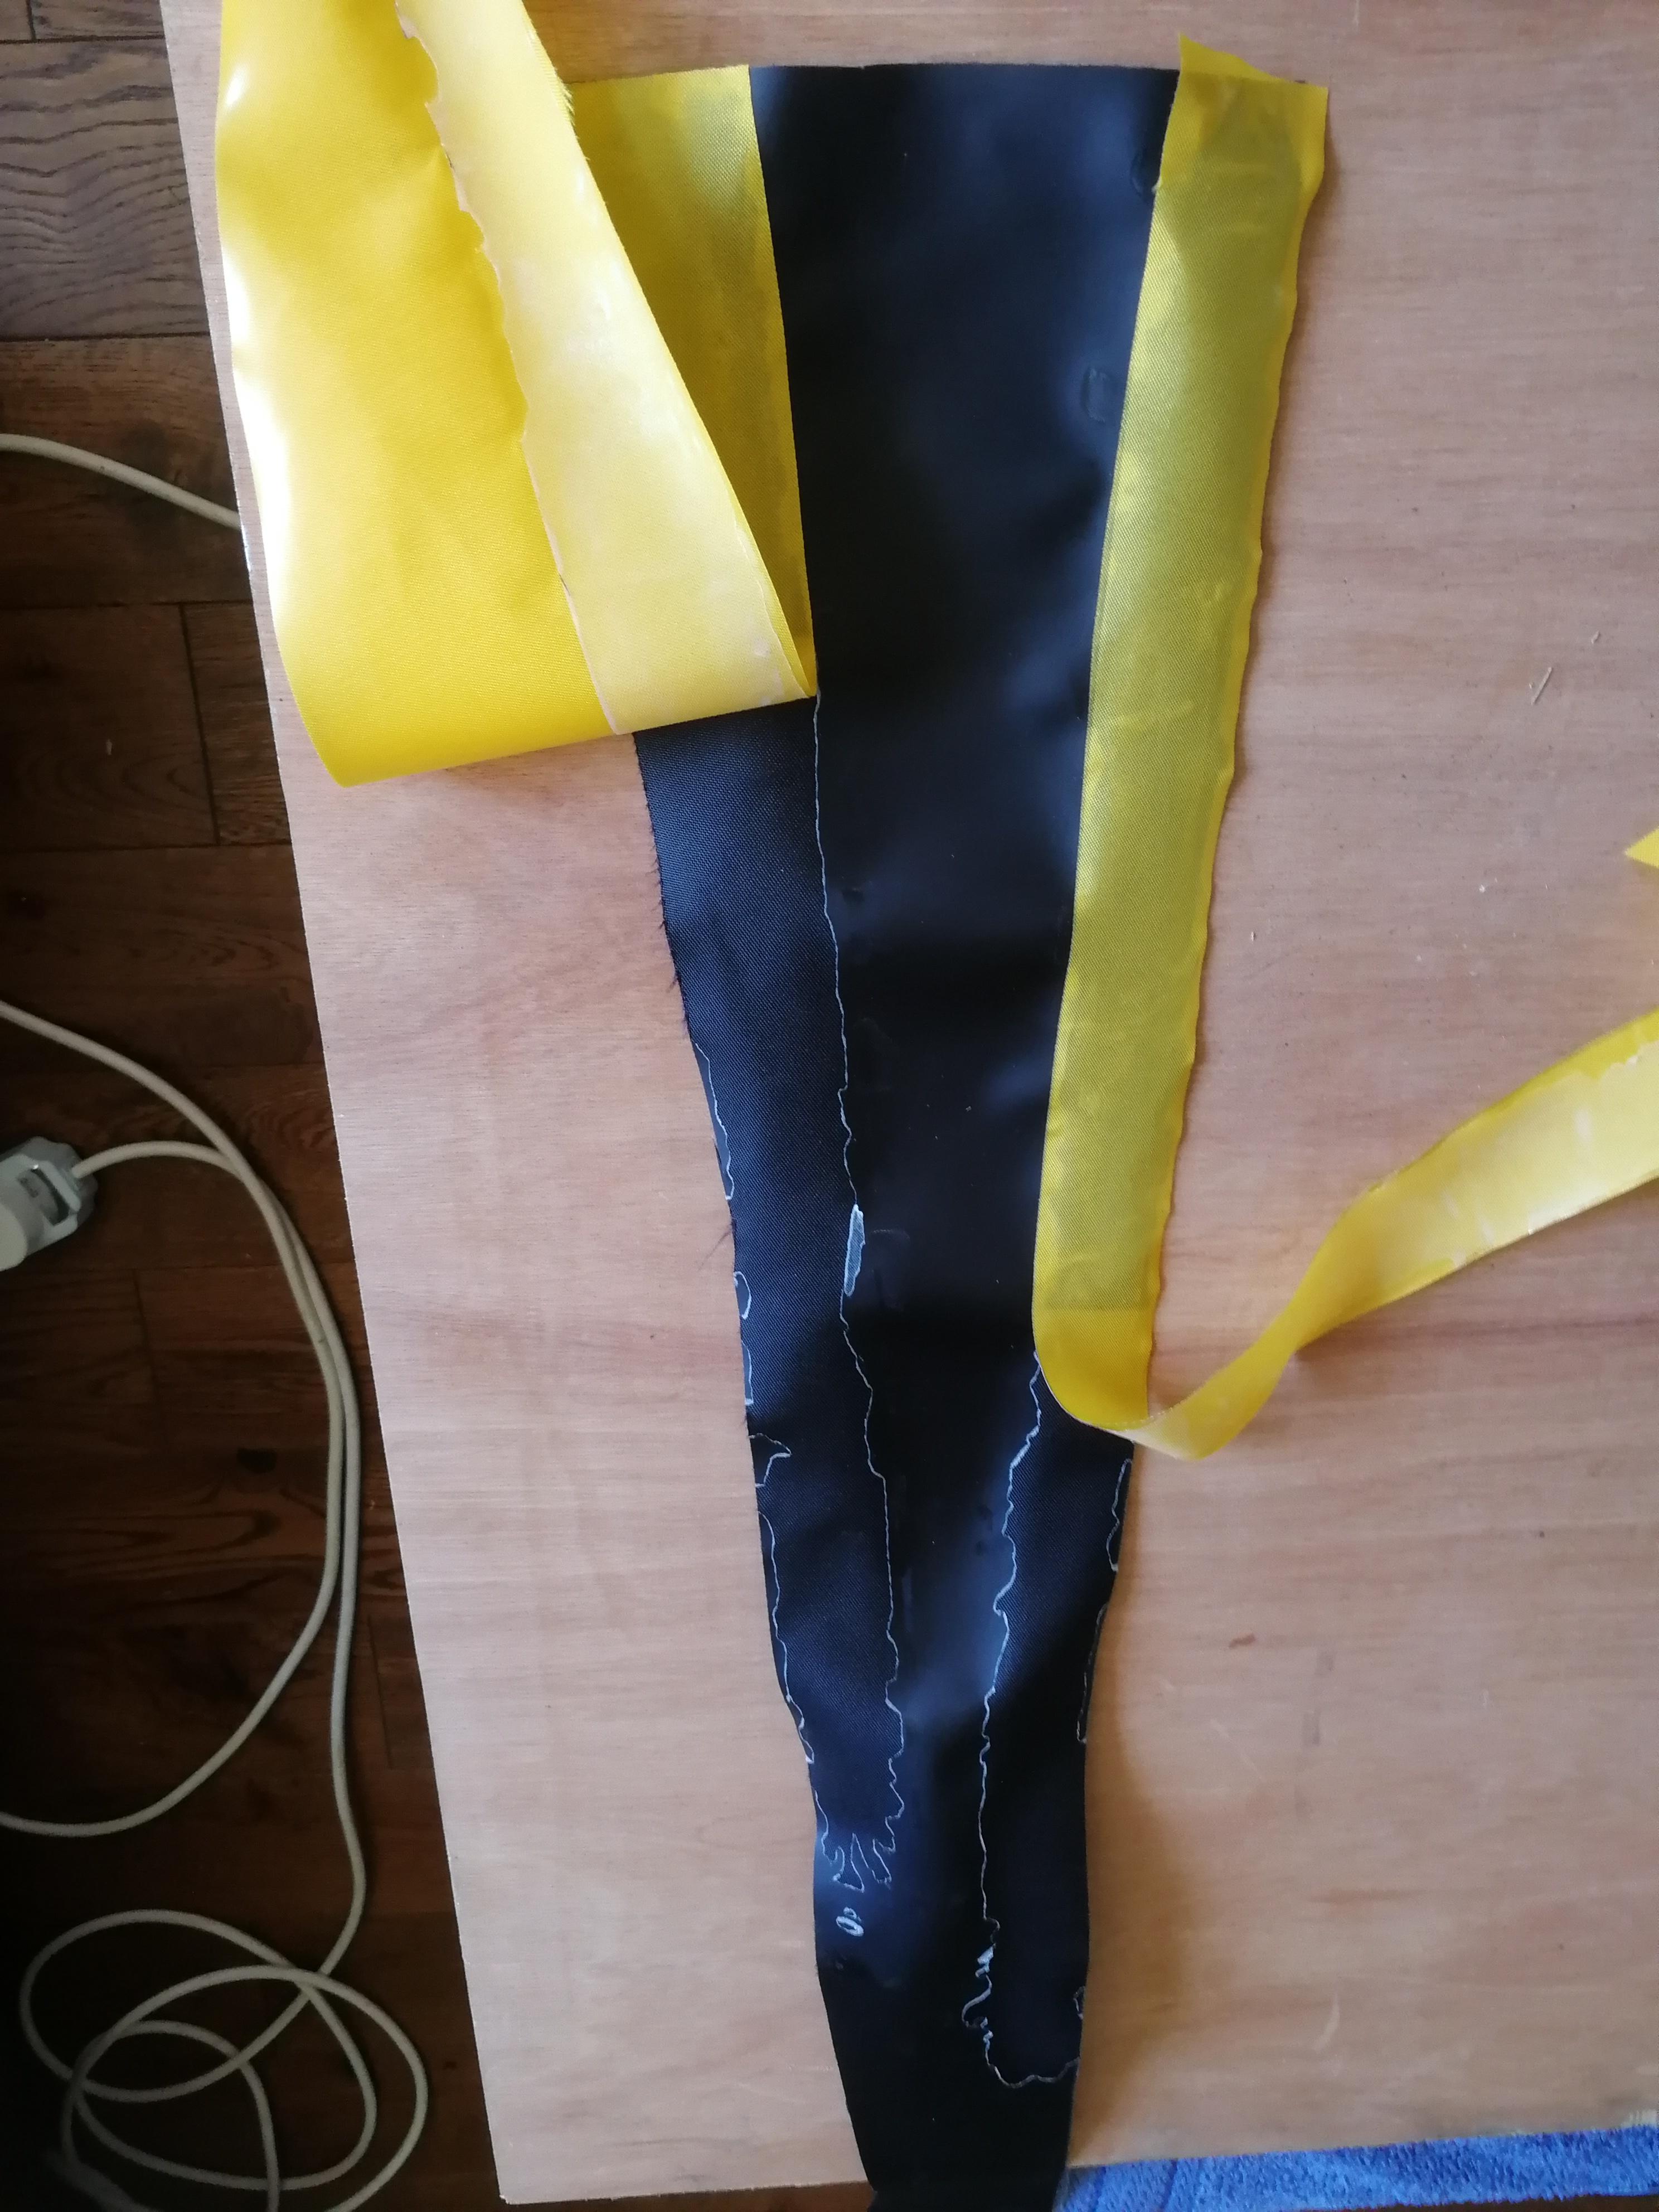
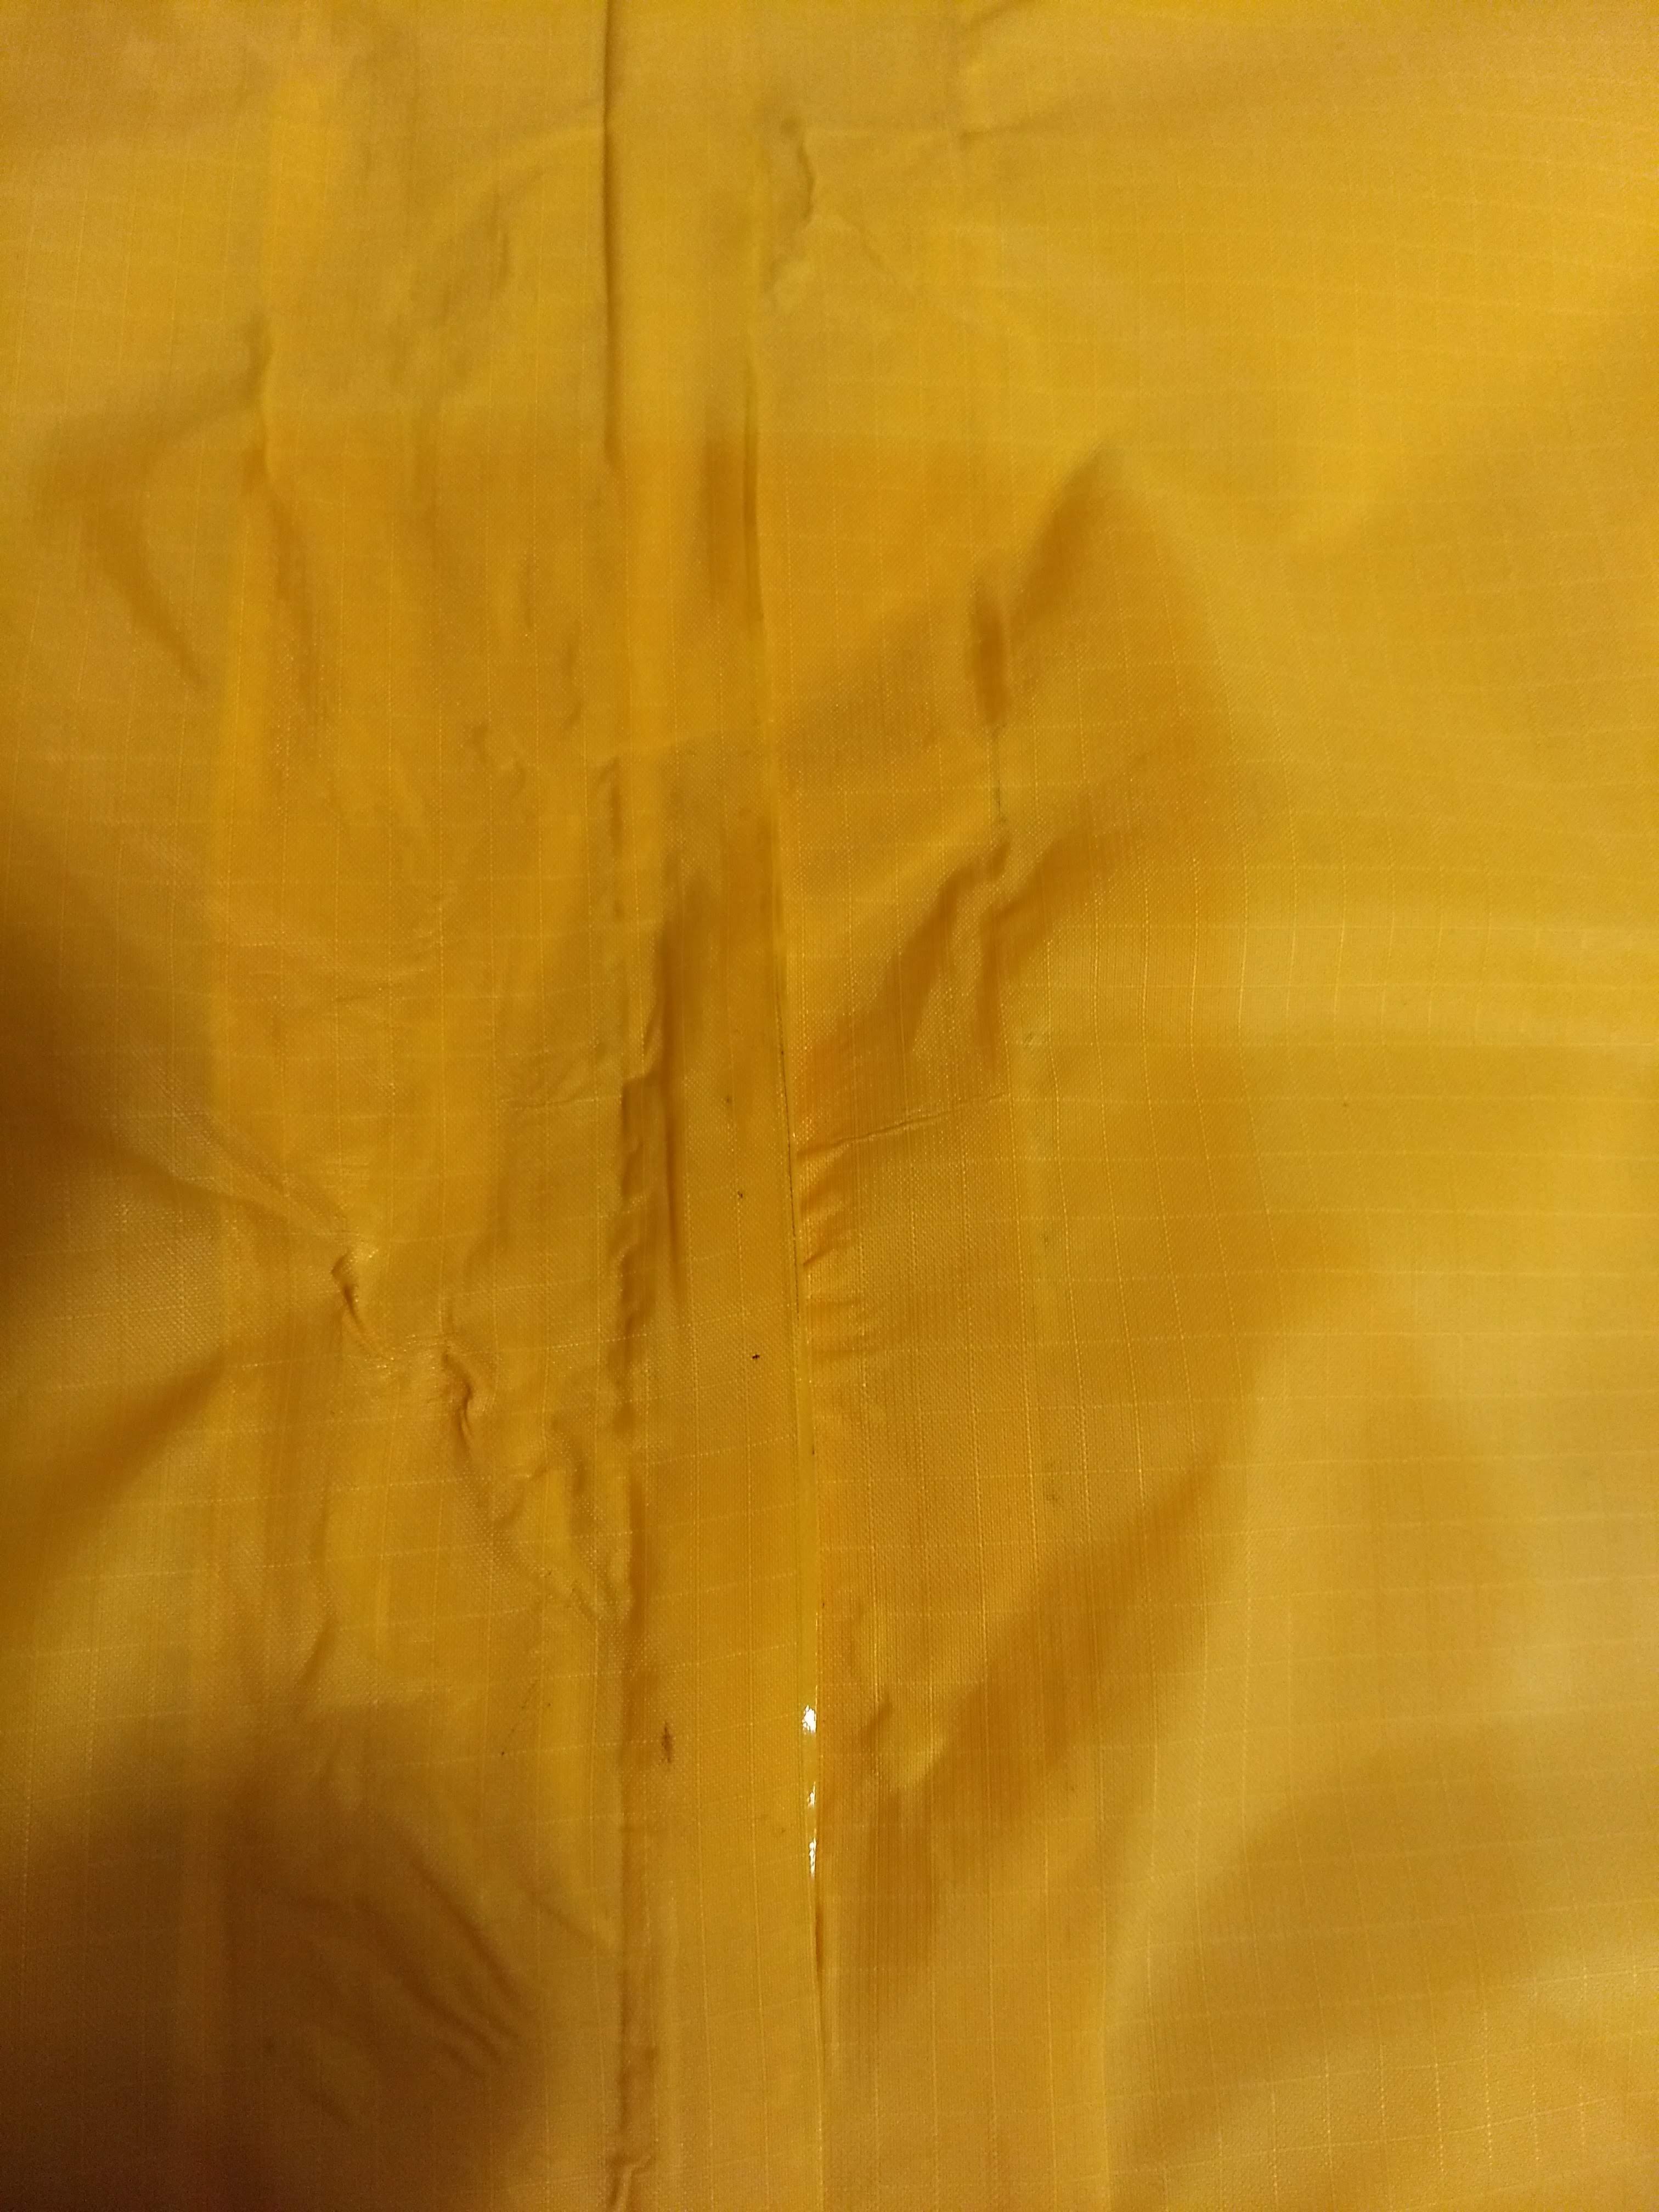
Heat sealing question – I have a few spots on 3R and 3L that have longer bubbles and there’s not a uniform translucency, is this going to cause any issues? I was using the edge of the iron and moving slowly back and forth towards the edge as I have a bigger iron. Definitely seems to be sealed as it survived being turned inside out and I’ve been bending it a little. I also melted the tpu a little on the underside of it. I’ve also included a pic of 2L that I did tonight. Doesn’t have the long bubbles but it’s not the translucency isn’t uniform. I’m using a roller on it after removing the iron. Hopefully I’m just being overly cautious and it’s all good! The seat turned out great and seemed to lose no air overnight.
3R
2L
-
May 20, 2020 at 9:03 am #12312Matt (Admin)Keymaster
Hi Aaron – your welds look good, and it sounds like they are holding just fine. I usually see some variation in the transparency of the welds (especially in the yellow and red fabrics), so that’s nothing to worry about. Do try to use the roller to squeeze out the air bubbles, but they look fine.
I’m going to answer the other part of your question on the instructions page, because more people will see it there. Cheers!
-
This reply was modified 6 years, 2 months ago by Matt (Admin).
-
This reply was modified 6 years, 2 months ago by
-
-
April 15, 2020 at 10:57 am #12056NatureCallsParticipant
Having a leak at the docking end of my TiZip on a new Skeena build, any hints? Yes have lubed it and done all the TiZip instructions.
-
April 15, 2020 at 12:30 pm #12066Matt (Admin)Keymaster
Usually leaks are caused by debris in the zipper: https://www.diypackraft.com/faq/why-is-my-airtight-zipper-leaking/
-
-
April 15, 2020 at 10:32 am #12055AaronParticipant
Awesome, that’s good to hear. I’ll try a few more with less heating time and see what happens. Then on to the inflation bag!
Thank you!
Aaron
-
April 14, 2020 at 11:10 am #11971AaronParticipant
Hi,
I am in the practice phase of heat sealing right now before I dive into making the raft and I have a couple questions about my heat sealing and if I’m going about it the right way. I’m using a Hangar 9 Iron that is definitely getting hot enough, but I’m wondering if it’s getting too hot. I was able to get dial it in to where I know it’s definitely too cold and the two pieces would pull apart easily. Moving the dial a tad higher and I can get everything to seal put when I force it apart most of the TPU comes off in one big chunk with a couple smaller areas that stay on other piece of fabric. This happens when sealing the standard (yellow) fabric to the seat fabric, the yellow to yellow, and then the standard yellow fabric to the 450 floor fabric. Based on the heat sealing technique page my iron might be too hot or I’m not pressing hard enough or holding it on long enough (I did have the other side of the TPU start to melt on the floor piece one time). I have attached some photos of my practice runs.
Any guidance is appreciated! Also, I tried to post this last night but it seems to have disappeared so apologies if this comes through twice.
Thanks!
Aaron
-
April 14, 2020 at 11:38 am #12045Matt (Admin)Keymaster
Hi Aaron – sorry I didn’t see this until now. There’s a bug in the forum software that was holding posts with multiple pictures in a hidden section, waiting for moderation, but it wasn’t notifying me about them. Hopefully I’ve fixed it now… we shall see. Don’t be afraid to email me if you don’t get a response within a day or so.
Anyway, your welds look pretty good to me. Ideally there would be equal amounts stuck to each of the 250 GSM fabrics, but what I see isn’t so bad – clearly the TPU layers are welding together. Try heating it for a shorter amount of time and that might help, but even if it doesn’t change, you’re certainly getting solid welds.
For the tube-to-floor welds with the 450 GSM fabric, this unequal peeling is to be expected (see my response to Jason below). The 450 GSM fabric is new and I hadn’t posted about this in the heat sealing technique page until recently, so you probably didn’t see it. Thanks for asking.
-
-
April 8, 2020 at 8:08 am #11946LisaRisaParticipant
Repairing damaged TPU /Seam grip sealant adhesive question
A few times my iron has came too close along the yellow fabric when for example doing the seam stripes. So little scuffs /damage that might effect the durability. If I add seam grip to these spots won’t it stain it ? Is there a way to fix these little blemishes/damaged area without staining yellow fabric? To I add seam sealant to shinny side?
-
April 8, 2020 at 8:12 am #11947Matt (Admin)Keymaster
Yeah, I apply the Seam Grip to the TPU side (shiny outside) of the fabric in spots like that if they’re somewhere that will be noticeable on the inflated packraft. If it’s somewhere hidden, like near where the tube meets the floor on the inside of the packraft, I apply it to the inside of the tube. Cheers!
-
-
April 5, 2020 at 3:17 am #11897JasonParticipant
Hi,
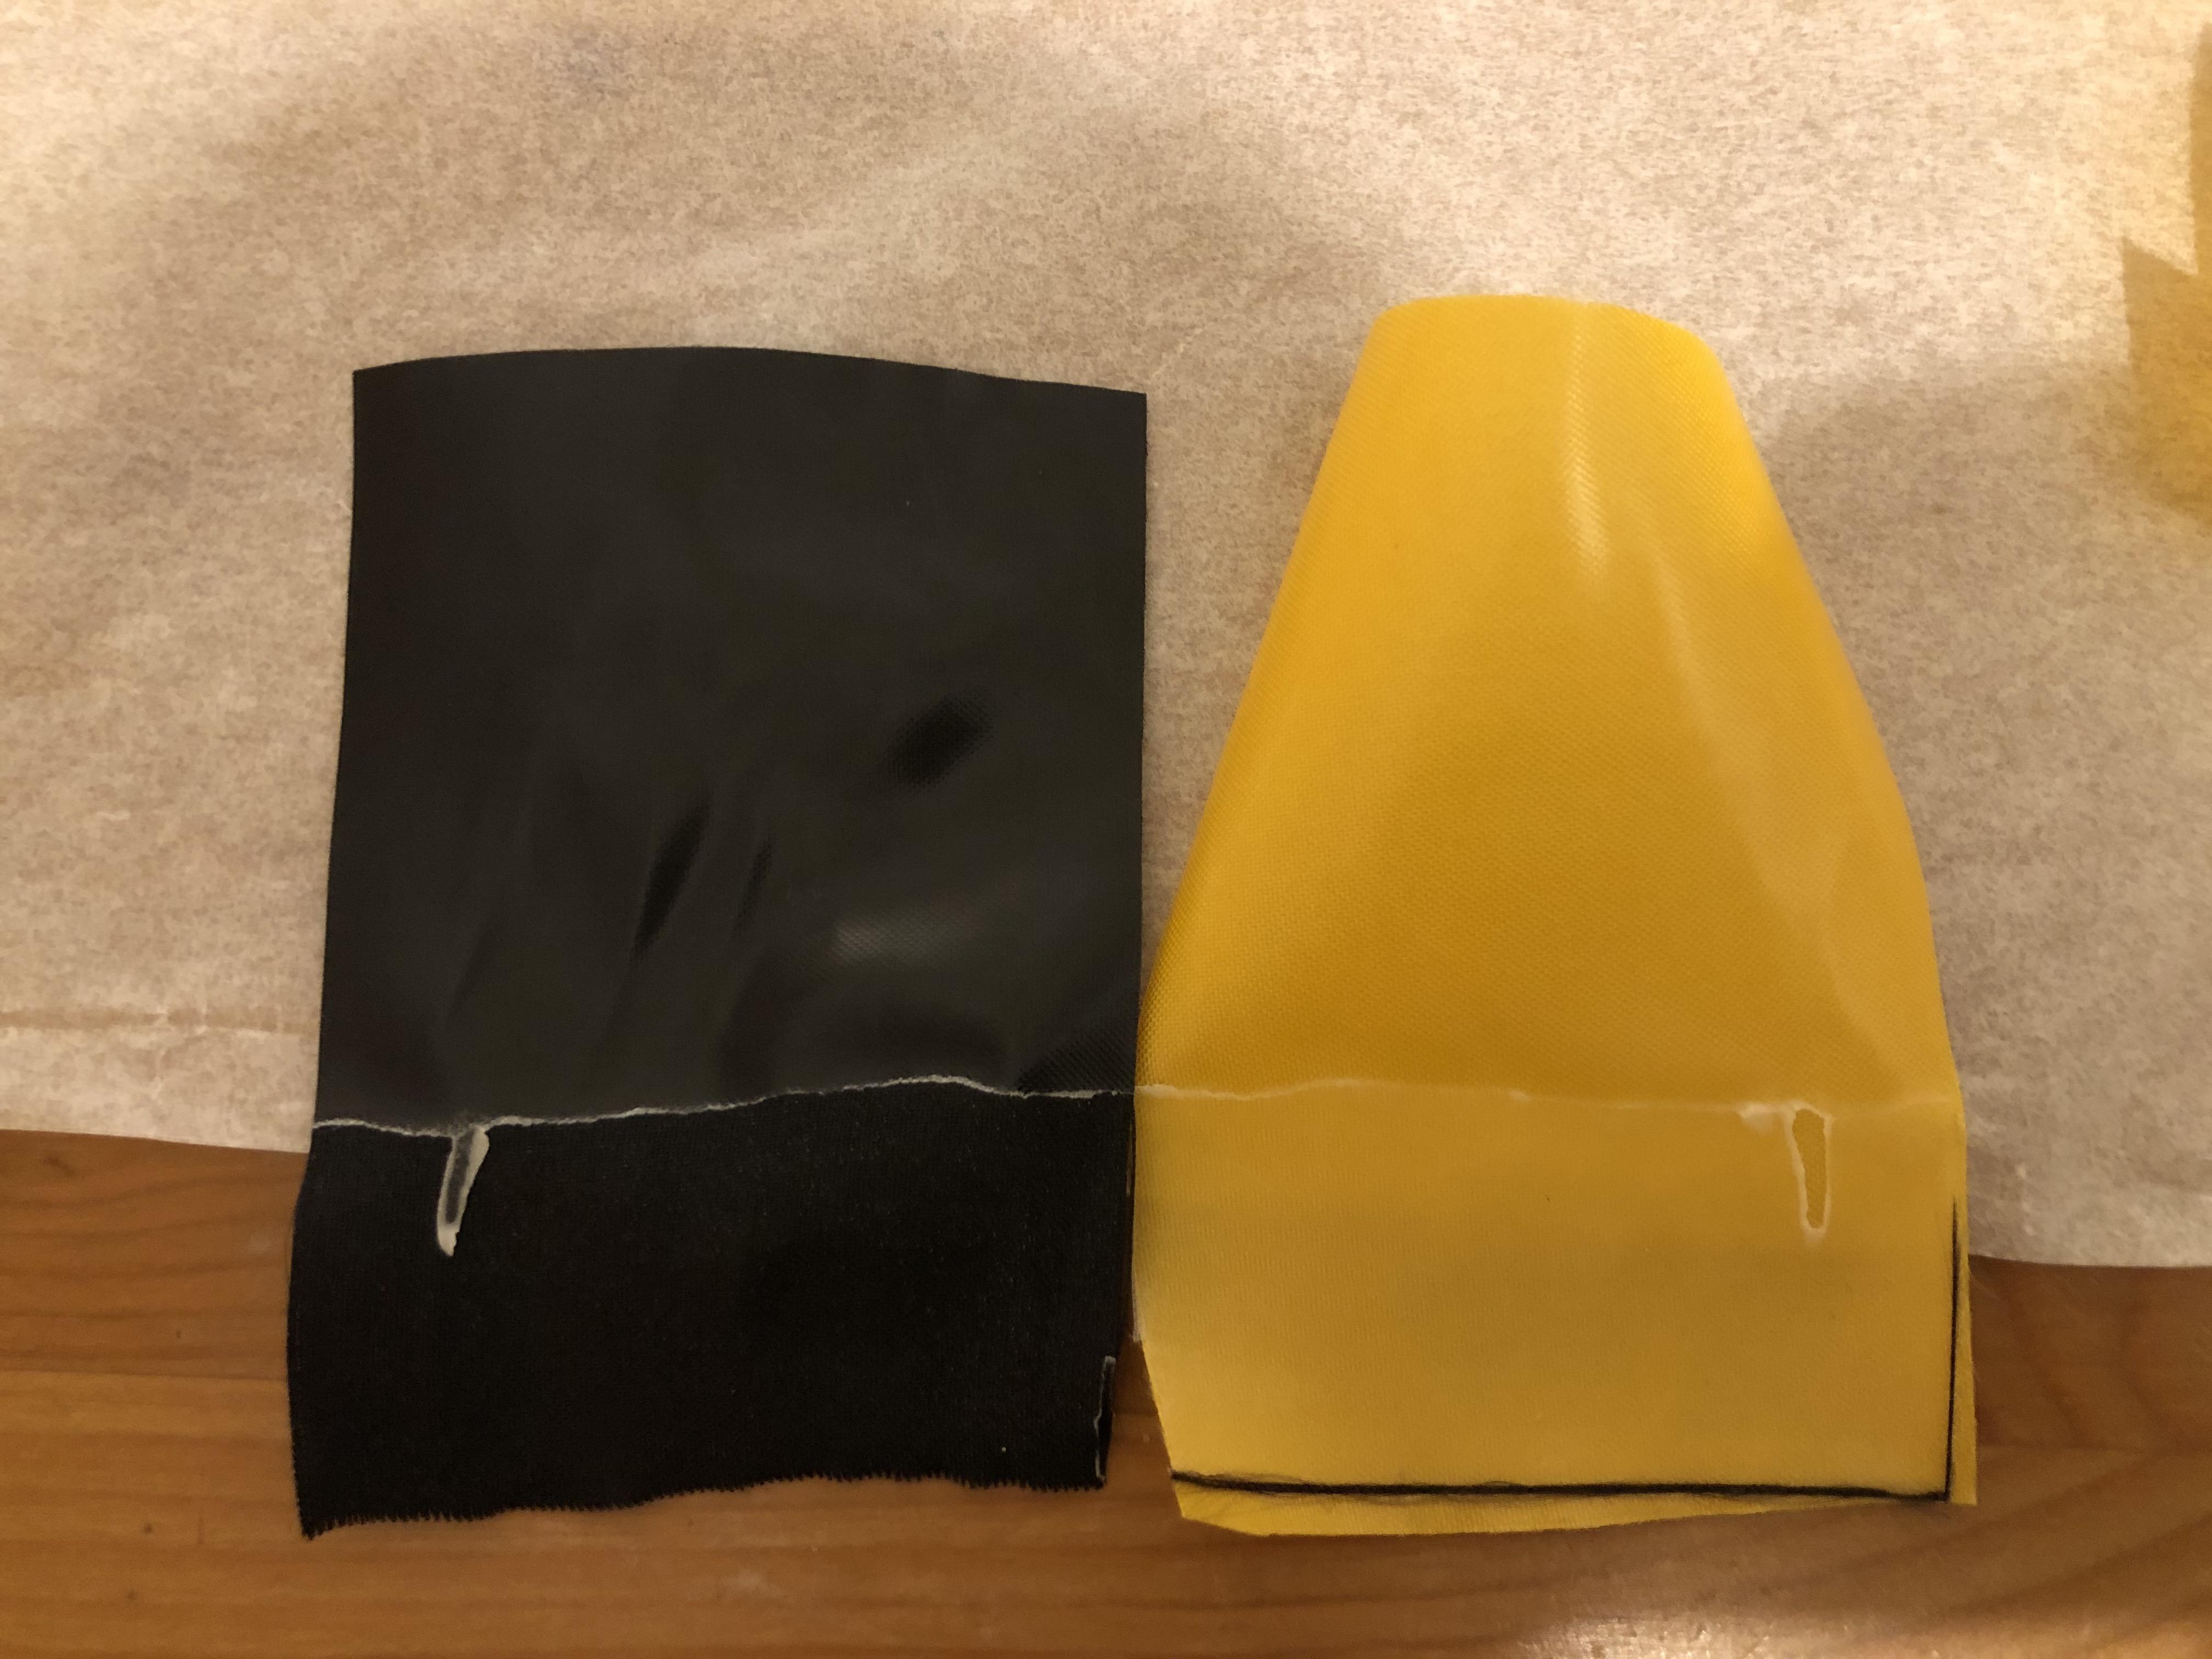
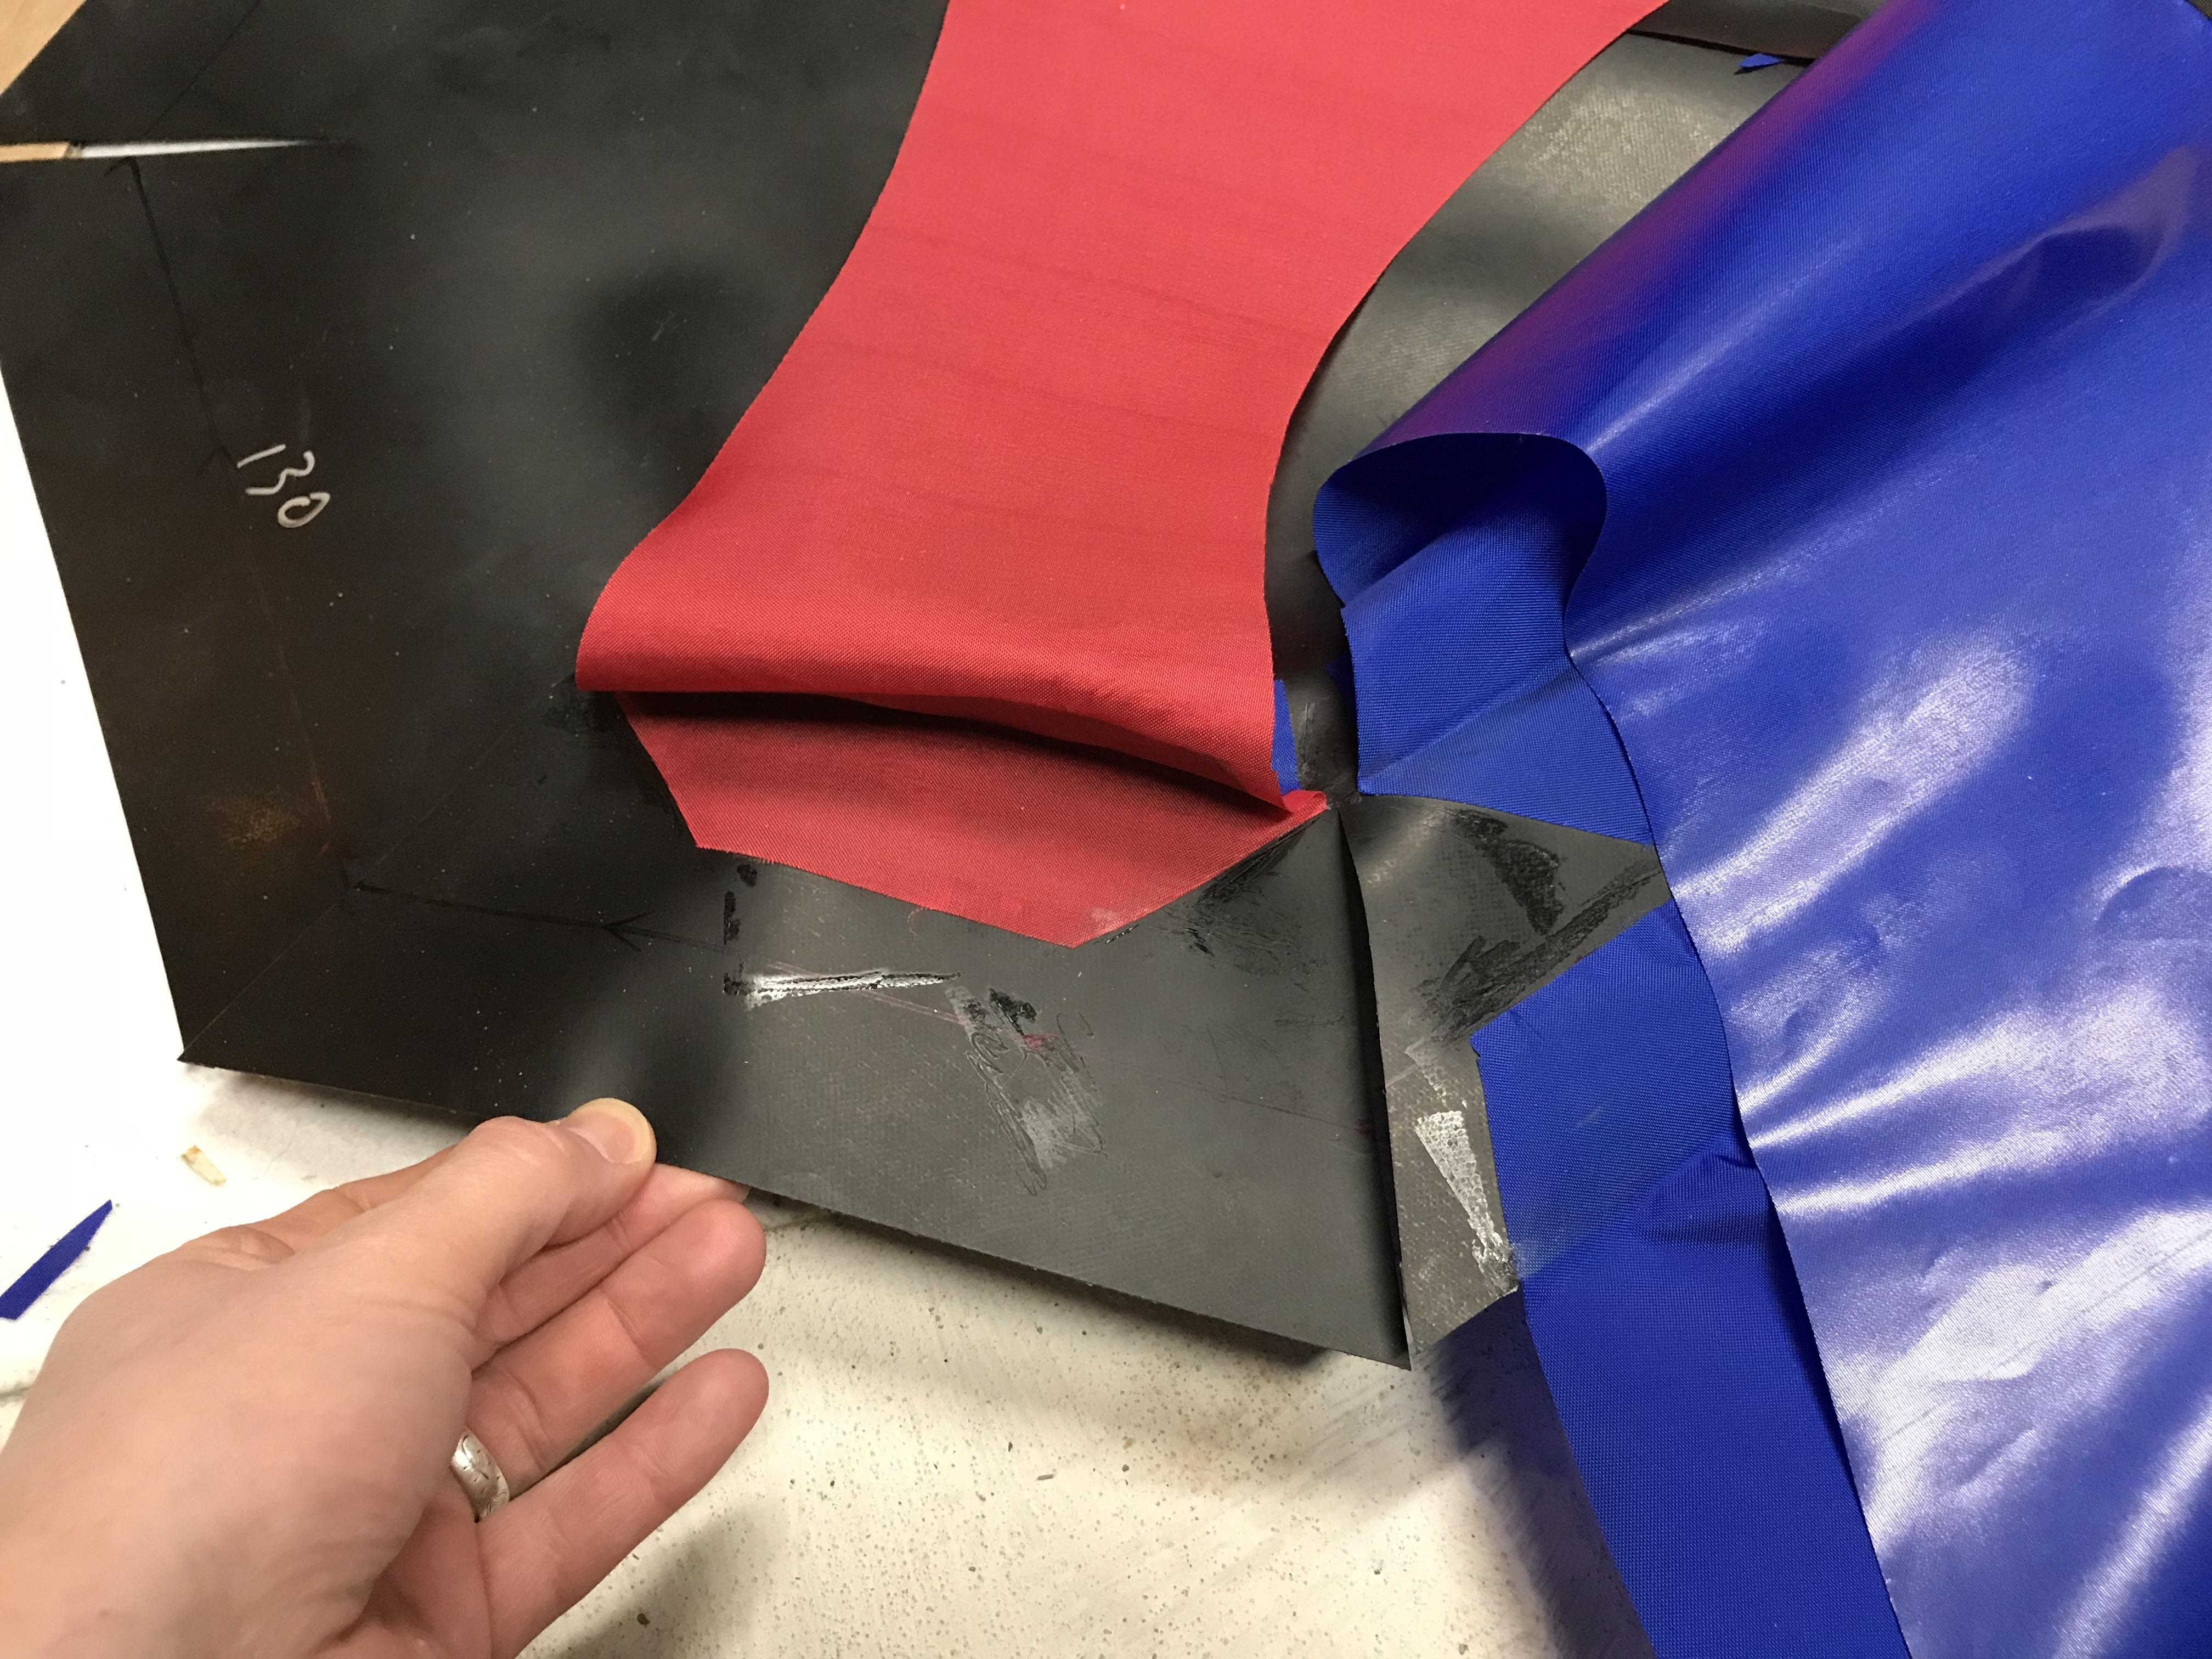
I have a question regarding the 450GSM material: Regardless of technique/temp etc the TPU on the 450GSM lifts off when I am doing a “pull apart test”. I have included a picture to help show my meaning. When there is a long run pulling left/ right away from the other yellow the bond is really very strong but as soon as I pulled from the bottom upwards it failed “relatively” easily – easier than the bonds created by the standard materials.
Am I doing something wrong? Is that expected?
I think I’ve got a good technique for the standard materials which are bonding well and very strong. I am using the same temp iron although I have experimented hotter/colder. I am ironing the standard (Yellow) onto the 450. Happy to provide a video if that helps.
Cheers
Jason
-
April 5, 2020 at 11:15 am #11900Matt (Admin)Keymaster
Hi Jason – excellent question! Your heat sealing looks great. The bond strength between the TPU layer and the woven fabric is slightly less in the 450 GSM fabric than the 250 GSM fabric, so this is to be expected. (In the packrafts, the tube-to-floor joints are designed to minimize peeling forces, so don’t worry about this.) I will add a note to the heat sealing technique page about this.
-
-
January 9, 2020 at 10:22 am #11464unnamedpeaksParticipant
Is the 190 GMS material any stronger than the 115, or is it just double coated? Because it ripped surprisingly easily when making the UL boat, it seems less tear resistant than 30 denier silnylon. But I don’t know if it’s heaver material and maybe stronger in terms of puncture resistance?
-
January 10, 2020 at 8:16 am #11465Matt (Admin)Keymaster
It’s just double coated, and that’s where the extra weight comes from.
-
-
December 29, 2019 at 9:34 am #11428ConradParticipant
In my experience of making 4 of these V3 rafts is only make trim at the bow and stern. Once all other tube sections are completed and connected up. Just my thoughts. Good luck
-
December 28, 2019 at 8:00 am #11422PeteHParticipant
Hi Matt,
I am now partway through my project. Have attached 3R and 3L all is going well but the fabric extends beyond dot by 1cm or so ( I chose to align with split at stern in preference?). Now about to attach 2R and 2L but on this occasion thinking to align with slit at Bow leaving excess material on 2L where it joins 3L. 1. Am I correct to assume 2L will need to be trimmed? And 2. Assuming 1 is correct should 2L be aligned with slit or 3L
I have added (via edit) photos to this post elsewhere but they have been lost in the forum somewhere….?
-
December 29, 2019 at 9:42 am #11429Matt (Admin)Keymaster
Hi @peteh
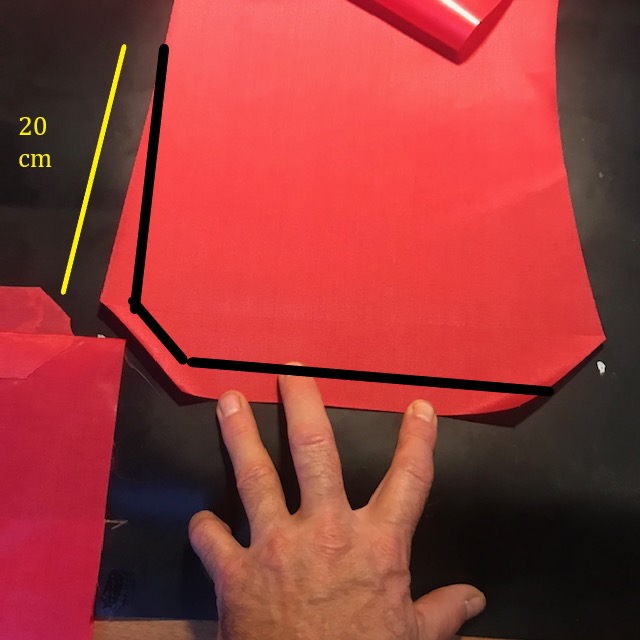
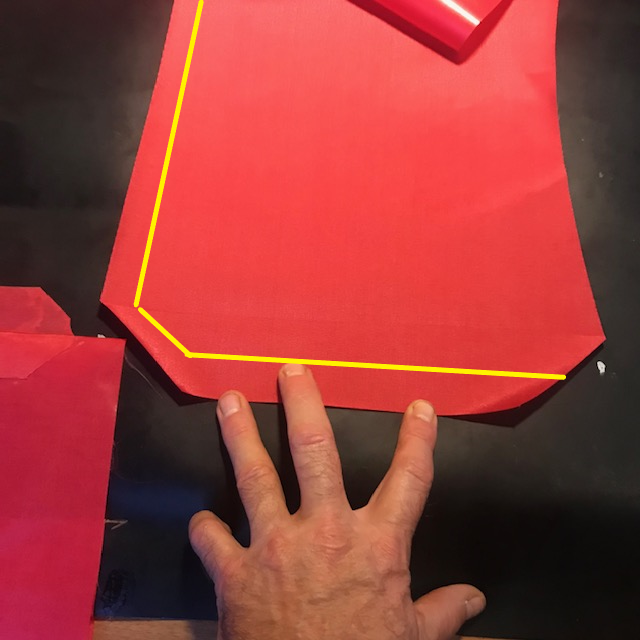
This is a common occurrence and nothing to worry about, due to some variations between the fabric pieces each time I cut them. You can trim the edge(s) to fit between the dots/slits, but don’t trim all the way along the seam – simply start trimming at the required width and then gradually make the trim narrower and narrower until it meets the edge of the piece after 20 cm (8″) or so. This minor variation won’t noticeably affect the shape of the packraft.
-
December 29, 2019 at 9:18 am #11426
-
-
December 21, 2019 at 1:03 am #11409unnamedpeaksParticipant
I have always been confused by how this works on your website.
-
December 20, 2019 at 4:57 pm #11408Matt (Admin)Keymaster
Is it just me, or are these comments not nesting properly anymore? I’m replying to other comments, but I’m seeing my most recent comments at the top of the page.
-
December 20, 2019 at 4:56 pm #11407Matt (Admin)Keymaster
Yeah, that’s definitely the area that is most likely to leak. I find that a cup or two of soapy water on the floor of the packraft works well there – you can hold the packraft up so the water pools over the floor-tube joint and squeeze the tubes while rotating it slowly… the bulk of the water will stay at the lowest point (obviously), but a soapy film spreads out over the seams, making bubbles if there’s a leak. You can also push “down” on the floor to pull it away from the tubes which will open up any holes that might be weakly held closed by the inflated tubes (does that make sense?).
-
December 20, 2019 at 4:09 pm #11405Matt (Admin)Keymaster
I’m sorry to hear you’re feeling discouraged! Are you sure it’s losing air, or could the pressure decrease be due to temperature changes? Can you elaborate on the situation and length of time we’re talking about?
-
December 20, 2019 at 4:42 pm #11406unnamedpeaksParticipant
Matt,
Well, you have said that the boat should hold air overnight. I am finding that once I temper up the boat, it loses that nice pressure within about 10 minutes, and overnight sags noticeably.
I found (or maybe created?) some more spots today by painting it with the soap and then taking it in a hot shower. As the air expanded I saw some additional leaks, and I have now sealed the line where the floor meats the raft at the front of the boat all the way around, maybe the front 1/3 and where the front two joints meet. The aquaseal is drying so I will report back after it tries and I try again.
p.s. folks get yourself a respirator, they are $15 dollars and are necessary when dealing with this solvent. I can feel the effects of using it without protection and have ordered a mask.
R
-
-
December 20, 2019 at 2:23 pm #11404unnamedpeaksParticipant
Matt,
I am discouraged! I did this and did identify some pinhole leaks that were not on seams. I patched them with aquaseal, but the boat still isn’t holding pressure. At this point I have painted every square inch with 1/2 dish soap 1/2 water 3 different times and I can’t identify any leaks, but the boat is still losing air.
I also covered the valve with soap/water mix to make sure it wasn’t faulty.
I need help!
-
December 17, 2019 at 2:15 pm #11394Matt (Admin)Keymaster
Great, I’m glad that worked.
The ultralight fabric isn’t as strong as the heavier fabrics used in the other kits (obviously), but it won’t spontaneously start leaking in undamaged areas, so once the leaks are fixed that’ll be it unless it gets damaged.
-
December 17, 2019 at 12:38 pm #11393unnamedpeaksParticipant
Yes, that was a helpful tip. I found areas on the fabric. It’s a lot of painting the raft with soap lol.
Do you find that the UL raft easily springs more small pinhole leaks, or that once you get it sealed up after assembly that it’s withstands use pretty well?
-
December 16, 2019 at 4:47 pm #11384Matt (Admin)Keymaster
You may have to expand your search with the soap and water to cover more area, not just along the seams (there could be small areas of the tube fabric TPU that were accidentally melted with the iron, for example). You might also check the valve to make sure it’s not leaking.
-
December 15, 2019 at 8:15 pm #11382unnamedpeaksParticipant
I am having trouble finding leaks. I made UL raft, and took it for a test paddle, it’s great. I found two small leaks and plugged with aquaseal. But it’s still leaking and I can’t figure out from where. I painted on 1/2 dish soap 1/2 water.
Any ideas?
-
September 18, 2019 at 3:35 pm #10863Daniel WalshParticipant
Hi,
I am coming along on my packraft (Skeena) construction, and things are going well for the most part. I’m having trouble though getting the areas where the seam strips, floor, and tubes all meet to seal together. Many of the areas have holes large enough to put a finger through even after multiple attempts to seal them; a combination of small wrinkles and glue seems to be preventing things from sealing. I’m pretty sure the packraft is structurally in good shape, but wondering what the best way would be to seal these areas to ensure the raft is airtight.
Dan
-
September 18, 2019 at 3:49 pm #10864Daniel WalshParticipant
I’m wondering whether it would be more effective to try to use glue to seal the holes or if I should try to glue a patch to the inside of the tube that covers that whole region. Anyone have experience with internal patches?
-
September 18, 2019 at 7:19 pm #10865Matt (Admin)Keymaster
Hi Dan, it’s hard to know for sure without seeing it, but if there’s already glue in there then you probably won’t be able to heat seal the pieces together and you’ll have to use more glue. A thick layer of Seam Grip or Aquaseal might do the job – sometimes I put a piece of fabric over top of the glue for good measure. Other people have recommended a glue called HH-66, but it’s not available where I live so I can’t vouch for it personally. If you’re considering an internal patch, I would look for HH-66 and give it a try on some scraps first, because Aquaseal and Seam Grip are great for filling small leaks, but not so great at gluing pieces of fabric together. Cheers!
-
-
-
July 16, 2018 at 7:15 pm #6752unnamedpeaksParticipant
Hi,
I am attempting to make a drybag packliner with the 40d fabric, both because I need one and because I want to get the hang of this before trying to make the raft. (and I am waiting on the release of the new UL kit!)
Anyway I got my iron and checked the temp with a IR thermometer I have. I adjusted the thermostat so that the tip of the iron was reading 200 and the center was reading as high as 225. (one post on the form said 200-225 was a good setting)
I decided for construction to bond the two tpu sides together in a 5/8 inch seam (this part went well), and then to cut a strip of fabric to bond to the outside of that seam, creating a stronger and more likely watertight seam.

 I got a lot of bubbling, and air pockets. I am not sure why this happened, it seemed to happen even if I was careful to start at the center and move the iron to the outside. Here are some pics. Can you tell me what went wrong?
-
October 1, 2018 at 4:25 am #7072William HealdParticipant
Hi, Planning to get a V3 kit, but don’t have a big workshop. How big should a work surface be to make construction as easy as possible? It will be my first attempt.
-
October 1, 2018 at 8:46 am #7077Matt (Admin)Keymaster
Hey, good question – I just posted an answer in the FAQ because I’m sure other people wonder the same thing and it’ll be easier to find there. Here it is: https://www.diypackraft.com/faq/what-size-work-surface-do-i-need-to-assemble-my-diy-packraft-kit/
Cheers!
-
-
July 17, 2018 at 8:23 am #6756Matt (Admin)Keymaster
Hi Robin – with the lightweight fabric, you may be able to use a slightly lower temperature, and to avoid bubbles I like to use the edge of my iron and slide it outward, rather than using the large flat part. Then it’s important to press on the fabric with a rag or something as it cools so it can’t lift before the weld sets. You may still have an occasional bubble or wrinkle, but it should be airtight. Cheers!
-
July 29, 2018 at 2:35 pm #6833unnamedpeaksParticipant
Hi.
ok I think I have gotten the technique down. But now I am stalled trying to make the drybag. It’s to fit perfectly inside my pack, to make a roll-top waterproof liner. I want it to have a rectangular bottom with rounded corners, but it looks like theres a limit to how tight the curves can be before everything gets really difficult. I am stuck, and the first attempt looks like a fail.
Will you help with this? Should I create a separate thread?
-
July 30, 2018 at 12:15 pm #6842Matt (Admin)Keymaster
Hi Robin,
Sealing around corners definitely gets more difficult the tighter the curves get. This video shows how I do it: https://www.diypackraft.com/construction/how-to/v2/step-6-center-seams/
You might consider making the drybag with pointy corners and/or making it slightly oversized, because as long as it’s larger than your backpack it will take on the correct shape regardless of its actual shape outside the pack.
-
-
-
-
June 12, 2018 at 11:10 am #6582kelloggsParticipant
I damage the TPU on one of my tubes where it is supposed to attach to the floor, can I use aqua seal to bound this piece where the TPU is damaged?
-
June 14, 2018 at 7:46 am #6600Matt (Admin)Keymaster
In this case I would heat seal them in place as best as possible and add Aquaseal where necessary, and then reinforce the joint with an additional strip of fabric heat sealed on the outside of tube-floor joint.
-
June 20, 2018 at 1:12 pm #6641kelloggsParticipant
This worked great!
-
June 20, 2018 at 1:39 pm #6642Matt (Admin)Keymaster
Excellent!
-
-
-
-
April 30, 2018 at 9:54 am #6183ConradParticipant
Hi Matt, Im part way through my second V3 and going better. I may be looking at getting a third – family paddling together etc. My question is can you supply the kit with a 5mm seam allowance to sew together before sealing? Just a few ideas Im mulling over? Thanks Matt. Ill post pics once I’ve completed number 2.
-
April 30, 2018 at 1:46 pm #6187Matt (Admin)Keymaster
Hi Conrad, unfortunately there’s no simple way for me to add an allowance to the pieces, but if you want I could make a kit with the lines drawn in pen instead of cutting them out, and then you could add an allowance yourself. It might be time-consuming for you though.
-
May 1, 2018 at 3:26 am #6195ConradParticipant
Thanks Matt. Thats exactly what I was thinking. If you were able to just spread the pieces out a little and draw around them I could certainly play with that. Ill see how robust the two I currently have are before deciding if sewing has any benefit. Thanks
-
May 1, 2018 at 11:56 am #6196Matt (Admin)Keymaster
Sounds good. I think you’ll find that a properly welded seam is stronger than the fabric panels, so sewing the seams would be redundant. You can see this demonstrated in my original fabric comparison video, where I show how the fabric tears before the welds give out. Cheers
-
May 1, 2018 at 12:18 pm #6197ConradParticipant
Thanks Matt, I was thinking that sewing the panels together along the seam and then welding them so that the sewing is holding it all in place to ensure a good weld? Join all the panels and seal them before then attaching to the floor the inner floor seems would be simple enough a nd i can’t see that the to seams would be much different from what we currently do but it may be neater finish, Just ideas at present as I seam to have two DIYpackrafts that work but have lots of seams that could be looking a whole lot better. Obviously my ineptitude but I don’t like being crap at things!!
-
-
-
-
-
April 13, 2018 at 7:48 am #6039ConradParticipant
Hi Guys,
Im new to this and trying my hardest to understand it all and especially the heating. Ive heat sealed piece 3 to begin with and it lined up well but the heat has also activated the TPU on the other side o the floor! Is this major problem or will it be mainly cosmetic? Will i need to patch it?
Thanks everyone in advance.
-
April 13, 2018 at 8:32 pm #6044Matt (Admin)Keymaster
Hi Conrad – don’t worry, it’s just cosmetic. Once you get the hang of it, you’ll know how long you can heat it without melting through. In the meantime, just make sure you’ve got a non-stick surface underneath, such as parchment paper. Cheers!
-
-
February 7, 2018 at 6:37 am #5417lewisParticipant
Hi there,
Looking forward to ordering my V3 kit in the next day or 2. I was wondering if there was a way to make the raft into a multi-chamber (2) raft. Has anyone done that? Is it possible?
Thanks
-
February 7, 2018 at 8:40 am #5418Matt (Admin)Keymaster
Hi Lewis, thanks for your interest in the packrafts!
I’m not aware of anyone making a traditional multi-chamber inflatable from one of my designs yet, but it shouldn’t be too difficult. It’s a bit more work to seal off different sections of the tubes, but it can be done. If you cut the side tube in half and add an extra-wide seam there, you’ll have an inward-facing TPU surface you can heat seal a circular bulkhead to.
A simpler method is to have separate cylindrical drybags that you insert into the tubes through the airtight zipper before inflating the packraft. These can be made of lighter fabric (40D), or the same fabric as the tubes (210D), depending on whether weight or durability is most important to you.
You can also make an inflatable floor insert, which acts as an additional chamber, along with your seat.
Cheers
-
-
January 7, 2018 at 6:23 pm #5200LoganParticipant
question for the experienced DIYers out there..
Small or big problem?As seen in photo I’m attempting to seal pieces 1-2 together. For some reason piece 2 is waaay off from where it is supposed to be. Previous to this I sealed seam 3 down and it was about 2cm off from where it was supposed to be as well. I couldn’t figure out why it kept coming up short. As you can tell below the problem has compounded itself and I’m not sure where to go from here.. any info would be appreciated.
thanks!
-
January 11, 2018 at 10:11 am #5211Matt (Admin)Keymaster
Hi Logan,
Sorry for the delay – I’m currently traveling with limited access to the forum.
It’s not uncommon to have some misalignment but this amount seems like a lot. It looks like your piece 2 might be a bit wrinkled where it’s attached to the floor, which may account for it – make sure to keep the pieces flat and tight when sealing. Can you send me an email at info at diy packraft dot com? Ideally with a picture of the bottom of your packraft showing the misalignment (the full length of piece 2 at least) and can you tell me the measurement in cm or inches of the length of the outer edge that piece 2 is being attached to?
The best way to proceed from here will be to trim the excess floor material from the outside corner where it meets the edge of piece 2 to the end of the slit.
-
January 11, 2018 at 5:57 am #5210ClemensParticipant
Hey Logan!
I havn’t started building my packraft yet but I’d be curious to know how you proceeded. Did it work out in the end?
-
March 3, 2018 at 5:41 pm #5601LoganParticipant
Ok, packraft is complete! I’ll post up pictures in a bit. Short Answer, this error I made in construction caused no noticeable difference. I can’t even see any wrinkles on that seam. Turns out I had my iron a tad bit too hot which caused some wrinkling leading to the shorter piece. All I did to fix this was cut the floor to match where the tube was, and it worked out just fine!
-
March 5, 2018 at 9:20 am #5613Matt (Admin)Keymaster
Excellent! Thanks for the update 🙂
-
-
January 12, 2018 at 10:08 am #5213LoganParticipant
Hello! Matt is helping me do some brainstorming on how to proceed. I will for sure post up the progress and how it ended up! It might not be the prettiest packraft, but as long as it can get me and a big pack across a lake I’ll be happy!
-
This reply was modified 8 years, 6 months ago by Logan.
-
This reply was modified 8 years, 6 months ago by
-
-
-
January 3, 2018 at 1:17 pm #5195LoganParticipant
Hello!
Currently building my first V3 raft and couldn’t be more excited! I believe this question was posed before, but I did not completely understand the answer. I recently heat sealed both sides of piece L3 to the floor and am ready to seal L4 down as well. For some reason L3 came up about 1.5cm short of the corner. From what I can gather it’s not a huge problem, but I’m not sure how to allign L4 with L3. Do I place L4 on the predetermined location labeled on the floor and have a 1.5cm gap between pieces? Or do I allign L4 next to L3 so the edges are touching? I feel if I do the latter there will be a countinous gap down the line which may or may not be an issue. If I place L4 in its corresponding place will I need to do something special to make up for the gap? I can post pictures later if need be.
Thanks a ton, I love the idea of DIY rafts. It’s a cool thing you are doing.
-Logan
-
This reply was modified 8 years, 6 months ago by Logan.
-
This reply was modified 8 years, 6 months ago by
-
November 12, 2017 at 3:19 am #4921PerrinParticipant
Question about zippers:
I just received my kits – all very exciting, like a kid on Christmas ‘n all that – but the zippers are proving a bit of a challenge. All five appear stuck and despite a fair amount of traction, to the point of where I’m afraid I’ll do damage, I can’t get any of them to budge.
They all look to be in good condition and have evidence of some lubrication around the edges.
Just wondering if this is a common issue? Is there any kind of initial treatment that might help?
Thanks in advance!
-
November 13, 2017 at 11:32 am #4937Matt (Admin)Keymaster
Hi Perrin,
Don’t worry – the zippers are very tight to begin with, but will loosen up over time. They’re especially difficult to open before they are mounted, because you have very little to grab on to. If you want to try them out before they are installed in the packraft, you can clamp one end of the mounting fabric in a padded vice or vice grips and pull on the T-zipper handle. Thread a dowel or something through the webbing loop to make a larger handle, if necessary.
That first opening will require a lot of force, but the zippers are very strong, so you shouldn’t be able to break them if you pull steadily (don’t try to jerk them open though).
After it’s open, adding the silicone lubrication to the zipper will help, and after it’s been opened and closed several times it will start to loosen up. It will always remain fairly tight though, compared to a normal zipper.
My recommendation is to open and close the zipper a few times before installing it, but to wait and lubricate it after it’s installed so you don’t risk getting silicone on the fabric, which could interfere with the heat sealing.
Cheers!
-
-
October 22, 2017 at 8:03 am #4790waldlaeufer.5105Participant
hello,
ithink about building a packraft from double side coated 210d tpu from e textil germany.
i think about this because i will integrate the tizip zipper ahd store my baggage inside.
i hope that the inside will be more abraison proof with the double side coated fabric.
now my question.
which fabric is best for making the seam?
is it helpfull to cover both sides with a stripe of fabrik?
regards
mike
-
October 22, 2017 at 9:37 am #4792keopgaardParticipant
Hi. I have made packraft from extremtextil’s fabric. Sealing was no problem, more heat from the sealing iron is the answer. Did use 210 D tpu dobbel side for floor and singel side tpu 210 D for tubes.
You could use singel side 210D tpu for bonding strips, should work just fine.
But I do not see the point using tpu dobbel side fabric for tubes, not the fabric from extremtextil because the tear resistanse is poor and way lower than Matt’s nylon 66 210 D singel tpu. And a tizip could be added with no problem in Matt’s fabric, no advantage there to fabric fram extremtextil. The fabric from Germany is heavy compared to nylon 66 210d tpu. Except from price and shipping speed from Germany I dont see any point using extremtextil’s fabric.
-
-
August 11, 2017 at 10:06 pm #3976keopgaardParticipant
Hi
I have some questions about making the packraft.1. Will there be an idea to bond all the tubes together first and then let the front or back of the tubes be open?
2. If you work this way, you can start to bond the tubes side by side against the open tube and bonding be more easy ond possible more airtight??-
August 12, 2017 at 2:15 pm #3986keopgaardParticipant
I was thinking of bonding all tubes together on left or right side first, before bonding anything to the floor. In that way I could let the bau or the stern be left open for bonding as last thing to do, and then starting to bond both tube side on left or right to the floor, working one side complete finished before bonding the other side, ending up either front or back of the packraft.
-
August 14, 2017 at 9:13 am #3990Matt (Admin)Keymaster
Yes, that could work for the V2 plans if you extend the tube pieces slightly (so the ends overlap enough to bond them together).
-
-
August 12, 2017 at 1:30 pm #3980Matt (Admin)Keymaster
I’m sorry, I’m not sure what you mean. Can you maybe draw a picture to help explain?
-
-
June 7, 2017 at 12:35 pm #3415JohnParticipant
so I was wondering if I buy a large packraft and then want to get extra strips to heat seal on the seams would this actually increase the seam strength of\r do you think that would be pointless?
-
June 7, 2017 at 12:43 pm #3416Matt (Admin)Keymaster
Hi John,
The heat-sealed bonds are actually stronger than the fabric itself (you can see this demonstrated in the fabric comparison video), so reinforcing the seams by sewing or adding wider strips over them would not increase the durability of the packraft overall unless you reinforce the tube fabric as well. You could do this by adding an extra layer of fabric anywhere that you are concerned will wear or tear (e.g. the floor or the lower/outer part of the tubes).
Cheers,
Matt
-
-
May 3, 2017 at 6:41 am #3098Chris ChittyParticipant
Top Up Valve Question:
I Searched around and didn’t see an answer to this question. If you want to install the top up valve with heat sealing do you seal a patch of fabric to the valve and then to the raft? Any suggestions on location? Thanks!
-
May 3, 2017 at 9:27 am #3116Kwok Wah LaiParticipant
Dear, I have the same question as I am thinking of doing or not installing that top up “valve” (but actually it is not a valve, it is just an air tap) to the raft being DIYed at the moment. However, thinking it as similar material to the Boston valve’s base, I will install it in the way as similar to that for a Boston valve installation as described in the video. But would you please help ? I don’t have experience on top up of an air chamber, does it really necessary ? For, I have been paddleing with a PVC air canoe which has an safety valve for any air expension due to sun shining. Thanks so much! Cheers mate. * O! Forget it, just saw Matt’s new post, it solves all my questions, great man.
-
This reply was modified 9 years, 2 months ago by Kwok Wah Lai.
-
May 3, 2017 at 9:44 am #3118Matt (Admin)Keymaster
😀
-
This reply was modified 9 years, 2 months ago by
-
May 3, 2017 at 9:15 am #3107Matt (Admin)Keymaster
-
-
March 28, 2017 at 4:13 pm #2848JamesParticipant
a question about joining tube pieces together (step 2). What is the tolerance for the corners lining up of two pieces that have been joined together? In spite of my best efforts i still have about a 1 cm difference between the two. Do I have to redo the seam?
-
March 29, 2017 at 2:09 pm #2849Matt (Admin)Keymaster
Hi James, @jameslthomson,
Sorry for the delayed response – I didn’t have internet access for a couple days.
Don’t worry – a 1 cm misalignment at the ends of a seam isn’t a big deal, and it’s not worth trying to re-seal the seam. At worst, you might have a small wrinkle near that corner.
You can either leave it the way it is or trim the protruding piece flush with the shorter one. Depending on which pieces they are, you may find that that corner doesn’t end up exactly where it should on the floor, but that’s okay – just position it as close as possible.
Does that make sense?
-
April 8, 2017 at 5:04 pm #2891JamesParticipant
I think that makes sense. If I don’t trim the long piece, should I align the edge with the longer piece (so there’s a gap between the shorter piece and its corresponding edge) or align it with the shorter piece (so the longer piece overlaps its corresponding edge)?
-
April 10, 2017 at 8:05 am #2895Matt (Admin)Keymaster
I agree with Mike, but regardless of whether you trim it or not, hold the adjacent corners lined up correctly on the floor and see where the uneven corner sits naturally. This might make the edges un-parallel, but that will probably be the best place to attach it because placing it there won’t have knock-on effects down the line (i.e. the next corner will sit where it should without trimming or stretching).
-
This reply was modified 9 years, 3 months ago by Matt (Admin).
-
This reply was modified 9 years, 3 months ago by
-
April 9, 2017 at 8:19 am #2893Mike MonsosParticipant
I find that trimming the long corner with a straight edge to the correctly aligned corner at the other side of the panel works best for me. If you think of the raft shape as a frying pan before closing the chambers, the attached panels edges are much easier to work with when it is a even continuous edge (rim). That way when you roll it to align with the first floor weld during step two it will match very closely.
Mike
-
-
-
-
March 20, 2017 at 10:54 am #2758JeremyParticipant
Curious if you have a how-to or suggestions for methods and location of installing the top up valve. Thanks! – Jeremy
-
March 20, 2017 at 4:59 pm #2767Matt (Admin)Keymaster
Hi Jeremy, @akjw7
In general, a good place to start is in piece #5 (either Left or Right) near the seam with piece #4 and on the down-slope on the outside of the tube. If you’re measuring during construction, that’s about 38 cm (15″) up from the corner between pieces 4 and 5 on the outside of the tube, and about 7 cm (2.75″) away from the seam.
I recommend using the same installation method as for the Boston valve (detailed here), where the valve flange is sandwiched with glue between two layers of fabric that are heat-sealed together.
If you wait to install the top-up valve until after your packraft is otherwise finished you will be able to paddle it first and practice twisting your body around to make sure that that location will work for you. People have different body sizes and degrees of flexibility, so the ideal placement may not be the same for everyone. If you find it too awkward to twist your body around to reach that spot, an alternative placement might be on the inside of the cockpit near where your face ends up when you bend forward (i.e. close to your knee, but not where it will rub).
If you like, you can use field repair tape or something similar to hold the valve in place while you experiment with different locations on the water.
Wherever you put it, remember to make sure your arm/elbow won’t hit the valve while you’re paddling!
-
This reply was modified 9 years, 4 months ago by Matt (Admin).
-
This reply was modified 9 years, 4 months ago by
-
-
December 18, 2016 at 1:55 pm #2033LarryParticipant
I’ve sealed nine of ten tube pieces to the floor. As I lay the tenth and final piece, I notice that it’s about a quarter-inch longer than the available space.
What do I do?
- Move the edges of the tube piece and the floor closer together, thus decreasing the width of the joint overlap
- Overlap the tube pieces 1/8 inch each
- Trim the edges of the tube piece so everything fits together nicely, in theory
-
December 18, 2016 at 3:22 pm #2035Matt (Admin)Keymaster
Hi Larry,
A 1/8″ overlap won’t be a problem, so I recommend centering the piece in the available space without trimming it.
Out of curiosity, which piece is it?
Cheers
-
December 16, 2016 at 5:54 pm #2022LarryParticipant
I just started assembling my packraft. (I really know how to have fun on a Friday night!)
I was so excited to get everything all lined up perfectly that I accidentally forgot the rule “2 cm left unsealed at each end of tube-floor joint (for now).”
So a couple of tube ends are sealed. Is this going to really mess things up down the road? How can I recover from this?
Larry
-
December 16, 2016 at 6:34 pm #2024Matt (Admin)Keymaster
Hi Larry,
Never fear! Where there is a will, there is a way.
You might be able to re-heat the ends with your iron and coax them apart while they’re hot. If this just makes a mess of things, leave them as-is and you can glue the end of the seam fabric to the outside of the floor. In Step 3 you will add some glue to the inside of this area anyway to ensure it’s airtight.
I will take a look at the instructions and see if I can flag this better so others don’t make the same mistake. To be honest though, I’ve done the same thing myself on once or twice, so I don’t know how much it’ll help!
-
-
November 13, 2017 at 12:17 pm #4940Matt (Admin)Keymaster
I merged this topic into the Help & Questions topic, but it messed with the order of posts… I’m trying to fix it, so far with no success 🙁
-
November 9, 2017 at 2:15 pm #4909aaron.scott77Participant
In answering my question..
I measured the temperature on the surface of the copper and found it was about 30 degrees C cooler than the reading from the other sensor.
So that bit of insulation is making a huge difference. In 3d printer land the sensors are often held on using silicone gasket sealant rated to 340 degrees. I think I will probably go that route now.. or bite the bullet and get an iron.
-
November 8, 2017 at 5:29 pm #4892aaron.scott77Participant
I dialled the temp up to 235c last night and overall it seemed to work a bit better for the 1000D.
My temperature sensor 5+ cm’s back from the sealing area and it is held in place with some heat resistant cotton wrapped around the copper tube. So I’m thinking as its basically an insulator that its probably reading much higher than at the actual sealing area.
I think I have a spare sensor so I should just measure the temp on the sealing area for comparison so I actually know what is going on.
The couple of sections I did last night had only a couple of small bubbles.
Cheers
-
November 8, 2017 at 7:25 am #4885Matt (Admin)Keymaster
Oh, and the fabric melts at around 240 C, but you shouldn’t need to get anywhere close to that hot. Your DIY iron sounds cool! If you’re finding it takes too long to seal the wider welds, it might be worth adding an inexpensive model airplane sealing iron to your quiver – the large foot makes quick work of the tube-to-floor welds.
-
November 8, 2017 at 7:18 am #4884Matt (Admin)Keymaster
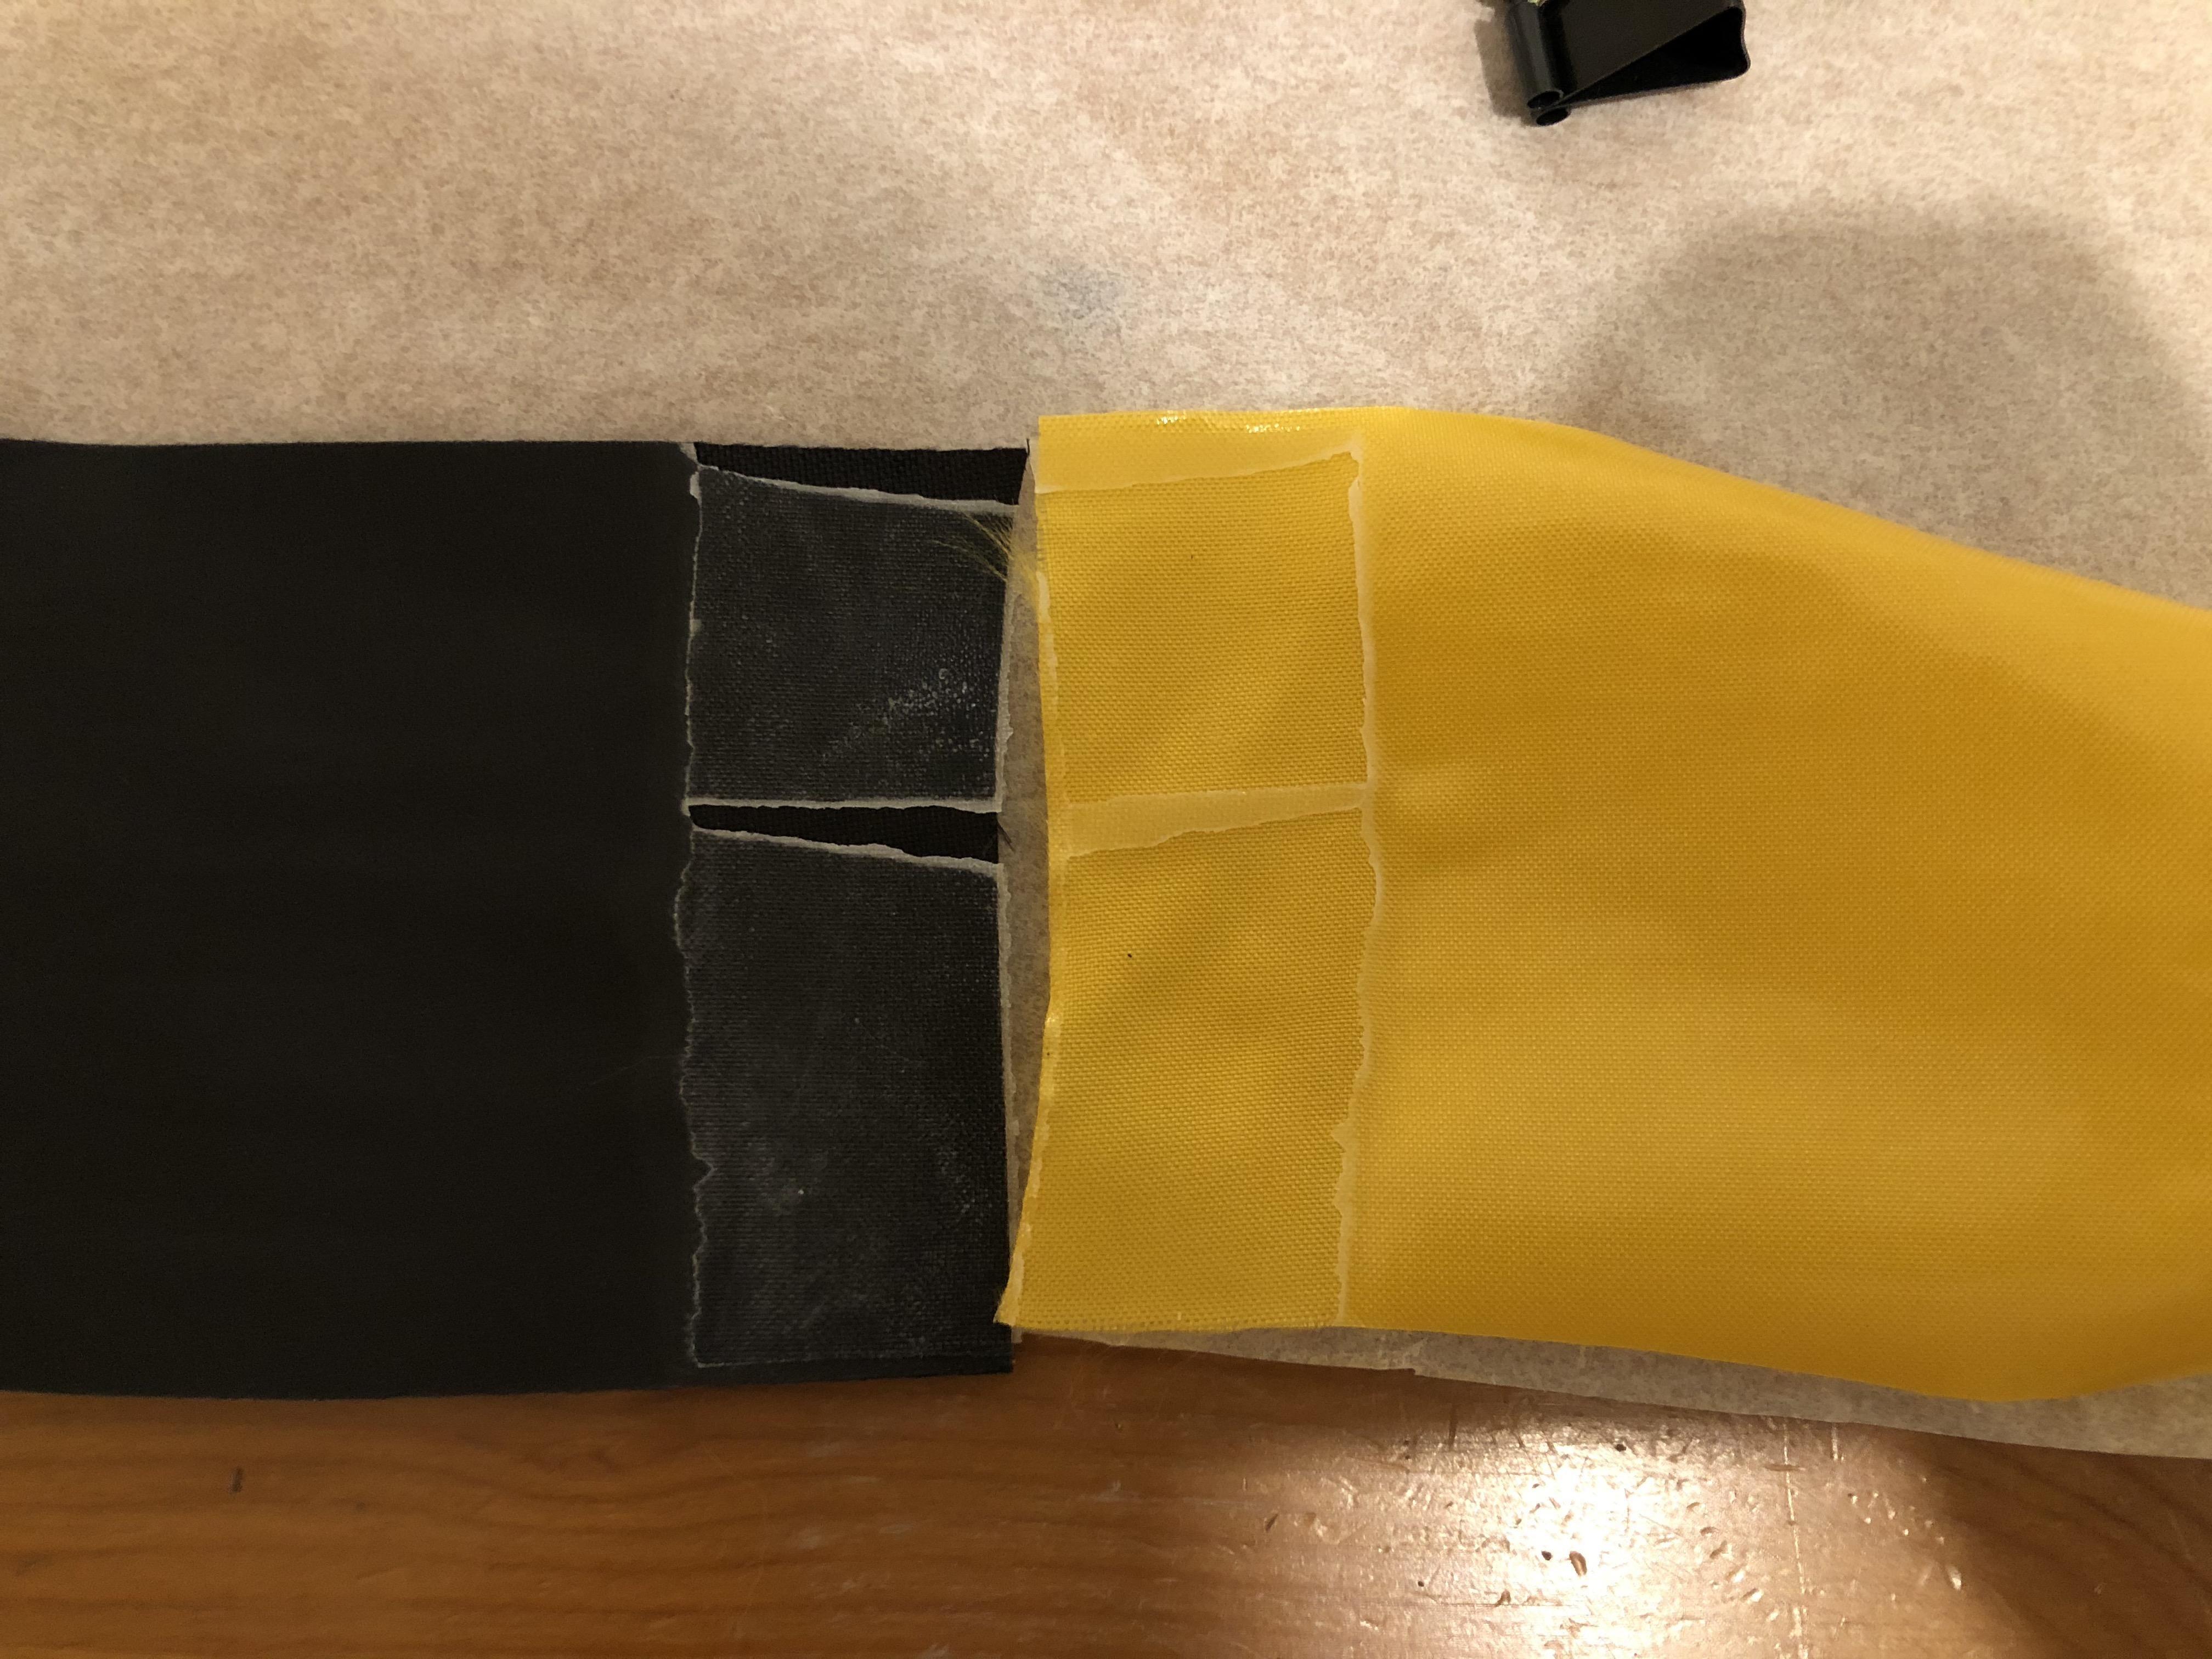
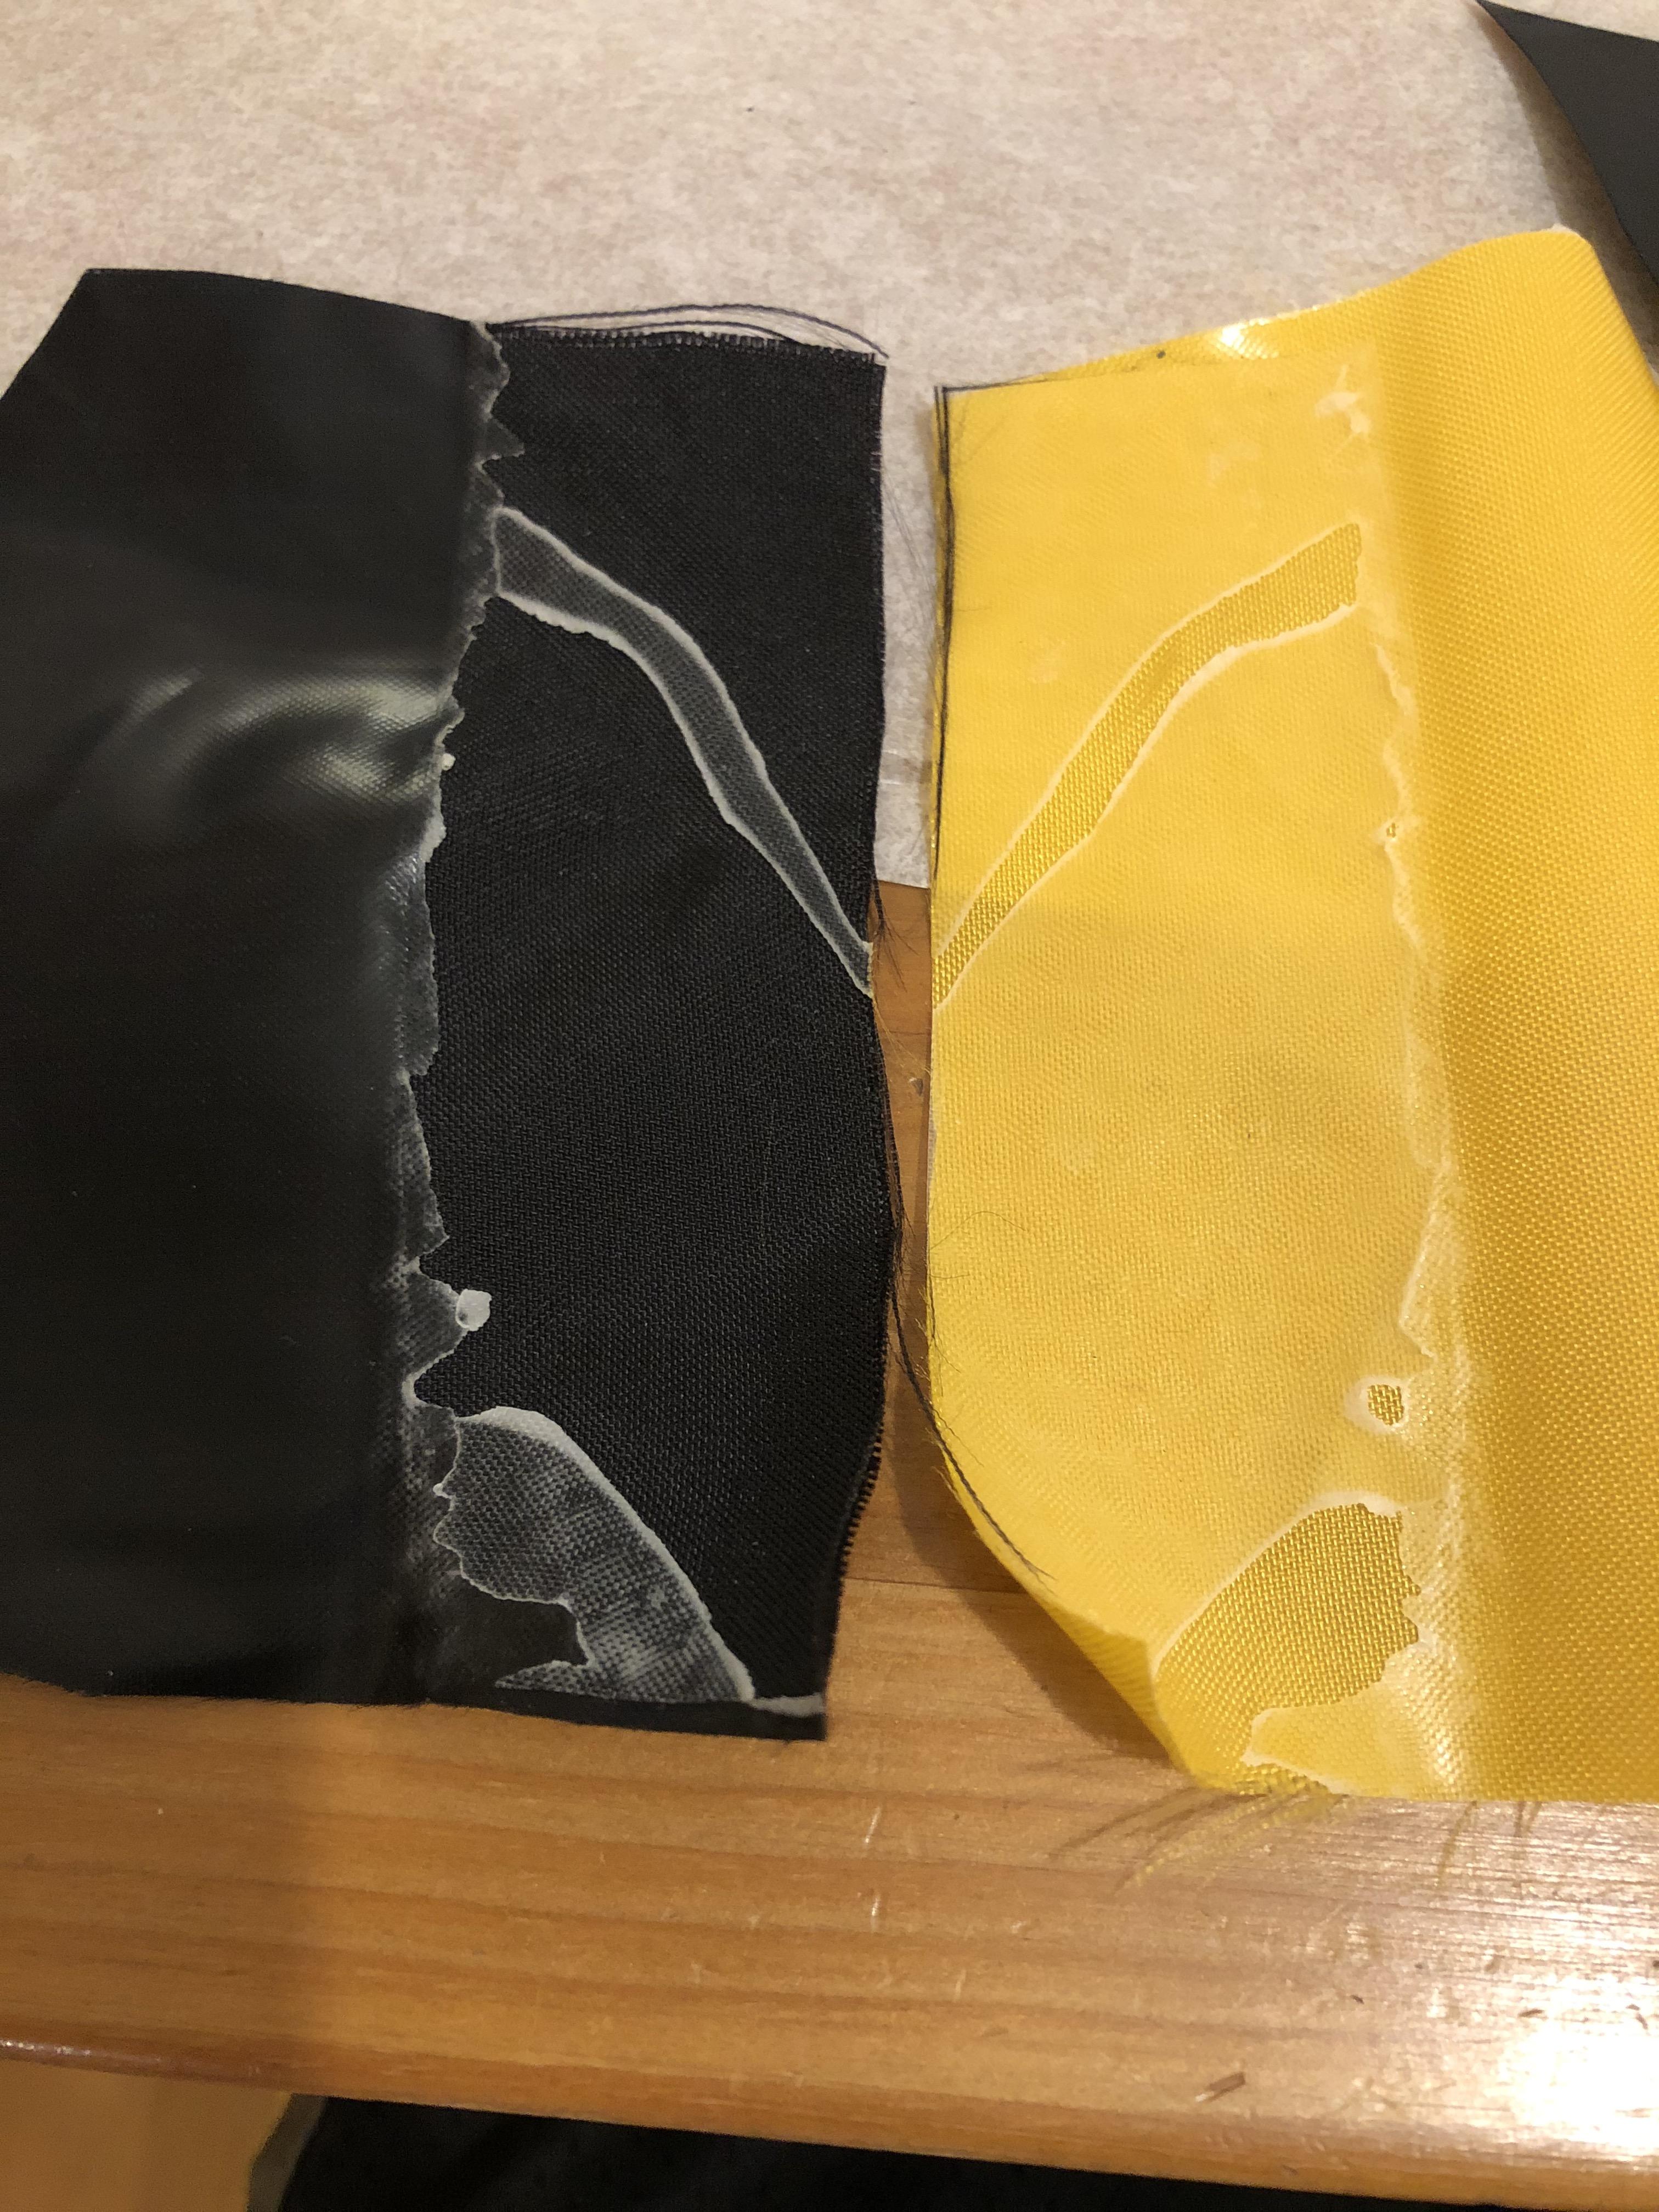
Hi Aaron – is that 215 degrees C or F? Assuming it’s Celsius, that should be plenty hot – maybe too hot, by the sounds of it. Maybe try around 200 C. You should be able to heat a small area, remove the iron, press on it with a rag for a few seconds to allow the weld to set, and then it should stay like that. You may see an occasional small bubble, as in the picture below, but larger bubbles might be caused by too high heat and/or trying to heat too large of an area at once. Here’s a picture showing what it should look like after heat sealing 210D (yellow) to 1000D (darker 210D fabrics aren’t as translucent, so you can’t see the weld like this).
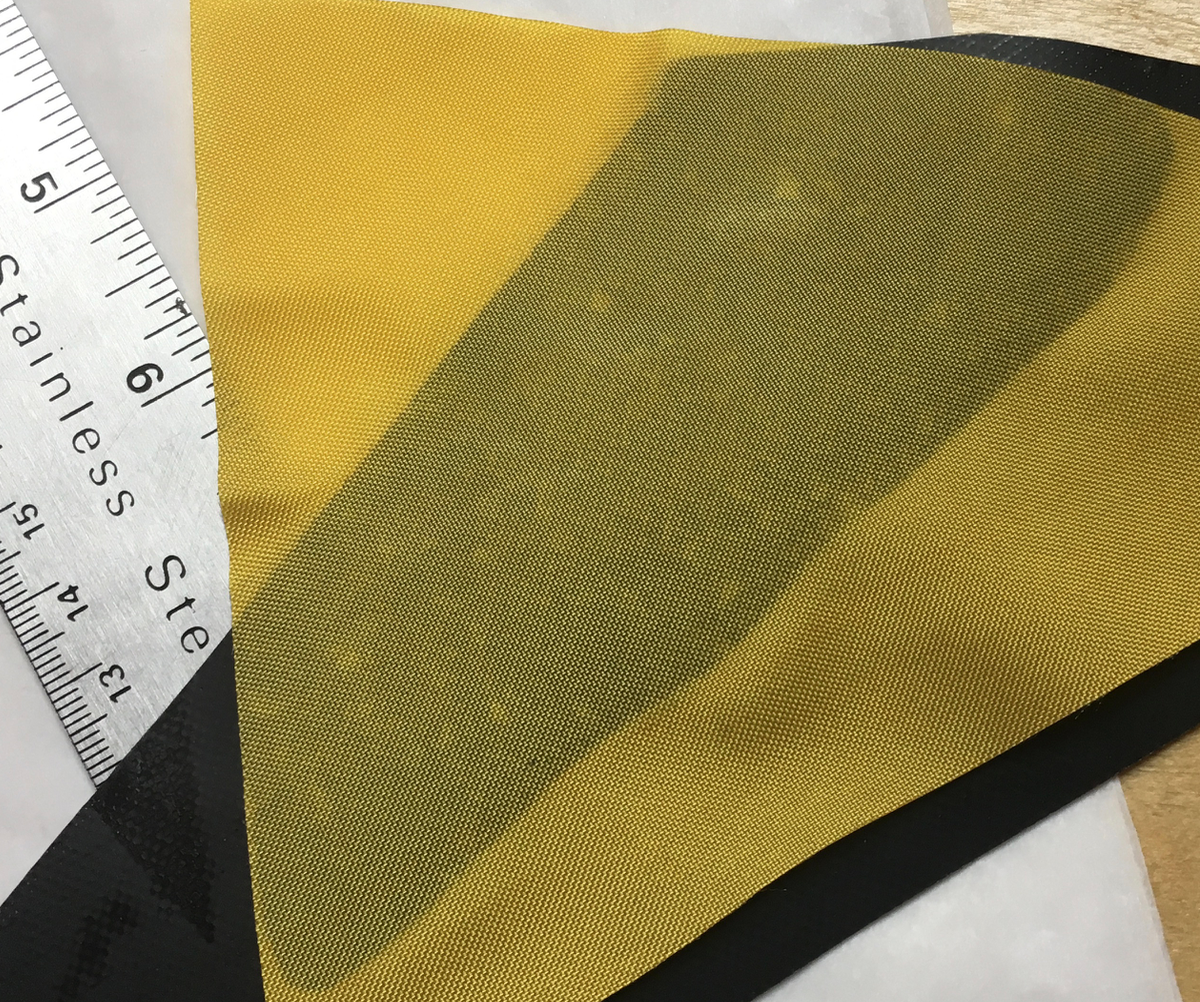
The pieces cannot be peeled apart without destroying the TPU. Once the temperature is dialed in, you shouldn’t have to repeat the sealing process – just heat an area for a few seconds (pressing firmly and sliding the iron a bit), remove the iron, and press on the weld with a rag while it cools for a few seconds, and then move on. If it lifts or bubbles after you remove the rag, press a bit longer to allow it to cool more or use a lower temperature. (When lowering the temperature, check to make sure the weld is still sound.) Practice with scrap material until it’s dialed in.
Cheers!
-
November 7, 2017 at 3:50 pm #4880aaron.scott77Participant
Hi,
I have a question regarding heat sealing the tubes to the 1000D fabric.
I’ve notice that air bubbles like to form after I’ve sealed the fabric and left it to cool – 10+ minutes afterwards. So I’ve been placing a piece of timber with some weights and leaving it.
This seems to minimise the bubble formation. Then I heat / repeat over and over. I get to the point where I think well a couple of small bubbles shouldn’t be an issue?
Just wondering if anyone might have any suggestions?
It is the different weight of material – differential expansion with heat?
Is my iron not hot enough? I built a temperature controlled iron out of 3D printer parts, it uses a bit of flattened copper pipe, 30W heater cartridge and a thermistor to monitor temperature. Basically I can set it to a temperature and it will be computer controlled.
I bumped it up to 215 degrees – should I go higher? It seems to require a lot of heating to bond the floor. What temp will the fabric start to melt?
Regards
Aaron
-
This reply was modified 8 years, 8 months ago by aaron.scott77.
-
This reply was modified 8 years, 8 months ago by Matt (Admin).
-
This reply was modified 8 years, 8 months ago by Matt (Admin).
-
This reply was modified 8 years, 8 months ago by
-
November 13, 2017 at 10:56 am #4929Matt (Admin)Keymaster
Ah, yeah, I should have asked where the temperature sensor was, as there’s always a temperature gradient between the heating element and the surface of an iron. In theory, you could calibrate it to display the surface temperature, but it wouldn’t really be worth your time – once you find the correct temperature by trial and error, you can just “set it and forget it.”
I recently added a video to the Proper Heat-Sealing Technique page under the How-To menu to show how the fabric behaves when the iron is set to the right temperature.
I’m obviously an advocate of the DIY approach, but after modifying several different irons myself with mixed success, I’ve come to the conclusion that for most people it’s worth spending $20-30 on a reliable iron that works well straight out of the box instead of spending a bunch of time making one from scratch or modifying an iron that was designed for a different purpose. If you’ve got the skills and the inclination to tinker with electronics though, that’s a totally different story!
-
-
AuthorReplies
- The topic ‘Help & Questions re: DIY Packraft Construction’ is closed to new replies.