Back to Step 1 – Tracing & Cutting Your Fabric
For this step, you will need a heat resistant work surface, some parchment paper, your heat-sealing iron (see the Tools page), the fabric shapes you’ve cut out, and your DIY packraft plans.
Start by placing a piece of parchment paper on your work surface. This will prevent your fabric from sticking to the work surface if you accidentally heat up the wrong part of the fabric.
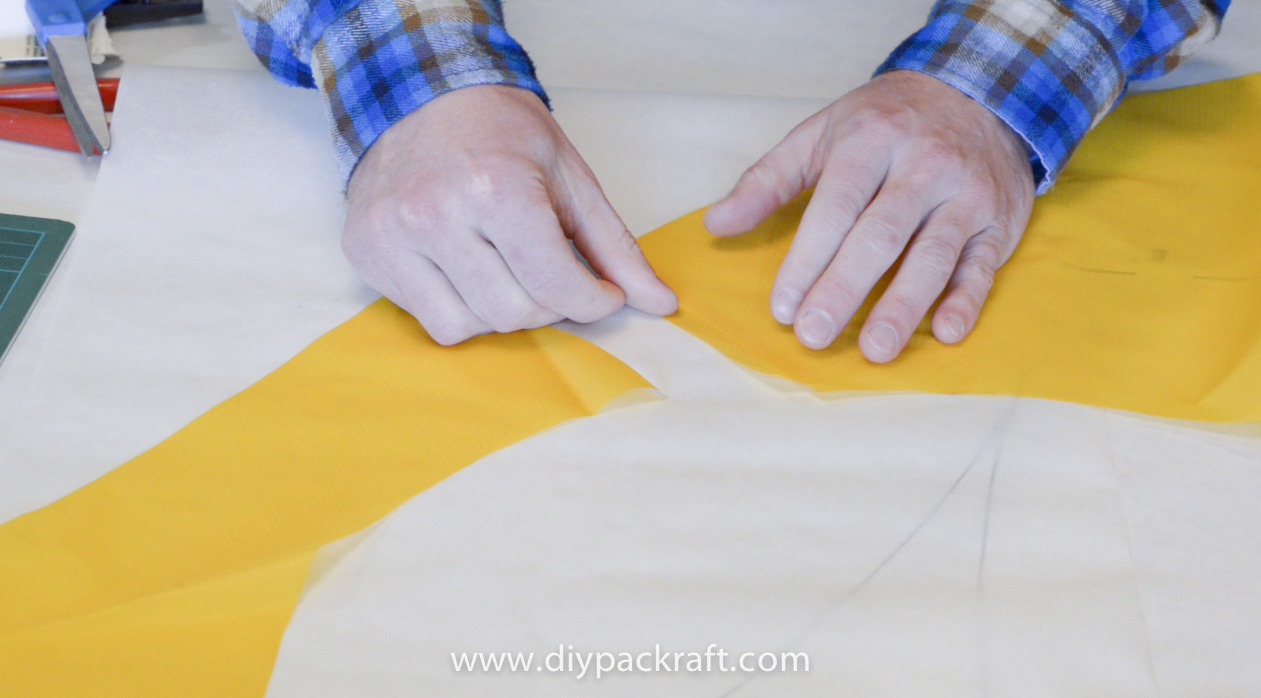
Next, lay out the pieces of fabric from one side of your packraft with the heat sealable sides facing down. Align the pieces with their corresponding edges together to make sure they line up properly. Double check on the plans to make sure you’re joining the right edges together (A to A, A’ to A’, and G to G, G’ to G’).

Cut a strip of fabric approximately 2 cm wide and slightly shorter (~1 cm) than the seam you are joining. Lay the 2 cm strip down beneath the joint with its heat sealable side facing up, and center it below the joint. If you like, you can tape everything in place to keep it from moving around as you work; just make sure you don’t melt the tape to the fabric.
Tack one end of the seam with your iron and work your way along the center of the joint to the other end, bonding the two larger pieces to the thin strip below. Then work out from the centre of the joint to the edges of the thin strip.
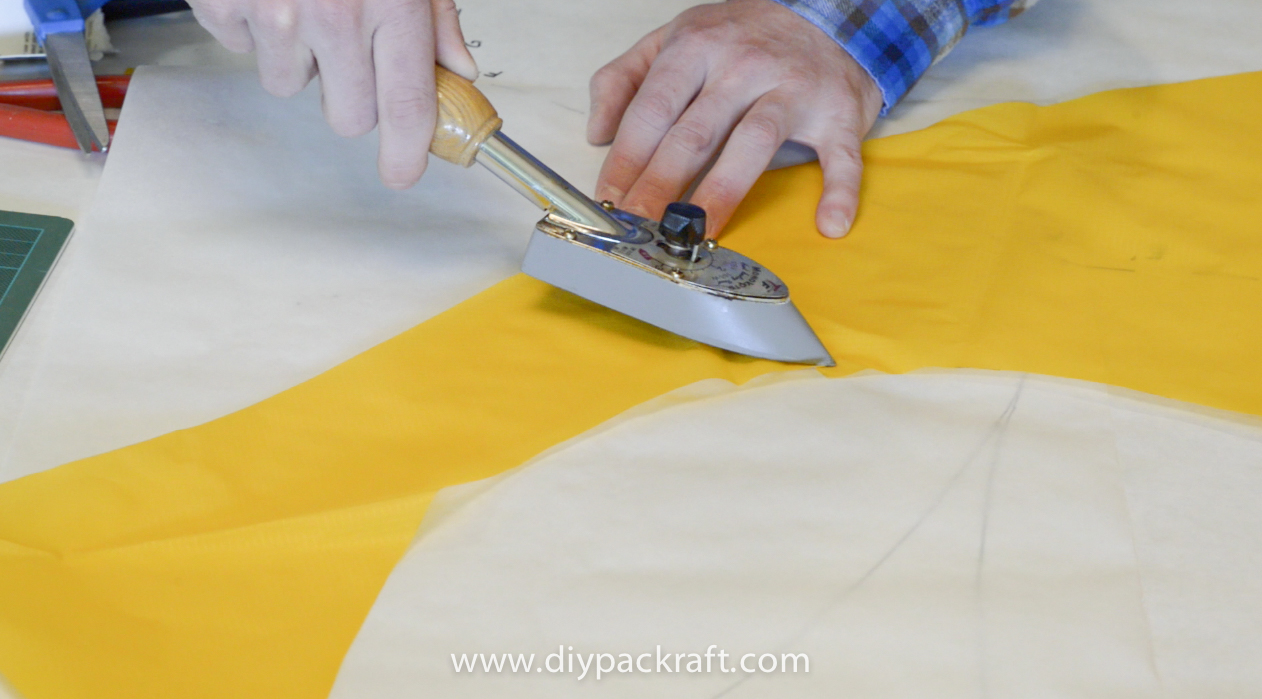
If your fabric is thick enough that you can’t see the thin strip through it, you may have to flip your pieces over and seal the joint with the thin strip on top. In that case, be very careful not to touch the heat sealable coating directly with your iron. To minimize the risk of damage to the TPU coating, you can place a piece of parchment paper between the fabric and your iron. If you do accidentally damage the coating, simply patch the hole by heat-sealing a small piece of fabric over it.
Once you’ve finished the first joint, move on to the second, and when that’s done you can cut out the shapes from the other piece of fabric (the other side of your packraft) and join them together following the same procedure.
4 Comments
Wouter · November 5, 2016 at 2:47 am
hi Matt,
Can you explain why the strip of fabric has to be slightly shorter than the seam you are joining?
Thank you!
Wouter
Matt (Admin) · November 5, 2016 at 6:55 pm
Hi Wouter,
The piece should be slightly shorter than the seam in this case so that there will be a TPU surface to bond when the curved edges are joined later. Does that make sense?
~Matt
Stig Amundsen · October 3, 2016 at 4:43 am
I was wondering, what kind of heat seling iron where you using in this video?
Matt (Admin) · October 3, 2016 at 11:26 am
Hi Stig,
I was using this iron: http://www.monokote.com/accys/topr2100.html It works well, but is a bit big for some of the more difficult to access seams, such as joining the tubes to the floor. There are also other companies that sell similar irons for applying heat sealable covering to model airplanes, and they are available in hobby shops that sell radio controlled airplane kits, and online.
Cheers,
Matt