Home › Forums › DIY Packrafts › Heat-sealing tools › Reply To: Heat-sealing tools
 Bruce
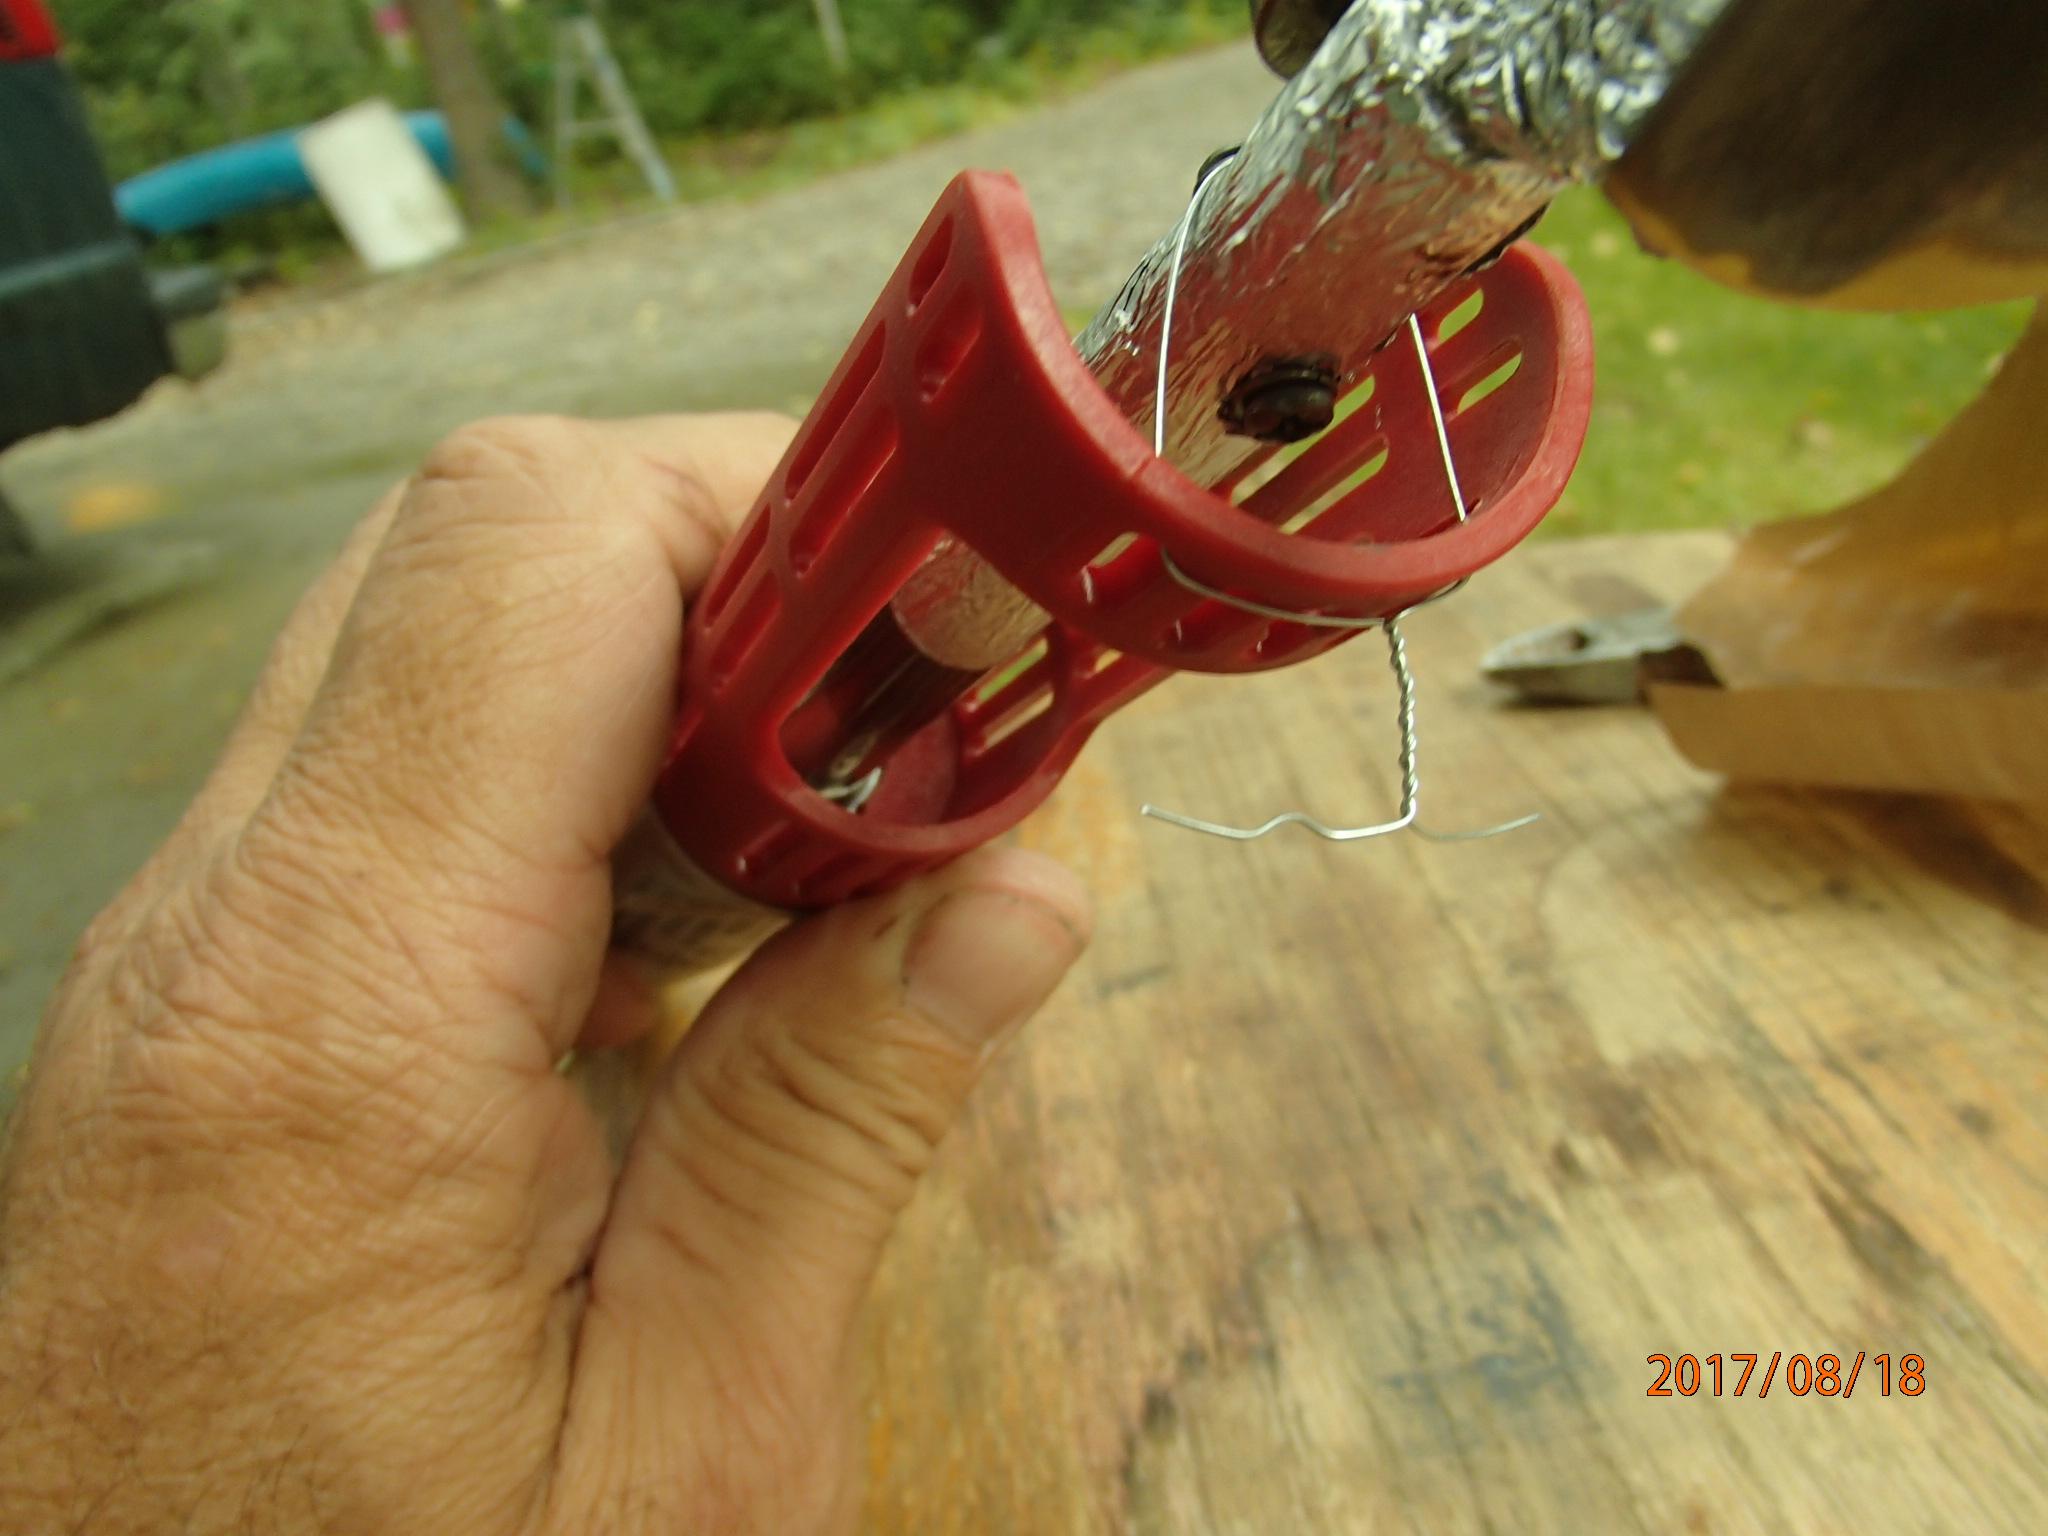
I recommend everyone reinforce their Clover Iron before first use! I loved Chris Christy’s solution, above, but couldn’t find a 1/2″x 13 “Tee” nut. I bought some aluminum round stock to toss onto the lathe to make a supply for our classes, but after thinking about how much work was involved, I “discovered” 4 inches of thin steel wire proved to be much simpler, stronger, and anyone can do it!
Use thin steel wire (I used galvanized picture hanging wire, do not use copper because I think it’s too conductive) to form a loop up through the red heat guard, over the heating element, and back to the red handle. Gently snug the wire taught, but only finger tight – don’t over stress the tiny dimple spot welds at the base of the handle.
I also recommend taping a piece of teflon over the heating element to cover the large top screw. This screw gets hot and can melt through nylon if you lose track of it amidst your partially assembled raft!
Of the 25 or so rafts we’ve started at The Folk School Fairbanks, we’ve suffered 5 or 6 iron failures. If they were expensive, this would be a complaint. But frankly, they do the job fine for such an affordable (inexpensive) tool. Compared to household irons, Aircraft heat sealing irons, Dritz Petite, various soldering irons, and everything else we’ve tried, we always go back to our Clover Mini-Irons for the fine detail and precise application of heat that they provide.
Of course, I’m absolutely thrilled to hear Matt is bringing out new plans to allow the wider model aircraft irons to work!
Bruce Campbell