Approximate time: depends on whether or not there are any leaks
Note: This step assumes that you completed all the previous steps using the proper heat sealing techniques. If there are visible gaps in your welds or areas where the fabric can be peeled apart or lifted with a fingernail, you will need to finish welding those areas before continuing here.
Note: You may wonder why this step is sequenced before the Apply Sealant to Outside Seams step – sealing the seams will prevent small leaks in the first place, so why not do that first? This is a valid point, but 1) we should fix any major leaks caused by incomplete welding before we cover them with sealant, and 2) it’s easier to apply the sealant to an inflated packraft, which we can’t do if it’s leaking badly.
The First Inflation
Congratulations on getting to this step – this is an exciting time!
Most first-time packraft builders have at least a few small leaks to fix at this point, so don’t be disappointed if your packraft isn’t completely airtight yet!
A Note About Temperature and Air Pressure
Because air pressure varies as a function of temperature, it can be difficult to tell the difference between a leak and a decrease in temperature. The change can be fairly dramatic and quick in some situations – for example:
- If you inflate the packraft in your warm house and then take it outside where the air is cold, the pressure in the packraft will drop even if no air is escaping (and vice versa – the pressure will increase if you move it from a cool place to a hot place).
- If you move the packraft from direct sunlight to shade the pressure will drop as the packraft cools – even a cloud passing in front of the sun can have this effect.
- If you inflate the packraft in the warm afternoon and then check to see if it leaked in the evening or morning when the air is cooler, the pressure will have dropped even if there’s no leak.
- If you inflate the packraft and then your air conditioner blasts it with cold air, the pressure will drop.
- If you inflate the packraft on land and then place it in the water to go paddling, the pressure will drop (assuming the water is cooler than the air, which is normally the case – more on this below).
Given the above, it’s best to check for leaks in a place with consistent temperature and lighting.
Find Fast Leaks
Once your packraft is inflated you’ll easily be able to tell if there are any major leaks, as it will quickly go limp. (If that doesn’t happen, skip to the next section.)
Much like fixing a punctured bicycle tube, the easiest way to find a fast leak is to inflate the packraft and squeeze it with your hands while rotating it around your head as you listen for the hiss of air escaping (do this in a quiet environment).
Hone in on the source of the sound by ear and then use a finger to probe the area as you hold it near your ear – you will feel the escaping air better if your finger is wet, and you will hear the sound change when your finger is covering the leak.
Mark the spot and examine it to determine the best way to fix the leak:
- If it’s leaking through a seam that isn’t fully welded, you may be able to fix it by simply ironing the area more thoroughly.
- If it’s leaking through a cut or puncture in the fabric, weld a patch of fabric over the hole.
- If it’s leaking through an area of damaged TPU (such as where you accidentally touched the TPU with your iron), you can either:
- Iron a patch of fabric over the area of damaged TPU (best for larger areas), or
- Coat the damaged TPU with Aquaseal, Aquasure, or Seam Grip+WP
- Whatever the cause, if it’s leaking in an area that can’t be ironed or patched easily, spread some Aquaseal, Aquasure, or Seam Grip+WP over it.
Tips:
- Before fixing a leak with liquid sealant and waiting 8+ hours for it to cure, cover the leak with tape and then check other areas of the packraft in case there is more than one leak – you will save time by fixing multiple leaks at the same time.
- If you installed an airtight zipper in your packraft and you’re fixing a leak with liquid sealant, it’s best to apply the sealant on the inside of the packraft too. Remember that the sealant will permanently darken the tube fabric, so only do this in areas where it won’t be noticeable on the inflated packraft.
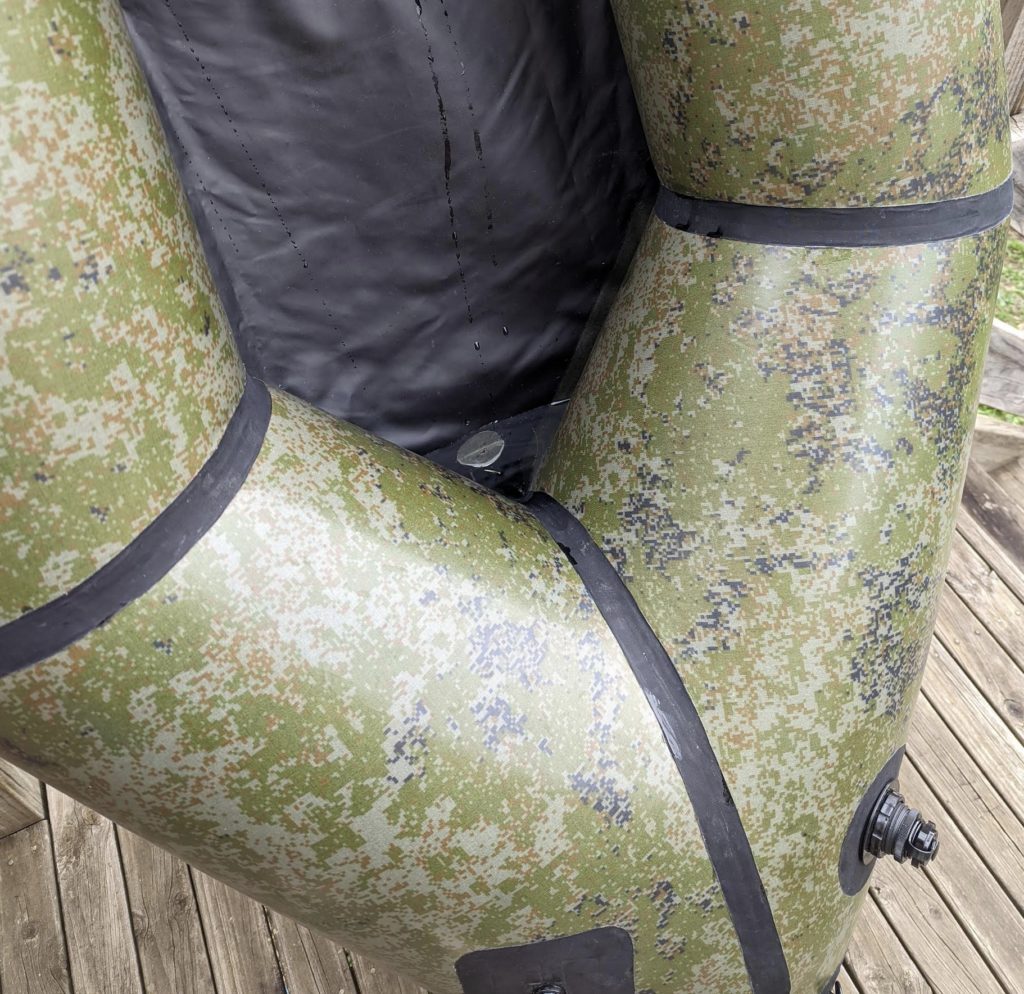
- After applying liquid sealant to an area where the fabric tends to fold over on itself, such as where the tubes attach to the floor in the packraft’s cockpit, prop up the fabric while the sealant cures so it won’t glue the fabric pieces together – the leak could open up again if you have to force the glued areas apart. After allowing time for it to cure, apply some talcum powder to the sealant’s surface otherwise it will tend to stick to itself for several days.
Find Slow Leaks
Note: You may want to come back to check for slow leaks after applying sealant to the outside of the seams (the next step). As long as you‘ve made sure all the seam welds are strong, it’s okay to apply the sealant to the outside of the seams before checking for tiny leaks.
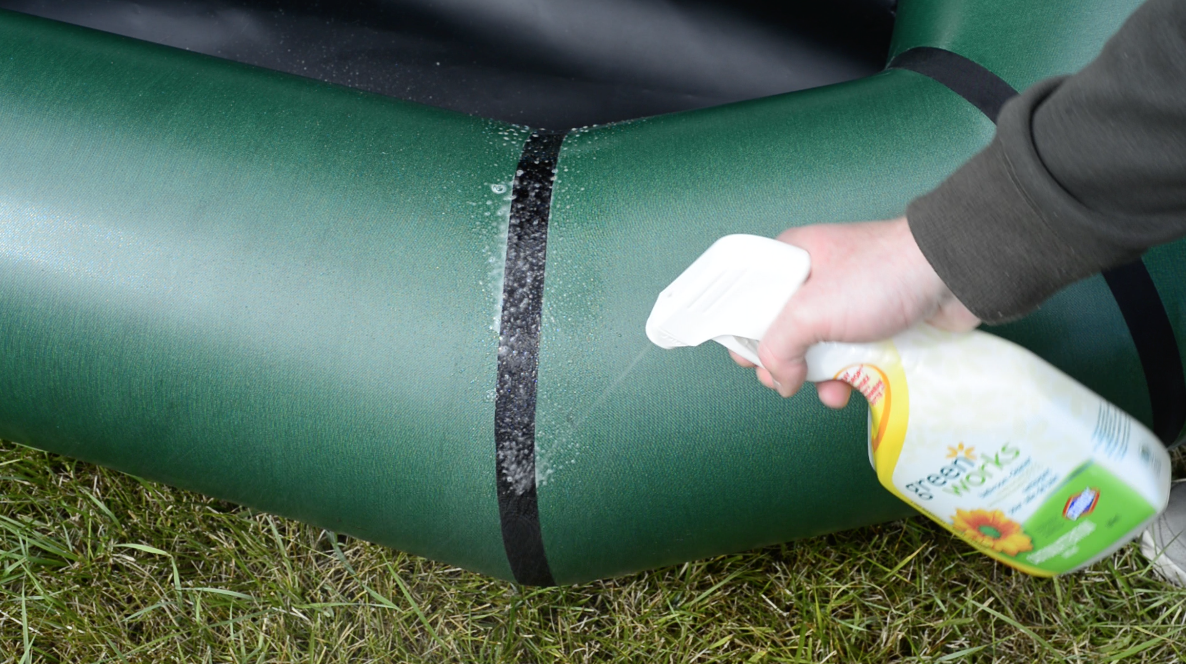
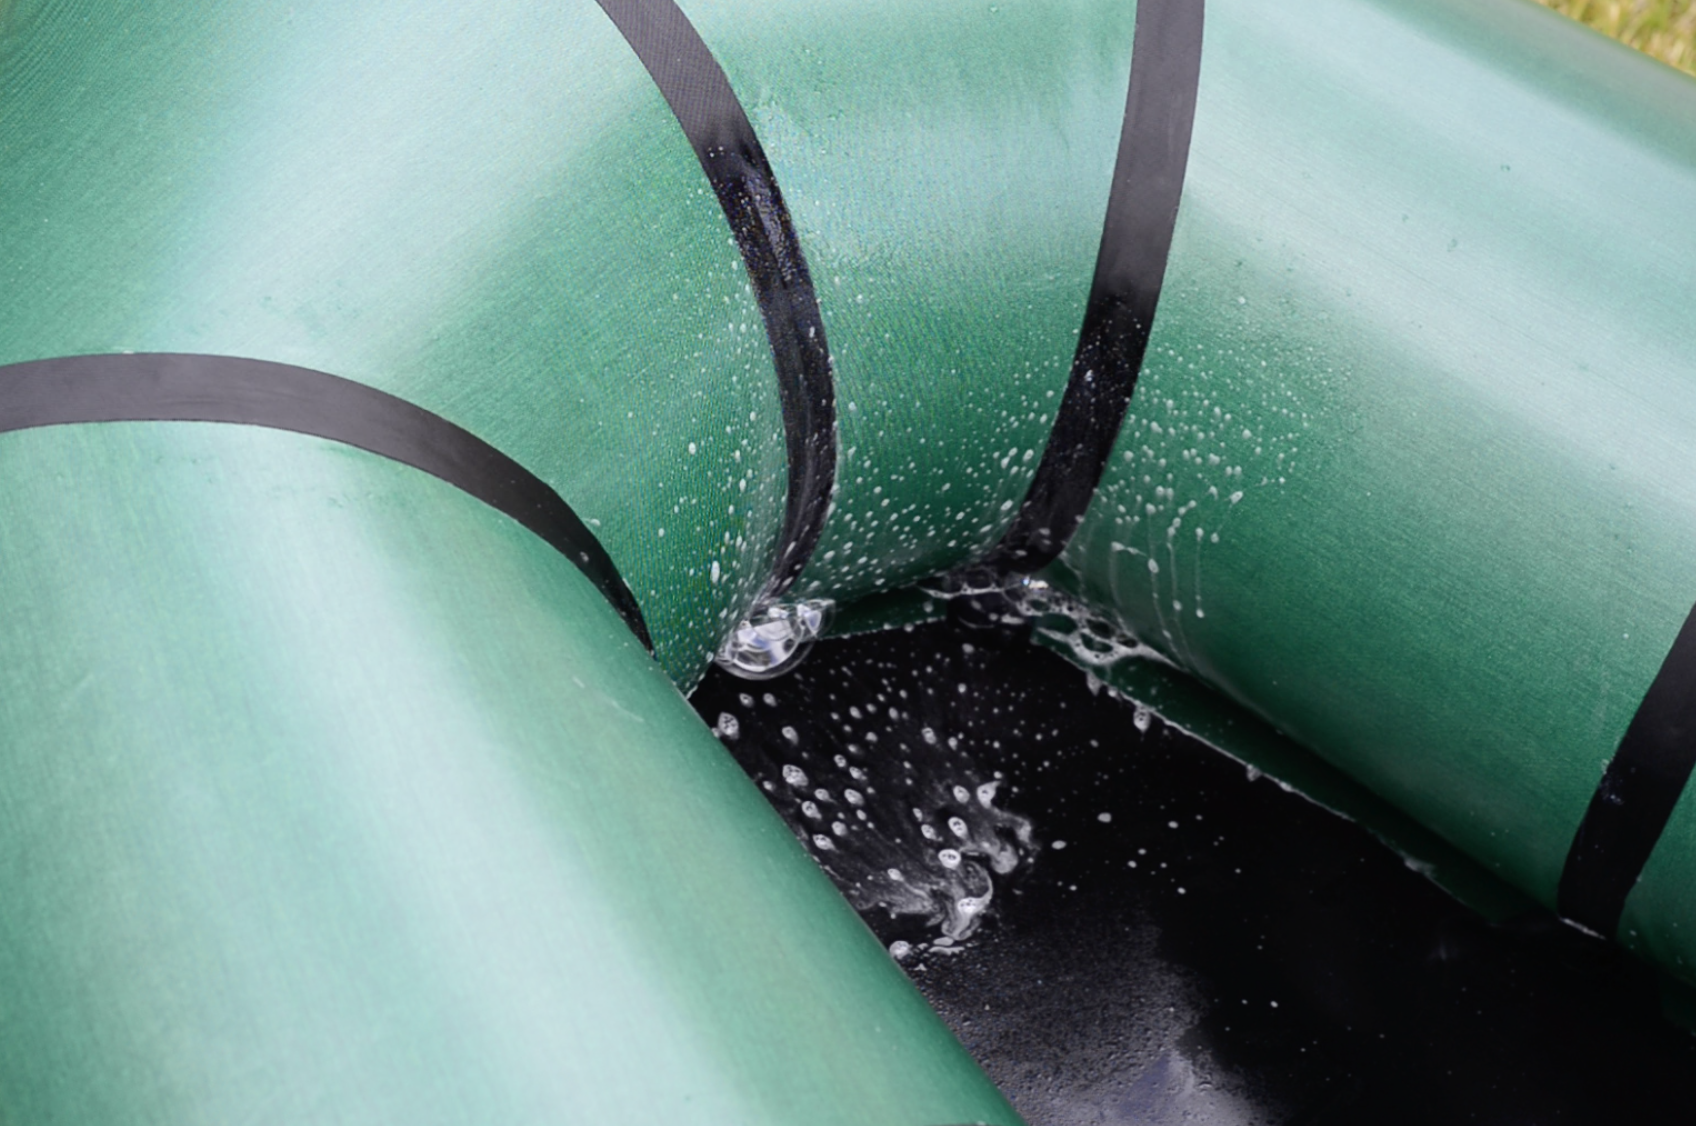
If you’ve fixed all the leaks that are detectable by ear but your packraft is still going limp over time, inflate it and apply some dish soap + water (a spray bottle works well for applying small amounts of soapy water, but a cloth or sponge works too). Soap bubbles will form wherever air is escaping.
Concentrate your efforts around the seams, but don’t forget to check around the valve, zipper, attachment points, and the broader areas of tube fabric where you may have accidentally touched the TPU with your iron and melted a hole through the airtight coating.
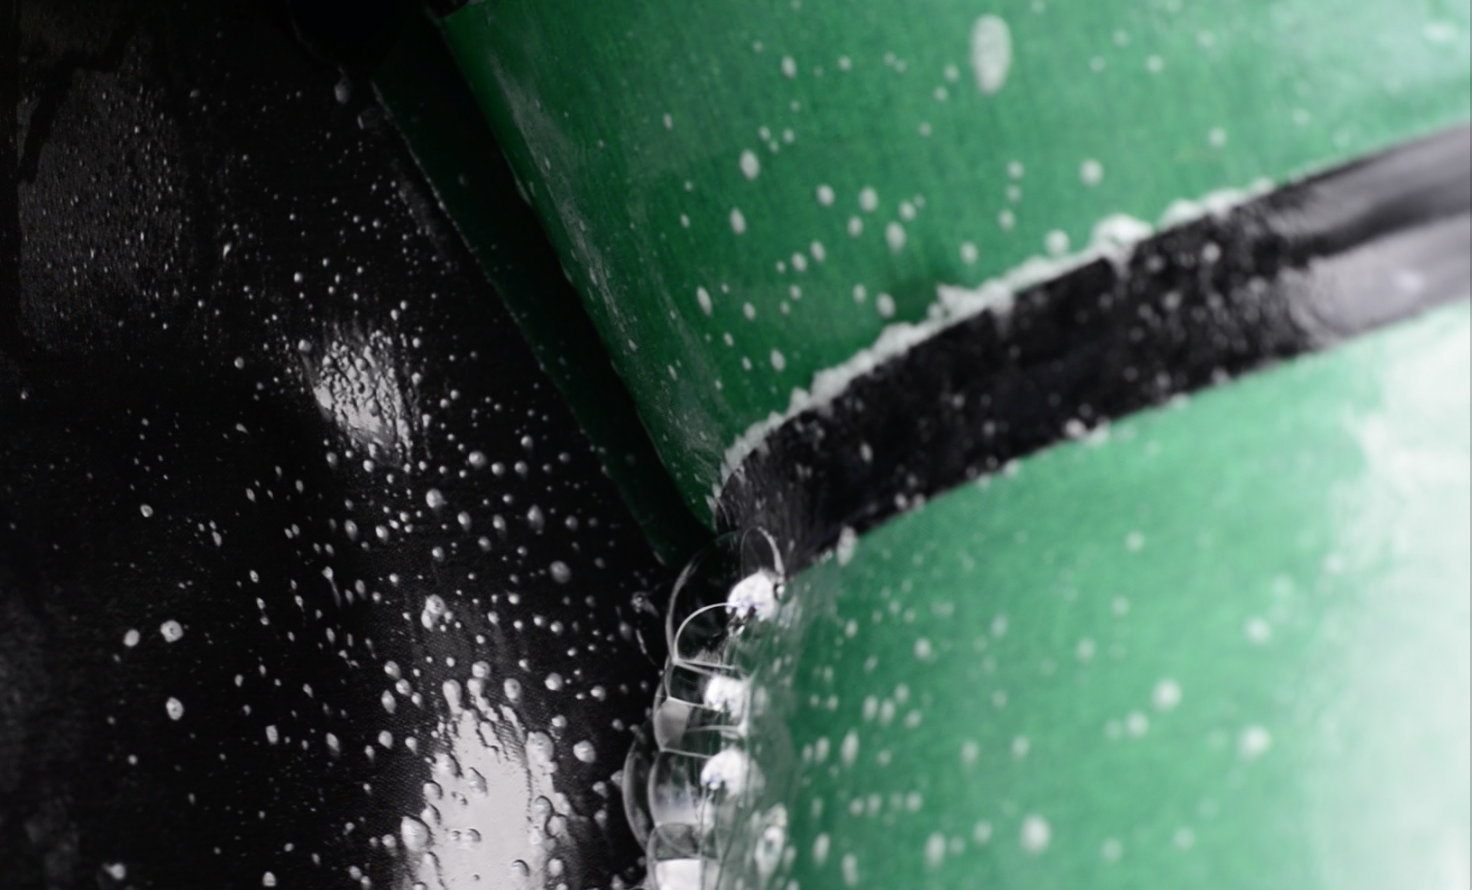
If you have a leak that is too slow to detect with a regular mix of soap and water, use a soap-to-water ratio of 1:1 and paint it onto the packraft with a brush. This thicker solution will stay in place longer so you can see slow-forming bubbles. (Thanks to Ken S. for this tip!)
Unless you have something like a grease pencil that can write on wet surfaces, it’s difficult to mark up the soapy fabric, so if you find a leak, draw a quick sketch of the packraft on a piece of paper (or print out this page of Atlin outlines) and mark the leak’s location on the sketch to remind yourself where it is after you rinse and dry the fabric. Then continue searching for more leaks with your soap and water.
After you’ve covered the entire surface of the packraft’s tubes with soap and water, rinse it thoroughly to remove all the soap and allow it to dry before applying sealant.
Depending on the location of the leak, fixing it may require a patch of fabric ironed over a hole, or a dab sealant. Check the bullet points in the Find Fast Leaks section above for my advice.
After fixing the leaks you found, inflate the packraft and check it again. If the packraft is still losing air, you will need to repeat the process of locating and fixing the leaks.
When all of the leaks are sealed you will be able to leave the packraft inflated overnight without any noticeable air loss (but remember that a change in temperature will also cause a change in pressure).
Once you have sealed all the leaks and your packraft holds air – congratulations!
Temperature Effects on the Water
As mentioned above, air pressure is directly related to air temperature. Water temperatures are typically colder than air temperatures, at least in the paddling season, so it’s normal to experience some pressure loss as the air inside the tubes cools after the packraft is placed in the water. The pressure drop is especially noticeable in the first few minutes, so plan to top up the air pressure 5-10 minutes after you set out.
I usually let my packraft sit in the water as I attach my gear and get ready to go paddling, then I top up the pressure before I set out so I don’t have to stop paddling – if you do this, tie up your packraft and/or don’t leave it unattended if there’s a risk the wind or current could take it away!
In general, be aware of temperature changes over the course of the day and be prepared to top up the pressure in your packraft or release air as needed.
Caution: Avoid leaving a fully inflated packraft on the beach after paddling, especially in direct sunlight, because that extra air you added on the water will heat up and the resulting pressure increase could damage your packraft. This can be an issue even in cooler climates, because it’s the change in temperature that matters, not the temperature itself – for example, a change from 10 to 20 degrees will result in the same pressure increase as a change from 80 to 90 degrees. I have never heard of a packraft popping because of this, but to be on the safe side I usually release some air from the packraft as soon as I land.
Assembly Steps:
- Iron Preparation & Heat Sealing Practice If this is your first DIY Packraft, do not skip this step!
- Separate Fabric Pieces
- Mark & Label Fabric Pieces
- Inflation Bag
- Footrest
- Seat
- Back Band
- Inflatable Floor Insert
- Packraft Assembly:
- Spray Deck Assembly (optional)
- Spray Skirt Assembly (optional)
Questions? Please leave a comment below!
0 Comments