Note: Instructions for making and installing attachment points for the thigh straps and back band are on their respective pages.
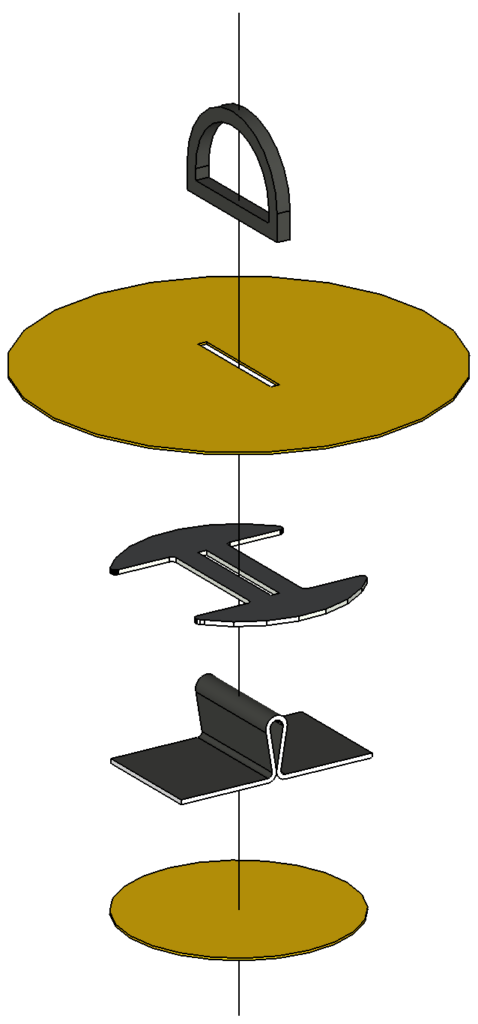
Perimeter Attachment Points
In your Chilko kit I’ve included D-rings and fabric to make eight Type 3 attachment points in case you want to add perimeter grab lines to your packraft’s front and rear tubes.
I don’t recommend storing a backpack on the bow of your Chilko, at least when you’re paddling in whitewater, because doing so raises the center of gravity and makes the packraft harder to control. It’s better to store gear inside the tubes using an airtight zipper.
If you choose to install grab lines, keep them tight along the tubes to minimize the risk of entrapment. (On that note, avoid loose ropes and straps in general, and never use a paddle leash in whitewater – these things kill people.)
Assembly Steps:
- Iron Preparation & Heat Sealing Practice If this is your first DIY Packraft, do not skip this step!
- Separate Fabric Pieces
- Mark & Label Fabric Pieces
- Inflation Bag
- Footrest
- Seat
- Back Band
- Inflatable Floor Insert
- Packraft Assembly:
- Spray Deck Assembly (optional)
- Spray Skirt Assembly (optional)
Questions? Please leave a comment below!
0 Comments